

Window Privacy Film Night Guide: What Actually Works
50% of respondents said light shining through their bedroom window disrupted their sleep, and 14% had slept in another room to avoid it, according to a survey cited by CPRE Norfolk. That makes the window more than a decorating decision. After dark, it affects comfort, sleep and how exposed a room feels.
But blocking an outside view and blocking incoming light aren't the same job. Choosing window privacy film for night use starts with a simple question: what can someone outside see when your normal room lights are on?
Night Privacy by Lighting Condition
Window privacy film night performance is best judged by lighting conditions, not by how mirrored the glass looks in a product photograph. A reflective surface can look reassuring during the afternoon and offer little protection during an evening meal.
The useful comparison is between the light outside and the light inside. Quote My Wall's day-and-night privacy guide explains that reflective films rely on the outside being brighter, so they shouldn't be treated as an around-the-clock privacy solution.
Window privacy film performance by lighting condition
| Lighting condition | One-way reflective film | Frosted or opaque film | Verdict |
|---|---|---|---|
| Bright daylight, room dimmer than street | Interior hard to see under suitable conditions | Frosted film blurs the interior; opaque film blocks the view | Both can work; one-way preserves the clearer outlook |
| Dusk, indoor lights just switched on | Partial visibility; movement may show | Frosted film hides detail but may reveal shapes; opaque film blocks the view | One-way weakens; obscuring film is more consistent |
| Lights on, street dark | Room may be clearly visible as the reflective effect reverses | Frosted film may reveal silhouettes; opaque film blocks the view | Don't rely on one-way film; close a blind or curtain |
| Lights off, street dark | Interior largely hidden, provided no other indoor light exposes it | Frosted interior largely hidden; opaque film blocks the view | Both offer privacy in this condition, but darkness isn't a permanent treatment |
Why the mirror effect changes
Think of a dark window while you're standing in a brightly lit kitchen. You see your reflection because light from the kitchen reflects back towards you, while comparatively little light arrives from the garden. Someone standing in that darker garden may see the illuminated kitchen through the same pane.
In daylight, the arrangement is usually reversed. A person outside sees a strong reflection of the bright surroundings, while someone in the dimmer room can look towards the brighter street. One-way film doesn't make glass transmit light in only one direction.
At dusk, that balance changes gradually. Switching on a ceiling light can reveal movement before the whole room becomes easy to see, so there isn't a reliable clock time at which privacy suddenly disappears.
The change can be especially noticeable in:
- A bathroom with a ceiling light, where a person may stand close to the window.
- A ground-floor living room facing a pavement, where passers-by have a direct viewing angle.
- A street-facing bedroom, where a bedside lamp illuminates the occupant beside the glass.
What frosted film still reveals
Frosted film scatters light rather than relying on a mirrored reflection. It can hide recognisable detail, but a person standing close to the pane may still cast a silhouette. Movement and broad colour changes from a television can also remain visible.
Fully opaque film is different: it blocks the view rather than merely blurring it. Don't treat the words frosted, translucent and opaque as interchangeable.
From inside, reflective film may look more mirrored at night, reducing your clear view out precisely when an outside observer can see in.
Practical rule: Treat one-way reflective film as a daytime tool. A room lit from within needs a separate night-privacy measure unless an obscuring film has been tested and provides the privacy you require.
Which Film Types Hold Privacy After Dark
Choose the film by what it hides with the lights on, then consider the daylight and outlook you're willing to lose. A decorative finish, a reflective finish and a solid opaque finish solve different problems.
Film types compared for night privacy
| Film type | Daytime privacy | Night privacy with lights on | Daylight kept | Best use |
|---|---|---|---|---|
| One-way reflective | High when outside is brighter | Low when the room is brighter | Tinted daylight; check the specification | Daytime privacy with an evening covering |
| Frosted or translucent | Moderate to high obscuration | Detail obscured; silhouettes may show | Diffused daylight; some reduction | Ground-floor windows and bathrooms after testing |
| Fully opaque obscure-grade film | High | High across fully covered glass | Little or none through a fully opaque area | Non-habitable spaces where daylight isn't essential |
| Patterned decorative | Partial screening through the pattern | Clear areas may expose the room | Daylight through clear and translucent areas | Living rooms with a separate evening covering |
| Frosted film with blind or curtain | High obscuration | High when an effective covering is closed | Diffused daylight with covering open; reduced when closed | Street-facing bedrooms |
Obscurity grades aren't film descriptions
The government's permitted-development technical guidance distinguishes obscure glazing from one-way glass and uses Level 3 as the minimum obscurity standard for relevant side windows, on a scale where Level 5 provides the highest obscurity.
That doesn't mean any film labelled frosted meets a planning condition. Nor does a high obscurity grade necessarily mean blackout: visual obscurity and light transmission are different properties. Check the specified glazing requirement rather than assuming a retail description establishes compliance.
Covering a whole habitable-room window also removes useful outlook and can reduce daylight. In a living room, that may be a bigger compromise than in a bathroom, so assess the whole room rather than the glass alone.
Choose for the room, not just the finish
- Ground-floor bathroom: Choose a strongly obscuring film that passes a ceiling-light test. Use opaque coverage where silhouettes would be unacceptable and daylight arrangements allow it.
- Street-facing bedroom: Combine frosted film with an effective blind or curtain, rather than expecting decorative glass alone to provide sleep-friendly darkness.
- Front living room: Preserve useful outlook where possible, but cover every exposed viewing route after dusk.
- Rented flat: Prioritise documented removability and written permission, not merely the word temporary on the packaging.
For a broader comparison of finishes, the guide to choosing the best window film for privacy helps distinguish appearance from screening.
If you're also considering an exterior screen, Aloha Window Bros screen services provides a separate screen-based option to investigate. Assess any screen against your actual night-time viewing conditions rather than assuming solar screening guarantees privacy.
How to Run a Lamp Test on Your Own Window
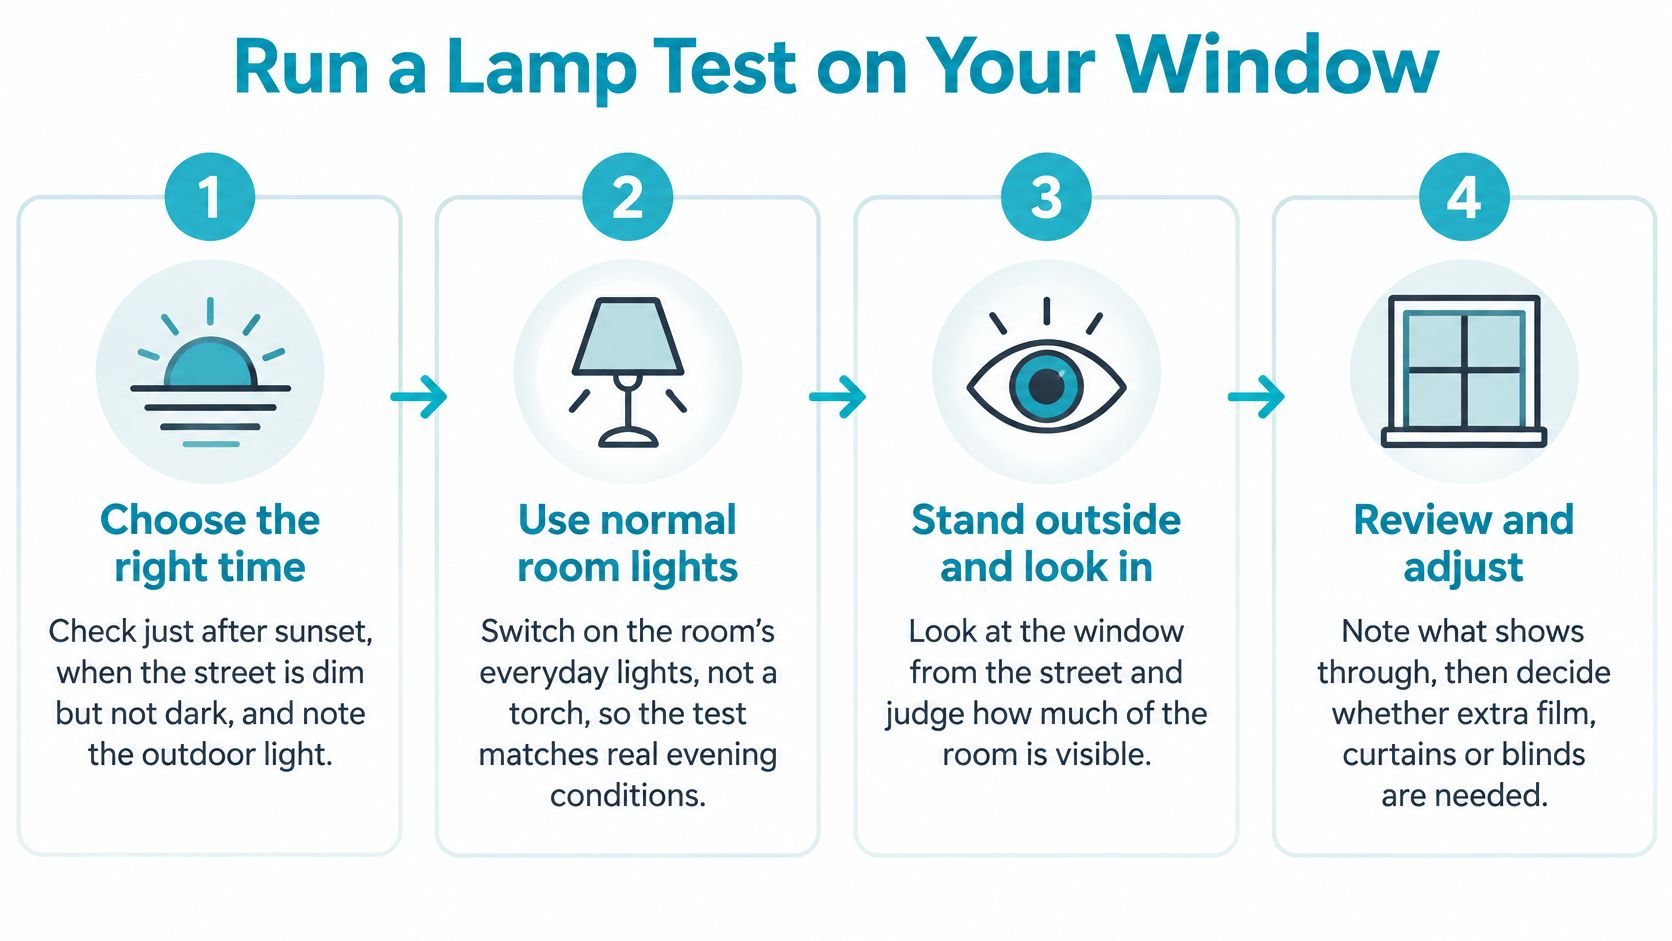
A lamp test replaces guesswork with an outside view of your own room. Test the existing window first, then repeat with a film sample if one is available. A sample only demonstrates the covered area, so don't mistake it for a whole-window result.
Follow the room's normal evening routine
- Begin just after sunset. Choose a time when the street is dim but not completely dark. Note nearby streetlights, porch lights and anything else illuminating the outside of the pane.
- Switch on the usual room lights. Use the ceiling fitting, bedside lamp or reading light you normally use, not a torch aimed at the window. You're testing ordinary occupancy, not an artificial spotlight.
- Put someone in the normal occupant position. Ask a helper to sit on the sofa or stand where they would use the bathroom, fully clothed. Look back from a safe, lawful position on the pavement or in your garden at a realistic observer height.
- Separate shapes from recognisable detail. Record whether you can detect a person, follow movement, distinguish clothing colours or recognise facial features and objects. Move between realistic viewing angles without entering neighbouring land.
- Compare the coverings separately. First switch the lights off to establish the darker-room result, then restore them and close the blind or curtain. This shows what the covering adds without confusing its effect with switching off the lighting.
- Try the lighting adjustment you're considering. Repeat with a dimmer setting or a warmer bulb suitable for the fitting, and note brightness and colour separately. A warmer colour alone doesn't guarantee less visibility.
- Record each lighting condition. Use the daylight, dusk, lights-on darkness and lights-off darkness categories from the comparison table. Return when the street is fully dark, because a dusk-only test can miss the most revealing condition.
Write down what would be unacceptable
A simple note such as movement visible beside shower is more useful than seems private. Include where the occupant stood and which light was on, so another household member can reproduce the check.
If shapes or movement are visible and that exposure is unacceptable for the room, add an effective blind or choose a more obscuring film before relying on the window at night.
Don't use a phone photograph as the sole verdict. Automatic exposure can make the recorded scene look brighter or darker than it appears to a passer-by.
Planning, Escape and Renter Checks Before Fitting Film
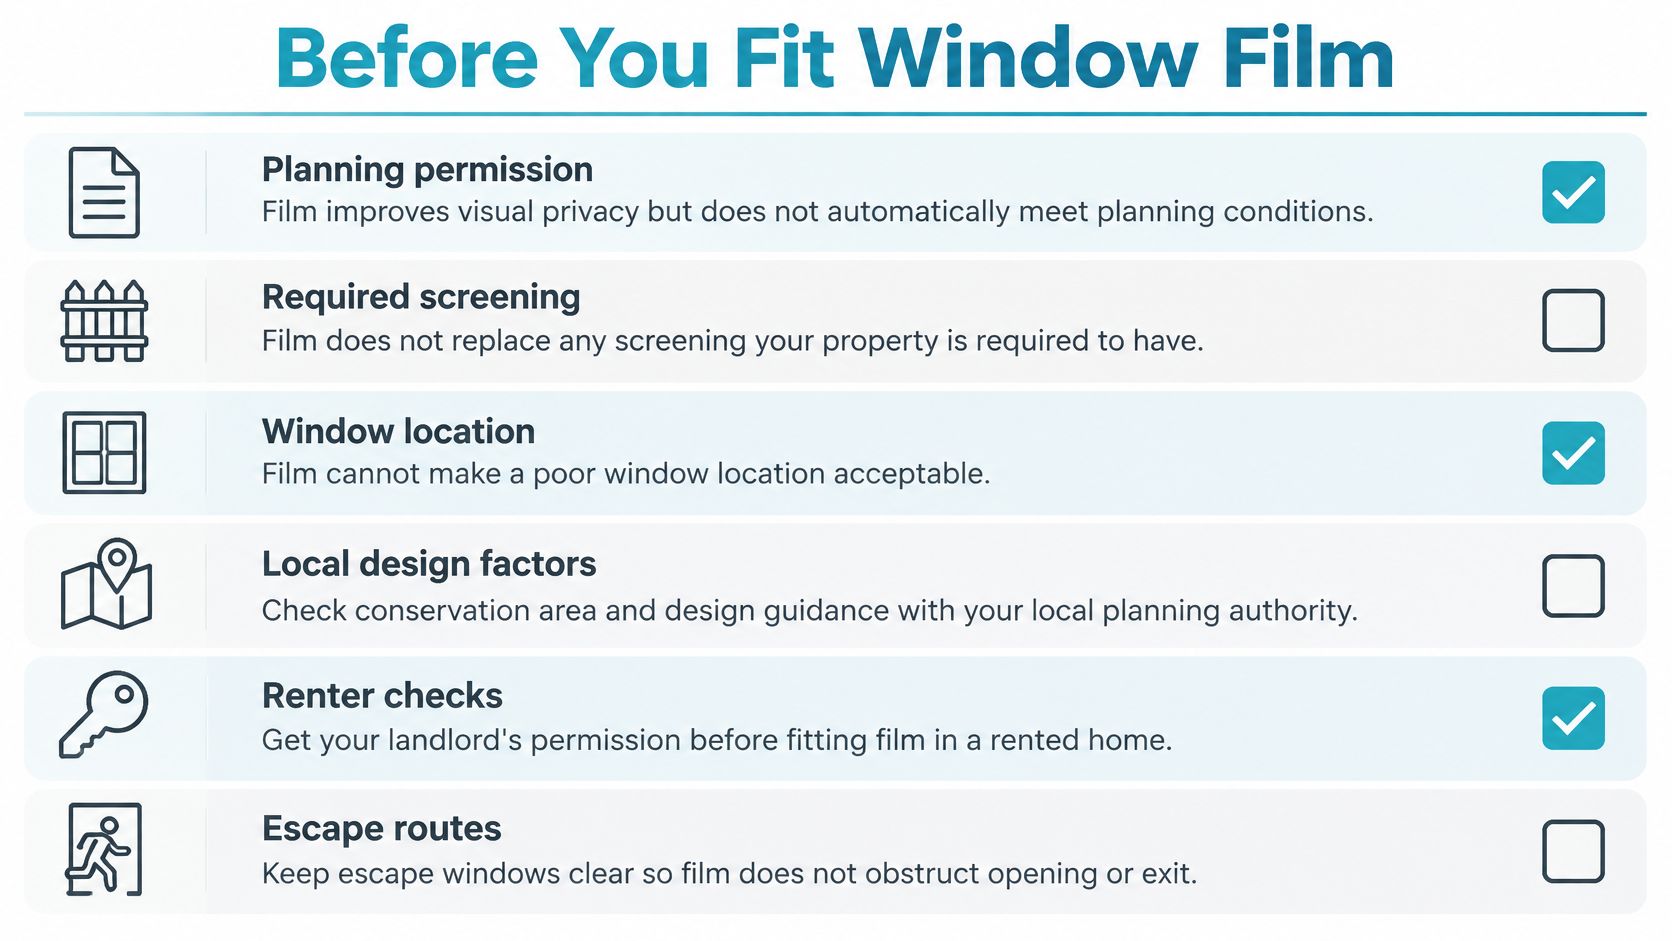
Film can improve visual privacy without resolving a planning or safety problem. Local policies consider window position, viewing angles, room use, opening arrangements and separation from neighbours; Denbighshire's residential-development guidance includes separation distances of 18 to 21 metres in some residential contexts. Those aren't universal distances for every home, and applying film doesn't automatically satisfy an overlooking condition or replace required screening.
Check the window's other jobs
- Emergency escape: Establish whether the window forms part of an escape arrangement. Film on the glass isn't automatically an obstruction, but the finished setup must leave the opening usable and mustn't introduce a screen that traps or delays someone.
- Markings and hardware: Keep required glazing markings identifiable and leave handles, hinges, locks and release mechanisms accessible. Don't bridge an opening joint with vinyl.
- Landlord consent: Obtain written permission before altering glazing in a rented home. Agree what must be removed at the end of the tenancy and how the glass should be left.
- Planning conditions: Check any condition requiring obscure glazing, restricted opening or a particular screening arrangement. Don't replace a specified solution with film without confirming acceptance.
- Ventilation: Open the window through its normal travel and check that film edges, added blinds and screens won't interfere. Leave trickle vents unobstructed.
- Cleaning and removal: Plan how you'll reach the glass safely and how the film will eventually come off. Avoid a setup that requires leaning out of an upper-floor window to maintain it.
Removable doesn't mean automatically permitted
The guide to static-cling film for windows is useful when comparing an adhesive-free approach with self-adhesive material. Check the actual product's application and removal instructions rather than assuming every window film behaves alike.
Families also need to consider who operates the window. A covering that an adult can move easily may still complicate a child's access to a handle, while a poorly positioned blind can obstruct everyday ventilation.
Safety check: Privacy should change the view through the glass, not your ability to open the window or leave the room.
If the window is needed for escape or ventilation, favour a removable treatment or an independently operable secondary covering, provided it preserves those functions. Removability is useful, but it isn't a substitute for checking the completed installation.
Layering Film and Choosing Your Night Setup
A lit room facing a dark street needs a setup that suits how people use it. Layering means combining film with a separate covering or lighting arrangement, not sticking different films on top of each other.
Start with changes that are easy to test, then commit to fitted treatments. Each layer has a different cost in effort, outlook and daylight.
Build the setup in a practical order
Move lamps first. Set a reading lamp back from the glass and direct it towards the chair or book rather than the pane. This costs no daylight and little effort, but it's a supporting adjustment, not dependable screening by itself.
Try sheer or net curtains where appearance matters. They soften the view and remain easy to draw during the day. Their trade-off is an extra fabric layer across the outlook, and they may still reveal a brightly lit room at night.
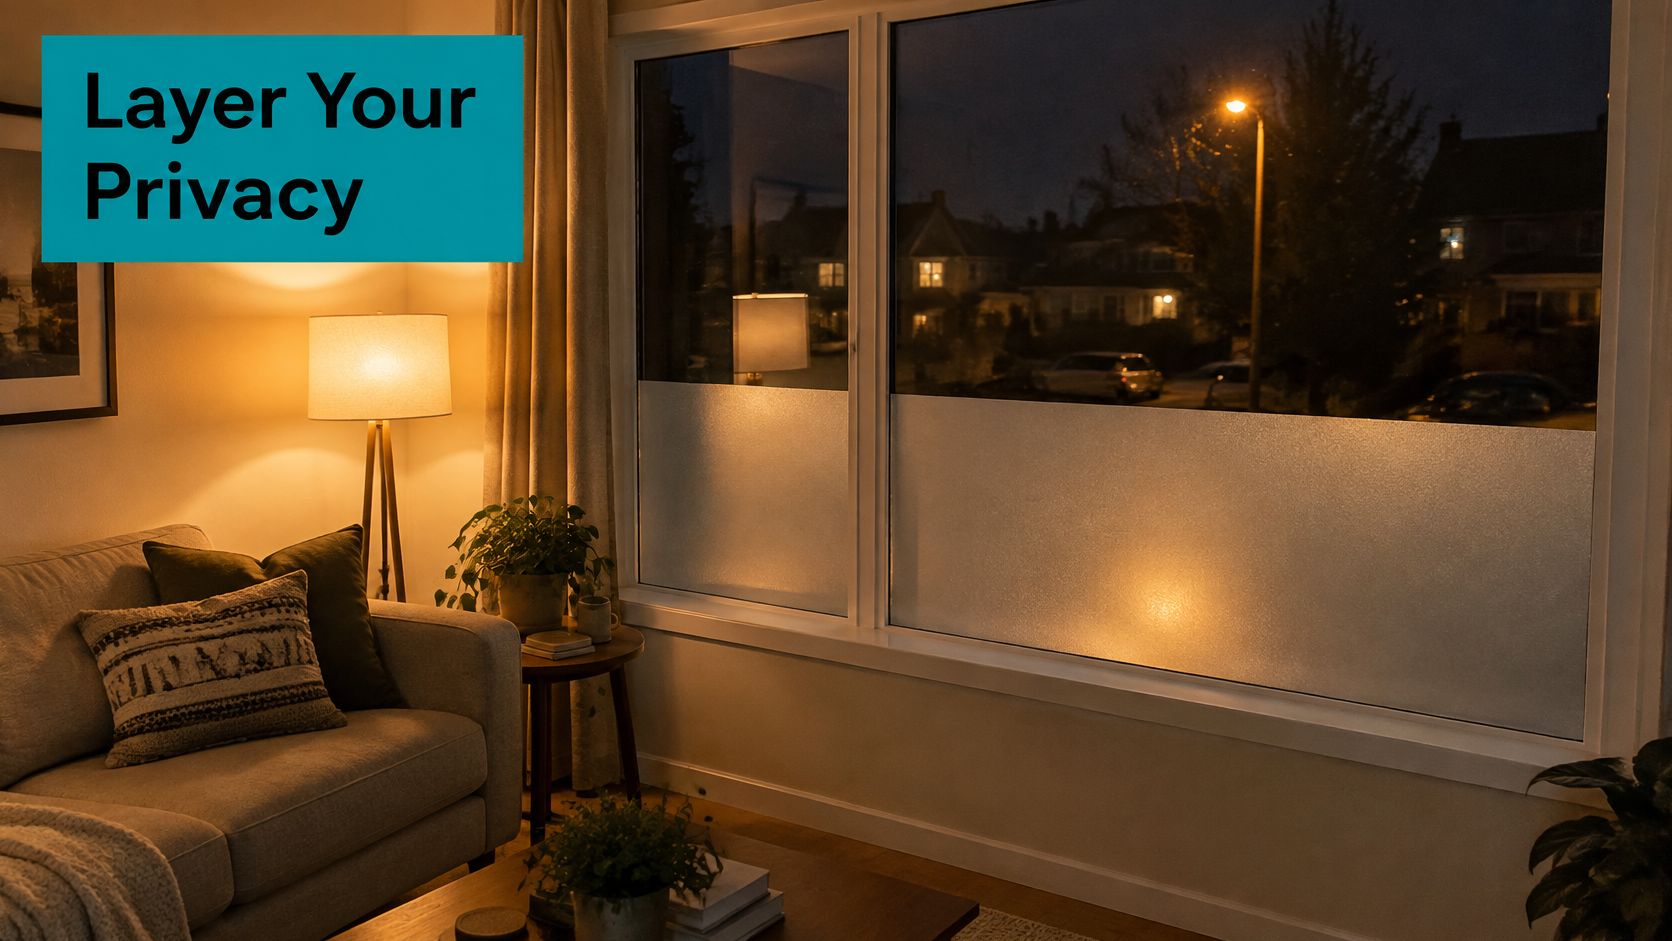
Fit film to the area that needs permanent obscuration. Lower-pane frosting can interrupt pavement-level sightlines while leaving upper glass clear. Check views from steps, sloping streets and neighbouring windows before deciding that partial coverage is sufficient.
Add a roller or blackout blind where full evening coverage matters. A closed blind sacrifices outlook while in use, but you can open it during the day. It also creates a daily task: someone must close it before the room becomes exposed.
Pair the treatment with the activity
For a ground-floor living room, patterned or frosted film can screen the seating area, while lamps set back from the window reduce direct illumination near the glass. Sheer curtains may provide a useful finishing layer, but choose a closing blind or lined curtain if the evening test still reveals occupants.
For a street-facing bedroom, frosted film plus a blackout blind separates daytime screening from night-time privacy and darkness. Check the blind's edges as well as its centre, because an uncovered strip can leave a direct viewing route.
A bathroom needs a different standard: the occupant shouldn't have to manage lamp positions to remain private. Choose a film that provides sufficient obscuration under the ceiling light, including when someone stands near the pane.
Room setup lookup for night privacy
| Room | Film to choose | Second layer after dusk | Check first |
|---|---|---|---|
| Ground-floor bathroom | Opaque or sufficiently obscuring frosted film | None only if the installed film passes the privacy test | Test with ceiling light on and occupant near glass |
| Street-facing bedroom | Frosted | Blackout or roller blind closed at dusk | Test with bedside lamp on |
| Front living room | Patterned or frosted | Lamps set back; sheer curtains, with a fuller covering if needed | Check clear pattern areas and lamp positions |
| Rented flat | Removable film, including a suitable self-adhesive option | Blind or curtain permitted by the tenancy | Written landlord consent and confirmed removal method |
Measure, Check and Order Your Film
Use your observations to choose a treatment, rather than buying a finish and hoping it works. If the test exposed movement where privacy matters, choose stronger obscuration or an effective closing covering. If preserving the view is your priority, plan for a removable evening barrier rather than permanently frosting every pane.
Make the final checks at the window
- Verify the complete evening setup. Repeat the test with normal room lights on and the chosen blind or curtain closed. Look for uncovered margins, clear patterned sections and viewing angles that weren't obvious from indoors.
- Confirm the safety arrangements. Establish whether the window is needed for escape, and keep required markings and operating hardware uncovered. Open it fully before ordering so you know where moving parts and ventilation openings sit.
- Measure each glass pane separately. Use a tape measure to record the visible glass width and height, not the surrounding frame. Label the measurements by room and pane position, and note any difference between apparently matching panes.
For lower-pane coverage, use low-tack masking tape to mark the proposed top edge. Sit, stand and check the outside sightline before settling on that height; an attractive horizontal line isn't useful if someone can see over it.
Order for the glass you actually have
Check the chosen film's compatibility with your glazing, particularly where there are existing coatings or unusual glass constructions. Confirm whether the ordering dimensions describe the supplied sheet or the finished coverage, and follow the product's trimming allowance rather than inventing your own.
At Quote My Wall, our range includes window privacy films, and our vinyl wraps for windows are self-adhesive. Match the selected finish and coverage to your measured panes, while checking the individual product details for its intended application.
Before fitting, use the window privacy film DIY guide to organise preparation and application. Have a tape measure, clean microfibre cloth, suitable squeegee and safe cutting surface ready, and use the application method specified for the film.
Tonight's action is straightforward: run the lamp test, choose the matching film-and-covering setup, then order for the measured glass.
Quote My Wall offers window privacy films for home updates, alongside self-adhesive vinyl for windows. Visit Quote My Wall with your pane measurements and lamp-test notes to choose a finish that suits your room's daylight needs and evening privacy setup.