

Vinyl Wrap Windows: How to Choose and Apply Film
You've measured the window, picked a design, chosen a Saturday morning for the job, and then stopped at the same question many reach: will the film stay on this glass, or is it going to peel, bubble or, worse, crack the pane? That hesitation is the right instinct, pointed at the wrong thing. The film isn't usually what fails. The glass decides the outcome before the backing paper comes off, and most of the disappointing results come down to a pane that should never have been wrapped in the first place.
So start at the glass. Work out what you're sticking to, check its condition, and only then think about design. Everything else, the film spec, the fitting method, the removal, follows from that first assessment.
Check Your Glass Before You Buy Film
A Saturday fitting fails on the pane you never identified. Find the manufacturer's stamp first. Most UK glazing carries a small etched or printed mark in one corner, and that mark names the standard the pane was made to. If there is no stamp, or it sits under the frame, ask a glazier. Do not guess the glass type from how the pane looks.
Measure thickness with a tape or calipers wherever an edge is reachable. Anything under 3 mm is a reason to stop. Then check every pane for chips, cracks, and misting inside a sealed unit. A unit that has already failed holds moisture between the panes. Film on the room face will not clear that fog or dry the cavity.
Use this as the shop reference before you order.
| Glass type | Film suitable? | What to check |
|---|---|---|
| Annealed single glazing | Yes, with care | Condition of the pane and thermal safety before application |
| Toughened safety glass | Check first | Thermal stress from absorbed heat; confirm with the film maker |
| Laminated glass | Not for anti-shatter film | Confirm compatibility before applying any film |
| Textured or patterned glass | Not recommended for anti-shatter film | Decorative vinyl may suit; test a small area first |
| Wired glass | Not recommended for anti-shatter film | Treat as non-safety glass and get advice |
| Sealed double-glazed unit | Check first | Film on the outer face raises heat stress; keep clear of seals |
| Glass under 3 mm thick | Risky | Can crack under the pressure needed to apply film |
Read the rows as separate categories, not as a neat climb from safe to unsafe. Annealed single glazing is the most forgiving surface to stick to, and it is also the pane most open to thermal shock once a dark film starts soaking up sun. Toughened glass copes better with impact and can still break outright if heat stress gathers at a chipped or tight edge, so confirm that limit with the film maker. Laminated and wired glass do not behave like plain float, which is why anti-shatter film is the wrong product for them. Patterned glass can take decorative vinyl on a small test patch; it is a poor base for a safety film that needs full, even contact. On a sealed double-glazed unit, film on the outer pane raises the temperature of that sheet of glass and has to stay off the edge seal.
Anything cracked, chipped, thinner than 3 mm, or of a type you cannot name is a pane for a professional to assess. It is not a pane to wrap. Write the glass type against every window before you buy, because the film that is reasonable on one opening may be the wrong film two metres along the same wall.
Limescale and mineral spotting have to come off the glass before film goes on. Left there, the marks show through and the adhesive will not lie flat. Ordinary descaling deals with inland spotting. That is a different job from preventing mineral spots on coastal homes.
Choose a Film for Privacy, Light or Heat
A south-facing kitchen that blinds you at the sink is a different job from a bathroom that needs the view blocked. Domestic window film is sold for one of three jobs: blocking the view in, cutting glare and fading, or reducing solar heat. Some films do two of those. None does all three at maximum, because the coating that rejects heat also cuts visible light. The product name will not tell you which trade-off you are buying. The datasheet will.
| Film | Visible light passed | Glare reduction | Solar heat rejected | Total solar rejected | UV rejected |
|---|---|---|---|---|---|
| Dorset Council test film (light-diffusing) | 54% | 41% | 25% | 35% | over 99% |
| Charcoal film (UK technical datasheet) | 36% | 65% | 34% | 47% | over 99% |
Read the columns against the room.
Visible light transmission is how dark the space will feel. The light-diffusing film at 54% keeps a room usable. The charcoal film at 36% suits a south-facing room you already want to shade. I would not put it on a north-facing room that already feels dim.
Glare reduction matters if you work at a screen or watch television with the sun behind you. Charcoal's 65% beats the light-diffusing film's 41%, and you pay for that in lost daylight.
Solar heat rejection is the figure to weigh for a conservatory or a room that overheats from June to August. 25% against 34% is a difference you can feel on a hot afternoon. It is not a privacy rating, and it is not a claim about the heating bill.
A technical datasheet published for Dorset Council's window-film assessment reports 54% visible-light transmission, 41% glare reduction, 25% solar-heat-gain rejection, 35% total solar-energy rejection and more than 99% UV rejection, with a solar-heat-gain coefficient of 0.64. The same assessment compares that with a UK-market charcoal film at 36% visible light, 65% glare reduction, 34% solar-heat-gain rejection, 47% total solar-energy rejection and over 99% UV rejection. Both sets are product test results under controlled conditions, not predictions of what your room will do. They say nothing about whole-house savings, which shift with glazing, shading, occupancy and ventilation.
If you're leaning frosted, the sequence in these frosted window film installation steps is a sensible cross-check before you commit to a large sheet. For a wider shortlist of privacy options and how they compare room by room, this guide to the best window film for privacy covers the choices in more depth.
Before you buy, ask four things: what the film's main job is, whether it's rated for your pane and orientation, what the warranty requires, and what service life the maker states. Glare and UV percentages tell you nothing about how long the film lasts.
Heat Loss, Energy Bills and What Film Cannot Fix
Will a vinyl window film meaningfully cut your heating bills? For a decorative or privacy product, no. A specialist insulating film is a different item entirely, and even then the effect is modest. The Energy Saving Trust's guidance on windows and doors describes secondary-glazing film as a cheap, usually DIY option, but says it doesn't last long, can be difficult to make aesthetically pleasing and gives the least thermal benefit among the secondary-glazing choices.
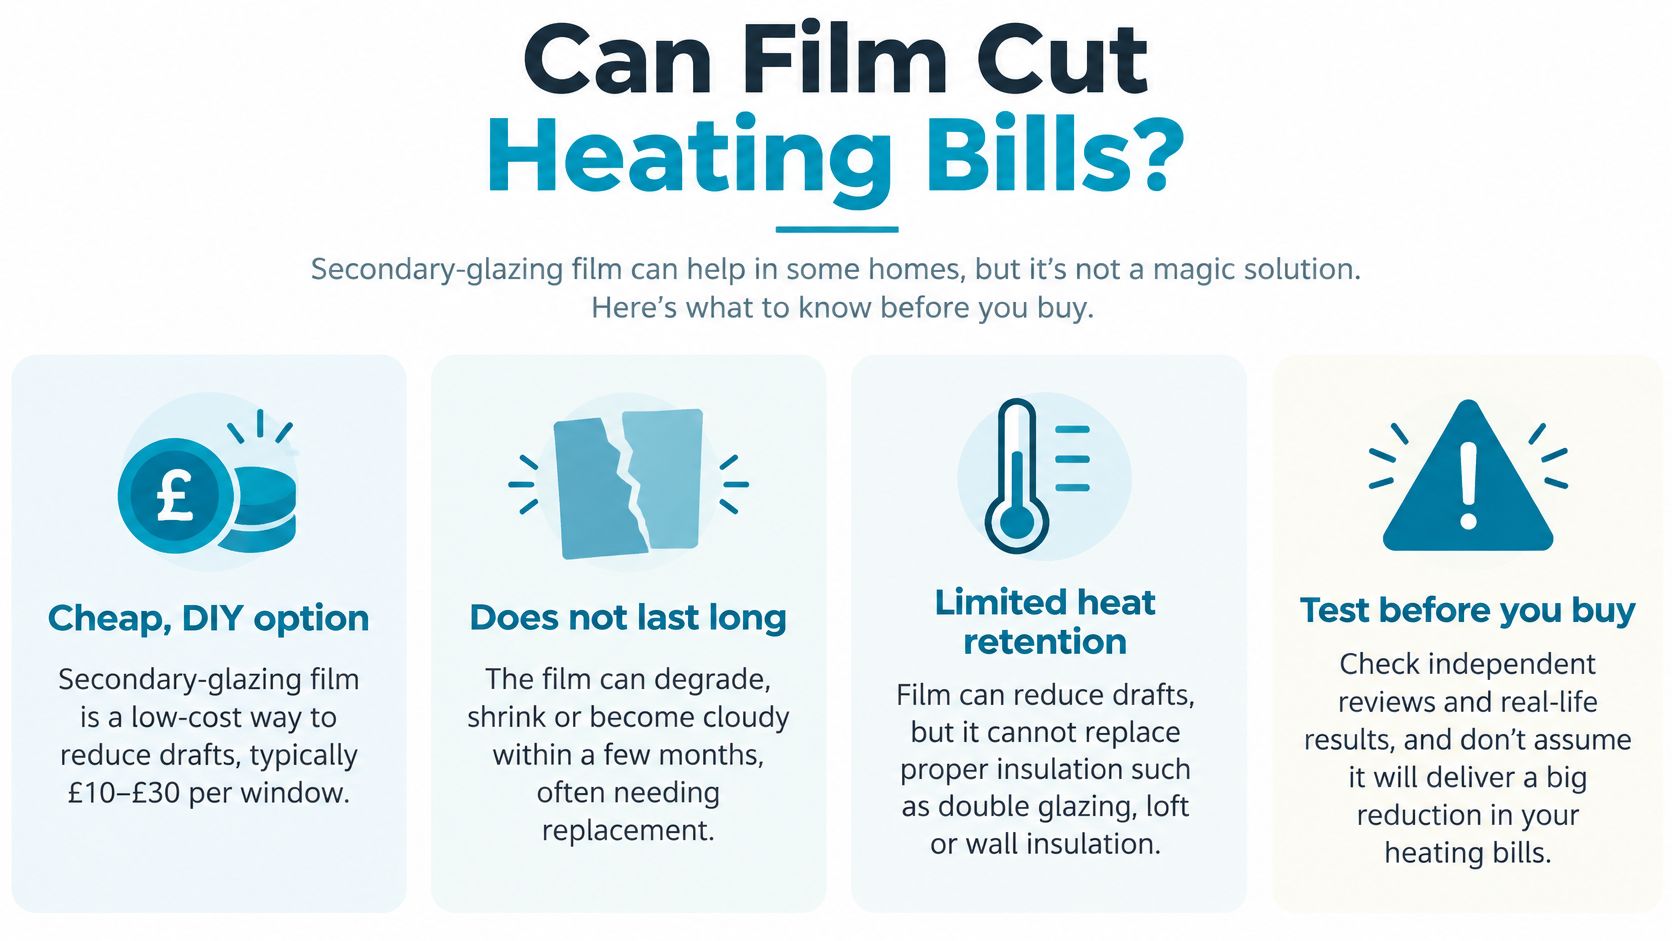
Split the goal before you spend anything.
- Privacy or appearance. Choose decorative vinyl and judge it on the light and glare figures. Don't expect a bill change.
- A room that feels cold in winter. Check draughts at frames, letterboxes, loft hatches and chimney breasts first. Gaps often lose more heat than the glass, and they're cheaper to fix.
- Genuine heat loss through the pane. Compare secondary glazing with film rather than film alone, because secondary glazing delivers more thermal benefit.
Practical rule: never quote a customer a percentage saving from a datasheet. Those figures describe product performance in a test, not your house.
Renters, Removal and Keeping the Glass Intact
You've ordered a privacy film for the bathroom window in a rented flat. The design looks right, and the listing says removable. At the end of the tenancy the agent runs a finger along the frame and finds a lifted seal or a dull patch of adhesive. That is the cost "removable" never priced in. The word describes the intended use. It does not promise a clean release on textured, damp or contaminated glass, and it does not cover scratches or seal damage if the peel goes wrong.
Permission comes before the order. Shelter's advice on making improvements to a rented home is clear that tenants shouldn't make improvements without the landlord's permission and should get agreement in writing before starting. Many local authorities also require secure tenants to request written consent before making alterations.

The paperwork is short. It covers you for the whole tenancy if a dispute appears at checkout.
Work through this before any film goes on the pane.
- Read the tenancy agreement for clauses on alterations, fixtures and decorations.
- Ask in writing. An email to the landlord or agent creates a record that a phone call doesn't.
- Test adhesion on an inconspicuous corner of the pane, then leave it a few days.
- Photograph every window before you fit anything, seals and frames included.
- Confirm removal expectations at move-out, so you know whether the film stays or goes.
Removal, in order. Peel slowly at a low angle rather than pulling straight out. A shallow angle spreads the load and reduces the chance of lifting a seal. If the film resists, warm it gently with a hairdryer on a low setting to soften the adhesive, working along the edge. Clean any residue with a glass-safe adhesive remover on a lint-free cloth, never a scraper. Quote My Wall vinyl is made to come away from walls and surfaces without causing damage or leaving residue. I'd still test it on your glass before committing to a full window. If you're weighing a cling product instead, this guide to static cling film for windows explains where the two approaches differ.
Ground-floor flats, bathrooms and shared houses are where this gets awkward, because the need for privacy is real and the restriction is real. Get the permission in writing early, before you've ordered the design you like.
How to Apply Window Vinyl Step by Step
Lay the tools out before you start, matched to the step that uses each one: a spray bottle, a soft squeegee with a felt edge, a sharp trimming blade plus spares, lint-free cloths, isopropyl alcohol, a degreasing cleaner and a tape measure. Missing any of these mid-job is how corners get rushed.
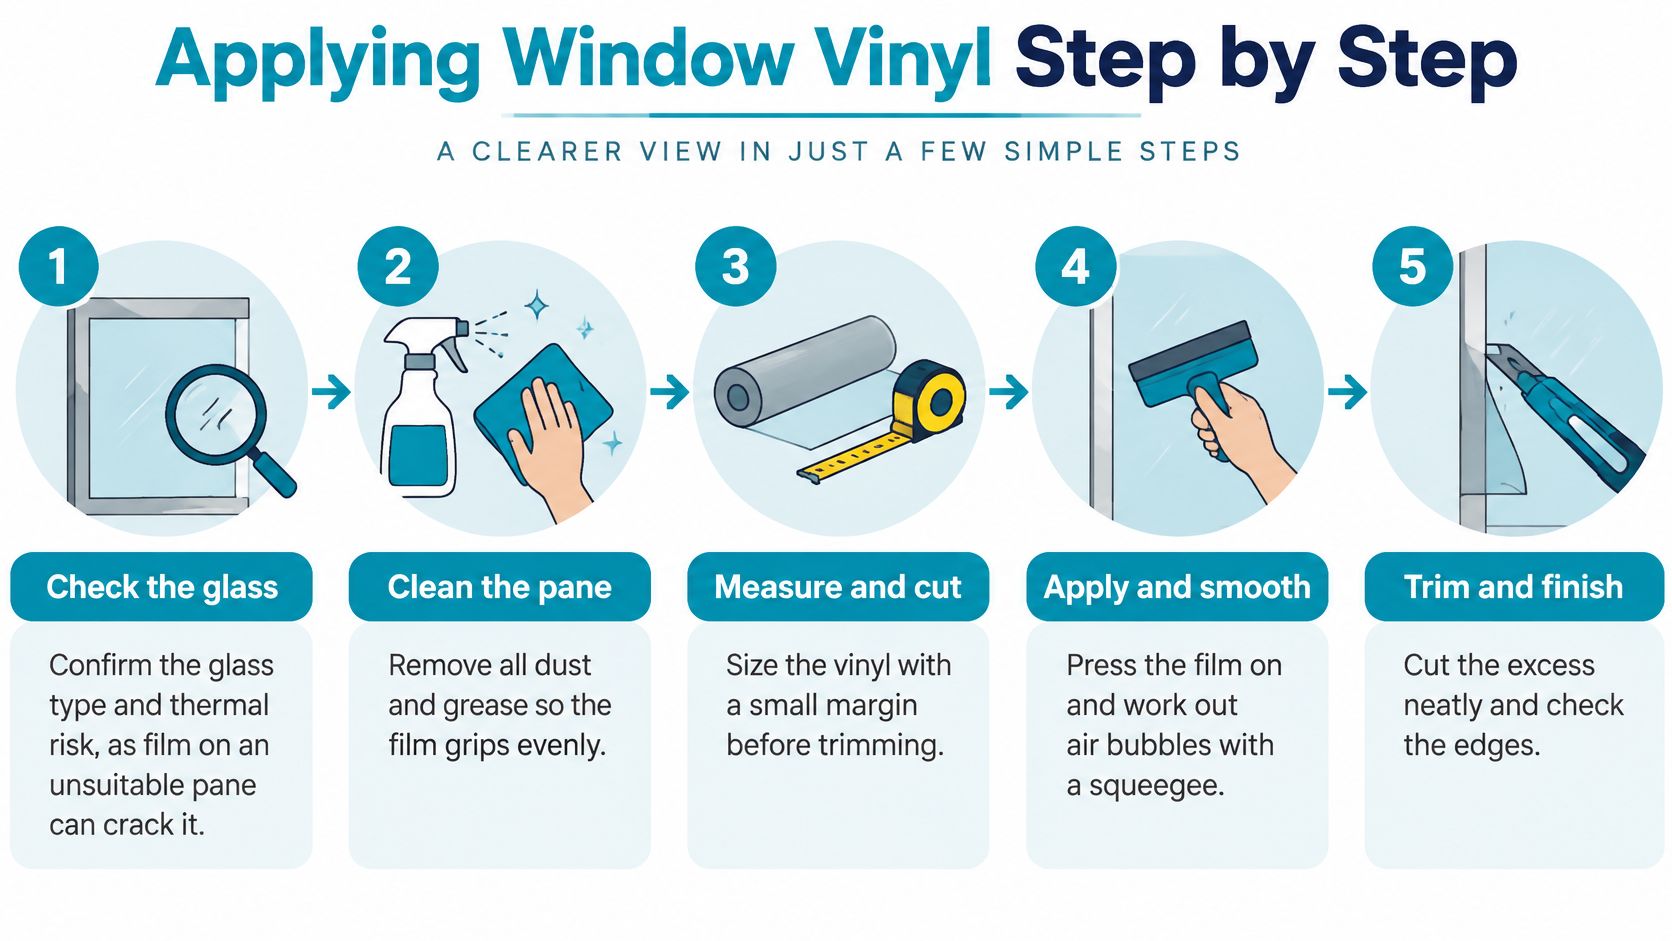
1. Confirm the glass. Reread the table in the first section for this pane. The National Protective Security Authority's guidance on anti-shatter film warns that thermal-safety checks must come before film goes on, because absorbed solar energy raises thermal-shock risk and can crack single glazing or a sealed unit. It also notes that glass below 3 mm can crack under the pressure needed to apply film, and that anti-shatter film isn't recommended for laminated, textured, hand-cast or wired non-safety glass. A decorative wrap isn't a substitute for safety glazing either.
2. Clean and degrease. Work the degreasing cleaner over the whole pane, edges included, then wipe with isopropyl alcohol and let it flash off. Oil from fingertips and airborne dust trapped under the film show up as permanent specks against a bright sky.
3. Measure and cut oversize. Add 20 to 30 mm on every side. You trim back to the frame later, and a sheet cut exactly to size leaves nothing to grip or straighten.
4. Mix the slip solution. Water with two or three drops of washing-up liquid is the usual DIY mix, unless the film maker specifies their own. Spray the glass generously, then the adhesive face too. Wet application is what lets you position and reposition before the film grabs.
5. Apply from the top. Peel the backing away in stages, pressing the top edge into place first and letting the rest hang. Working downward keeps the film aligned and stops it folding onto itself.
6. Squeegee from the centre out. Use light, steady pressure in overlapping strokes, pushing water and air toward the edges. Heavy pressure on thin or hot glass is exactly what the thermal and pressure warnings are about.
7. Trim without cutting the seal. Run a fresh blade along the frame line, outside the seal. On a double-glazed unit, never let the blade into the sealed edge, because a broken perimeter seal is a new unit, not a new blade.
8. Let it cure. Leave the film undisturbed for the period the maker states, often several days, and don't clean that window in the meantime. Most of the small water bubbles you'll see on day one are part of curing.
The two slips that cause the most callbacks are skipping the alcohol wipe and applying dry. Both leave you with edge lift within a fortnight, on a job that otherwise looked perfect.
Fixing Bubbles, Dust and Lifted Edges
Almost everything that goes wrong shows up in the first day or two, and most of it is diagnosable from the symptom alone. Small water bubbles near the edges are the most common sight and the least serious: they're water still curing under the film, and they usually clear on their own. Leave them for the full cure period before you touch them.
| Symptom | Likely cause | Fix |
|---|---|---|
| Small water bubbles near the edges | Water still curing under the film | Leave for the cure period, then squeegee if they persist |
| Air bubbles that stay in the middle | Trapped air from light squeegee pressure | Lift, re-wet and squeegee from the centre outward while workable |
| Dust or specks under the film | Dust or oil on the glass before fitting | Peel back, clean the glass with alcohol, re-fit |
| Lifted corner or edge | Contaminated or damp glass, or cutting too early | Remove, clean, re-apply and allow full cure |
| Crease that will not flatten | Film folded or stretched during fitting | Remove and reposition; do not force it flat |
The decision underneath the table is timing. If the film is still wet and movable, re-fit now, because every hour of cure makes the adhesive harder to lift cleanly. If it has started to cure and the fault is cosmetic, wait it out and judge the window in daylight after the cure period. For the aftercare, the cleaning method matters: this guide to cleaning tinted windows sets out the approach that avoids scratching and hazing the surface. When you're refitting a sheet you've already cut, the technique in this walkthrough of how to apply vinyl wrap is worth reviewing, since a second attempt on wet glass behaves differently from the first.
A crease will not flatten. Forcing it stretches the film and leaves a shiny line that catches the light from across the room. Take it off and start that section again.
Test One Window and Plan the Next Action
Pick one low-risk window: visible enough that you'll judge the result, but not the main light source for a room you use all evening. A bathroom pane or a secondary window is ideal. Confirm its glass type and thickness against the table in the first section, and stop entirely if it's cracked, thinner than 3 mm, laminated, wired or an unusual system. That one gets a professional assessment, not a Saturday experiment.
If you rent, make sure the written permission is in hand before you peel anything. Then fit the film using the eight steps, and leave it alone for the full cure period before you inspect it against the problem table. One window, cured and inspected, tells you more than any amount of reading.
Only when that test window looks right after curing should you order for the rest of the house.
Your next action is a written list, not a purchase: every window, its glass type, its thickness, its orientation and its goal (privacy, glare, fading or heat). That list turns a vague decorating idea into a specification you can buy against, and it stops you ordering the wrong film for the one pane that can't take it. If you're buying from Quote My Wall, ask us for the exact product datasheet first. Our window range includes privacy films, Christmas window stickers and Halloween window stickers, and our printed wall art vinyl is rated to last at least 5 years indoors and at least 3 years outdoors.
When you've checked your glass and settled on a goal, Quote My Wall stocks self-adhesive vinyl wraps for windows alongside privacy films and seasonal window stickers. Everything is printed onto premium removable vinyl, so you can change the look without committing to it permanently. Measure the pane, match the film to the job, and browse the window range at Quote My Wall when you're ready to order.