

Vinyl Wrap Interior: How to Wrap Furniture and Walls
You're staring at a kitchen that works perfectly well but looks tired. The carcasses are solid, the doors hang straight, yet the colour dates the whole room and quotes for replacement feel disproportionate. A vinyl wrap interior project sits in that middle ground, provided the surface underneath is sound and you understand where film works, where it doesn't, and how temperature and preparation decide the result.
Which Surfaces Suit an Interior Vinyl Wrap
Before you buy anything, spend ten minutes checking each surface. Press edges and corners, run a palm over the face, and look at an angle under a window or torch. You're looking for flaking paint, lifting veneer, swollen board and greasy patches. Turn the item over too, and check for any furniture label. If you can't get a fingernail under the existing finish and the surface feels dry and firm, you're probably looking at a candidate. If paint powders, veneer crackles or MDF has blown at the edge, fix that first or choose another route.
Interior surfaces and whether a vinyl wrap suits them
| Surface | Suitable? | Preparation focus | Watch for |
|---|---|---|---|
| Painted MDF or flat-pack cabinet doors | Yes | Light sanding and degreasing | Chipped or swollen MDF edges |
| Laminate worktops and drawer fronts | Yes | Thorough degreasing, adhesion test | Silicone or wax residue |
| Real wood veneer | Yes, only if bonded | Repair and bond any lifting areas | Lifting veneer under the film |
| Glass and mirrors | Use film made for glass | Clean with alcohol | Furniture wrap is the wrong product |
| Ceramic tiles | Yes | Degrease and dry completely | Grout lines showing through |
| Plastered or painted walls | Yes, if sound | Fill cracks, remove flaking paint | Damp patches and loose paint |
| Upholstered sofas, chairs and headboards | No for decorative wrap | Not recommended | Fire-safety rules for upholstery |
| Radiators | Check the product rating first | Confirm temperature tolerance | Heat softening the adhesive |
Painted MDF and flat-pack doors are the most forgiving starting point, which is why they're a common first project. If you're weighing up a kitchen run specifically, our guide to the best vinyl wrap for kitchen cabinets helps you match film to door style. Laminate can work just as well, but old polish, silicone spray and cooking grease reduce adhesive effectiveness. Wood veneer is different again. The film will faithfully follow a lifting patch and then lift with it, so bonding comes before colour.
Walls need the same honesty. Sound plaster or well-bonded paint can take a wrap, while damp, chalky or peeling areas can't. Tiles are hard and washable, although the film may bridge or reveal grout lines depending on depth and texture. Glass and mirrors need a product designed for glass, and radiators need a temperature rating checked against the product specification, not a guess based on touch.
Decorative film belongs on hard, smooth, non-upholstered surfaces. Anything soft, flexible or safety regulated sits outside that boundary.
That boundary matters for upholstery. The Furniture and Furnishings (Fire) (Safety) Regulations impose ignitability requirements on furniture fillings, permanent covers and upholstery composites, and permanent covers may need to pass the match test unless an applicable material and interliner exception applies. A wrap on a hard wardrobe door isn't the same issue as covering a sofa, padded chair or headboard, obscuring a required label or changing an upholstered cover. For care homes, nurseries, rentals, healthcare and other commercial settings, get separate professional advice rather than treating decorative film as universally suitable.
Walk through the house with the table in hand and mark each item yes, repair first or no. That small discipline stops you ordering a beautiful finish for a surface that was never going to hold it.
Vinyl Types and Finishes for Indoor Projects
Most interior films fall into two broad families. Calendered film costs less and works well on flat panels such as slab doors, drawer boxes and plain wardrobe fronts. Cast film conforms more readily around curves, recesses and shaped edges, so I'd choose it for profiled drawer fronts, rounded corners and pieces where you need the material to settle rather than fight you. Neither option rescues a poor substrate, and thicker or more flexible doesn't mean you can stretch your way out of bad measuring.
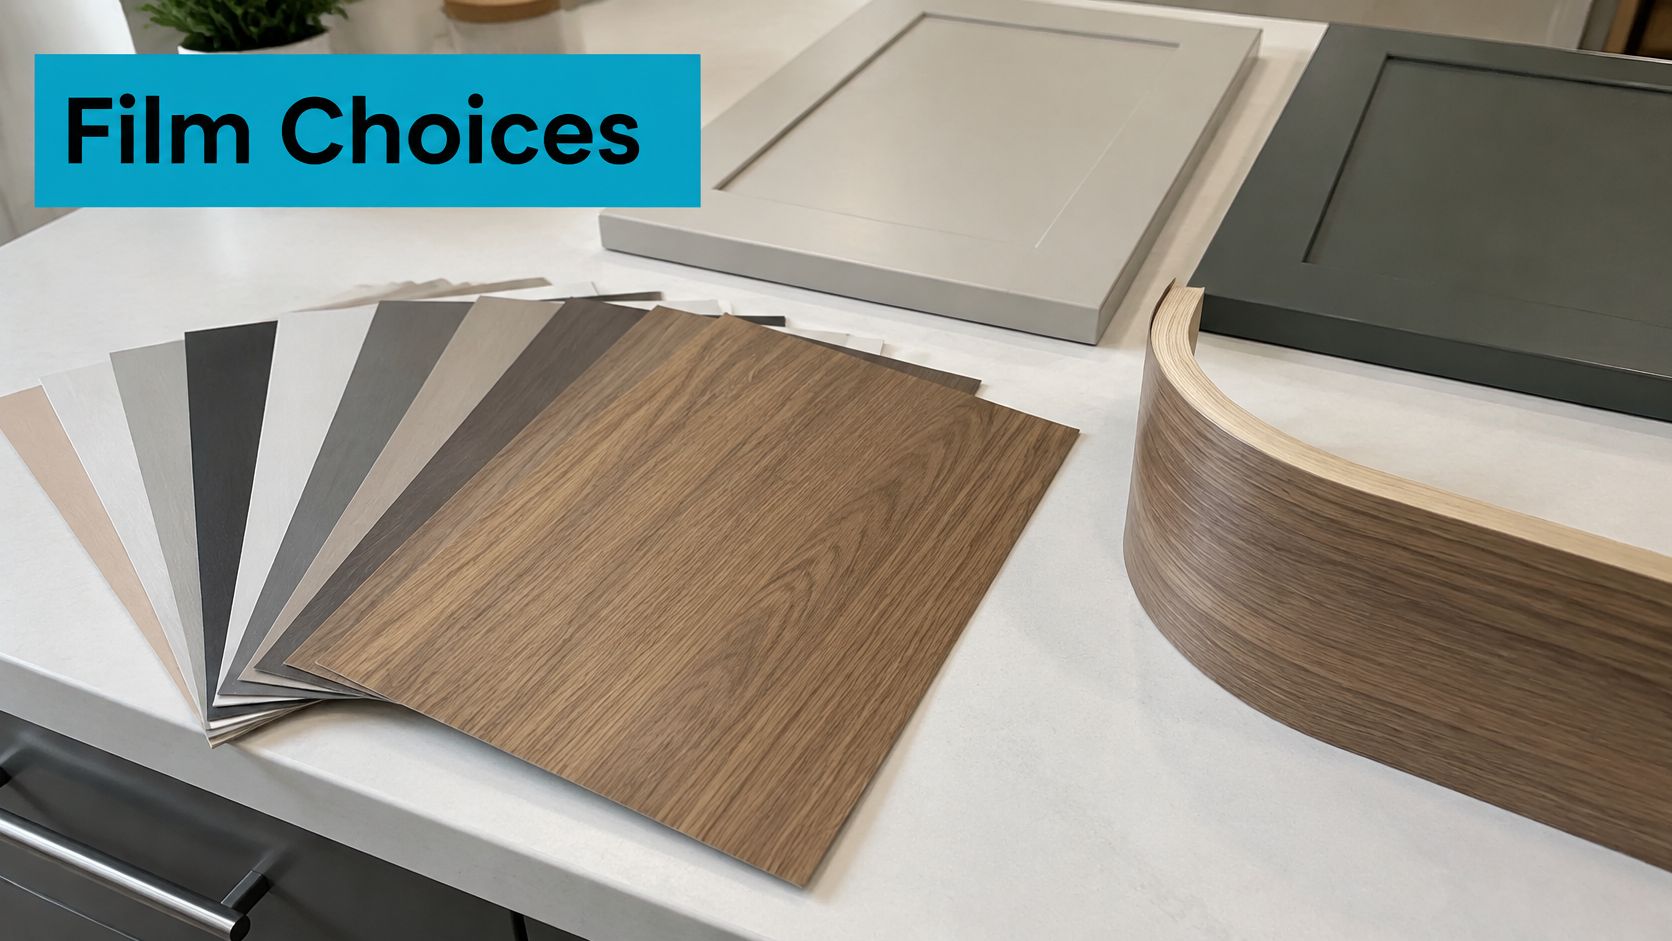
Finish changes how forgiving the job looks in ordinary light. A colour that seems calm on a screen can turn cold under north-facing daylight or yellow under warm bulbs.
- Gloss: Gives a sharp, reflective result, but shows ripples, filler edges and every speck left under the film.
- Satin or matte: Hides small imperfections and fingerprints better, making it a practical choice for kitchen fronts and busy drawers.
- Textured or brushed metal: Disguises light scuffs on high-touch edges and handles repeated contact with less visual fuss.
- Wood grain or marble print: Works well on tall units and broad panels, provided you plan pattern direction and place seams deliberately.
- Carbon fibre: Reads best as a feature panel or small accent, because full coverage can quickly dominate a room.
Choosing without wasting a full roll
Order a little more than your measured area. You need trimming allowance, room to square the first edge and a spare piece if your opening attempt goes crooked. Keep the offcuts too. They're ideal for an adhesion test, a drawer interior or a small repair later.
Order a sample of the exact finish and tape it to the furniture for a day. Check it in morning light, under your usual evening lighting and next to flooring or worktops that aren't changing. If it only looks right at noon, it isn't the right finish.
How to Prepare Surfaces Before Wrapping
Good wrapping is mostly cleaning, checking and waiting. The application itself is the short part. The 3M DI-NOC Architectural Finishes Technical Data Sheet specifies an ambient and substrate temperature of 12–38°C, with the surface at least 12°C for flat applications, so a cold garage or unheated spare room can undermine the job before you peel any backing.
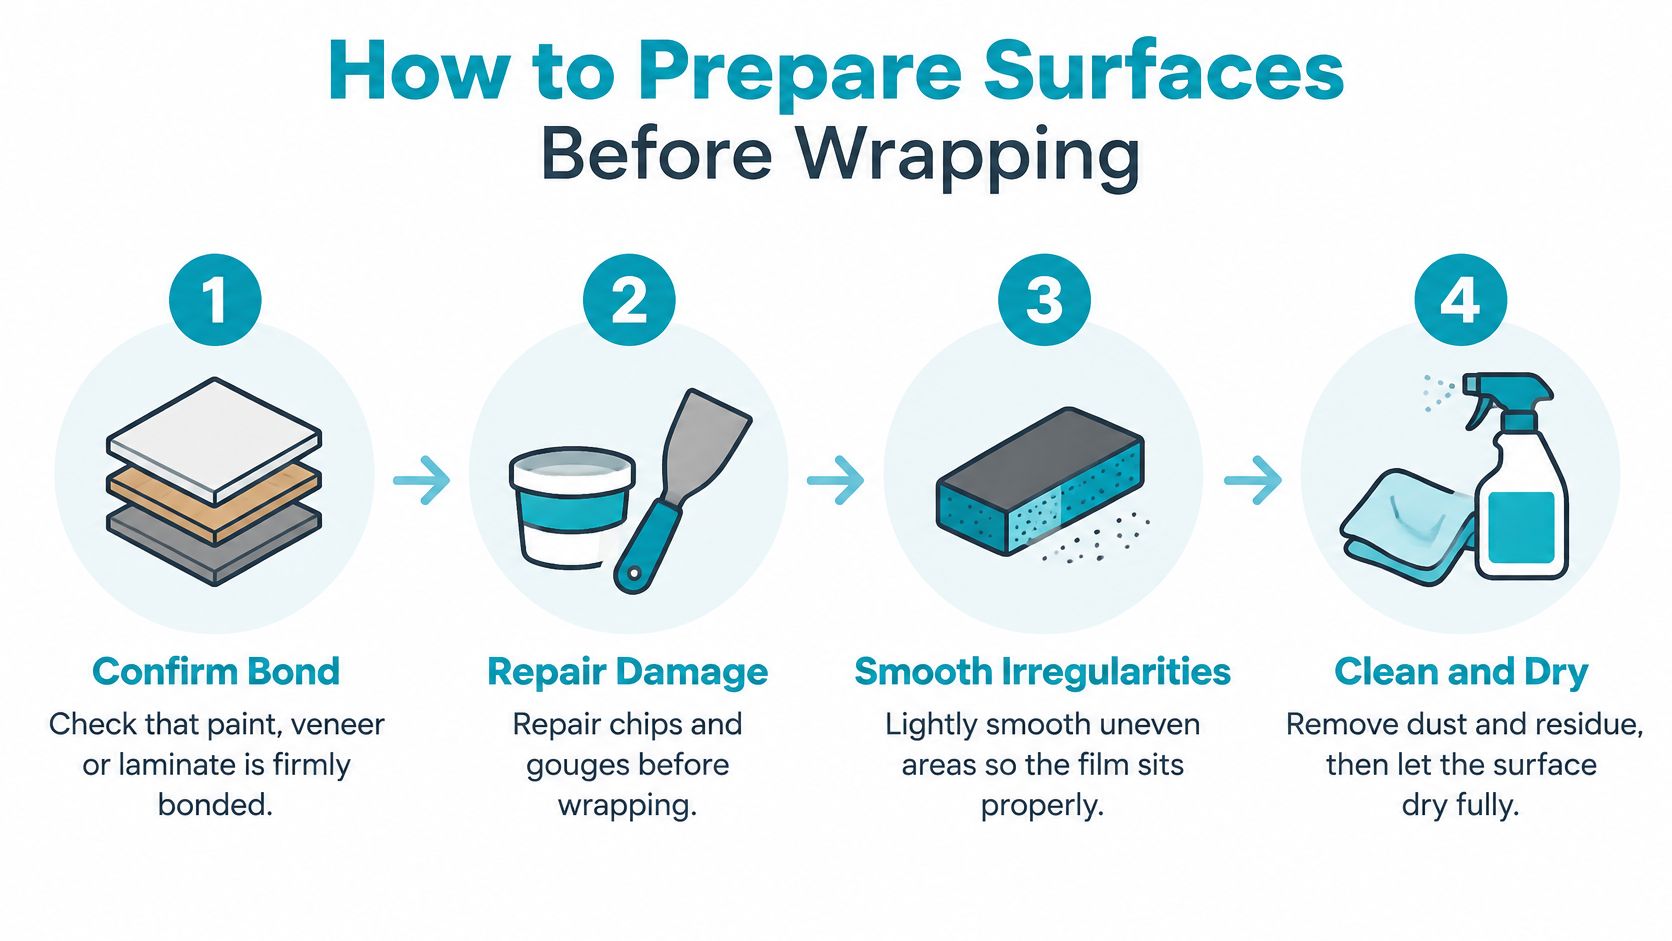
- Confirm the existing layer is bonded. Pick gently at hidden edges and press veneer, laminate or paint for movement. Film stuck to a loose layer only holds until that layer lets go.
- Repair chips and gouges. Fill damage, allow filler to cure, then level it carefully. A shallow dent may disappear under textured film, but a sharp chip usually telegraphs through.
- Smooth irregularities lightly. Sand ridges, nibs and rough filler until your palm passes over without catching. You're creating an even surface, not stripping the piece back unnecessarily.
- Remove contamination. Use a suitable degreaser to clear dust, grease, wax and silicone, paying attention to handle areas, worktop edges and the zone near a hob. Change cloths when they start spreading residue around.
- Let everything dry completely. Moisture trapped in filler, grout, bare board or cleaned laminate can dull the bond and encourage lifting. If the surface feels cool and damp, wait.
- Run a small adhesion test. Apply offcut film somewhere inconspicuous on unfamiliar paint, old laminate or treated wood. Leave it, then check the edges and removal before committing the full panel.
- Prime or promote adhesion where needed. Porous or absorbent surfaces may need a compatible full-surface primer, while difficult glossy or silk-painted substrates can require an adhesion promoter. Match the product to both film and surface rather than using whatever is under the sink.
A simple paint test
Press masking tape firmly onto painted furniture, smooth it down and pull it away. If paint comes with it, stop. Stabilise, sand back or repaint the weak area first, because wrap will pull harder than tape.
Practical rule: If your fingertip can find dust, grease or a loose edge, the adhesive will find it too.
Preparation is also where style decisions get tested against the room. A traditional shaker door, for example, needs its recesses cleaned and checked before any finish goes near it. If you're deciding whether to preserve that character or modernise it, you can explore traditional kitchen styles for context before covering a profile that may be worth keeping visible.
Don't rush because the cleaned piece looks ready. Vacuum or wipe away sanding dust, wash your hands and clear the work area. One gritty speck under gloss film becomes a permanent punctuation mark.
How to Apply Vinyl to Walls, Furniture and Windows
Start the day before. The TeckWrap technical data sheet recommends conditioning the roll in its original packaging in the installation room for up to 24 hours, states that initial adhesion occurs around 17–19°C, and says maximum adhesion is reached after 48 hours. Use an infrared thermometer on the wall or furniture itself, not just a thermostat reading across the room. Cold film feels stiffer, cold adhesive has less tack at the edges and a warm room with a cold external wall can fool you.
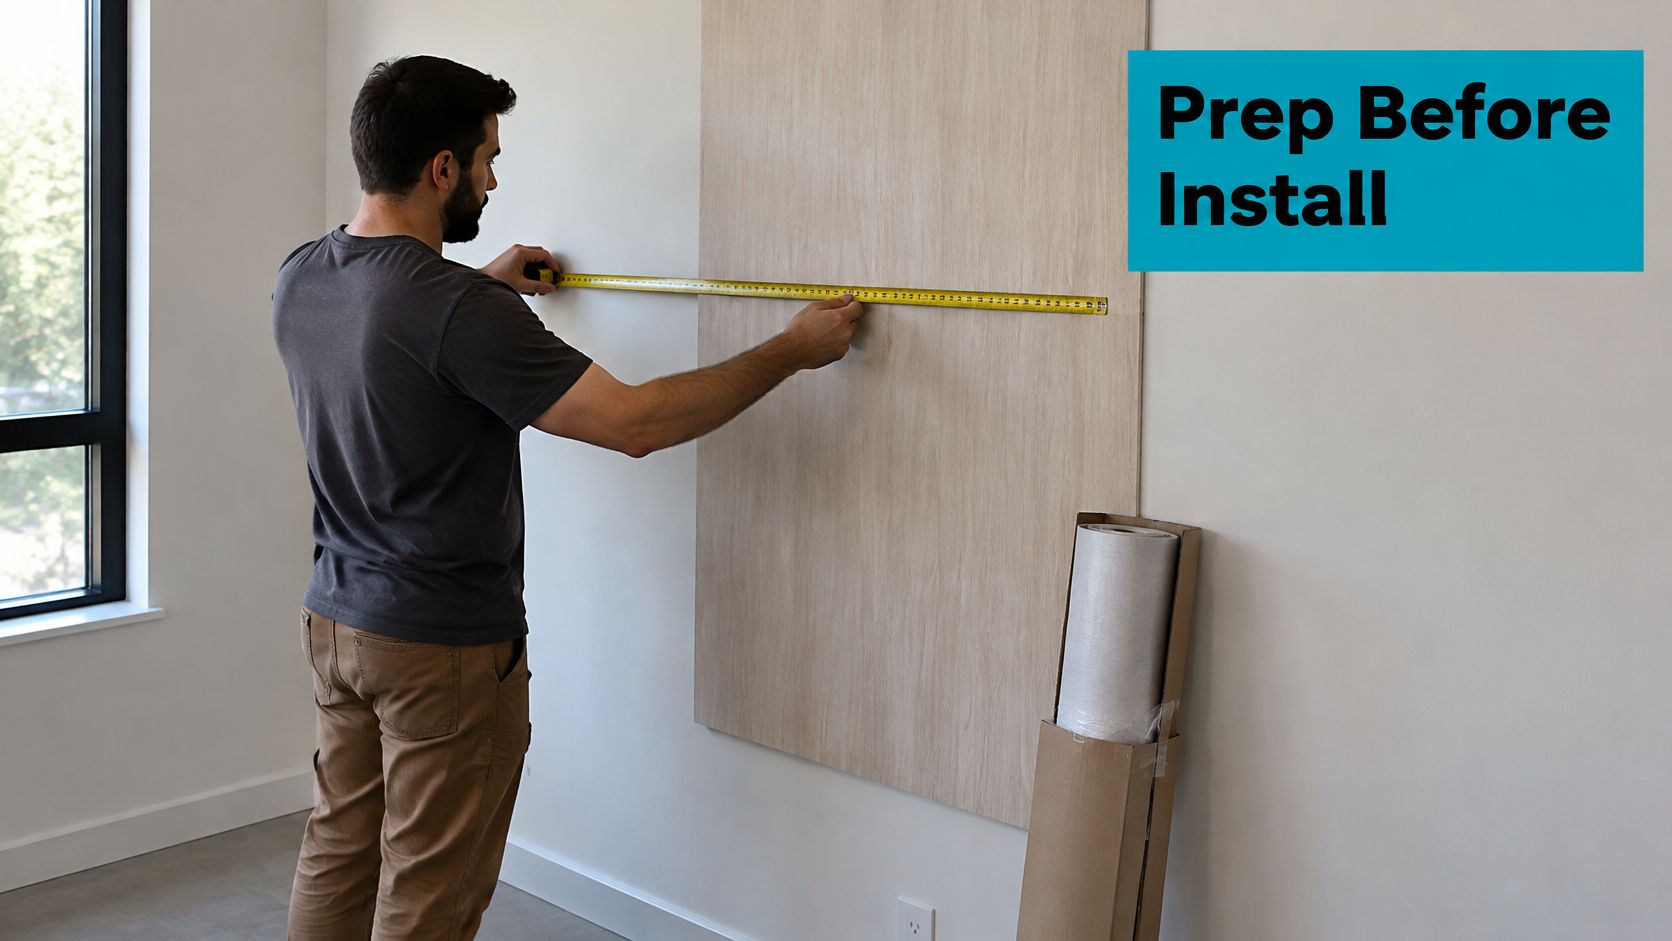
Lay out a felt squeegee, sharp craft knife with spare blades, metal ruler, masking tape, lint-free cloth and a hairdryer or heat gun you can control. Remove handles and hinges where practical. Working around hardware creates awkward cuts and trapped corners that take longer than refitting it.
The basic furniture routine
- Measure and cut oversized. Leave about 5cm extra on each side so you can align, wrap an edge and trim cleanly. Mark the top and pattern direction on the backing.
- Reveal a starter strip. Peel back roughly 15cm of backing, fold it flat and align the exposed film against a reliable straight edge such as a cabinet top. Don't expose the whole sheet and then try to wrestle it.
- Fix the first line. Press that strip down only when the alignment is right. A small error here travels diagonally across the entire panel.
- Work from the centre outwards. Pull the backing away gradually with one hand while the other moves the felt squeegee in overlapping strokes. Keep even pressure and let air escape ahead of the squeegee.
- Use moderate heat selectively. Warm curves, recesses and edges so the film relaxes into shape, moving the heat source constantly. Stretching a flat area to make it reach usually stores up wrinkles or shrinkage.
- Trim with a fresh blade. Angle the knife slightly away from the visible surface and use the furniture edge or ruler as a guide. Change blades often, because a dragging blade tears instead of cutting.
- Inspect under strong light. Check corners, joints, seams and transitions from several angles. Press edges down again and deal with small bubbles while repositioning is still manageable.
Take doors off and lay them flat if you can. Gravity helps rather than pulls, and you can rotate the piece instead of reaching awkwardly around it. For a pair of doors, finish one completely and use its pattern position to plan the next, especially with wood grain.
Walls need panels and planned seams
A wall isn't one giant sticker. Work in manageable panels, establish a plumb line and plan overlaps so seams sit away from direct eye level and strong side light where possible. Corners need patience because few internal walls are perfectly square. Align to the most visible vertical first, then trim into the corner rather than forcing the film around an uneven junction.
Keep sockets and switches switched off if you're loosening faceplates, and never trim blindly around electrical fittings. Cut conservatively, check the opening and enlarge it in small passes.
Windows use a different product
Don't treat window film as leftover furniture wrap. Windows need film made for glass, and installation may be wet or dry depending on the product. Follow that manufacturer's method exactly because privacy film, decorative film and furniture vinyl behave differently. Our dedicated guide explains how to install window privacy film in the correct sequence for glass.
When the last edge is trimmed, leave it alone. Avoid washing, heavy abrasion, repeated handling and dragging objects across the surface while adhesion builds. Reinspect corners and joints after curing, and only then refit handles that might catch or twist a fresh edge.
Bubbles, Lifting Edges and Other Fixable Faults
Bubbles are the fault people notice first, usually because the film went down too quickly or the squeegee travelled from one side and pushed air into a dead end. Small bubbles are easiest in the first few hours. Lift the nearest edge gently, support the film so it doesn't crease and re-lay it from the centre outwards. For a stubborn isolated pocket, a fine pin prick at the edge of the bubble lets you press air out with a fingertip or squeegee. Don't stab repeatedly across the face, especially on gloss, because you'll trade one bubble for a constellation of marks.
Vinyl wrap faults, causes and fixes
| Symptom | Likely cause | Fix |
|---|---|---|
| Trapped bubbles after applying | Applied too fast or from one side | Lift gently and re-lay from the centre outwards; pin-prick stubborn air pockets |
| Edges lifting | Dust, grease or a cold room | Clean the edge, warm lightly and press down; check temperature next time |
| Wrinkles or creases | Overstretching the film | Peel back and re-lay; use heat only on curves |
| Hazy or dull patches | Residue, wax or trapped moisture | Clean with a suitable cleaner and allow to dry; re-test the surface |
| Visible seams or gaps | Poor overlap at joints | Lift the joint, trim and re-lay with a clean overlap |
| Adhesive lines at edges | Excessive heat collapsing air channels | Replace the section; use heat more sparingly |
| Peeling after several weeks | Waxy or silicone-contaminated surface | Remove, degrease thoroughly and re-apply |
| Paint lifting under the film | Unstable paint or moisture | Sand, prime and let dry before re-wrapping |
Lifting edges tell a more specific story. Dust, grease, cold adhesive or an edge trimmed too short can all start the curl. If you catch it early and the underside is clean, warm it lightly and press it back with the squeegee wrapped in a soft cloth. If grit has stuck to the adhesive, pressing harder won't restore the bond. Trim back to a clean section or replace the panel.
Wrinkles need honesty. Film that's been overstretched doesn't reliably shrink back into a smooth face, and more heat often distorts the pattern. Peel back beyond the crease, let the material relax and re-lay it with less tension. Save heat for the curve itself.
Hazy patches point below the surface. Wax, cleaning residue or moisture can interfere unevenly, leaving dull islands that no amount of surface polishing will solve. Adhesive lines are different. Too much heat can collapse air-release channels and leave visible tracks, so that section normally needs replacing rather than rescuing.
Timing matters: Adhesion builds over the first two days, so a careful lift and re-lay on day one is usually far easier than the same repair after a week of handling.
If paint is lifting underneath, stop blaming the wrap. The substrate has failed. Remove the film, sand and prime the unstable paint, let it dry fully and test again. Wrapping over it a second time only gives you the same failure with cleaner edges.
Removing Wrap and Choosing Wrap, Repaint or Replace
A cabinet that still closes properly, but whose film has lifted at the handle, is a removal job, not a replacement. Day to day, wrapped furniture doesn't need specialist treatment. Wipe it with mild soap, water and a soft cloth. Keep abrasive pads, scouring powders and strong solvents away from edges and printed finishes. Lift hot pans, kettles and heavy appliances rather than sliding them, and deal with standing water around seams instead of letting it sit.
Removing film without tearing the surface apart
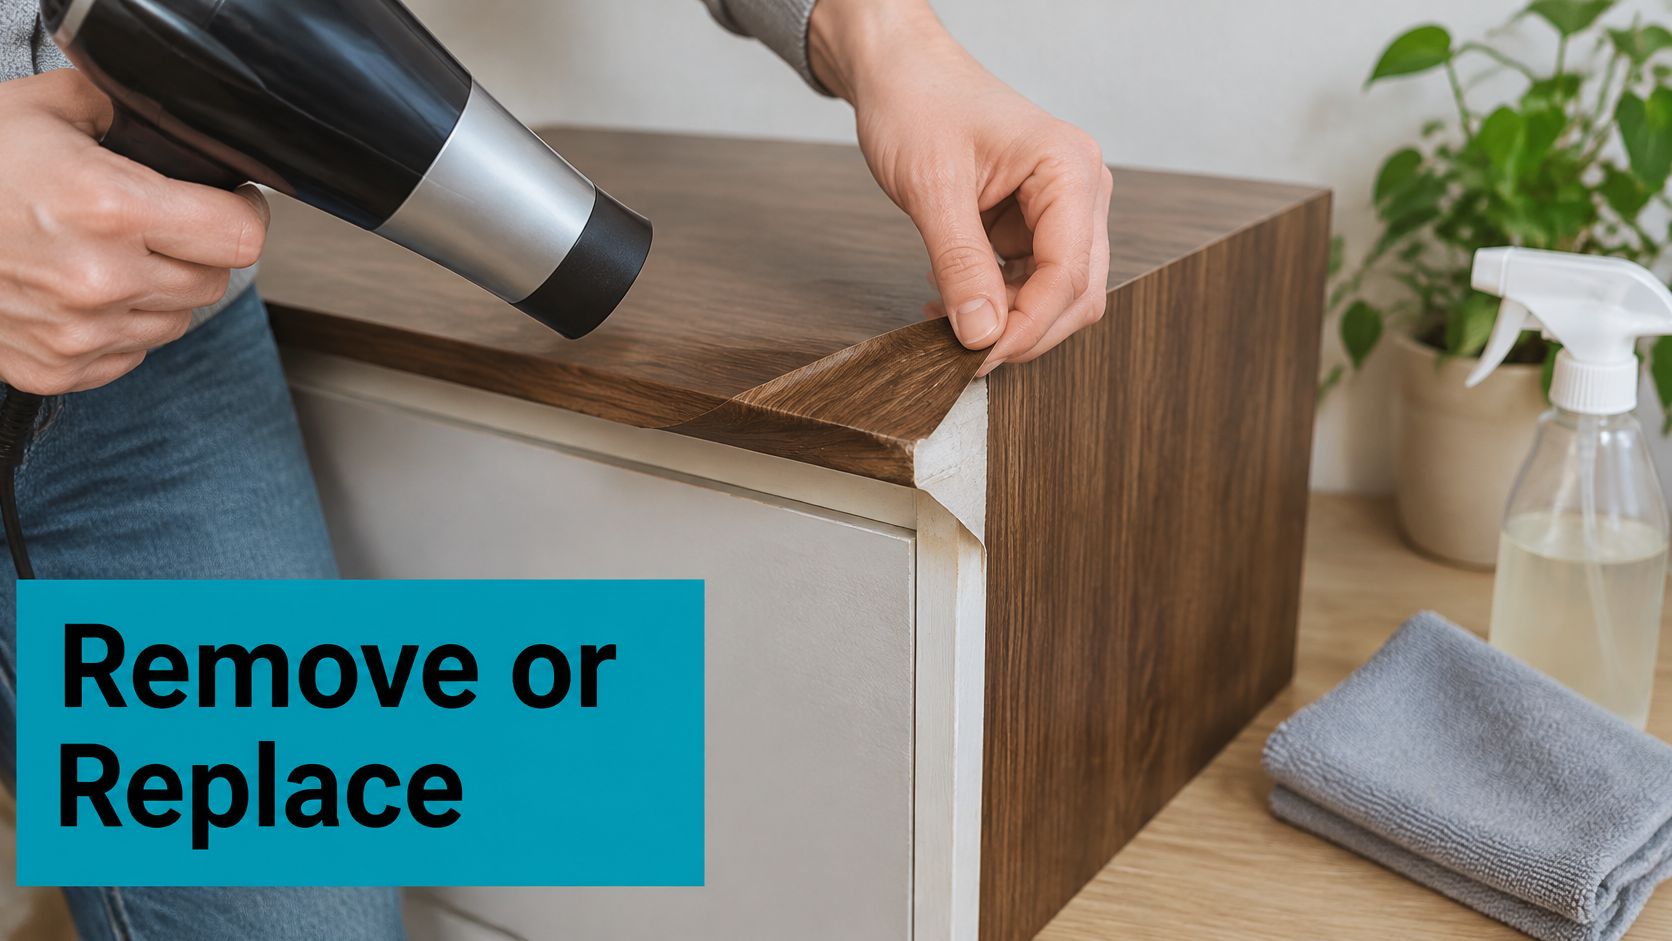
Warm a corner gently with a hairdryer on a low setting. Peel slowly at a shallow angle, keeping the section just ahead of your fingers warm so the adhesive releases and the film doesn't snap into strips. Work across the panel in small advances. If resistance suddenly increases, pause and warm again rather than yanking.
Test any adhesive remover on a hidden patch first. Products that soften residue can also dull paint, swell exposed board or mark laminate. Check the paint as you go. Sound, well-bonded paint should stay put, but weak paint can come away with the film regardless of how careful your angle is.
Quote My Wall's vinyl wraps for furniture and windows are self-adhesive, and the vinyl can be removed from walls and surfaces without causing damage or leaving residue when the underlying surface is suitable and sound. Several vinyl furniture wraps are priced from £2.50 GBP, including the Gold Calacatta Marble Vinyl Wrap, which makes a hidden test panel a sensible first purchase rather than an expensive experiment.
Renters need one extra step before any of this. Get landlord permission and check the deposit terms in writing. Removable in product terms doesn't guarantee that old paint, delicate laminate or a poorly bonded wall finish will survive removal unchanged.
Is wrapping automatically the greener choice
Wrapping a structurally sound cabinet, table or drawer unit can keep it useful for longer. Calling every wrap sustainable is too easy. You're adding a PVC film to another material, and that mixed construction can complicate separation at end of life. The better question is whether the item has enough sound life left to justify any new finish.
A 2025 WRAP case study states that the UK discards approximately 1.2 million desks and 1.8 million chairs annually, while only 17% are recycled. It also reports that 50% of organisations still dispose of unwanted office furniture as general waste, even though more than 40% of furniture held in storage was estimated to be reusable. Those figures concern workplace furniture, but the judgement applies at home. Don't discard a sturdy piece solely because the surface looks dated, and don't wrap a failing piece just to delay an inevitable replacement.
Judge the bones first. Drawers should run, joints should hold, boards shouldn't be wet or crumbling, and veneer should be bonded over most of the surface. If the piece no longer suits your home but remains usable, remove damaged film, clean it and offer it through a local reuse scheme, charity collection or community marketplace. A wrapped finish that you dislike may still be perfectly acceptable to the next owner.
If cost is driving a worktop decision, it can help to compare laminate countertop resurfacing costs alongside film and replacement, so you're comparing full routes rather than material price alone.
Wrap, repaint or replace compared
| Option | Lifespan | Removable? | Repairable? | Disposal route |
|---|---|---|---|---|
| Vinyl wrap | 5–7 years indoors | Yes, if applied to sound paint | Replace the film panel | Substrate reusable; film needs separate handling |
| Repaint | Several years with proper prep | No | Easy to touch up | Substrate reusable |
| Replace | Full lifespan of the new item | Not applicable | Not applicable | Furniture recycling or landfill |
I'd wrap a sound cabinet, drawer unit, door or hard, smooth wall panel when the problem is colour, pattern or light surface wear and you may want to change it later. Film gives you finishes that paint can't reproduce easily, including marble, brushed metal and consistent wood effects. The trade-off is that a damaged area usually means replacing a panel of film, not dabbing in a repair.
I'd repaint when the surface is sound but you want a durable, touch-up-friendly finish more than a printed pattern. Paint takes longer between preparation and coats, yet a scuffed edge can often be sanded and touched in. If you're torn between those two routes, this comparison of vinyl wrap vs paint works through appearance, effort and reversibility in more detail.
Replace the piece when the structure has gone. Wet-rotted boards, broken joints, extensively failing veneer, distorted carcasses and drawers that no longer run aren't cosmetic problems. A new surface makes them look presentable in a photograph while leaving the daily frustration untouched. Upholstered seating and contract furniture sit outside the decorative wrap route altogether and belong with reupholstery or specialist advice.
Wrap for reversible pattern on hard, smooth surfaces, repaint for easy touch-ups, replace when the structure has failed. Don't ask a surface finish to repair the furniture underneath.
Finish with one concrete test. Wrap a hidden side, drawer interior or the least visible door first. Leave it for 48 hours, then inspect the corners, try the handle, wipe it gently and view it under side light. If the edges hold and the finish still looks right, you've validated the surface, the temperature and your technique. If they don't, you've learned it on one panel instead of an entire room.
Start with that hidden test panel, choose a finish you've checked in your own light and give the surface proper preparation before the film goes down. Browse self-adhesive furniture wraps and window films at Quote My Wall to find a design that suits the cabinets, walls or drawers you're keeping.