
How to Install Window Privacy Film Like a Pro
Putting up window privacy film is a brilliant little DIY project. Honestly, it's one of those jobs you can get done in a single afternoon, and the results are instant. The basic process is simple enough: clean the glass, cut the film to size, wet the window, stick on the film, and smooth out the bubbles. It's a surprisingly affordable way to get a bit more privacy and cut down on that annoying glare.
Why Window Film Is a Game Changer for Your Home

Before we jump into the how-to, it’s worth taking a moment to appreciate just why window film has become such a go-to for homeowners. It’s not just about stopping the neighbours from peeking in; it's a clever, multi-tasking solution that genuinely improves your living space. Especially here in the UK where our homes can be quite close together, it offers a stylish fix to privacy issues without having to sacrifice daylight.
It's about much more than just looks, though. Good quality film brings a hat-trick of practical perks:
- UV Protection: Most films will block up to 99% of harmful UV rays. This is a big deal for preventing your furniture, carpets, and photos from fading in the sun.
- Glare Reduction: Ever tried watching TV or working on a laptop with the sun streaming in? Window film can make a huge difference, cutting down that harsh reflection.
- Temperature Control: By reflecting some of the sun's heat, these films can help keep your rooms a bit cooler in the summer, which might even trim a little off your energy bills.
The popularity of these films isn't just anecdotal. The UK window film market was valued at around USD 140.23 million in 2023 and is expected to almost double by 2035, largely because more of us are living in urban areas and seeking these exact benefits.
Key Takeaway: Installing window privacy film is more than a privacy fix. It’s a smart investment in your home's comfort, protecting your belongings and potentially helping to lower your energy costs.
Of course, film isn't the only way to tackle bright sunlight. If you're weighing up your options, there are other expert-approved ways to block sunlight from windows worth looking into. But for a cost-effective and elegant solution, window film is hard to beat for improving your home's privacy and comfort.
Choosing the Right Film and Gathering Your Tools
Before you even think about peeling off a single backing, the real first step is figuring out exactly what you want your new window film to do. Are you trying to block the view into a ground-floor bathroom completely? Or maybe you just want to soften the harsh sunlight in a living room that faces the street, without losing all the light. It could even be that you're just after a bit of decorative flair.
The type of film you choose makes all the difference. For example, a mirrored or reflective film is brilliant for daytime privacy. It works like a one-way mirror when it’s brighter outside than in. Just remember, that effect flips at night when you've got the lights on inside – suddenly, you're the one on display!
If you need guaranteed 24/7 privacy, you’ll want to look at frosted or completely opaque films. These are the gold standard for bathrooms and bedrooms because they blur the view entirely while still letting that lovely, diffused natural light pour in. And if you’re looking to inject some personality, decorative films come in all sorts of styles, from elegant botanical patterns to sharp geometric designs. If you like the idea of using patterns to transform a space, our guide on peel and stick wallpaper has some great inspiration you can borrow.
Your Essential Toolkit for a Perfect Finish
Once you've settled on the perfect film, it's time to get your gear together. I can't stress this enough: having the right tools is the secret to a smooth, bubble-free finish. It might be tempting to just grab what you have lying around the house, but believe me, this is one of those jobs where the proper equipment makes a night-and-day difference.
Here's a checklist of everything you'll need to install your window privacy film without any last-minute hardware store runs.
| Tool/Material | Why You Need It | Pro Tip |
|---|---|---|
| Application Squeegee | Your absolute MVP. It has the perfect stiffness to push out water and air bubbles without damaging the film. | Avoid using a credit card! It’s too rigid and can easily crease or scratch the film, leaving you with a messy finish. |
| Spray Bottle | To mix your "slip solution"—water with a few drops of baby shampoo. This lets you slide the film into the perfect spot. | Give the bottle a good shake before you start and keep it handy. You'll use more of this solution than you think. |
| Craft Knife | Essential for trimming the film precisely to the window's edge for that professional, "is-it-glass?" look. | Snap off the old blade section to start with a fresh, ultra-sharp tip. A dull blade will snag and tear the film, guaranteed. |
| Tape Measure & Ruler | For taking accurate measurements and guiding your craft knife for perfectly straight cuts. | A metal ruler is best as it won't get nicked by the knife blade, ensuring your cuts stay true from start to finish. |
| Lint-Free Cloths | One for cleaning the glass (crucial for a clean application) and another for mopping up excess water. | Microfibre cloths are your best friend here. They pick up every speck of dust and won’t leave annoying fibres behind that get trapped under your film. |
Taking a moment to gather these specific items will save you a world of frustration. It really is the key to getting that flawless, professional-looking result everyone wants.
Preparing Your Windows for a Flawless Finish
If there’s one secret to getting a professional-looking finish with window privacy film, it’s this: it all comes down to the prep work. Honestly, the application itself is the easy part. It’s what you do beforehand that prevents those frustrating bubbles and ensures the film sticks perfectly.
Think of it as setting the stage. A little time spent here pays off massively in the final result. We’re talking about careful measuring, a seriously thorough clean, and cutting the film with precision. Get these right, and you're well on your way.
The Measure and Clean Routine
First up, grab your tape measure. You need to measure the exact height and width of the glass you want to cover. Once you have those numbers, add an extra 2.5 cm (about 1 inch) to both measurements. This small overlap is your safety net—it gives you a bit of wiggle room for positioning and makes trimming the edges for a perfect fit much, much easier.
Now for the most important part: cleaning the glass. You need it to be spotless. Even a tiny speck of dust or a stray pet hair can create a permanent bubble under the film. Use an effective glass cleaner and a lint-free microfibre cloth. Don’t just clean the glass; give the surrounding window frame a good wipe down too, to get rid of any loose dirt that could fall onto your clean surface.
This infographic breaks down these crucial first steps.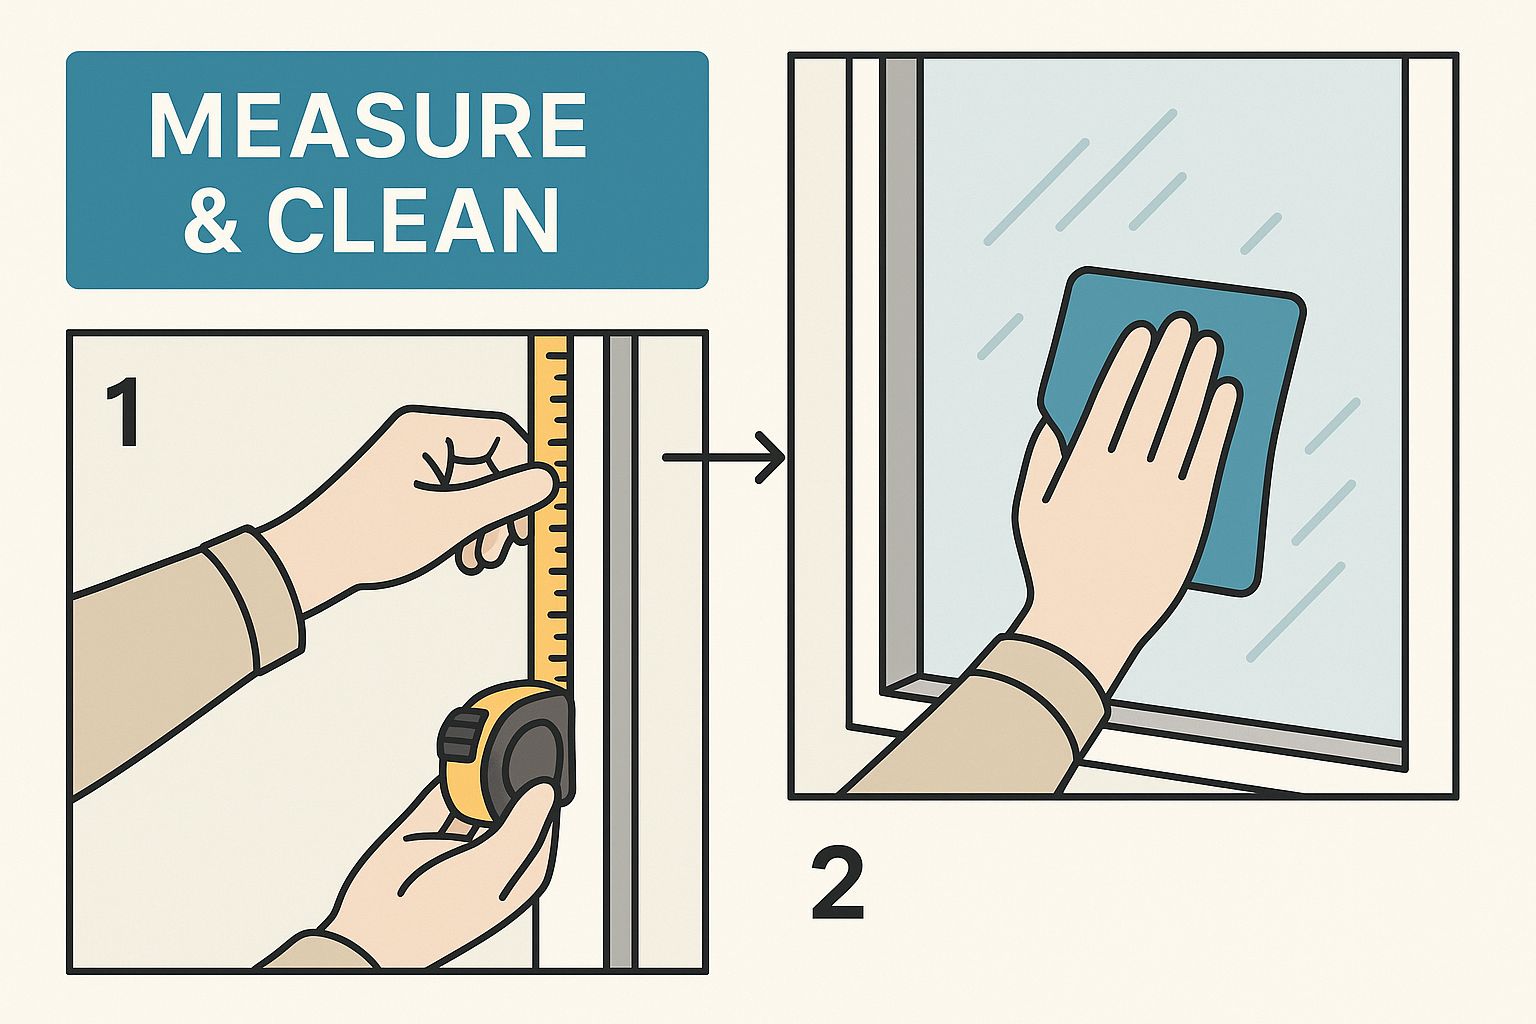
Seeing the process laid out really highlights why these initial stages are so critical for success.
Cutting Your Film Accurately
With your measurements in hand, it’s time to cut the film. You’ll need a large, clean, and flat surface for this—a dining table or even a spotless bit of floor works perfectly. Unroll the film and, using your tape measure and a straight edge (a metal ruler is ideal), mark out the dimensions you just took, remembering to include that extra 2.5 cm.
Pro Tip: Don’t even think about using a dull blade. A fresh, sharp craft knife blade is essential. A blunt one will snag and tear the film, which is a surefire way to ruin your piece. If you have a snap-off knife, pop off the old segment for a perfectly sharp point.
Take your time here. A straight, clean cut will make the final trim on the window a breeze. On a side note, if you're dealing with old decals on the glass first, our guide on how to remove a wall sticker has some great tips that will work for that too.
Applying the Film Without Bubbles or Wrinkles
This is the moment where all that careful prep work really shines. The secret to a perfectly smooth, professional-looking application isn't some expensive tool; it's what we call a 'slip solution'. Don't worry, it's nothing fancy – just a spray bottle filled with water and a few drops of mild soap, like baby shampoo. Be generous with it!
Start by thoroughly spraying the clean window pane. I mean, drench it. You want water running down the glass. This solution is what allows you to slide the film into the perfect position without it grabbing onto the glass too soon and sticking where you don't want it.
Placing and Squeegeeing Your Film
With the glass wet, it's time to tackle the film. Carefully peel the protective backing liner away from the piece you've already cut. As you peel and expose the adhesive side, start spraying that side liberally with your slip solution too. This is a crucial step that many people miss, but wetting the film itself is what guarantees it will glide smoothly over the glass.
Now, gently place the wet adhesive side of the film onto the wet window. Thanks to all that slip solution, you should be able to slide it around easily until it's perfectly aligned with the edges. That 2.5 cm overlap you cut earlier gives you a handy margin for error.
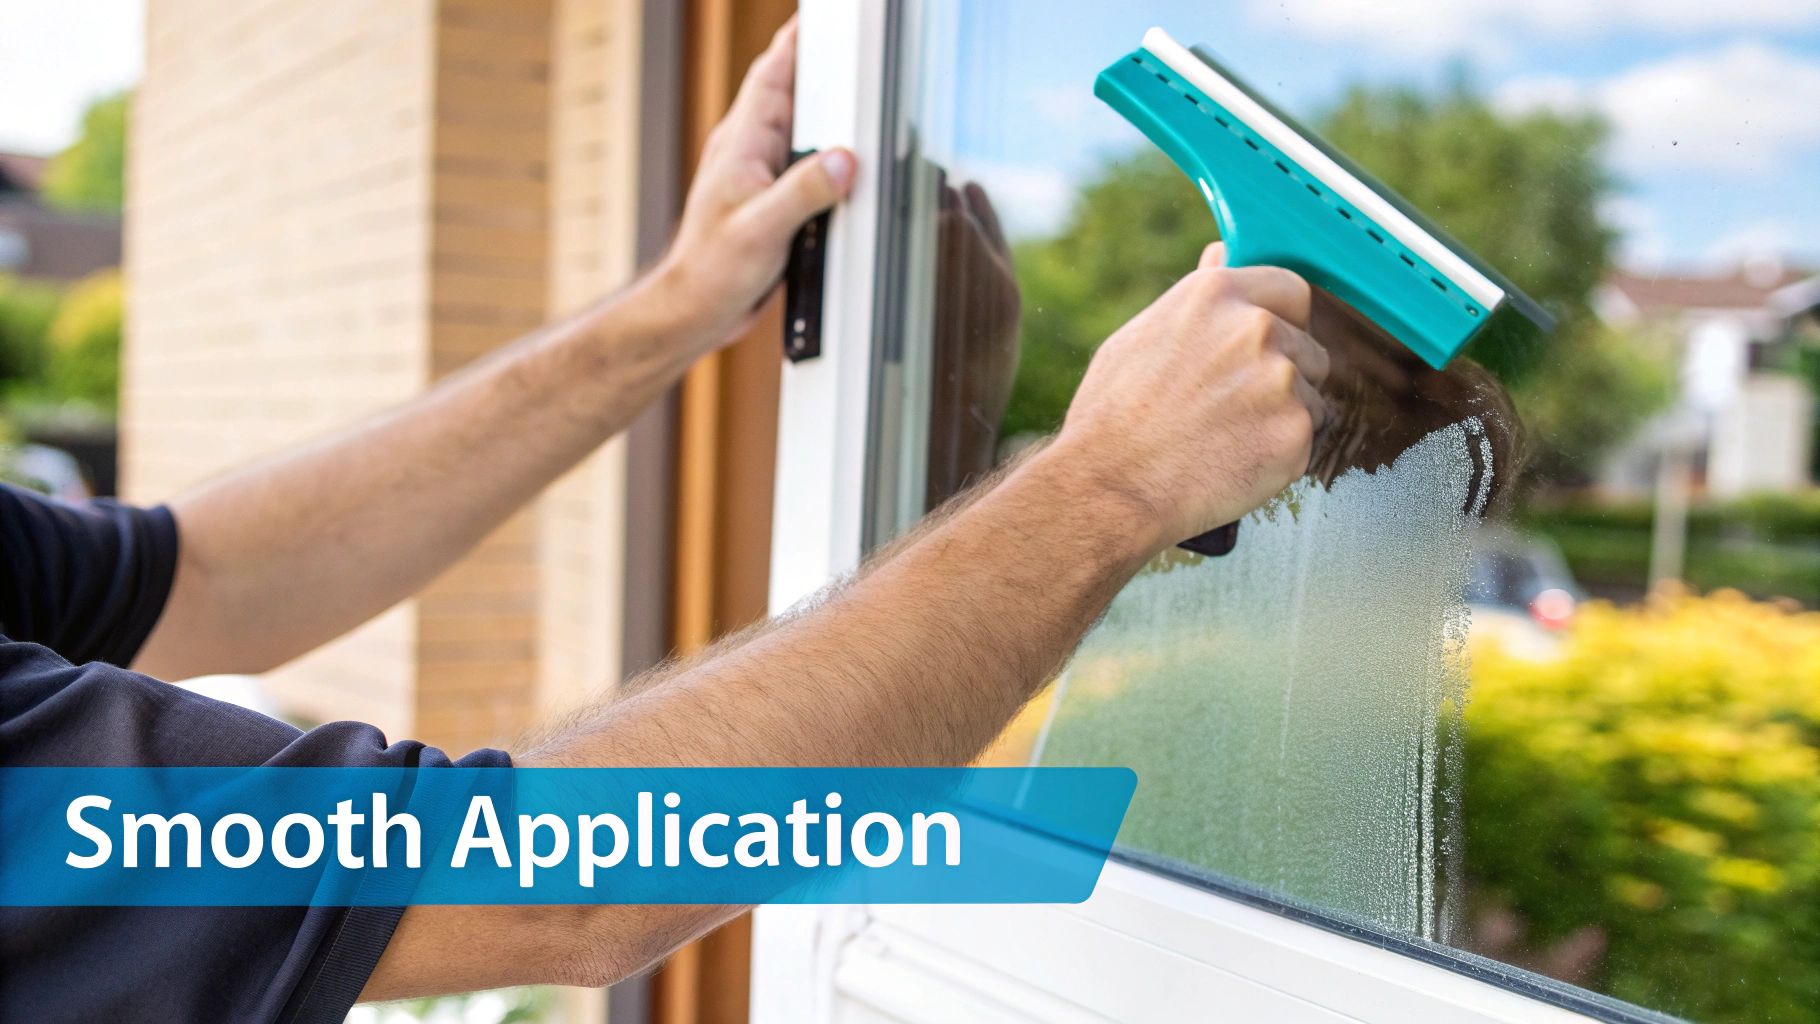
Once you’re happy with the positioning, grab your squeegee. Starting from the very centre of the window, begin working your way outwards with firm, even pressure. Your goal here is to push all the water and trapped air bubbles from under the film towards the edges.
Master the Technique: The trick is to always work from the centre out. Use overlapping strokes, maybe going across horizontally first, then moving vertically. This systematic approach ensures you don't accidentally trap any air or water pockets, which is the key to that flawless, clear finish.
Trimming for a Professional Finish
After squeegeeing the entire surface, you'll be left with that small amount of excess film overlapping the window frame. This is where a sharp craft knife and a firm guide—a credit card or even the edge of your squeegee works well—come into play.
Press your guide firmly into the corner where the glass meets the gasket or frame. Then, run your craft knife carefully along the edge of the guide to trim away the excess film. Go slowly and deliberately to get a clean, straight line. This final trim is what really delivers that seamless, almost factory-installed look.
The growing popularity of window film isn’t just a DIY trend, either. With government policies pushing for more house-building, the demand for films in new builds and renovations is soaring. They offer an incredibly cost-effective way to add privacy and boost energy efficiency without the massive expense of replacing windows. It's a key reason the market is expanding so quickly. You can explore the UK window film market outlook to see just how common this simple home upgrade is becoming.
Sorting Out Those Common Installation Snags
Even when you follow the instructions to the letter, you might still face a stubborn air bubble or a corner that just won’t stick down. Don’t worry, it happens to everyone. These are usually simple fixes and are just part of the learning process. A bit of patience and some extra slip solution will sort out most problems.
Spotted a bubble after you’ve already squeegeed? That’s almost always just trapped water. Grab your squeegee and gently but firmly work the bubble out towards the closest edge of the film. If you’ve got a really persistent bubble that won't budge, chances are a tiny speck of dust has snuck in there.
Tackling Dust and Lifting Edges
If you see a small lump under the film, you’ve definitely got some dust or debris trapped. The trick is to deal with it while everything is still wet. You’ll need to carefully peel back the nearest corner of the film until you get to the problem area.
Take the tip of your craft knife or a pair of tweezers and very gently lift the speck off the glass or the film. Be careful not to scratch anything! Once it's gone, give both the window and that section of film another good spray before laying it back down and squeegeeing it smooth.
Top Tip: If you have an edge or a corner that refuses to lie flat, it’s almost always because the film is just slightly overlapping the window frame or the rubber seal. This tiny overlap stops it from creating a proper seal on the glass itself. The fix is to trim a tiny sliver—we’re talking 1-2mm—off that edge. This creates the small gap needed for the film to adhere perfectly to the glass.
What if a corner has already started to dry before you noticed it wasn't stuck? You can sometimes rescue it with a hairdryer. Set it to low heat and gently warm the corner to make the film a bit more flexible, then press it down firmly onto the wet glass.
Keeping Your Window Film Looking Its Best
Right, the film is on, and your window looks brilliant. Now, to make sure it stays that way for years to come, there are a couple of things to keep in mind, especially in the first few weeks.
The film needs a little time to settle in and fully bond with the glass. This is known as the curing process. You might notice a bit of haziness or a slightly milky look under the surface. Don't panic! This is just the leftover application fluid slowly evaporating, and it’s completely normal. How long it takes can vary from a few days to a few weeks, depending on how warm and humid it is. The key here is to just let it do its thing.
Long-Term Cleaning and Care
Once the film has had a good 30 days to fully cure, you can clean it like any other window, but with a gentle touch. The golden rule is to avoid anything abrasive that could scratch the surface. That means no harsh ammonia-based cleaners, no strong detergents, and definitely no scouring pads.
Keeping it clean is simple:
- A soft microfibre cloth is your best friend here.
- For the cleaning solution, a few drops of mild washing-up liquid in a spray bottle of water is all you need.
- Just give it a light wipe-down and then dry it off with another clean, dry microfibre cloth.
It's worth remembering that these films do more than just offer privacy. Many solar control films can block up to 99% of damaging UV rays and cut down solar heat by as much as 78%. This not only protects your furniture from fading but also helps keep your home cooler and more comfortable. This combination of easy installation and practical benefits is a big reason they're so popular across the UK. For a deeper dive, you can read the full research on window film market trends.
Proper care is what makes sure you get to enjoy those benefits for the long haul. And if you're someone who enjoys seasonal decor, you might find our guide on Christmas window stickers has some useful tips on application and removal that you can apply here too.
Ready to give your space a stylish and practical upgrade? Explore the extensive range of high-quality window privacy films at Quote My Wall and find the perfect design for your home. Visit https://www.quotemywall.co.uk to get started.
Article created using Outrank