

Stickers on Names for Walls That Actually Last
You've got the name sticker picked, the wall paint looks fine from across the room, and then you notice the problem. The wall isn't just a backdrop, it's the part that decides whether the lettering stays put, curls at the edges, or takes paint with it when the day comes to change the room again.
That's why stickers on names for walls need a material-first decision, not just a colour or font choice. On a UK wall, the finish underneath matters just as much as the design on top, especially in rented rooms, nurseries, and bedrooms that have been painted more than once.
Why the Wall Behind the Name Matters More Than the Design
A parent can spend an evening choosing the sweetest script font, only to find the sticker behaves completely differently on two walls that look almost identical. One room has older, cured emulsion on plasterboard and the name settles neatly. The next has a fresh coat from last month, and the same decal can cling too aggressively or lift badly when removed. That is the part most buyers miss.
Three wall conditions change everything
Standard emulsion on plasterboard is usually the safest starting point, because it gives the adhesive a stable surface to grip. Fresh emulsion is a different story. Independent installation guides warn that the wall should be completely dry before application, and the practical reason is simple, moisture weakens the bond and can leave visible haze or weak points under the decal (wall decal installation guidance).
Low-VOC and washable paints create another wrinkle. They are popular in family homes because they wipe clean, but that same smoother, more modern finish can make adhesion less predictable on some brands and sheens. A sticker that sits beautifully on one emulsion finish can feel marginal on another, which is why “removable” on the packet never means “risk-free” on every wall.
Practical rule: if the paint is fresh, soft, or still curing, treat the wall as the main variable, not the sticker.
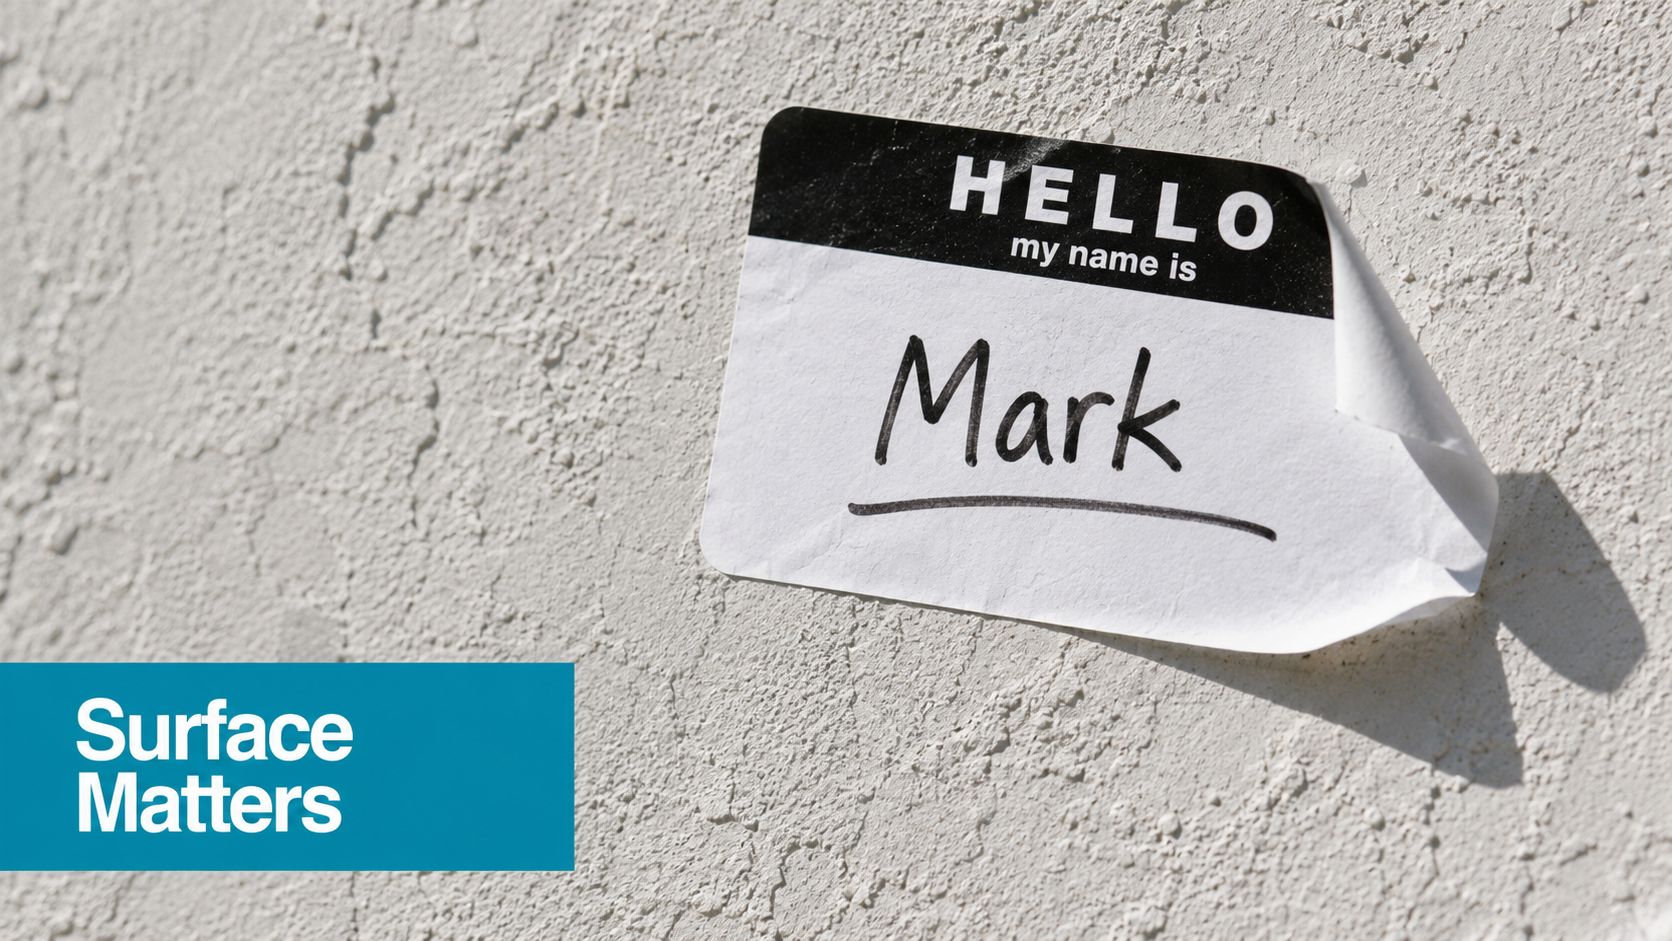
The same sticker can behave differently next door
That is why two identical names can have opposite outcomes in neighbouring rooms. A calm, dry wall in one bedroom may accept a decal cleanly, while the wall beside it, repainted recently or finished in a different washable emulsion, can turn the same sticker into a removal problem later. The adhesive format itself has deep roots in the modern self-adhesive label format that became practical after 1935, so the technology is established, but the wall still controls the result (history of stickers).
If you're choosing for a rental, that distinction matters even more. The UK private rented sector still houses about 4.6 million households according to the provided brief, which is why low-risk décor is such a common need. Removable does not automatically mean deposit-safe, especially on older walls or recently decorated rooms.
For textured walls, the surface question becomes even more important. A guide from Quote My Wall on wall stickers for textured walls is worth reading before you buy, because texture changes the adhesive contact area and makes edge lift more likely.
Choosing the Right Material and Finish for a Name Wall Sticker
A name sticker can look perfect on the sample sheet and still fail on a real UK wall. The wall finish, the paint age, and the adhesive choice all matter more than the font, because those three things decide whether the sticker sits flat, stays put, and comes off cleanly later. On a fresh nursery wall, I treat the surface first and the design second.
Premium vinyl, economy vinyl, paper-based stickers, and fabric or printed options all behave differently once they meet emulsion, low-VOC paint, or a wall that has not fully cured yet. A careful buyer has to judge the material against the substrate, not just against the colour of the room.
Material choice is really a durability choice
Premium vinyl is usually the safest pick for most interior walls because it gives a cleaner edge, better day-to-day durability, and more predictable removal when the paint is sound. That makes it a sensible option for nurseries, bedrooms, and rental rooms where you want a crisp result without turning the wall into a long-term commitment.
Economy vinyl can still work for short-term decorating, but it is less forgiving on difficult paint or light texture in plaster. Paper-based stickers sit lower down the list for wall use because paper and moisture do not mix well, especially in rooms that get regular humidity swings. Fabric or printed options can look softer and more decorative, yet the trade-off is usually a flatter finish and less certainty about how they will lift off later.
If the wall is one you want to keep in good condition, buy for the substrate first, then for the look.
Finish changes the tone of the whole room
Matte vinyl usually reads calmer and closer to painted lettering. Gloss looks sharper, but it also throws back more light, which can feel distracting in a bright room with a south-facing window. Metallic vinyl changes the mood again. A name in brushed rose gold feels warmer and more decorative than the same letters in plain silver, even when the size is identical.
Sunlight matters here as well. A glossy name can look brighter than intended near a strong window, while a matte finish does a better job of hiding small wall imperfections. That is why a nursery decal above a cot often feels more settled in matte, while a feature wall in a bedroom can handle a little shine if the rest of the room is simple.
For a broader comparison point, Revellia's buyer guide is useful because it treats family name wall art as a material decision as much as a style choice. That same approach applies here, because the room and the wall condition should drive the material, not the other way round.
| Name wall sticker materials at a glance | |||
|---|---|---|---|
| Material | Typical Finish | Best For | Watch Out For |
| Premium vinyl | Matte or light sheen | Nurseries, bedrooms, rentals | Can still struggle on fresh or textured paint |
| Economy vinyl | Basic matte or gloss | Short-term décor | Less forgiving on difficult walls |
| Paper-based | Matte | Temporary indoor decoration | Humidity and residue risk |
| Fabric or printed | Soft, decorative | Gentle visual effect, flat walls | Flatter look, not always the best removal choice |
A quick practical filter helps. If you want something for a nursery wall, premium vinyl is usually the safest first choice. If you want a decorative panel on a fully cured wall in your own home, a more decorative finish can make sense.
For a closer look at product formats, see this guide to vinyl decals for walls. The basic rule stays the same, if you want crisp text and fewer surprises, rule out paper-based stickers and treat economy vinyl as the budget option, not the default.
Measuring, Centring and Dry-Fitting the Layout
A good layout starts before the backing paper comes off. Most bad installs begin with a sticker that was technically the right design but placed too high, too low, or slightly off-centre, so the whole wall feels wrong even though the letters themselves are straight.
Find the wall centre before you touch the adhesive
For a single name, measure the full wall run, then mark the centre lightly with painter's tape or a removable pencil dot in an unseen spot. From there, work outward so the name feels balanced against the furniture below it. Above a cot, the safe habit is to keep the eye-line calm and the spacing generous, not crowded against the ceiling.
A longer surname above a desk needs even more restraint. If you're laying out a word like Eleanor-Rose across a 1.6 metre run above a low chest of drawers, tape out the full width first, step back, and read it from the doorway. The name can be perfectly level and still look cramped if the spacing is too tight at the edges.
Dry-fit with tape before the sticker ever leaves its liner
Masking tape is the cheap tool that saves the most mistakes. Pin the sticker in place as a loose mock-up, use a spirit level to check the baseline, then step back and judge the height from the room entrance, not from arm's length. If you're fitting sibling names on a shared wall, leave breathing room between them, and for grouped decals a practical guide often lands around 8 to 12 inches between items (wall decal spacing guidance).
Measure once, tape it up, live with it for five minutes, then decide. That pause saves more rework than any fancy tool.
If the wall sits above furniture, the bottom line should follow the furniture line, not fight it. Once the dry-fit looks right from the main viewing angle, only then should you commit to the adhesive. That way the sticker is not just straight, it's correctly placed for the room you live in.
Applying the Sticker Without Bubbles or Lifting Corners
A good name decal usually comes down to a slow, steady install, not a quick one. The sequence matters. Start with a clean, fully dry wall. Set the decal with tape first. Peel the backing gradually. Smooth from the centre outward. Press the edges again before you leave it alone.
The hinge keeps the name where you planned it
Wipe the wall until it is fully dry before you begin. Not damp, and not nearly dry. Then position the decal and use masking tape to create a hinge at the top or side, depending on the shape. That hinge holds the sticker in place while you peel the backing away in stages rather than all at once.
The worst bubbles and creases usually show up at the first letter, the last letter, and any join in script fonts. Those are the points where hands start to rush, especially when the name is long or the lettering has flourishes. Pull the liner slowly and smooth from the centre outward with a squeegee or a clean cloth so trapped air can escape as you work.
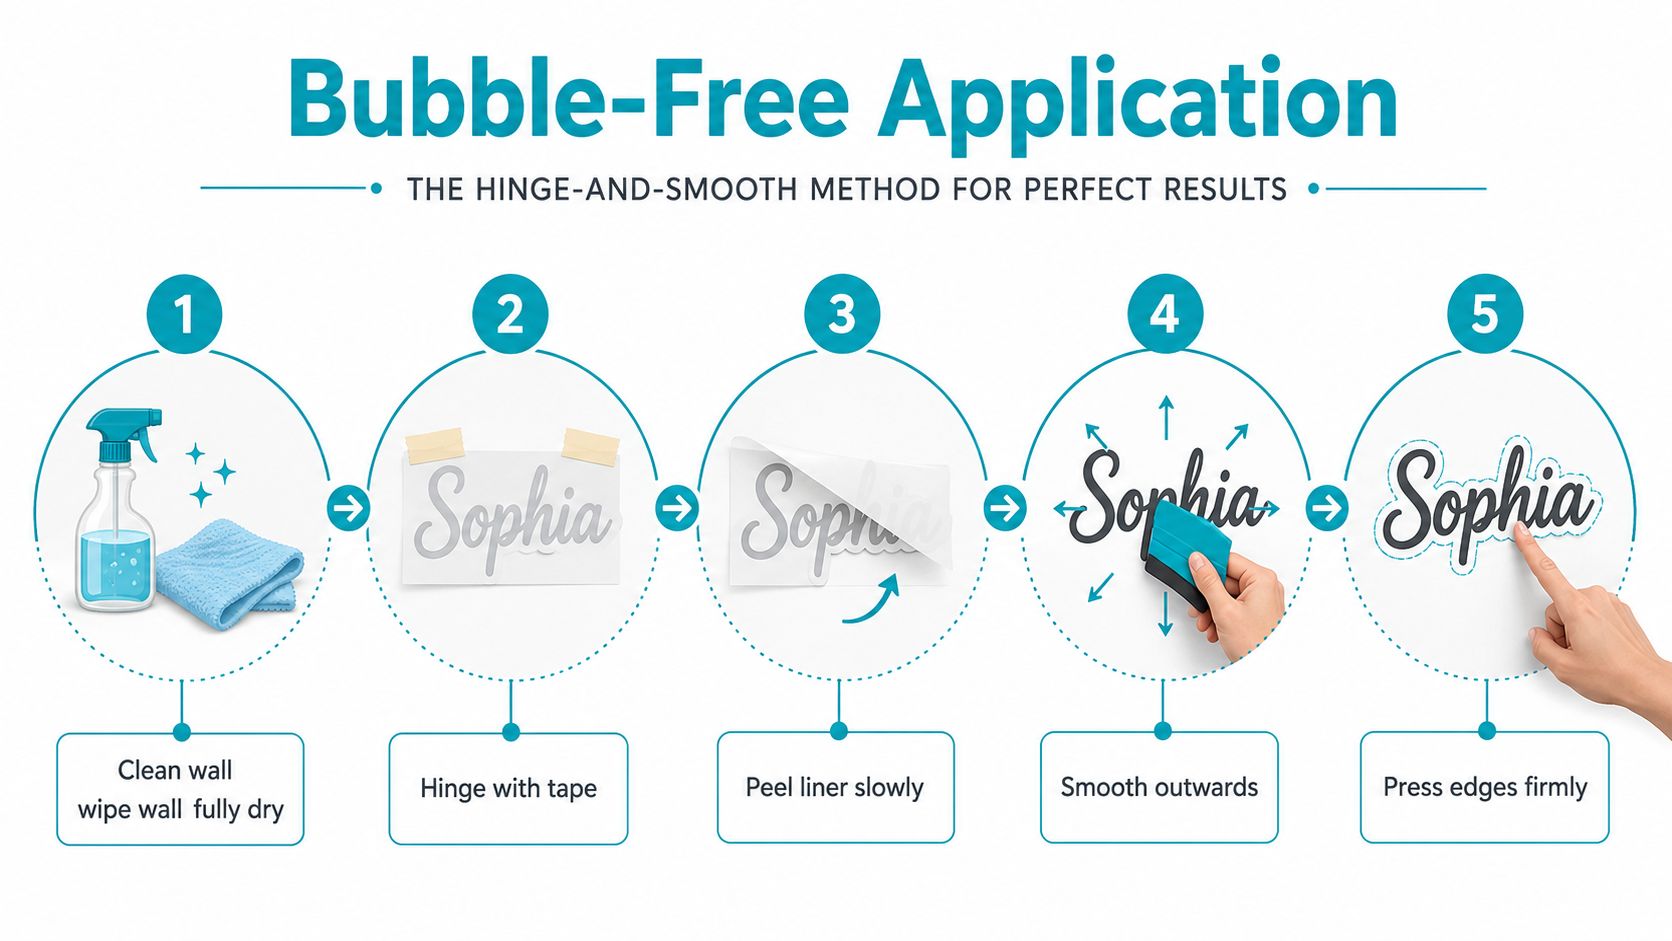
Fix small faults before they become visible
If a tiny bubble survives, do not rip the decal back off. A pin prick at the edge of the bubble lets the air escape with far less risk of tearing the vinyl. If a corner lifts, press it down firmly again and hold it for a few seconds. On a child's bedroom wall, that extra attention matters because toys, hands, and daily cleaning all work against the edges over time.
The clean-install habit from how to apply wall stickers is the same each time, but the pressure you use should be lighter on thin script and more deliberate on larger block lettering. The adhesive also needs time to settle, so leave it undisturbed for at least 24 hours after application.
That waiting period matters more than people think. A sticker that looks fine after ten minutes can still shift if a child brushes against it or if you start cleaning the wall too soon. Leave it alone overnight, and the bond is more likely to hold the way you wanted.
Removing Name Stickers Cleanly From Different Surfaces
Removal is where the wall condition you ignored at the start comes back to answer you. A name sticker on cured emulsion, a freshly painted wall, textured plaster, and a vinyl-wrapped piece of furniture each need a different approach. Treat them the same, and you're asking for residue, torn edges, or lifted paint.
Four surfaces, four removal habits
On cured emulsion, low heat from a hairdryer helps soften the adhesive so you can peel low and slow. Keep the pull angle shallow, not straight out from the wall, and work along the sticker rather than yanking one corner.
On freshly painted walls, be more cautious. If the paint has not fully cured, the adhesive can bond unpredictably and the paint can lift with the decal. A small test at one corner is safer than a full pull, and if residue remains, use a mild adhesive remover very sparingly.
On textured or limewash plaster, the main issue is contact inconsistency. A soft brush can help loosen debris around the edge before removal, but don't expect the same clean release you'd get from smooth emulsion. On furniture wrapped in vinyl, a damp cloth and mild soap are usually enough for residue, and sharp tools are a bad idea because they'll scar the wrap.
If the sticker is on a wall that still feels new, wait longer than you think. Fresh paint and low-VOC finishes can stay soft at the surface for a while, and that softness is what causes paint to come away with the vinyl. Owners often rush because the room looks finished, while renters usually need the extra caution because one bad pull can turn into a repair claim.
Photograph first if you're renting
If you're a UK renter, photograph the wall before removal, especially in a property that's recently decorated. That gives you evidence if paint comes away or if there's already damage behind the sticker. It also helps when you're dealing with a deposit discussion, because you can show the wall's condition before you started.
For surface-specific buying advice, nurseries near you is a useful reminder that the same practical approach matters in childcare settings too, where easy-clean surfaces and wall condition can be more important than the prettiest lettering.
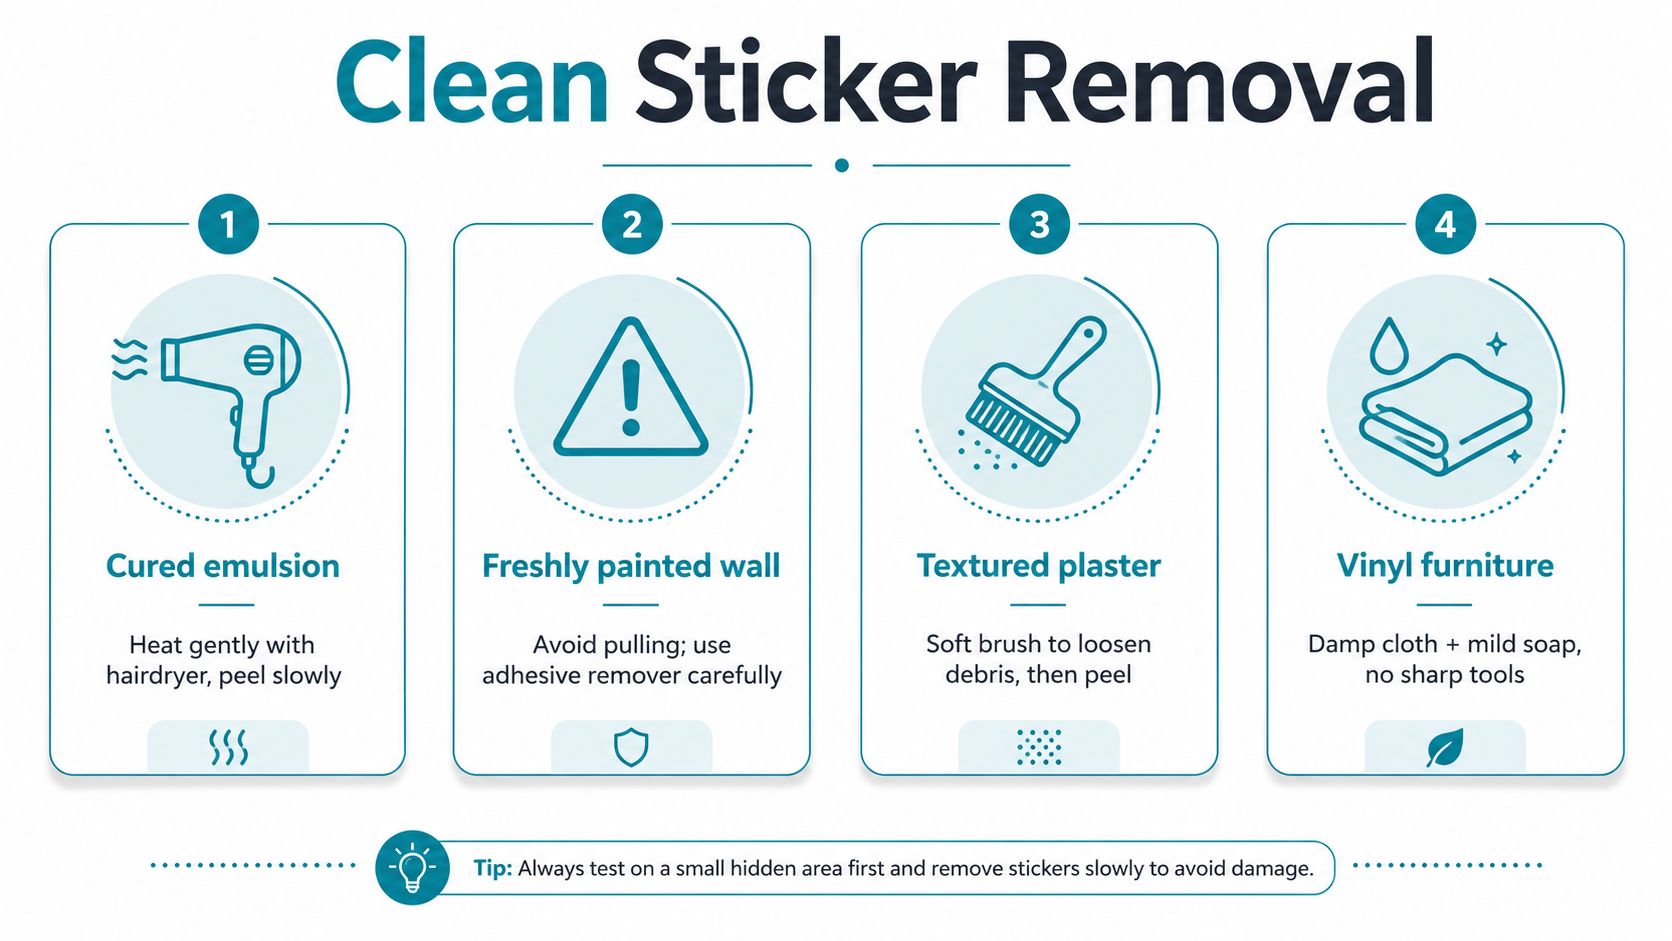
A strong remover will do less damage than force ever will. If the sticker resists, stop, warm it again, and continue with patience.
Where Name Stickers Work and Where They Don't
The phrase “name sticker” covers three different jobs, and they're not interchangeable. A decorative bedroom wall letter, a removable nursery decal near a cot, and a washable clothing label all use adhesive, but the durability and safety requirements are completely different.
Decorative wall text is not a clothing label
A soft vinyl wall name belongs on a feature wall, not in a school wash bag. Clothing labels need to survive repeated laundering, and wall vinyl is not built for that. The reverse mistake is just as common, because a clothing label is over-engineered and visually flat if you put it on a feature wall where you want the name to feel warm and decorative.
Nursery wall decals are the middle ground. They need to be easy to clean, gentle on the wall, and visually soft enough for bedrooms and play spaces. Around cots and other high-touch areas, the question is less about style and more about whether the edge will stay down and whether the surface can be wiped without the sticker failing.
Use the room, not the label, to decide
Bathroom tiles and kitchen splashbacks are another place buyers get this wrong. Those surfaces can tempt people because they're smooth, but heat, steam, and frequent cleaning change the risk profile. Radiator proximity does the same thing, because warmth can stress the adhesive over time.
For school and care settings, the right label is often a washable one, not a decorative wall decal. If you're designing for a child's room and also need practical labels for uniforms or containers, keep the products separate. That split saves money and avoids buying a wall product for a job it was never meant to do.
Caring for Name Stickers So They Last Their Full Lifespan
A name sticker that stays tidy for years usually comes down to what it sits on and how it is looked after. On a cured painted wall, a soft cloth and a little patience are often enough. On fresh emulsion, low-VOC paint, or a wall that was not fully cured before installation, the adhesive can bond differently, so the care routine has to be gentler from the start.
Small habits protect the adhesive
Strong sunlight changes more than the sticker itself. South-facing bedrooms can fade paint unevenly, and that makes the outline of the lettering stand out even when the vinyl is still sound. If a corner starts to lift, warm it lightly and press it back down. Pulling at it usually does more harm than the lift itself.
Cleaning matters just as much. Nursery walls, school corners, and family bedrooms collect fingerprints, but harsh sprays and abrasive pads shorten the life of the decal quickly. Use a soft dry cloth for dust, then a lightly damp cloth if the surface needs it, and keep chemicals mild so the finish stays intact.
The wall finish affects care too. Matt emulsion, silk emulsion, and low-VOC paints do not all behave the same, especially if they were painted recently. A sticker on a fresh surface may look fine at first, then start to show edge issues if the paint is still curing underneath. That is why I always tell homeowners to treat the wall like part of the product, not just the background.
If you want a wall sticker to sit cleanly on a bedroom feature wall, the wall itself needs the same attention as the design. That is true whether the room is a nursery or a space built around original 1982 Tron quad posters. The surface decides how long the adhesive stays calm.
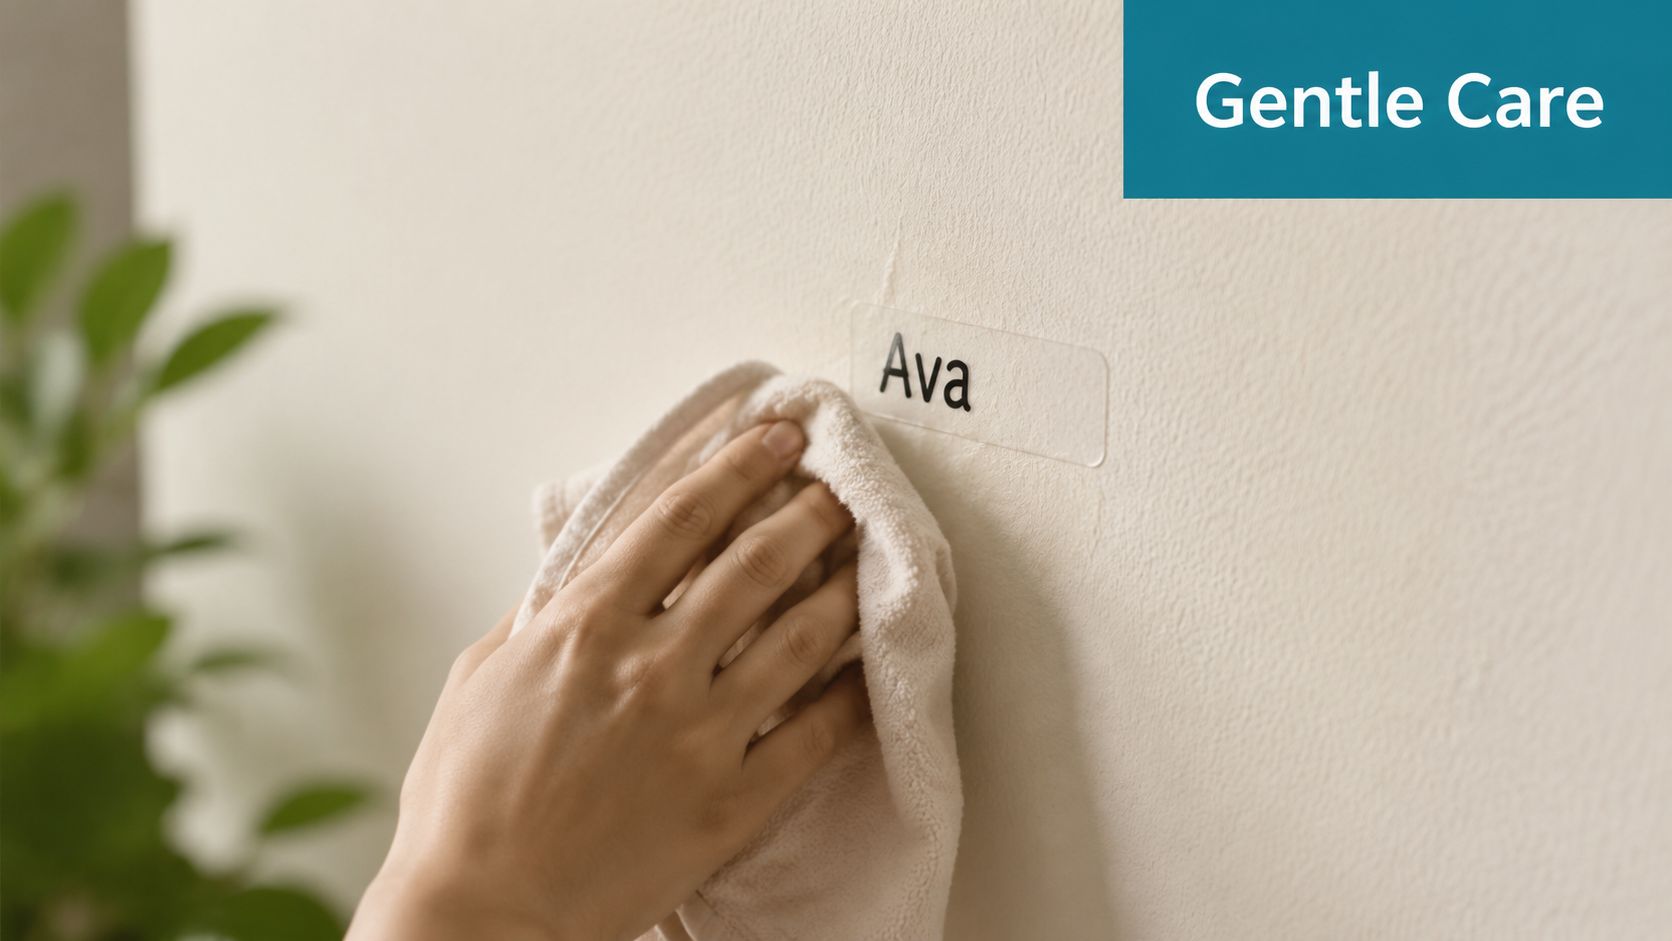
A weekend checklist that actually works
Choose premium vinyl if you want a good balance of longevity and removability. Dry-fit the layout with tape before anything touches the wall, because once adhesive meets paint, small alignment errors become hard to hide. Use the hinge-and-smooth method to apply it, then leave it alone long enough for the bond to settle. Wait 24 hours before you touch or clean it, and if you are renting, photograph the wall before removal so you have a record of the original condition.
That is enough to handle the job in one weekend without guesswork. If you are dealing with a nursery update, a rental wall, or a child's bedroom refresh, the result usually comes down to substrate choice, patient installation, and careful removal later on. The sticker lasts when the wall finish, the adhesive, and the cleaning routine all suit each other.