

Wall Stickers for Textured Walls: Flawless Application Guide
If you're staring at a painted wall with a light stipple, orange peel, or a more obvious knockdown finish, you're probably asking a common question before ordering: will a wall sticker stay put, or will the corners curl by the weekend?
That hesitation is justified. Smooth walls are easy. Textured walls are not. The difference isn't just the sticker design or the room you're decorating. It comes down to surface profile, vinyl thickness, adhesive strength, and prep. Get those right and wall stickers for textured walls can look sharp and stay put. Get them wrong and even a beautiful decal will fight you from the first minute.
That's why generic advice isn't enough here. A quick wipe with a damp cloth won't solve a wall with dust sitting in every tiny recess, and thin bargain vinyl won't magically bridge bumps and troughs. The good news is that vinyl décor keeps growing because people want a more flexible and affordable option for updating a room. The broader sector that includes interior wall decoration stickers is projected to reach $5 billion in 2025 and grow at a 7% CAGR through 2033, according to Market Report Analytics on interior wall decoration stickers.
Your Guide to Using Wall Stickers on Textured Surfaces
The honest answer is yes, but only on the right kind of texture and only with the right method.
A lightly textured wall is often workable. A heavily stippled wall, deep slap brush finish, or sharp popcorn-style surface usually isn't a sensible candidate for standard decals. The problem is contact. Adhesive needs enough continuous contact area to grip the wall properly. When the wall surface is too uneven, the sticker touches the high points and floats over the low points.
Start with a wall reality check
Before buying, look at the wall in side light. That tells you more than a straight-on glance. If the texture casts shallow, soft shadows, you may have a workable surface. If you can see strong ridges, crater-like dips, or pronounced trowel marks, you're already in the high-risk category.
Use this quick self-check:
- Visual check: Look for repeating bumps, ridges, or obvious hand-applied patterns.
- Touch check: Run your palm over the surface. If it feels only slightly pebbled, that's very different from a wall that feels abrasive or sharply raised.
- Paint check: Older walls with multiple paint layers can behave better than rough walls with a dry, chalky finish.
Practical rule: If the texture feels like a painted eggshell with a bit of grain, stickers may work well. If it feels like sand, plaster clumps, or dried brush ridges, expect trouble unless you prep the wall properly first.
Why texture doesn't always mean no
People often assume texture automatically rules out vinyl. It doesn't. What matters is whether the vinyl can conform to the contour of the wall and whether the surface has been prepared so the adhesive can bond cleanly.
That's where most failed installs go wrong. The wall wasn't assessed first, and the material wasn't chosen for texture. Both matter more than the design itself.
Assess Your Wall Texture Before You Buy
A lot of failed installs start before the parcel even arrives. The design gets picked first, then the wall gets checked later. On textured surfaces, it needs to be the other way round.
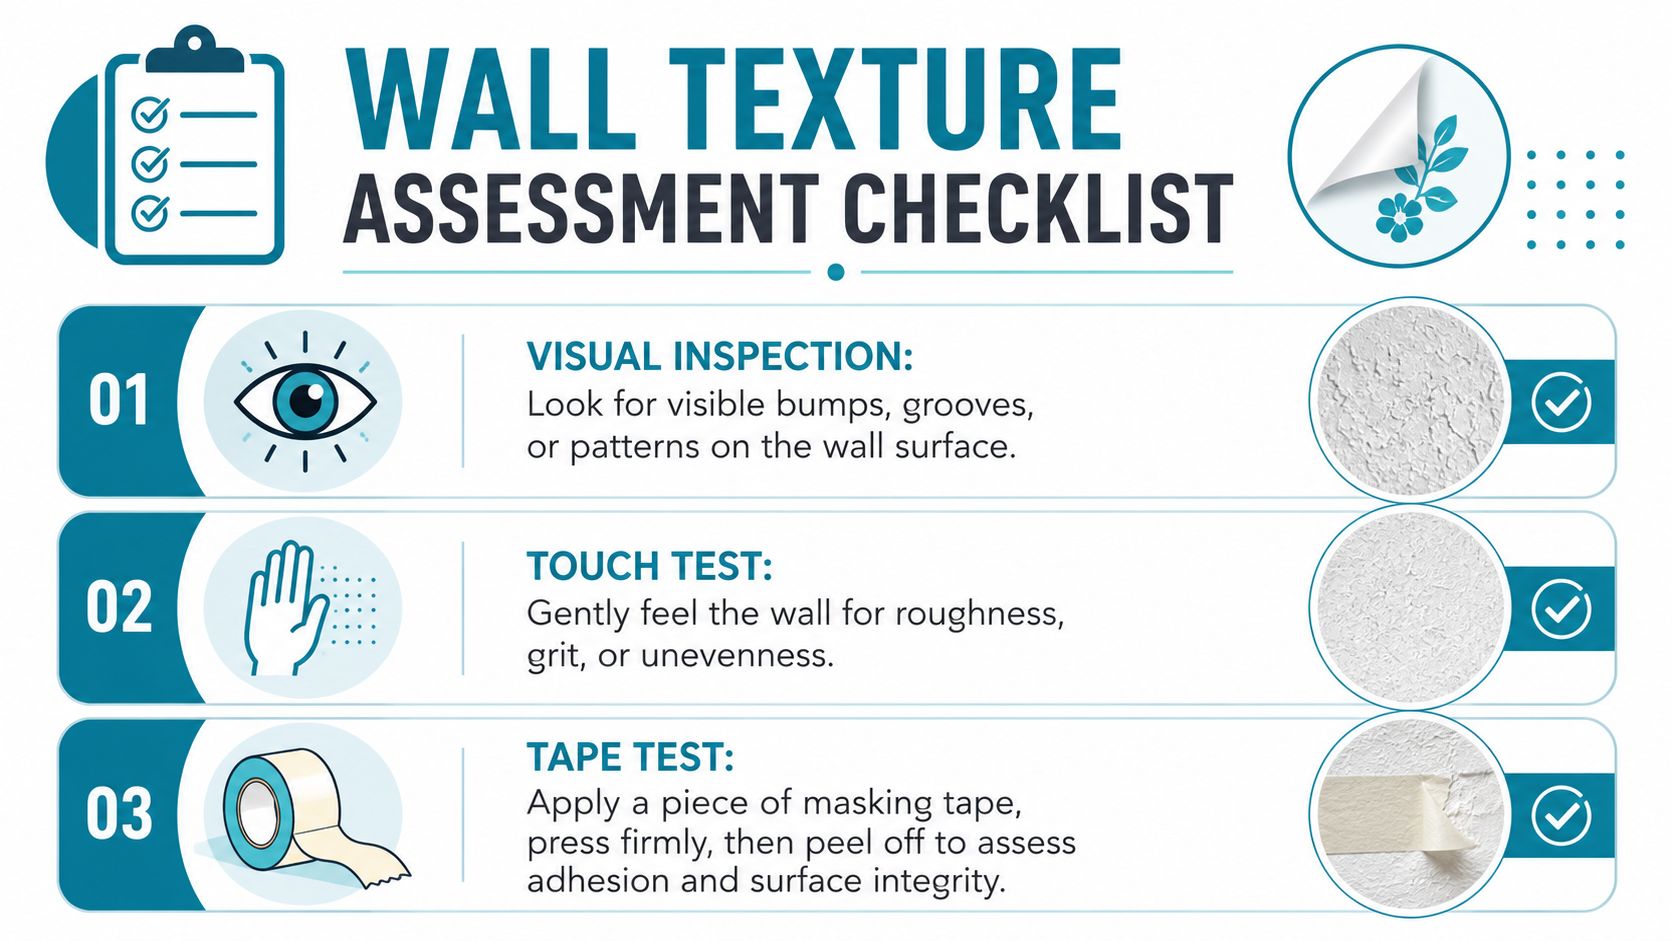
Three texture types that matter
Most interior walls fall into one of these practical categories:
| Texture type | What it looks like | Sticker suitability |
|---|---|---|
| Light orange peel | Fine, rounded dimples with a fairly even finish | Usually the best candidate |
| Knockdown | Flattened raised areas with irregular trowelled patches | Possible, but prep matters far more |
| Heavy stipple or deep patterned texture | Sharp peaks, strong troughs, obvious relief | Often better suited to alternatives |
Light orange peel is where premium wall stickers for textured walls perform best. The profile is uneven, but not so extreme that the vinyl can't settle into it. Knockdown can still work, although edges and corners need much more care. Heavy textures are where most homeowners waste time and money trying to force a product to do a job the wall won't allow.
The tape test tells you more than the paint colour
Use a piece of masking tape on an inconspicuous area. Press it down firmly, especially into the texture, then peel it away. You're checking two things: whether dust or paint comes away, and whether the wall surface feels stable.
If the tape lifts powder, loose paint, or flakes, stop there. The issue isn't the sticker. It's the wall surface.
A textured wall can be sticker-friendly and still be poorly painted. Adhesive failure often starts with surface failure.
Why cheap vinyl is a false economy
For textured walls like light orange peel, vinyl must be at least 6 mils (0.15mm) thick. Thinner 3 to 4 mil vinyls fail because the adhesive only touches the peaks of the wall, not the troughs, and unprepared surfaces see an 80% failure rate according to this textured-wall vinyl guidance.
That's the part many buyers miss. If you're applying to texture, the wall and the material have to be matched. Thin decorative film may look fine in the packet, but it doesn't have the body to bridge an uneven painted surface.
If you're still deciding whether a textured wall is the best place for vinyl art at all, Templeton Built's guide for homeowners is a useful reference for comparing decorative wall finishes more broadly.
Why Premium Vinyl Is Non-Negotiable for Texture
On a smooth wall, thinner vinyl can sometimes get away with average adhesive and average handling. On a textured wall, average fails.
The reason is simple. Thin film behaves like a sheet laid over a bumpy mattress. It drapes over the highest points, but it doesn't naturally fill the low areas. On a wall, that leaves tiny air gaps, weak contact patches, and edges that start lifting first.
Thickness is doing real work
When installers talk about mils, they're talking about material thickness. That thickness affects how the sticker handles, how much pressure it can take during installation, and how well it resists edge curl on a textured surface.
Premium vinyl has more body. It doesn't crumple as easily during application, and when pressure is applied properly it has a better chance of conforming to the wall rather than tenting over it.
A few practical signs you're looking at better material:
- It feels substantial in the hand: flimsy film is usually the wrong choice for texture.
- It tolerates pressure: textured installs require more firm working with a squeegee or cloth.
- It responds well to controlled warmth: quality vinyl softens and moulds more predictably.
Material quality and prep belong together
Premium vinyl doesn't replace preparation. It makes preparation worth doing. If the wall hasn't been cleaned, stabilised, and made more adhesive-friendly, even good vinyl is being asked to bond to dust, paint texture, and air gaps.
That's why I always treat the job as a system rather than a sticker. Surface, primer, activator, warmth, and pressure all work together. Remove one of those and the finish becomes much less reliable.
For a broader look at how vinyl types differ in real decorating use, this guide to vinyl for wall art is worth reading before you commit to a design.
Premium vinyl isn't a luxury on texture. It's the minimum standard if you want the decal to behave like wall décor rather than a temporary experiment.
What doesn't work
These are the usual failure points on textured walls:
- Thin calendered vinyl: too little body, weak bridging over texture.
- Low-tack bargain adhesive: often fine for glass, poor for pebbled paint.
- Skipping test application: especially risky on washable or older painted walls.
- Assuming all texture is equal: a subtle orange peel is not the same as deep knockdown.
The Crucial Surface Preparation Protocol
Texture punishes shortcuts. The wall might look clean from a metre away and still hold dust in every recess. That dust becomes a release layer between the adhesive and the wall, which is why proper prep changes the result so dramatically.
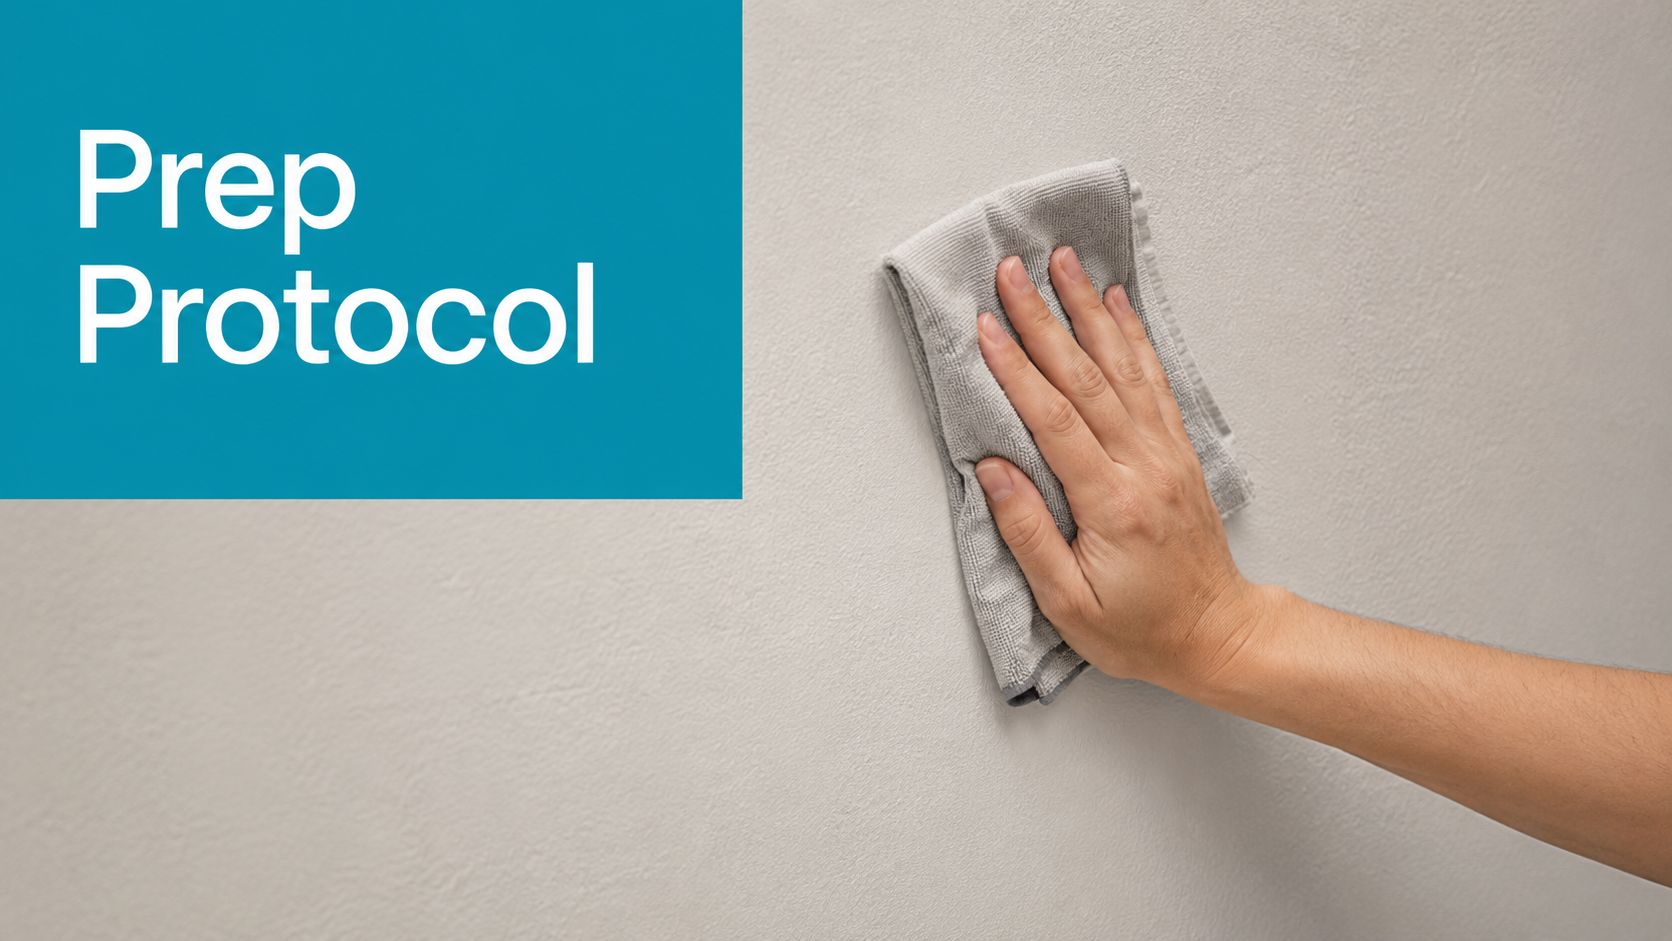
A UK-specific protocol calls for cleaning with sugar soap, priming with a product like Zinsser Bulls Eye 1-2-3, and using an adhesion activator. Skipping the primer is the main cause of peeling, and it increases edge failure rates by over 60% on textured surfaces according to this textured-wall preparation guidance.
Step one clean into the recesses
Use sugar soap solution rather than a casual wipe-down. Textured walls trap fine dust in the low points, and that dust won't always come away with a dry cloth alone.
Work with:
- A clean microfibre cloth
- Sugar soap solution
- A second cloth for rinsing residue
- Plenty of drying time
Don't scrub so aggressively that you damage the paint film. The goal is to lift contamination, not polish the wall.
Step two prime the texture
Primer gives the adhesive a more stable and more uniform surface to grab. On textured paint, that matters because porosity and finish can vary from peak to trough.
Zinsser Bulls Eye 1-2-3 is often chosen because it helps stabilise the surface and improves consistency across the wall. Let it cure properly. Rushing from primer to sticker is one of those mistakes that feels faster and ends up taking longer.
If an edge curls after install, people often blame the sticker. On textured walls, the wall prep is usually the first thing to inspect.
Step three use an adhesion activator
An adhesion activator helps the vinyl bond more confidently to a difficult painted surface. On textured walls, that extra help is useful at the exact points that tend to fail first, especially edges, corners, and finer parts of a design.
Apply it evenly and sparingly. Too much product can make placement messier than it needs to be. You want improved bond, not a soaked surface.
When to go further than the basic protocol
If the texture is more pronounced, basic prep may not be enough. In those cases, professional-grade thinking means considering a light skim coat, wall liner, or another surface-smoothing method before any sticker goes near the wall.
Being realistic about wall conditions helps. Some walls are ready for decals after careful prep. Some need surface correction first. Knowing the difference saves a lot of frustration.
How to Apply Your Wall Sticker Flawlessly
Once the wall has been prepped properly, the application itself becomes much more predictable. The goal isn't just to get the sticker onto the wall. It's to press the vinyl into the wall's profile so the adhesive makes full contact wherever it can.
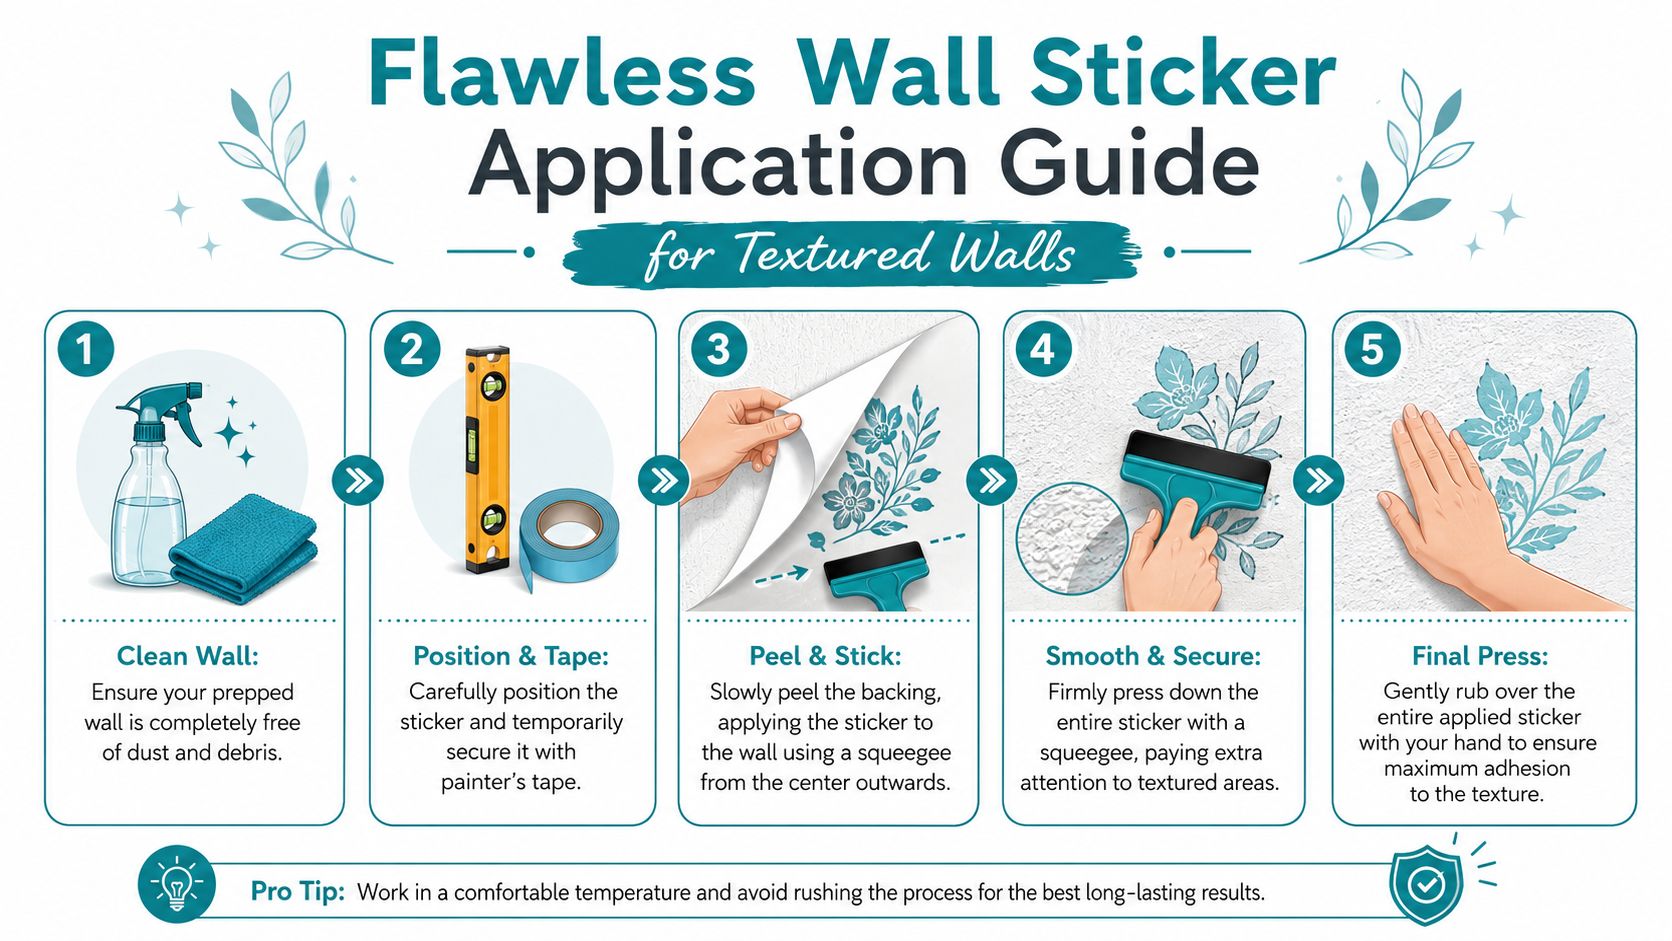
Successful application on textured walls relies on heat from a hair dryer, which makes the vinyl more pliable, and firm, consistent pressure with a squeegee, which helps the decal bond across the textured area. That technique supports the 5-year interior lifespan associated with premium vinyl in StickerBrand's textured-wall decal advice.
A clean application sequence
Use a methodical order rather than trying to stick the whole piece down at once.
-
Position first
Use painter's tape to hold the design in place and check spacing, level, and visual balance. -
Peel gradually
Don't expose the whole adhesive side immediately. Work in sections. -
Squeegee from the centre out
This pushes air outward and helps seat the vinyl into the texture rather than trapping hollow spots. -
Warm small areas
A hair dryer on low heat softens the vinyl so it can mould more readily to the wall. -
Press again after warming
Use a squeegee or soft cloth and firm hand pressure. At this point, the bond is really established.
For a more general installation walkthrough, this wall sticker application guide covers the base method that you can adapt for textured surfaces.
If this happens do this
Textured installs rarely reward speed. They reward response.
- If the sticker bridges over bumps: warm that section lightly, then press it into the contour with slow, firm strokes.
- If a corner keeps lifting: focus pressure on that edge, hold it longer than you think you need to, and revisit after a short settling period.
- If transfer material won't release cleanly: peel it back slowly against itself rather than pulling outward from the wall.
- If small bubbles show up: work them outward first with a cloth or squeegee before deciding the area has failed.
Slow hands beat strong hands. Most textured-wall problems come from rushing the release and not giving the vinyl time to settle into the surface.
The pressure most people underestimate
People tend to press hard in one quick pass and assume that's enough. On textured walls, it usually isn't. You need repeated, deliberate pressure, especially around narrow lettering, tips of shapes, and outside edges. Those are the first places that tell you whether the application has been done properly.
Troubleshooting Peeling Edges and Other Issues
Even when the prep is solid, textured walls can still throw up a stubborn edge or a trapped pocket of air. The trick is to treat the symptom early instead of hoping it settles on its own.
Edge lifting
If you see one edge starting to peel, don't pull the whole section off. Warm the area gently, press it back with a soft cloth, and hold pressure for longer than you would on a smooth wall. Then leave it alone for a bit. Constant fiddling often makes the adhesive dirtier and weaker.
If the same edge lifts again, inspect the wall beneath it. A rough paint lump, dust pocket, or under-pressed recess is often the actual cause.
Tiny bubbles or hollow patches
Small bubbles can appear once the sticker has had time to settle. On texture, some of these aren't classic air bubbles. They're areas where the vinyl hasn't fully dropped into the wall profile.
Try this:
- Warm lightly: enough to soften, not enough to overwork the material.
- Press from several angles: one direction may miss a recess.
- Use a cloth over your finger for detail areas: this helps around lettering and intricate cuts.
Corners and thin details
Corners fail first because they catch movement and have less surrounding material to anchor them. Thin script lettering and delicate flourishes can also be awkward because they don't have much adhesive footprint.
A few practical fixes help:
- Reduce tension while peeling application tape
- Support tiny elements with a fingertip through a cloth
- Revisit narrow details after the first full pass
When the wall is the real problem
If multiple areas refuse to stay down, stop blaming technique for a surface issue. Some walls are too aggressive in profile, too powdery, or too poorly painted for direct vinyl application.
In those cases, the sensible move isn't to fight harder. It's to change approach. A smoother panel, framed print, or another removable décor option may give you the finish you want.
Care Removal and Smart Alternatives
Once the sticker is up, care is straightforward. Keep cleaning gentle. A soft dry cloth is usually enough for routine dusting. If you need more than that, use a lightly damp cloth and avoid soaking the edges. Aggressive scrubbing can catch corners and weaken the bond over time.
Removal should be just as controlled as installation. Gentle warmth helps soften the adhesive so the vinyl peels more cleanly. Lift a corner slowly, then pull back on itself rather than straight outward. That reduces stress on the paint. If you want a full walkthrough, this removal guide for wall stickers shows the safest approach.
Smart alternatives for heavily textured walls
If your wall has deep texture, you don't need to force a decal where it won't perform well. Better options often look more intentional anyway.
Consider these instead:
- Framed prints or quotes: they give you the design impact without asking adhesive film to conform to a difficult wall.
- Mounted panels or boards: apply the vinyl to a smoother removable surface, then hang that surface.
- Selected wall panelling features: useful if you want to visually tame a rough wall before decorating it.
- Room organisation labels and accessory graphics: for utility spaces, removable labels can still be useful on smoother storage surfaces. If you're sorting boxes for a move or nursery clear-out, these fragile warning labels are a practical example of how the right adhesive label works best when matched to the right surface and use.
A good result on textured walls isn't about optimism. It's about choosing the right material, preparing the wall properly, and knowing when another décor route makes more sense.
If you want wall décor that's made with premium vinyl and designed to last, Quote My Wall offers a wide range of wall stickers, nursery designs, custom quotes, vinyl wraps, and prints for UK homes. If you're unsure what will work on your wall, get in touch and ask before you order. It's the fastest way to avoid the wrong material on the wrong surface.