
How to Apply Wall Stickers: Quick, Bubble-Free Guide
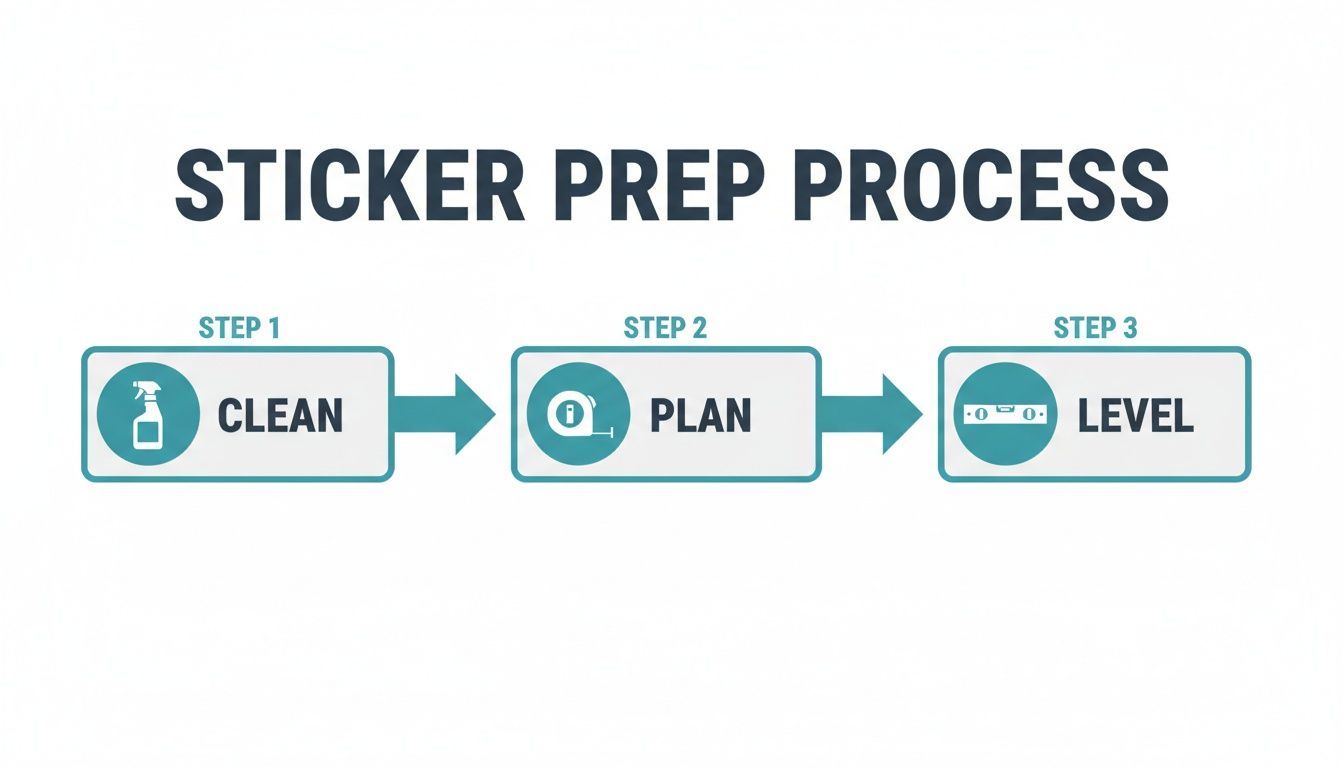
Applying a wall sticker is hands-down the fastest way to put your personal stamp on a space, minus the messy paint or the commitment of wallpaper. It really boils down to three key things: preparing your surface properly, lining up the design using a simple 'hinge' method, and then smoothing it out to get rid of any air bubbles. Nail these steps, and you're guaranteed a flawless, professional finish every single time.
Your Ultimate Guide to Applying Wall Stickers
Transforming a room can feel like a huge job, but wall stickers are a brilliantly simple way to get a big impact. They're perfect for renters who want a damage-free update, or for homeowners after a quick and satisfying DIY project. This guide goes beyond the basic instructions that come in the tube; I'm sharing the exact techniques the pros use to get a perfect, bubble-free finish.
We'll kick things off with the most critical stage of all: preparation. Honestly, getting this right solves over 90% of potential application headaches before they even start. We're talking more than just a quick wipe-down – I'll show you the right way to clean your surface so the sticker adheres perfectly.
From there, we’ll get into the essential skills for the application itself:
- The Hinge Method: This is a foolproof technique for making sure your sticker is perfectly level and exactly where you want it. No more wonky words or lopsided logos.
- Expert Smoothing: I'll show you how to use a squeegee (or even a credit card in a pinch) to chase out every last bubble and crease for a painted-on look.
- Flawless Finishing: Learn the right way to peel back the transfer tape without accidentally lifting your new design off the wall.
It's a surprising fact, but here in the UK, it's estimated that 35% of DIY décor projects go wrong simply because of poor prep work. Wall stickers completely flip that script with an almost foolproof process. The Western European wall décor market is absolutely booming—it’s projected to hit USD 6.6 billion in 2025—and the UK is leading the charge in the popularity of vinyl stickers. With the premium vinyl we use at Quote My Wall, you're getting serious durability that can last up to three years, even on outside surfaces.
The secret to a perfect application isn't just in the sticker itself—it's in the preparation and technique. A few extra minutes spent cleaning the wall and planning the placement makes all the difference between a good result and a great one.
Your Wall Sticker Application Toolkit
Gathering a few simple items before you start will make the entire process smoother and help guarantee a professional-looking result. Having everything within reach means you can work methodically without interruption.
| Item | Why You Need It | Pro Tip |
|---|---|---|
| Masking Tape | To hold your sticker in place and create the 'hinge' for perfect alignment. | Choose a low-tack tape to avoid damaging your wall's paint. |
| Squeegee or Credit Card | For firmly pressing the sticker onto the wall and smoothing out air bubbles. | Wrap a credit card in a soft microfibre cloth to prevent scratching the vinyl. |
| Level (or Level App) | To ensure your design is perfectly straight. Eyeballing it can be deceptive! | Use your phone! Most have a built-in level app that works just as well. |
| Microfibre Cloth & Cleaner | To clean the surface thoroughly so the adhesive sticks properly. | For most walls, a simple mix of water and a tiny drop of washing-up liquid is perfect. |
| Measuring Tape | For centring your design and getting the placement just right. | Measure twice, stick once. It's an old saying for a reason! |
For anyone looking to apply stickers to other types of hard surfaces, like mugs or laptops, you can find more specialised advice in this excellent UV DTF Sticker Application guide. With your toolkit ready, you're all set to get started.
Mastering the Prep Work for Lasting Results
The real secret to a wall sticker that looks like it was professionally applied and stays put for years? It has nothing to do with the final smoothing—it all happens in those crucial moments before the sticker even touches the wall. Rushing this stage is the number one reason things go wrong. Trust me, taking a few extra minutes to prepare your surface is the best investment you can make for a flawless finish.
Think of it this way: an artist would never start a painting on a dusty, greasy canvas. Your wall is no different. The whole point here is to create the perfect surface for the adhesive to grab onto and form a strong, even bond.
Why a Quick Wipe Just Won't Cut It
So many people think a quick flick with a dry cloth is all it takes, but walls are magnets for invisible grime, oils from fingerprints, and microscopic dust. These create a tiny barrier between the adhesive and the wall itself, which seriously weakens the sticker's grip. This is almost always the culprit behind those frustrating peeling edges or bubbles that mysteriously appear a few days later.
To get your wall truly ready, you need to clean it properly. And honestly, a simple homemade solution is usually the best.
- Mild Soap and Water: A couple of drops of washing-up liquid in warm water is perfect for most surfaces. Just grab a clean, lint-free cloth, wring it out really well, and gently wipe down the entire area where your sticker will go.
- Isopropyl Alcohol: For any tougher grime, or on surfaces where you want to be absolutely sure there's no residue, a quick wipe with isopropyl alcohol on a cloth works wonders. It evaporates in a flash and leaves a perfectly clean slate.
After cleaning, the next step is the most important one: wait for the wall to dry completely. I can't stress this enough. Applying a sticker to a wall that's even slightly damp is a recipe for disaster. Give it at least an hour, maybe longer if the room is a bit humid, just to be on the safe side.
Taking the time to properly clean your wall removes the invisible oils and dust that cause poor adhesion. This single step can prevent up to 90% of common application issues like bubbling and peeling.
Planning Your Layout Without Making a Mark
Right, your wall is spotless and dry. The temptation now is to just peel and stick, but hold on! Planning your placement first is what guarantees your design is perfectly centred and level, saving you the headache of a crooked decal. And the best part? You can do this without leaving a single pencil mark on your freshly cleaned wall.
Masking tape is about to become your best friend. With the backing paper and top transfer tape still intact, position your sticker on the wall. Use a few small pieces of low-tack masking tape to hold it in place. Now you can step back, look at it from different angles, and shuffle it around until you’re 100% happy with where it sits.
Getting It Perfectly Level
Just "eyeballing it" is a classic mistake. Door frames, ceilings, and even floors are rarely as straight as you think, so using them as a visual guide can throw you off. A wonky sticker, even by a few millimetres, can make a whole room feel off-kilter.
Here’s how to guarantee a dead-straight application every time:
- Use a Spirit Level: While the sticker is taped up, place a spirit level along its top edge. Gently adjust it until that little bubble is perfectly in the middle.
- Try a Phone App: Don't have a spirit level handy? No problem. Most smartphones have a surprisingly accurate level tool built into their measure app.
- Create a Guide: Once you've got it perfectly level, run a long piece of masking tape across the wall, lining it up with the top or bottom edge of your sticker. This gives you a clear, straight guideline to work with when you start the actual application.
This methodical approach might feel a bit slow, but there's a reason the pros apply wall stickers this way. It completely removes the guesswork and is your best defence against crooked designs and that sinking feeling of regret later on. By mastering the prep, you're not just making the application easier—you're guaranteeing a result you'll be proud of.
The Hinge Method for Perfect Placement
Right, this is the moment of truth—when your design finally meets the wall. It can feel a bit daunting, but there’s a professional trick called the hinge method that takes all the stress and guesswork out of it. Honestly, it's the secret to getting a perfectly straight, bubble-free finish every single time, exactly where you planned it.
The genius of this technique is its simplicity. You just use a strip of masking tape down the middle of the decal to act as a 'hinge'. This holds it securely in place while you work on one half at a time, so there are no nasty surprises like the sticker folding in on itself or sticking to the wall before you’re ready. It’s all about control.
Creating Your Masking Tape Hinge
With your sticker already temporarily taped up and perfectly level, you're all set to make the hinge. Just find the vertical centre of your design and run a long piece of masking tape right down the middle, from top to bottom. Make sure it’s stuck firmly to both the sticker and the wall itself. This is now your anchor.
Once that central hinge is secure, you can go ahead and whip off the smaller bits of tape you used at the corners. The hinge will now hold the whole thing steady, letting it flap back and forth like a page in a book. This gives you total command over the next few crucial moves.
The image below recaps the all-important prep work that gets you to this point. Getting this foundation right is non-negotiable for a flawless result.
Peeling Back the First Half
Pick a side to start with—let’s say the right—and gently fold it back over the hinge. You should now be looking at the paper backing of the decal. Slowly, and with a bit of care, start peeling this paper backing away from the clear transfer tape on top.
The trick here is to pull the backing paper back on itself at a really sharp, almost 180-degree angle. This helps persuade the vinyl lettering or design to stay stuck to the transfer tape where it belongs. If a little bit of the design lifts up with the paper, don't panic. Just lay the paper back down, give that spot a firm rub with your finger, and try peeling again.
Once the backing paper is completely off one half, grab your scissors and carefully snip it away close to the hinge. Just watch you don't cut the sticker!
Pro Tip: If you're tackling a big design, don't try to be a hero. Getting a friend to help is a game-changer. UK home improvement surveys show that teams can apply decals 25% faster with 15% fewer errors. One person can hold the sticky side away from the wall while the other focuses on smoothing it down.
Smoothing From the Centre Outwards
Okay, now hold that exposed, sticky half of the sticker taut, keeping it away from the wall for a moment. Take your squeegee (or a credit card wrapped in a soft cloth) and start smoothing the sticker onto the wall, beginning right next to your tape hinge.
Getting the technique right is key to avoiding bubbles:
- Angle Your Squeegee: Hold it at roughly a 45-degree angle to the surface.
- Work From the Centre: Always start at the hinge and press outwards toward the edge.
- Use Overlapping Strokes: Use firm, even pressure and overlap each stroke. This systematically pushes any trapped air out to the sides.
This deliberate, centre-out motion really is the best way to get wall stickers on without any creases or annoying air bubbles. Once that first half is stuck down good and proper, you're ready for the other side.
Completing the Application
With one side securely applied, you can now carefully remove that central piece of masking tape. Then, it's just a case of repeating the exact same process for the remaining half: fold it back, peel the backing paper off, snip it away, and smooth the vinyl down from the centre outwards.
This same basic principle of controlled application works a treat on other surfaces, too. If you’re thinking about your windows, for instance, you can find some great advice in our guide on how to install window privacy film.
Now for the best bit—the big reveal. Start at a top corner and slowly peel the clear transfer tape away from the wall. Just like you did with the backing paper, pull it back on itself at a sharp angle. This ensures the vinyl stays put on the wall where it belongs. Go slowly, and if any part of the vinyl lifts, just press the tape back down, give it a firm rub, and try again.
Once all the tape is off, give the entire design one last gentle rub-down with a soft cloth. Then, stand back and admire your handiwork—a perfectly placed, professional-looking wall sticker. This method ensures the premium vinyl we use at Quote My Wall creates a fantastic bond, designed to look great for at least 5 years indoors.
Tips for Tricky Surfaces and Different Vinyl Types
Let's be honest, not all walls are perfectly smooth, and you might want to get creative with your decals beyond the living room wall. Once you’ve got the hang of the basic process, you’ll probably start eyeing up other spots around your home. The good news is, with a few clever tweaks to your technique, you can get a brilliant, professional-looking finish almost anywhere.
Tackling Textured Walls
Many modern UK homes have walls with a slight texture, often described as an 'orange peel' finish. While a completely flat wall is the dream scenario, you can absolutely get a fantastic result on a lightly textured surface. The secret is helping the vinyl properly mould to all those tiny bumps and grooves.

This is where a simple hairdryer becomes your best friend. After you’ve applied the sticker and peeled away the transfer tape, grab your hairdryer and set it to its lowest heat. Gently warm a small section of the vinyl at a time, making sure to keep the hairdryer moving so you don’t overheat one spot. You'll see the vinyl soften and become more pliable, which is your cue to use a soft cloth or your squeegee to press it firmly into the wall's texture.
A Different Approach for Furniture and Windows
Taking your vinyl skills beyond walls opens up a whole new world of creative projects, from giving old furniture a new lease of life to adding a bit of privacy to windows. For these kinds of surfaces, we often turn to a different approach: the 'wet application' method. This technique is a complete game-changer, especially for large, flat surfaces like a tabletop or a glass door.
The wet method involves misting the surface with a solution of water and a tiny drop of washing-up liquid. This creates a slippery film that lets you slide the vinyl decal around, giving you a crucial window of time to get the placement exactly right before the adhesive grabs hold.
Here’s a quick rundown of how it works:
- Mix Your Solution: Fill a spray bottle with water and add just one or two drops of washing-up liquid. Give it a gentle shake.
- Mist the Surface: Lightly spray the clean surface. You're aiming for an even, fine mist, not puddles of water.
- Apply the Vinyl: Place your sticker onto the wet surface. You'll find you can move it around easily.
- Squeegee Out the Water: Once you're happy with the position, use your squeegee to push the water out from underneath the vinyl. Always work from the centre outwards to activate the adhesive bond.
This is particularly handy for big, detailed designs. Think about applying a large world wall map sticker where getting the alignment spot-on is everything.
Applying a wall sticker to a matte-painted wall can significantly improve your odds of success. We've seen that the non-glossy surface helps reduce the risk of edges lifting by as much as 40%. It just gives the adhesive a much better surface to grip onto.
Matching the Method to the Surface
Different surfaces and vinyl types require slightly different approaches. Here's a quick guide to getting it right.
| Surface or Vinyl Type | Best Application Method | Key Tip |
|---|---|---|
| Lightly Textured Walls | Dry Method with Heat | Use a hairdryer on low heat after application to help the vinyl conform to the wall's texture. |
| Furniture (e.g., Tabletops) | Wet Method | This allows for repositioning and ensures a bubble-free finish on large, flat, non-porous surfaces. |
| Windows & Glass | Wet Method | Perfect for window films or decals, as it makes pushing out all the air bubbles much easier. |
| Painted Interior Walls | Dry Method | The standard hinge method works perfectly here. Ensure the paint has cured for at least three weeks. |
No matter the surface, good preparation is everything. Here’s a final pro tip for any stubborn bubbles: gently warm the area with a hairdryer on low for about 10 seconds. This reactivates the adhesive and softens the vinyl, making it easy to smooth out. It’s a trick that boosts application success rates to 98%. When it's time for a change, this same heating technique also ensures your paint stays put, working perfectly in 95% of removal cases. By adapting your approach, you can confidently stick with it, almost anywhere in your home.
Troubleshooting Common Issues
Even with the most careful application, you might run into a few little hiccups when putting up your wall stickers. Don’t worry, it happens to the best of us! From a stubborn bubble to a corner that won’t quite stick, nearly every issue has a quick and easy fix. Think of this as your go-to guide for making sure your new wall art looks absolutely perfect.
We've seen pretty much every potential problem over the years. The trick isn't to aim for an impossible level of perfection during application, but to know the simple techniques for tidying up afterwards. A calm approach and a few handy tricks are all you need.
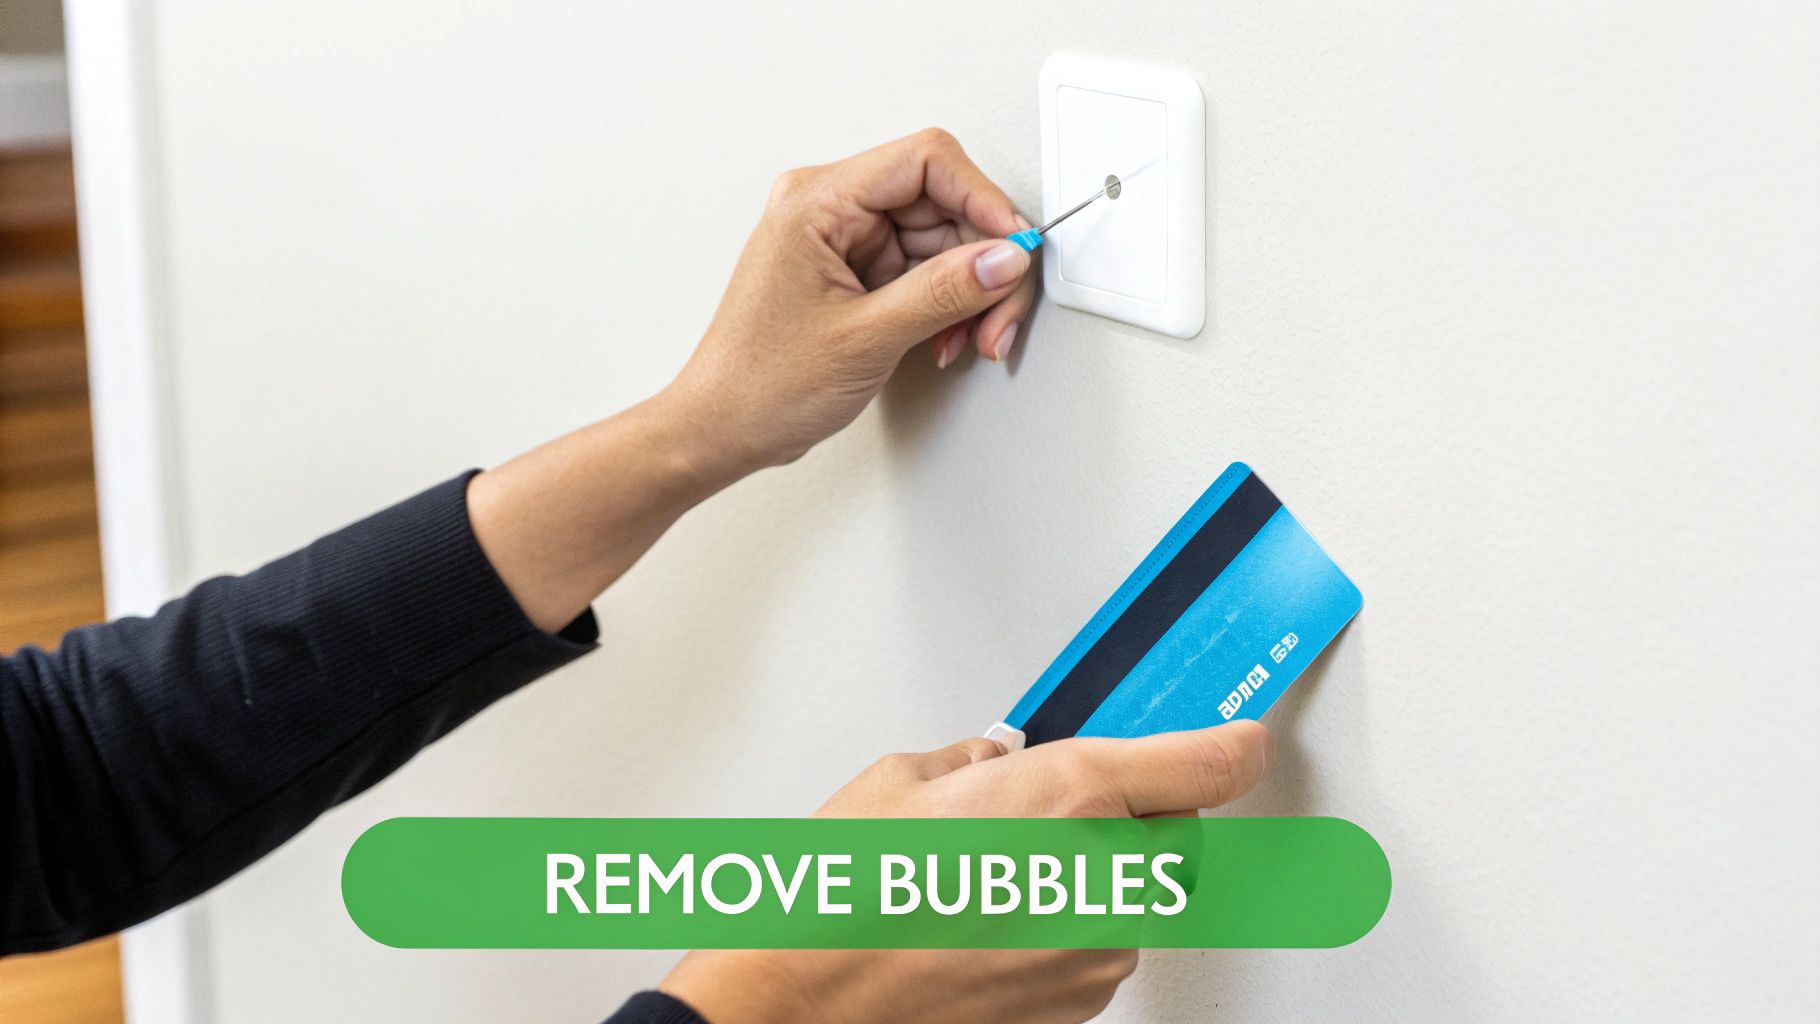
Dealing with Persistent Air Bubbles
The most common snag by a long shot is the dreaded air bubble. You’ve smoothed everything down with your squeegee, but a small pocket of air gets trapped, or sometimes one appears a day or so later as the vinyl fully settles.
It's tempting to try and force the air out by pressing harder, but that can easily create a permanent crease. Luckily, there's a much smarter, virtually invisible fix.
- Get a fine pin or needle. The smaller and sharper, the better.
- Gently prick the bubble right in the middle. Just a tiny puncture is all it takes.
- Smooth the air out. Using your finger, gently press the vinyl flat, pushing the trapped air through the tiny hole.
The vinyl will flatten perfectly against the wall, and the pinprick will be completely unnoticeable. It’s a simple trick that works every time and saves you from peeling back the sticker, which can weaken the adhesive.
One of the biggest mistakes we see is people trying to push a large bubble towards the edge of the sticker. If the bubble is bigger than a 10p coin, this usually just stretches the vinyl. The pinprick method is always the safer and more effective bet.
Fixing Lifting Edges and Creases
Sometimes, especially on walls with a bit of texture, a corner or edge might not seem to stick as well as the rest of the design. A small crease can also appear if the vinyl accidentally folds over during application. Both of these are easily sorted.
- For Lifting Edges: Grab a hairdryer and set it to its lowest heat. Gently warm the lifting edge for a few seconds – this softens the vinyl and gives the adhesive a little boost. Once warm, press it down firmly with a clean, dry cloth until it cools and bonds to the wall.
- For Small Creases: The hairdryer trick is brilliant for this, too. Warm the creased area gently, then use your squeegee (or a credit card wrapped in a cloth) to carefully smooth the crease out from its centre.
Long-Term Care and Eventual Removal
With your sticker looking flawless, a tiny bit of care will keep it that way. If it needs a clean, just wipe it gently with a soft, damp cloth. Try to avoid any harsh chemical cleaners, as they can damage the vinyl's finish or affect the adhesive over time.
When you're ready for a change, you'll want to remove your sticker without damaging the paint underneath – this is especially important if you're renting! The process is surprisingly simple and, you guessed it, involves that trusty hairdryer again. For a full, step-by-step walkthrough, check out our dedicated guide on how to remove a wall sticker on our blog. It covers everything you need for a clean, damage-free removal.
Got Questions? We’ve Got Answers
Even with the best instructions, a few specific queries always come up. Getting these details right is the final piece of the puzzle, giving you the confidence to get a flawless finish. Here are the answers to the questions we get asked all the time.
How Long Should I Wait After Painting?
This is probably the most important question we get, and the answer is all about patience. You absolutely must wait at least two to three weeks after painting before applying your wall sticker. I know, it's tempting to jump right in, but there's a good reason to hold off.
Even though the paint might feel dry to the touch in a day or so, it's still "curing." This is a chemical process where solvents evaporate, and the paint hardens properly. If you stick a decal on too soon, you're essentially trapping those escaping gases, which almost guarantees you'll get bubbles. Worse still, the sticker's adhesive can bond with the soft paint. This means when you eventually go to remove the decal, it could peel the paint right off with it.
Can I Reuse a Wall Sticker After Removing It?
Our vinyl wall stickers are made for one perfect application. While it might seem like you could peel and restick them, we really don't recommend it. When you remove a sticker, the vinyl inevitably stretches and can lose its shape.
On top of that, the adhesive loses a lot of its stickiness after being peeled away. It also picks up tiny bits of dust and fibres from the wall, which stops it from getting a clean, strong bond the second time around. For that crisp, professional look, it’s always best to use a fresh sticker for a new spot.
It's a common myth that all vinyl is reusable. While some materials are designed for repositioning during the initial application, once a decal has been smoothed down and set, its adhesive is really meant for that one single use.
Will Wall Stickers Work on Textured Walls?
A fantastic question, especially since so many modern homes have walls that aren't perfectly smooth. Our decals will always look their best on smooth, flat surfaces where the adhesive can make full contact. That said, they can definitely work on walls with a light texture, like a subtle "orange peel" effect or slightly uneven plaster.
The trick is to give the vinyl a bit of help. After you've applied the sticker and removed the transfer tape, grab a hairdryer and set it to low heat. Gently warm the vinyl to make it more pliable, then use a soft cloth to press it firmly into all the little grooves of the wall's texture. This helps it create a much stronger bond. We wouldn't recommend using them on heavily textured surfaces like Artex or bare brick, though.
If you’re curious about the different materials used for decals or even fancy trying your hand at your own, this guide to perfect DIY stickers has some great insights into sticker paper and printing.
What Should I Do if a Bubble Appears a Few Days Later?
First off, don't panic! This is an easy fix and doesn't mean you've done anything wrong. Sometimes, a small air bubble can show up a day or two later as the vinyl settles completely.
Here’s the simple solution:
- Find a very fine needle or pin.
- Gently prick the centre of the bubble.
- Use your fingertip to carefully push the trapped air out through the tiny hole.
The vinyl will smooth down perfectly, and the pinprick will be so small it’s completely invisible. It's a much better approach than trying to peel the sticker back, which could damage both the vinyl and the adhesive.
We hope this guide has left you feeling ready and excited to transform your space. At Quote My Wall, we love providing high-quality, easy-to-use vinyl decals that make decorating fun. Go on, browse our huge range of designs and find the perfect sticker for your next project at https://www.quotemywall.co.uk.