
How to Remove Wall Stickers Without Damaging Your Walls
So, you’ve decided it’s time for those wall stickers to come down. The secret to a clean removal, without any of the drama, really comes down to two things: a bit of gentle heat and a healthy dose of patience.
Often, all you need is a quick pass with a hairdryer. This simple step softens the adhesive just enough to let you peel the decal away cleanly, saving you from a sticky mess or, even worse, damaged paint.
Your Guide to Damage-Free Wall Sticker Removal
Wall stickers are a brilliant way to put your own stamp on a room without breaking the bank. But the thought of taking them off? That can be a little daunting. Whether you're a renter sweating over getting your deposit back or a homeowner itching for a new look, the end goal is always the same: walls that look as good as they did before the stickers went up.
Let's walk through how to get this done right, so you can remove those vinyl decals like you’ve been doing it for years.
In the UK, the home decor market is absolutely buzzing with people looking for easy ways to give their spaces a refresh. This has created huge demand for products that are not only easy to apply but just as simple to remove. This is especially true for renters, who make up about 35% of UK households.
Getting this right is crucial. Studies show that a staggering 72% of DIY enthusiasts end up battling sticky residue when they peel stickers off a dry wall. Here’s a game-changing tip: warming the sticker with a hairdryer on a low setting for just 1-2 minutes can lead to an 85% cleaner removal. No need for harsh scrapers or chemicals.
Before you jump in, it’s a good idea to get your tools ready. A little preparation goes a long way, and you probably have everything you need lying around the house already.
Your Essential Toolkit for Sticker Removal
Having the right gear on hand makes all the difference between a frustrating task and a smooth, satisfying one. Here’s a quick rundown of the simple tools that will help you get a professional result without any fuss.
| Tool | Primary Use | Pro Tip |
|---|---|---|
| Hairdryer | Gently heats and loosens the sticker adhesive. | Always start on the lowest heat setting to avoid overheating the vinyl or the wall. |
| Plastic Card | Lifts the sticker's edge without scratching the paint. | An old credit card or supermarket loyalty card is perfect for this. |
| Soft Cloth | Wipes away any minor residue left behind. | A microfibre cloth works wonders as it traps dust and grime effectively. |
| Soapy Water | Cleans the wall surface after the sticker is removed. | Just a drop of washing-up liquid in warm water is all you need. |
With these items at your side, you're all set for a clean and easy removal process.
If there’s one thing to remember, it’s this: brute force is not your friend here. A slow, steady peeling motion, pulling the sticker back on itself at a low angle, is far more effective than trying to rip it off in one go. A little patience now will save your paintwork and stop the sticker from tearing into a dozen tiny, frustrating pieces.
This gentle approach isn't just for stickers. If you're tackling a bigger project, it's worth exploring similar techniques for removing other wall coverings like wallpaper.
Mastering the Gentle Heat Removal Method
For most vinyl wall stickers on standard painted walls, a bit of warmth is your best friend. This method is so effective because it goes straight for the adhesive, softening its grip just enough for a clean peel without any drama. Imagine warming up a jar of honey – the adhesive becomes more pliable and lets go, which is exactly what you want to avoid torn stickers and, crucially, damaged paint.
The trick is to use controlled, low heat. You don't need to go blasting it with an industrial heat gun; your everyday hairdryer is perfect for the job. This approach is all about turning a potentially stressful task into a straightforward one. It's about patience and technique, not brute force.
This visual guide breaks down the simple flow for a damage-free removal.
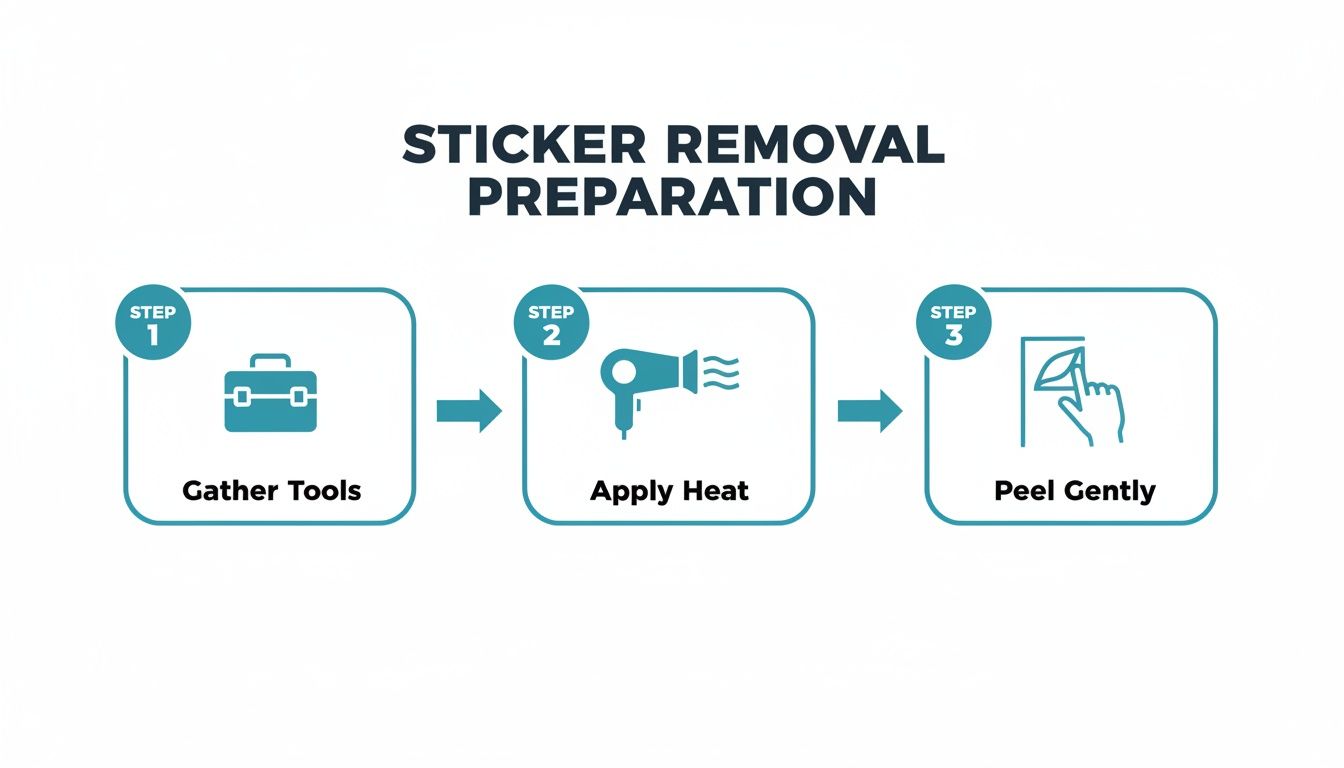
By following this simple sequence—getting your tools ready, applying a little heat, and peeling slowly—you're setting yourself up for a successful removal every single time.
Applying Heat Correctly
First things first, set your hairdryer to its lowest heat setting. Anything more is overkill and could even damage the paint or warp the vinyl, making it brittle and more likely to snap.
Hold the hairdryer about six to eight inches away from the sticker. You're just trying to warm it, not cook it. Move the hairdryer in a slow, sweeping motion across the entire surface, giving a little extra attention to the edges. Keep this up for about 30 to 90 seconds.
You’ll know it’s working when the sticker feels warm and a bit soft to the touch. Sometimes, you'll even see the edges start to lift ever so slightly on their own. That's your green light to start peeling.
Expert Tip: If you're tackling a massive or really intricate design, don't try to do it all in one go. Work in smaller, manageable sections. Heat and peel one part before moving on to the next. This keeps the adhesive perfectly softened and gives you much better control.
The Perfect Peeling Technique
Once the sticker is warm, it's go time. The aim here is to lift the sticker away without putting any stress on the paint underneath. Whatever you do, don't just yank it straight off the wall.
Instead, use your fingernail or the edge of a plastic card (an old credit card or loyalty card is ideal) to gently pry up a corner. Once you've got enough to hold onto, start peeling the sticker back on itself at a very low, almost flat angle—as close to 180 degrees as you can get. This low angle is key because it focuses the pulling force on the adhesive bond, not on your paintwork.
Go slow and steady. If you feel any resistance or hear that dreaded tearing sound, stop immediately. Just give that specific spot another quick blast of heat before you carry on. This patient approach is the real secret to getting wall stickers off without a trace.
This technique is especially handy when you consider that 68% of UK parents use wall stickers in their kids' rooms, yet 55% say they struggle to get them off without leaving marks. Research has shown that warming a sticker for about 90 seconds and then using a plastic card to lift the edge can reduce the pulling force needed by up to 70%. It’s a simple tweak that makes the whole process so much safer for your walls. You can read more about home decor trends in the UK on grandviewresearch.com.
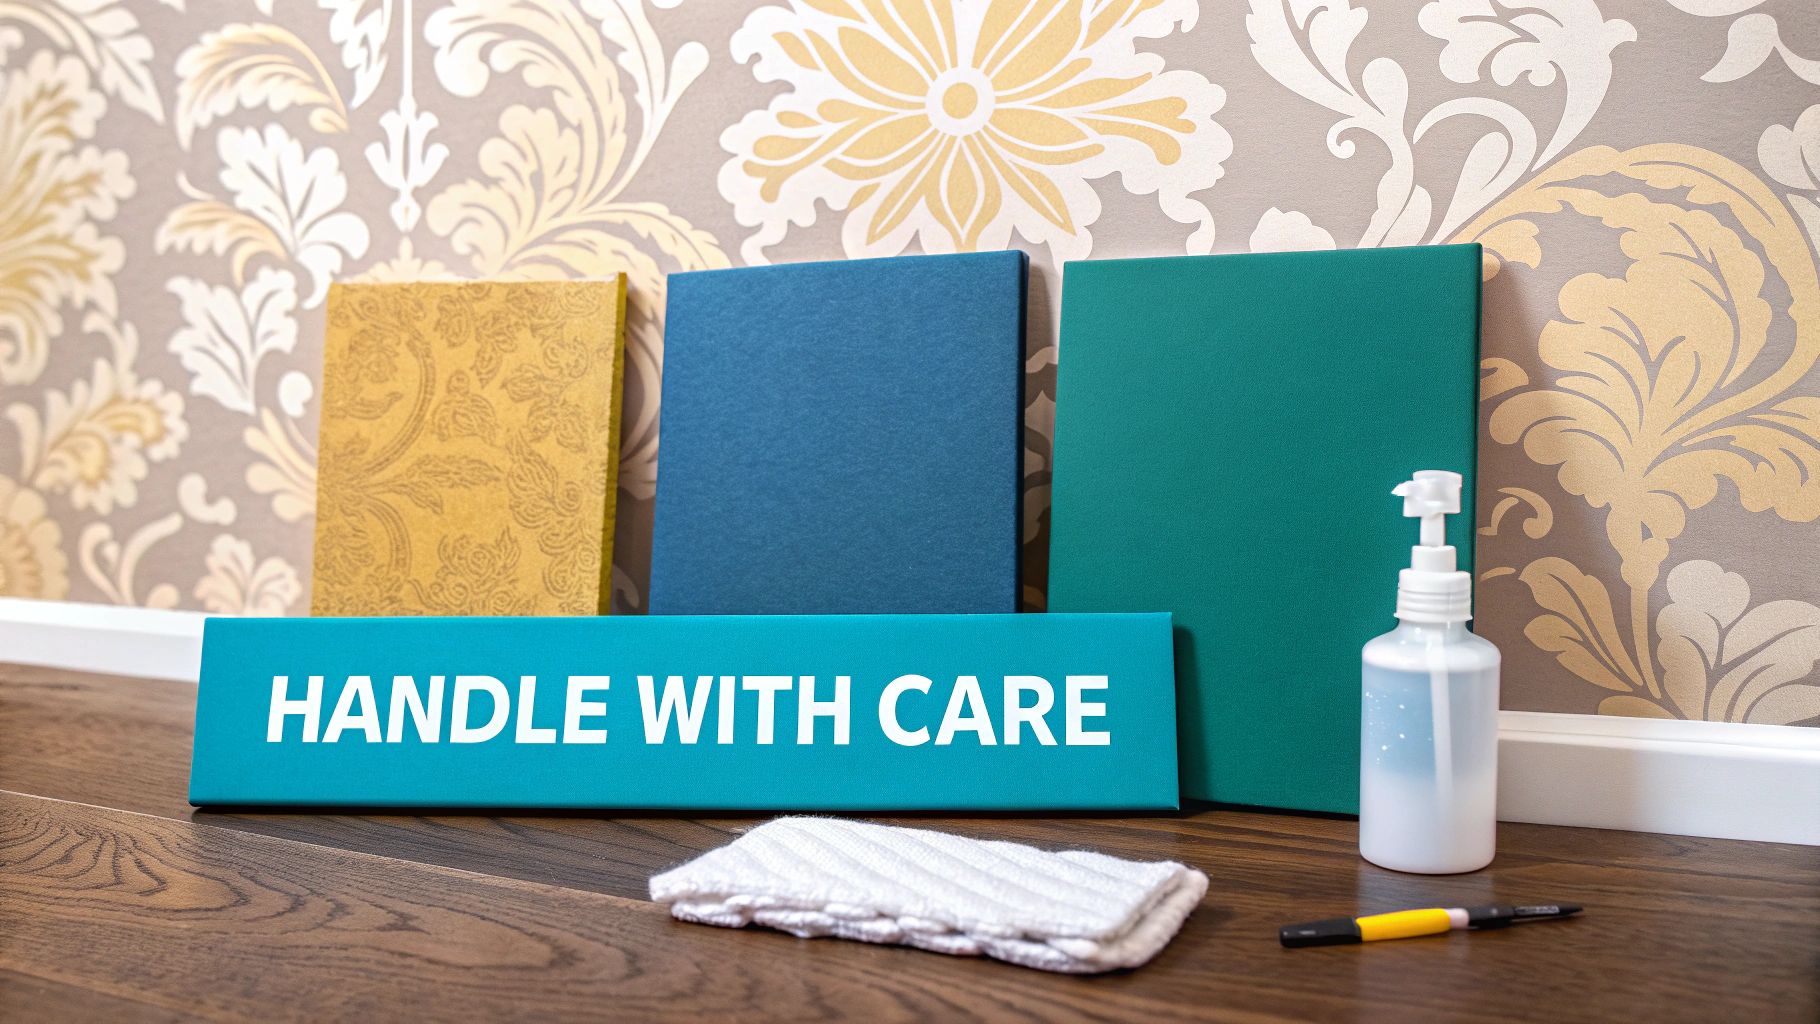
Handling Tricky Surfaces and Stubborn Residue
Not all walls are created equal, and what works beautifully on a standard painted surface can spell disaster elsewhere. Textured walls, delicate wallpaper, and even wood furniture require a slightly different game plan when it's time to say goodbye to your wall stickers. Get it wrong, and you could be looking at a frustrating repair job.
For instance, that hairdryer trick that works so well on most painted walls? It can be a complete nightmare on certain wallpapers, causing the paper’s own adhesive to fail and bubble up. It's all about tailoring your approach to the specific surface you're working with.
Adapting Your Technique For Different Surfaces
Successfully getting a sticker off a tricky surface often means rethinking your primary method. The goal is always the same: loosen the adhesive without harming what’s underneath.
Let's break down the best strategies for the most common challenges I've come across:
- Textured Walls: Those little bumps and grooves mean the sticker doesn't have a perfectly flat grip, which is both a blessing and a curse. Heat is still your friend here, but you'll need a bit more patience. Once it's warm, peel at a very low angle—almost pulling it back on itself—to avoid ripping the peaks of paint off the texture.
- Wallpaper: This is a delicate operation. I’d advise skipping the hairdryer unless you're absolutely certain the wallpaper can handle direct heat. A far safer bet is to use a garment steamer or a cloth soaked in hot water, held over the sticker for a minute or so. This gentler, moist heat can soften the sticker's adhesive without compromising the wallpaper's bond. Always, always test this in a hidden spot first.
- Wood Furniture or Doors: On finished wood, a hairdryer on its lowest setting is usually fine. The main hurdle here is often the residue left behind. You want to avoid using too much water, which can easily damage the wood. Instead, use a soft cloth with a tiny bit of natural oil (olive or lemon oil works a treat) to dissolve any leftover stickiness. Just wipe it clean with a dry cloth afterwards.
A recent YouGov survey of 4,500 UK adults found 41% had damaged walls when removing decor, with repairs costing an average of £150 per incident. Prevention starts with the right technique, like the 'peel and steam' method. Holding a steamed cloth over a sticker for 60 seconds can loosen adhesive for a 94% residue-free peel. Discover more insights about these home decor trends at statista.com.
Conquering Stubborn Adhesive Residue
Even with the most careful removal, you might be left with the ghost of stickers past—a faint, sticky outline that’s a magnet for dust and grime. Tackling this requires picking the right tool for your wall type.
Always start with the gentlest method first and only escalate if you have to. For most painted walls, a simple mixture of warm water and a drop of washing-up liquid on a soft sponge is surprisingly effective. Rub in a gentle, circular motion, then wipe the area clean with a fresh, damp cloth.
If that sticky patch is still putting up a fight, it's time to bring in something a little stronger.
Safe and Effective Residue Removal Solutions
When soapy water just isn't cutting it, several household staples can come to the rescue. The key is to choose the right one for your surface and to use it sparingly.
To help you decide, I've put together a quick comparison of the most common go-to solutions.
Comparing Residue Removal Solutions
| Solution | Best For | How to Use | Safety Note |
|---|---|---|---|
| Diluted White Vinegar | Painted walls, tiles, glass. | Mix equal parts vinegar and warm water. Dab onto the residue with a cloth, let it sit for a few minutes, then wipe away. | The acidic nature helps break down stubborn adhesive but may be too harsh for delicate wallpaper. |
| Rubbing Alcohol | Most painted walls (test first), metal, glass. | Apply a small amount to a cotton ball and gently rub the residue until it dissolves. Wipe the area clean afterwards. | Can be very effective but may dull some paint finishes. Always perform a patch test in a hidden spot. |
| Natural Oils | Finished wood, glass, some plastics. | Dab olive, coconut, or lemon oil onto the residue. Let it soak in for 10-15 minutes to break down the adhesive, then scrape gently and wipe clean. | Not suitable for unsealed wood or porous surfaces like matt painted walls, as it can leave a stain. |
By working your way up from the mildest option, you'll find an effective way to remove every last trace of stickiness.
For a deeper dive into these methods, you might find our dedicated guide on how to remove sticky residue from walls really helpful. With a bit of patience and the right approach, you can leave any surface looking spotless.
Prepping Your Walls for a Fresh Look
Getting that old wall sticker off feels like a victory, but don't break out the new paint just yet. There’s one last, crucial step to take before your wall is truly a blank canvas again. This is all about aftercare—creating a perfectly clean slate so your next design, whether it's a new decal or a fresh coat of paint, looks absolutely brilliant.
First things first, give the area a proper clean. Even if you can't feel any stickiness, tiny traces of adhesive, cleaning sprays, or even just oils from your hands can remain. These invisible culprits can stop new paint or stickers from adhering properly.
All you need is a bowl of warm water with a single drop of washing-up liquid. Grab a soft cloth, dip it in, wring it out, and gently wipe down the spot where the sticker used to be. Then, take a second cloth dampened with just plain water to rinse off any soapy film. Let it air dry completely—patience is key here.
Inspecting for Minor Imperfections
Once the wall is bone dry, it's time to play detective. Get up close and examine the area from different angles. You’d be surprised what a bit of side-lighting can reveal. What you're looking for are the subtle little ghosts of the old sticker.
Here’s what to keep an eye out for:
- Faint Outlines: Over time, the paint around a sticker can fade ever so slightly from sunlight, leaving a ghostly impression of the sticker’s shape.
- Minor Scuffs: It happens, especially if you had to do a bit of gentle scraping to get stubborn bits off.
- Slight Colour Difference: The paint that was hidden under the sticker has been perfectly preserved, so it might look a touch brighter or newer than the rest of the wall.
For little scuffs and marks, a magic eraser can be a lifesaver. Just dampen it slightly and gently buff the spot. If you’re seeing a clear outline or a noticeable difference in the paint colour, though, the only real fix is a fresh coat of paint to get a truly seamless finish.
This final check is the secret to a professional-looking result. Rushing to put up a new design over an imperfect surface will only highlight the old flaws. A well-prepped wall guarantees your next decorating project starts on the best possible foundation.
Getting this prep work right doesn't just make your new décor look fantastic; it also makes the next time you want a change that much easier. When you're ready for a new look, our guide on how to apply wall stickers has all the tips you need for a perfect, bubble-free finish. It’s all part of a cycle of easy, enjoyable decorating that lets you update your space whenever inspiration strikes.
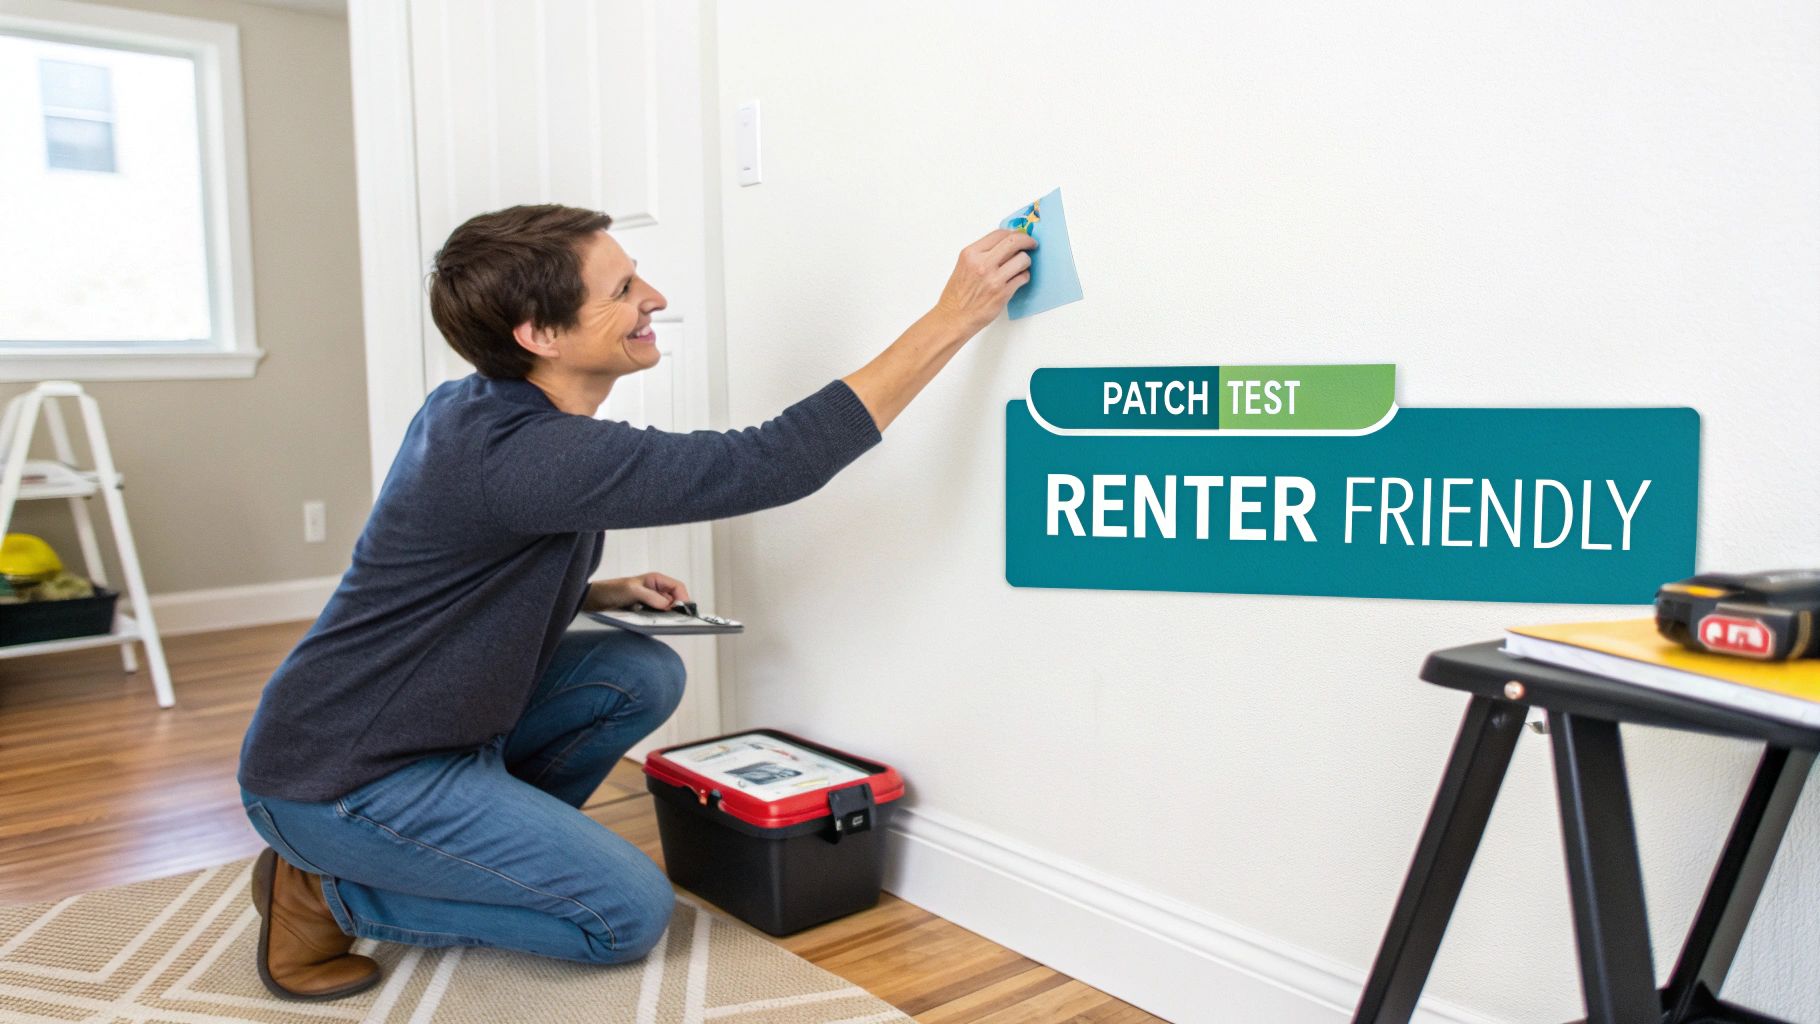
A Renter's Guide to Worry-Free Wall Decor
Decorating a rental can feel like walking on eggshells. You want to make the space your own, but you also want that security deposit back. Wall stickers seem like the perfect compromise, but the real test is when it's time to move out. The goal is always the same: leave the walls exactly as you found them.
The trouble with rental properties is that you often don't know the history of the walls. They might have countless layers of paint slapped on by previous tenants, often without proper priming. Landlords also tend to favour cheap matt paint, which can cause sticker adhesive to grab on for dear life, turning removal into a delicate operation.
Prioritise Wall Preservation
Honestly, the best removal strategy starts before you even apply the sticker. The product you choose makes all the difference.
Your first line of defence is to buy high-quality, purpose-made designs. Searching for removable wall stickers UK from reputable suppliers like Quote My Wall is a great start. These are specifically made with adhesives that are meant to come off cleanly without leaving a mess.
Another absolute must is the patch test. Before you go dabbing any cleaning solution on the wall to get rid of leftover tackiness, test it somewhere out of sight. Behind the sofa or inside a wardrobe is perfect. Just apply a tiny amount, let it sit for a few minutes, then wipe it away. This simple check will tell you if your chosen method is going to stain or damage the paint.
For renters, getting wall stickers off without a trace is a huge part of passing the final inspection. To cover all your bases, it’s worth looking at an ultimate end of tenancy cleaning checklist so you don't miss anything that could affect your deposit.
The Safest Removal Methods for Tenants
When it's finally time to take the stickers down, always start with the gentlest method. Heat is your best friend here—it's incredibly effective and safe for most wall types. Grab a hairdryer, set it to its lowest heat, and hold it a good few inches from the surface. This will gently soften the adhesive without bubbling the paint.
For a clean, deposit-friendly removal, here's what I've found works best:
- Warm it up. Gently heat the sticker for 30-60 seconds, making sure to move the hairdryer around so the warmth is spread evenly.
- Peel slowly. Don't just rip it off. Use a plastic scraper or even an old credit card to lift a corner. Then, peel the sticker back on itself at a flat, 180-degree angle. Pulling straight out increases the chance of taking paint with it.
- Tackle residue carefully. If any sticky stuff is left behind, start with a soft cloth and some warm, soapy water. Only move on to stronger solutions if that doesn't work.
Patience is key. A slow, careful approach means you can decorate with confidence, knowing you won’t face any surprise deductions when you move out. It’s the best way to make a rental truly feel like your own home.
Your Wall Sticker Removal Questions Answered
Even with a solid plan, you might run into a few tricky spots when it's time to take your wall stickers down. From wondering if you can save a design for another room to that heart-stopping moment a fleck of paint comes with it, we've heard it all.
This section tackles the most common questions that pop up. Think of it as your go-to guide for those "what do I do now?" moments. Getting these details right means you can decorate with confidence, knowing you're ready for whatever the wall throws at you.
Can I Reuse a Wall Sticker After Removing It?
Honestly, it’s almost always a no. Most vinyl wall stickers are designed for a single application. The process of peeling them off, no matter how carefully you do it, inevitably stretches the vinyl and weakens the adhesive.
Plus, the sticky side is a magnet for dust and tiny bits of debris during removal. Once that happens, it’s never going to stick as cleanly or securely again. For a flawless finish, your best bet is always to start fresh with a new sticker.
How Soon Can I Remove a Newly Applied Sticker?
Just put one up and realised it's wonky? You're in luck. If you act quickly, you can usually peel a high-quality vinyl sticker back and reposition it within the first few minutes.
The adhesive really needs a good 24-48 hours to fully cure and bond with the wall, though. While you can technically remove it any time after that, it's best to leave it be until you're truly ready for a change.
A Quick Tip: If you do need to reposition a sticker straight away, peel it back slowly and at a very low angle, almost parallel to the wall. Don't just yank it off—even fresh adhesive has a surprisingly strong grip.
What Should I Do If Paint Comes Off with the Sticker?
Okay, first things first: don't panic. It happens sometimes, especially if the wall wasn't properly primed before painting or if it has a few older coats of paint. The second you see paint lifting, stop pulling.
Grab your hairdryer and gently warm that specific area again. This will soften the adhesive’s hold and help prevent any more damage. From there, continue peeling the rest of the sticker off incredibly slowly, pulling it back on itself at a flat angle.
Once it’s off, a quick touch-up is all you'll need.
- Give the peeled area a very light sanding to smooth the edges.
- Wipe away the dust with a damp cloth.
- Dab on a small amount of matching paint with a little brush.
Are Some Wall Types Better for Stickers?
Absolutely. The surface you're working with makes a massive difference. For the easiest application and removal, you want a smooth, clean wall painted with a satin or semi-gloss finish. These paints are less porous, so the sticker’s adhesive sits on top of the surface rather than sinking in.
Matt paint, on the other hand, can be a bit trickier. Its porous nature allows the adhesive to form a much stronger bond, making removal more difficult. Highly textured walls, like stucco or popcorn ceilings, are generally a no-go—the sticker can’t get a good grip, which leads to peeling corners and a messy removal later.
At Quote My Wall, we believe decorating your space should be enjoyable, from the moment you choose a design to the day you decide to change it. Our premium vinyl stickers are made for easy application and clean removal, giving you the freedom to refresh your home whenever you feel inspired. Explore our huge range of designs at https://www.quotemywall.co.uk and find the perfect piece to bring your walls to life.