

How to Choose, Apply and Remove a Space Wall Sticker
You've found a planet or astronaut design that would suit the bedroom, but you're looking at the wall and wondering whether it'll stick properly, or take the paint with it when it comes off. That's the right question to ask before ordering. A space wall sticker can change the room without taking up floor space, but the finish depends as much on the wall underneath as the design you choose.
Is Your Wall Ready for a Space Sticker
The sticker only holds as well as the coating beneath it. Rub the wall with a clean cloth and inspect it in side light. Powder on the cloth, loose paint, greasy marks and raised defects all need attention before application.
Normal matt emulsion is the most reliable painted surface for our stickers. Glossy and silk finishes can cause peeling, while wallpaper may accept the adhesive but tear during removal. For uneven finishes, use our guidance on wall stickers for textured walls before buying a large design.
Surface suitability and removal risk
| Surface | Suitability | Removal risk | What to do |
|---|---|---|---|
| Matt emulsion, dry and sound | Suitable | Low on a well-bonded coating | Apply once the paint has fully cured |
| Glossy or silk paint | Risky | High, paint may peel | Test a small piece before a full design |
| Freshly painted wall | Not yet suitable | High, paint may lift | Wait for the paint manufacturer's cure time |
| Wallpaper or paper-based surface | Possible | High, may not remove cleanly | Get landlord approval first and test in a hidden spot |
| Glass, tiles, mirror or furniture | Suitable when smooth and sound | Low on sound, non-porous finishes | Remove grease, then finish with a clean, dry cloth |
| Damp, mould or condensation | Not suitable | High | Fix the moisture source and let the wall dry first |
Treat preparation as moisture control, not just cleaning. The Schumacher hanging guide reinforces the need for a properly prepared, dry substrate before installing wallcoverings. Don't conceal mould or a damp patch behind vinyl.
Make the final decision with a test piece
Repair defects, sand them smooth and remove the sanding dust. Bare or porous plaster needs an appropriate coating, not a sticker applied directly over it.
Our application policy requires a minimum of 5-6 weeks after painting, and you should allow longer if the paint manufacturer specifies a longer cure. Dry to the touch isn't the same as fully cured.
Apply a small test piece in a hidden spot, press it firmly with a squeegee, then inspect both adhesion and controlled removal before committing. A successful bond alone doesn't prove the paint will release cleanly.
Keeping Children Safe Around Wall Stickers
A non-toxic label isn't enough to assess a nursery decoration. You need to know what the material is, how it's printed and whether any supporting documents apply to the finished sticker rather than just its raw ingredients. Equally, PVC-free construction alone doesn't establish that a product is suitable for every use.
The UK government's furniture and furnishings fire-safety guidance, updated in 2025, explains changes affecting some baby and young-children's products while retaining general product-safety obligations for products outside those rules. That isn't a reason to treat a wall decal as upholstered furniture. Ask for documentation relevant to the actual product and intended location.
Questions to ask the supplier before buying
| Question for supplier | Why it matters | What to look for |
|---|---|---|
| Is the vinyl PVC or PVC-free? | Identifies the base material a child could touch | Clear written material statement |
| What is the ink system? | Inks can affect indoor air during and after fitting | Named ink type and an applicable safety data sheet |
| Is emissions information available? | Shows whether emissions have been tested | Test report or certificate identifying the product |
| Are there intended-use restrictions? | Some designs are decorative only | Restrictions stated on the pack |
| Is fire-performance documentation available? | Relevant requirements must match the intended use | Documentation provided where relevant |
| How long should the room be ventilated? | Gives practical instructions after fitting | A specific recommendation in writing |
Check reach as well as materials
Keep small motifs and peelable edges beyond a young child's reach, including from a mattress, chair or bunk ladder. Don't arrange rockets or planets where they could encourage climbing onto furniture, and avoid positioning detachable pieces above a cot.
Safety check: If a piece loosens, remove it from the room rather than leaving it within reach.
Moving our wall stickers isn't recommended in children's bedrooms and nurseries because loosened pieces can present a choking hazard. Keep the room ventilated during fitting, clear away backing paper immediately and check accessible edges during routine cleaning. Our guide to decals for children's rooms offers further room-planning considerations.
Pick the Right Size and Spot for Your Room
Measure the visible wall area, not just the distance between corners. A wardrobe, open door or tall headboard can hide a substantial part of a design. Decide whether the sticker will frame the bed, sit above a desk or occupy a separate clear wall before choosing its dimensions.
Use a tape measure and a simple sketch to record those obstacles.
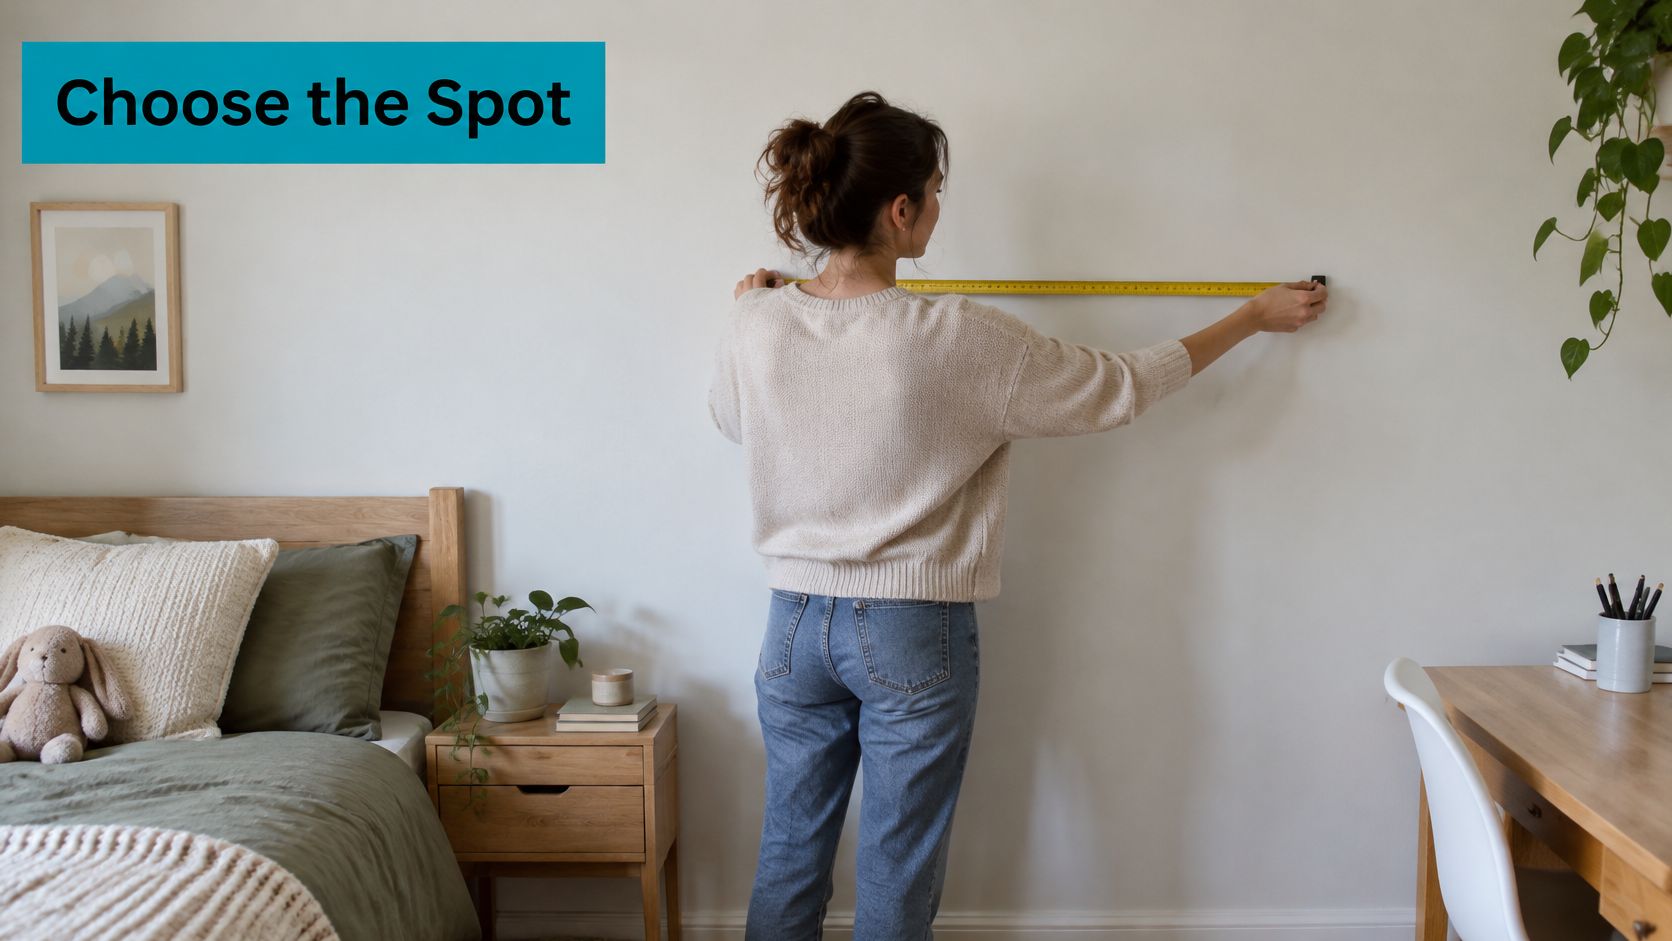
Check whether the listing describes the dimensions of the supplied sheet, the largest individual motif or the completed arrangement. These aren't interchangeable. A scattered set can occupy a generous area while each planet remains relatively small.
Sticker scale by wall width
The following is a hypothetical planning example, not a product-sizing specification. Adjust the clearances to suit furniture, safe reach and the actual dimensions of your chosen design.
| Wall width | Suggested design | Placement |
|---|---|---|
| Under 1 m, such as a door panel or headboard edge | One small motif, such as a single planet | Centre near the main user's viewing height, outside young children's reach |
| 1-2 m, such as above a bed or desk | A cluster of three to four small planets | Try leaving 15-20 cm clear of the bed frame and skirting |
| 2-3 m, a full feature wall | A planet arc or galaxy spread | Start at the centre line and work outward |
| Over 3 m, a long wall | Two groups of the same design | Try a 30 cm gap between groups to create distinct zones |
Judge the layout from the doorway
Mock up the outer edges with low-tack painter's tape, testing the tape on the finish first. Stand back and check whether the arrangement looks balanced with the furniture rather than merely centred on the plaster.
In a shared bedroom, choose a position visible from both beds. Keep generous blank space around a large moon or planet, and use smaller stars to support it rather than filling every gap.
A restrained layout is easier to coordinate with changing bedding and furniture. If the wall already carries the space theme, plain curtains and simple textiles usually work better than another competing pattern.
How to Apply a Space Wall Sticker Step by Step
Arrange installation for a time when the room is dry and its temperature is stable. Don't fit vinyl immediately after washing the wall or while nearby bathing or cooking is generating steam. Cold, damp patches and persistent condensation are reasons to postpone the job, not to press harder.
The English Housing Survey for 2024-25 found that 31% of households reported condensation, damp or mould. For installation, assess the particular wall rather than assuming a bedroom must be dry. Avoid enclosed positions directly behind wardrobes or beds where airflow is restricted.
Gather the tools before exposing the adhesive
You'll need a felt-edged squeegee or a plastic card wrapped in a soft cloth, low-tack painter's tape, a pencil and clean cloths. Keep the floor clear so the exposed adhesive can't pick up lint or grit.
Each of our wall stickers comes with a see-through application sheet and white backing paper. The clear sheet supports the design during transfer; it isn't a permanent protective layer.
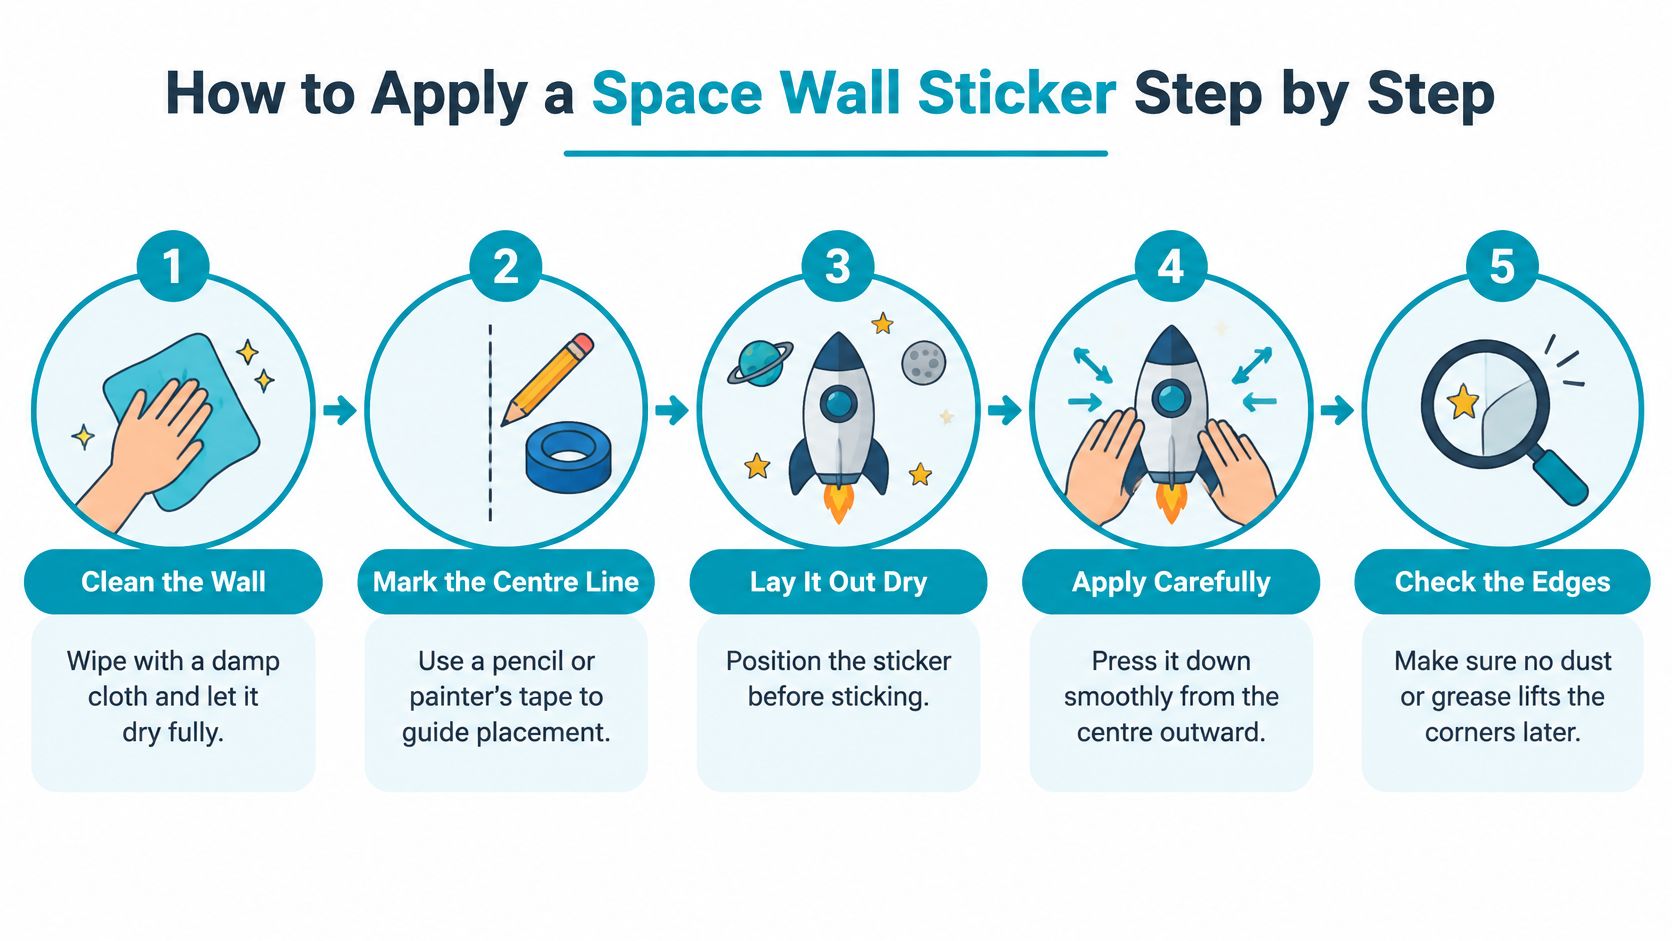
The visual guide shows the main stages of preparation and fitting.
Transfer the design without stretching it
- Clean and dry the area. Wipe with a lightly dampened cloth, using a suitable mild cleaner for grease if needed, then remove any cleaner residue. Let the surface dry completely, because a wall that looks clean can still retain moisture.
- Mark the centre line with a light pencil mark outside the finished design or a strip of tested painter's tape. Check alignment against the furniture, since a straight design can still look misplaced above an off-centre desk.
- Lay it out dry. Position the backed sticker against the wall and secure the top temporarily with tape. For a large piece, use another adult to support it rather than letting the sheet fold onto itself.
- Fold back part of the white backing near the middle while keeping the clear application sheet supporting the vinyl. Press the exposed centre into position, then progressively withdraw the remaining backing without touching the adhesive.
- Squeegee from the centre outward. Use overlapping strokes to push air towards the free edges while lowering the design gradually. Don't pull the vinyl taut, because stretched shapes can distort and corners may curl later.
- Re-burnish the perimeter through the application sheet, paying attention to fine points and narrow lettering. Peel the clear sheet back slowly at a low angle; if vinyl follows it, lay the sheet down again and press that area before continuing.
- Inspect the finished transfer. Look across the surface in side light and gently secure any edge that hasn't made contact. Check again the following day, but don't repeatedly lift a sound edge just to test it.
Leave the application sheet supporting the design until the vinyl has transferred. Pulling it away sharply is a common way to lift fine details.
Stop if the backing tears, the adhesive touches dust or the paint begins to detach. Continuing under pressure usually turns a small, local problem into a replacement piece or a paint repair.
Fixing Bubbles, Lifted Edges and Peeling
A bubble doesn't automatically mean the sticker is defective. An isolated pocket usually points to trapped air, while widespread lifting suggests a surface or adhesive-contact problem. First identify whether you're dealing with air, contamination or a failing coating.
Don't use stronger glue as the default fix. It can stain the wall, complicate removal and still leave the weak paint layer underneath.
Symptoms, causes and fixes
| Symptom | Likely cause | Fix |
|---|---|---|
| Bubbles under the vinyl | Air trapped during application | Lift gently where the product allows, then re-burnish from the centre outward |
| Edges lifting within a day | Dust, chalky paint or an uncured surface | Peel back cautiously, clean and dry the wall; re-apply only if the coating and adhesive remain sound |
| Paint coming off with the sticker | Weak, flaking or glossy paint | Stop, don't re-apply, and repair the paint first |
| Corners curling in a bathroom or steamy room | Condensation or steam | Remove the affected piece, ventilate and choose a drier wall for a replacement |
| Creased or stretched vinyl | Stretched during application | Replace the piece rather than forcing it flat |
Decide whether the piece is recoverable
For a fresh air pocket close to an edge, guide the air towards that edge with a cloth-covered card. Avoid digging at the surface with a fingernail or puncturing it with a knife. If correcting the bubble requires pulling up a large bonded area, replacement may be the cleaner option.
A gritty adhesive face won't become reliable through extra pressure. Likewise, wiping chalky paint doesn't necessarily make the coating sound enough to hold vinyl. Repair the substrate and let the new finish cure before fitting another piece.
Repeated edge lift is a reason to investigate the wall, not to keep pressing the same corner every morning.
For expectations about wear and maintenance, see how long wall stickers last. Assess failure by its cause rather than assuming age is responsible.
If troubleshooting reveals a larger wallcovering or preparation job, a decorator may be more appropriate than another DIY attempt. Readers arranging work in New Zealand can compare Auckland wallpaper hanging professionals through Painters North Shore, particularly when the task extends beyond applying a decal to a sound painted wall.
Remove a Space Sticker Without Damaging the Wall
Plan the position as a lasting choice. Our wall stickers aren't designed to be removed and repositioned, and moving them weakens their adhesive. We guarantee interior sticker life for 5 years, but that isn't a guarantee that every underlying paint finish will survive removal.
For renters, decoration can become a financial issue. A 2025 survey reported by The Intermediary found that half of landlords expected tenants to pay for decoration, with the same proportion expecting tenants to cover resulting damage. Check your tenancy agreement and obtain written permission where required.
Record the condition, then remove slowly
Before installation, save dated photographs showing the whole wall and close-ups of existing chips or marks. Keep the permission email and fitting instructions with them. Photographs document condition; they don't prove in advance that removal will be damage-free.
- Test an inconspicuous edge. Start with a small area and watch the paint, not just the vinyl. Stop if the coating begins to move.
- Gently warm the vinyl with a hairdryer on low only where the surface and product instructions allow it. Keep the dryer moving and avoid making the wall hot.
- Peel slowly at a low angle, folding the vinyl back close to the wall rather than pulling straight out into the room.
- Pause to check for paint lifting, adhesive residue or colour differences. Take photographs as you work if a problem appears.
- Stop if paint detaches. Agree any repair with the landlord before sanding or repainting, then photograph the final condition.
Don't use wallpaper-removal methods on vinyl
Alex Trend Painters' explanation of soaking and scraping old wallpaper describes a different removal job. Don't transfer that approach to a small self-adhesive decal by saturating the wall or levering beneath it with a scraper.
Removable doesn't mean damage-proof. Slow peeling reduces avoidable force, but it can't strengthen poorly bonded paint. Choose a position you'll want to keep rather than planning frequent changes.
Quote My Wall offers wall stickers made to order in the UK, including space-themed designs for bedroom updates. Visit Quote My Wall to choose a design that fits your measured wall area, and confirm your surface is suitable before ordering.