
Decals for Children's Rooms: A Parent's Guide to Decorating
Staring at blank walls, trying to imagine a magical space for your little one without the fuss and fumes of paint? I've been there. Decals for children's rooms are the perfect solution—they're a wonderfully fast, affordable, and renter-friendly way to completely transform a nursery or playroom in an afternoon. With so many themes and materials out there, you can let your creativity run wild.
Why Wall Decals Are Such a Smart Choice for UK Parents
It's no surprise that wall decals have become so popular across the UK. For parents, and especially those of us renting, they offer complete freedom from the permanence and hassle of wallpaper or paint. You can create a stunning feature wall or a whimsical woodland scene, all with the peace of mind that it can be peeled off when your child moves from dinosaurs to space rockets, or when your tenancy is up.
This isn't just a fleeting trend. The market for children's wall decals has been growing steadily, with experts predicting a compound annual growth rate of 5.5% between 2019 and 2030. It shows a real shift towards decor that's personal, easy to use, and doesn't break the bank.
Choosing Your Decal Material
Picking the right material is probably the most important decision you'll make. It directly impacts how the decal looks, how long it lasts, and how easily it comes off the wall. Your main options are vinyl and fabric, and each has its place.
- Vinyl Decals: These are the most common and budget-friendly choice. Modern vinyl is surprisingly durable, a doddle to wipe clean, and comes in a huge range of colours and finishes, from subtle matte to a high-sheen gloss. They work best on smooth walls and give a really crisp, clean look.
- Fabric Decals: Often made from a woven polyester, these are the more premium option. Fabric decals have a lovely, textured finish that almost looks like it’s been painted directly onto the wall. They tend to be thicker, more resistant to tearing, and are often repositionable, which is a lifesaver if you don't get the placement right the first time!
To make it a bit easier, here’s a quick rundown of the pros and cons.
Decal Material Comparison for UK Homes
This table compares the most common decal materials to help you decide which is best for your child's room.
| Material Type | Best For | Durability | Removal |
|---|---|---|---|
| Vinyl | Smooth, flat walls; budget-friendly projects | Good; wipeable and resistant to scuffs | Generally easy, but may require a hairdryer to soften adhesive on removal |
| Fabric | Slightly textured walls; a premium 'painted' look | Excellent; tear-resistant and often repositionable | Very easy; typically peels off cleanly without leaving residue or damage |
Ultimately, both are fantastic choices. Vinyl is a brilliant all-rounder for most projects, while fabric offers that extra touch of quality and forgiveness during application.
Keeping Safety First
When you're decorating a space for a child, safety is always the top priority. It’s so important to choose decals made from non-toxic materials. Always check the product description for labels that confirm they are:
- PVC-free
- Printed with water-based or eco-solvent inks
- Free from nasty chemicals like phthalates
Any reputable UK supplier will be completely transparent about their materials and safety standards. For nurseries, a simple but crucial tip is to place any small, individual decals well out of a curious baby's reach from the cot. This little bit of planning prevents any loose sticker from becoming a potential choking hazard.
A huge plus for high-quality wall stickers is just how renter-friendly they are. Most are designed to be fully removable without a hint of damage to the paint underneath, giving you total peace of mind.
Getting to know the benefits of these temporary decorations can make the whole process much less daunting. For a deeper dive, you can learn about the advantages of removable wall stickers in the UK in our detailed guide. Making an informed choice means you'll end up with a room that’s not just beautiful, but also safe and practical for your little one.
Getting Your Wall Decal Layout Just Right
Unrolling a new set of decals is one of the best parts of decorating a kid's room. That initial excitement is fantastic, but taking a little time to plan your layout first can be the difference between a few stickers on a wall and a truly stunning, intentional design. Honestly, just 30 minutes of prep can save a lot of headaches later.
First things first, let's talk about scale. You need to get the proportions right for the room and the furniture in it. A huge decal scene might feel a bit much in a cosy nursery, while a few tiny stars could get completely lost on a big, blank wall. It's all about finding that sweet spot.
Grab a tape measure and jot down the dimensions of the wall you're working with. Don't forget to measure the key pieces of furniture that will be against it, like the cot, changing table, or a chest of drawers.
A handy rule of thumb: Aim for your main decal or decal cluster to be about two-thirds the width of the furniture it sits above. So, if you have a cot that's 150cm wide, a decal arrangement that spans roughly 100cm above it will look perfectly balanced.
Map it Out Before You Stick it Down
Once you've got your measurements, it's time for the fun part: planning the layout. This is your secret weapon against the dreaded stick-peel-repeat cycle that ends in frustration and stretched decals. You don't need any fancy software for this, either.
I find the easiest method is to use low-tack masking tape. Just tear off little pieces and pop them on the wall where you think each decal should go. It gives you a fantastic real-world preview of the spacing and overall look, and you can move the tape around until it feels perfect.
Another great trick, especially if you have lots of smaller, individual decals like animals or stars, is to trace them onto paper and cut them out. A tiny bit of tape is all you need to temporarily stick these paper versions to the wall. It’s a brilliant way to see how the whole group will look together before you commit.
Creating a Centre of Attention
Every great room needs a focal point—that one spot that naturally draws your eye. Wall decals are an amazing, low-commitment way to create one. Usually, this will be the wall behind the cot or bed.
Here are a few layout ideas that always work well:
- The Single Statement Piece: A large, singular decal can have a huge impact. Think of a beautiful world map, a personalised name decal, or a stylised tree positioned over the main piece of furniture. It’s simple, effective, and often looks really sophisticated.
- The Symmetrical Scene: For a look that feels calm and ordered, try placing a central element (like a sun or a hot air balloon) and then arranging smaller, matching decals (like clouds or birds) evenly on either side.
- The Immersive Scatter: To create a more playful, energetic feel, scatter smaller decals across the whole wall. Polka dots, safari animals, or florals are perfect for this. My advice is to place the bigger decals first, spacing them out, and then fill in the gaps with the smaller ones. This creates a wonderful sense of depth and movement.
Putting in this little bit of effort upfront means you can apply your decals with complete confidence, knowing the final result is going to look exactly as you pictured it.
Applying and Removing Wall Decals Without the Stress
Right, this is the exciting bit – getting your chosen design perfectly positioned on the wall. A little bit of prep work here goes a long way, and trust me, it's the secret to getting that smooth, professional look without any pesky bubbles or creases. The key to a flawless finish actually starts before the decal even comes near the wall.
First things first, your wall needs to be clean, dry, and smooth. A quick wipe with a slightly damp cloth is all it takes to get rid of dust, then just let it dry completely. And here’s a crucial tip if you’ve been painting: you absolutely must wait at least three weeks for the paint to fully cure. If you stick a decal on too soon, the adhesive can fuse with the uncured paint, which means it won't come off cleanly later.
Your Simple Application Toolkit
You don’t need any fancy equipment for this. In fact, you've probably got everything you need lying around the house.
- A soft, dry cloth: Perfect for pressing the decal firmly onto the wall.
- A squeegee or credit card: Your best friend for smoothing out air bubbles.
- Masking tape: An absolute lifesaver for holding larger decals in place while you work.
- A spirit level: To make sure your masterpiece isn't on a slant.
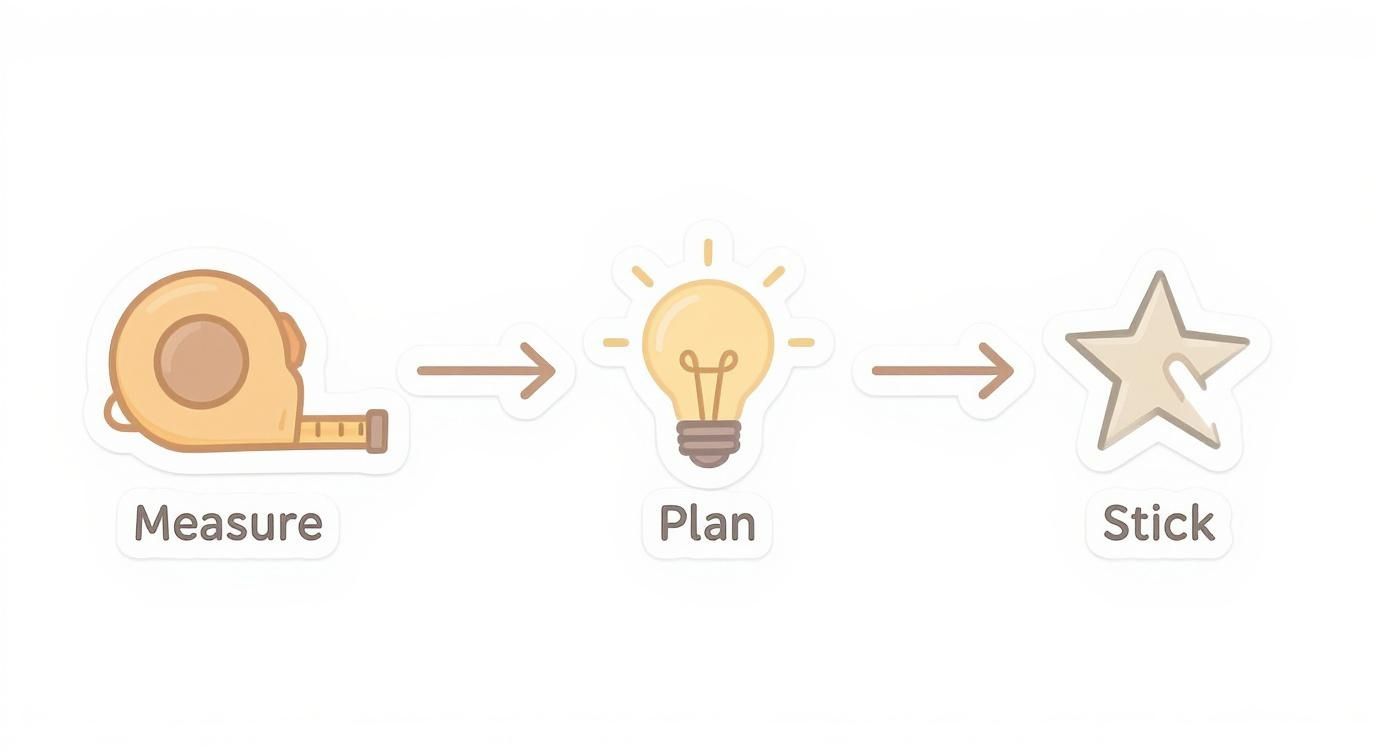
This process really boils down to three simple stages: measure, plan, and then stick. Thinking it through like this helps avoid mistakes and makes sure the final layout looks deliberate and well-balanced.
When you're tackling a bigger piece, use the masking tape to create a 'hinge' along the top edge. Stick it to the wall, then you can peel the backing paper away from the top downwards, smoothing the decal onto the surface as you go. It’s a game-changer for control and the best way I know to stop it from wrinkling up on you.
A little patience pays off. Always work slowly from the centre outwards, pushing any air towards the edges. If a bubble pops up, don’t panic! Just gently peel back that section, release the air, and smooth it down again.
Damage-Free Removal for Renters and Redecorators
The beauty of modern wall decals is that they aren't a lifelong commitment. When your little one outgrows the design or it's time to move out, taking them down should be completely straightforward, leaving your walls looking good as new. Many of the same tips for handling removable wallpaper for apartments also apply here, especially when it comes to leaving no trace behind.
Your secret weapon for a clean removal? A simple hairdryer.
Warm the decal on a low heat setting, keeping the hairdryer a few inches away from the wall. This will soften the adhesive just enough for you to get a fingernail under a corner and start peeling. Keep the warm air flowing as you slowly pull the decal away from the wall at a sharp angle. If you'd like a more detailed guide, our post on how to remove a wall sticker has you covered.
Creative Styling Ideas for Nurseries and Kids' Rooms
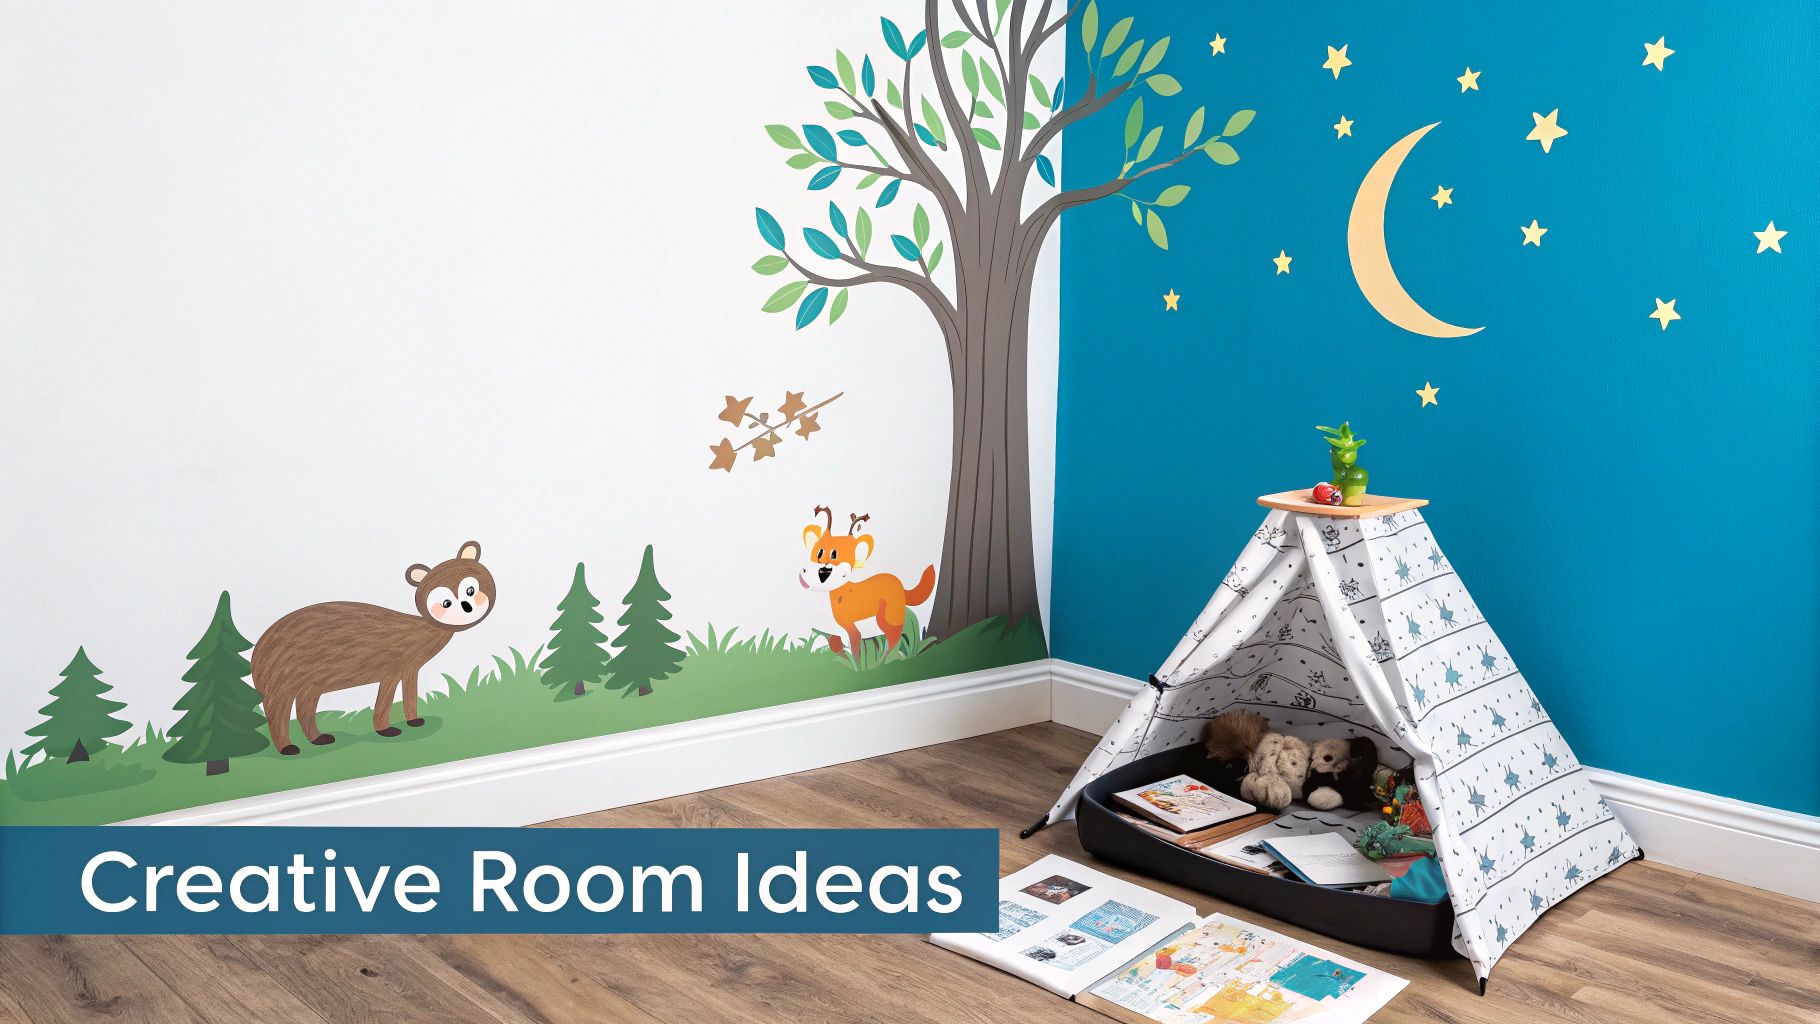
Right, now for the best bit—bringing your ideas to life. Using decals for children's rooms is so much more than just sticking pictures on a wall. It's your chance to tell a story and craft a space that feels genuinely personal and magical. The right theme can turn four plain walls into a whole new world.
For the tiniest occupants, a calm, serene environment is usually top of the list. Think soft, nature-inspired decals—watercolour animals, gentle woodland scenes, or a scattering of pastel stars can create a truly peaceful atmosphere that’s perfect for a nursery. These themes work wonderfully with neutral furniture and soft, cosy textures.
As your little one grows, their personality and passions start to shine through, and their room can easily evolve right alongside them. This is where decals are a parent’s best friend. A toddler's room can transform into a vibrant jungle with cheeky monkeys and safari animals, while a curious preschooler might be fascinated by a giant, educational world map or a glowing solar system on their ceiling.
Harmonising Decals with Your Existing Decor
One of the most common worries I hear is about making decals look like they belong in the room, rather than just being stuck on as an afterthought. The secret is all in the colour palette.
Simply pull one or two key colours from your chosen decal set and repeat them elsewhere. This could be in the cushions, a rug, some storage boxes, or the bedding. For instance, if you’ve gone for a beautiful floral decal with soft pinks and sage greens, a sage green throw or a couple of pink baskets will tie everything together beautifully. It’s a simple trick that makes the room feel intentionally styled, without needing a complete overhaul.
Wall decals offer a fantastic and accessible way to refresh a child's room, much like other enjoyable DIY home decor projects. They are a perfect fit for the growing demand we're seeing in the UK for personalised kids' decor, with more parents looking for affordable ways to create truly unique spaces.
Creating Zones with Decals
Decals are also a brilliant way to create different 'zones' in a room, visually separating areas for specific activities. This is an absolute game-changer in shared bedrooms or larger playrooms.
You could try:
- A Reading Nook: Mark out a cosy corner with a decal of a large, whimsical tree and some falling leaves. Pop a comfy beanbag underneath, add some low shelves for books, and you’ve got an irresistible reading spot.
- A Creative Corner: Define an art station with colourful polka dots, paint splatters, or alphabet decals above a little table and chairs.
- An Adventure Zone: Use mountain range decals or a winding road sticker to map out a dedicated play area, sparking all sorts of imaginative games.
Using decals to define zones does more than just look good—it helps your child understand how their space is organised, from quiet time in the reading nook to energetic play in the adventure zone.
These ideas are really just a starting point. The beauty of using decals for children's rooms is the freedom you have to experiment and create a space that perfectly captures your child's unique personality. If you're looking for more inspiration, especially for a tranquil space for a new arrival, you might love these charming nursery wall decor ideas.
Right, so you've put in the effort and created a brilliant space for your little one. The last thing you want is for those gorgeous decals to start looking tired. The good news? Keeping your decals for children's rooms looking fresh is dead simple. It doesn’t demand special potions or a chunk of your precious time.
Honestly, a bit of gentle care is all it takes to keep them looking brand new for years. The usual culprits are just dust and the odd sticky fingerprint. For a quick clean, grab a soft, dry cloth (microfibre is perfect) and give the decals a gentle wipe. If you’re dealing with something a bit more stubborn, just dampen the cloth with a little water, gently clean the spot, and pat it dry. Easy.
Simple Fixes for Common Issues
Even when you’ve applied them perfectly, decals can sometimes act up, especially in rooms where the temperature goes up and down. But don't panic – these little issues are usually a doddle to sort out.
- Lifting Corners: Noticed an edge starting to peel away? No problem. Grab a hairdryer and put it on its lowest heat setting. Hold it a few inches away from the decal for about 10-15 seconds. This just warms up the adhesive enough for you to press it firmly back against the wall with your thumb.
- Small Bubbles: Sometimes a tiny air bubble pops up a day or two later. Most of the time, you can just smooth it out towards the edge with your finger. If you’ve got a stubborn one, a tiny pinprick right in the middle will let the air out. You can then smooth it down flat, and you’ll never even know the pin was there.
A quick but important word of warning: steer clear of chemical cleaners, abrasive sponges, or any kind of harsh spray. These are the mortal enemies of wall decals. They can make the colours fade, damage the vinyl, and weaken the glue, which is the last thing you want.
What to Avoid During Cleaning
To keep your decals in top nick, there are a few definite no-gos. Think of them as the villains in your decorating story. Avoid all-purpose sprays, window cleaners, and anything with bleach or alcohol in it. Seriously, just stick to plain water.
This gentle approach doesn't just protect the decal; it keeps the paint on your wall safe, too. Following these simple tips means your child's room will stay a vibrant, imaginative, and happy space for a long, long time.
Got Questions About Children's Wall Decals? We’ve Got Answers.
Even with a head full of ideas, it's completely normal to have a few practical questions before you start. Getting the right information upfront means you can choose your child’s new decor with total confidence, knowing it’s perfect, safe, and stress-free.
We’ve pulled together the most common questions we hear from UK parents and renters, with all the answers you need in one place.
Are Wall Decals Safe for Nurseries and Children's Rooms?
Absolutely, as long as you know what to look for. Your top priority should be finding decals for children's rooms that are clearly marked as non-toxic, PVC-free, and printed with water-based inks. Any reputable UK supplier will be upfront about these safety features on their product pages.
For a nursery, placement is everything. Keep any small, individual decals well out of arm’s reach from the cot. Even if they seem firmly stuck, this simple step eliminates any potential choking hazard and gives you complete peace of mind.
Will Decals Damage the Walls in My Rented Home?
This is the big one for renters, isn't it? The good news is that high-quality removable decals are designed specifically for you. When you stick them on a well-maintained, properly prepared wall, they should peel off cleanly without a trace of sticky residue or chipped paint.
If you’re a bit worried about the state of the paintwork, here’s a pro tip: use a hairdryer on a low heat setting to gently warm the decal before peeling. This softens the adhesive just enough to make removal extra smooth and safe for the surface underneath.
The real secret? It all comes down to the condition of your wall before you even start. A decal is only as secure as the paint it’s stuck to.
Can I Reuse Wall Decals After I’ve Taken Them Down?
It really depends on the material. Most standard vinyl decals are a one-and-done deal. They tend to stretch or tear when you remove them, making it nearly impossible to get them to look good a second time.
Fabric-based decals, on the other hand, are often designed to be reused and repositioned. If you want that flexibility, make sure the product description specifically mentions it. A great tip is to save the original backing paper the decal came on – it’s the ideal non-stick surface to store them on if you move house or just fancy a change.
What's the Best Wall Surface for Decals?
Decals stick best to smooth, clean, and dry indoor walls. A surface painted with a satin, semi-gloss, or eggshell finish is the sweet spot. These paints provide just the right amount of grip for the adhesive to bond perfectly.
You'll want to avoid heavily textured walls, like popcorn ceilings or rough plaster. The decal can’t get a flat, even grip, which usually leads to the edges peeling up over time. And critically, if you’ve just painted, you must let the walls fully cure for at least three to four weeks before applying any decals. Patience now prevents paint damage later!
Ready to create a magical space for your little one? At Quote My Wall, we offer a huge range of beautiful, safe, and renter-friendly decals for children's rooms. Explore our collection and find the perfect theme today.