

A UK Guide to Wall Decal Quotes for Your Home
Looking for a simple, stylish, and commitment-free way to inject some personality into a room? Wall decal quotes are a fantastic solution. For years, homeowners and renters across the UK have been using these vinyl transfers to make a space their own, avoiding the hassle and permanence of paint or wallpaper. They're a brilliantly creative and affordable way to turn a blank wall into a real talking point.
Bringing Your Walls to Life with Decal Quotes
We’ve all been there—staring at a blank wall, feeling totally uninspired. It's a space that’s just crying out for a bit of character, a story, or maybe a dose of daily motivation. But the thought of getting the rollers out or wrestling with wallpaper can feel like a massive undertaking. It takes time, money, and a level of commitment you might not be ready for, which is a big deal if you're renting and have restrictions to think about.
This is exactly where wall decal quotes shine. They aren’t just stickers; they're a form of accessible art that lets you express yourself in an instant. Think of them as the perfect accessory for your home—one you can use to add warmth, humour, or inspiration with practically zero fuss.
Why Are Decals Gaining Popularity?
It's no surprise that removable decor is becoming more and more popular. The UK wall art market, which includes these clever quotes, pulled in a massive USD 3,597.2 million in 2022. And it's not slowing down; forecasts predict that figure could hit USD 5,500.4 million by 2030. It just goes to show how many of us are looking for smarter ways to decorate.
This trend points to a real shift in how we think about our interiors. We want our homes to reflect who we are, but we also want the flexibility to change things up without a major overhaul.
The benefits are pretty compelling:
- Affordability: You get a high-impact look for a fraction of what you'd spend on a painter or new wallpaper.
- Easy Application: Most decals can be on your wall in under an hour. No special tools, no mess.
- Damage-Free Removal: Good quality vinyl peels off cleanly, which is a lifesaver for renters or anyone who likes redecorating often.
- Endless Customisation: Whether it's a motivational kick for the home office or a sweet lullaby in the nursery, you can find—or create—a quote for any room or mood.
This guide is all about giving you practical, real-world advice. Forget generic tips. My goal is to give you the confidence and know-how to choose, customise, and apply your decals like a pro for a project you'll love.
For more creative ways to liven up your space, it's always worth exploring different UK home decorating ideas. Ultimately, this is about turning an empty wall into a meaningful expression of you.
Finding the Perfect Quote and Style for Any Room

This is where the real fun begins—choosing the words that will bring your space to life. A thoughtfully chosen wall decal quote is more than just decoration. It sets a mood, sparks a conversation, or offers a quiet moment of reflection. The trick is to find a message that perfectly fits the room's purpose and, most importantly, your own personal style.
Try to think beyond the phrases you see everywhere. What feeling are you aiming for? A kitchen might be the perfect spot for a witty, food-related quip, while a bedroom often calls for something more serene and calming. The goal is to land on words that feel completely authentic to you and the life you live within those walls.
Matching the Quote to the Room
Let's talk about how different spaces can spark different ideas. The family living room, for example, is the heart of the home. This makes it the ideal canvas for words that speak of togetherness, laughter, and shared memories. A simple quote like "This is our happy place" or "Together is a wonderful place to be" can instantly reinforce that warm, communal feeling.
A home office, on the other hand, is all about focus and drive. A motivational or empowering phrase here can make a genuine difference during a long workday. Something short and sharp like "Create your own sunshine" or a line from an inspiring figure you admire can serve as a powerful mental reset whenever you glance up.
For a bit more inspiration on choosing the right wording, it's always a good idea to browse through a variety of quotes for walls stickers. Seeing different examples can help you discover ideas you might not have even considered.
Your quote should feel like a natural extension of the room's function. The best wall decal quotes don't just fill a space—they enhance its purpose and reflect the personality of the people who use it.
And if you want to make your walls truly unique, you might want to explore options for personalised wall art. This gives you the freedom to go beyond pre-made designs and create something that is entirely one-of-a-kind.
Selecting Typography and Font Style
Once you have your words, it’s time to think about the font. The typography is just as crucial as the quote itself; it’s the visual tone of voice for your message. The style you pick should complement your existing decor, not clash with it.
Here’s a quick guide to pairing fonts with common interior styles:
- Modern and Minimalist: This look is all about clean lines and simplicity. You can’t go wrong with crisp sans-serif fonts like Helvetica or Futura. Their straightforward, unadorned letterforms create a sleek and sophisticated feel.
- Rustic or Farmhouse: For that cosy, traditional vibe, a flowing script or a classic serif font with a handcrafted feel works beautifully. Think of fonts that look like they could have been handwritten or taken from a vintage print.
- Bohemian or Eclectic: This style thrives on personality and freedom. Feel free to be more playful here—mix different fonts or choose something bold and artistic that really makes a statement.
- Industrial: A space with exposed brick or metal accents calls for strong, blocky fonts. Stencil-style lettering or bold, condensed sans-serifs perfectly echo that raw, utilitarian aesthetic.
Choosing the Right Colour
Colour is your final tool for perfecting your wall decal. Your choice here can either make the words pop from the wall or blend in for a more subtle, textured effect. It all comes down to contrast.
For a bold, eye-catching statement, choose a decal colour that contrasts strongly with your wall paint. A black decal on a white wall is a timeless high-contrast look, but you could also get creative with a vibrant teal on a neutral grey wall for a modern pop.
If you’d rather have a more understated and integrated look, opt for a colour just a few shades lighter or darker than your wall. This creates a lovely tonal effect that adds depth and interest without overwhelming the space. A charcoal grey decal on a light grey wall, for instance, looks incredibly elegant and refined.
Still wondering where to start? This little table offers some inspiration for pairing quotes with different rooms around the house.
Wall Decal Quote Ideas By Room
| Room | Theme Idea | Example Quote Suggestion | Suggested Font Style |
|---|---|---|---|
| Kitchen | Culinary & Family | "The secret ingredient is love" | Playful Script or Bold Sans-serif |
| Bedroom | Serenity & Relaxation | "And so to dream" | Elegant Serif or Cursive |
| Nursery | Whimsical & Sweet | "Twinkle twinkle little star" | Rounded, Soft Font |
| Home Office | Motivation & Focus | "She believed she could so she did" | Clean, Modern Sans-serif |
| Hallway | Welcome & Warmth | "Hello lovely" | Casual Handwritten |
By thoughtfully combining the right words, font, and colour, you can create a wall decal quote that not only looks fantastic but adds a truly meaningful layer to your home's story. It's all about making your space feel like yours.
Getting Your Decal Placement Just Right
Getting the placement right is what makes a wall quote look like a stunning, integral part of the room, rather than just an afterthought. We’ve all seen it – a tiny decal looking lost and lonely on a huge feature wall, or a massive one overpowering a small nook. A few simple planning tricks are all it takes to make your decal look like it was always meant to be there.
First things first, grab your tape measure. Don't just eyeball it and hope for the best. You need to know the exact height and width of the wall space you're working with, whether you're hanging the quote above a sofa, a headboard, or a hallway console table.
Knowing your canvas helps you choose the right size decal to begin with. Here’s a good rule of thumb I always follow: if you're placing a decal over a piece of furniture, aim for it to be about two-thirds the width of the furniture. For instance, if your sofa is 180cm wide, a decal around 120cm wide will look perfectly balanced and intentional.
How to Visualise the Final Look
Once you have your measurements and a decal in mind, it's time for the most important part: visualisation. You absolutely have to see how the quote will sit in the space before you even think about peeling off the backing paper. This is where a brilliantly simple trick comes in.
Don't bother trying to hold the flimsy decal up to the wall; you'll never get a true sense of how it will look. Instead, make yourself a quick template.
- For smaller decals: Simply cut a piece of paper (or tape a few together) to the exact dimensions of your decal.
- For larger, more complex designs: Use low-tack masking tape to create an outline of the quote's shape and size right on the wall.
This hands-on approach is a game-changer. It lets you shuffle the template around, play with different heights, and step back to see how it looks from across the room. You’ll often find that what you imagined in your head is actually a few inches too high or slightly off-centre once you see a placeholder in the real world.
Classic Placement Ideas
Where you put your quote really depends on your room's layout and the vibe you’re going for. There aren't any strict rules, but some classic placements just work.
Have a look at these popular spots:
- Above Furniture: This is a classic for a reason. Centring a decal over a key piece like a bed, sofa, or cot creates an instant focal point. Just be sure to use a spirit level to get your template perfectly straight.
- To Create Vertical Height: Got high ceilings? Placing a taller, vertically-oriented quote in a narrow spot—like beside a door or between two windows—draws the eye upward and can make the room feel even grander.
- To Fill an Awkward Space: That empty corner or the blank wall on the stair landing? These are golden opportunities. A well-placed quote can add a pop of personality and interest where it's least expected.
- Asymmetrical Placement: Not everything needs to be dead centre. An off-centre placement can feel much more modern and dynamic. Try aligning the start of your quote with the edge of a piece of furniture for a chic, deliberate effect.
My Top Tip: Live with your template for a day or two. Stick your paper or masking tape outline to the wall and just leave it be. See how it looks in the morning sun versus your evening lamplight. A little bit of patience now can save you from placement regret later.
Ultimately, this planning stage is your secret weapon. Taking just 20-30 minutes to measure and map everything out is what ensures your wall decal looks balanced, intentional, and professionally applied. It’s that small bit of prep that delivers a massive impact.
A Practical Guide to Flawless Decal Application
Right, this is it—the moment of truth. Time to get your new wall decal quote up on the wall. It might feel a bit intimidating, especially if you've gone for a large design, but with a little prep and patience, the process is surprisingly straightforward. Getting that smooth, professional look is all about following a few key steps to make sure your vinyl sticks perfectly, without any of those frustrating bubbles or creases.
Honestly, the most important work happens before you even think about peeling the backing off. Your wall needs to be clean, dry, and ready to go. Nailing this prep work is non-negotiable if you want a long-lasting finish and it prevents pretty much every common application problem.
Preparing Your Wall Surface
First things first, let's talk paint. Vinyl decals love a wall with a satin or semi-gloss finish. These smoother surfaces give the adhesive something solid to grip onto. You can apply decals to matte or eggshell walls, but you’ll need to be extra thorough when you’re pressing the vinyl down to get a really strong bond.
No matter the paint type, the wall must be spotless. Give the entire area a good wipe with a damp cloth—just water or a tiny bit of mild soap will do—to get rid of any dust or grime. Then, let it dry completely. And I mean completely. 24 hours is a good rule of thumb. Sticking a decal on a damp or dirty wall is a surefire way to find it peeling off later.
A crucial tip if you’ve just painted: wait at least three weeks before applying any wall decals. Fresh paint needs time to 'cure' and release solvents. If you stick the vinyl on too soon, you’ll trap those gases and end up with bubbles under your beautiful new quote.
The Essential Tools for the Job
You don't need a massive toolbox for this. Most of what you need is probably tucked away in a drawer somewhere.
Before you start, grab these bits and bobs:
- A spirit level – because nobody wants a wonky quote.
- A tape measure for getting the positioning just right.
- Masking tape to hold the decal in place while you work.
- A squeegee or a firm plastic card (a credit card works a treat).
- A soft, dry cloth for the final press.
Having everything within arm's reach makes the whole process smoother. There’s nothing worse than being mid-application, holding a sticky decal in place, only to realise your squeegee is on the other side of the room.
The image below gives a quick overview of the planning stages that happen before you get to the application itself.
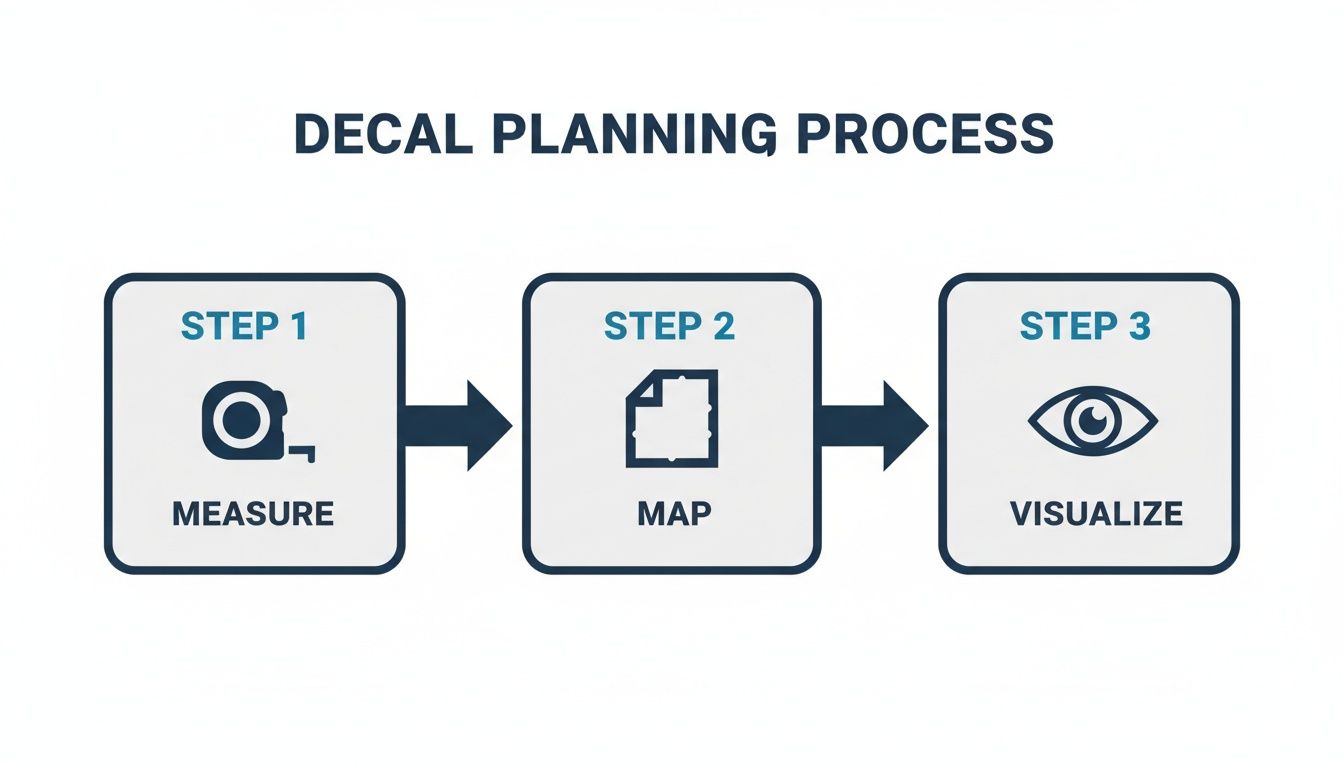
As you can see, the real work of measuring and mapping out your space is what sets you up for success.
Applying the Decal with the Hinge Method
For any decal bigger than a small sticker, the "hinge method" is the technique the pros use. It guarantees a straight, bubble-free finish every single time by letting you apply the decal in two manageable halves.
Here’s a breakdown of how it works:
- Position and Tape: With the backing paper still attached, hold the decal against the wall. Use your spirit level to get it perfectly straight. Once you’re happy, run a long strip of masking tape vertically down the centre, sticking it to both the decal and the wall. This is your "hinge."
- Peel One Side: Pick a side to start with. Lift that half of the decal and carefully peel the backing paper away from the clear transfer tape, stopping at your central hinge. Snip off the loose backing paper.
- Squeegee the First Half: Holding the transfer tape taut and away from the wall, start smoothing the vinyl down. Use your squeegee and work from the centre hinge outwards, applying firm, even pressure to push out any air.
- Repeat on the Other Side: Now you can remove the central masking tape hinge. Gently lift the second half of the decal and peel away the remaining backing paper.
- Squeegee the Second Half: Just like before, work from the centre outwards. Smooth the rest of the vinyl onto the wall with your squeegee, overlapping your strokes to make sure the whole design is pressed down firmly.
If you’d like a more in-depth look, our guide on how to apply wall stickers takes you through every single step in more detail.
The Final Reveal
Once the whole decal is on the wall, give it one last going-over with the squeegee. This is called "burnishing," and it activates the adhesive. Pay extra attention to the edges of all the letters to ensure a really solid bond.
And now for the best bit. Starting at a top corner, slowly peel the clear transfer tape back on itself at a very sharp, flat angle—don't pull it straight out from the wall. If a letter tries to lift off with the tape, just lay the tape back down, give that spot a firm rub with your finger, and then continue peeling.
With the transfer tape gone, take your soft cloth and gently press over the entire quote one last time. Step back and admire your handiwork. You've done it
Keeping Your Wall Decal Clean and Removing It Safely
So, your beautiful wall decal quote is up, and it looks fantastic. The best part? Keeping it that way is incredibly easy. Good quality vinyl is tough stuff, designed to stay looking sharp for years with hardly any effort from you. Forget special cleaners or complicated routines.
For day-to-day care, a quick dust is all it needs. If you do get a splash or a grubby mark on it – something that's bound to happen in a kitchen or a busy hallway – just wipe it gently with a soft, damp cloth. Steer clear of any abrasive scourers or harsh chemical sprays, as they can scratch the vinyl or weaken the adhesive. A simple wipe-down is all it takes.
Your Guide to Damage-Free Removal
One of the great things about wall decals is that you're not stuck with them forever. This makes them perfect if you're renting or just love to switch up your style with the seasons. When you decide it's time for a change, taking them down is straightforward and, when done right, won't leave a trace.
The real secret to a clean removal? A little bit of gentle heat. This simple trick softens the adhesive, letting the vinyl peel away from the wall without taking the paint along for the ride.
Pro Tip: Your hairdryer is your best friend here. A few seconds on a low heat setting works wonders to loosen the adhesive's grip, making the whole job a doddle.
The Safe Removal Process
Ready to take your decal down? It only takes a few minutes. Just follow these steps, and your wall will be left in perfect condition, ready for its next look.
Here's how to get a clean finish every time:
-
Gently Warm the Vinyl: Grab your hairdryer and set it to its lowest heat. Hold it about 15-20cm from the decal, moving it back and forth over the area you're starting with. You only need about 30 seconds – the vinyl should just feel slightly warm to the touch.
-
Lift a Corner: Once it's warm, use your fingernail or a plastic scraper to carefully lift an edge or corner of the letter.
-
Peel Slowly and Low: This is the crucial bit. Pull the decal back on itself at a very flat angle, keeping it almost parallel to the wall. Whatever you do, don't pull it straight out towards you – that's what creates tension and can chip the paint.
-
Work in Small Sections: Keep applying a little heat and peeling slowly. If you feel any resistance at all, just give that spot another quick blast of warmth.
It's rare for good quality vinyl to leave any sticky residue behind, but if it does, you can usually just rub it away with your finger or a cloth with a dab of soapy water.
Following this simple method ensures your walls stay flawless. For a more detailed walkthrough, check out our guide on how to remove wall stickers. This worry-free process gives you the freedom to change your decor whenever inspiration strikes.
Got Questions About Wall Decal Quotes? We've Got Answers
We've walked through everything from picking the perfect quote to getting it up on the wall, but I know there are always a few lingering questions. That's completely normal. Let's tackle some of the most common queries we get, so you can feel totally confident before you get started.
Think of this as your go-to FAQ for all those little "what ifs." We'll cover everything from tricky wall surfaces to how long your new vinyl art will actually last.
Can I Put Wall Decal Quotes on Textured Walls?
This is probably the number one question we hear, and the honest answer is: it depends. Perfectly smooth walls are the dream canvas for vinyl, but you can absolutely apply decals to walls with a light texture. Think of that common "orange peel" finish you see in so many UK homes – that's usually fine.
The whole game is getting enough of the adhesive to make solid contact with the wall. Here's a great little trick I've learned: after you've used your squeegee, grab a tennis ball and firmly roll it over the entire design. This helps press the vinyl into all the tiny grooves and dips, creating a much stronger bond.
However, if you're dealing with heavily textured surfaces like popcorn ceilings or very rough plaster, it's going to be a struggle. For these, I strongly recommend you test a small, discreet area first. Using a tiny sample or an offcut from the decal can save you a world of frustration.
The quality of the vinyl itself makes a huge difference here. Our premium vinyl uses a strong, yet removable, adhesive designed to work on the widest possible range of common interior walls.
How Long Do Vinyl Decals Last and Are They Waterproof?
When you put the effort into choosing and applying a decal, you want it to stick around! The great news is that a high-quality vinyl wall decal, applied indoors and away from direct, harsh sunlight, will easily last for 5+ years without peeling, cracking, or fading. They really are a durable, set-it-and-forget-it decor solution.
Now, about water. Vinyl decals are water-resistant, but they aren't fully waterproof. This is a key distinction. It means they’re perfectly happy in rooms with a bit of humidity, like kitchens and bathrooms. You can wipe them down with a damp cloth to get rid of splashes or condensation without a problem.
What you can't do is put them somewhere that gets a constant, direct soaking. Sticking one inside your shower enclosure, for instance, is a no-go; the adhesive will eventually give up. But on the main bathroom wall, away from the direct spray? Go for it.
Is It Possible to Create a Custom Wall Decal Quote?
Absolutely! This is where you can really let your personality shine. Creating a custom design is one of the most rewarding parts of using wall decals. It’s your chance to go beyond the popular phrases and turn something deeply meaningful into a stunning piece of art.
The possibilities are endless. You could immortalise a funny family saying, a line from your wedding song, or your child’s name in a beautiful script for their nursery.
Getting it made is usually very straightforward:
- Type Your Text: You provide the exact words, names, or dates.
- Choose Your Font: Pick from a huge library of styles to match your decor.
- Pick Your Colour: Find the perfect shade to pop against or blend with your wall colour.
- Select Your Size: Specify the exact dimensions to fit your space like a glove.
It's the ultimate way to make sure your wall decor is a one-of-a-kind statement about you and your home.
Will Removing the Decal Damage My Paint?
This is a big worry, especially for renters or anyone who just loves to switch things up. The good news is that high-quality vinyl decals are specifically designed to be removed cleanly, leaving your paintwork untouched—as long as the wall was in good condition to start with.
The secret to a perfect, damage-free removal is gentle heat.
You don't need any special tools. Just grab a standard hairdryer on a low heat setting. Gently warming the vinyl softens the adhesive, making it pliable and easy to peel away. Once the vinyl feels slightly warm, you can get a fingernail under a corner to lift it.
Here’s the most important part of the technique: peel the decal back on itself at a flat angle, almost parallel to the wall. Never pull it straight out towards you. That creates tension and is what can cause paint to chip. This simple, patient method makes wall decals a brilliant, worry-free option for both temporary and long-term decorating. You get total creative freedom with zero long-term commitment.
Feeling inspired to transform your space? At Quote My Wall, we offer a huge range of high-quality wall decal quotes and custom designs to bring your vision to life. Explore our collection and find the perfect words for your walls today.