
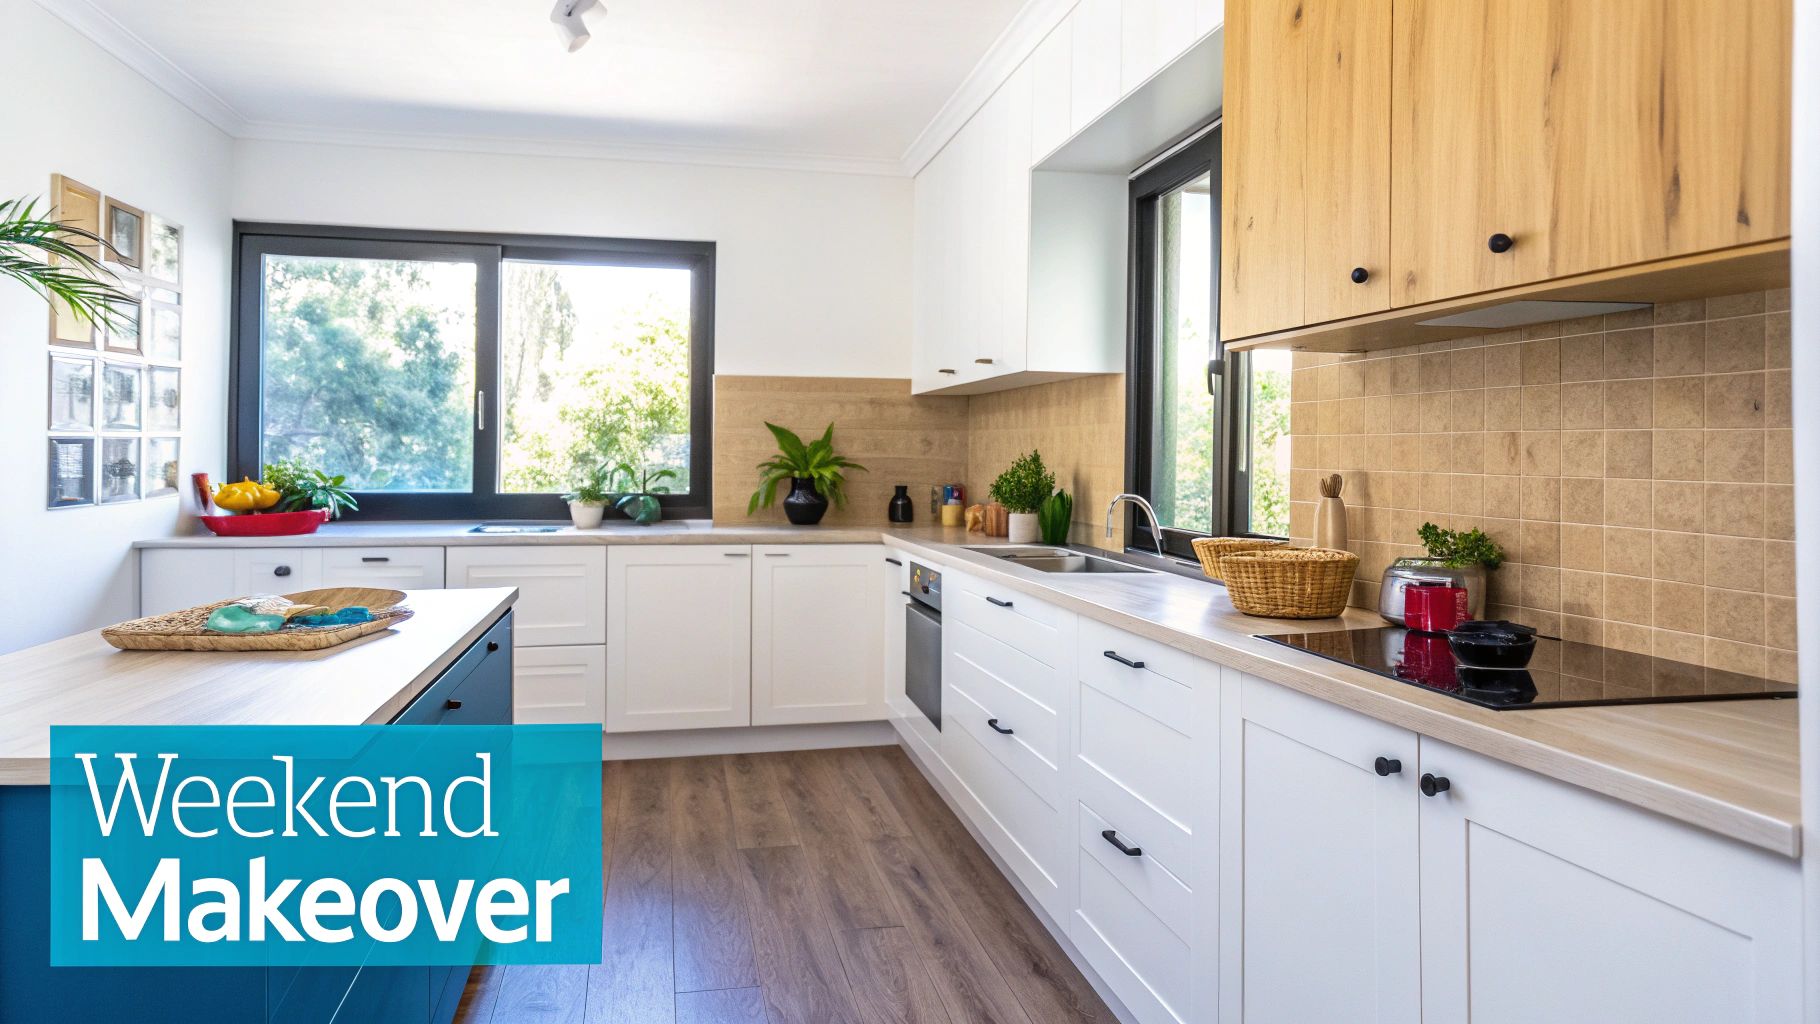
Stickers For The Kitchen A Complete UK Makeover Guide
Staring at your dated kitchen and dreading the thought of the cost and chaos that comes with a full renovation? There’s a better way. High-quality stickers for the kitchen offer a genuinely stunning, affordable, and quick fix. Forget those flimsy decals you might remember from years ago; today's vinyl wraps and tile stickers can completely transform your backsplash, cabinets, and appliances over a single weekend.
A Fresh Kitchen Without The Renovation Headache
Picture this: you swap out those tired, old-fashioned tiles for a chic, contemporary pattern. Or maybe you cover up those scuffed cabinet doors with a sleek, modern finish. That’s the real power of kitchen stickers. It’s a design solution that puts you in control, letting you achieve a dramatic new look without the dust, disruption, or daunting expense of a traditional remodel.
Think of this guide as your complete introduction to making it happen. We’ll walk through how these simple yet incredibly effective tools can breathe new life into the heart of your home, turning what feels like a massive project into a satisfying and manageable weekend job.
Why Are Kitchen Stickers So Popular?
The appeal of kitchen stickers isn't just about looks; it's rooted in practicality and accessibility. For so many of us, a full-scale renovation is simply off the table because of time or money. Stickers offer an immediate, high-impact solution that fits perfectly with our busy lives.
It's a trend you can see right across the UK as more homeowners embrace clever DIY solutions. The custom printing market, which includes all these brilliant personalised vinyl products, hit a value of USD 2,208.9 million this year and is on track to nearly double by 2030. This boom is powered by products like those from Quote My Wall, which make durable, easy updates possible using premium vinyl that’s built to last for years.
Kitchen stickers bridge the gap between the kitchen you have and the kitchen you want. They offer a creative, commitment-free way to play with colours, patterns, and textures, giving you that high-end look for a fraction of the price and effort.
What Can You Achieve With Stickers?
The beauty of kitchen stickers is their versatility—almost no surface is off-limits. You can create a complete, cohesive makeover by focusing on a few key areas in your kitchen. The possibilities are endless, but here are some of the most popular ways people use them:
- Backsplash Transformation: Cover dated or plain tiles with anything from classic subway tile patterns to bold geometric designs.
- Cabinet Upcycling: Give old cabinets a new lease on life with solid colour vinyl wraps, instantly changing them from dark wood to a fresh, clean white.
- Appliance Refresh: Disguise scratches or update the colour of your fridge, dishwasher, or washing machine so it all matches your new decor.
- Wall Accents: Add a splash of personality with decorative decals, quotes, or murals without the permanence of paint or wallpaper.
If you’re hunting for more inspiration to get that fresh new look, you can explore other budget-friendly room makeover ideas that work beautifully alongside a sticker project.
Choosing The Perfect Kitchen Sticker For Any Surface
Let's be honest, not all stickers are cut from the same cloth. This is particularly true when you’re talking about a kitchen – a room that has to deal with steam, splashes, and daily wear and tear. Picking the right material isn't just about how it looks; it's about making sure your hard work lasts.
Think of it like choosing a coat for a winter storm. A paper-thin jacket won't do you much good in a blizzard, and the same logic applies here. A standard paper sticker just won't stand a chance against kitchen life. The real hero of this story is high-quality vinyl.
Why Vinyl Is The Go-To For Kitchens
Vinyl is, hands down, the champion material for pretty much any kitchen project. Why? It's all down to its practical, non-porous surface, which makes it naturally waterproof and tough against grease and food stains. That means last night's spaghetti sauce can be wiped away in seconds, without leaving a mark or causing the sticker to peel.
Unlike paper, which turns to mush when wet and soaks up every little stain, vinyl acts as a protective shield for whatever surface it's covering. The premium vinyl we use at Quote My Wall is engineered to be durable, washable, and long-lasting, keeping your new look fresh for years to come.
To help you get a clearer picture, here’s a quick comparison of the materials you might come across.
Kitchen Sticker Material Comparison Guide
| Material Type | Key Features | Best For | Pros | Cons |
|---|---|---|---|---|
| Premium Vinyl | Waterproof, washable, scratch-resistant, durable adhesive. | Backsplashes, cabinets, worktops, appliances. | Highly durable, easy to clean, huge range of designs, long-lasting. | Higher initial cost than paper, can be tricky to apply on large surfaces. |
| Tile Decals (Vinyl) | Pre-cut to standard tile sizes, heat & water-resistant. | Covering existing ceramic tiles on a backsplash or wall. | Quick, mess-free transformation, completely reversible. | May not fit non-standard tile sizes perfectly. |
| Static Cling Vinyl | Adhesive-free, uses static to stick to smooth surfaces. | Fridge doors, glass cabinet doors, temporary decorations. | Reusable, easy to remove without residue, repositionable. | Not suitable for high-heat areas, less permanent grip. |
| Paper-Based Stickers | Inexpensive, easy to print on. | Pantry labels in dry areas, temporary use away from water/heat. | Low cost, widely available. | Not waterproof, tears easily, absorbs stains, not durable for kitchen use. |
As you can see, investing in a quality vinyl product from the start saves a lot of headaches down the line. It's simply built for the job.
Matching The Sticker To The Surface
Different spots in your kitchen face different challenges, so it pays to match the right type of sticker to the right job. While most are made from that brilliant, durable vinyl we just talked about, they come in a few different forms.
Here's a quick rundown of what you'll find:
-
Tile Stickers: These are your best friend for a tired-looking backsplash. They’re individually cut decals designed to fit right over your existing ceramic tiles. It's the perfect way to get a whole new look—from intricate Moroccan patterns to classic subway tiles—without the cost and mess of a full re-tiling job.
-
Vinyl Wraps: These come on larger rolls and are ideal for covering big, flat surfaces like cabinet doors, worktops, or even your fridge. A good quality wrap gives a sleek, seamless finish, making it possible to turn dated wooden cabinets into something sharp and modern. For more on this, check out our guide on how to cover kitchen cabinets.
-
Decorative Decals: These are more about adding a bit of personality. Think of a favourite quote on a wall, stylish labels for your pantry jars, or a subtle pattern to break up a plain space. They add character without needing to cover a whole area.
The secret to a successful kitchen makeover lies in selecting a material that is not only beautiful but also functional. Heat resistance and washability are non-negotiable features for any sticker used near hobs, sinks, or food preparation areas.
The Non-Negotiables: Heat And Water Resistance
Your kitchen is a hive of activity. One minute it's calm, the next the kettle's boiling, a pan is simmering, and the tap is running. This constant change in temperature and humidity means that heat and water resistance aren't just nice-to-haves; they are absolutely essential.
A quality kitchen sticker must be able to handle:
- Steam from cooking: Steam from kettles and pans is the arch-enemy of weak adhesives, causing inferior stickers to lift and peel right off the wall.
- Splashes from the sink: Properly waterproof vinyl stops water from getting underneath, which prevents mould from growing and the adhesive from breaking down.
- Heat from appliances: While you should never expose any vinyl sticker to a direct flame, heat-resistant options are a must for walls behind hobs (especially electric or induction) or next to ovens.
- Regular cleaning: Kitchens need to be wiped down constantly. A washable sticker will hold its own against gentle, non-abrasive cleaners without the design fading or getting scratched.
When you prioritise these features, your DIY project becomes a durable, practical upgrade rather than just a temporary fix. This focus on quality is what separates a professional-looking finish that lasts for years from a peeling, disappointing mess. At Quote My Wall, we specialise in materials that meet these tough standards, giving you the confidence that your new look is built to handle real kitchen life.
How To Prepare Your Surfaces For A Flawless Finish
Here’s a little secret from those of us who’ve done this a thousand times: the key to a professional, bubble-free finish has almost nothing to do with the actual sticking. It’s all in the prep work.
Think about it like painting a room. You wouldn't just slap a new coat of paint over a dusty, greasy wall and hope for the best, would you? The exact same logic applies here. A perfectly clean surface is the only foundation for a flawless, long-lasting result.
Spending a little time on prep now ensures the adhesive on your vinyl stickers can create the strongest possible bond. This simple effort is what stops those annoying peeling corners and frustrating air bubbles from showing up weeks or months later. It’s the difference between a quick fix that looks cheap and a durable, stunning transformation.
The Essential Cleaning And Degreasing Process
Kitchens are naturally greasy places. Even if you can’t see it, a fine layer of cooking oil, food splatters, and residue from cleaning sprays settles on everything from cabinets to backsplashes. This invisible film is the number one enemy of sticker adhesion.
Your first job is a thorough clean. Start by washing the surface with warm, soapy water to get rid of any obvious dirt and grime. But for the sticker to really grab hold, you need to go one step further and get rid of all the grease. To learn how to do this properly, you can discover more about using a safe kitchen degreaser to tackle those stubborn films you might not even see. Don’t skip this – it's absolutely vital for making sure your stickers stay put.
Once it’s clean and degreased, the surface must be 100% dry. Use a clean, lint-free cloth to wipe it down, then just let it air dry for at least an hour. Any trapped moisture will get between the surface and the adhesive, leading to peeling down the line.
The Final Wipe-Down For Perfect Adhesion
Want a pro tip that makes all the difference? A final wipe with isopropyl alcohol (you might know it as rubbing alcohol). This little trick zaps any lingering, invisible residues left behind by your cleaning products, creating the perfect, sterile surface for the vinyl.
Just pop a small amount onto a clean microfibre cloth and give the entire area a quick wipe. The alcohol evaporates in seconds, leaving behind a perfectly prepped surface that’s ready for your sticker. It might seem like a tiny detail, but this is the secret weapon professionals use to guarantee a perfect stick, every single time.
A perfectly clean, dry, and degreased surface allows the sticker’s adhesive to create a powerful, uniform bond. Skipping this crucial preparation is the single biggest cause of application failure, leading to bubbles, lifting edges, and a finish that won't stand the test of time.
Measuring Twice To Buy Once
Right, before you get carried away and start peeling that backing paper, it’s time to grab the tape measure. Rushing this part is a classic mistake that leads to wasted material and the sheer frustration of being just a few centimetres short. Getting it right the first time saves you time, money, and a massive headache.
A simple, methodical approach is all you need. Grab a tape measure, a pencil, and a notepad.
Your Measurement Checklist:
- Measure Each Surface Individually: Don't just assume two cabinet doors are identical. Measure the height and width of every single piece you plan to cover.
- Account for Edges and Wraps: Planning to wrap the vinyl around the edges of a door or worktop? You’ll need to add the thickness of that edge to your measurements. For a 2cm thick door, for instance, you'll need to add at least 2cm to your width measurement to cover it cleanly.
- Add a Bleed Margin: This is a big one. Always add an extra 5-10cm to both your height and width measurements. This "bleed" or "overage" is your safety net. It gives you a margin for error and makes it so much easier to trim for a perfect, crisp fit once the sticker is applied.
- Sketch a Simple Diagram: For tricky areas, like a backsplash with plug sockets, a quick sketch with all your measurements clearly labelled is a lifesaver. This little visual guide will be invaluable when you start cutting and applying your kitchen stickers.
By following these simple prep and measurement steps, you’re setting yourself up for a smooth, stress-free application and a beautiful finish that looks like you hired a professional.
Your Step-By-Step Sticker Application Guide
Right, this is where the fun really begins. With your surfaces prepped and your kitchen stickers at the ready, it's time to start the transformation. We’ll break down the whole process into simple, manageable steps, turning what might feel a bit daunting into a really satisfying DIY job.
Think of applying a large sheet of vinyl like putting a screen protector on a new phone; patience and a steady hand are your best friends here. The aim is to work slowly and methodically. This way, you'll avoid those dreaded air bubbles and creases that can spoil the final look. Get the technique right, and you'll end up with a smooth, professional finish that looks like an expert did it.
This diagram shows you exactly what we mean by proper prep – it’s all about getting the foundation right.
 Following these three steps – clean, degrease, and dry – makes sure there's absolutely nothing left behind to interfere with the adhesive. It’s the secret to a flawless application that lasts.
Gathering Your Essential Toolkit
Before you dive in, it pays to get a few simple tools together. It'll make the whole process much smoother and give you a far better result. You don't need a full workshop, just a handful of basics.
- Squeegee or Credit Card: This is your most important tool. You’ll use it to smooth the vinyl and push out any air bubbles. A squeegee with a felt edge is ideal as it won't scratch the sticker's surface.
- Sharp Craft Knife: Absolutely essential for trimming excess vinyl around edges, plug sockets, and corners with precision. A fresh blade makes all the difference.
- Tape Measure and Pencil: Perfect for double-checking measurements and making any final marks on the sticker's backing paper before you commit.
- Spray Bottle with Water: This is your secret weapon for the 'wet application' method, which we’ll get to in a moment. You can add a single, tiny drop of washing-up liquid to the water.
The Standard Application Method Step-By-Step
For smaller bits and pieces like individual tile stickers or decorative decals, the standard 'dry' method is usually the quickest and easiest way to go.
- Position Your Sticker: Hold the sticker against the surface to decide on its final placement. If it’s a larger piece, you can use a small bit of masking tape at the top to create a hinge, holding it in place.
- Peel Back a Small Section: Whatever you do, don’t rip all the backing paper off at once! Just peel back the top 5-10cm and fold the backing paper down on itself.
- Apply and Squeegee: Press the exposed sticky edge firmly onto the surface. Now, grab your squeegee and, working from the centre outwards, apply firm, even pressure to smooth the vinyl down.
- Continue and Smooth: With one hand, slowly pull away more of the backing paper. With the other, keep smoothing the sticker down with your squeegee. This methodical approach pushes air out as you go, preventing bubbles from forming.
- Trim the Excess: Once the entire sticker is on, use your sharp craft knife to carefully trim any overhanging material. This gives you that clean, perfect edge.
For an even more detailed walkthrough, you can check out our comprehensive guide on how to apply wall stickers.
Mastering The Wet Application Method
When you're working with large vinyl sheets, like for a worktop or a fridge door, the 'wet application' method is a genuine game-changer. It gives you a little wiggle room, letting you slide and reposition the vinyl for perfect alignment before it sticks for good.
The wet application technique creates a temporary cushion of water between the adhesive and the surface. This makes the sticker repositionable, allowing you to slide it into the perfect spot and eliminate air bubbles with ease. It's the pro's trick for getting big projects right.
Simply give both the surface and the sticky side of the vinyl a light mist with your water spray. Place the vinyl onto the wet surface, and you'll notice you can gently move it around. Once you're completely happy with its position, use your squeegee to push the water out from the centre to the edges. Over the next few hours, the water will evaporate, and the adhesive will form a strong, permanent bond.
This trend of using specialised vinyls for home updates is really taking off in the UK. The market for self-adhesive labels, which includes these durable kitchen stickers, is projected to be worth a massive USD 2.39 billion by 2031. At Quote My Wall, our products tap directly into this demand. We offer washable, customisable vinyls that are even tough enough to go through a dishwasher, making them perfect for busy modern homes.
Keeping Your New Look Fresh for Years to Come
You’ve put in the effort, and your kitchen looks fantastic. The good news? Keeping it that way is surprisingly easy. High-quality vinyl is made for the realities of a busy kitchen, so it’s tough, durable, and a breeze to look after.
Maintaining your new surfaces is far simpler than you might imagine. Unlike porous materials that soak up every little spill, premium vinyl acts like a shield. That means you can stop worrying about every splash of coffee or stray bit of bolognese.
This desire for durable, easy-to-manage home updates is a big reason why the self-adhesive market is booming. In the UK alone, the market (which includes these clever kitchen stickers) was valued at £10.11 billion in 2022 and is expected to reach £12.45 billion by 2030. People want DIY solutions that look great and actually last. High-quality vinyl that holds up for 5+ years indoors, like the options from Quote My Wall, is a smart choice for both renters and homeowners who want an update without the waste. You can find out more about these market trends and the drive for durable products.
Simple Cleaning for a Lasting Finish
Keeping your vinyl stickers looking spotless is refreshingly straightforward. You can put away the harsh chemicals and abrasive scourers – in fact, they’re the last thing you want to use. A gentle touch is all it takes to handle everyday kitchen mess.
For day-to-day cleaning, just grab a soft microfibre cloth and some warm, soapy water. A gentle wipe is usually enough to lift off grease, food splatters, and fingerprints. To finish, give it a quick once-over with a dry cloth to prevent any water marks from forming.
What Not to Use on Your Vinyl:
- Abrasive Cleaners: Things like scouring powders or creams will scratch the vinyl and ruin its finish for good.
- Bleach or Ammonia-Based Products: These harsh chemicals are notorious for causing colours to fade over time. Stick to pH-neutral cleaners.
- Scouring Pads or Steel Wool: Never, ever use anything abrasive. Soft cloths and sponges are your best friends here.
A Reversible Update – Perfect for Renters
Perhaps one of the best things about kitchen stickers is that they're not a life sentence. They're completely removable, which makes them a dream come true for renters or anyone who simply loves to switch up their decor every few years.
The real magic of quality vinyl is in the adhesive. It’s engineered to be strong enough to stay put for years, but it peels away cleanly when you want it to, leaving the surface underneath exactly as it was. It's the ultimate peace-of-mind update.
When it’s time to move out or you just fancy a change, taking them down is simple and won't cause any damage. All you need is a hairdryer.
How to Remove Stickers Without Leaving a Trace:
- Warm It Up: Set your hairdryer to a low or medium heat. Hold it about 15-20 cm away and gently warm the sticker, moving the hairdryer back and forth for about a minute to soften the adhesive.
- Lift a Corner: Once the vinyl is warm and pliable, use your fingernail or a plastic scraper (like a credit card) to carefully lift a corner.
- Peel Slowly: Get a good grip and peel the sticker back on itself at a shallow angle. Don’t just pull it straight out. If it feels a bit stubborn, just give it another quick blast of heat.
- Wipe Away Any Residue: Most of the time, it will come off perfectly clean. If you spot any lingering stickiness, a bit of soapy water or a dab of rubbing alcohol on a cloth will get rid of it in seconds.
This simple method means your original tiles, cabinets, or walls will be left in pristine condition, just as you found them.
Inspiring Design Ideas For Your Kitchen Makeover
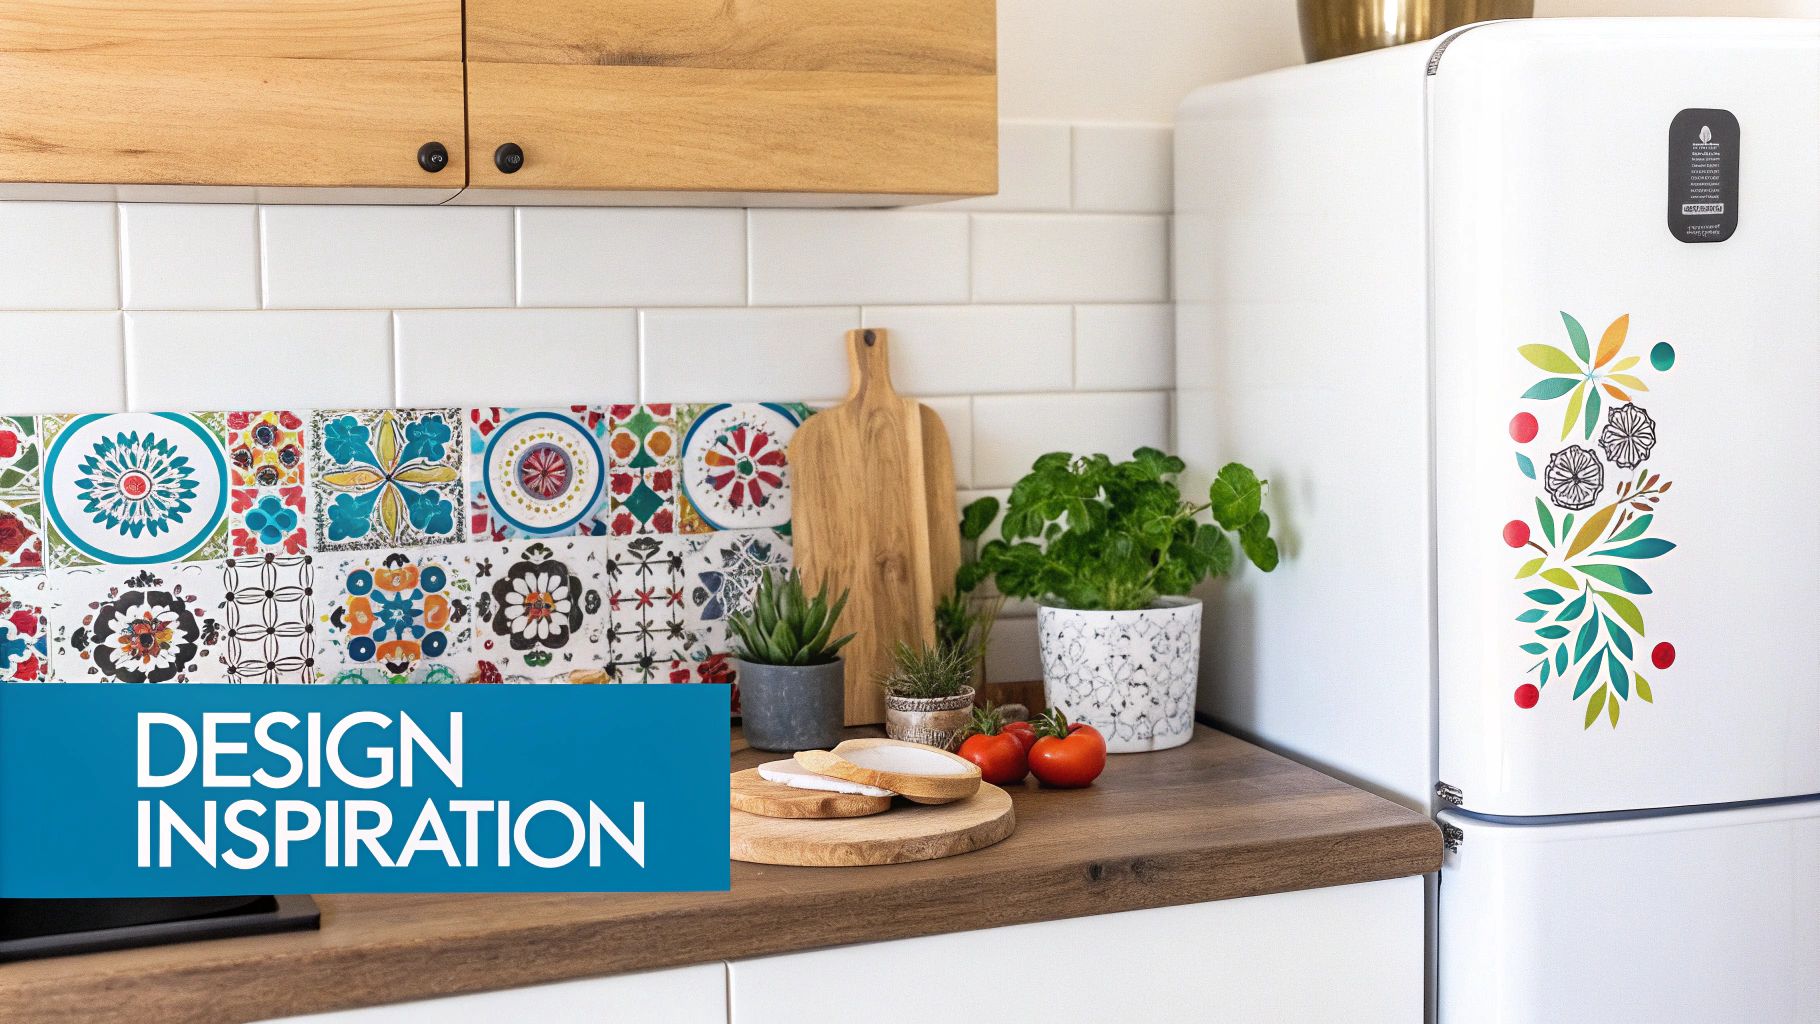
Right, the prep work is done and you know how to apply them. Now for the fun part: unleashing your inner designer! This is where you get to see just how creative you can be with stickers for the kitchen. They’re so much more than a simple cover-up; think of them as your secret weapon for expressing your style and completely reimagining your space.
Whether you're dreaming of a sleek, modern kitchen or a cosy, rustic retreat, there’s a design out there with your name on it. The sheer variety of patterns, colours, and textures means you can capture almost any aesthetic without the cost and chaos of a full renovation. Just look at your kitchen as a blank canvas waiting for your touch.
From Modern Minimalist To Rustic Farmhouse
Your personal taste should guide every decision. The beauty of stickers is how effortlessly they can bring a specific design vision to life, changing the entire mood of your kitchen with a few simple updates. They're incredibly adaptable, no matter what look you're going for.
Here are a few popular themes to get you started:
- Modern and Sleek: This look is all about clean lines. Try a matte black or high-gloss white vinyl wrap on your cabinets. To finish it off, a backsplash with a subtle, geometric pattern creates a sophisticated, uncluttered feel.
- Rustic Farmhouse Charm: Want to add some warmth? Faux-wood grain wraps on worktops or cabinets are perfect. Pair them with tile stickers that look like classic metro tiles or even hand-painted ceramics.
- Bold and Eclectic: Don't hold back! A vibrant, patterned vinyl can turn a boring old fridge into a stunning focal point. Or, inject some serious personality with a colourful terrazzo-style backsplash. For more ideas, have a look at our guide to the perfect bathroom and kitchen makeover product.
Thinking Beyond The Obvious
Backsplashes and cabinets are the go-to choices, but why stop there? The real magic happens when you start thinking about the smaller details that can pull the whole room together. These little touches often have the biggest impact on how a space feels.
Your kitchen makeover doesn't have to stop at the big surfaces. Think creatively about how decorative and functional stickers can add layers of personality and order, turning a functional room into a space that truly reflects you.
Why not try some unexpected applications? You could add a touch of elegance with a beautiful wall quote above your breakfast bar. Or, create a set of stylish, custom labels for your pantry jars and spice containers to get organised. Even using a frosted or patterned film on a kitchen window can add privacy without blocking that lovely natural light. At Quote My Wall, our customisation options mean we can help bring any idea to life, making sure your kitchen is a true reflection of you.
Your Kitchen Sticker Questions Answered
Even with all the tips and tricks, you might still have a few lingering questions. That's perfectly normal! Let's tackle some of the most common queries we hear, so you can get started on your kitchen project with total confidence.
Are Kitchen Stickers Safe to Use Behind a Hob?
This is probably the most important question of all, and the answer is all about safety first. While our high-quality vinyl is heat-resistant, it should never come into contact with a direct flame.
For gas hobs, we strongly recommend leaving a gap of at least 25-30cm between the flame and the sticker. It’s a non-negotiable for safety.
Things are a bit more relaxed with electric or induction hobs, as the heat isn't as direct. However, it’s always a good idea to double-check the specific heat resistance of the product you choose. If you want complete peace of mind, a popular trick is to place a clear glass or acrylic panel over the stickers – you get the look you want, with an added layer of protection.
Will the Stickers Damage My Surfaces When I Take Them Off?
This is a huge concern, especially if you're renting. The good news is, you can breathe easy. Premium stickers for the kitchen are engineered to be removed without a fuss from smooth, non-porous surfaces.
Just like we talked about earlier, a bit of gentle heat from a hairdryer works wonders. It softens the adhesive, letting the sticker peel away cleanly without leaving that frustrating sticky residue or pulling up paint (as long as it was properly cured). It makes it a completely stress-free way to update your space.
The real secret lies in the quality of the vinyl and its adhesive. Cheaper, low-grade stickers can be a nightmare, leaving behind a gummy mess or even damaging the surface. It’s why investing in a quality product is so crucial for a temporary design fix.
How Do I Clean Kitchen Stickers Without Making Them Peel?
It's surprisingly simple. Just grab a soft cloth, some mild soap and water, or a gentle all-purpose cleaner.
The golden rule is to avoid harsh chemicals, bleach, or anything abrasive like a scouring pad. These can scratch the vinyl’s surface or attack the adhesive at the edges, causing it to lift. A quick, gentle wipe-down is all it takes to keep your stickers looking brand new for years.
Can I Apply Stickers Over Existing Grout Lines?
For the best and most long-lasting result, it’s always better to apply stickers directly onto the tiles themselves, so they sit neatly within the grout lines.
If you lay a large sheet over the top of a tiled area, the grout lines can sometimes show through, and you risk air pockets forming over time. Individual tile stickers are brilliant for this job, as they completely refresh the look of old tiles while keeping the authentic feel of a properly grouted wall.
Ready to kickstart your kitchen makeover? Have a look at the huge range of durable, stylish, and fully customisable stickers for the kitchen at Quote My Wall. You're sure to find the perfect design to bring your vision to life. https://www.quotemywall.co.uk