
How to Cover Kitchen Cabinets A Complete DIY Guide
Fancy a kitchen refresh but can't face the chaos of a full renovation? You're not alone. The good news is, you don't need to rip everything out to get a stunning new look.
When people ask how to cover kitchen cabinets, the simplest answers are often the best: either use a quality peel-and-stick vinyl for a fast, reversible change, or grab a tin of specialised cabinet paint for something more permanent. Both can completely change the feel of your kitchen without the hefty price tag or mess of a total replacement.
Your Guide to Covering Kitchen Cabinets
A kitchen update doesn't have to mean weeks of living with dust and disruption. Sometimes, the most dramatic transformations are just surface-deep, and giving your cabinets a facelift is one of the smartest ways to modernise your space. It's often something you can tackle in a single weekend on a shoestring budget.
Which route you take really boils down to three things: how much you want to spend, your comfort level with DIY, and whether you're after a temporary or a forever fix.
We're going to dive into the three most popular and effective methods for breathing new life into tired kitchen cupboards:
- Vinyl Wrapping: This is a fantastic, renter-friendly solution. It involves applying a tough, self-adhesive film that comes in a massive range of finishes, from solid matte colours to incredibly realistic wood grains.
- Painting: The classic choice, and for good reason. Painting gives you limitless colour options. Get the prep work right and use a high-quality cabinet paint, and you’ll end up with a durable, professional-looking finish that lasts for years.
- Refacing: This is the most involved of the three. It means replacing the doors and drawer fronts entirely while keeping the cabinet boxes. It gives you the look of a brand-new kitchen for a fraction of the cost.
Thinking through the pros and cons of each will help you land on the right approach. For example, if you're also planning to update your splashback to match, you'll find the principles are quite similar. Our guide on how to cover kitchen tiles covers techniques that are a perfect companion to a cabinet makeover.
To give you a clearer picture, let's compare these options side-by-side.
Key Takeaway: The best way to cover your kitchen cabinets is a balancing act between cost, effort, and how long you want it to last. Vinyl wrap is your go-to for a quick, modern, and reversible fix, while painting offers endless colour choices for a permanent upgrade.
Kitchen Cabinet Makeover Methods at a Glance
Deciding between wrapping, painting, or refacing can be tricky. This quick comparison should help you see which method aligns best with your project's budget, timeframe, and goals.
| Method | Average Professional Cost (UK) | Typical Timeframe | Best For |
|---|---|---|---|
| Vinyl Wrapping | £1,500 - £3,000 | 1-3 days | Renters, quick style updates, and achieving modern finishes like matte or high gloss. |
| Painting | £800 - £2,000 | 3-5 days | Homeowners seeking a specific colour scheme and a durable, long-lasting finish on a budget. |
| Refacing | £2,000 - £6,000 | 2-4 days | Achieving the look of new cabinets without a full renovation, especially if current doors are damaged. |
As you can see, the options vary significantly. A vinyl wrap is the speediest choice, perfect for a weekend project, whereas painting requires a bit more patience. Refacing sits in the middle time-wise but comes with the highest cost, delivering a near-total transformation.
Getting Your Cabinets Ready for Their New Look
Here’s a secret that anyone who's ever done a successful cabinet makeover knows: the final result has almost nothing to do with the last step. Whether you’re painting or wrapping, the real magic happens in the prep work. Honestly, rushing this stage is the single biggest mistake people make, and it's why so many DIY projects end up looking, well, a bit DIY.
Think about it. You can't expect fresh paint or sticky vinyl to cling to a surface caked in years of cooking grease, dust, and grime. You need a completely clean, solid foundation. This isn't just a suggestion; it's the key to getting a finish that looks professional and actually lasts.
The Big Clear-Out and Deep Clean
Before a single tool comes out, it’s time to empty everything and give your cabinets the most thorough clean they've ever had. This isn’t just a quick wipe-down. We’re on a mission to get rid of every last bit of that invisible, sticky film that builds up in every kitchen.
First things first, take all the doors and drawer fronts off. Remove every hinge and handle. It might feel like a chore, but trying to paint or wrap around hardware is a recipe for a messy, amateur-looking job. It's a shortcut you will absolutely regret later.
My best tip: Get organised from the start. Use a bit of painter's tape to label each door and its corresponding spot on the cabinet frame (e.g., "Top Left"). Pop all the screws and hinges for that door into a small, labelled sandwich bag. This little bit of effort now will save you a world of pain when it's time to put it all back together.
With everything dismantled, it's time to degrease. Grab a sugar soap solution or a dedicated TSP (Trisodium Phosphate) cleaner. These products are brilliant because they’re designed to slice right through that stubborn kitchen gunk that normal cleaners just smear around. Follow the instructions on the box, get a non-abrasive sponge, and scrub every surface you plan on covering—fronts, backs, and the cabinet frames themselves.
Creating the Perfect Surface
Once your cabinets are spotless and bone dry, the next job is to create a perfectly smooth canvas. Any dings, deep gouges, or old handle holes will stick out like a sore thumb under a new finish, so deal with them now.
A good quality wood filler is your friend here. Use a putty knife to apply it, making sure to slightly overfill any holes or scratches. Let it cure completely – don't rush this part, just check the tin for timings. Now you're ready for the most important part of the physical prep: sanding.
Sanding does two vital jobs:
- It smooths out your repairs. You'll gently sand down the wood filler until it's perfectly level with the rest of the surface.
- It gives the surface some "tooth." A light once-over with medium-grit sandpaper (around 120-150 grit is ideal) will scuff up the old glossy finish. This creates a slightly rough texture that gives the new primer or vinyl adhesive something to really grab onto.
You don't need to go crazy and sand right down to the bare wood. The goal is just to get rid of the shine. A palm sander makes this super quick for the big flat areas, but you'll still need to do the edges and any detailed bits by hand. After sanding, wipe every single surface with a tack cloth to pick up every last speck of dust. This is non-negotiable.
Your Prep Toolkit Essentials
Having everything you need within arm's reach makes the whole job feel less like a chore. Before you get started, pull together these bits and pieces so you're not hunting for things mid-job.
| Tool/Material | What It's For | Why You Need It |
|---|---|---|
| Screwdriver/Drill | Removing hardware | Gets doors, drawers, and handles off quickly without stripping screws. |
| Sugar Soap or TSP | Degreasing surfaces | The only way to properly shift kitchen grime so your new finish sticks. |
| Sponges & Rags | Cleaning and wiping | For applying the cleaner and getting everything properly dry. |
| Wood Filler | Patching imperfections | Fills dings and old screw holes for that flawless, smooth finish. |
| Medium-Grit Sandpaper | Scuff-sanding | Creates the 'tooth' needed for primer or vinyl to get a good grip. |
| Tack Cloth | Dust removal | Picks up the fine sanding dust that a regular cloth will always miss. |
| Painter's Tape | Labelling and masking | Keeps you organised and protects walls or worktops from mishaps. |
Spending a bit more time on careful preparation might feel like the boring part of the project, but I promise you, it's the most critical. A clean, smooth, and well-prepped surface is the only way to build a new kitchen look that you’ll be proud of for years to come.
Vinyl Wrapping Your Cabinets for a Modern Look
If you're after a dramatic change without the fuss of paint, learning how to cover kitchen cabinets with architectural vinyl is a real game-changer. It’s a fast, modern solution that gives you a factory-like finish and, best of all, it's completely reversible—a dream for renters and homeowners who like to change their minds.
Vinyl wrapping has exploded in popularity for kitchen refreshes across the UK. It's not hard to see why when you look at the numbers. A professional wrap typically costs between £1,500 and £3,000. One survey even found that homeowners who went this route saved up to 60% compared to ripping out and replacing their cabinets. It’s a seriously smart investment.
Why Choose Vinyl Wrap for Your Kitchen?
The appeal of vinyl is pretty straightforward. It gives you a sleek, flawless surface that's tough to get right with a brush or roller. And the choice of finishes is incredible—from solid matte colours and super high-gloss sheens to convincing wood, stone, and even metallic textures.
Unlike painting, which feels like a marathon of coats and curing times, you can often knock out a vinyl wrap project in a single weekend. It's also incredibly tough stuff, offering a wipe-clean surface that stands up to scratches, chips, and moisture much better than most paint jobs.
This visual guide breaks down the essential prep work, which is the foundation for any great cabinet makeover. A perfect finish relies on a perfect starting surface.
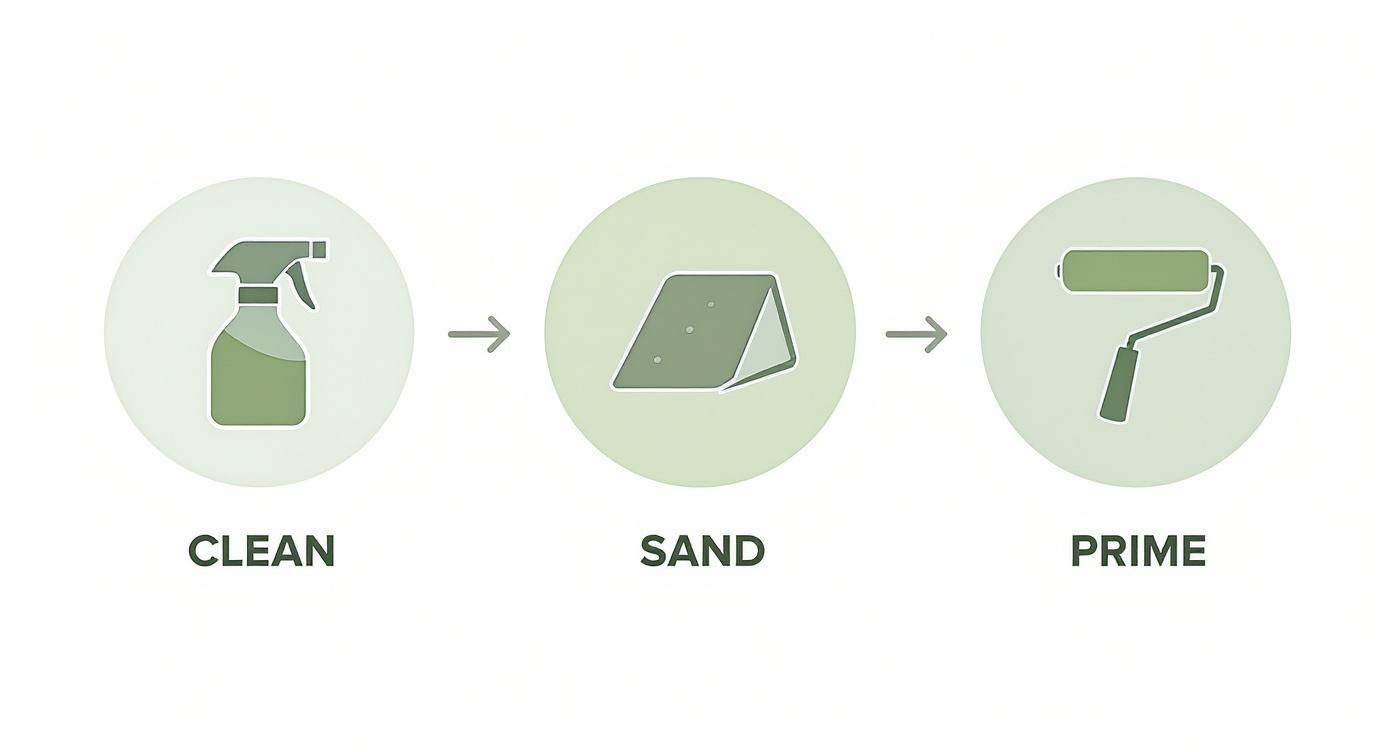
As you can see, whether you're painting or wrapping, getting the surface clean, smooth, and properly primed is the key to a job that lasts.
Measuring and Ordering Your Vinyl
Getting your measurements spot on is the first step towards a flawless wrap. It's not enough to just measure the front of the door; you need extra material to wrap cleanly around the edges for that seamless, professional look.
- For Doors and Drawer Fronts: Measure the height and width, then add at least 5cm to both dimensions. This extra vinyl is your 'wrap-around' allowance, giving you plenty to fold over all four edges and trim neatly on the back. So, for a 60cm x 40cm door, you'd cut a piece of vinyl that’s at least 65cm x 45cm.
- For Cabinet Frames: Don't try to be a hero and cover the whole frame in one go. Measure each visible section separately and plan to apply the vinyl in manageable pieces.
Once you’ve got all your measurements, add them up to figure out the total square meterage you need. I always recommend ordering 10-15% extra to cover any slips of the knife or tricky cuts. If you're stuck on what type to get, our guide on the best vinyl wrap for kitchen cabinets is a great place to start.
Pro Tip: Think about your cabinet style when picking a finish. Simple, flat-fronted doors look amazing in any finish, especially high-gloss. But if you've got detailed doors, like a Shaker style, a matte or satin finish will be much more forgiving and easier to work into those recessed panels.
The Application Process Step by Step
Right, with all your prep done and vinyl cut, it's time for the fun part. Tackle one door at a time, laying it down on a clean, flat surface to work.
The secret to avoiding bubbles is what's called the "hinge" method. Start by peeling back just about 10cm of the backing paper from one side of your vinyl. Carefully line this sticky edge up with the edge of the cabinet door, making sure you have an even overhang on all sides.
Press this section down firmly with a squeegee—that's your 'hinge'. Now, with one hand, slowly pull the rest of the backing paper away from underneath. At the same time, use your other hand to smooth the vinyl onto the door with the squeegee. Always work from the centre outwards using firm, overlapping strokes.
Nailing the Corners and Edges
The corners are what separate a DIY job from a pro one. The trick? A little bit of heat. A hairdryer or a heat gun on a low setting will make the vinyl just pliable enough to stretch and mould around those tricky shapes without creasing.
When you get to a corner, snip a diagonal relief cut into the vinyl, from the corner of the film right to the corner of the door. Gently warm the vinyl, then stretch and smooth one flap around the edge. Do the same for the other flap, overlapping it slightly. A sharp craft knife is your best friend here for trimming the excess and creating a perfect seam.
For the straight edges, just wrap the leftover vinyl around to the back of the door. Use your squeegee to push it down firmly, making sure you don't trap any little air pockets along the edge.
Troubleshooting Common Wrapping Issues
Even the most careful wrappers can hit a few snags. Don't worry, most issues are an easy fix.
- Bubbles: See a bubble? Don't panic. Good quality architectural vinyl has tiny air-release channels, so you can usually just push the air out towards the edge with your squeegee. For a really stubborn one, a tiny prick with a pin is all you need to let the air escape.
- Wrinkles: If a crease appears, gently lift the vinyl back up before it's fully stuck down. Pull it taut and re-apply it, this time with a bit more tension. A quick blast with the hairdryer can help release the adhesive if you need it to.
- Lifting Edges: If you find an edge isn't sticking as well as you'd like (this can happen on the back), a primer pen or a dab of edge sealer will create a permanent bond. This is especially handy for cabinets near the sink or dishwasher that get a lot of heat and moisture.
Mastering the Art of Painting Kitchen Cabinets
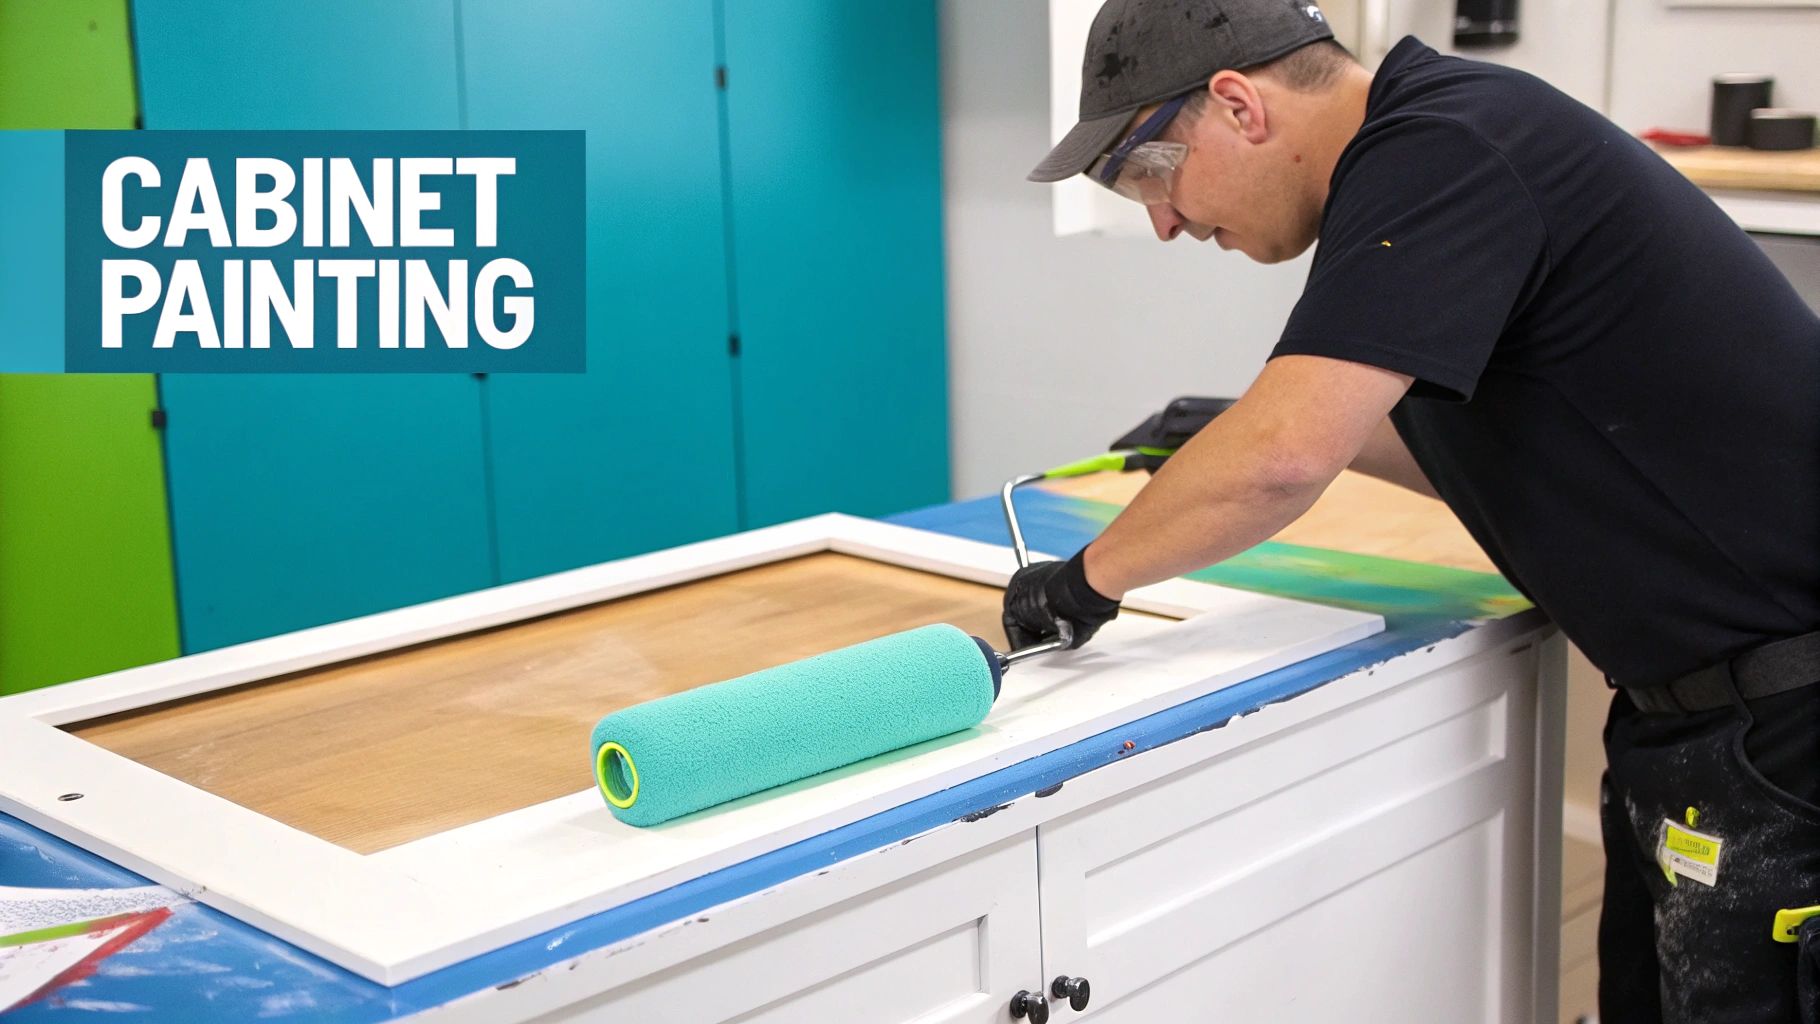
A fresh coat of paint can feel like a complete kitchen overhaul, turning tired, dated cupboards into a real standout feature. It’s a brilliant, budget-friendly answer to the question of how to cover kitchen cabinets without the disruption and cost of a full rip-out. That said, getting it right comes down to using the right materials and, more importantly, the right technique.
It's an incredibly popular option. According to the UK Houzz Kitchen Trends Study, 38% of homeowners who renovated their kitchens chose to paint their cabinets rather than replace them. While a professional job can set you back between £800 and £2,000, the DIY route is much more accessible. The study found that white remains the top choice for 42% of renovators, with grey (28%) and navy blue (12%) following close behind.
Key Insight: Don't underestimate the power of paint. Proper prep and application can give you a finish that lasts over a decade, easily rivalling more expensive replacements.
Choosing Your Primer and Paint
The secret to a long-lasting finish isn't the paint—it's the primer. Picking the right one is absolutely vital for adhesion, preventing chips and peels down the line. Oil-based primers are fantastic on raw wood or bare MDF, but water-based formulas are much easier to clean up and have fewer fumes. If you're tackling tricky surfaces like laminate or thermofoil, you’ll need a specialist high-adhesion primer to stop it from peeling off.
A few tips for picking your primer:
- Look for deglossing or "liquid sandpaper" formulas to help grip onto existing finishes.
- Try to match your primer to your topcoat (e.g., latex primer for latex paint).
- For wood with knots or a tendency to bleed tannins, a stain-blocking primer is non-negotiable.
Once you’ve sorted the primer, a top-quality cabinet paint will give you that smooth, durable surface that can handle daily wear and tear. Look for acrylic-urethane or modern alkyd paints, as they create a tough, resilient finish.
Comparing Application Methods
The tools you use will have a massive impact on the final look. Each has its pros and cons, so it’s worth thinking about what finish you’re aiming for.
- Brush: Essential for getting into crevices and detailed mouldings with precision. You can minimise those tell-tale brush marks by investing in a good-quality angled brush with flagged bristles.
- Roller: This is your best friend for flat panels and drawer fronts. A dense foam roller is the key here; it leaves far fewer bubbles and stipples than a traditional fluffy one.
- Sprayer: If you’re after a flawless, factory-like finish, a sprayer is the way to go. It does, however, require a lot more prep and careful masking. Brands like Wagner and Makita make some great HVLP sprayers that are popular with keen DIYers.
For most people, a combination of a high-quality brush and a mini foam roller gives the best balance between speed, cost, and a great-looking finish.
Getting the Layers Right: Primer and Paint
I can’t say it enough: prep is everything. Rushing this stage is where most paint jobs go wrong. Start by scuff-sanding all the surfaces with 120–150 grit sandpaper. This creates a "tooth" that helps the primer really stick. After sanding, wipe every speck of dust away with a tack cloth before you even think about opening a tin of primer.
When you're ready to start, apply a thin, even coat of primer. Let it dry completely—this usually takes 3–4 hours, but check the tin. Once dry, give it a very light sand with fine 220 grit paper to knock down any imperfections, then wipe it down with a tack cloth again. Finally, you can apply your first of two thin coats of paint, using long, even strokes.
Patience is key here. Waiting between coats prevents drips, sags, and that awful drag you get when painting over a tacky surface. If you’re working in the cooler UK months, opening a window or having a fan running can help speed up the drying process.
Finishing and Topcoat Tips
A clear protective topcoat is the final piece of the puzzle. It acts as a shield, guarding the paint against scuffs and keeping the colour looking vibrant for years. A polyurethane topcoat is a solid choice for kitchens.
For the best results, lightly sand between each topcoat layer with very fine 320 grit paper and apply two or three thin coats in a well-lit area so you can spot any misses. Always wipe away the dust with a lint-free cloth before each coat. Expect the final finish to take a good 24–48 hours to fully cure before you can start using your kitchen normally again. This final step is what ensures your hard work can handle hectic weekday mornings without showing signs of wear.
Trending Colours and Styling Advice
Right now, the UK trend is leaning towards soft, muted neutrals paired with bolder accent tones. White is still the champion for 42% of renovators, and for good reason—it’s incredibly versatile and makes smaller kitchens feel more spacious.
- White opens up compact spaces and works with any style.
- Grey adds a sophisticated, modern edge without feeling too imposing.
- Navy blue brings a sense of depth and luxury, pairing beautifully with brass or gold hardware.
If you want to inject a bit of personality, consider painting just an island unit in a muted sage green or a dusty pink, keeping the surrounding upper cabinets in a complementary neutral.
For a really deep dive into achieving professional results with a brush and roller, you might find a detailed guide on how to paint kitchen cabinets helpful.
detailed guide on how to paint kitchen cabinets
Maintenance and Longevity
The good news is that looking after painted cabinets is pretty straightforward. A weekly wipe-down with a soft cloth and a mild, non-abrasive detergent is usually all that’s needed. Just be sure to steer clear of harsh scouring pads, which can scratch the finish.
If you do spot a chip, touch it up straight away with a bit of leftover paint. This will seal the surface and stop any moisture from getting underneath. A quick inspection of the doors and frames every few months helps you catch any minor issues before they become a bigger job.
Common Mistakes and How to Fix Them
From experience, rushing the prep work is the number one mistake people make. Skipping the sanding or failing to properly degrease the surfaces will almost guarantee a peeling finish later on.
- Inadequate priming: Always use a bonding primer designed for the surface you’re painting.
- Overbrushing: Too many strokes can leave a messy finish. Try to apply the paint and then "lay it off" with a final, light stroke.
- Applying thick coats: Two thin coats are always better than one thick one. Thick layers are prone to sagging and can take an eternity to dry properly.
Expert tip: Always test your paint and primer on a hidden spot first, like the back of a drawer front. This lets you check for adhesion and confirm you’re happy with the colour before you commit to the whole kitchen.
Budget and Time Expectations
For a DIYer, painting a standard UK kitchen with around 10–12 doors and 4–6 drawers will typically take 3–5 days from start to finish. In terms of cost, you can expect to spend around £50–£100 on a good primer, £100–£200 on quality cabinet paint, and another £30–£60 on sandpaper, rollers, and other supplies.
Of course, the total cost will depend on the quality of the paint and tools you choose. But even when you factor in new handles or knobs, you can realistically keep the total outlay for materials well under £500.
Ultimately, a fresh paint job is about more than just a surface-level change. It’s an investment that can completely renew the heart of your home and add real value.
Using Cabinet Refacing for a Major Upgrade
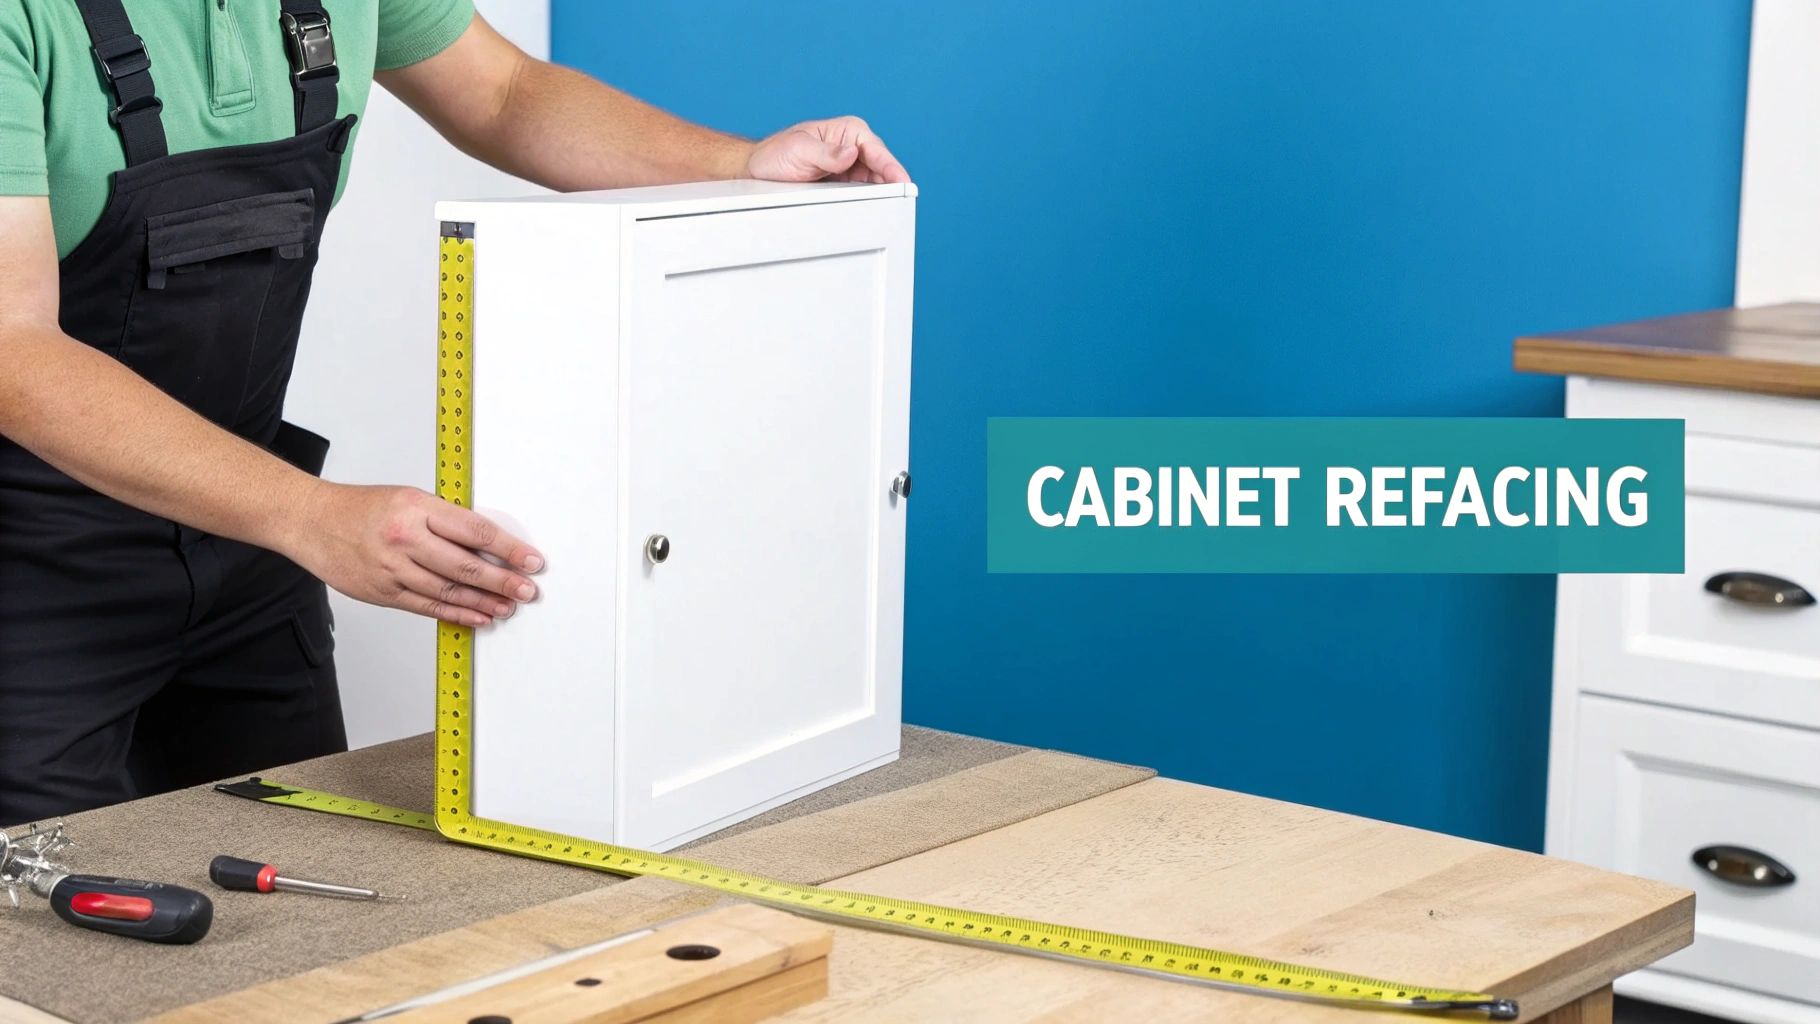
If your cabinet boxes are still solid but the doors have seen better days, refacing is a brilliant middle ground. It’s a much bigger change than painting or wrapping, giving you the feel of a brand-new kitchen without the price tag or disruption of a full-scale renovation. It really is the ultimate answer to how to cover kitchen cabinets when a simple surface fix won’t cut it.
The whole idea is to keep your existing cabinet framework—the 'carcasses'—and just swap out all the doors and drawer fronts for new ones. To get a seamless finish, you can also apply a matching veneer to any visible cabinet sides so everything ties together perfectly. It’s a project that completely overhauls the style, colour, and feel of your kitchen.
Why Consider Cabinet Refacing?
Refacing strikes that sweet spot between visual impact and investment. It’s a fantastic choice if your current kitchen layout works perfectly fine, but the overall look feels dated. The best part? It's far less disruptive than a total gut job. You can often keep using your kitchen throughout most of the process, and it usually only takes a few days from start to finish.
This approach is becoming seriously popular in the UK. Recent data shows the average project costs somewhere between £2,000 and £6,000. In fact, in 2025, 24% of renovating homeowners chose to reface their cabinets, pointing to that perfect balance between cost and the final result as the main reason. For a deeper dive into these numbers, you can check out the full kitchen renovation cost report from EcoSafe Group.
Choosing Your New Doors and Materials
Now for the fun part! This is where you get to pick a completely new look for your kitchen, from the style of the door right down to the material it's made from. This is the decision that will redefine your kitchen’s entire character.
Popular Door Styles:
- Shaker: The go-to for a reason. Its simple frame and recessed panel are timeless and work with almost any interior style.
- Slab: A single, flat piece with no detailing. It’s the perfect choice for creating a sleek, clean, and contemporary kitchen.
- Traditional: If you love classic elegance, look for doors with more ornate details like raised panels or decorative edging.
The material you choose is just as important as the style. Solid wood gives a premium, long-lasting finish, while MDF (Medium-Density Fibreboard) is a brilliant, budget-friendly option that provides a perfect canvas for painting. For a really durable, low-maintenance choice, consider doors that come pre-finished in a tough laminate or thermofoil wrap.
Top Tip: Always think about the overall style of your home when choosing. A super-modern slab door might feel jarring in a cosy country cottage, just as an ornate traditional door could clash with minimalist decor.
Measuring and Sourcing Your Doors
This is the one step where you absolutely cannot afford to make a mistake. Get the tape measure out and carefully record the height and width of every single door and drawer front. My advice? Measure everything twice. Don't forget to note which side the hinges are on, as you'll need to specify whether they're on the left or right.
You'll find plenty of online suppliers that specialise in replacement kitchen doors. Most let you simply key in your measurements and then pick your style, material, and finish. Before you commit to a full order, I always recommend ordering a sample door. It's the only way to be sure about the quality and to see how the colour looks in your own kitchen's light. The principles are similar to any good upcycling project—get the foundations right first. For more ideas on this, our guide on how to upcycle furniture has some useful tips.
Common Questions About Covering Cabinets
When you're thinking about how to cover your kitchen cabinets, a few questions are bound to pop up. It's completely normal. Getting solid, practical answers is the best way to feel confident about your project and sidestep those all-too-common mistakes. Let's run through the most frequent queries I hear.
Which Method Is the Most Durable?
Durability is a big one, and the honest answer is that it really depends on the method and how well it's done. A proper paint job, done with high-quality cabinet paint and sealed with a protective topcoat, can easily look great for 7-10 years before you might think about a touch-up.
Good architectural vinyl wraps are surprisingly tough, too. You can expect a lifespan of around 5-7 years from a quality wrap, and they're brilliant at shrugging off chips, moisture, and the general wear and tear of a busy kitchen. But if you're looking for the undisputed champion of longevity, cabinet refacing wins hands down. You’re getting brand-new, factory-finished doors built to last 10-20 years, sometimes even longer.
Can You Cover Laminate or Thermofoil?
Yes, you absolutely can, but your success will live or die by the prep work. You can't just stick or paint something straight onto their slick, non-porous surfaces and hope for the best. For both laminate and thermofoil, you have to start by giving them a deep clean to get rid of every last trace of grease.
After that, you'll need to lightly scuff the entire surface with sandpaper. This knocks the shine off and creates a "tooth" for the new finish to really grab onto.
- If you're painting: A high-adhesion primer is a must. Don't skip it. It's specifically made to stick to slick surfaces and is the key to preventing the paint from peeling off down the line.
- If you're using a vinyl wrap: The smooth surface of laminate is actually perfect for this, but you have to make sure any peeling thermofoil is completely removed first.
For anyone thinking about a more substantial change or weighing up options beyond a DIY cover-up, exploring professional kitchen renovation services can open up comprehensive solutions that go way beyond just a surface update.
What Is the Best Option for Renters?
For renters, the best choice is almost always a high-quality peel-and-stick vinyl wrap. It’s a fantastic way to get a dramatic, modern look that is completely reversible. When your tenancy is up, you just peel it off, and the original cabinets underneath should be untouched. It’s the surest way to get your deposit back.
Painting or refacing are permanent changes that you'd need written permission from your landlord for, and that's not something they often agree to. This really makes vinyl the only truly non-committal and safe bet for tenants who want to put their own stamp on a space.
How to Clean Your Newly Covered Cabinets
Gentle care is the secret to keeping your updated cabinets looking as good as new. For both painted and vinyl-wrapped surfaces, all you really need is a soft cloth, dampened with a bit of mild, non-abrasive cleaner. A simple mix of warm water and a drop of washing-up liquid is perfect.
Steer clear of harsh chemical cleaners, anything with bleach, or abrasive pads and scourers. They'll scratch or dull the new finish in a heartbeat. If you’ve gone for refaced doors, it's always best to check the manufacturer’s specific care instructions, as advice can vary a lot depending on the material. A little bit of regular, gentle cleaning will keep them looking beautiful for years.
Ready to start your transformation? At Quote My Wall, we offer a massive range of premium, bubble-free vinyl wraps to make your kitchen makeover fast, affordable, and stunning. https://www.quotemywall.co.uk