
How to Upcycle Furniture: Easy & Creative DIY Tips
Learning how to upcycle furniture is all about seeing the potential in an old or forgotten item and transforming it into something beautiful and functional. It’s a hugely rewarding DIY process, where you can combine a bit of imagination with practical skills like painting, sanding, or applying vinyl wraps to give dated furniture a whole new lease of life.
Why Upcycling Furniture Is a Smart Move
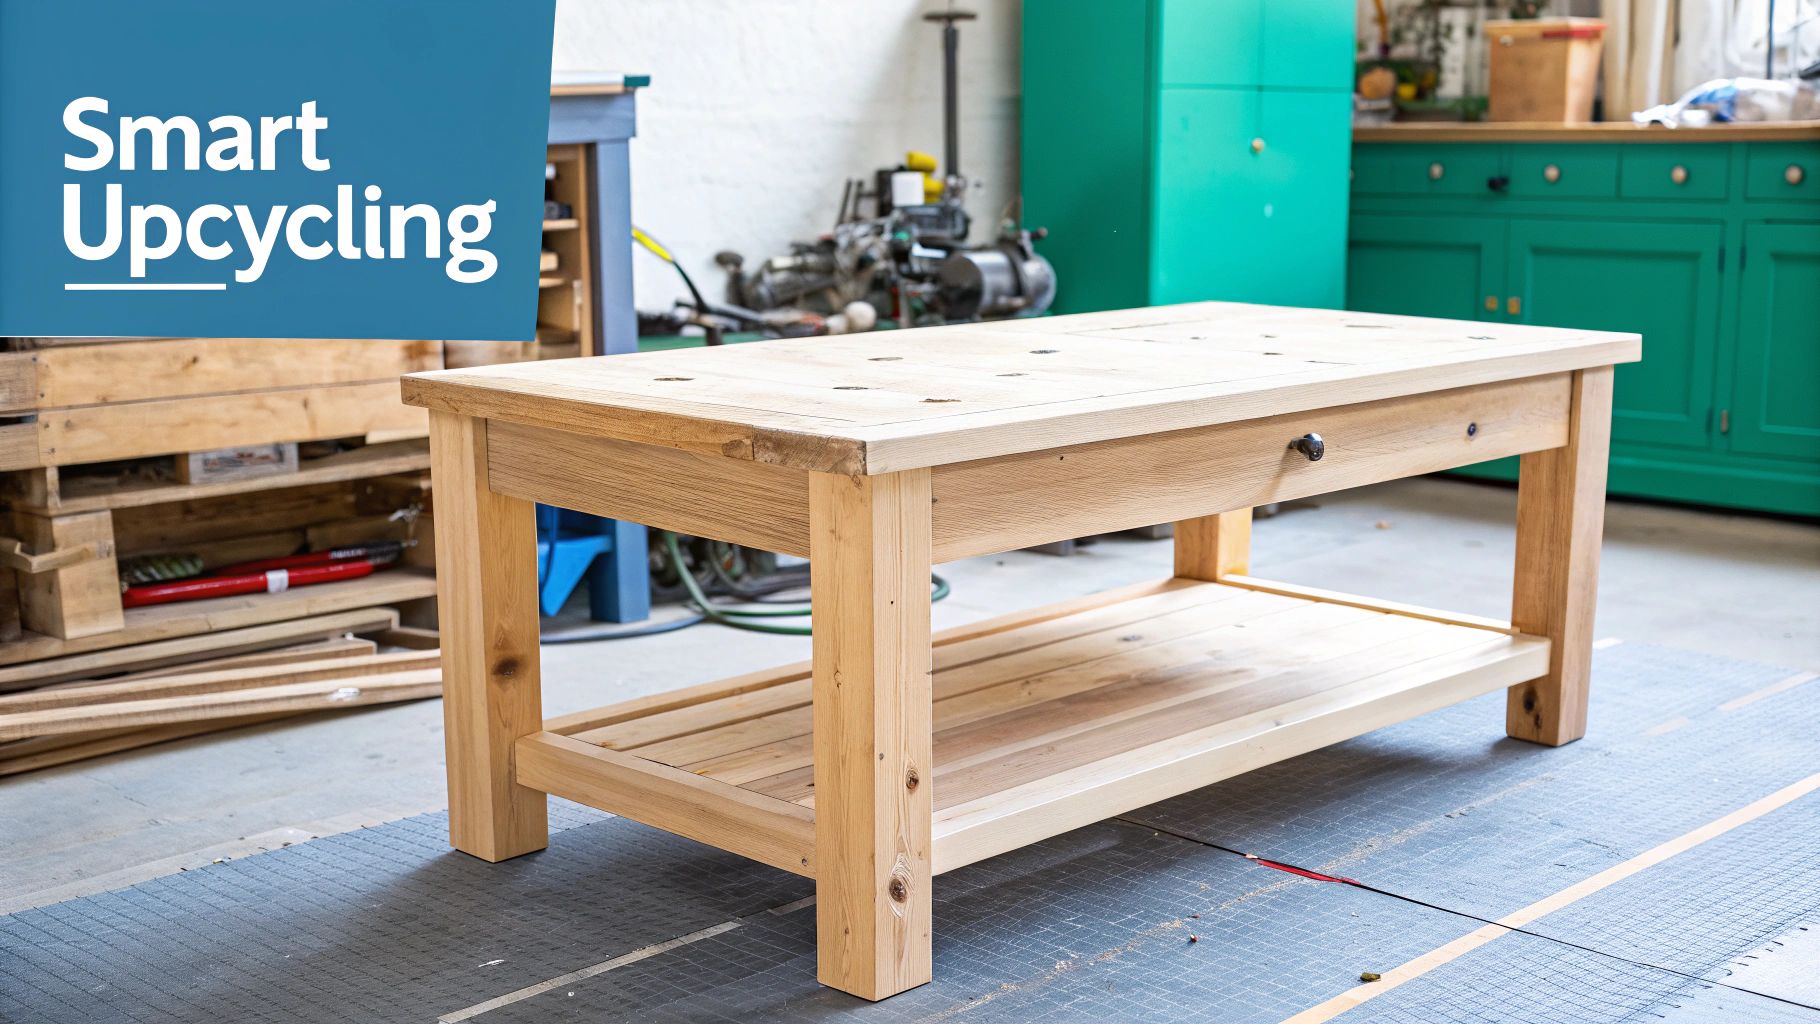
Before you write off that old coffee table or chest of drawers, it’s worth understanding why upcycling is so much more than just a passing trend. It's a smart, sustainable, and budget-friendly choice that lets you put your own stamp on your living space in a way that mass-produced furniture never can.
Giving old furniture a makeover lets you create bespoke pieces that perfectly match your personal style. Think about turning a generic pine dresser into a vibrant, modern statement piece, or giving a tired laminate cabinet a sophisticated marble finish with a simple wrap. These projects let you break free from the designs you see everywhere and create something truly one-of-a-kind.
More Than Just a Pretty Makeover
Beyond making things look good, upcycling is a powerful act of conscious consumerism. The amount of furniture waste in the UK is staggering—over 22 million pieces are thrown away every single year. Many of these items end up in landfills simply because their owners couldn't sell them. When you choose to upcycle, you're directly helping to reduce this waste.
Upcycling isn’t just about saving money or getting a unique piece of furniture. It's about seeing the potential in the overlooked and making a conscious choice to reduce waste, one project at a time.
The Benefits Are Clear
This hands-on approach offers plenty of perks that go beyond the obvious. Giving an old item a new purpose is not only incredibly satisfying but also very practical.
Here’s what you stand to gain:
- Cost-Effective Design: You can achieve a high-end look for a fraction of the price of buying new. A tin of paint or a roll of vinyl is far more affordable than a brand-new sideboard.
- Unmatched Personalisation: You’re in complete control of every detail, from the exact shade of paint to the style of the handles, ensuring the finished piece is a perfect fit for your home.
- Sustainable Living: Every item you upcycle is one less item heading to a landfill and one less reason to use up resources manufacturing something new.
Embracing upcycling means you start to see the hidden potential in forgotten items and take part in a positive, meaningful change. For more ideas, have a look at our guide on why vinyl furniture wraps are better for upcycling.
Finding the Perfect Piece for Your Project
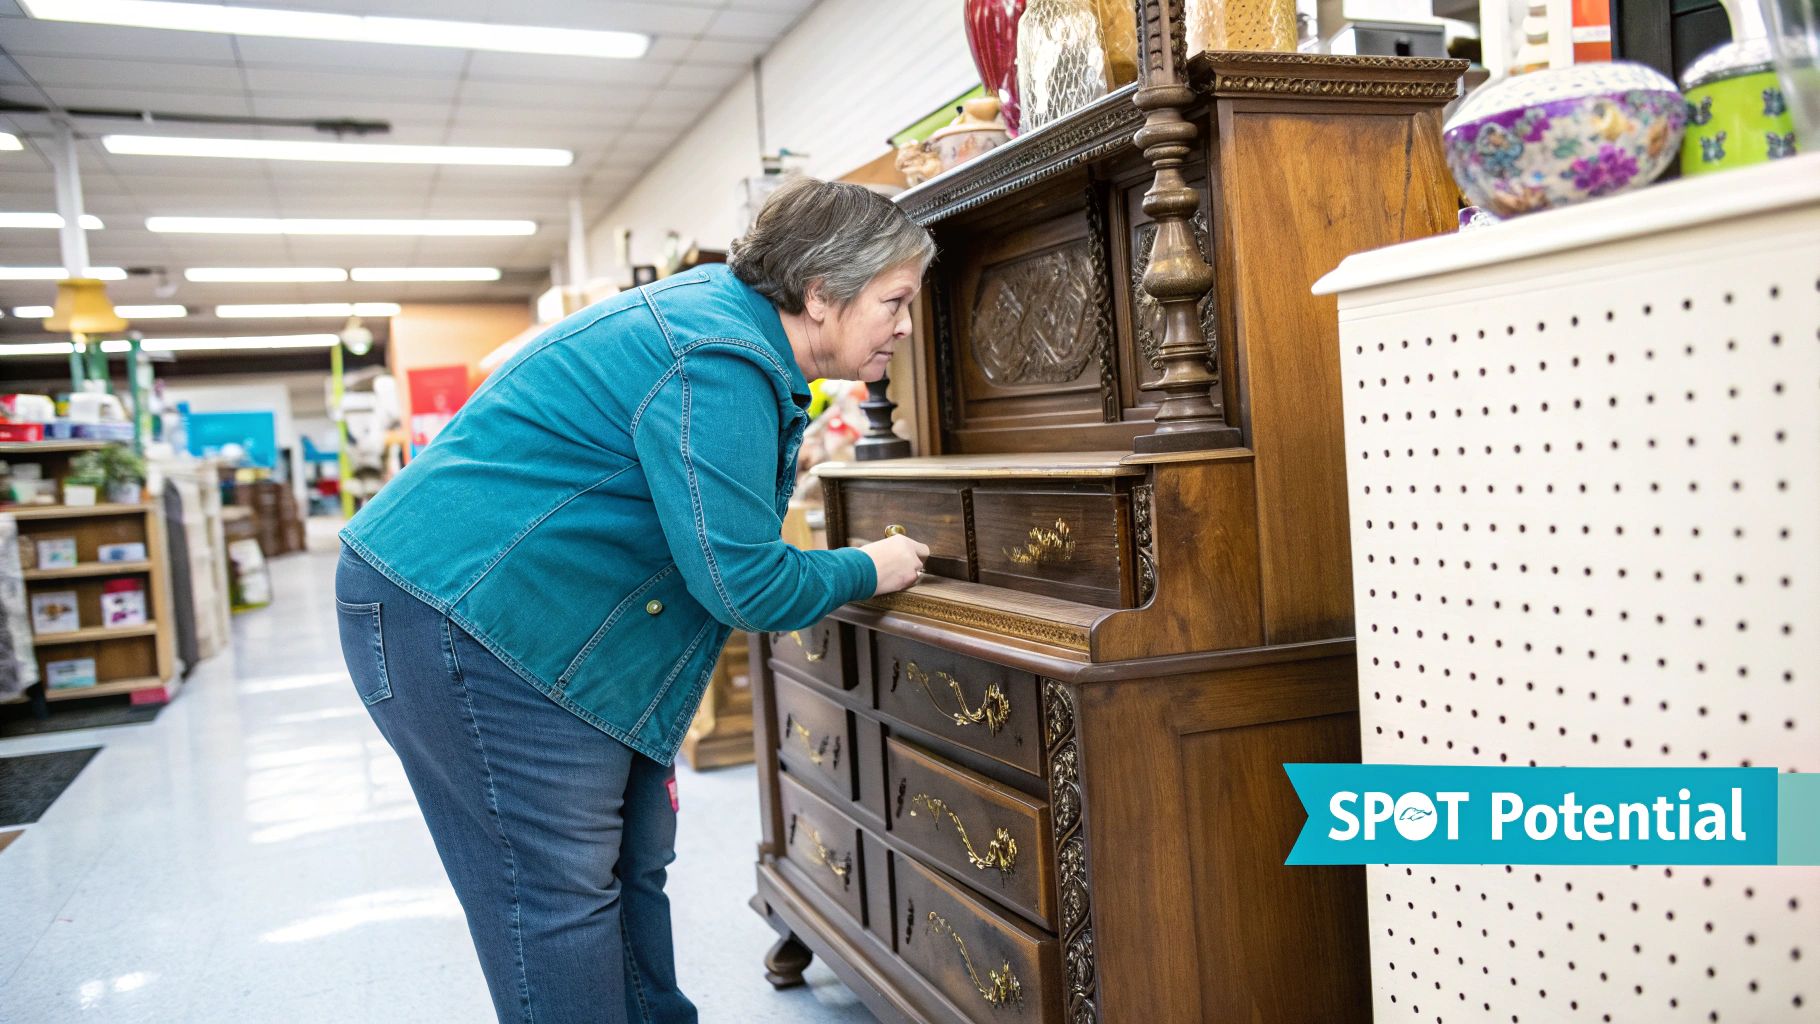
Every great upcycling project starts with finding that diamond in the rough. Before you even think about vinyl wraps or a new coat of paint, you need a piece of furniture that’s actually worth the effort. It’s all about training your eye to see the potential, whether you're rummaging through a local charity shop, browsing online marketplaces, or even digging through your own attic.
The trick is to look past the scuffed finish or dated handles and see the piece’s "bones." Is it well-built? Does it have a classic shape? A wobbly chipboard cabinet might seem like a bargain, but it will only lead to headaches. On the other hand, a scratched pine dresser with solid dovetail joints is the perfect canvas for your next creation.
What to Look For When Sourcing Furniture
When you're on the hunt, have a mental checklist ready. The first thing, and it’s non-negotiable, is solid construction. Give any potential piece a gentle shake. If it wobbles or feels flimsy, you could be looking at complex structural repairs that are often more trouble than they're worth. Also, check that drawers slide in and out smoothly and that cabinet doors hang straight.
Next up, figure out what it’s made of. Solid wood is the holy grail for upcyclers because it's incredibly durable and forgiving—you can sand, paint, and repair it with ease. You can usually spot it by looking for a continuous grain pattern on the edges and underside. Veneer, which is a thin layer of real wood over a core of MDF or chipboard, can also be a great find. You just have to be far more gentle when sanding, as it’s easy to wear right through that thin top layer.
Remember, the goal is to find a piece with good bones and a solid structure. Cosmetic flaws like scratches, scuffs, and even an outdated colour are easily fixed, but a fundamentally weak frame is a deal-breaker.
Spotting the Deal-Breakers
While you can fix most surface-level issues, some problems are best left behind. Learning to spot these red flags will save you a world of time, money, and frustration.
Keep an eye out for these major issues:
- Active Woodworm: Small clusters of holes spilling fine, light-coloured dust (called frass) are a sure sign of an active infestation that needs treating.
- Severe Water Damage: Look for swollen, warped wood or large, dark stains. This suggests prolonged moisture exposure that can seriously weaken the structure.
- Strong, Musty Odours: A persistent mouldy smell is incredibly difficult to shift and often points to deeper problems you can't see.
Choosing second-hand isn't just a budget-friendly move; it's a huge trend, especially with younger people in the UK. A recent survey found most UK households own at least five second-hand furniture items. Gen Z is leading the way, owning an average of eight pieces each—more than double that of older generations. You can read more about the rise of the reuse revolution and see how you’re part of a bigger movement.
By picking your starting piece wisely, you set your project up for success from the very beginning.
Getting Your Upcycling Toolkit Together
Let's be honest, there's nothing more frustrating than getting halfway through a project only to realise you're missing a crucial tool. It kills your momentum. To get that polished, professional look on your upcycled furniture, you need the right kit from the get-go.
Think of it as setting up your workshop. This isn't about splashing out on every gadget you see. It's about building a core collection of reliable supplies that will see you through from stripping back an old piece to applying that perfect finishing touch.
Nailing the Prep Work
I can't stress this enough: preparation is everything. It's the part people are most tempted to rush, but it's the absolute foundation for a finish that not only looks brilliant but actually lasts. A little extra time spent here saves you a world of headaches later.
Here’s what you absolutely need to get that perfect canvas:
- Sugar Soap or a Good Degreaser: You'd be amazed at the years of grime that can build up on old furniture. A simple wash-down with sugar soap and warm water cuts through all that grease and ensures your primer and paint can actually stick.
- Sandpaper (in a few grits): A small selection is all you need. Grab a medium grit, something around 120, for scuffing up shiny surfaces or removing old varnish. Then, have a fine grit, like 220, on hand for getting a super-smooth finish between coats of paint.
- Tack Cloths: These are my secret weapon for a flawless finish. After sanding, these slightly sticky cloths pick up every last speck of dust that a regular cloth would just move around. No more gritty bits in your paintwork!
- A Quality Primer: Please, don't skip the primer! A good one does so much work—it blocks stains from bleeding through, helps your new colour stick to tricky surfaces like laminate, and gives you a beautiful, even base for your topcoat.
The secret to every stunning upcycled piece I've ever seen? A flawless foundation. Take your time with the prep work; I promise it will pay off tenfold in the final result.
Choosing Your Finish
With all the boring (but essential!) prep out of the way, we get to the fun part—the transformation. The products you choose here will define the entire look and feel of your piece.
A fantastic option for a quick, modern update is to use vinyl wraps. If you're tackling a tired-looking chest of drawers or a bland tabletop, you can create an instant new look with patterns like marble, wood, or solid colours without any of the mess or drying time of paint. If you want some ideas on how to get really creative, our guide to custom vinyl wraps and furniture stickers is packed with inspiration.
If you’re a painter at heart, the world is your oyster. Chalk paint is famously forgiving for beginners and gives a beautiful matte, rustic finish with very little prep needed. For something a bit more contemporary and durable, I often go for a satinwood or eggshell paint. It gives a subtle sheen that’s easy to clean. And of course, a decent set of brushes in various sizes makes tackling both large areas and fiddly details a breeze.
Finally, you need to protect your hard work. For chalk-painted pieces, a clear wax seals the finish and gives it a soft, lovely lustre. For anything that’s going to see a lot of wear and tear—like a desk or a dining table—you need something tougher. A hard-wearing polyurethane varnish in a matte or satin finish is definitely the way to go.
Your Upcycling Project Shopping List
To make things even easier, here’s a quick shopping list to get you started. It covers the essentials you’ll need for most projects, plus a few optional extras that can make the job a bit easier.
| Project Stage | Essential Items | Optional Upgrades |
|---|---|---|
| Preparation | Sugar soap, Sponges/cloths, Sandpaper (120 & 220 grit), Tack cloths, Good quality primer | Electric sander, Masking tape, Dust mask |
| Application | Your chosen finish (Paint, Vinyl Wrap), Quality paint brushes/rollers, Squeegee (for vinyl) | Paint tray, Small detail/artist brushes |
| Finishing | Topcoat (Wax or Varnish), Lint-free cloths (for wax application) | Heat gun (for tricky vinyl corners), Microfibre cloths for buffing |
With these items in your toolkit, you'll be well-equipped to handle your first upcycling adventure with confidence. Happy creating
How to Properly Prep Furniture for a Flawless Finish
I get it. It’s so tempting to jump straight to the fun part of an upcycling project, but if there's one secret I've learned over the years, it's this: proper preparation is everything. This is the stage that makes the difference between a durable, professional-looking piece and a DIY fail that starts peeling in a few months. Taking the time to prep properly is non-negotiable.
First things first, you have to give your furniture a really good clean. You'd be amazed at the amount of dust, grime, and greasy residue that builds up over the years. All that gunk will stop any new finish from sticking properly, so you need a clean slate.
A simple mix of sugar soap and warm water usually does the trick perfectly. Grab a sponge and scrub down every single surface – don't forget the legs, the undersides, and the insides of drawers. Once you're done, wipe it all down with a clean, damp cloth to get rid of any soap residue, then let it dry completely.
The Importance of Sanding
With your piece clean and dry, it's time to give the new finish something to grab onto. This is where sanding comes in. You're not necessarily trying to strip it back to bare wood (unless that’s the look you want), but just rough up the existing surface. This is absolutely critical for anything with a glossy, varnished, or laminate finish.
For most projects, a medium-grit sandpaper – something around 120-grit – is perfect for this initial scuff-sanding. You can do it by hand on smaller bits, but an electric sander will save you a ton of time and effort on big flat surfaces like a tabletop. Just remember to always sand in the direction of the wood grain to keep things looking neat.
After sanding, you’ll have a fine layer of dust everywhere. A quick wipe with a dry cloth won’t cut it. For a truly professional finish, you need a tack cloth. These are slightly sticky and are brilliant at picking up every last speck of dust, which means you won't get any annoying gritty bits in your final coat.
Making Minor Repairs
Now is the ideal time to fix any little imperfections. Have a good look over the piece for small dents, scratches, or old screw holes. These are easily sorted with a bit of wood filler and a putty knife.
Let the filler dry completely (always check the instructions on the tin), then sand it smooth with fine-grit sandpaper, maybe around 220-grit, until it’s perfectly flush with the surface. This is also your moment to tighten any wobbly legs with a bit of wood glue and a clamp.
Don’t skip the small repairs. Filling a tiny dent or tightening a wobbly leg now takes just a few minutes, but it elevates the final piece from looking like a quick DIY job to a thoughtfully restored item.
Why Priming Is Your Best Friend
Finally, we get to the last—and arguably most crucial—prep step: priming. A good primer is the essential link between the old surface and your new finish. It covers up stains, stops tannins in woods like pine from bleeding through your paint, and gives you a perfectly uniform base so your new colour looks its best.
For those really tricky surfaces like laminate, MDF, or anything super glossy, an adhesion-promoting primer is a must-have. It’s made specifically to stick to slick surfaces where normal paint would just scratch or peel off over time. Just apply a thin, even coat and wait for it to dry completely.
This quick visual guide breaks down the essential prep work into three clear stages.
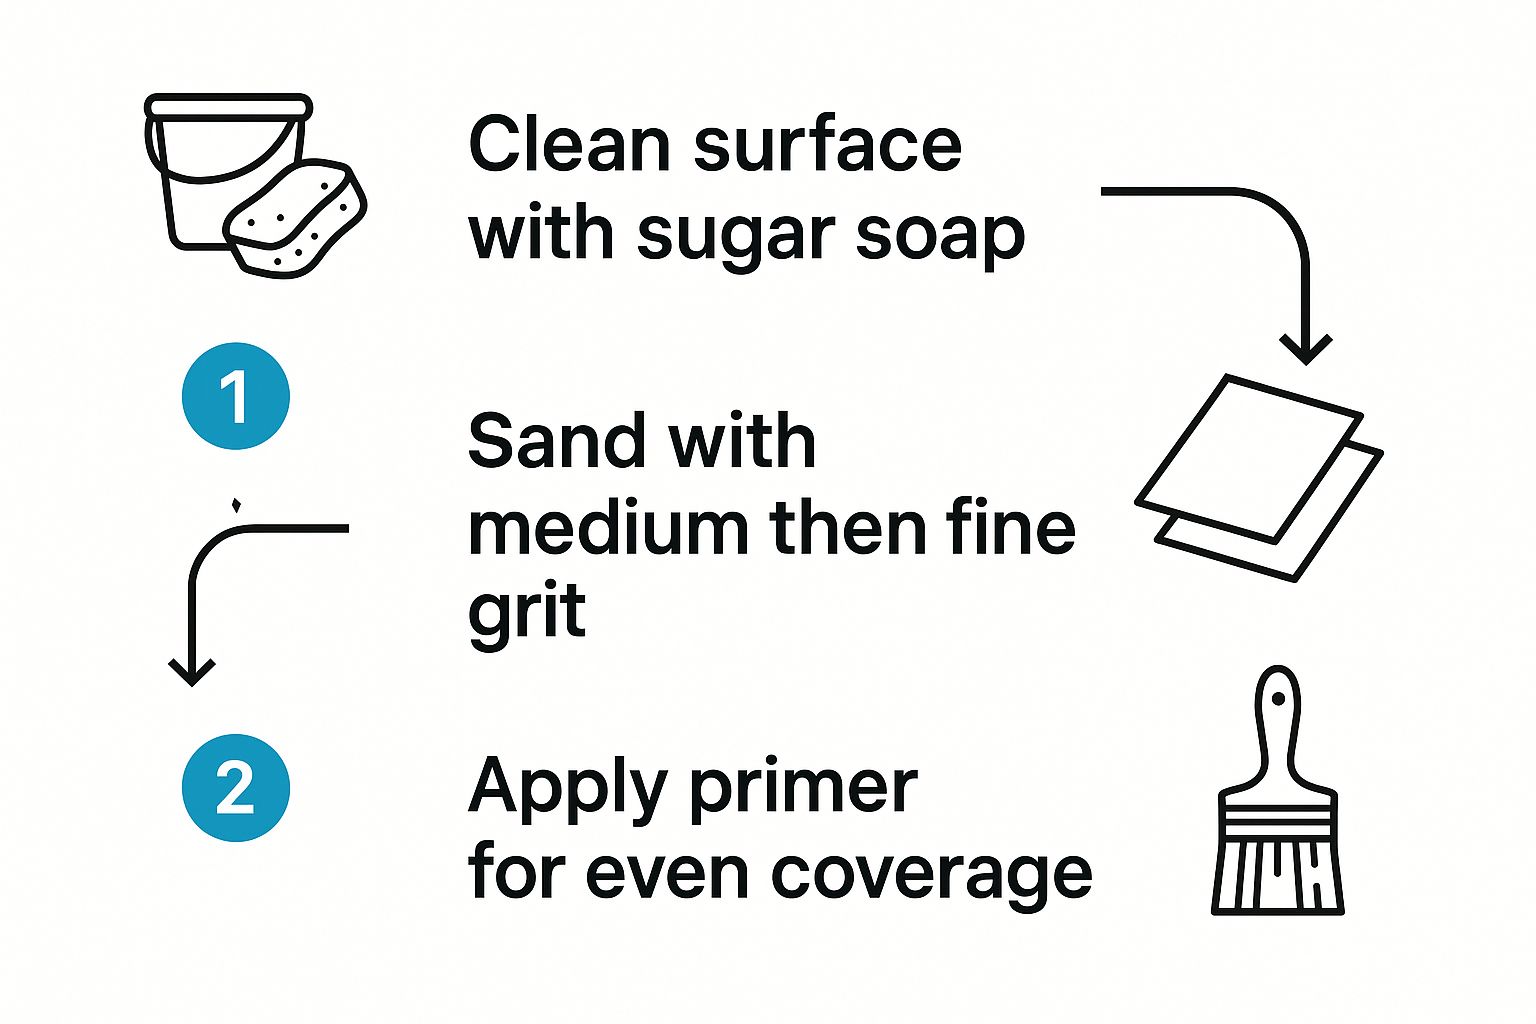
Following this simple sequence of cleaning, sanding, and priming is your best bet for a finish that's smooth, even, and built to last.
Creative Techniques to Transform Your Furniture
With all the prep work out of the way, you’re ready for the best part. This is where your vision truly comes to life, turning that clean, smooth piece of furniture into something you'll be proud to show off. We're going to dive into two fantastic methods for this: the classic approach of painting and the modern, instant-impact solution of vinyl wrapping.
Neither one is better than the other; they just offer different creative paths. Painting gives you a world of colour and the chance to add artistic, hands-on finishes. On the other hand, vinyl wraps offer a huge range of patterns and textures for a quick, mess-free makeover that can convincingly mimic high-end materials like marble or oak. It all comes down to the look you're after.
The Art of a Flawless Paint Job
There’s a reason painting is a go-to for upcyclers, but getting that professional, silky-smooth finish takes a bit more finesse than just dipping a brush in a tin. To get rid of those tell-tale brush marks, the trick is to use long, even strokes that all go in the same direction. If you’re tackling a large flat area, like the top of a chest of drawers, a small foam roller will be your secret weapon for a perfectly even coat.
But don't just stop at one solid colour! You can inject so much character with a few simple techniques.
- The Distressed Look: Once your base coat is completely dry, take some fine-grit sandpaper and gently scuff the edges and corners. Focus on areas that would naturally show wear and tear over time. It’s a brilliant way to achieve that rustic, farmhouse charm.
- Stencilling for Intricate Designs: Stencils are a game-changer if you want detailed patterns without being a confident artist. The key is to use a stippling motion with a stencil brush or foam dauber, using very little paint. This prevents it from bleeding under the stencil and ruining your sharp lines.
- Modern Colour Blocking: For a bold, contemporary feel, use good-quality masking tape to section off geometric shapes or divide drawers. Painting these sections in different complementary colours can bring a dated piece right into the 21st century.
Here’s a pro tip I've learned from experience: always aim for two thin coats of paint instead of trying to get it all done in one thick layer. It gives you far better coverage, a smoother finish, and it's much more durable against knocks and chips.
Getting a Perfect Finish with Vinyl Wraps
If you're looking for a quick, dramatic update with zero mess, you really can't beat a high-quality vinyl wrap. This is my favourite method for flat surfaces like cabinet doors, desktops, and drawer fronts. The secret to a bubble-free application is all about taking your time.
First, cut your vinyl so it’s slightly larger than the surface you’re covering. Peel back just a few inches of the backing paper to start, and carefully line up the exposed edge. Grab a squeegee and, working from the centre outwards, smooth the vinyl onto the surface. This motion pushes any air bubbles out to the sides before they get trapped.
Slowly pull away more of the backing paper with one hand while you continue to smooth with the squeegee. This steady process is the best way to prevent big, frustrating bubbles. If you do get a stubborn one, you can usually lift the vinyl gently and re-apply it. For tiny ones, a tiny pinprick will release the air, and you can smooth it down flat.
There are so many amazing designs out there. If you need a bit of inspiration, check out these creative vinyl wrap ideas for furniture to get your ideas flowing.
Corners and edges need a little extra attention. For a sharp 90-degree corner, you can make a neat diagonal cut and fold the vinyl over, just like wrapping a Christmas present. For rounded edges, a quick blast with a hairdryer will make the vinyl soft and pliable, allowing you to stretch it around the curve for a truly seamless look.
Adding the Final Details That Make a Difference
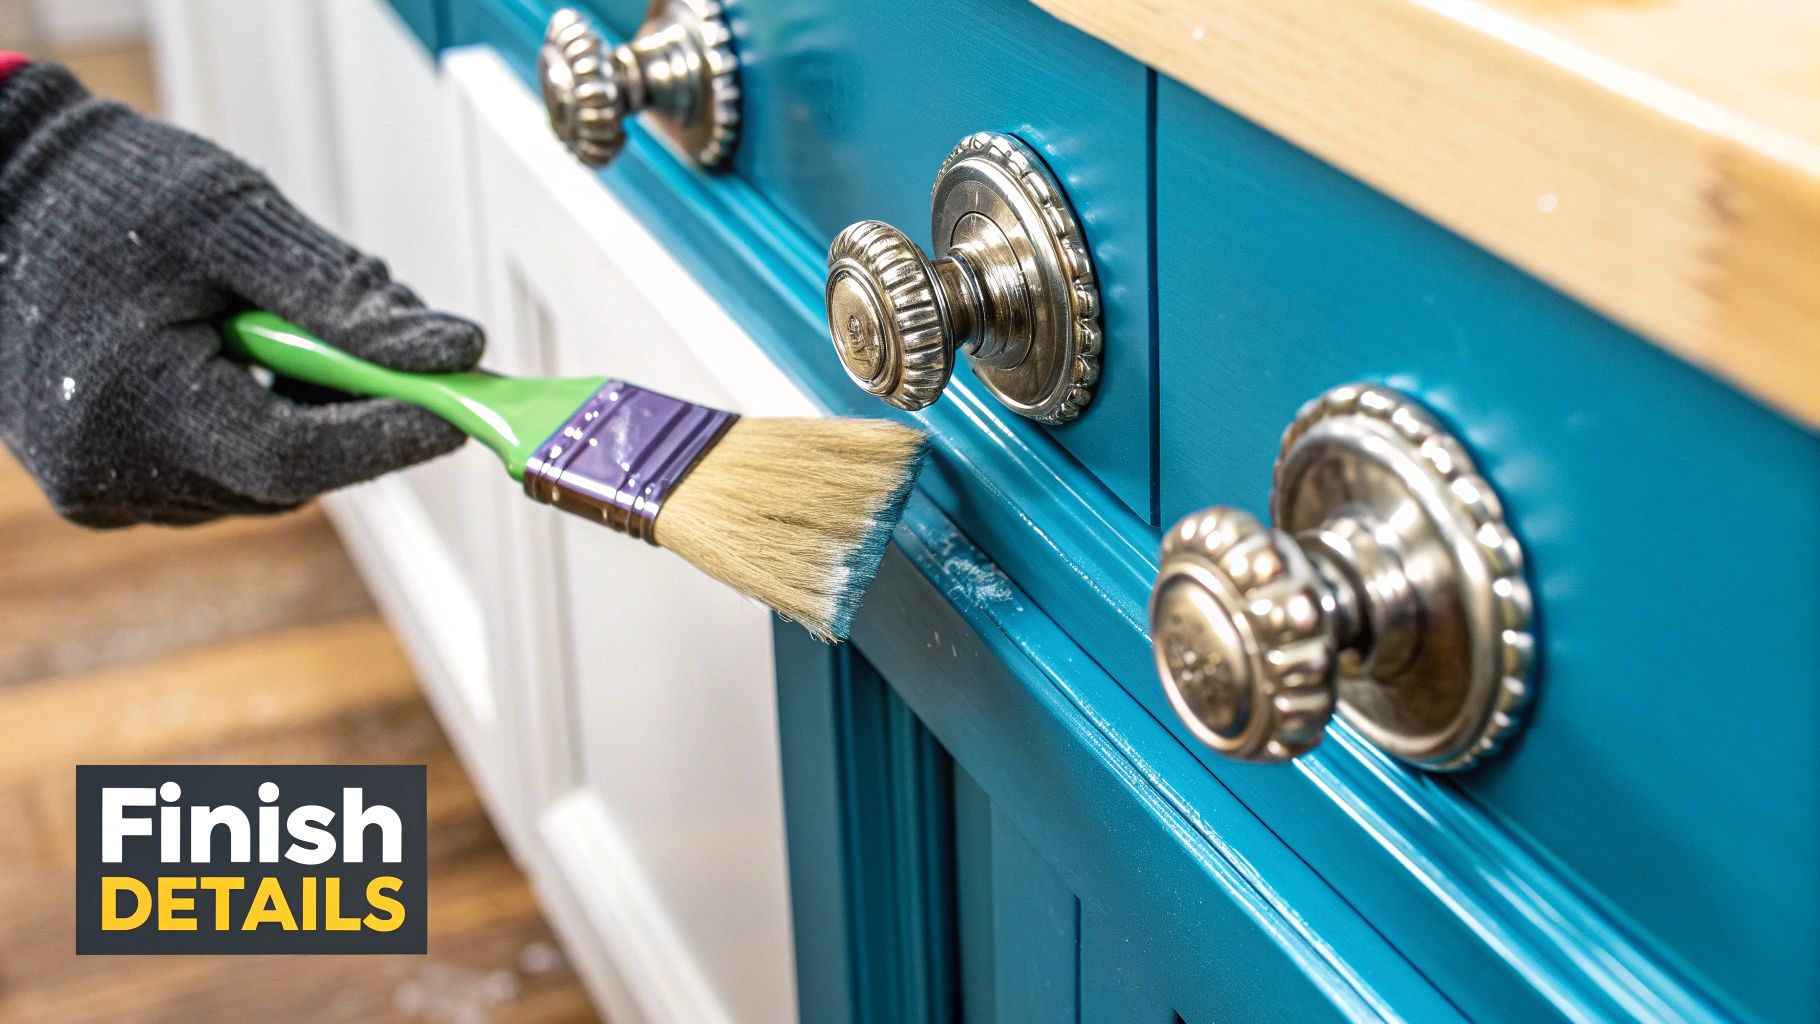
The finishing touches are where the real magic happens. This is the stage that separates a simple DIY job from a piece of furniture that looks genuinely restored and thoughtfully designed. It’s all about the final details—the hardware and the protective coat—that add personality and ensure your hard work lasts for years to come.
One of the easiest yet most dramatic changes you can make is updating the hardware. A tired old chest of drawers can be given a completely modern look with some sleek new handles, while a plain cabinet can instantly feel more vintage with antique-style brass knobs. It’s a small detail with a huge impact.
Choosing and Updating Your Hardware
You don’t have to break the bank to find incredible hardware. I've found some of my best pieces in charity shops, at car boot sales, and by scrolling through online marketplaces. They are absolute treasure troves for unique and affordable knobs and pulls.
Sometimes, you don't even need to buy new. The original hardware can often be salvaged with a good clean and a quick spritz of metallic spray paint. Just think about the style you're aiming for. A dark, moody cabinet with bright gold handles tells a very different story than one with subtle matte black pulls.
Protecting Your Hard Work With the Right Topcoat
After all that time spent prepping and painting, the last thing you want is for your masterpiece to get chipped or stained within weeks. Applying a protective topcoat is an essential final step, especially for furniture that's going to see daily use.
What you use to seal your piece really depends on the paint you’ve used and what the item will be used for.
- Soft Wax: This is the go-to for sealing chalk paint. You simply rub it on with a lint-free cloth and buff it to a soft sheen. It creates a lovely, mellow finish that’s perfect for low-traffic items like bookcases or a bedside table.
- Polyurethane Varnish: For high-traffic surfaces like a dining table, desk, or coffee table, you need something much more robust. A water-based polyurethane varnish offers a tough, wipeable, and water-resistant shield against spills and everyday knocks.
Think of the topcoat as insurance for your project. A couple of thin, even coats might feel like an extra chore, but it's the single most important thing you can do to keep your upcycled furniture looking fantastic for years.
This focus on making things last is part of a much bigger picture. The UK sustainable home furniture market was valued at around £5.25 million in 2023 and is expected to grow by about 5% each year until 2030. People are consciously choosing to upcycle and buy responsibly. You can read more about the growth of sustainable furniture in the UK and see just how significant this movement is.
When you're applying your topcoat, take your time. Use long, even strokes with a decent brush or foam roller. For a seriously smooth finish, let each coat dry completely, then give it a very light sand with fine-grit sandpaper before applying the final layer. This careful process is what makes your piece truly ready for its new life.
Got Questions About Upcycling Furniture?
Diving into your first upcycling project is exciting, but it’s completely normal to have a few questions buzzing around. While learning the ropes always involves a bit of trial and error, getting a handle on the basics from the get-go will save you a ton of hassle and help you get a finish you’re genuinely proud of.
Let's walk through some of the most common queries we hear from people just starting out, with some practical, no-nonsense answers to get you on the right track.
What Is the Best Paint to Use for Upcycling?
The perfect paint really comes down to the style you’re after. For anyone new to this, chalk paint is a fantastic starting point. Its biggest selling point is that it sticks to almost anything with very little prep, and it dries to a lovely, rustic matte finish that’s brilliant at hiding minor imperfections.
If you're after something a bit more modern and hard-wearing, I’d point you towards a satinwood or eggshell paint. These have a subtle sheen that’s much easier to wipe down, which is a lifesaver for high-traffic pieces like dining tables or kitchen cabinets. Just remember, if you’re trying to cover a dark colour or a shiny, varnished surface, putting in the effort with a good primer first is absolutely essential for a smooth, even result.
Can I Upcycle Laminate or MDF Furniture?
You certainly can, but your success hangs entirely on the prep work. You can’t just slap a coat of paint onto a slick, glossy laminate surface and hope for the best – it simply won’t stick for long.
The trick is to give the paint something to grab onto. First, give the piece a really good clean to get rid of any grease or grime. Then, you'll need to lightly scuff the entire surface with fine-grit sandpaper – something around a 180-220 grit is perfect. After wiping away the dust, the crucial step is applying a top-quality, adhesion-promoting primer. This is what creates that all-important bond between the laminate and your topcoat.
I know it’s tempting to cut corners on prepping laminate, but please don't. That quick sand and a coat of specialist primer are the difference between a finish that peels off in a month and one that looks great for years to come.
How Do I Know if a Piece Is Not Worth the Effort?
Most old furniture has hidden potential, but some pieces are just not worth the headache. I'd suggest walking away from anything with major structural damage, like a wobbly frame that can't be tightened, badly warped wood, or significant water damage that's turned the material soft and crumbly. These problems often mean expensive, expert-level repairs.
A couple of other red flags to watch out for are active woodworm (look for little holes with piles of fresh, fine dust nearby) and a really strong, musty smell you can’t shift. If a good clean doesn't get rid of that smell, it could be a sign of mould deep within the material.
Ready to give your furniture a stunning new look without the fuss of painting? The easiest way to a flawless finish is with high-quality vinyl wraps from Quote My Wall. You can explore hundreds of designs, from realistic wood grains to chic marble effects, and give your old pieces a whole new lease of life. Find your perfect style at https://www.quotemywall.co.uk.