

Privacy Window Film Installation: A Complete DIY Guide
You're standing at the front window, lights on inside, wondering if a roll of film can really stop neighbours, passers-by, and people on the pavement from seeing straight in. That's the right question to ask before you buy anything, because privacy window film installation only works well when the film type matches the room, the glass, and the way British homes are lit after dark. Done properly, it's one of the cleanest upgrades for renters and homeowners alike, and the wider market keeps growing inside a mature architectural-films category valued at USD 12.9 billion in 2025 and projected to reach USD 21.9 billion by 2033, with a 7.1% CAGR from 2026 to 2033, according to Grand View Research. That scale matters in the UK because privacy film isn't a novelty, it's a practical retrofit that sits alongside decorative and solar-control films.
Understanding What Privacy Window Film Can and Cannot Do
A client once told me she'd fitted frosted film on her front-facing downstairs window and expected it to solve everything. It did, during the day. At night, with the hall lamp on and the street dark outside, the effect changed enough that she still wanted curtains for peace of mind. That's the core lesson with privacy film. It's not magic glass, it's a light-control product.
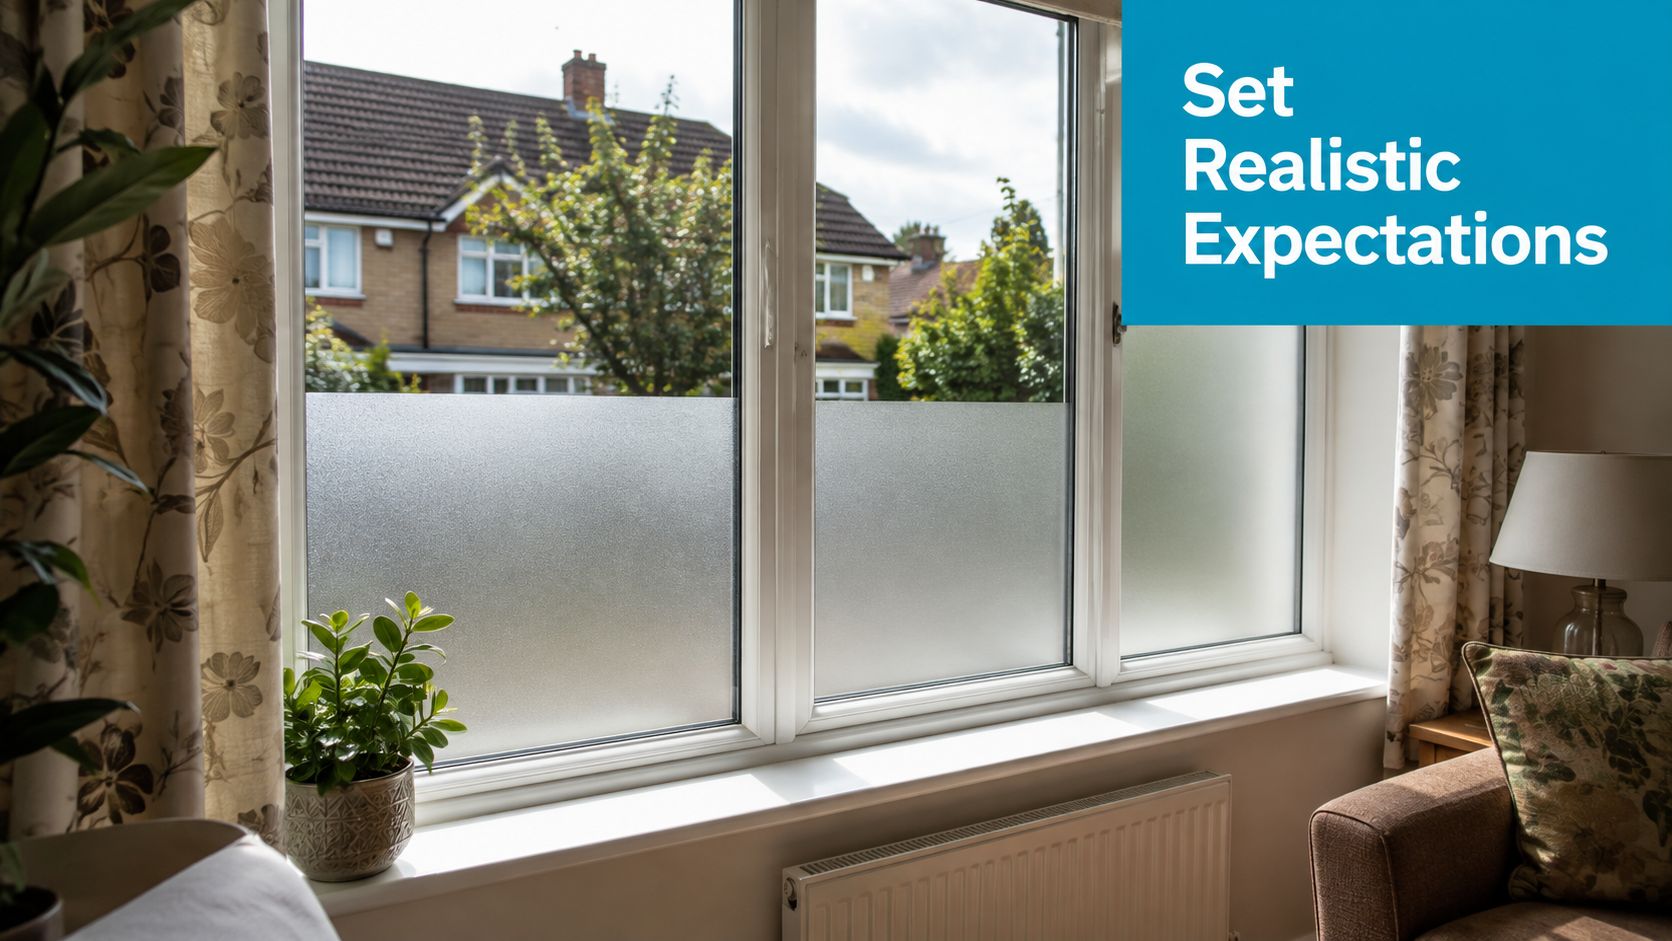
Frosted film and reflective film solve different problems
Frosted privacy film diffuses light and blurs shapes, so it gives a steady, low-maintenance solution for bathrooms, front doors, and street-facing rooms. It doesn't rely on a “you can see out, they can't see in” effect. By contrast, reflective one-way film depends heavily on light balance. If the outside is brighter than the inside, it can work well. If your room is lit and the street is dark, the privacy effect drops, which is why night use is the weak point many buyers miss, as specialist guidance on lighting conditions for night privacy explains in Contravision's advice on lighting for night privacy.
That distinction matters for UK homes with terraced streets, flats, and conservatories. If you need reliable daytime privacy with daylight still coming through, frosted film is usually the safer bet. If you want a view out and are willing to manage lighting, reflective film can work, but only in the right conditions.
Practical rule: If you need privacy at all hours, don't buy a film based on daytime performance alone.
What you should check before buying
Use the room itself to guide the choice, not the packaging. A bathroom with a small, overlooked pane is a good fit for frosted film. A bedroom on a busy street may need film plus a blind. A living room window facing a garden can often take a lighter privacy level if you mainly want a softer look.
If you're comparing styles, the best window film for privacy guide is a useful place to start because it separates decorative looks from practical privacy performance. I'd also suggest sanity-checking cost expectations against broader installation pricing with compare window tint installation prices, even though the labour market is different, because it helps people understand where DIY saves money and where complexity drives cost.
Preparing Your Windows and Gathering the Right Tools
Good film looks simple only after the prep has been done properly. The glass needs to be clean enough that you're not trapping dust, old polish, or fine grit under the film, because every speck shows once the film goes on. The surface also needs to suit the film type. That means checking for existing coatings, double glazing, and any damage that a thin privacy layer might highlight rather than hide.
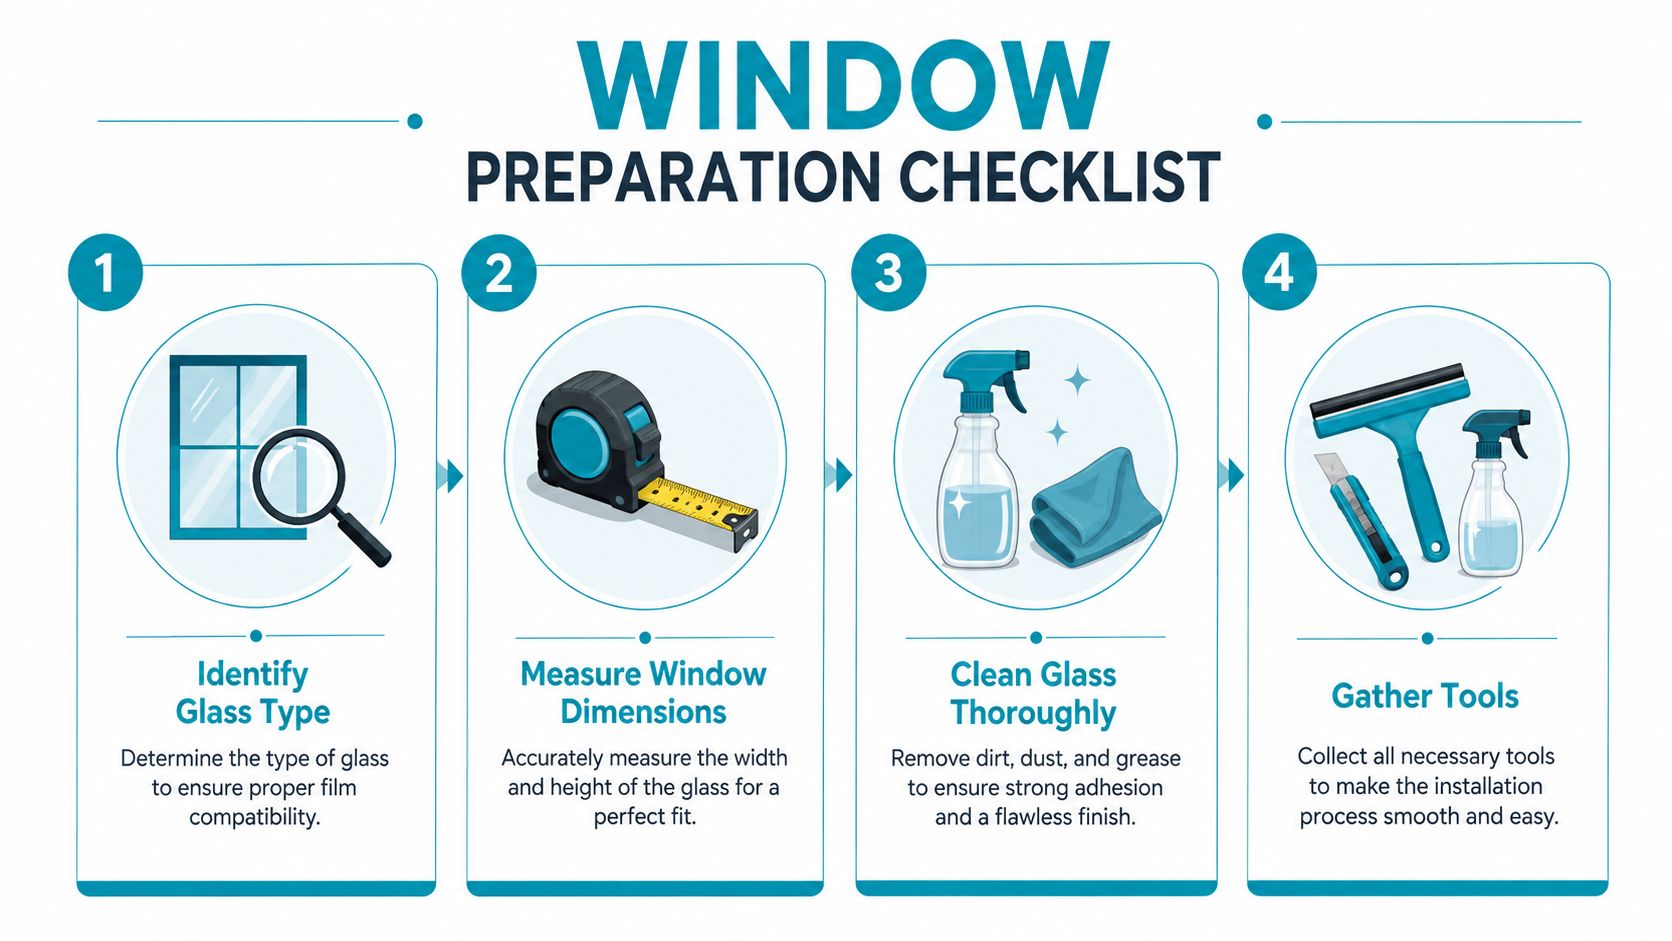
Start with the glass, not the roll
Look at the pane in daylight and again with the room light on. Tiny scratches, silicone smears, and old sticker residue become much more obvious once film is fitted. If the window already has a low-E coating, secondary glazing, or unusual performance layer, pause before applying anything. You're not just fitting décor, you're adding another layer to a system that already exists.
For cleaning, avoid harsh shortcuts. Home-improvement guidance on installation stresses careful prep, ammonia-free cleaning, and protecting the glass from scratches, which is exactly the right mindset for this job, especially if the film might later need removal. I've learned the hard way that a rushed wipe with the wrong cleaner saves ten minutes and costs an afternoon.
Gather the kit before you start
You don't need a van full of tools, but you do need the right few items within arm's reach:
- Sharp utility knife: Use a fresh blade. Dull blades drag and tear the edge.
- Squeegee: A proper plastic squeegee gives control, especially on larger panes.
- Spray bottle: This is essential for the wet method.
- Microfibre cloths: They help with final dust removal and perimeter cleaning.
- Measuring tape: Measure the glass, not just the visible opening.
- Lint-free paper towel or clean cloth: Useful for the frame edges and corners.
Measure twice, cut once sounds old-fashioned because it's still the best advice in film work.
If you're installing alone in a typical British home, clear the area first. Move curtains, lift nearby ornaments, and shut doors to reduce dust. A small draft can blow lint onto the pane right before you apply the film, which is how a “nearly perfect” job ends up with one annoying speck in the middle of the view.
For renters, this stage is also where you think about future removal. The link between prep and removal matters because a film that goes on cleanly usually comes off more cleanly too. Independent DIY guidance for removable film also notes the value of careful surface preparation and patience during curing, which is why I'd recommend keeping the window free of unnecessary handling once the film is on.
The Wet Application Method for Flawless Results
The wet method is the one I trust for most privacy film jobs because it gives you room to correct mistakes before the film commits to the glass. That matters on larger panes and on first-time installs, when you're still learning how the film behaves. The key is controlled slip, not soaking the entire room.
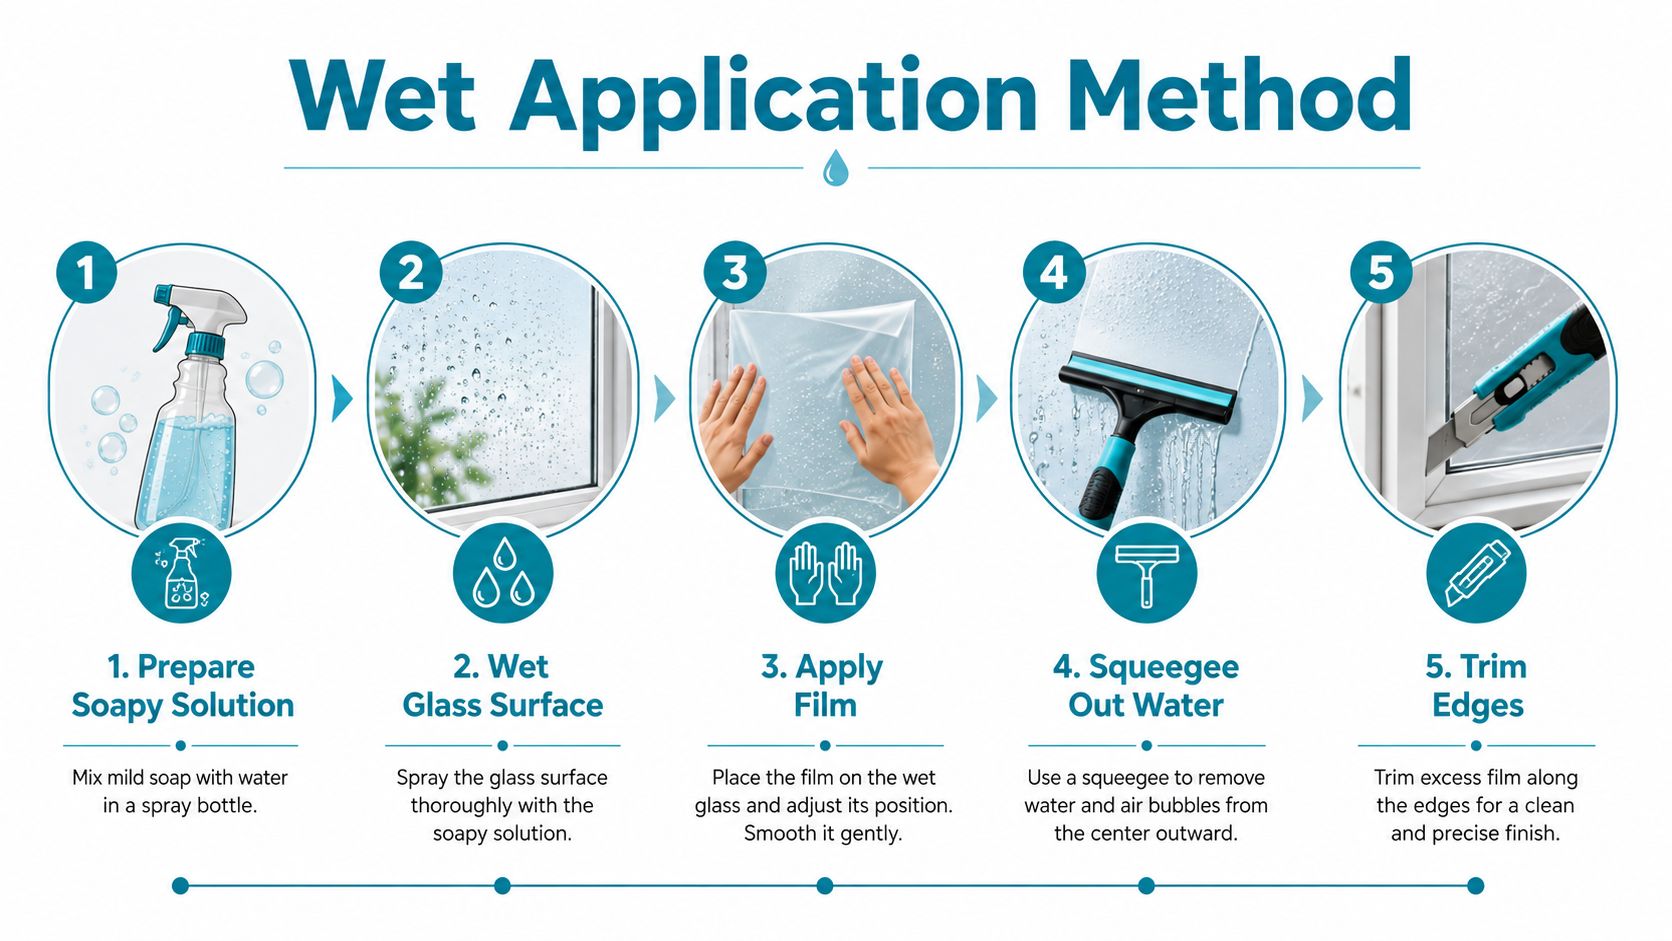
Get the slip solution right
Use water with a little washing-up liquid in a spray bottle. You don't want suds everywhere, just enough slip that the film can be nudged into position before it bonds. Spray the glass, then the adhesive side if your film type needs it. The wet surface is what buys you alignment time.
Cut the film slightly oversize first. UK homeowner guidance recommends leaving about 1 inch/2.5 cm oversize so you can position the piece and trim cleanly after it's in place, which is a very sensible margin for DIY work. The same workflow, cut, wet, align, squeegee, trim, is the one I've used repeatedly because it reduces panic when the film lands a few millimetres off.
Position from the centre outward
Lay the film onto the wet pane and don't rush the first placement. Once it's roughly where it needs to be, use your squeegee from the centre outward. That pushes water and air toward the edges, which is far easier than trying to chase bubbles later. For a wide window, work in sections rather than sweeping across the whole pane in one frantic pass.
If you want a broader refresher on the wiping motion itself, this guide on how to squeegee a window like a pro is worth a look because the hand movement is the same principle, even though you're working with film rather than plain glass.
A clean trim comes next. Run the utility knife carefully along the edge, using the frame as your guide. Don't force the blade into the corner, just let it glide. That's how you avoid the little tears that later turn into lifting edges.
Expect curing, not instant perfection
Fresh film can look slightly cloudy at first. That's normal while the moisture works out. Follow the manufacturer's curing advice for the specific film you buy, and don't clean or peel at the edges too early. I've seen too many people mistake curing haze for failure and start poking at a job that would have settled on its own.
Troubleshooting Common Installation Problems
Most bad installs don't fail for dramatic reasons. They fail because one small issue gets ignored. A bubble that seemed minor, a dusty corner, a blade that was already dull, or a panel that was forced to fit instead of being trimmed properly. The fixes are usually simple, but only if you know which problem you're looking at.
Bubbles, wrinkles, and film that sticks to itself
A few tiny bubbles can disappear as the film cures, especially if the film is still drying and the pane was applied correctly. What doesn't disappear is trapped dirt or a bubble created by poor squeegee work. If a bubble refuses to move, it's usually because it's trapped against contamination, not because the film is “bad”.
Wrinkles are different. They usually mean the film folded on itself during handling or wasn't floated into position smoothly enough. If the wrinkle is fresh and the adhesive hasn't grabbed, lift the film gently, re-wet the pane, and reset it. Once the film has started to bind in patches, it's often faster to remove that section and restart than to keep pushing the defect around.
If the film is clean but still won't lie flat, stop and reset the section. Fighting a bad placement usually makes it worse.
Edge lift and dust under the film
An edge that lifts after installation often points to incomplete trimming, residue on the frame line, or a pane that wasn't dry enough at the perimeter. Pressing harder won't fix that for long. Clean the edge, dry it properly, and check that the film isn't running hard against the frame. A small gap usually helps more than a perfect-looking edge that's too tight.
Dust particles are the most annoying problem because they're visible forever. If the speck is tiny and away from the line of sight, you may decide to live with it. If it sits in the middle of a bathroom window or front pane, removal and restart is the honest fix. I'd rather lose twenty minutes than stare at one flaw for years.
Divided lites and decorative frames
Windows with small panes, muntins, or busy frames need a different mindset. The more interruptions the glass has, the more likely you are to mis-cut or misalign the film. In those cases, work slowly and cut each pane individually rather than trying to bridge awkward shapes in one go. That's also where practice windows, like a spare side panel or utility room pane, pay for themselves.
If the shape is too awkward, don't force a hero DIY. You're not failing by stopping. You're avoiding a more expensive mistake.
Night-Time Privacy and Lighting Considerations
The toughest part of privacy film is also the part most product pages gloss over. A film that looks excellent in daylight can feel disappointing once the lamps are on and the curtains are open. In UK homes, that matters because winter nights are long, street lighting is common, and many terraced houses and flats sit close to other windows.
Why lighting changes the result
Reflective one-way films need a stronger light source on the outside than the inside to keep the mirror effect working. When that balance flips, the room becomes easier to see into. That's why night privacy is fragile in real homes, especially if you've got bright interior lamps and a dark street beyond the glass. Specialist manufacturer guidance makes lighting the decisive factor, not just the film label, which is the point buyers should focus on before fitting anything.
Frosted film behaves differently. It doesn't promise a perfect mirrored effect, it blurs the view. That makes it far more predictable for evening use. If your main concern is somebody seeing straight into a kitchen, bathroom, or hallway, frosted film is usually less fussy and more honest about what it delivers.
Match the film to the room
Think room by room instead of choosing one film for the whole house:
- Front-facing bathrooms: Heavy privacy usually makes the most sense.
- Ground-floor living rooms: A combination of film and a curtain or blind often feels better.
- Conservatories: Evening use can expose every angle, so supplementary shading matters.
- Flats opposite other buildings: Close sightlines make lighting balance more important.
For a more detailed breakdown of the frosted option itself, this frosted window film for privacy guide is useful because it focuses on the type most individuals end up choosing when they realise they need dependable, low-fuss coverage.
Best practice: Choose the film for the worst lighting condition you expect, not the best one.
That's the mistake I see most often. People buy for sunny daytime privacy, then discover that the actual problem happens at 7 p.m. in December. If your room needs privacy when it's dark outside, design for that reality from the start.
Renter-Safe Removal and Surface Compatibility
Renters need a different checklist from owners. The main question isn't just whether the film looks good, it's whether it comes off cleanly and whether the glass underneath stays intact. That concern is valid, because a deposit conversation is never fun when you're standing beside a window with residue still on it.
Choose a film you can remove with confidence
If you're in a tenancy, favour a removable product and test a small corner first. Static-cling styles are the obvious renter-friendly option because they're designed for temporary use, and the broader guidance on static-cling film for windows is worth reading before you commit to a full room. For a temporary installation, that extra flexibility is often the difference between a useful upgrade and a risky one.
Modern double glazing, low-E glass, and conservatory panes deserve caution. Some films are fine on smooth interior glass, but not every coating or pane type likes additional layers. If the pane already has a specialist finish, check compatibility before application rather than hoping it will be fine. That's especially important in conservatories, where heat and sun exposure can make poor choices show up faster.
Remove it slowly, not heroically
When it's time to take the film off, work from one corner and peel gradually. If the film has adhesive, gentleness matters more than speed. Heat can help soften the bond, but brute force usually just leaves you with fragments and residue. A plastic scraper and a careful clean-up are better than a sharp blade near a pane you're trying to hand back in good condition.
Don't rush removal before the film has fully cured, either. If you've only just installed it, let it settle first. The cure period matters because lifting early can leave the film stretched, marked, or harder to remove cleanly later.
A tidy removal starts with a tidy installation. The cleaner the prep and the gentler the fit, the easier the exit.
For landlords and homeowners alike, a sensible expectation is that film is a finish, not a forever material. Quality, use, light exposure, and cleaning habits all affect how long it stays looking sharp, so plan for replacement when the finish begins to dull rather than waiting for failure.
When to DIY and When to Hire a Professional
DIY makes sense when the panes are standard, accessible, and not full of awkward detail. That covers a lot of UK homes. A bathroom pane, a hallway sidelight, or a straightforward bedroom window is usually well within reach if you're patient and prepared. The job becomes less forgiving when size, height, shape, or glass type complicates the work.
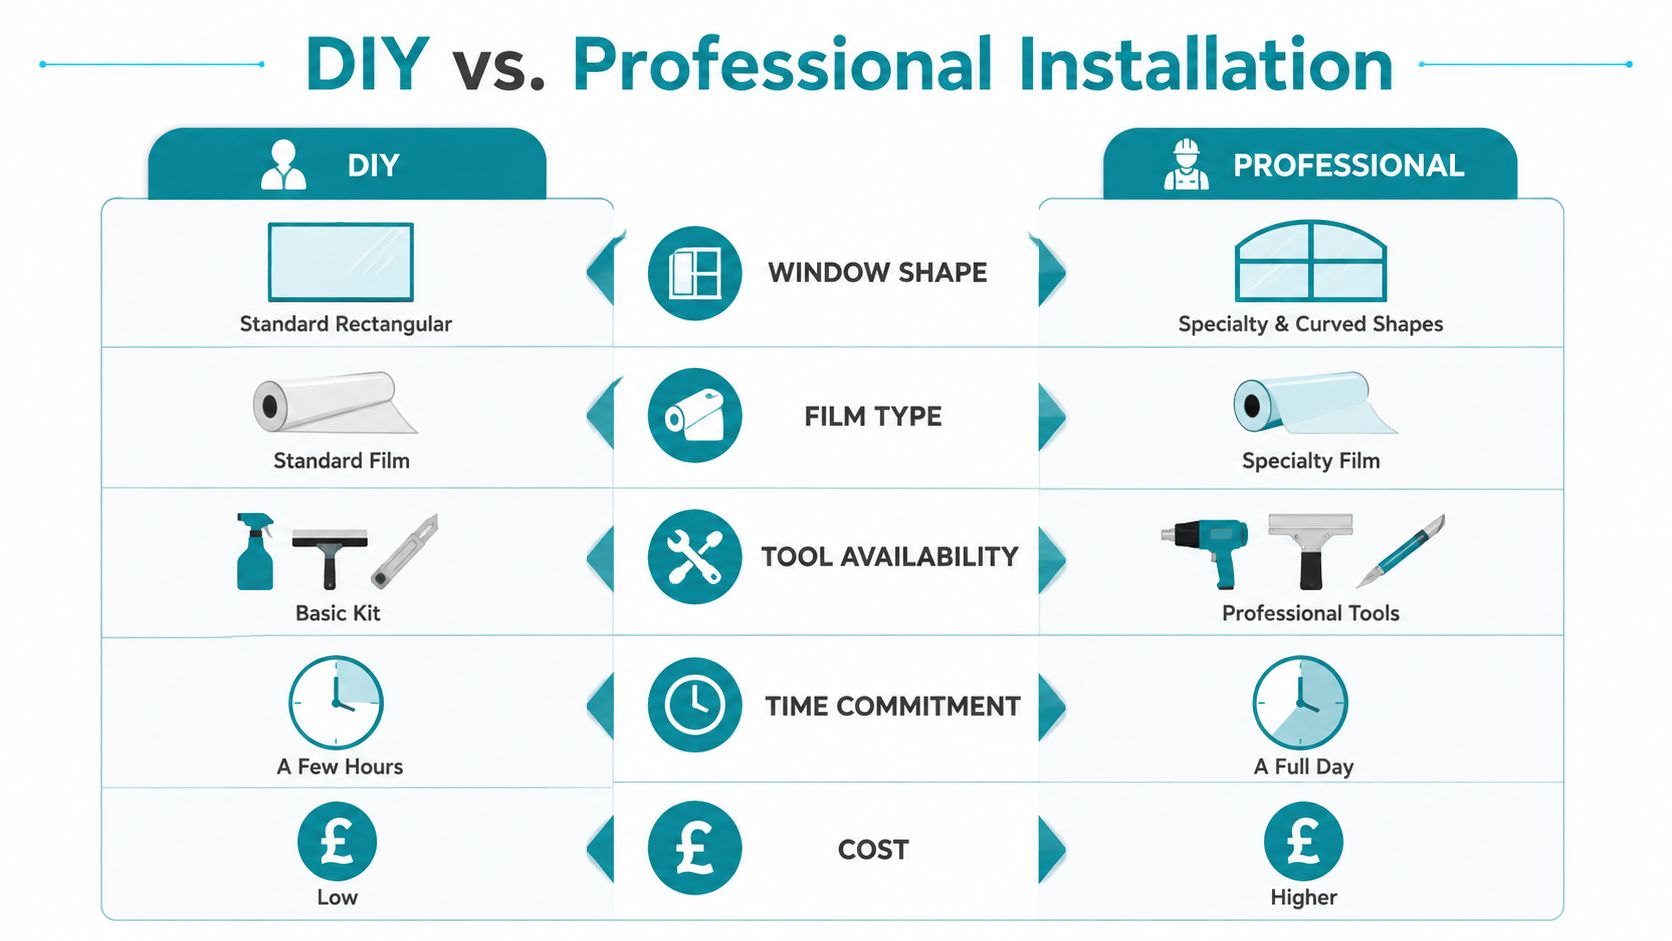
DIY works best when the window is simple
If the glass is easy to reach, rectangular, and smooth, a careful homeowner can usually get a clean result with basic tools. The wet method gives you enough forgiveness to correct alignment, and a fresh blade plus patient squeegee work handles most of the rest. For renters, the ability to remove the film later is another reason DIY often makes sense.
Professional help becomes sensible when you're dealing with large panes, awkward layouts, high windows, or specialist glazing. Divided lites and tall conservatory sections are the classic trouble spots. They're not impossible, they're just the sort of job where one mistake turns into wasted material and a longer afternoon than you expected.
Compare effort, finish, and risk
Here's the simplest way to decide:
- Go DIY: Standard panes, ground-level access, and removable film.
- Hire a pro: Tall windows, complex shapes, or expensive glazing you don't want to experiment on.
- Pause and check compatibility: Any window with coatings, unusual structure, or a tenancy clause that limits alterations.
For a sense of the broader style-versus-function trade-off, the peel and stick window shades guide is useful because it shows how another removable window treatment handles privacy and convenience, even though the installation method is different.
If you're confident, DIY is satisfying and cost-conscious. If the pane is awkward or the glass is expensive to replace, paying an installer can be the calmer choice. The better decision is the one that fits the window, not the one that flatters your pride.
If you're ready to choose film that suits your windows, visit Quote My Wall to explore privacy-focused vinyl and window products that fit real UK homes, not just showroom examples. You'll find options that make sense for renters, homeowners, and anyone trying to balance privacy, light, and easy installation without overcomplicating the job.