

A Parent's Guide to Personalised Nursery Wall Art
When you’re creating a nursery, it’s about so much more than just decorating. You’re crafting a sanctuary, a special little world for your baby, and personalised wall art is the perfect way to make it truly their own. It’s that final touch that turns four walls into a space brimming with love and personal meaning, weaving in custom names, special dates, and unique designs.
Crafting a Magical Space with Personalised Wall art
A baby’s first room is a magical place. It’s where you’ll share those first giggles, sleepy cuddles, and countless quiet moments together. While paint colours and furniture set the scene, it’s the little personal details that really fill the space with warmth and character. This is exactly where personalised nursery wall art comes in, transforming a standard room into a heartfelt haven that feels completely and uniquely yours.
Imagine seeing your child’s name beautifully displayed on the wall every day or a favourite quote that holds special meaning. It’s a constant, gentle reminder of your love and all the dreams you have for them. This simple act of customisation turns the nursery from just a room into a personal storybook, with every piece chosen just for them.
More Than Just Decoration
The idea of making our living spaces deeply personal isn't just a fleeting thought; it's a huge trend. The UK wall art market was valued at an impressive USD 3,597.2 million in 2022 and is set to keep growing, which shows just how much families want to invest in meaningful home décor. A big part of this boom comes from products like wall stickers and coverings, which accounted for 34.59% of the market alone. You can find more details in this report on UK wall art market trends to see how our homes are evolving.
This guide is here to walk you through the wonderful world of wall art and help you feel confident in your choices. We’ll cover everything from the different types available to styling tips that will help bring your vision to life.
The goal isn’t to chase fleeting trends, but to create a space that tells your family’s story. Personalised art acts as a gentle anchor, grounding the room in love and identity from the very beginning.
Whether you're drawn to the easy versatility of vinyl wall stickers, the classic charm of a framed print, or the soft, tactile feel of a canvas, the possibilities are endless. By the time you're done reading, you'll have all the inspiration and practical know-how to design a nursery that’s not only beautiful but deeply personal—a true celebration of the new life it welcomes.
2. Choosing the Right Materials for Your Nursery Art
Once you've got a theme bubbling away, it’s time to decide what your wall art will be made of. This choice isn't just about looks; it shapes the cost, practicality, and even safety of your little one's new room. It can feel like there are endless options, but let's break it down.
Here, we'll walk through the most popular materials, focusing on why vinyl wall stickers are such a game-changer for modern nurseries. By comparing them to traditional choices like framed prints and canvas, you'll be able to confidently pick what’s right for your home, style, and budget.
The Modern Parent’s Choice: Vinyl Wall Stickers
There’s a good reason vinyl wall stickers have become a go-to for parents. They offer a brilliant mix of style, flexibility, and affordability that’s tough to beat, especially in a space like a nursery where your needs (and your child's tastes!) can change in the blink of an eye.
Think of them as high-quality decals that you apply straight onto the wall. The result? A stunning, paint-like effect without any of the mess or commitment.
The real magic for parents is their easy, damage-free application and removal. This is a lifesaver if you're renting and can't make permanent changes. A well-made vinyl sticker peels off cleanly, leaving the wall in perfect condition. If you want to dive deeper into how they work, check out our guide on removable wall decals in the UK.
This flexibility is tapping into a huge trend. The UK wall art market is growing fast—projected at a rate of 6.3%—as more of us seek out modern, eco-friendly ways to decorate. Premium vinyl fits the bill perfectly, offering a durable, stylish alternative to throwaway decorations.
How Do the Options Stack Up?
While vinyl is a fantastic choice, it’s always smart to see how it compares to the more traditional art forms you might be considering.
-
Framed Prints: They give a classic, timeless feel and are easy to move around. The downside? You'll need nails or hooks, and the glass can be a safety worry in a baby’s room.
-
Canvas Art: Canvas brings a lovely, textured finish to a room, adding a real sense of depth. They’re lightweight, but they can be pricier and might need a bit more care when cleaning.
This simple flowchart can help point you in the right direction based on the look you're hoping to achieve.
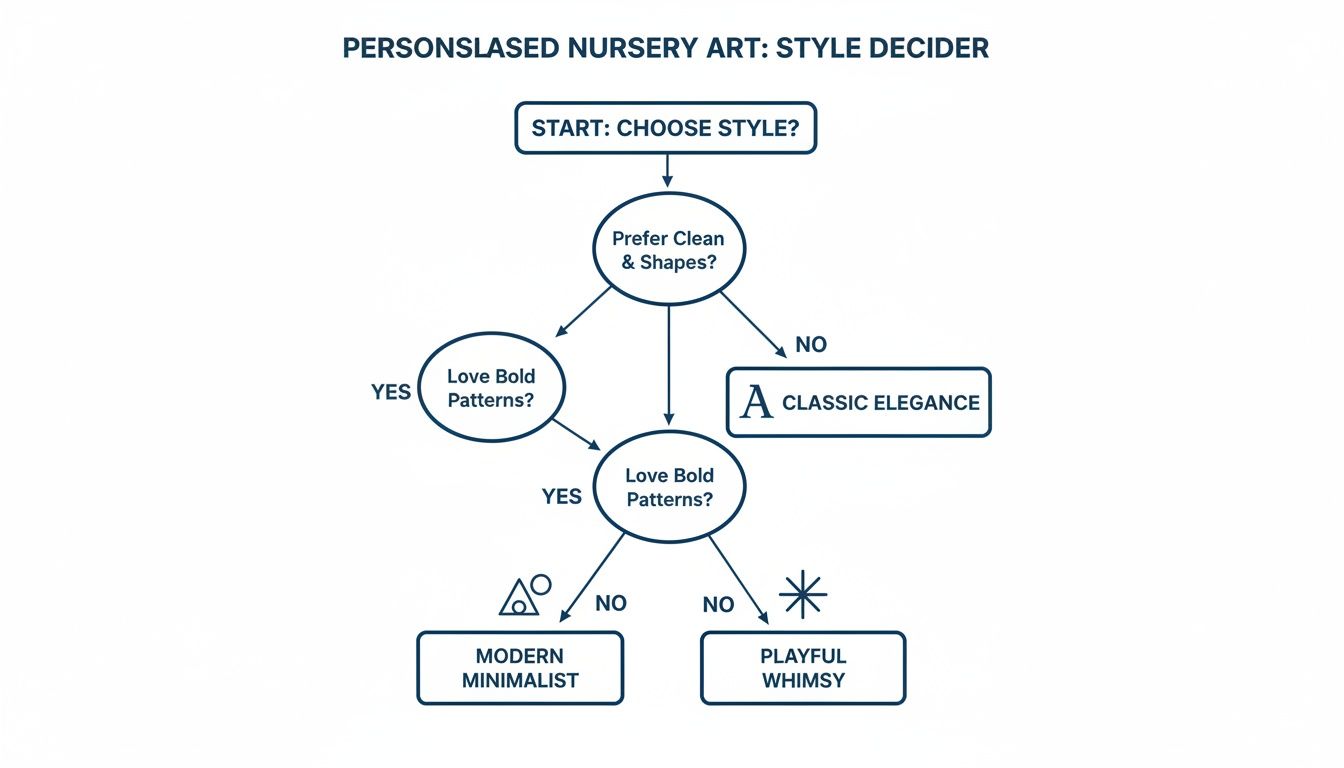
As you can see, your starting point—whether that's a modern, classic, or playful vibe—can naturally lead you to the best material for the job.
To make it even clearer, here's a quick-glance comparison to help you choose the best wall art material for your nursery based on cost, durability, and ease of installation.
Comparing Nursery Wall Art Materials
| Feature | Vinyl Wall Stickers | Framed Prints | Canvas Art |
|---|---|---|---|
| Installation | Peel-and-stick; no tools needed | Requires nails or hooks | Needs secure hanging |
| Wall Damage | None upon removal | Yes (nail holes) | Yes (nail holes) |
| Safety | No breakable parts; safe over a cot | Potential glass hazard | Lightweight; no glass |
| Durability | Long-lasting; resists fading | Protected by frame | Can be prone to dents |
| Cost | Most affordable option | Varies widely by frame | Mid-to-high price range |
| Best For | Renters; changing themes | Classic, timeless décor | Creating a bold focal point |
This table shows just how practical vinyl stickers can be for a nursery, especially when you value safety, flexibility, and keeping your walls pristine.
A Quick Word on Finishes and Safety
The final details can make all the difference. When it comes to the finish of your art, a matte finish is nearly always the best bet for a nursery. It cuts down on glare from lamps or nightlights, creating a much softer and more calming atmosphere for your baby. Glossy finishes can look sharp, but they often reflect light in a way that's distracting at bedtime.
Most importantly, safety has to be your number one priority. Always make sure that any art you choose is made from non-toxic, baby-friendly materials. Reputable suppliers will always use high-quality vinyl and inks that are free from harmful chemicals, making them completely safe for your child’s environment. This is one area where there’s simply no room for compromise.
The Art of Personalisation and Custom Design
This is where the real magic happens. We've talked about materials and finishes, but now we get to dive into the heart of it all: making a piece of art that’s truly, uniquely yours. This is your chance to weave your family’s story, your hopes, and all that love right into the walls of your baby’s very first room.
The most stunning designs are almost always the most personal ones. They capture a moment, a feeling, or an identity. It’s a bit like designing a personalized bed frame to get the style just right—every little choice, from a name to a colour, helps build a space that feels intentional and full of warmth.
Making It Meaningful with Names and Numbers
The most classic and, let's be honest, most loved way to personalise is with your child's name. There’s something so powerful about seeing their name on the wall, claiming the space as their own right from the very beginning. It creates an instant sense of belonging. If you're exploring ideas, our guide on crafting the perfect personalised name wall stickers has plenty of inspiration.
But why stop there? Adding birth statistics is a wonderfully sentimental touch that freezes that incredible moment in time.
- Date of Birth: The day they officially joined the family.
- Time of Birth: That exact minute your world changed forever.
- Weight and Length: A sweet, tangible reminder of just how tiny they started.
These details transform a lovely piece of art into a treasured family keepsake. You could also think about adding a meaningful quote, a line from a favourite storybook, or even a custom illustration that tells a little story—a nod to where you met or a sketch of the family pet.
Finding the Right Voice with Typography
The font you pick does so much more than just spell out a name; it sets the whole emotional tone for the room. Think of typography as the voice of your design. Is it soft and gentle? Bold and modern? Or maybe timeless and elegant? Getting a handle on the basics will help you choose one that sings in harmony with your vision.
Let's quickly break down the three main font families:
- Serif Fonts: These are the classics with little decorative feet (serifs) on the letters, like Times New Roman. They feel traditional, established, and a touch sophisticated.
- Sans-Serif Fonts: "Sans" just means "without," so these are the clean, modern fonts without the feet, like Arial. They're perfect for a minimalist or contemporary nursery.
- Script Fonts: These are the fonts that look like beautiful handwriting or calligraphy. They can be anything from playful and bouncy to elegant and formal, adding a really personal, artistic touch.
Your font choice should feel like it belongs with your nursery's theme. A whimsical, flowing script might be perfect for a magical woodland scene, while a clean, crisp sans-serif would look right at home in a Scandi-inspired space.
Weaving in Colour and Emotion
Colour is one of the most powerful tools you have. It can completely change the mood of a room, creating a space that feels either calm and serene for sleep or gently stimulating for playtime.
You don't need to be a colour theory expert to get this right. The best place to start is with your room's existing palette.
- Complementary Colours: To make your art really pop, pick a colour from the opposite side of the colour wheel to your main wall colour. Think a soft peach accent on a pale blue wall.
- Analogous Colours: For a more soothing, harmonious vibe, choose colours that sit next to each other on the wheel. Soft blues, greens, and teals work beautifully together.
- Monochromatic Schemes: This sounds fancy, but it just means using different shades of the same colour (like various shades of grey or pink). It creates a really sophisticated, calming effect.
Remember, the colours in your wall art are part of the room’s overall story. Soft pastels and earthy tones tend to feel calm, while brighter, bolder colours can add a splash of playful energy. It’s all about finding that perfect balance for the little sanctuary you’re creating.
Styling and Placing Your Art for Maximum Impact
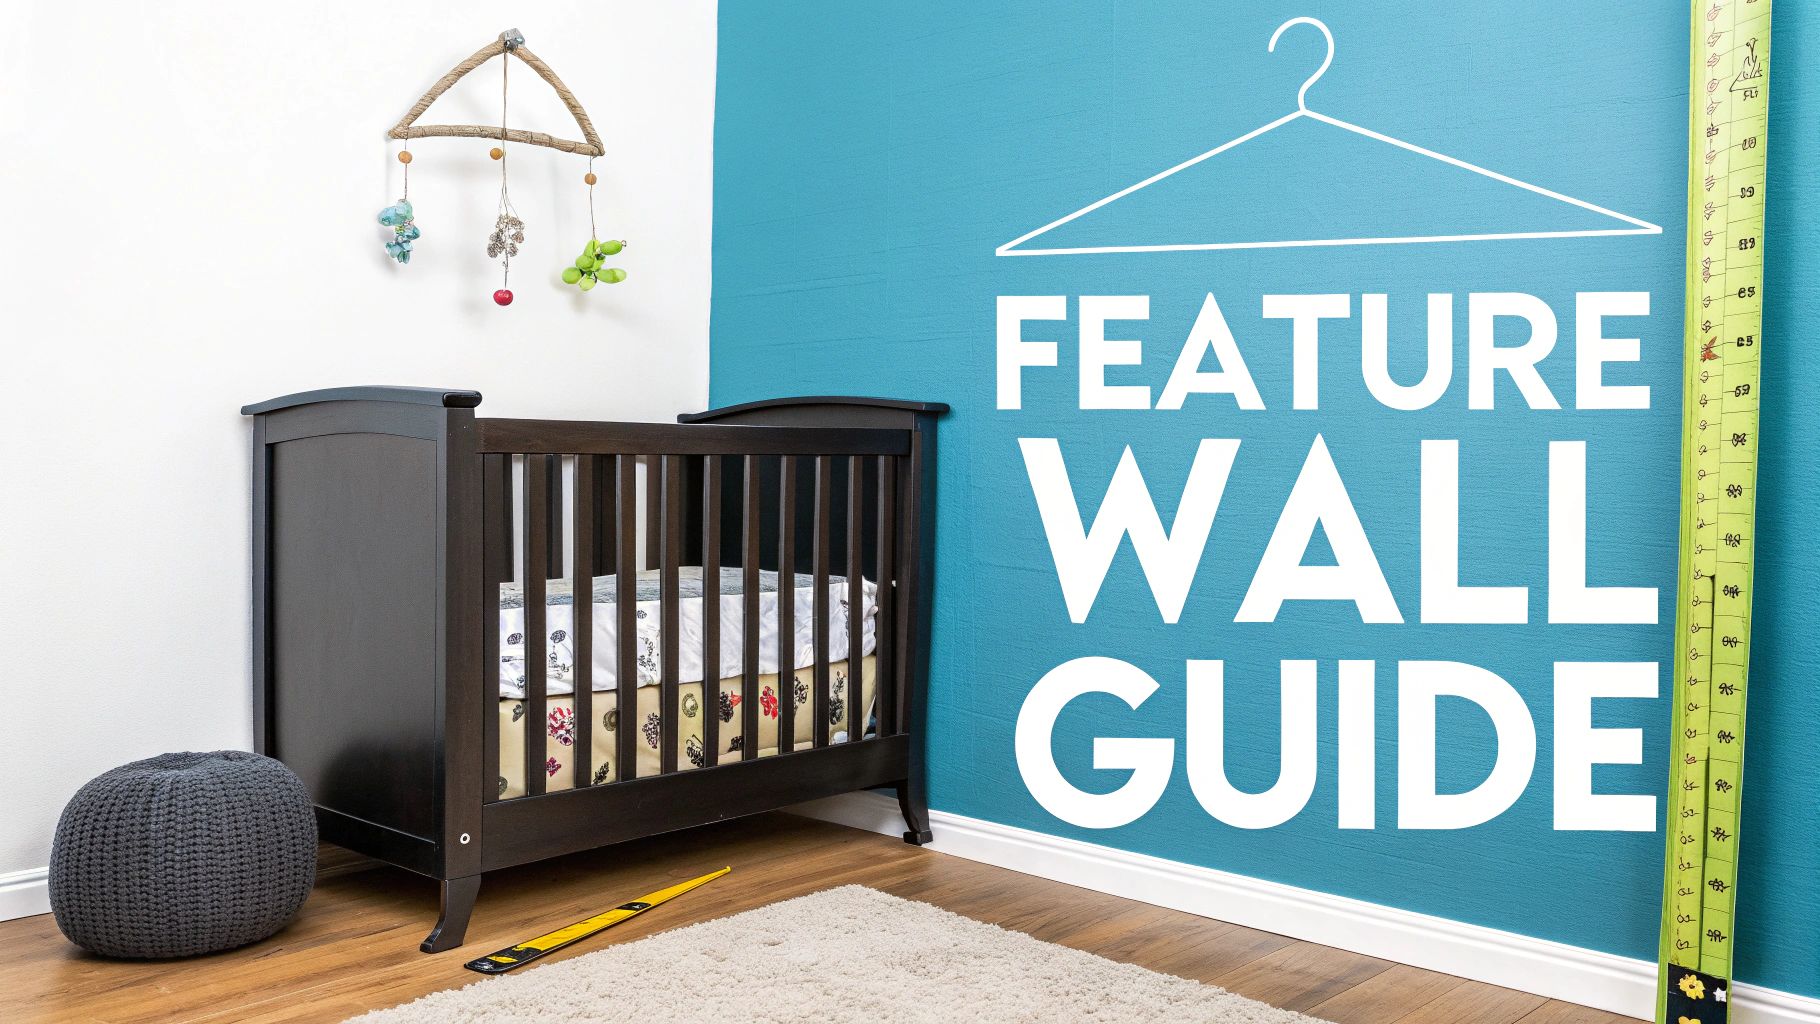
You’ve designed the perfect piece of personalised art—now, where does it go? Finding the right spot for it is more than just filling an empty space; it’s about making your new artwork a deliberate and beautiful part of the room’s story. With a few simple ideas, you can make sure your special piece gets the attention it deserves.
This isn't about following stuffy interior design rules. It’s about creating balance and drawing the eye to the most meaningful parts of your nursery, turning a blank wall into a thoughtful centrepiece.
Creating a Stunning Feature Wall
One of the best ways to show off your art is by creating a feature wall. This is usually the wall above the cot or changing table, and placing your art here instantly anchors the room and gives it a clear focus.
The real secret to getting this right is understanding scale and proportion. Think of your wall art and furniture as dance partners—they need to be in sync. A tiny piece of art floating above a large cot will look a bit lost, while a huge piece can make the furniture seem small and the room feel cramped.
A great rule of thumb is to choose art that is roughly two-thirds the width of the furniture it’s hanging over. This simple guideline helps create a pleasing sense of balance, making the art feel properly connected to the space rather than just stuck on the wall.
Practical Steps for Perfect Placement
Before you peel or hang anything, grab a measuring tape. A tiny bit of prep now will save you from any placement regrets later on.
- Measure Your Wall: First, get the total height and width of the wall you’ve chosen.
- Measure Your Furniture: Jot down the width of the cot or changing unit sitting below.
- Visualise the Size: This is my favourite trick. Use painter's tape to mark out the dimensions of your art on the wall. It lets you step back and get a real feel for how the size works in the room before you commit.
By mapping out the space first, you can adjust the size of your personalised art order to perfectly fit the scale of your room. It’s a simple step that makes all the difference for a professional, balanced look.
The Charm of a Curated Gallery Wall
If one piece isn’t enough and you’re after a richer, more collected look, a gallery wall is a fantastic option. This approach lets you mix your main personalised piece with other elements, creating a display that’s deeply personal and full of character.
Think of a gallery wall as your chance to tell a bigger story. You can bring together different textures, sizes, and styles to create a collection that feels like it has been thoughtfully curated over time.
Consider mixing and matching these elements:
- Your Personalised Centrepiece: This will be the heart of your gallery wall, the piece everything else revolves around.
- Family Photos: Add some black-and-white or colour snaps of loved ones.
- Smaller Prints: Pop in some illustrations or abstract art that complements your theme.
- Textural Pieces: Don’t forget other materials! Small woven hangings or wooden letters can add lovely depth.
This personal approach to decorating has become incredibly popular. In fact, residential applications now command a 71.2% market share in the wall art industry. This trend is heavily influenced by platforms like Pinterest and Instagram, which inspire us all to create unique, stylish spaces. You can learn more about how home décor trends are shaped by reading this wall art market analysis.
Inspiration for Popular Nursery Themes
Sometimes, seeing how art works within a theme is all it takes to spark an idea. For a woodland nursery, you could pair a personalised name sticker featuring forest animals with rustic wooden frames and prints of trees. If you're going for a safari theme, your custom art could be the main event, surrounded by smaller, playful prints of elephants and giraffes.
Or, for a dreamy celestial theme, place a personalised moon-and-stars piece in the centre and scatter smaller, sparkly star decals around it. You'll create a magical night sky right on their wall. These little combinations are what bring your chosen theme to life, making the room feel cohesive and truly special.
How to Apply and Care for Your Wall Art
You’ve designed the perfect piece of personalised art for the nursery, and now for the really exciting part: getting it up on the wall. A little bit of care during installation makes all the difference, ensuring your art looks absolutely stunning and stays put for years to come. This guide will walk you through the process, with a special focus on getting a professional, bubble-free finish with vinyl stickers.
Getting Your Wall Ready
Good preparation is everything. Think of it as the groundwork – rushing this bit is where things can go a bit wobbly. Taking a few moments to get the surface just right will pay off massively with a flawless result.
Before you even think about peeling a sticker, run through this quick checklist:
- Clean and Dry: Give the wall a gentle wipe with a damp cloth to get rid of any dust, then let it dry completely. A clean surface is a happy surface for vinyl to stick to.
- Smooth Surface: Vinyl stickers love a smooth, standard painted wall. They can be a bit fussy with heavily textured or bumpy surfaces, so check that first.
- Cured Paint: This one is crucial. Fresh paint needs time to fully harden, or "cure". We always advise waiting at least three weeks after painting before you apply any wall stickers. Popping them on too soon can damage both the paint and the sticker.
Flawless Application Step-by-Step
Putting your new art up should be a satisfying moment, not a stressful one. With the right technique, you can easily avoid those dreaded air bubbles or a wonky finish. If you've chosen framed art, the priority is hanging it securely, well out of your baby’s reach; this guide to hanging your picture with precision is a brilliant resource for getting it right.
For our vinyl stickers, here’s how to get that perfect finish:
- Positioning is Key: Use a bit of masking tape to temporarily hold the sticker on the wall. This is your chance to stand back, have a look, and tweak the placement until it feels just right. No commitment yet!
- Create a Hinge: Happy with where it is? Run a long piece of masking tape right across the middle of the design, sticking it to the wall on either side. This clever trick creates a hinge that keeps it perfectly in place.
- Peel and Apply: Now, lift one side of the sticker and carefully peel the backing paper away, right up to your tape hinge. Snip off the loose backing paper.
- Squeegee Smooth: Take a squeegee (a credit card works well too!) and start smoothing the sticky vinyl onto the wall. Work from the centre hinge outwards to push any air away.
- Repeat: Remove the hinge tape and do the exact same thing for the other half.
- The Final Reveal: Once the whole design is smoothed down, it's time for the big reveal. Slowly and carefully peel away the top layer of application tape at a sharp angle. Voila!
Top Tip: If a pesky little air bubble does appear, don't worry. Just prick it with a tiny pin and use your finger to gently smooth the air out. The hole will be so small, you'll never even see it.
Long-Term Care and Easy Removal
Your new wall art is made to last, but a little TLC will keep it looking its best. A gentle wipe with a soft, dry cloth is all it needs to stay fresh. It’s best to avoid any harsh chemical cleaners, as they can be unkind to the vinyl.
One of the best things about high-quality vinyl is that it’s completely renter-friendly. When you fancy a change, taking it down is just as straightforward as putting it up. Just warm the vinyl gently with a hairdryer on a low setting to soften the glue. Then, start at a corner and slowly peel the sticker back on itself. It should come away cleanly, leaving your wall looking good as new.
For a more detailed walkthrough, you can also check out our full instructions on how to apply wall stickers.
Your Custom Order Checklist Before You Buy
You've explored the materials, dreamed up the perfect design, and picked out just the right spot on the wall. The exciting part is finally here: making it real. Ordering a custom piece of art for your nursery should be a joy, not a source of last-minute stress. This final checklist is your safety net, designed to make sure that what you click ‘buy’ on is exactly what you’ve been imagining.
Most of the time, the process is simple. You'll pick a design you love, type in your text, select colours and sizes, and maybe even get a digital proof to approve. But in the rush of creating something so meaningful, it’s easy for a tiny detail to slip through the cracks. A quick once-over is the best way to catch any little hiccups before they happen.
The Triple-Check Before You Commit
Think of this as your final quality control moment. Taking a few extra seconds now to review your order details guarantees that what arrives at your door is perfect. It’s the difference between a treasured keepsake and the slight disappointment of spotting a tiny typo later on.
Before you finalise anything, give these essentials a quick look:
- Spelling and Names: Check every single letter. Autocorrect has a funny way of tripping up on unique names, so read it back to yourself slowly and make sure it looks exactly right on the screen.
- Dates and Numbers: Are the birth date, weight, and time all correct? It’s so easy to mix up numbers when you’re tired—double-check that a 12 hasn't accidentally become a 21.
- Colour Confirmation: Do the colours you've chosen on-screen still feel right for your nursery scheme? If you’re ordering on your phone, it’s worth trying to view the colour swatches on a larger computer screen, as shades can look slightly different from device to device.
A great little tip is to take a screenshot of your final design before you pay. It acts as a personal record of exactly what you approved, giving you that extra bit of peace of mind.
Sizing, Pricing, and Timelines
One last check on the measurements can save you a world of hassle. Just grab your tape measure and hold it up against the wall again, comparing it to the dimensions you’ve selected online. Does that size still feel right for the space? It’s a simple step that ensures your new art will fit its home perfectly.
Finally, get a clear picture of the cost and the timeline. The price for custom nursery art will naturally depend on how big and detailed you go. Most sellers are really upfront about this, showing you the final cost as you build your design. Also, make a mental note of the estimated production and delivery times. Remember, custom pieces are made just for you and take a little longer to create with care, so it’s good to factor that into your nursery planning.
With these final checks ticked off, you can place your order with total confidence and get ready for that happy-delivery day.
Your Questions, Answered
Choosing that perfect piece of personalised art is one of the most exciting finishing touches for a nursery. But it’s completely normal to have a few questions before you make your final decision. We've put together some straightforward answers to the things we get asked most often, helping you feel 100% happy with your choice.
Is Personalised Nursery Wall Art Safe for My Baby's Room?
Yes, absolutely. Any good supplier will put your baby’s safety first, using high-quality, non-toxic vinyl and water-based inks. These materials are made specifically for kids' spaces and don't give off any nasty VOCs (Volatile Organic Compounds), keeping the air in your nursery clean and safe.
When you're shopping, just make sure the product description clearly states it's baby-safe or non-toxic. For anything going into your little one's room, this is a must-have.
Will Vinyl Wall Stickers Damage My Painted Walls?
Not if you use good quality, removable vinyl. It's designed to be kind to your walls. So, when you're ready for a change, the stickers should come off cleanly without damaging properly dried paint. This makes them a brilliant option if you're renting or know you’ll want to update the theme as your child gets older.
The secret to taking them off without a trace is a little bit of patience. Use a hairdryer on a low setting to gently warm the vinyl, then slowly peel it back on itself. It’s also wise to wait at least three weeks after painting before putting any wall art up, just to make sure the paint is fully set.
How Long Will My Personalised Wall Art Last?
Good quality vinyl wall art is built to last. You can expect it to stay put for years without peeling, fading, or cracking, as long as it’s indoors. Your beautiful design will look just as good when your baby becomes a toddler and beyond.
What if I Can't Find a Design I Like?
This is where the fun really begins! If you can't find exactly what you're looking for, many companies (including us!) offer a full custom design service. If you've got a special idea, a meaningful quote, or a unique theme in mind, you can often work one-on-one with a designer to bring it to life.
Never be afraid to ask. A design team can work with you to create something totally unique – a piece of personalised nursery wall art that tells your story and makes the room feel truly yours.
Ready to create a warm, wonderful space for your little one? See what's possible at Quote My Wall and design a piece of art that’s as unique as your family. Start designing your perfect personalised nursery wall art today.