
Removable Wall Decals UK Your Ultimate Guide to Damage-Free Decor
Picture this: you could completely transform a room in less than an hour, with absolutely no mess and zero long-term commitment. That’s the magic of removable wall decals, a game-changer for modern, flexible home decorating here in the UK. They offer a stylish, damage-free alternative to paint and wallpaper that’s perfect for renters and homeowners alike.
An Instant Home Makeover with Removable Decals
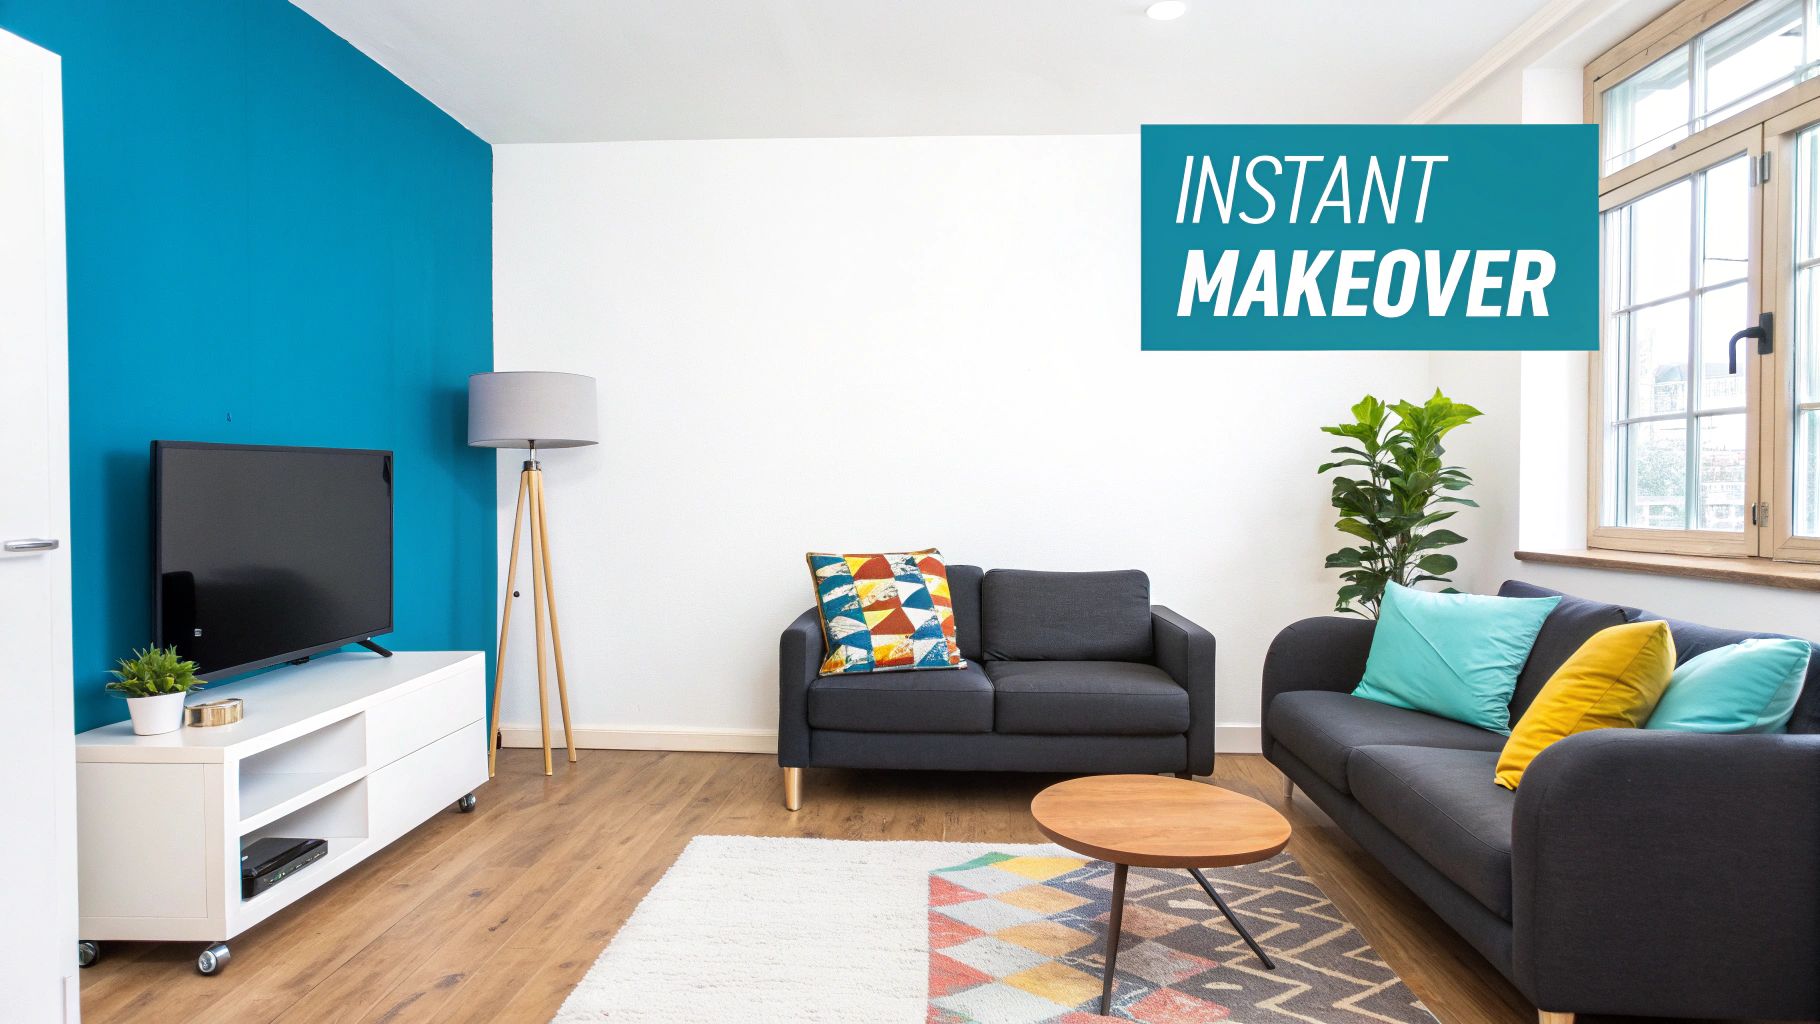
The days of wrestling with messy paint pots and permanent wallpaper are numbered. Across the UK, people are finding a smarter, more adaptable way to refresh their spaces. Removable wall decals have become incredibly popular because they offer a simple yet powerful way to personalise a room without the fuss or finality of traditional decorating.
You can think of them as sophisticated, grown-up stickers for your walls. Forget the flimsy paper stickers from your childhood; today's decals are typically crafted from premium vinyl with a specially formulated adhesive. This clever design means they stick smoothly to walls for years but peel away cleanly whenever you fancy a change, leaving no sticky mess or damage. It's this very feature that makes them ideal for anyone who loves to switch up their décor with the seasons or follow new trends.
Why Are UK Homes Embracing Wall Decals?
The massive appeal of removable wall decals in the UK comes down to a perfect blend of practicality and style. For the millions of us in rented accommodation, they're a brilliant way to make a space feel like home without putting the security deposit at risk. Homeowners, on the other hand, love the freedom to experiment with a bold design or a delicate pattern without having to commit to it forever.
The numbers don't lie. This trend isn't just a niche hobby; it's a huge market.
In the UK, the wall art market—which includes wallpapers, stickers, and other coverings—generated an incredible USD 3,597.2 million in revenue back in 2022. This slice of the market accounted for a massive 34.59% of the total share that year, making it the biggest and fastest-growing category in UK wall art.
This guide is your one-stop-shop for mastering the art of the wall decal. We’ll walk you through everything, from choosing the perfect design for your space to applying it like a pro. Whether you want to create a calming feature wall in the bedroom, add a splash of fun to a nursery, or even give old furniture a new lease of life, you'll find what you need right here. And remember, while decals are great for a makeover, sometimes even functional items can double as colorful pieces of wall decor like chore charts, adding to a room's overall feel.
Let's get started and unlock the endless creative possibilities for your home.
So, What Exactly Are Removable Wall Decals?
Let’s get one thing straight from the start: when we talk about high-quality removable wall decals, we’re not talking about the shiny, flimsy stickers you might remember from your childhood bedroom. The modern wall decal is a sophisticated piece of interior design, engineered for both stunning looks and total practicality.
Think of it less like a sticker and more like a whisper-thin layer of premium vinyl. This vinyl is fused with a clever adhesive that strikes the perfect balance – it's strong enough to hug your wall for years, but gentle enough to peel away cleanly whenever you fancy a change, leaving your paint completely unscathed.
It's this blend of materials that gives a quality decal its magic. It’s the secret to achieving that seamless, ‘painted-on’ finish that instantly elevates a room, all without the fuss, mess, or commitment of a paintbrush.
The Anatomy of a Wall Decal
Every wall decal arrives as a simple three-layer "sandwich." Understanding what each layer does takes the mystery out of the application process and helps you get it right the first time, every time.
Here’s a quick breakdown of the three parts:
- The Backing Paper: This is the waxy, thick paper the decal sits on. Its only job is to protect the sticky side until you’re ready to bring your design to life.
- The Vinyl Decal: This is the star of the show! It's your chosen design, quote, or pattern, precision-cut and nestled between the other two layers.
- The Transfer Tape: This is the semi-see-through, slightly tacky film on top. It’s the real hero, holding every individual piece of your design in perfect formation as you move it from the backing paper to your wall.
For a sprawling floral design or a quote with lots of separate letters, that transfer tape is absolutely crucial. It keeps every petal and full stop perfectly aligned, turning a potentially tricky job into a surprisingly simple one.
Finishes That Define Your Style
The finish you choose for your decal has a massive impact on the final look. The two most common options in the UK offer very different vibes, so it’s worth thinking about what suits your space and lighting best.
Most people decorating interior walls go for a matte finish. Because it doesn’t reflect light, it has a flat, soft appearance that genuinely looks like it’s been painted on. This creates a really elegant, subtle effect that melts beautifully into your existing decor.
A gloss finish, on the other hand, is all about making a statement. It’s shiny, reflects light, and makes colours really pop. It’s also a bit more durable and easier to wipe down, which makes it a fantastic choice for kitchens, bathrooms, kids' rooms, or for upcycling furniture where you want a bold, eye-catching result.
To help you decide, here’s a quick comparison of how the different finishes stack up.
Choosing Your Perfect Decal Finish
| Finish Type | Best For | Appearance | Key Benefit |
|---|---|---|---|
| Matte | Living rooms, bedrooms, offices, and most interior walls. | Flat, non-reflective, and soft. | Blends seamlessly with painted walls for a hand-painted look. |
| Gloss | Kitchens, bathrooms, high-traffic areas, furniture upcycling. | Shiny, reflective, and vibrant. | More durable, easy to clean, and makes colours pop. |
Ultimately, the choice comes down to personal taste and where the decal is going. Both finishes offer a fantastic way to personalise your home.
The buzz around these decorations is a huge part of the UK home decor scene right now. Removable vinyl decals are leading the charge, fitting perfectly into a wider trend for flexible and durable home styling. If you're curious, you can read more about the growth of the wall decal market and its key trends. This popularity shows just how many people are embracing decals as their go-to for an easy, stylish, and damage-free design update.
How to Choose the Right Wall Decal for Your Space
Picking the perfect removable wall decal isn't just about finding a design you love; it's about matching the art to the room's purpose and making sure the material works with your wall's unique character. Think of it like buying a coat. A gorgeous wool trench coat is a classic, but it’s not much use on a sweltering summer day. In the same way, a beautiful decal needs the right environment to truly shine.
So, where do you start? It all boils down to two key things: the function of the space and the type of surface you're working with. Get these two right, and you'll end up with a decal that not only looks stunning but also lasts, especially in a busy UK home.
Match the Decal to the Room's Vibe
Every room in your house has a personality, and the right wall decal can turn up the volume on that feeling. You want to choose a design that clicks with the atmosphere you’re trying to create, whether that's total calm, a buzz of creativity, or a warm welcome.
-
For Bedrooms and Living Rooms: These are your sanctuaries, the places you go to unwind. Opt for designs that soothe the soul, like gentle botanical patterns, serene landscapes, or inspiring quotes in an elegant script. A matte finish is perfect here because it gives a hand-painted look without any distracting glare from lamps or windows.
-
For Kitchens and Bathrooms: Let’s be honest, these rooms work hard. They face moisture, splashes, and constant use, so durability is non-negotiable. Look for removable wall decals UK suppliers specifically label as water-resistant. A gloss or satin finish is a smart choice as it can be wiped clean in seconds. Tile stickers are also a brilliant, budget-friendly way to give a kitchen splashback or bathroom wall a facelift without calling in the tilers.
-
For Nurseries and Children's Rooms: This is your chance to have some fun! Go wild with playful, colourful designs that spark joy. Think cute animals, bold rainbows, and whimsical patterns that can create a truly magical space for your little ones. For a bit of inspiration, browsing through different nursery wall art ideas can help you picture the perfect theme.
Understanding Your Wall Surface
Once you’ve got a theme sorted, it’s time for a reality check with your wall. The type of paint and texture of your surface has a huge impact on how well a decal will stick and how good it will look. This is a big deal in the UK, where our homes range from modern new-builds with plasterboard walls to older properties with surfaces full of character (and quirks!).
The golden rule for wall decals is simple: the smoother the surface, the better the result. High-quality vinyl needs a good, even surface to create a strong bond that ensures a bubble-free, seamless finish.
Let's break down the common wall types you'll find in UK homes and how they play with decals.
Paint Finish Compatibility
Believe it or not, not all paints are decal-friendly. The finish on your paint can be the difference between a flawless application and a frustrating afternoon.
-
Matte or Eggshell Paint: This is the ideal surface for pretty much any removable wall decal. Its slightly porous, non-reflective texture gives the adhesive plenty to grab onto, creating a strong bond that results in that gorgeous, painted-on effect.
-
Satin or Silk Paint: These popular finishes have a slight sheen and are less porous than matte. Most decals will stick just fine, but you’ll want to apply a bit more pressure with a squeegee during application to make sure every edge is sealed down tight.
-
High-Gloss Paint: Now, this one can be tricky. The slick, non-porous surface doesn't give the adhesive much to grip. It’s not impossible, but you have to be meticulous. The wall must be spotlessly clean, and you'll need to apply the decal with extra care and patience.
-
"Wipeable" or "Scrubbable" Paints: A word of caution here. Paints marketed as stain-repellent or easy-clean often contain additives like silicone or Teflon. Their entire job is to stop things from sticking to them—and that includes your lovely new wall decal.
Dealing with Textured Walls
Many UK homes, especially older ones, don't have perfectly flat walls. A bit of texture is normal, but a heavily textured surface can be a real problem for decals.
-
Light Texture (e.g., Orange Peel): You’re generally in the clear here. Most high-quality decals are flexible enough to mould into minor dips and bumps. A great tip is to use a hairdryer on a low heat setting as you apply it. This gently softens the vinyl, helping you press it firmly into the wall's contours for a better stick.
-
Heavy Texture (e.g., Artex): Unfortunately, heavily textured walls and decals just don't mix. The vinyl can’t make enough contact with the surface, leaving gaps where it will fail to stick properly and eventually start to peel. For these walls, you’d be better off looking at stencils or a classic framed print.
Getting it Right: A Step-by-Step Guide to Flawless Application
Putting up a wall decal for the first time might seem a bit nerve-wracking, but it’s actually a really satisfying little project. Think of it less as a tricky DIY job and more as a mindful creative task. A little patience and prep work are all you need to get a smooth, bubble-free finish that looks like it was professionally painted on.
Before you even think about peeling anything, let's get your tools ready. You won’t need a trip to B&Q; you probably have everything you need lying around the house.
Your Application Toolkit:
- A soft, clean cloth (microfibre works a treat)
- A bit of mild soap mixed with water
- Masking tape
- A squeegee, or even just a credit card will do the job
- A spirit level (especially for quotes or straight-edged designs)
Getting these bits together first means you can get in the zone without any last-minute searching.
Step 1: Prep Your Wall Like a Pro
Honestly, this is the most important part. If you want your decal to stick around, the wall needs to be spotless. Any dust, grease, or grime will stop the adhesive from getting a proper grip.
Start by giving the area a gentle wipe-down with your damp cloth and a tiny drop of soap. Then, go over it again with a cloth dampened with just water to get rid of any soapy residue.
The final, crucial part of this step? Making sure the wall is completely dry. I’d recommend waiting at least a few hours, or even overnight, just to be absolutely certain.
Step 2: Position Your Decal Perfectly
Now for the fun bit – figuring out exactly where it’s going to live. Before you peel off any backing, use small pieces of masking tape to hold the decal on the wall. This is your chance to stand back, look at it from different parts of the room, and tweak the position until it feels just right.
For anything with text or straight lines, grab your spirit level. Don't just trust your eyes! What looks level when you’re up close can often look wonky from a distance. Once you’re 100% happy with how it looks, you’re good to go. For a more in-depth look at this, our guide on how to apply wall stickers for a perfect finish has even more tips.
This simple diagram shows how thinking about the room, surface, and style helps you make the best choice from the start.
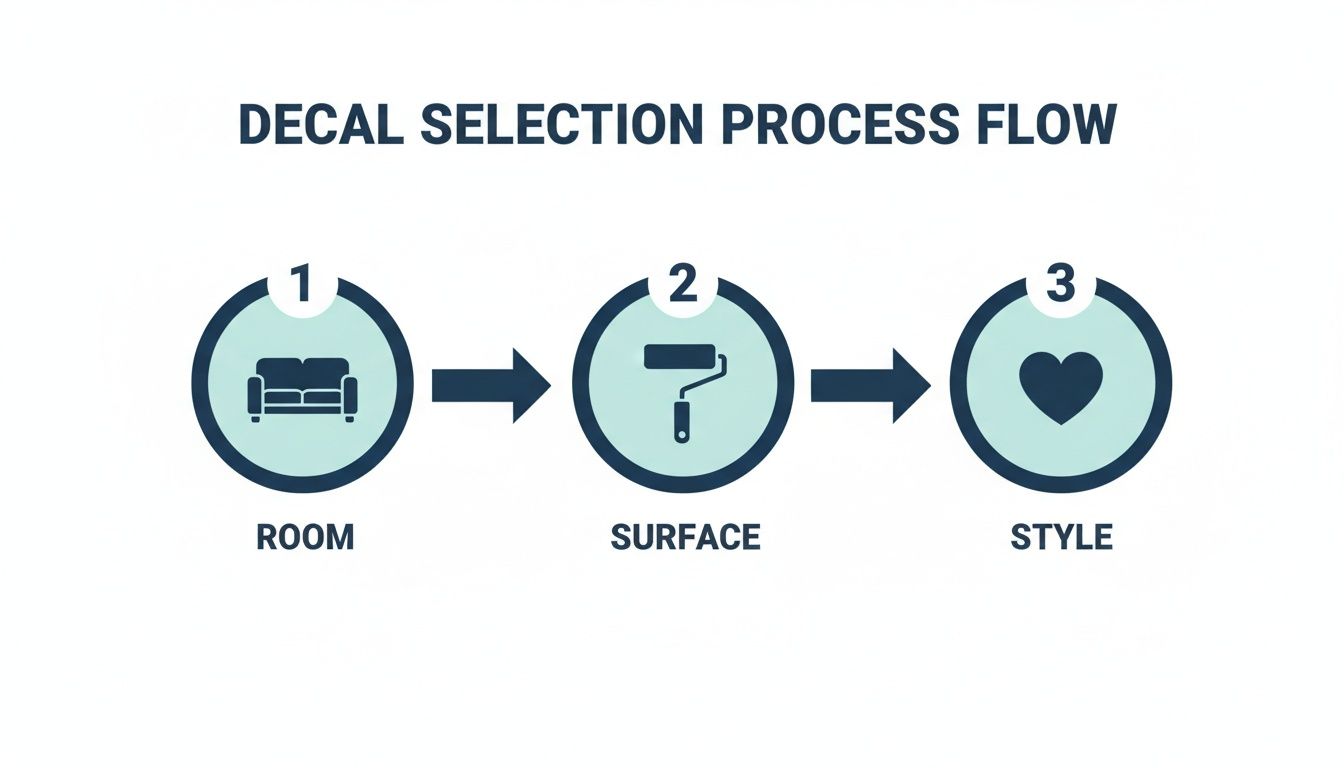
Following this logic ensures your decal won't just look fantastic but will also be right for the space.
Step 3: The Big Moment – Applying the Decal
If you're working with a larger design, the "hinge method" is your best friend. It sounds technical, but it’s easy. Just run a strip of masking tape across the middle of the decal, sticking it to the wall. This creates a 'hinge' that lets you apply one half at a time.
- Peel the Top Half: Carefully peel the white backing paper away from the top half of the decal, pulling it down towards your masking tape hinge. The vinyl design should stay put on the see-through transfer tape.
- Snip the Backing: Once exposed, simply cut away that loose piece of backing paper.
- Squeegee Down: Starting from the centre hinge, use your squeegee or credit card to smooth the decal onto the wall. Use firm, overlapping strokes, working from the middle outwards to push out any trapped air.
- Repeat for the Bottom: Now you can remove your hinge tape and the rest of the backing paper. Just repeat the process, smoothing the bottom half down from the middle.
Expert Tip: Hold your squeegee at a 45-degree angle as you press down. This angle is perfect for chasing air bubbles out to the edges, leaving you with a perfectly flat finish.
Step 4: The Grand Reveal
With the whole decal firmly stuck to the wall, give it one last all-over rub with the squeegee for good measure. Now, it's time to remove the clear transfer tape.
Start at a top corner and slowly peel the tape back on itself at a really sharp angle – almost 180 degrees. Take your time and keep an eye on the vinyl to make sure every little bit is staying on the wall. If a piece tries to lift off, just lay the transfer tape back down, give that spot a good rub, and then continue peeling.
And that’s it! Stand back and admire your handiwork. A completely transformed wall, and you did it all yourself.
Safe Removal and Maintenance for Pristine Walls
One of the biggest draws for anyone considering wall decals is their temporary nature. But what happens when you fancy a change? The thought of peeling paint or scraping off sticky residue is enough to put anyone off, but it doesn't have to be that way.
With the right technique, removing your decal is a surprisingly simple and stress-free job that leaves your walls looking untouched.
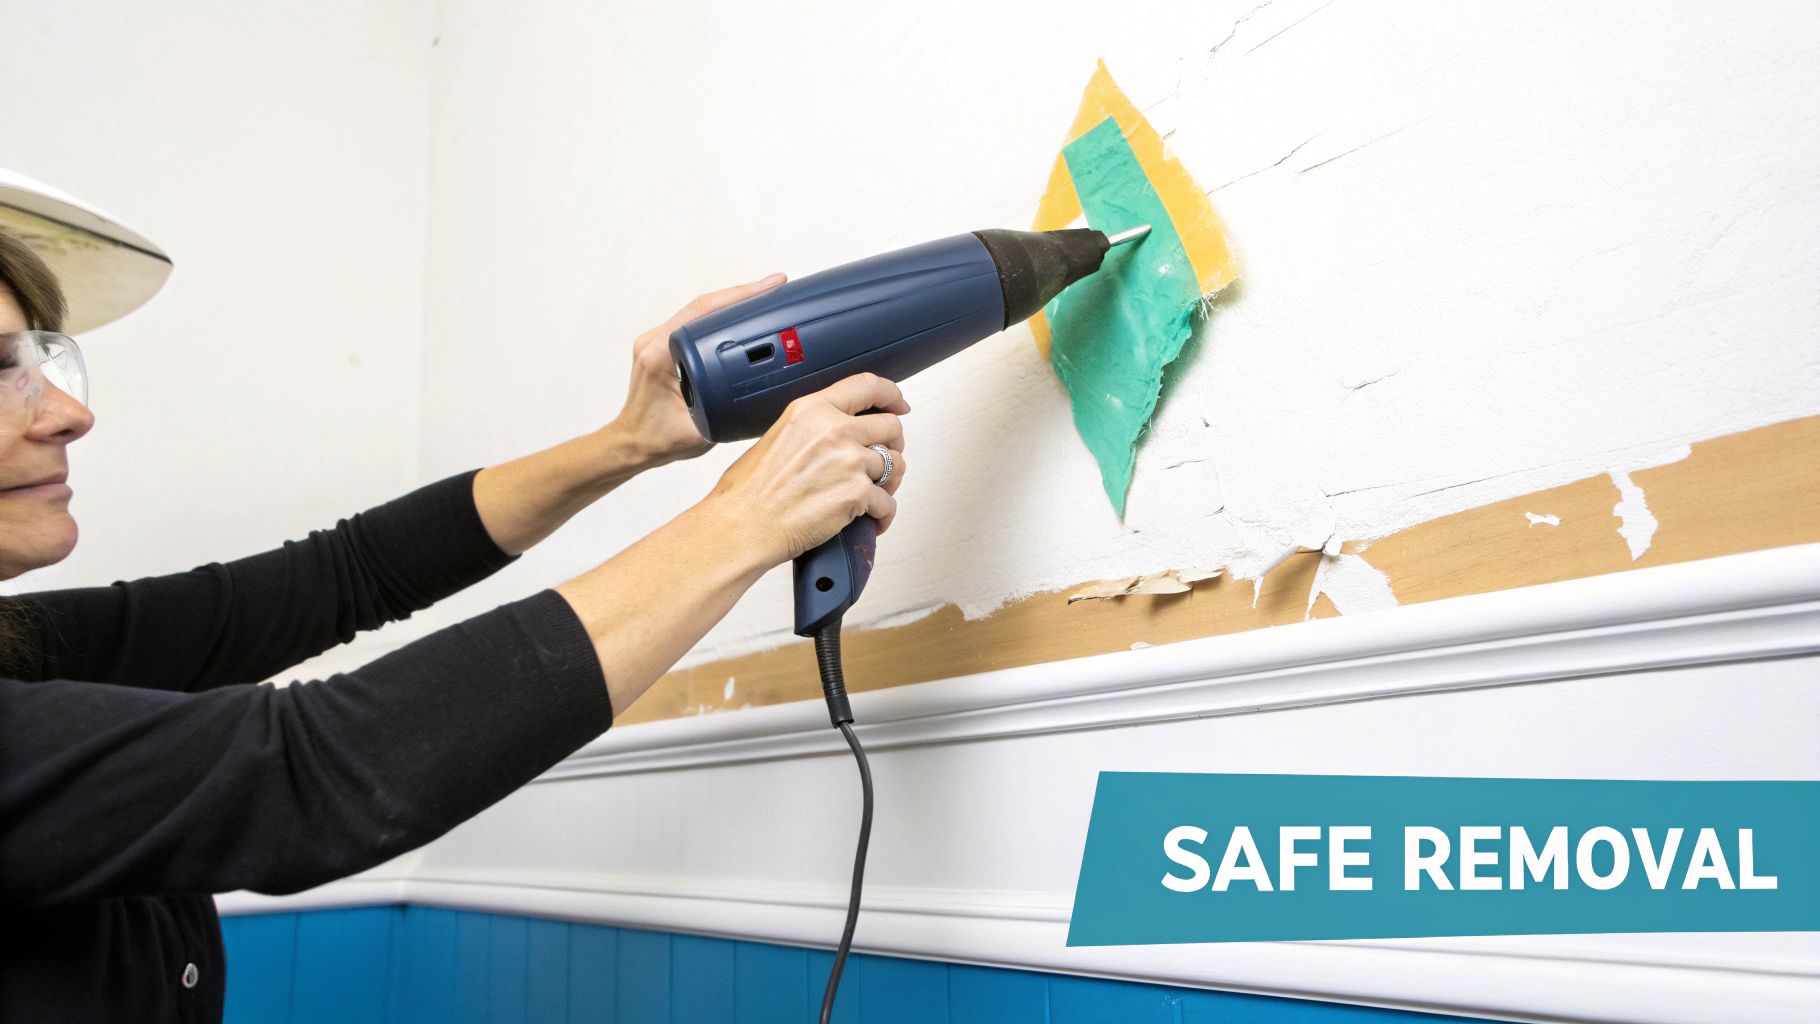
The secret weapon for a clean removal? A bit of gentle heat. You don’t need any fancy tools – a standard hairdryer on a low or medium setting is perfect. This gentle warmth softens the adhesive, making it pliable and allowing it to release its grip on the wall without a fight. It’s a game-changer for protecting both your paintwork and your sanity.
The Damage-Free Decal Removal Process
Follow these simple steps for a perfect, pristine finish every time. This method is crucial if you're in rented accommodation and want to guarantee you get that security deposit back.
-
Warm the Vinyl: Grab your hairdryer and hold it about 15-20 centimetres away from the edge of the decal. Sweep it back and forth for about 30-60 seconds to gently warm the vinyl and the adhesive underneath.
-
Lift an Edge: Once the area feels warm, use your fingernail or a plastic scraper to carefully lift a corner. Go slowly and avoid anything sharp that could scratch the paint.
-
Peel Slowly at an Angle: This is the most important part. Pull the decal away from the wall at a sharp, 180-degree angle, almost folding it back on itself. Do not pull it straight out towards you; this creates too much tension and is what risks pulling paint away with it.
-
Apply Heat as You Go: Continue to aim the hairdryer just ahead of the area you’re peeling. This keeps the adhesive soft and ensures the rest of the decal comes away just as cleanly.
If you hit a stubborn spot, a little more heat is usually all it takes. For a more in-depth look, our complete guide on how to remove wall stickers has a few extra tips and tricks for a flawless finish.
Keeping Your Decals Looking Fresh
Thankfully, maintaining your wall decals is incredibly easy. The durable vinyl used in quality decals is designed to handle everyday life in a busy home, so you won’t need to do much to keep them looking vibrant for years.
A simple, regular wipe-down is all it takes. Use a soft, slightly damp microfibre cloth to gently clean the surface, removing any dust or light scuffs. Just be sure to avoid any harsh chemical cleaners or abrasive sponges, as these can damage the vinyl's finish and fade the colours.
This easy-care routine ensures your designs remain a beautiful focal point in your room. It's this combination of easy application, simple maintenance, and damage-free removal that has made removable wall decals such a go-to decorating solution for UK homes. They offer total creative freedom without the long-term commitment.
Thinking Beyond the Wall: Creative Ways to Use Removable Decals
The name might be a bit misleading. While they're fantastic on walls, the real magic of removable decals happens when you start thinking off the wall. Here in the UK, where we love a good upcycling project, these sticky marvels are the go-to for breathing new life into almost any smooth, non-porous surface. It’s all about adding a splash of personality to forgotten corners and everyday items.
Take that tired chest of drawers you've been meaning to sort out. Instead of sanding and painting, imagine wrapping it in a vibrant vinyl design. In just an afternoon, you can take a piece of furniture from drab to designer-inspired, achieving a flawless finish with none of the fuss, fumes, or waiting for paint to dry.
It’s no surprise this is catching on. The UK home decor market is flourishing, with forecasts suggesting it could reach a whopping USD 32.18 billion by 2031. A big part of that growth comes from people like us hunting for clever, renter-friendly solutions. Decals are a clear winner here, often coming in 70-80% cheaper than calling in a professional decorator. If you're interested in the numbers, you can read more about the home decor market's impressive growth.
Upcycling and Customising Your Bits and Bobs
The best part about decals is their power to refresh things you already own. There's no need to buy new when a bit of creativity works wonders.
- Furniture Facelifts: That standard IKEA TROFAST unit or plain wardrobe can get a serious glow-up. A chic geometric pattern or a realistic wood-effect vinyl can make flat-pack furniture look completely bespoke.
- Quick Kitchen & Bathroom Fixes: Are your tiles stuck in a time warp? Specially designed tile stickers can transform a dreary kitchen splashback or bathroom wall without the mess and expense of re-tiling. For a deeper dive, have a look at our DIY guide to using removable tile stickers and vinyl wraps.
- Personalised Tech: Small decals are brilliant for making your laptop, phone case, or even a mirror feel like yours. A simple monogram or a favourite quote turns a generic item into something special.
- Smarter Storage: Plain plastic storage boxes, filing cabinets, and yes, even your wheelie bin, can be jazzed up. Custom decals make organising things a lot more fun.
What About Windows?
Decals aren't just for solid surfaces. If you need a bit more privacy but don't want to lose the light, frosted or patterned window films are a brilliant solution. They're perfect for overlooked windows, glass-panelled doors, or ground-floor bathrooms, and they peel off without a trace when you're ready for a change.
The trick is to start seeing every smooth surface as a blank canvas. From giving your fridge a funky new look to labelling pantry jars with elegant script, the only real limit is your own imagination. It's the ultimate tool for creating a home that’s flexible and truly personal.
Your Wall Decal Questions, Answered
It's smart to have a few questions before you start peeling and sticking. It shows you care about getting it right! We get asked a lot of the same things, so we've gathered the most common queries from our UK customers to give you clear, practical answers.
Can I Reuse a Wall Decal After I've Removed It?
In short, probably not. Think of a high-quality removable wall decal like a very specialised plaster. You can make small adjustments right as you’re applying it, but once it has settled and bonded to the wall, that’s its home.
When you peel a decal off after it's been up for a while, the vinyl inevitably stretches a little, and the adhesive loses its initial tack. Trying to re-stick it elsewhere usually results in curled edges and a frustrating, bubbly finish. For a perfect look every time, it's best to treat them as a one-shot deal.
How Long Do I Need to Wait Before Applying a Decal to a Freshly Painted Wall?
This is a big one, and getting it wrong can cause real headaches. You absolutely must wait at least three to four weeks after painting before applying a decal.
A freshly painted wall might feel dry in a day, but it’s still curing. This means it's slowly releasing solvents into the air, a process called 'outgassing'.
If you stick a decal on too soon, you trap those gases. This is what causes those mysterious bubbles to appear later on. Even worse, the decal’s adhesive can fuse with the soft, uncured paint, and when you go to remove it, it could pull a chunk of paint off with it. A little bit of patience now saves a lot of hassle later!
Are Removable Wall Decals a Good Idea for Bathrooms?
Yes, they’re fantastic for bathrooms! The premium vinyl we use is water-resistant, so it can handle the steam from a hot shower without any trouble. It’s a brilliant way to add personality to a room that’s often tricky to decorate.
Just follow a couple of simple guidelines for the best results:
- Make sure you apply the decal to a surface that is smooth, clean, and completely dry.
- Try to avoid placing it where it will be constantly soaked, like inside the shower itself.
They look great on bathroom walls, mirrors, or even the tile surround, giving the space an instant and stylish lift.
Will Wall Decals Actually Stick to Textured Walls?
This is a classic "it depends" situation. Decals need good surface contact to look their best, which is why smooth, flat walls are the ideal canvas.
Many UK homes have a light 'orange peel' texture, and decals often work perfectly well on this. You might just need to use a bit of extra firm pressure during application, and a quick blast with a hairdryer on a low setting can help the vinyl soften and mould to the bumps.
However, for heavily textured surfaces like traditional Artex, wall decals are a no-go. The vinyl just can't get enough grip, and you’ll be left with peeling edges and a look you won't be happy with. If you're not sure about your wall, the safest bet is to test a small, inconspicuous area first.
Ready to bring your walls to life? At Quote My Wall, we have thousands of designs for every room and style. Find your perfect vinyl decal or create something truly unique by visiting our shop at https://www.quotemywall.co.uk.