
Name Labels Clothes: Types, Durability and Buying Advice
The coat is on the hall floor again, inside out, and you cannot tell which child it belongs to. Nursery bags look the same by the door. In a care home, a white blouse can leave the laundry trolley and come back to the wrong room. Name labels for clothes only earn their keep when they stay attached, stay readable, and do not put private details on show.
I would treat this as a labelling system, not a Saturday of random stickers. Rank garments by what they cost to replace, place the label where washing will not peel it, and match the words on the fabric to the setting. School, nursery and shared laundry do not need the same identifier.
Name Label Types Compared at a Glance
| Label type | Attachment | Typical wash durability | Best for |
|---|---|---|---|
| Woven name tape | Sew on by hand or machine | Very high; usually lasts through hot washes and tumble drying | School jumpers, PE kit, care-home uniforms |
| Printed cotton tape | Sew on or iron on | Medium to high on a well-printed tape washed at a moderate temperature | Soft garments, sensitive skin, babywear with sewn labels |
| Iron-on transfer | Pressed on with a hot iron | Medium; can crack or lift after many hot washes | T-shirts, sportswear, quick labelling |
| Stick-on vinyl | Peel and press; no sewing | Medium to high for ultra-high-tack vinyl pressed onto a clean, smooth surface | Shoes, hats, coats, lunch bags, fast nursery labelling |
| Marker or ink stamp | Written directly on the fabric or tag | Low to medium; fades with bleach and 60°C washes | Temporary use, budget labelling, garments you will replace soon |
Woven name tape is the long-wear choice. Hand or machine stitching holds it through hot washes and tumble drying, which is why it suits school jumpers, PE kit and care-home uniforms that go through the machine every week. Printed cotton tape is softer against skin, so it suits babywear and anyone who reacts to vinyl, provided the print itself is dense enough to survive detergent.
Iron-on transfers are fast on T-shirts and sportswear. Heat fuses them, but repeated hot washes can crack the film or lift a corner, especially on stretch fabric. Stick-on vinyl needs no sewing and grips shoes, hats, coats and lunch bags when the surface is smooth and the tack is high. A rough weave or a dusty heel will fail it. Marker and ink stamps are the cheapest fix and the first to fade, particularly if you use bleach or a 60°C cycle.
Durability is not a property of the label alone. Fibre, wash temperature, detergent and drying method all change the result. A claim of tumble-dryer resistance is a starting point, not a guarantee for your jumper. Run a short wash test on one garment before you buy a hundred labels.
Practical rule: Choose the label from the garment's wear pattern, not the other way round. Sew for long-term wear. Stick on for speed and for items you cannot stitch neatly.
What decides the choice
If the garment will be washed weekly for a school year, sew woven tape. If you need names on twenty nursery hats before Monday, use ultra-high-tack stick-on vinyl and accept that you may reapply a few. Do not put a marker on a coat you cannot afford to lose. The ink will be gone before half-term, and you will be buying the coat again.
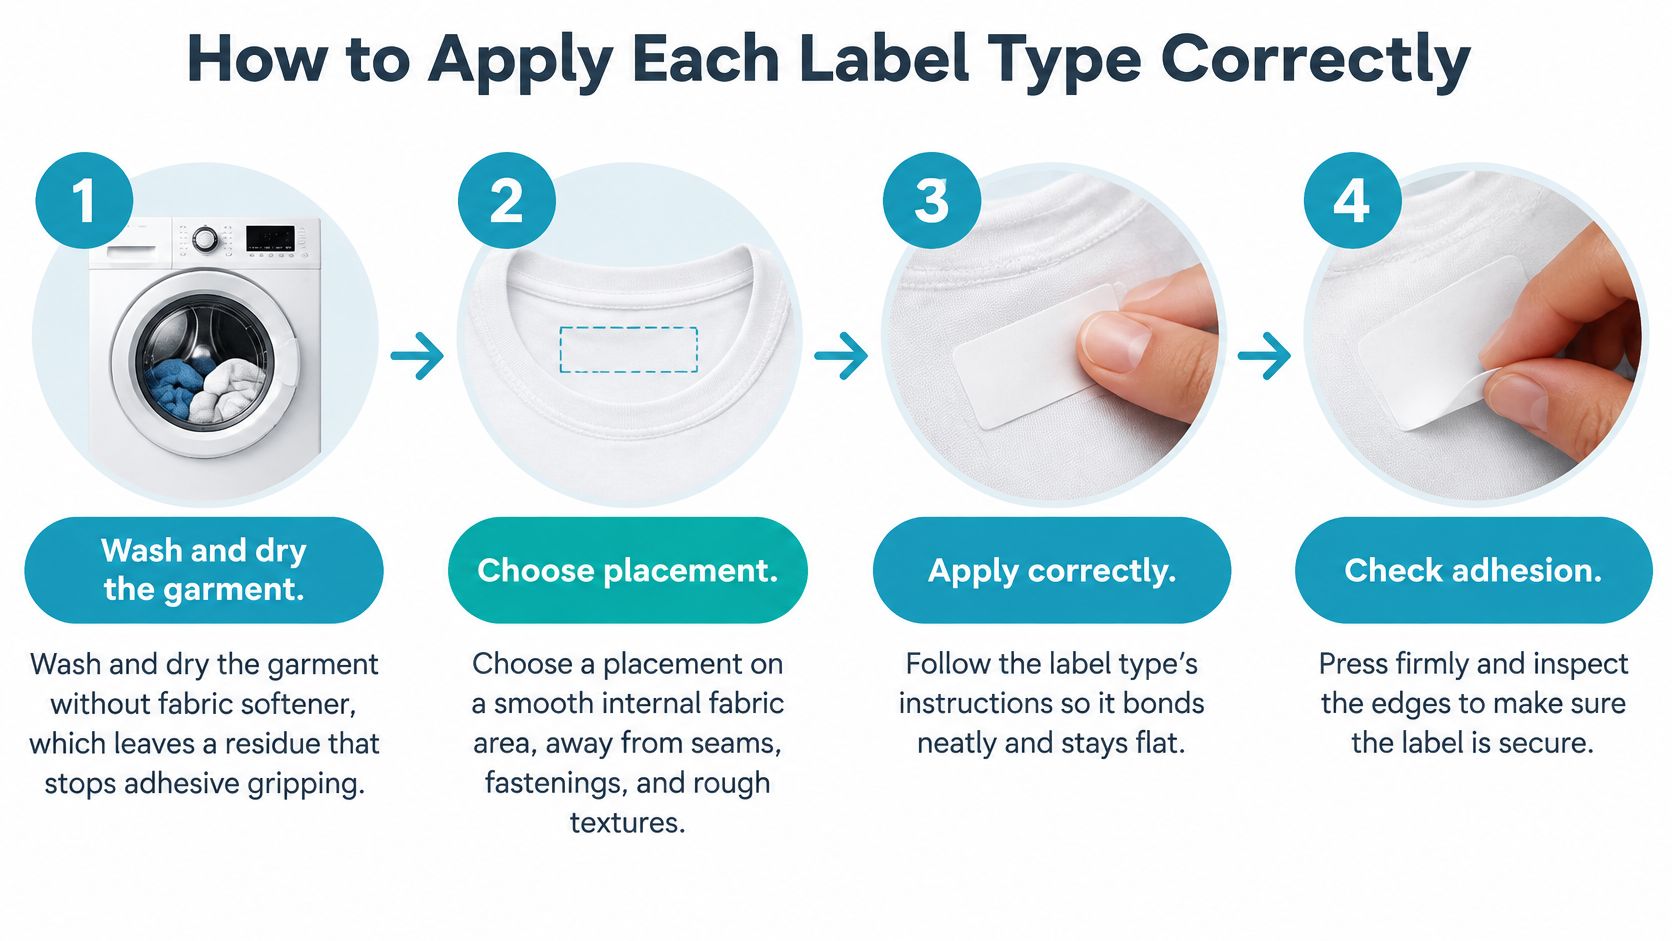
How to Apply Each Label Type Correctly
A label that lifts in week two was usually applied onto residue, a seam, or a spot that flexes every time the wearer moves. Get the surface and the placement right before you worry about the brand.
- Wash and dry the garment without fabric softener. Softener leaves a film, and adhesive will not grip through it.
- Place the label on a smooth internal area, away from seams, fastenings, underarms and the care label. GOV.UK textile labelling guidance requires fibre-composition information to stay durable, easily legible, visible, accessible and securely attached, so a name label must not cover or peel that information off.
- For stick-on vinyl, wipe the spot, press firmly for about 30 seconds, and wait the time the maker states before the first wash, usually 24 hours, so the adhesive can set.
- For an iron-on transfer, heat the iron to the setting in the instructions, cover the transfer with a pressing cloth, press without sliding, and let it cool fully before you peel the backing.
- For sewn tape, stitch all four edges with short, close stitches and tie off the thread ends so a corner cannot work loose in the drum. If you want the stitch pattern, sew-in clothes labels sets out a simple method for tape that has to survive a school year.
- After the first wash, check the edges. Check again after about ten washes. Press a lifting stick-on label back on only if the adhesive is still tacky. Otherwise replace it. Restitch any sewn edge that frays.
Mistakes that undo a good label
Ironing straight over stick-on vinyl melts the film or cooks the adhesive until it goes brittle. High-flexion zones, such as underarms, knees and the fold of a hood, rub the edge every time the fabric bends, so the corner lifts first. Peeling an iron-on while it is still warm pulls the transfer off with the backing.
On washable schoolwear and care clothing, keep labels off areas you iron directly. Heat, detergent and mechanical agitation wear print and lift edges faster there than on a flat inner panel. A maker's claim that a label survives the tumble dryer or the dishwasher should come from wash-cycle checks on real fabrics, temperatures and detergents, not from how sticky the backing feels in the packet.
After a month of school wear, a well-applied label lies flat, the text is still easy to read, and no corner has started to curl.
Testing Label Durability at Home
Product claims about washing and tumble drying are a starting point. Buy a sample, not a bulk pack, until one of your own garments has proved the label.
- Pick three test pieces: a school jumper, a PE top and a coat. Put a different label type on each so you are comparing attachment, not just one fabric.
- Apply each label the way that type requires, and note the date and the exact spot. A note on your phone is enough.
- Wash the jumper and PE top at your usual temperature, then once at 60°C, with your normal detergent and no fabric softener. Tumble dry on the setting you use.
- Inspect after 1, 5 and 10 washes. Look for lifting edges, cracked print, fading and loose stitching.
- Write the result next to the claim on the packet. Buy in bulk only if the name still reads clearly and the label is still fully attached after 10 washes.
For care-home laundry, run the same test on the hottest cycle that home uses. Family wardrobes and commercial machines are not the same heat, the same detergent or the same drum time. A label that survives your 40°C wash can fail on the home's hot programme.
A label that is still flat and readable after ten washes on your own fabric is the one worth buying in quantity. Marketing copy is not that test.
If you want a label sold as ready for the machine, read how machine washable labels are described, then still put one through your own ten washes before you trust it on an expensive coat.
Labelling School Uniform and PE Kit
In a UK primary-school survey summarised by Stikins, 90% of schools named name labels as the best practical fix for lost property, yet only 3% said most uniform and kit was labelled. Where at least half of parents labelled clothing, 9% of schools rated lost property as severe. Where fewer than one-quarter of kit was labelled, 49% did.
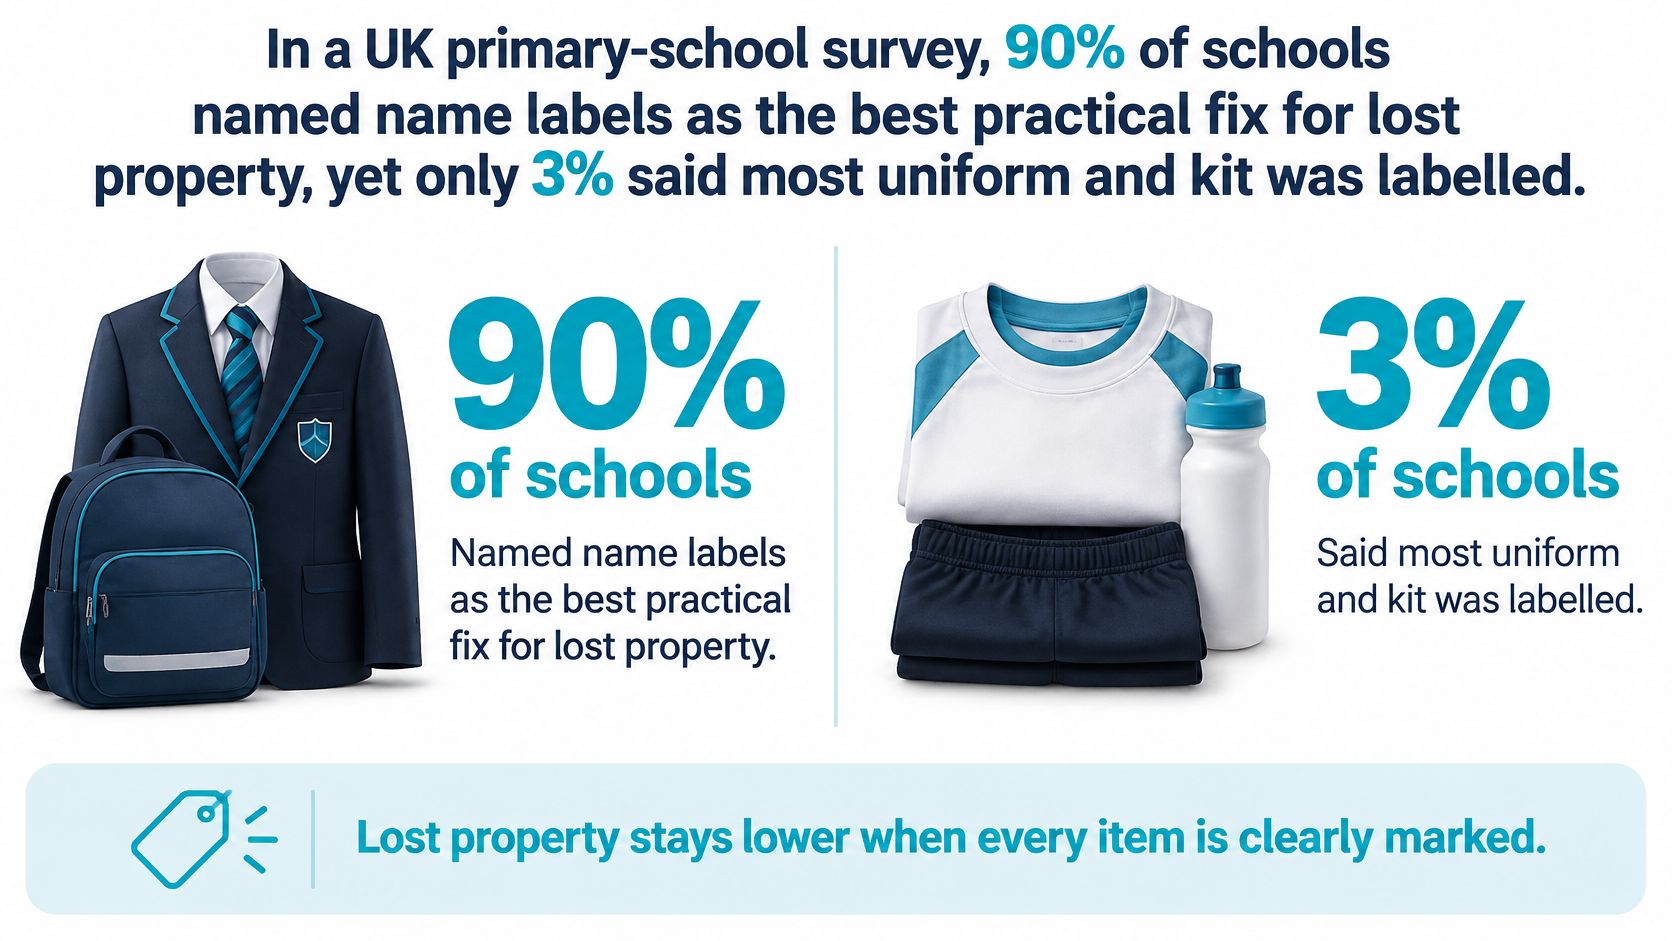
That is an association, not a controlled experiment. Labels line up with calmer lost-property piles, and schools also point to parents checking the rail and teaching children to look for their own name. A label with nobody looking for it still sits in a box until the end of term.
Where to put the name
- Jumpers and cardigans: Inside the back neck, on a flat panel, not across the collar seam.
- Coats: Inside the collar or along the hem facing, where staff can open the coat and read it without turning it fully inside out.
- PE shorts: Centre back of the waistband, clear of the elastic channel so the stitch or vinyl does not rub.
- Shoes and bags: Inside the shoe or on a smooth inner panel of the bag, not on a sole or a mesh pocket that flexes.
Label jumpers, cardigans, sweatshirts, hoodies and coats before the first day, not after the first loss. Those are the layers children take off and leave on pegs. A name inside a shirt does little when the lost item is the hoodie. On hand-me-downs, read the old label before the garment goes back into use. A sibling's name sends the jumper to the wrong class.
The gain is practical. Fewer pieces land in the lost-property crate, and when several children wear the same navy sweatshirt, the name settles the argument in seconds.
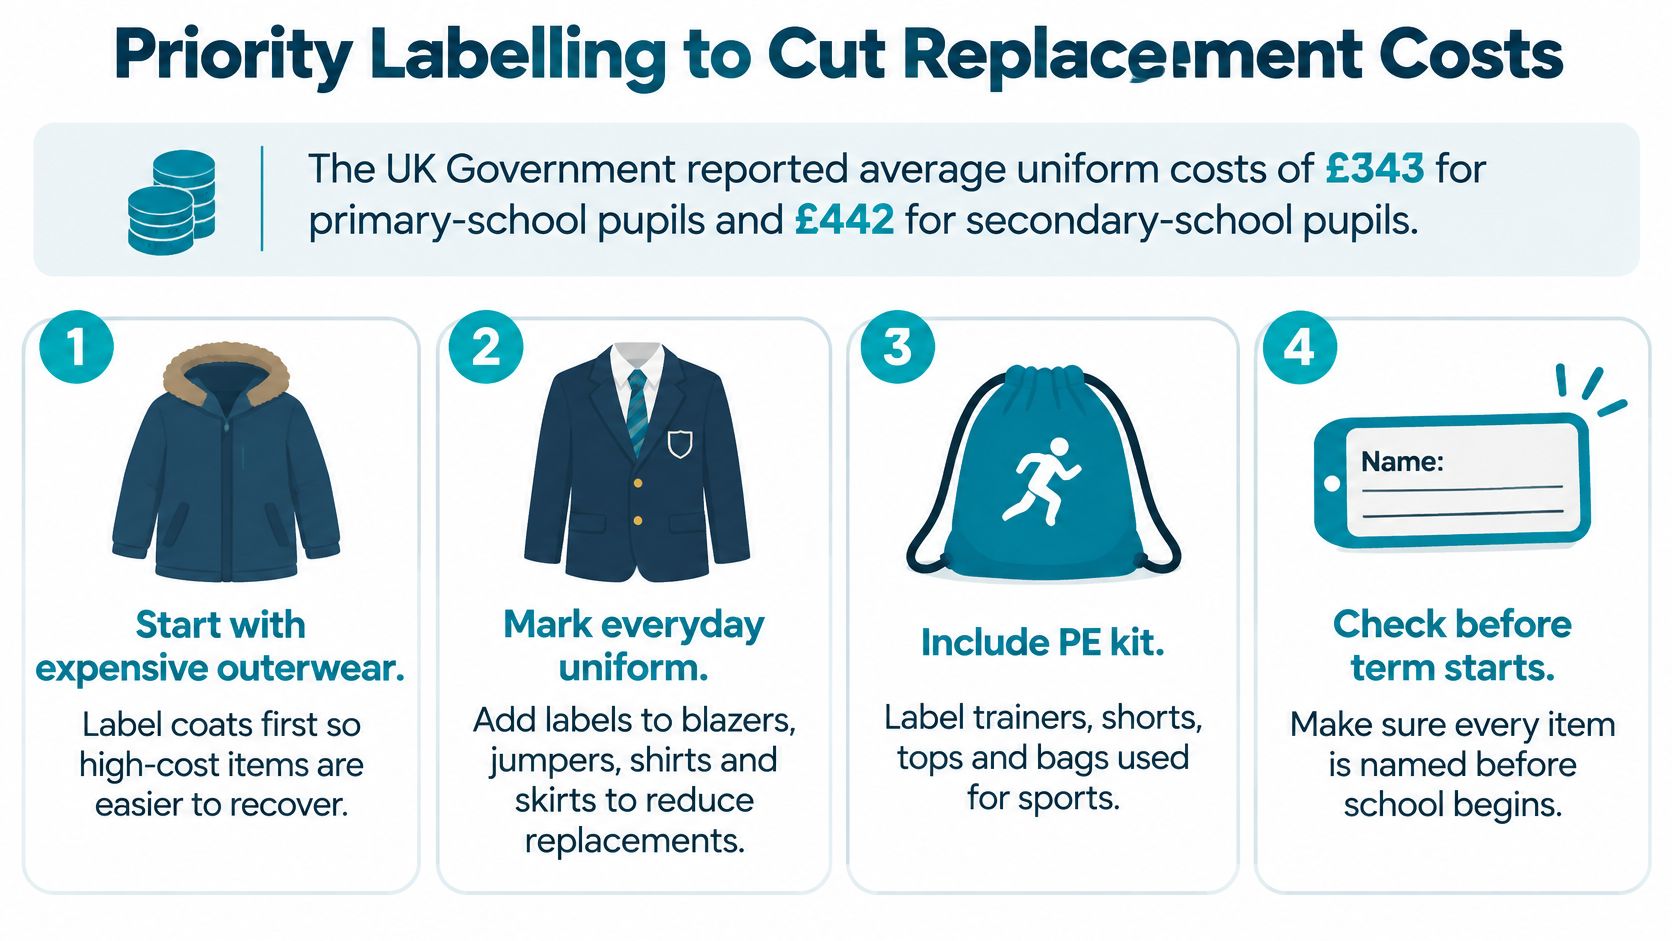
Priority Labelling to Cut Replacement Costs
A child can lose a coat at the school gate and a PE top after class. Replacing both costs more than replacing a shirt or a pair of socks, so label the garments in order of replacement cost.
A Stikins article on name labels and lost property reports UK Government average costs of £343 for primary-school uniform and £442 for secondary-school uniform. Outer layers and PE kit are often the costlier losses.
Three tiers
Tier one, label first. Coats, fleeces, blazers and PE tops. They are costly to replace and come off during playtime, PE and at the school gate.
Tier two, label before colder weather. Jumpers, cardigans, sweatshirts and hoodies often get left on chairs when children take them off indoors.
Tier three, label as the budget allows. Shirts, trousers and socks are lower-cost priorities than outerwear. Start with garments where losing one would mean a more expensive replacement.
For two children, compare the cost of a label pack covering both coats and PE tops with the cost of replacing one coat. If the labels cost less, labelling the outer layers can pay for itself when a garment is returned instead of replaced. There is no need to label every sock first.
A label works best as part of a routine: children can check the name when packing and unpacking, alongside helping children organise their schoolwork.
Labelling checklist
- Hand-me-downs: Check the existing name and replace it before the garment is worn.
- Siblings: Update the name when clothes pass from one child to another.
- Replacements: Label new clothes when they arrive, before the first school day.
- Term start: Review the tier-one garments with the child and check that each has a readable label.
Care Home and Shared Laundry Labelling
Laundry staff need to read a label in a mixed load. A full name, room number or phone number on a cardigan can also identify a resident to anyone who handles that clothing. That is the trade-off, and it is easy to get wrong if the only instruction is "mark every item".
Stikins' detailed lost-property summary is written for schools, and the same operational gap shows up in shared laundry. Advice often says mark everything, and it rarely separates a full name from initials, a room code or a discreet identifier.
What goes on the garment
Use the least detail that staff can match to a record.
- Initials plus surname works when several residents share a first name and the laundry team knows the household.
- A room or resident code keeps the name off the fabric. Staff match the code to the admission record.
- A discreet identifier, such as a short code with no address, is enough if the emergency contact stays on file, not on the collar.
Residents who have capacity should agree the approach. Where a resident lacks capacity, families or the appropriate representative should agree it, and the home should record that agreement. Do not embroider a phone number "just in case". The file is the right place for contacts.
Placement in a mixed load
Most garments take the label at the waistband or inside the neckline, where a hand can find it without unpicking a seam. On reversible pieces, label the inside of both layers, or the garment comes back nameless the day it is worn the other way out. Shoes need a mark inside the shoe or on the tongue, not on the sole.
Glasses cases, hearing-aid boxes and mobility aids are not clothing. Give them their own identifier and a separate line on the inventory. A clothing label will not stop a pair of glasses leaving the unit.
Inventory, kept simple:
- On admission: List each garment and non-clothing item, with the code used on it.
- On transfer: Log the move between units the same day, including what went in the bag.
- On a loss: Note the missing item the day it is reported, not at the end of the week.
Washable is not the same as permanently identifiable. Inspect labels after repeated laundering, especially on high-friction spots and on anything washed hot or tumble dried. Clothing labels for nursing homes are one option for shared laundry. They still need that inspection, because a code that has faded is no longer an identifier.
Personalising Labels and Keeping Them Safe
Match the words to the person who has to recognise them.
A full first name is clear at school when surnames differ. First name plus an initial separates two children called Sam without printing a home address. A nickname is fine if staff and the child both use it. Otherwise the lost-property volunteer will not connect "Buzz" to the register. A symbol or colour code helps nursery children who know a picture before they can read a name. Pair the symbol with a short name so adults are not guessing.
Pick a font size and a strong contrast, dark on light or light on dark, that still reads after washing. If you cannot read it from about a metre away in ordinary room light, it is too small for a busy cloakroom.
What to leave off
Leave out the home address, phone number, date of birth, and anything that tells a stranger where a child lives or when they are collected. A first name is an identifier for staff. A full contact block is a risk on a coat that sits on a public peg.
Babies and toddlers mouth cuffs and tags. A small label that can peel or be pulled free is a choking risk. Use fully stitched tape on anything that goes near the mouth, and tug every label before you hand the garment over. Children who chew fabric may need a safer outlet than a clothing tag. Sensory chew toys for autistic children are one option families look at when mouthing is the issue, so the garment label can stay flat and attached rather than becoming something to bite.
Adhesives and printed transfers can irritate sensitive skin. Test a new label on a hidden fabric area, or on a small patch of skin if the wearer is prone to reactions, before you label the whole drawer. For children's nightwear, read the flame-retardant marking before you add anything, and do not cover zips, poppers or other fastenings. A label across a zip stops the zip and can create a hard edge against the skin.
Attached, legible, non-irritating, and free of personal details. If a label fails any one of those, change it before the garment goes out.
Choose Your Label and Start This Week
You do not need the whole wardrobe done tonight. You need the expensive, easy-to-lose pieces named before they leave the house again.
- Match each garment to a label type from the comparison table. Sewn tape for weekly washes, stick-on vinyl for shoes, hats and anything you cannot stitch.
- Set the detail for the setting. A school first name is enough. In a care home, use initials or a code, and keep contacts on the record.
- Label tier-one garments first, then tier two. Leave shirts and socks until the coats and jumpers are done.
- Put a reminder at the start of each term, and another check whenever clothes pass to a sibling.
- Keep a short list of what is labelled and what is still bare, so a replacement is obvious.
Quote My Wall (quotemywall.co.uk) sells stick-on clothing labels for school and care-home use. I would still run the ten-wash test before relying on any washability or tumble-dryer claim for an expensive garment. Label one coat and one jumper this week. If both names are still flat and readable after those washes, then decide whether the rest of the wardrobe is worth the same treatment.
Quote My Wall makes personalised stick-on clothing labels for school uniform, nursery kit and care-home laundry, so you can name a garment without sewing or ironing. If you are ready to label the coats and jumpers that go missing, visit Quote My Wall and choose a name label you can put through your own wash test before you buy for the whole family.