
Sew in clothes labels: Durable, Easy Tips for School Uniforms
When you need a label that absolutely, positively has to stay put, sew-in clothes labels are the classic, time-tested answer. These are the traditional name tapes that are physically stitched into a garment. This creates a permanent bond that simply won't peel, fade, or wash away, making them the ultimate choice for long-term identification.
Why Sew-In Labels Are the Gold Standard for Durability
In a world full of quick fixes like stick-on and iron-on labels, the humble sew-in label still holds its own for one key reason: it’s virtually indestructible. Think of it as the bedrock of garment labelling. While modern adhesives are pretty impressive, you just can't beat the physical security of thread woven through fabric for surviving the rough and tumble of daily life.
This kind of staying power isn't just a nice-to-have; in some situations, it's essential. For items that are in constant rotation and subjected to heavy-duty washing, a failed label means lost property, confusion, and extra costs.
Where Unmatched Durability Matters Most
Let’s look at a few real-world examples where a less permanent label just wouldn't cut it:
- School Uniforms: A kid's school jumper or PE kit endures a relentless cycle of being worn, washed, and tumble-dried. A sewn-in label is your guarantee that it will find its way back home from the lost property pile, time and time again.
- Care Home Clothing: In residential homes, laundry is often done communally and can be quite harsh on clothes. Sew-in labels offer clear, permanent identification that prevents stressful mix-ups and helps preserve a resident's dignity.
- Handmade Garments: If you're a crafter or artisan, sewing your brand label into a piece is that final professional touch. It becomes part of your creation and lasts just as long as it does.
The real value of a sew-in label is its sheer resilience. It’s engineered to outlast the garment it’s attached to, surviving countless hot washes and tumbles without breaking a sweat.
The Long-Term Advantage
Yes, it takes a few minutes with a needle and thread to attach one, but that small upfront effort pays off massively over the life of the garment. The stitches become part of the clothing itself, completely immune to the heat, water, and friction that make other types of labels give up. You can read more about how different machine washable labels stand up to the test in our detailed guide. All this makes sew-in labels the most reliable and, in the long run, cost-effective choice for anyone needing a truly permanent fix.
Choosing the Best Material for Your Sew In Labels
Not all sew in clothes labels are made the same, and the material you pick makes a world of difference to both comfort and how long the label lasts. It's a bit like choosing tyres for a car; what works for a city runabout isn't going to cut it for a rugged off-roader. Your choice really boils down to what the garment is for and who's wearing it.
Often, you're striking a balance between how soft the label feels against the skin and its ability to survive countless trips through the washing machine. A delicate cashmere jumper, for instance, needs a label that's just as gentle, while a sturdy school blazer needs something that can take a real beating.
This expectation for durability is something we're all used to. Here in the UK, sewn-in care and content labels are a legal requirement on most clothing, so we've all grown up with them. This has set a standard in our minds: labels should be permanent, washable, and last for years, which shapes what people look for when buying personalised name labels too.
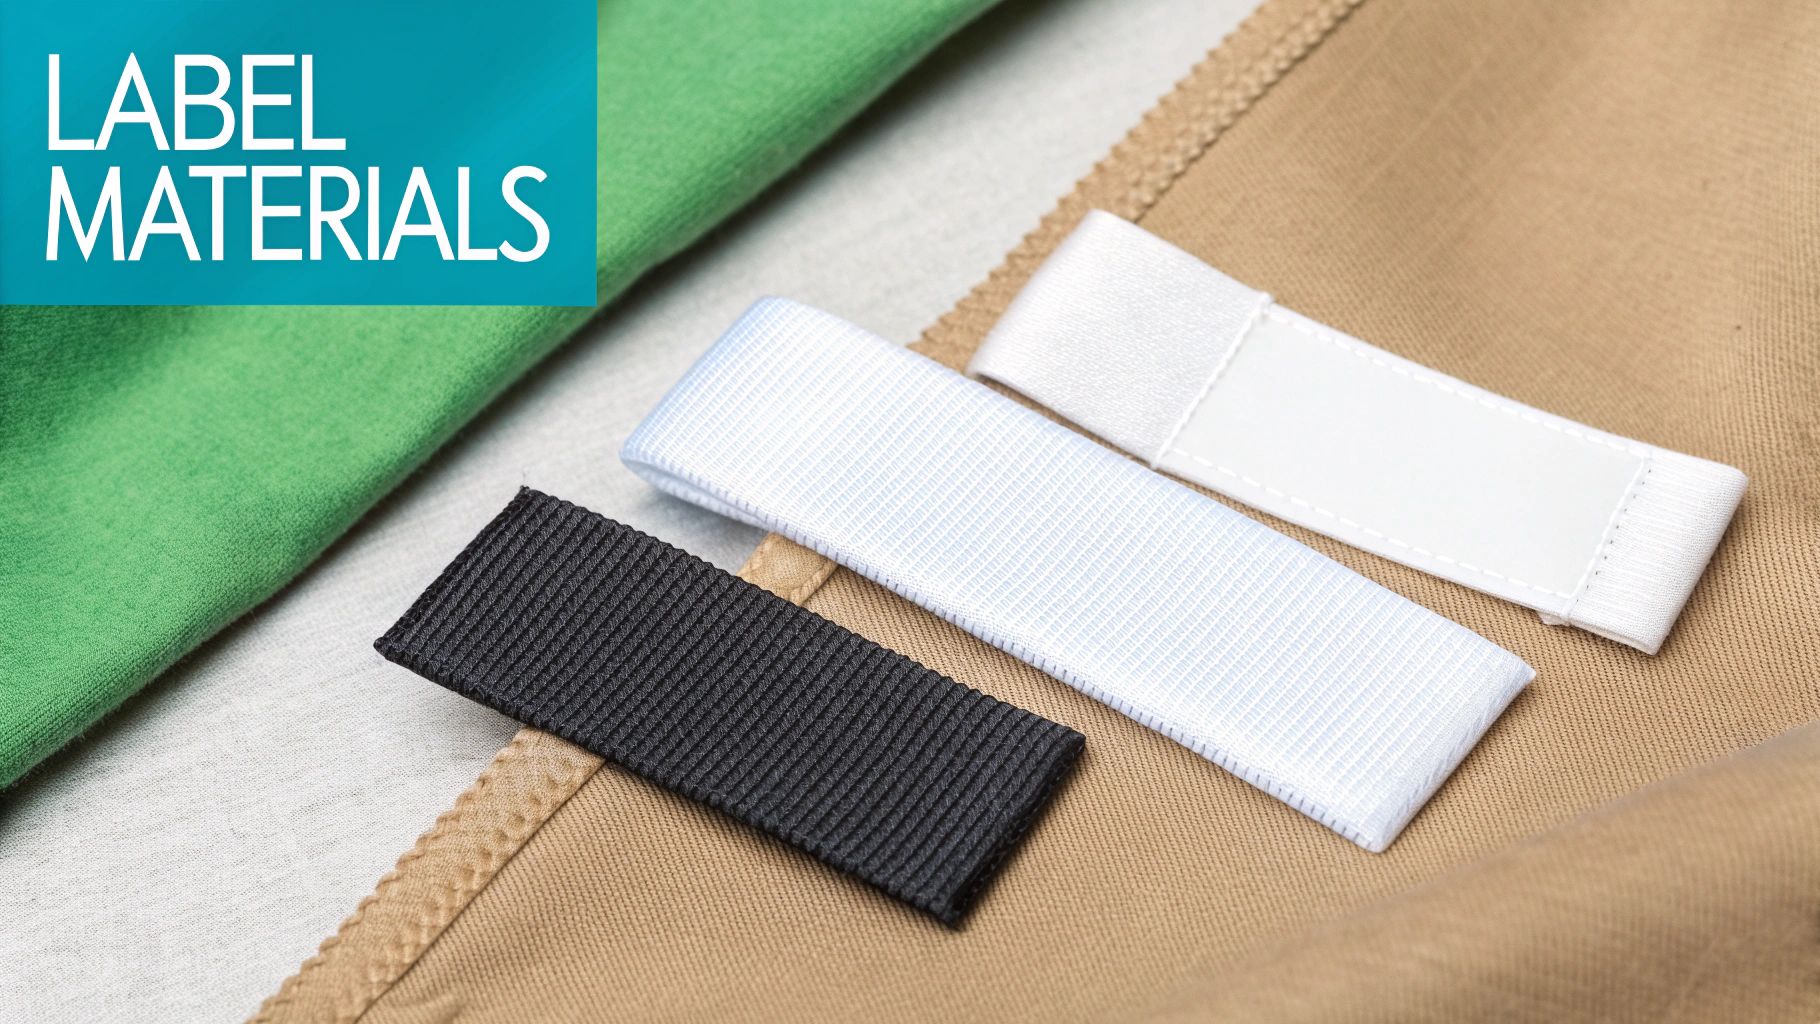
Woven Polyester: The Classic Workhorse
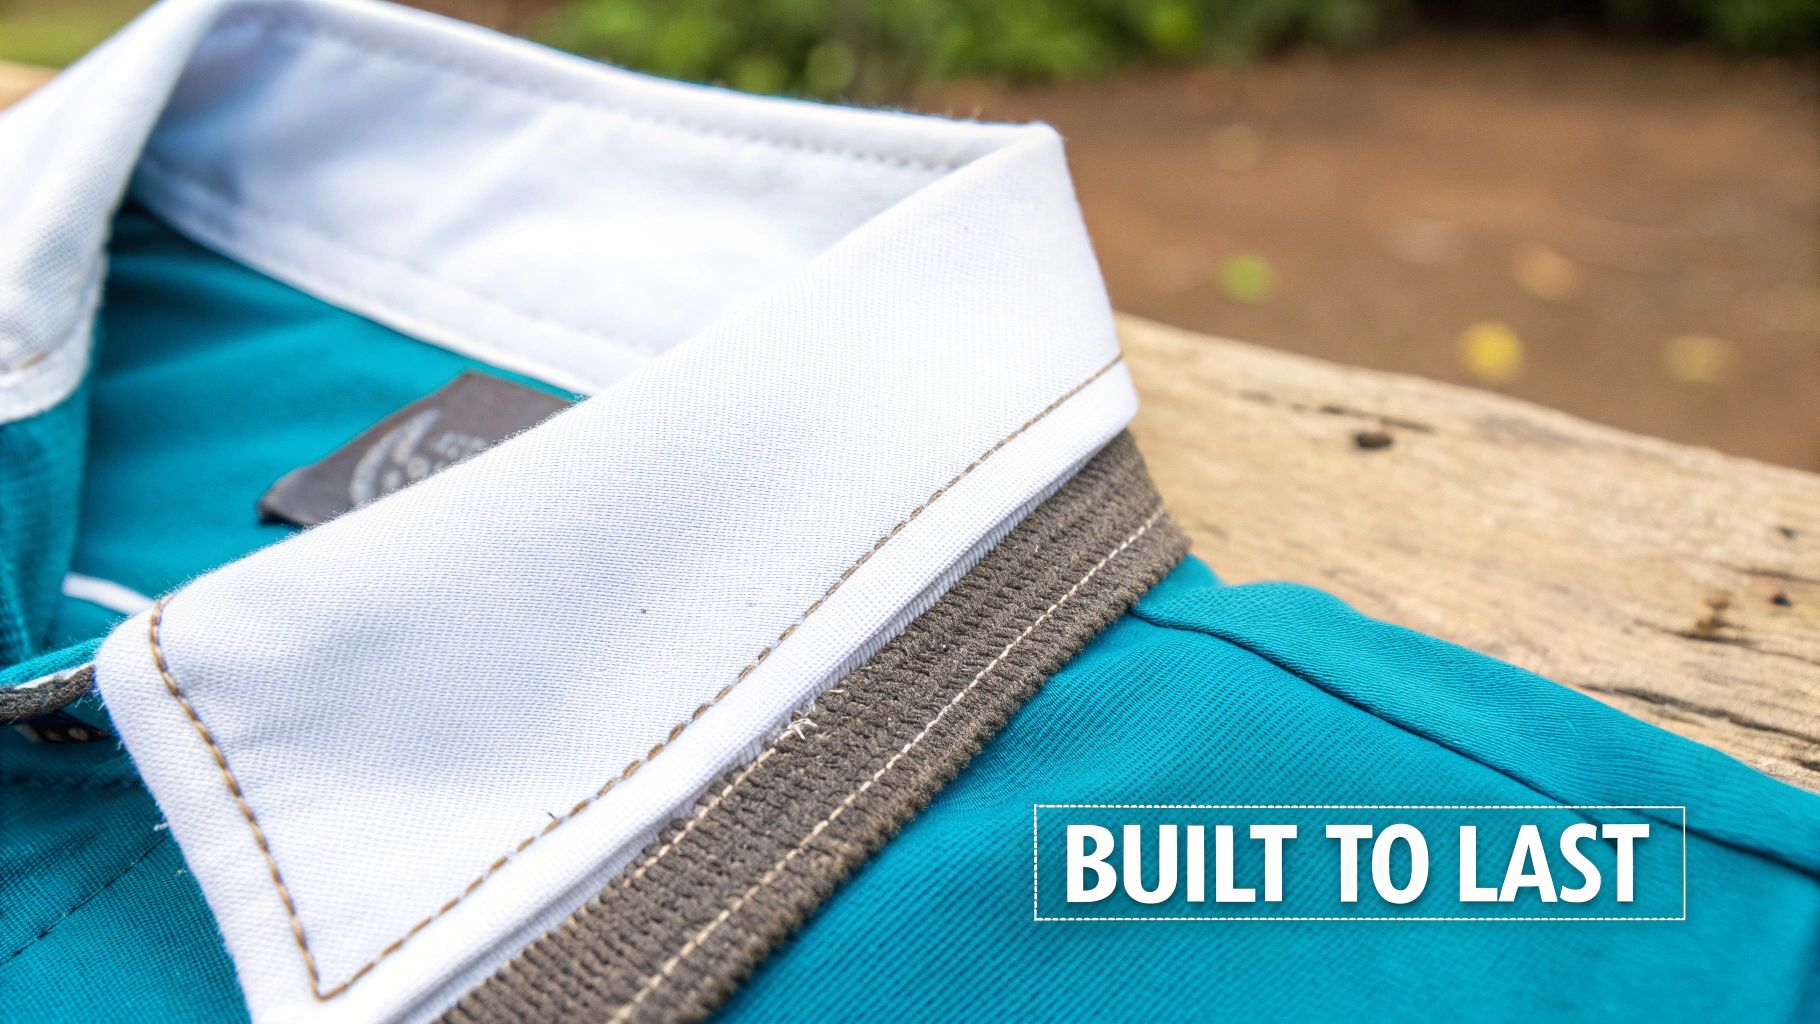
When you think of traditional school uniform labels, you're probably picturing woven polyester tapes. They are the go-to for uniforms and workwear, and for good reason. The name is literally woven into the fabric of the label, not just printed on top, so it simply can't fade or wash away. It’s easily the most durable option out there, built to outlast the garment it's attached to.
The flip side of all that toughness? Woven polyester can sometimes feel a bit scratchy, particularly for those with sensitive skin. This makes it a perfect match for a blazer, a coat, or a PE kit, but maybe not the best for things worn right next to the skin, like vests or pyjamas.
Printed Satin: Soft and Smooth
For a much softer touch, printed satin labels are a fantastic alternative. They have a silky, smooth finish that feels lovely against the skin, which makes them an excellent choice for baby clothes, delicate knitwear, or any piece of clothing where comfort is the top priority.
The trade-off here is durability. The text is printed onto the satin, and while it starts off crisp and clear, it can begin to fade after many, many washes. They’re still very tough, mind you, but they just don't have the absolute permanence of a woven label. Think of them as the luxury option, where a gentle feel is more important than surviving an industrial laundry for decades.
Natural Cotton: Breathable and Gentle
If you prefer natural fibres, cotton labels are a brilliant choice. They're soft, breathable, and feel great, making them a popular pick for handmade items and organic clothing lines. Much like satin, the name is printed onto the surface of the cotton.
For those keen on making their own labels from scratch, specialised products like Northcott Fabrics Project Label Panels can be a great, high-quality starting point. The main thing to watch with cotton is that it can fray at the edges if you're not careful when sewing it in, and it might not withstand the same punishing wash cycles as polyester.
To make things a little clearer, here's a quick comparison of the most common materials you'll come across.
Sew-In Label Material Comparison
| Material Type | Durability | Comfort Level | Best For |
|---|---|---|---|
| Woven Polyester | Extremely High | Can be scratchy | School uniforms, workwear, coats, outerwear |
| Printed Satin | Good | Very High (soft & silky) | Baby clothes, delicate fabrics, knitwear, lingerie |
| Natural Cotton | Moderate | High (soft & breathable) | Handmade items, organic clothing, casual wear |
Ultimately, the right material comes down to the job at hand. Each one has its place, and by matching the label to the garment, you'll get a result that looks great and lasts.
How to Properly Attach Sew-In Clothes Labels
Don't worry, you don't need to be a master tailor to attach a label that will last for years. The thought of sewing can be a bit daunting for some, but trust me, securing sew-in clothes labels is a simple skill anyone can pick up with a few basic tools and a little patience. Think of it less like complex dressmaking and more like tying a few strong, simple knots.
This guide will walk you through the process with straightforward instructions. Just a few minutes of your time will create a permanent bond, ensuring those labels stay put through countless washes and all the rough-and-tumble of daily life.
Gathering Your Simple Toolkit
First things first, let's get your supplies ready. You only need a few basic bits and bobs, and having them on hand will make the whole job go much smoother.
- A Needle: Any standard, sharp sewing needle will do the trick. A thinner one is often better as it will glide through the fabric and label more easily.
- Thread: A good quality polyester or cotton thread is what you're after. If you want a neat finish, try to match the thread colour to the label or the garment itself. For a nearly invisible look on items not worn right against the skin, you could even use a specialist clear thread.
- The Label: Of course, have your name label ready to go.
- Scissors: Just a small, sharp pair for snipping the thread.
And that's it. No fancy equipment is needed to get a professional-looking and seriously durable result.
Finding the Perfect Placement
Where you put the label is just as important as how you sew it on. The aim is to make it easy for someone to find, but completely unnoticeable for the person wearing the garment.
The best spot for a label is typically inside the garment along an existing seam. This keeps it out of sight, prevents it from irritating the skin, and makes it dead easy to find in a lost property pile.
Here are a few of the most common and effective spots:
- Inside the Collar: Right in the centre of the back of the neck, usually just below the brand or size tag. This is the classic, most obvious place.
- Along a Side Seam: Tucked away near the bottom of a top, where the washing instructions are usually found. This is a great, discreet option.
- On the Waistband: Perfect for trousers, skirts, and shorts. Just pop it on the inside of the waistband at the back.
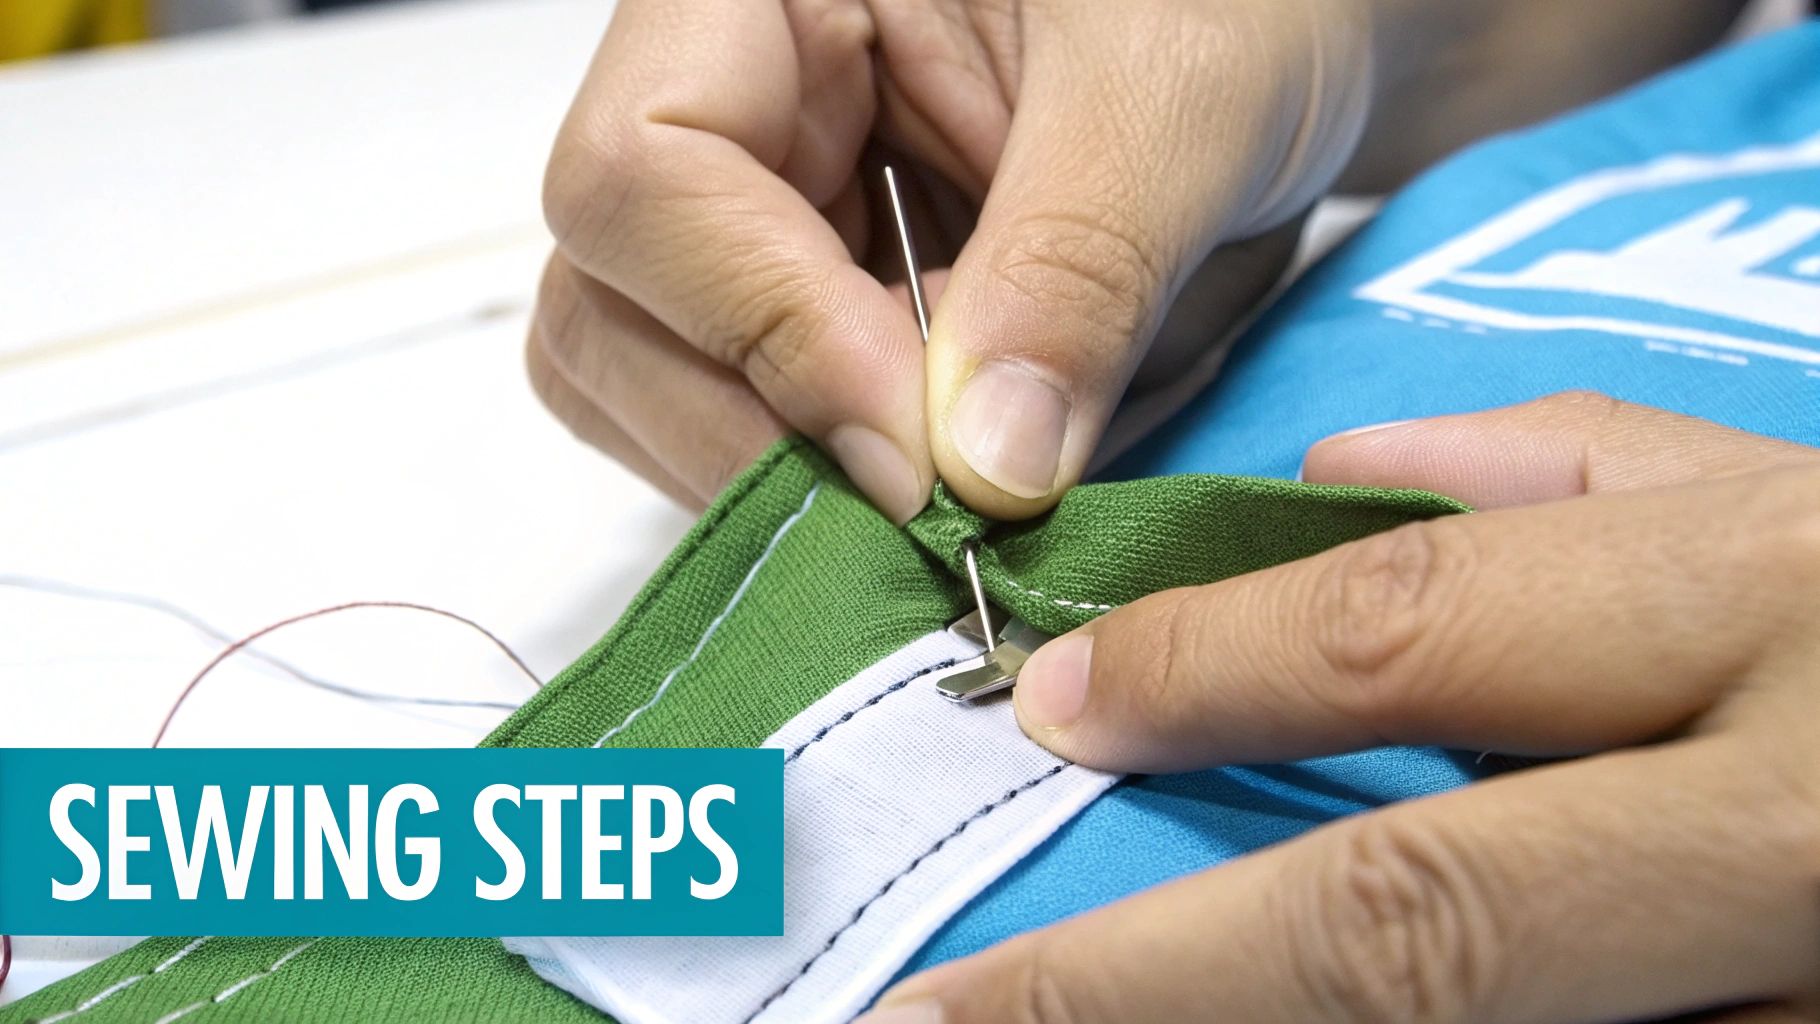
The Basic Stitching Process Step-by-Step
Honestly, the simplest and most effective method is to just stitch down both short ends of the label. It’s quick, incredibly secure, and keeps the label lying nice and flat against the fabric.
- Prepare Your Thread: Cut a piece of thread about 40-50 cm long. Thread it through the eye of your needle, then tie a small, tight knot at the very end of the thread.
- Position the Label: Place your label exactly where you want it on the garment. Use your thumb to hold it firmly in place.
- Start Sewing: From the inside of the garment (the wrong side), push the needle up through one corner of the label. That knot you tied will anchor the thread on the other side.
- Create Small Stitches: Push the needle back down through both the label and the fabric, very close to where it came up. Repeat this a few times along one short end of the label to secure it. This is a simple but effective running stitch.
- Secure and Repeat: After a few stitches on one end, create a small knot on the back to lock it in. Now, just do the exact same thing on the other short end of the label.
- Finish Off: Once both ends are stitched down, tie one last secure knot on the inside of the garment and snip off any excess thread.
If you'd like to explore different stitching styles, our post on sew-on clothing tags has some extra tips and techniques. By following these simple steps, you can confidently attach any sew-in label and know it’s there to stay.
The Enduring Value of Sew In Labels in the UK
Even with all the quick and easy alternatives out there, the good old-fashioned sew in clothes label is still going strong, especially here in the UK. Its appeal is a mix of tradition and pure practicality, creating a sense of trust that newer options are still trying to match.
You see this most clearly during the annual back-to-school frenzy. For generations, parents have made it a ritual to sew name tapes into school blazers, jumpers, and PE kits. It's a small investment of time that pays off massively, stopping expensive uniform pieces from disappearing into the lost property black hole. That simple act has become part of the fabric of getting a child ready for school life.
Beyond the School Gates
But it’s not just about the classroom. The sheer reliability of a sewn-in label has made it the go-to choice in any situation where clothes are likely to get mixed up.
- Care Homes: When laundry is done communally, clear and permanent labels are crucial. They prevent frustrating mix-ups and help maintain residents' sense of personal ownership and dignity.
- Nurseries and Camps: With little ones, things get jumbled up constantly. A securely stitched-in label is often the only thing ensuring that a favourite jumper makes it back to the right peg.
- Artisan Brands: For small-scale clothing makers and crafters, a sew-in label is the final touch. It adds a professional, lasting mark of quality to their handmade garments.
The sheer size of the UK schoolwear market really drives home how much we rely on these labels. According to the UK Schoolwear Association, parents in Britain spend an estimated £1.4 billion a year on uniforms and accessories. What’s more, a 2023 survey revealed that 94% of primary school parents buy new uniform items every year, often because the old ones have been lost. If you dig into the data on the UK packaging and labels market, you get a real sense of the scale.
For many, spending a few minutes with a needle and thread is a small price to pay for total peace of mind. A sewn-in label becomes part of the garment itself, a permanent fixture that promises it will always find its way home.
This deep-rooted trust is why, even with fantastic stick-on options now available, the sew-in label is still seen by many as the ultimate solution for identifying clothes. It's a method that has been tried and tested for decades, and it’s proven to handle anything daily life can throw at it.
Sew-In vs Stick-On Labels: Which One Should You Choose?
When it comes to labelling clothes, the big question is nearly always the same: do you go with traditional sew-in clothes labels or their modern stick-on cousins? It really boils down to a simple trade-off between permanence and convenience. Think of it as the classic battle between something built to last forever and something designed to get the job done quickly and easily.
Getting to grips with what each type does best is the key to making the right choice.
Sew-in labels are, without a doubt, the champions of durability. Once you’ve stitched one into a garment, it’s not going anywhere. It becomes part of the fabric, ready to handle countless washes, high-heat tumble dryers, and years of rough and tumble. This makes them the perfect solution for items you need to label for life, like a school uniform you plan on passing down or a hand-knitted jumper you want to cherish forever.
Stick-on labels, on the other hand, are all about speed and simplicity. If you’re a busy parent staring down a mountain of new school uniforms, the thought of peeling and sticking a label in a few seconds is a lifesaver. While they might not last for a decade, good quality stick-on labels are surprisingly tough and more than up to the job.
The Durability Debate
The secret to a sew-in label's staying power is its physical bond. It doesn’t rely on any adhesive that could weaken over time with exposure to heat and washing detergents. Instead, it’s held firmly in place by thread, giving it a level of security that’s fundamentally more permanent.
That said, adhesive technology has come on in leaps and bounds. High-quality stick-on labels, especially those designed to be stuck onto a garment’s care tag, use incredibly strong, waterproof glues. For most everyday needs, like labelling a school jumper for the academic year, a premium stick-on label is more than durable enough. If you want to dive deeper into their staying power, you can check out our guide on stick-on clothing labels in the UK.
This little flowchart can help you decide which route is best for you.

As you can see, if you need absolute, long-term permanence, sewing is the way to go. For just about everything else, the sheer convenience of a stick-on label is hard to beat.
Time And Effort Considerations
This is where stick-on labels really pull ahead. You can pop one on in under 10 seconds – no special skills, no needles, no fuss. While sewing a label isn't complicated, it does require a needle and thread, and you're looking at about five to ten minutes of work for each garment. That time really adds up when you’re faced with a whole new school wardrobe.
The rise in their popularity is clear. The European clothing labels market is expected to hit USD 1.85 billion by 2032, and peel-and-stick labels are the fastest-growing part of that market. This boom is almost entirely down to how much easier they make life for parents and care homes, where time is always in short supply.
To make things even clearer, let's break down the key differences side-by-side.
Feature Comparison Sew In vs High-Tack Stick On Labels
This table offers a direct comparison to help you choose the right label type based on your priorities.
| Feature | Sew-In Labels | High-Tack Stick-On Labels |
|---|---|---|
| Permanence | Highest. Becomes a permanent part of the garment. | Very High. Designed to last many washes but removable. |
| Application | Manual stitching required (needle and thread). | Quick. Peel and stick onto the care label. |
| Time to Apply | 5–10 minutes per label. | Under 10 seconds per label. |
| Best For | School uniforms, care home clothing, handmade items. | Everyday clothing, school items, temporary labelling. |
| Removal | Difficult. Requires carefully cutting the stitches. | Can be peeled off, sometimes with heat (e.g. hairdryer). |
| Material Feel | Can be felt inside the garment, but woven ones are soft. | Cannot be felt as it's attached to the existing care tag. |
Ultimately, what works for one person might not work for another. If you're labelling a cherished family heirloom or a coat you expect to last for years, the time spent sewing is a brilliant investment. For almost everything else, a high-quality stick-on label gives you a fantastic blend of durability and time-saving efficiency.
Your Top Clothing Label Questions, Answered
Once you’ve picked your labels, a few practical questions always seem to come up. It's one thing to have the labels, but another to use them effectively. I've gathered some of the most common queries we get about sew in clothes labels and their stick-on cousins to give you some straightforward, practical answers.
Think of this as a little troubleshooting guide to help you get every garment sorted perfectly.
Can I Use Sew-in Labels on Any Type of Clothing?
Pretty much, yes! One of the best things about a traditional sew-in label is just how versatile it is. You can attach them to almost any fabric imaginable, from the tough twill of a school blazer to a soft, delicate hand-knitted jumper.
The trick is simply to adapt your sewing method to the material. For instance, if you're labelling stretchy sportswear, use a more flexible stitch that can move with the fabric. When it comes to waterproof coats, it's a smart move to sew the label onto an existing internal tag rather than piercing the outer waterproof layer. With the right needle and thread, there really isn't an item in the wardrobe that a sew-in label can't handle.
How Do I Remove a Sewn-in Label Without Damaging Clothes?
Removing a sew-in label is much easier than it sounds, and you can definitely do it without leaving a trace. Your best friend for this job is a seam ripper, though a small, sharp pair of scissors will also work in a pinch.
- Expose the threads: Gently pull the label away from the fabric so you can clearly see the stitches.
- Snip with care: Slide the tip of the seam ripper or scissors under each stitch and cut it.
- Lift it off: Once you’ve snipped all the stitches, the label should come away easily.
- Tidy up: Use tweezers to pull out any tiny bits of thread left behind.
The key is to take your time. Go slowly and be careful not to tug at the threads, as this could pucker or even tear the fabric.
By being patient, you can remove a label completely, leaving the garment looking good as new. This comes in really handy for school uniforms you plan to pass on or donate.
Are Modern Stick-on Labels as Good as Sew-in Labels?
That’s the big question, isn't it? The honest answer is that it really depends on what you need. A traditional sew-in label is still the undisputed champion for ultimate permanence. It’s not going anywhere.
However, a high-quality stick-on label is a very close contender these days. When you apply them correctly – and that means sticking them onto the smooth, silky care tag inside the clothing – they are engineered to be incredibly tough. A premium one can easily handle dozens and dozens of trips through the washing machine and tumble dryer.
So, for an item that will see heavy use for many years, a sew-in label is the most permanent choice. But for a fantastic blend of brilliant durability and unbeatable, time-saving convenience, modern stick-on labels are a lifesaver for busy families.
What’s the Best Place to Sew a Name Label on a School Jumper?
For school jumpers, blazers, and cardigans, picking the right spot is key for both comfort and making sure it’s easy to find. The two best places are inside the garment: either just below the collar or along a side seam, right next to the washing instructions.
The collar is the classic spot because it’s so easy for someone to spot in a chaotic lost property pile. Placing it along the side seam is a bit more discreet and completely eliminates any chance of the label irritating the back of a child's neck. Both are great options that keep the label secure and hidden when the item is being worn.
If you're looking for a quick and incredibly durable labelling solution that lets you skip the sewing altogether, have a look at the machine-washable stick-on clothing labels from Quote My Wall. Our ultra high-tack labels are designed to withstand the rigours of school and care home life, saving you a huge amount of time. Discover our range of washable stick-on clothing labels.