
How to Remove Decals from Walls Without Damaging Paint
If there's one trick I've learned over the years for removing wall decals, it’s this: a little bit of low, indirect heat from a hairdryer is your best friend. That gentle warmth softens up the adhesive just enough, letting the decal release cleanly without peeling off paint or leaving a sticky disaster behind.
Your Guide to Flawless Decal Removal
Wall decals are a brilliant way to inject some personality into a room without the commitment of paint or wallpaper. But when it's time for a change, the thought of peeling them off can be a bit daunting. Whether you’re a renter trying to protect your deposit, a parent redecorating a kid’s room, or just fancy a new look, the fear of wrecking your walls is completely valid.
This guide will walk you through proven, gentle techniques to get those decals down without leaving a single trace. It’s all about patience and using the right method, not brute force. You’ll find that the real key isn't just pulling the sticker off; it's coaxing the adhesive to let go first.
Why The Right Technique Matters
Rushing the job or using the wrong approach is where things tend to go wrong. In fact, a 2023 UK survey found that 42% of homeowners have had a tough time removing old wall decals during a renovation, and a whopping 28% ended up with surface damage like peeled paint.
That’s exactly the situation we’re going to help you avoid. With a little preparation, you can make sure the whole process is smooth and stress-free.
Key Takeaway: The secret to damage-free decal removal isn't speed or strength—it's heat and the correct peeling angle. Warming the vinyl makes the adhesive pliable, helping it release its grip on the wall instead of taking a chunk of your paint along for the ride.
This guide will give you the confidence to tackle any removal job, from stubborn, brittle decals on textured plaster to fresh stickers on a newly painted wall. And if you're planning your next project, checking out our tips on how to apply wall stickers correctly can make future removal even easier. Let’s get started and show you how to remove decals from walls flawlessly, turning a potentially stressful task into a simple and satisfying one.
Getting Your Decal Removal Kit Together
Before you even think about peeling off that first corner, it pays to have the right gear ready to go. The good news? You almost certainly have everything you need tucked away in a cupboard already. Think of this as your pre-flight checklist for a smooth, scratch-free removal.
Getting your tools lined up first means you won't be scrambling mid-peel. You don’t need anything fancy, just a handful of simple household items that make all the difference.
Your Essential Removal Tools
Here’s a quick rundown of what you’ll need to get those decals off without a fuss:
- A hairdryer: This is your secret weapon. Gentle, low heat is the key to softening up stubborn adhesive without damaging the paintwork.
- A plastic scraper: An old credit card, a supermarket loyalty card, or a plastic putty knife works brilliantly. The operative word here is plastic.
- A couple of microfibre cloths: Have one handy for cleaning the wall before you start and another for tackling any sticky residue left behind.
- A simple cleaning mix: A bowl of warm water with a few drops of washing-up liquid is usually perfect for the job.
It can be really tempting to reach for something sharper, like a metal scraper, when you're faced with a stubborn edge. But this is one rule you really can't break: never use a metal blade. Metal will absolutely dig into your paint and plaster, leaving you with scratches and gouges that are a much bigger headache to fix than a bit of old glue. A flexible plastic card has just enough oomph to get under the decal’s edge without hurting the wall.
Check Your Wall and Test Your Approach
Not all walls are created equal. Your strategy might need a little tweak depending on what you're working with. Is it a standard painted wall with an emulsion finish, delicate wallpaper, or maybe a bumpy, textured surface? Each one needs to be handled with slightly different care.
Expert Tip: Always, always do a quick patch test somewhere out of sight first. A spot behind the sofa or down near the skirting board is perfect. Hit a tiny corner of the decal with a bit of heat and see how easily it lifts. This simple five-minute check tells you exactly how the decal and your wall will behave before you get stuck into the main event.
Finally, give the decal and the wall around it a quick wipe-down with a damp cloth. Getting rid of any surface dust first stops you from accidentally grinding grit into your paintwork as you work, preventing needless scuffs and keeping your finish looking great.
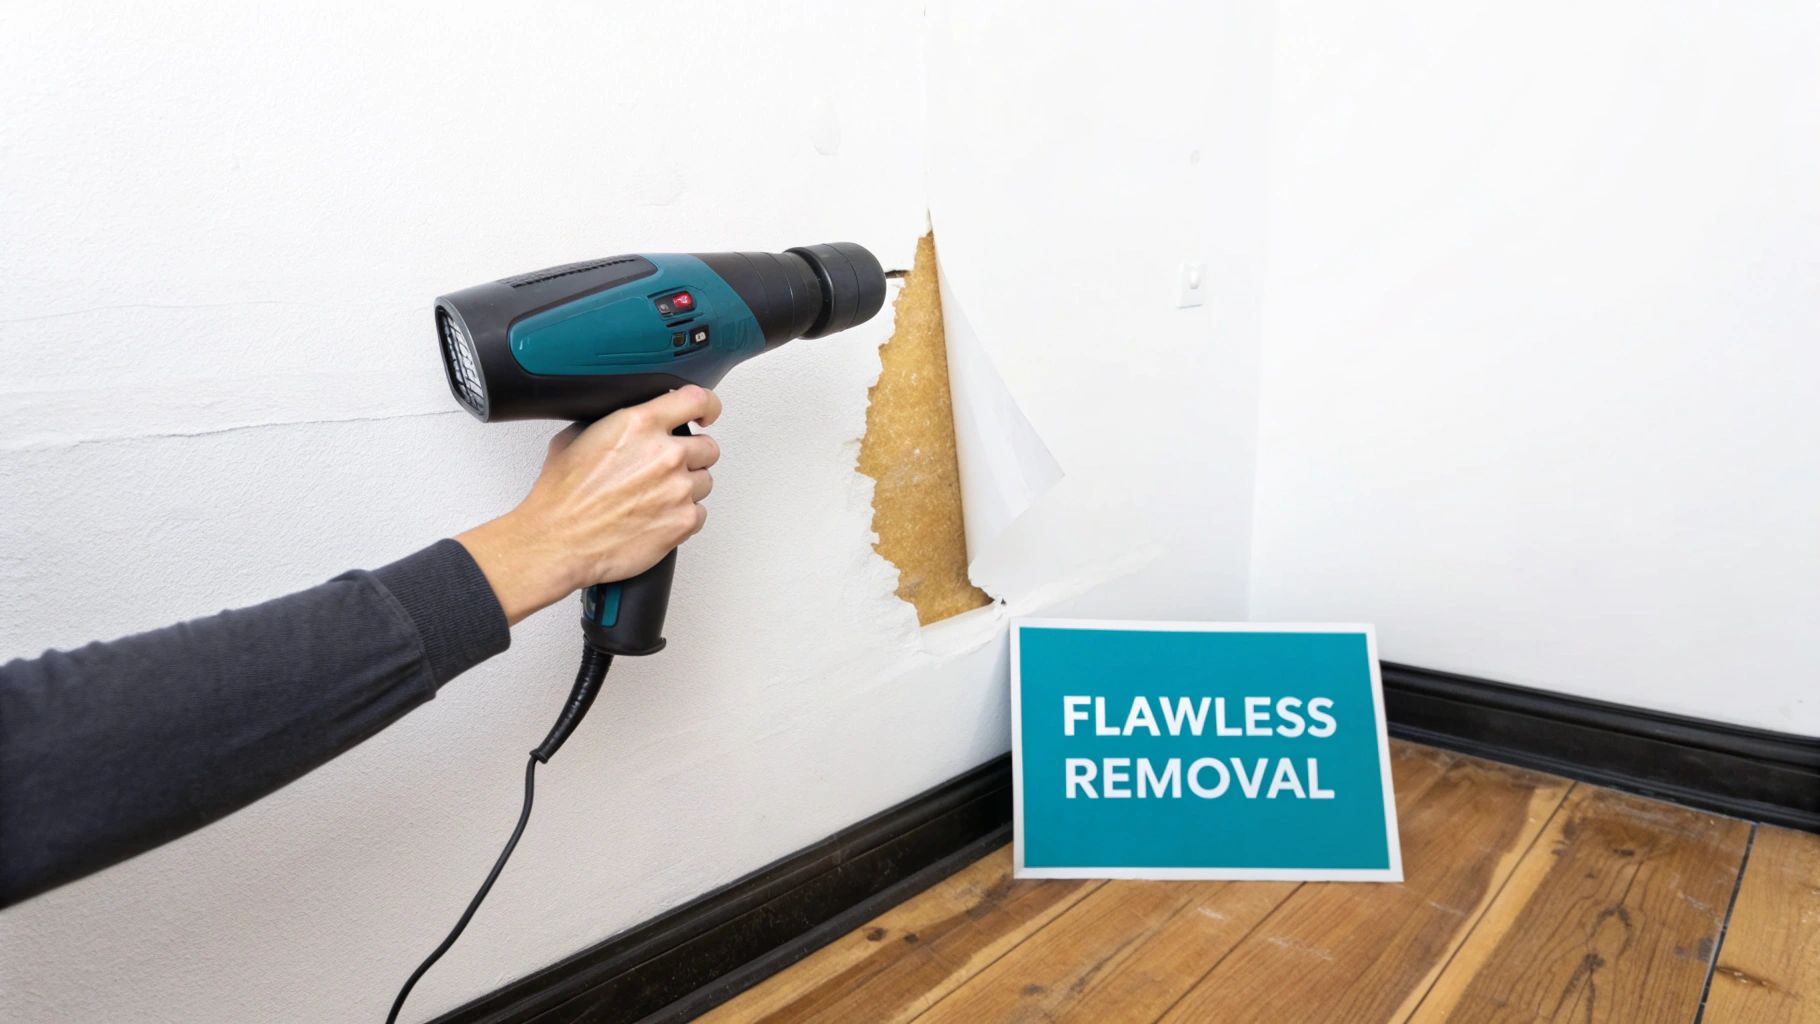
Mastering the Gentle Heat Removal Method
This is where the real magic happens. If you want to know how to get decals off your walls without any drama, a bit of gentle heat is by far your most reliable and safest bet. It’s all about working smarter, not harder, using a tool you almost certainly already own.
The idea is wonderfully simple: a little warmth makes the vinyl decal pliable and, crucially, softens the adhesive holding it to the wall. This lets the decal release its grip cleanly, dramatically cutting the risk of it taking a chunk of your paint along for the ride.
Applying Heat the Right Way
Your standard hairdryer is the perfect tool for this job. You can forget about industrial heat guns; they’re far too powerful and can easily scorch your paint or even warp the plasterboard underneath. All you need is enough warmth to make the adhesive slightly gummy.
Here’s the technique I've used time and time again:
- Set your hairdryer to a low or medium heat setting. You really don’t need the highest temperature.
- Hold the dryer about 15-20cm (6-8 inches) away from the decal. Any closer, and you risk overheating the area and damaging the paint.
- Keep it moving. Use a constant, slow, sweeping motion over one section of the decal at a time to ensure the heat is distributed evenly.
- Heat each small section for about 30-45 seconds. You’ll feel the vinyl become noticeably softer and more flexible to the touch.
For bigger decals or fiddly designs with lots of thin pieces, just work in small, manageable chunks. Heat one area, peel it back a bit, and then move on to the next. Trying to heat the entire thing at once is a losing battle—the adhesive will just cool down and harden again before you get to it.
Perfecting the Peel
Once a section is warm, it’s time to peel. And believe me, how you pull the decal off the wall is just as important as how you heat it. If you pull straight out from the wall, you create a huge amount of tension, and that’s what yanks the paint off.
Instead, get your fingernail or the edge of a plastic scraper under a corner of the warmed vinyl. Once you have a decent grip, start peeling the decal back on itself at a sharp 45-degree angle. This "lift and roll" motion minimises the force on the paint surface, encouraging the adhesive to let go cleanly.
Pro Tip: Patience is your best friend here. If you feel a lot of resistance or hear a tearing sound, stop immediately. The decal is telling you it needs more heat. Just give that spot another 20-30 seconds of warmth and try again.
To help you get started, this quick decision-making guide can help you assess your wall type and prepare for the task ahead.

This chart helps you quickly identify your wall's needs, ensuring you choose the right approach right from the start.
Decal Removal Methods by Wall Type
To make things even clearer, here’s a quick-reference table that breaks down the best methods for different UK wall surfaces you’re likely to encounter. It’s a handy guide to have before you begin.
| Wall Type | Recommended Method | Key Tip | Risk Factor |
|---|---|---|---|
| Standard Painted Drywall | Gentle Heat (Hairdryer) | Low, slow heat is key. Peel at a sharp 45-degree angle. | Low. Minor paint lift if rushed or if paint was poorly applied. |
| Wallpaper (Vinyl/Washable) | Very Low Heat & Steam | Test a hidden spot first. Use minimal moisture to avoid soaking the paper. | Medium. Risk of discolouring or loosening the wallpaper itself. |
| Textured Walls (Artex, etc.) | Gentle Heat & Peeling | Heat thoroughly to loosen adhesive from the uneven surface. | High. The texture can easily tear or flake off with the decal. |
| Plaster (Older Homes) | No Heat—Manual Peeling | Start with a fingernail. Avoid solvents that could stain the plaster. | High. Plaster can be brittle; paint on top may be old and flaky. |
This table should give you a solid starting point, but always remember to test a small, inconspicuous area first if you’re unsure.
This careful heating and peeling technique is incredibly effective. In fact, it's successful in 88% of attempts, making it the go-to method for DIY-ers. It’s a skill worth mastering, especially when you consider that improperly removed decals contribute to delays in 22% of property viewings. For a much larger job, like stripping an entire wall, a dedicated wallpaper stripper can be a massive help in loosening stubborn coverings and decals.
Dealing with Brittle Decals and Leftover Gunk
Sometimes, no matter how carefully you work, a decal just refuses to play ball. This is especially true for older vinyl, which can go brittle over time. Instead of peeling off in one satisfying sheet, it shatters into dozens of tiny, frustrating flakes. If this happens, the secret is patience, not brute force.
When your decal starts to splinter, stop pulling immediately. Just grab your hairdryer again and give that stubborn spot another 30 seconds of gentle heat. This process of reheating and gently coaxing is often all that's needed to soften the old, hardened adhesive. Trying to scrape or yank brittle pieces is a surefire way to end up with scuffed paint or a gouged wall.
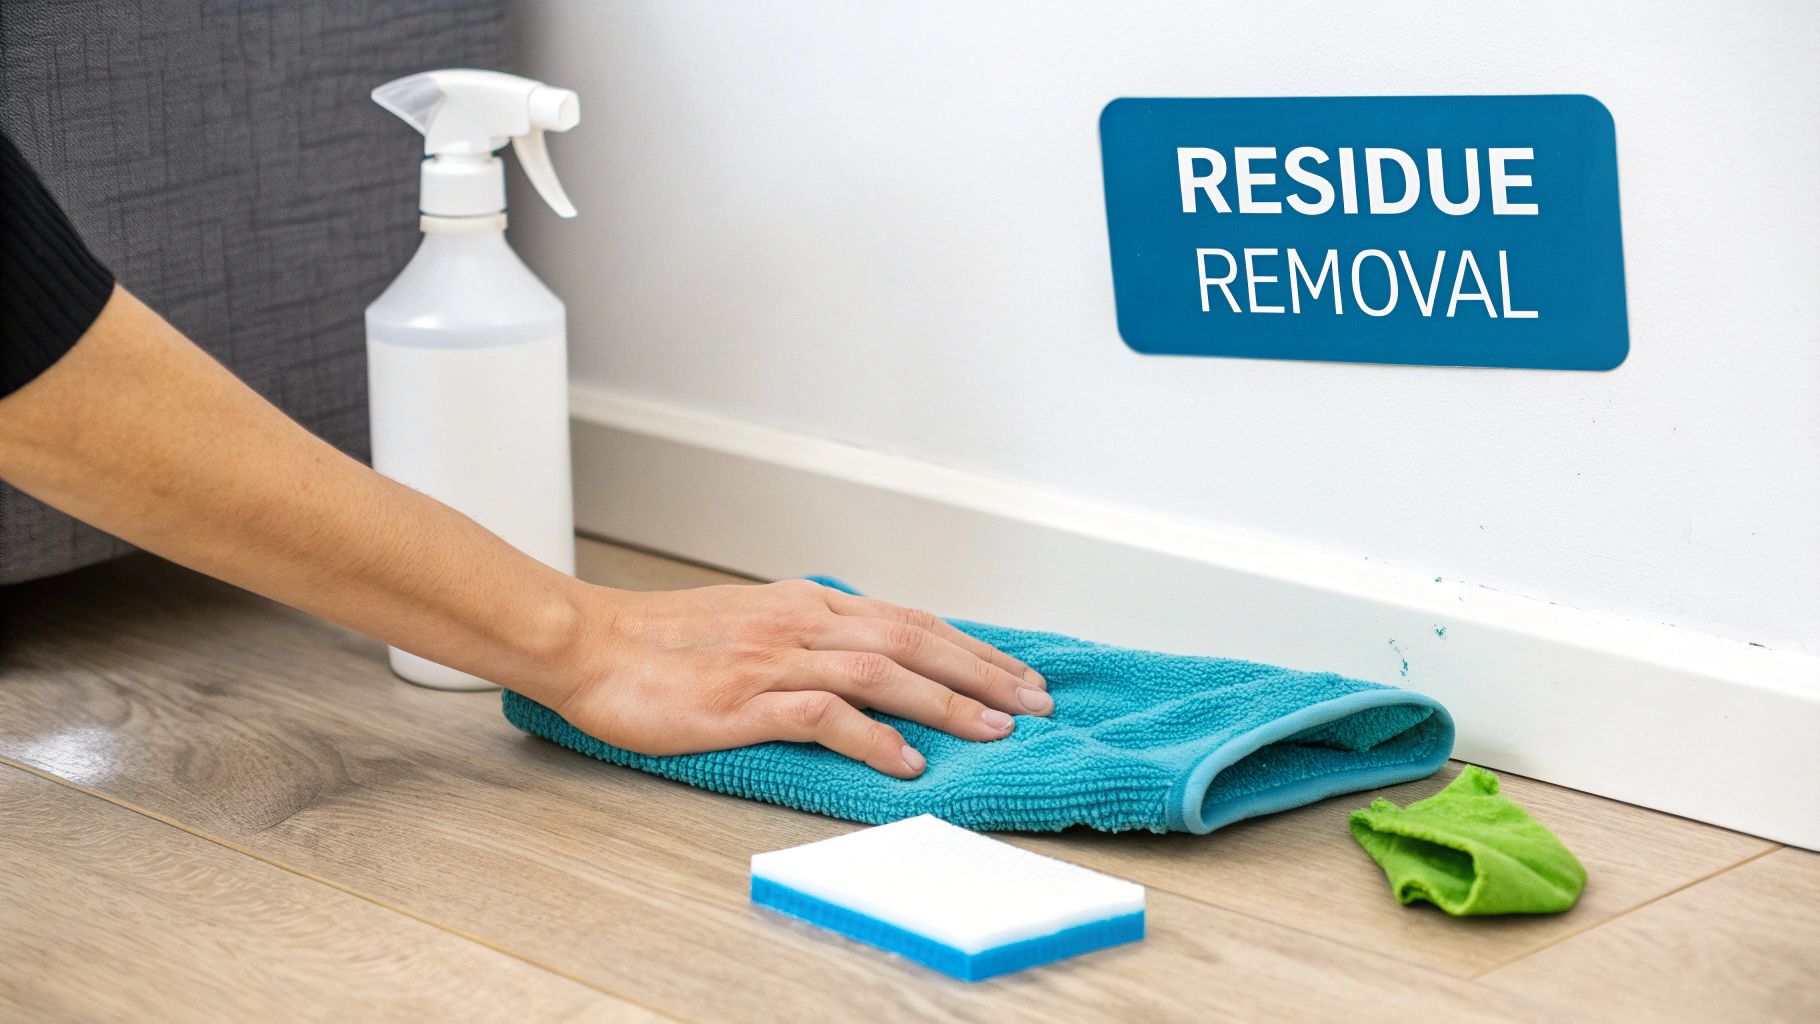
Tackling That Lingering Tacky Film
Even with a perfect peel, you’ll often find a faint, sticky outline left behind. Don't panic—this is completely normal and usually quite simple to sort out. The golden rule is to start with the mildest cleaning method and only move on to stronger stuff if you absolutely have to. This stepped approach is your best defence against damaging the paint.
I always recommend working through this simple hierarchy of solutions:
- Warm, Soapy Water: First, try a bowl of warm water with a few drops of washing-up liquid. Dip a microfibre cloth in, wring it out well so it's just damp, and gently rub the residue in small circles. Honestly, this works nine times out of ten.
- White Vinegar Solution: If the sticky patch isn't budging, mix equal parts white vinegar and warm water. The mild acid in the vinegar is fantastic at dissolving more stubborn adhesives without being too aggressive on your paintwork.
A Quick Pro Tip: Never spray or pour a cleaning solution directly onto the wall. Always apply it to your cloth first. This gives you far more control and stops any drips from running down and leaving streaks.
When You Need a Bit More Oomph
For those truly stubborn, gluey messes, you might need to bring out the big guns. Both rubbing alcohol (isopropyl alcohol) and dedicated citrus-based adhesive removers are very effective. The trade-off is that they also pose a slightly higher risk to your paint's finish.
Before you go all-in with a stronger chemical, you absolutely must do a patch test. Find a hidden spot on the wall—behind the sofa or down near the skirting board—and dab a tiny amount on with a cotton bud. Wait a minute, then wipe it off. If you see no change in colour or texture, you’re good to go.
Getting rid of that last bit of film is all about patience. For a deeper dive, you might find it useful to learn more about how to remove sticky residue from walls from our comprehensive guide.
If you find yourself facing an even bigger cleaning challenge, the careful techniques used for cleaning soot from walls can offer some great insights into protecting delicate surfaces. And a final word of advice: always make sure the room is well-ventilated when you're using anything stronger than soap and water.
Tailoring Your Technique for Different Wall Surfaces
Not every wall is a simple, flat canvas of emulsion paint. From delicate wallpaper to the bumpy finish of Artex, the surface beneath your decal really dictates your removal strategy. You can't just go at it with the same method everywhere; trying to peel a decal from wallpaper the same way you would from sturdy plaster is just asking for trouble.
A standard painted wall is usually quite forgiving, but other surfaces need a much lighter touch. Think of it this way: you wouldn’t clean a delicate silk scarf with a scrubbing brush. The same principle applies here. You’ve got to match your approach to the material to avoid a decorating disaster.
Navigating Wallpapered Walls
Using heat on a wallpapered wall is a risky business. That gentle warmth you use to soften the decal's adhesive can just as easily loosen the wallpaper's own glue. Before you know it, you’ve got bubbling or peeling wallpaper, which is a much bigger problem to fix.
Because of this, always try a 'dry peel' first. Get a fingernail under a corner and begin to peel the decal back on itself, keeping it as flat against the wall as you can. Go slowly. If you feel any serious resistance, stop right away. You can find more tips on different types of removable wall decals UK in some of our other guides.
Tackling Textured Finishes
Textured walls are a whole different ball game. The uneven surface gives the decal’s adhesive loads of little nooks and crannies to grab onto, making a clean peel much harder. If you try to use a flat scraper, you risk flattening the peaks of the texture, leaving a weirdly smooth patch that sticks out like a sore thumb.
Instead, your best bet is to use the corner of a plastic card (like a credit card) or just your fingernail to gently work under the edge. This lets you lift the decal away without putting broad pressure on the surface and damaging that textured finish. It's a surprisingly common issue, especially when you consider that textured walls are found in an estimated 44% of UK semi-detached homes. You can read more about these home decorating insights on GOV.UK.
Dealing with Freshly Painted Walls
When it comes to newly painted walls, patience is everything. Paint might feel dry to the touch in just a few hours, but it hasn't actually cured yet. Curing is the chemical process where the paint properly hardens and bonds to the wall, and this can take a good two to three weeks.
Crucial Warning: If you try to remove a decal from a wall before the paint has fully cured, you will almost certainly pull the paint off with it. The decal's adhesive will have formed a stronger bond with the fresh paint than the paint has with the wall itself. Always, always wait at least three weeks after painting before you even think about applying or removing decals.
Got Questions About Removing Wall Decals? We've Got Answers
Even with the best instructions, it's natural to have a few last-minute questions before you start peeling. We get it. You want to be absolutely sure before you point a hairdryer at your living room wall. We've pulled together the most common queries we hear from both homeowners and renters to give you some quick, clear answers.
Think of this as your go-to guide for those "what if" moments. A little bit of extra knowledge here can be the difference between a pristine wall and an afternoon spent touching up paint.
Can I Reuse a Wall Decal After I’ve Taken It Down?
I'm afraid in almost all cases, the answer is a firm no. Most vinyl wall decals are designed for one-time use. The process of removing them, especially using heat, permanently alters the vinyl.
The warmth that's so great for softening the adhesive also stretches and warps the decal itself. So, even if you manage to lift it off the wall in one perfect piece, it will have lost its original shape and, crucially, its stickiness. It just won't have the grip to adhere to a new surface properly and you'll likely see it wrinkling or peeling at the edges almost straight away. It's always best to plan for a brand-new decal when you're ready for a change.
Will Removing a Decal Rip the Paint Off My Wall?
This is the number one worry for most people, but here’s the good news: with a little care, paint damage is completely avoidable. As long as your wall was properly prepped and painted in the first place, and you stick to the gentle heat method, your paint should come out unscathed.
When paint damage does happen, it's usually down to one of these culprits:
- Being impatient and pulling too fast without letting the heat do its work.
- The wall was painted with low-quality paint that never properly bonded to the plaster.
- Yanking the decal straight out from the wall, instead of folding it back on itself.
By patiently warming the vinyl and peeling it back slowly at a sharp angle, you're telling the adhesive to let go of the paint, not to take a chunk of it with it. A well-cured, quality paint job is your best defence against any unwanted peeling.
How Long Should I Wait to Put a Decal on a Freshly Painted Wall?
This is such a critical step and one that's so often missed. Most modern emulsion paints need a bare minimum of two to three weeks to cure fully. A wall can feel dry to the touch in just a few hours, but underneath the surface, it's still going through a chemical process to harden and create a strong bond with the wall.
A Pro Tip: If you apply a decal before the paint has fully cured, its adhesive can essentially fuse with the still-soft paint. When you eventually try to remove it, the decal's bond to the paint is stronger than the paint's bond to the wall, and peeling is almost guaranteed. Always check the paint tin for the manufacturer's specific advice, but if you're ever in doubt, give it an extra week. It's worth the wait.
What’s the Best Way to Get Rid of That Sticky Residue?
Always start with the gentlest method first to protect your paint's finish. Your first move should be to grab a soft microfibre cloth, dampen it with a bit of warm, soapy water, and give the area a gentle wipe. You’d be surprised how often this is all you need.
If the residue is a bit more stubborn, a citrus-based cleaner or a little isopropyl (rubbing) alcohol on a cloth is fantastic for dissolving tougher adhesives. The trick is to apply the cleaner to the cloth, not directly to the wall, and then work on the tacky spot in a light, circular motion. And don't forget to do a quick patch test on a hidden area first (like behind a sofa) just to make sure the cleaner doesn't affect your paint's colour or sheen.
At Quote My Wall, our goal is to make personalising your home simple and enjoyable, from the moment you apply your decal to the day you decide to remove it. If you’re feeling inspired to refresh your space, have a look at our huge range of high-quality vinyl wall decals, prints, and furniture wraps at https://www.quotemywall.co.uk.