

DIY Shoe Rack Ideas You Can Build This Weekend
You come home with three pairs of muddy shoes, a bag digging into your shoulder, and nowhere sane to put any of it except the strip of floor by the front door. In a narrow UK hallway, that pile becomes the whole room fast. A diy shoe rack fixes the actual problem, it gives you storage that fits the wall, clears the skirting board, and stops the entrance looking like a boot sale after rain.
Why Most UK Hallways Need a DIY Shoe Rack
A shop-bought shoe rack can look tidy on a website and still fail in a real British hallway. The depth may be wrong, the top rail can sit awkwardly under a radiator, and the finish can look out of place beside old plaster or painted timber. In a terrace, flat, or rental, the better answer is usually a rack built to suit the space you have.
That matters because UK homes are often compact, and the layout has to work around door swings, narrow circulation space, and the steady clutter of coats, bags, and umbrellas. A DIY build lets you set every awkward centimetre yourself, so the key question is not just what to build, but where it can sit without making the hall feel tight. The wider appetite for home-organising projects shows up in household spending on furniture and furnishings, which was about £23.3 billion in 2023 in the UK, according to the ONS dataset referenced in the brief, and the same practical demand shows up in articles like PopSci's overview of easy DIY shoe rack ideas.
The same small-space pressure shows up well beyond shoes. A useful comparison is Playz storage for tiny homes, where the layout has to work hard in very limited floor area, just like a narrow hallway.
The real hallway problem
A good rack solves the daily mess, not just the storage count. Trainers get dropped by the door, school shoes drip onto the mat, and the storage you bought for order becomes another obstacle if it sticks out too far or stands too high.
Practical rule: build for the hallway first, then for the shoes. If the rack blocks movement, it is the wrong rack.
For readers in rented terraces, flats, or houses with under-stairs dead space, this guide focuses on four approaches that work in British homes, from a classic floor rack to a renter-friendly over-door version. It also covers the finishing touches that make a handmade rack look deliberate instead of improvised, including a clean vinyl wrap and labelling ideas that suit family use.
The point is straightforward. A diy shoe rack is not a generic furniture project. It is a custom answer to one corner, one climate, and, often, a landlord who will not let you drill.
Tools, Materials and Fixings You Will Reuse Across All Four Builds
Buy once, build once, then build again without another hardware run. The same core kit covers the floor rack, the over-door version, the pallet build and most finishing jobs, so it makes sense to gather everything before you start cutting timber. A cordless drill, a metric tape measure, a 90 cm spirit level, a pencil and a square are essential.
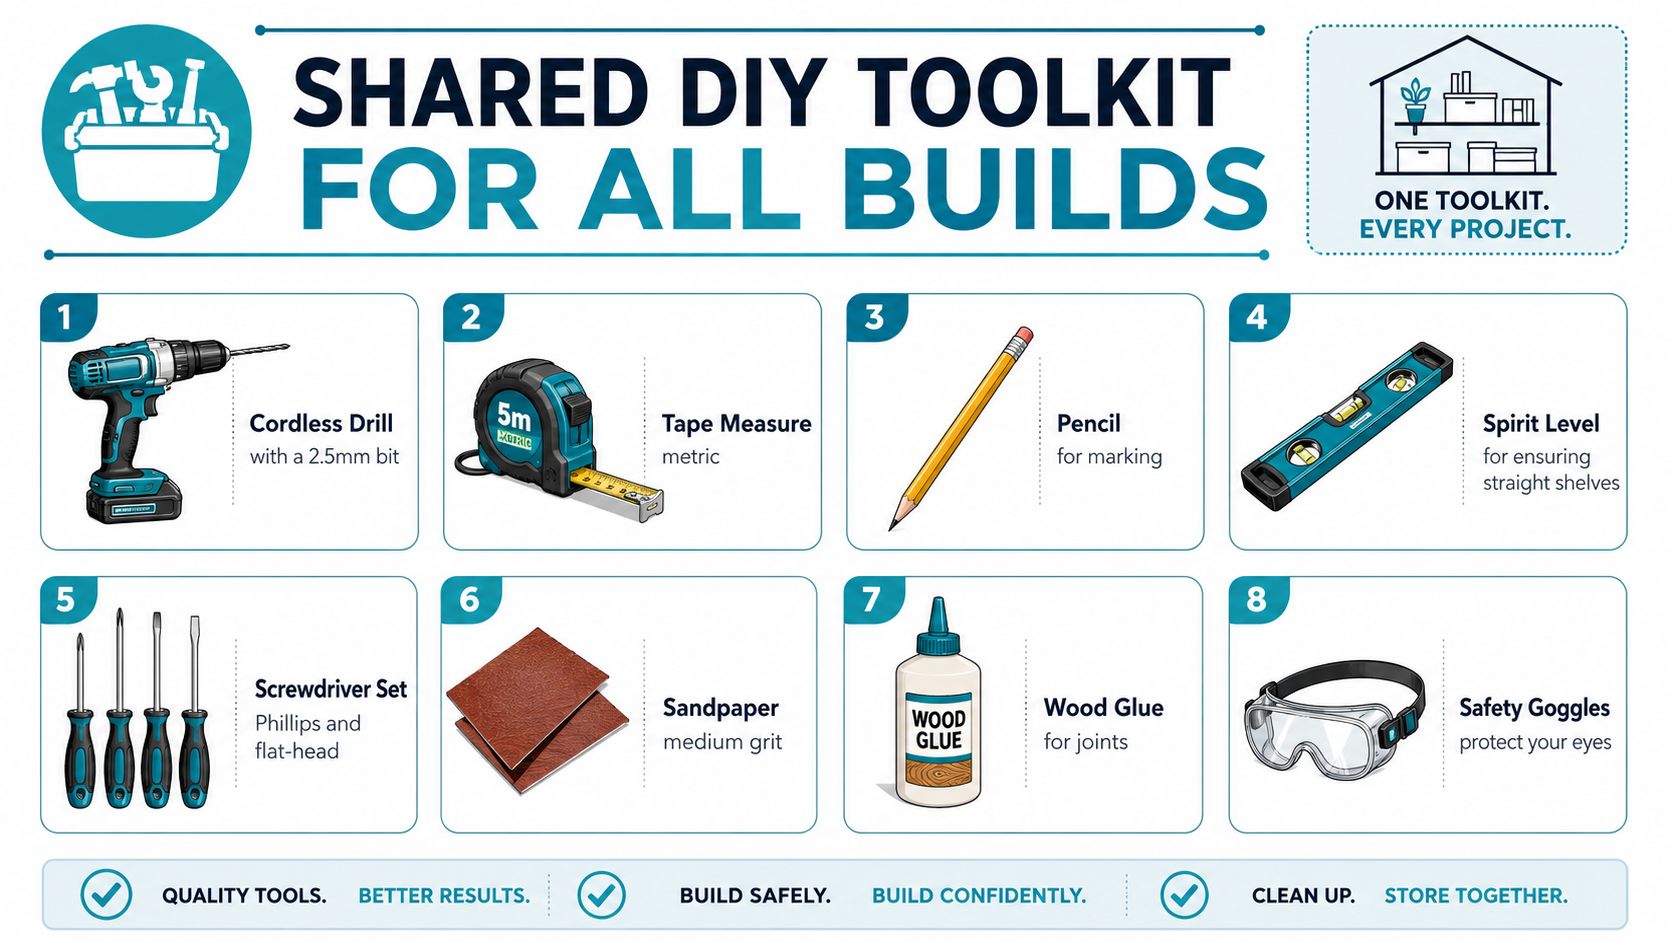
The shared kit that actually gets used
For timber, structural pine or PAR is the easiest route for a clean home build. Use 18 mm boards where the rack carries weight and 12 mm boards where you want to reduce bulk, especially on renter-friendly builds. Add exterior-grade PVA or waterproof wood glue, 4 mm x 30 mm wood screws, a countersink bit, wall plugs, sandpaper in 120 and 240 grit, safety glasses and a handsaw or jigsaw.
The small stuff matters more than people expect. Pilot holes stop softwood from splitting, especially near ends. A tin of primer or undercoat seals raw edges, and a tack cloth removes dust before you finish or wrap the surface. I'd also keep wood filler, edging tape and a microfibre cloth in the box, because those are the bits that make a rack look finished instead of workshop-bare.
What to buy extra
- One extra board: Straight timber is worth paying for, but a spare piece saves a weekend if one board twists.
- A spare pack of screws: Small fixings disappear quickly, and there's nothing worse than stopping halfway through assembly.
- A fresh blade or sharp saw: Rough cuts wander, and rough cuts show up immediately on visible furniture.
- Primer for cut ends: Even a well-made rack looks cheap if raw edges stay exposed.
A hands-on build also benefits from patient prep. Sand to 240 grit before assembly where you can, dry-fit the frame on the floor, and check the square with a level before any glue grabs. That habit carries through every design below, whether you're making a simple hall rack or a slimmer hanging version.
The Classic Tiered Floor Rack for a Standard UK Hallway
The workhorse build is the one that behaves in a real hallway. I'd size it at about 1 m high, 1 m long and 30 cm deep, because that's tall enough to stack shoes without turning into a tower and shallow enough to stay out of the way. The cleanest version uses four tiers, with shelves spaced to fit trainers, school shoes and the occasional boot without the whole thing wobbling.
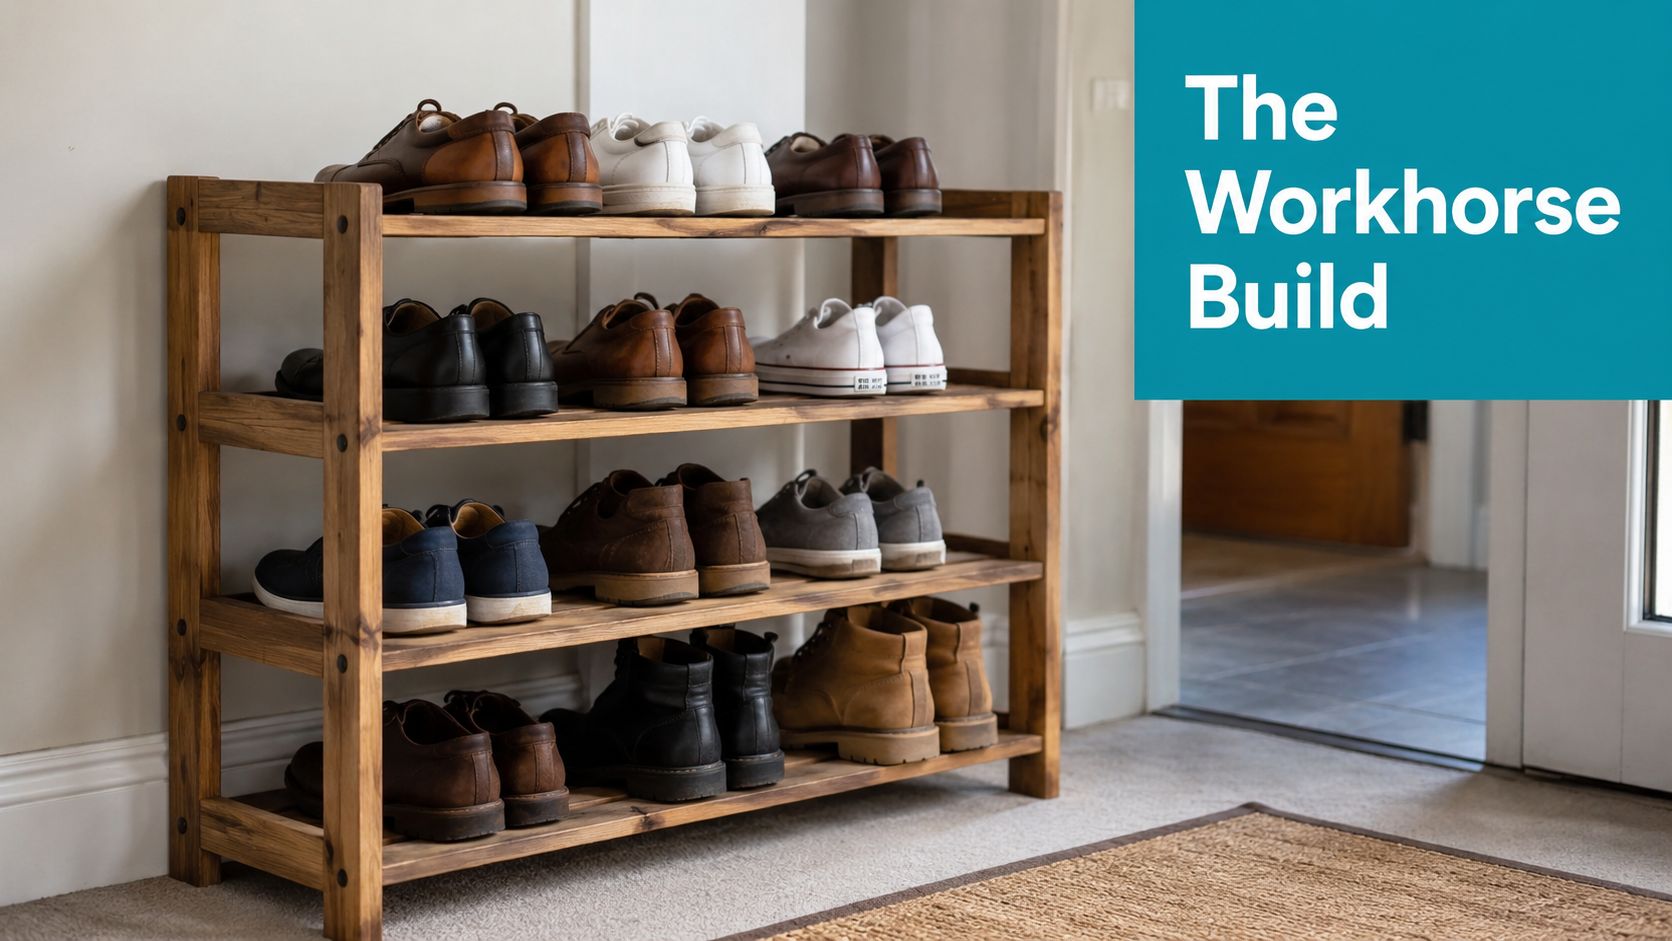
Cut once, then dry-fit
A simple cut list in millimetres keeps the build honest. Use four uprights, two long rails, six short shelf pieces and, if you've got shoes that keep falling backwards, an optional back panel. Check every board for straightness before you cut. Twisted uprights are the fastest way to create a rack that looks fine on the bench and hopeless on the floor.
Cut all pieces first, then sand them to 240 grit. Lay the frame out on the floor and dry-assemble it before glue goes anywhere near the joints. That's the moment to spot a shelf that's too tight, an upright that's leaning, or a rail that needs trimming.
Assemble so it stays square
Pilot-drill every screw hole. Softwood splits far too easily if you drive screws straight in, and the ends are the worst place to gamble. On the frame itself, check both diagonals before the glue sets, because equal diagonals tell you the rack is square.
Glue and screws work better together than either does alone. Glue gives the joint bite, screws hold the shape while it cures, and countersinking keeps the fixings flush.
The three failures I see most are predictable. The first is a twisted upright, usually because the timber wasn't straight enough. The second is shelves that rock after the frame has racked out of square. The third is a back panel that pushes the whole rack off the wall when someone loads it unevenly. For a first-time builder, this takes roughly 3 to 4 hours and, in the UK, material cost commonly lands around the same level as a modest timber buy, roughly $60 in materials in the benchmark DIY example from IndexBox's shoe-rack market overview.
The Over-Door Rack for Renters Who Cannot Drill
If you rent, or your landlord gets twitchy about wall fixings, the over-door rack is the quickest win. The trick is keeping it slim enough to clear the frame and light enough not to swing every time the door moves. A practical build starts with 12 mm pine and hooks or over-door brackets that are made for the job, not improvised from hardware that doesn't belong there.
Get the clearances right
Make the rack about 7.5 cm narrower than the door itself so it clears the frame, and keep the depth to roughly 22 cm at most. That's enough room for ordinary shoes without making the door heavy or awkward. A centre spreader bar helps stop the frame from racking when you load one side more than the other.
Cut two door-width runners, four short shelf slats, two side retainers and a top hanger bar. Assemble flat, sand the edges and test the hang before you load it. If the door has a deep rebate, check whether the hooks sit cleanly over the top edge, because a bad fit here makes the whole thing bounce.
What works when drilling is off the table
A stick-on version can be safer than a hook-on one if the door leaf is unusually thin or the top profile won't support weight properly. That's the point where zero-damage fixings make more sense than forcing a hanging rack to behave like a permanent fitting. For renters who are also trying to protect floors, temporary flooring ideas for renters are worth a look alongside the rack itself, because the whole entrance often needs the same non-permanent mindset.
The over-door build is fast. If your cuts are ready and the hanger hardware fits cleanly, you can get it done in under 2 hours, with materials usually landing in the lower-cost end of the range for a simple project like this. For most flat shares, student lets and short-term rentals, that makes it the sensible option.
The Pallet Wood Statement Rack for Character on a Budget
Pallet wood has the right look when you want the rack to feel like furniture, not workshop leftovers. It also brings real risks, because not every pallet is worth touching and not every board will stay straight once you start dismantling it. Stick to EUR or EPAL stamped pallets from a local business, and skip anything with chemical markings, spills or obvious contamination.
Dismantle it with patience
Use a crowbar and work the boards loose slowly. If you attack pallet wood with a saw too early, you lose board length, chew through useful grain and create uneven edges that make assembly harder later. Once it's apart, sort the material into the longest structural planks and the thinner slats.
A broad, low rack works best with pallet timber, especially under a window or along a kitchen back wall where visual character matters more than a formal silhouette. Cut four 70 cm uprights, two long rails and eight to ten shelf slats, then sand hard enough to remove every splinter you'd hate to touch with bare hands.
Where pallet wood fails
Knots can punch through under load, especially if you put a heavy pair of boots directly over a weak spot. Twisted boards fight the square frame and make the whole build feel cheap even when it's not. The one modification that always splits is driving a screw too close to a dry end without a pilot hole, so pre-drilling matters more here than on fresh pine.
Pallet projects look casual, but the fixings can't be casual. If the joint is soft, the rustic finish just becomes a wobble.
Material cost is the appeal. If you've got the pallet, the build can be close to free apart from screws and glue. If you don't, you're still usually only buying a modest amount of hardware. The nicest part is that this style takes stain well, and the timber character looks deliberate once the rack is cleaned up, especially if you borrow upcycling finish ideas from this furniture transformation guide.
Designing for Wet UK Weather, Mud and Daily School Shoes
A shoe rack in a British hallway has to do more than hold pairs in a row. It needs to cope with wet soles, dripping laces and the clumps of mud that come in after school runs, dog walks and a late bus home. If the build ignores that, the floor ends up doing the work instead. The weather point is reinforced by the brief's reference to Homestyler's note on weather management for shoe storage.
Open, sealed or enclosed
Open slats dry fastest and let grit fall through, which is useful in a narrow terrace hallway where shoes get kicked off in a hurry. They also show the mess sooner, and if the slat spacing is too generous, lightweight trainers can tip or slide out of line. Sealed shelves wipe down more easily and stop drips reaching the floor, but they can hold moisture against the shoe for longer. Enclosed storage hides everything, though it slows drying and can trap smells if shoes go in while they are still damp.
For families with primary-age children, I would choose an open-slat rack with a tray. It gives the shoes somewhere to dry and gives the mud somewhere to go. For a flat share, enclosed storage still works if the household is willing to air shoes elsewhere first. For a country home with work boots, a wider open design makes more sense, because drying matters more than a neat front face in that setting.
Small fixes that make a big difference
A staggered shelf layout with about 7 inches between tiers gives repeatable clearance and keeps the frame steady on a bench-style build. A hidden drip tray made from a cut-down oven liner catches water without making the rack look clumsy. A breathable canvas wrap on the lower shelf helps with boots, because it gives the wet pair a cleaner landing spot without sealing moisture in.
Labels help too, especially in homes where one child drops trainers on the wrong shelf and nobody notices until school morning. A simple name sticker on each section keeps the rack organised, and a guide like this shoe labels guide for parents and kids makes it easier to keep pairs in the right place.
| Household type | Best storage style | Key design feature |
|---|---|---|
| Family with school-age children | Open slats with tray | Easy drying and mud capture |
| Flat share | Enclosed or semi-enclosed | Visual tidy-up and controlled mess |
| Country home with boots | Wide open rack | Fast drying and simple cleaning |
The decision comes down to maintenance, not just style. If the hallway sees wet shoes every week, the rack has to dry and drain first, then look good. A shoe rack that suits the weather stays cleaner and lasts longer with less effort.
Finishing Touches With Quote My Wall Vinyl, Stickers and Labels
A timber rack looks handmade until you finish it properly, then it starts reading like part of the room. A vinyl wrap is the fastest way to do that because it covers tired pine, mismatched boards or patchy stain without forcing you back to bare wood. If you've ever stalled halfway through painting furniture, this is the stage that gets the job over the line. The wrap approach is laid out clearly in this guide to vinyl wrap for furniture in the UK.
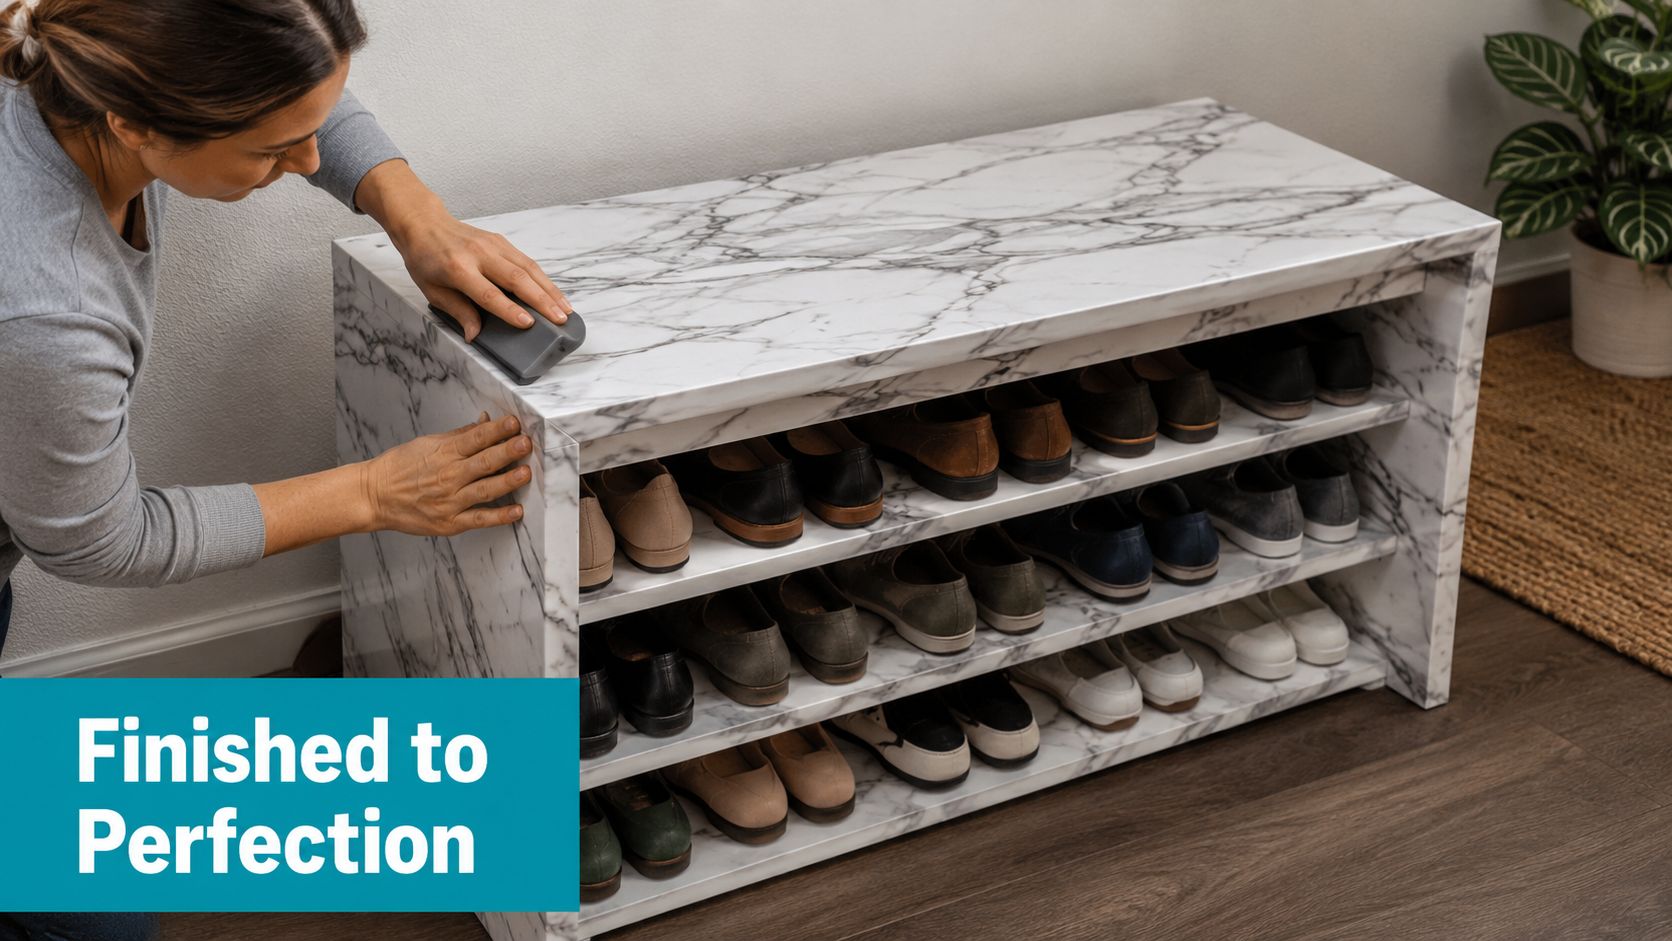
Wrap it so it looks bought, not bodged
Measure the front face of the rack carefully, cut the vinyl a little oversize, then lay it down with a soft squeegee and trim flush with a sharp blade. Wood-effect finishes work well if you want the rack to disappear into the hallway, while colour-block wraps are better when you want the storage to read as a design piece. Clean, dust-free timber is the difference between a neat wrap and one that bubbles at the edges.
Labels help the rack behave in family life. Shelf-edge stickers can mark each person's section, and stick-on clothing labels inside the rack make school shoes and trainers easier to return to the right place. The label idea also makes sense in homes where every pair looks the same by the front door.
The finish that turns it into furniture
- Seal the raw edges: Cut timber and exposed ends need sealing before wrapping or painting.
- Apply the wrap slowly: Work from the centre out so you don't trap air.
- Label each zone: Family storage stays tidy when everyone knows where their pair goes.
- Wipe the surface: A washable finish is easier to live with in a hallway that gets muddy.
The point of the finish is simple. It protects the wood, cleans up the look and makes the rack feel built-in instead of temporary. If you want the whole thing to read as coordinated home storage rather than a weekend experiment, the right vinyl and labels make a bigger difference than a second coat of paint ever will.
If you want your rack to look like it belongs in the house, not just the hallway, visit Quote My Wall for vinyl wraps, wall stickers and washable labels that suit the same kind of practical, lived-in spaces this project is built for. Their finishes make it easier to turn a rough timber build into something you'd be happy to leave by the front door.