

Design Your Own Stickers: Ultimate Guide for UK Homes &
You've got a roll of vinyl or a sticker idea in mind, and the next choice feels bigger than it should. A nursery name on the wall, a set of school labels, a bathroom tile update, or a clothing label for a care-home wardrobe all look simple until the wrong adhesive, finish, or file setup turns them into a waste of time. The difference between a sticker that looks polished and one that peels, curls, or prints with fuzzy edges usually gets decided before the first design line is drawn.
UK buyers are in a good position to treat design your own stickers as a normal online purchase, not a novelty. In January 2025, 26% of all UK retail sales were made online, and non-food online sales reached 36.4% of total non-food retailing, according to the Office for National Statistics release. That matters because people are already comfortable uploading images, choosing finishes, and checking out online, which makes custom decals, labels, and wall stickers a practical everyday buy rather than a specialist project.
Choosing the Right Sticker Type and Material
A parent sits at the kitchen table with a laptop open, trying to decide whether the same artwork should become a wall decal, a clothing label, or a tile sticker. That's the right moment to stop thinking about the design and start thinking about where the sticker will live, because material choice decides whether it survives the room it goes into.
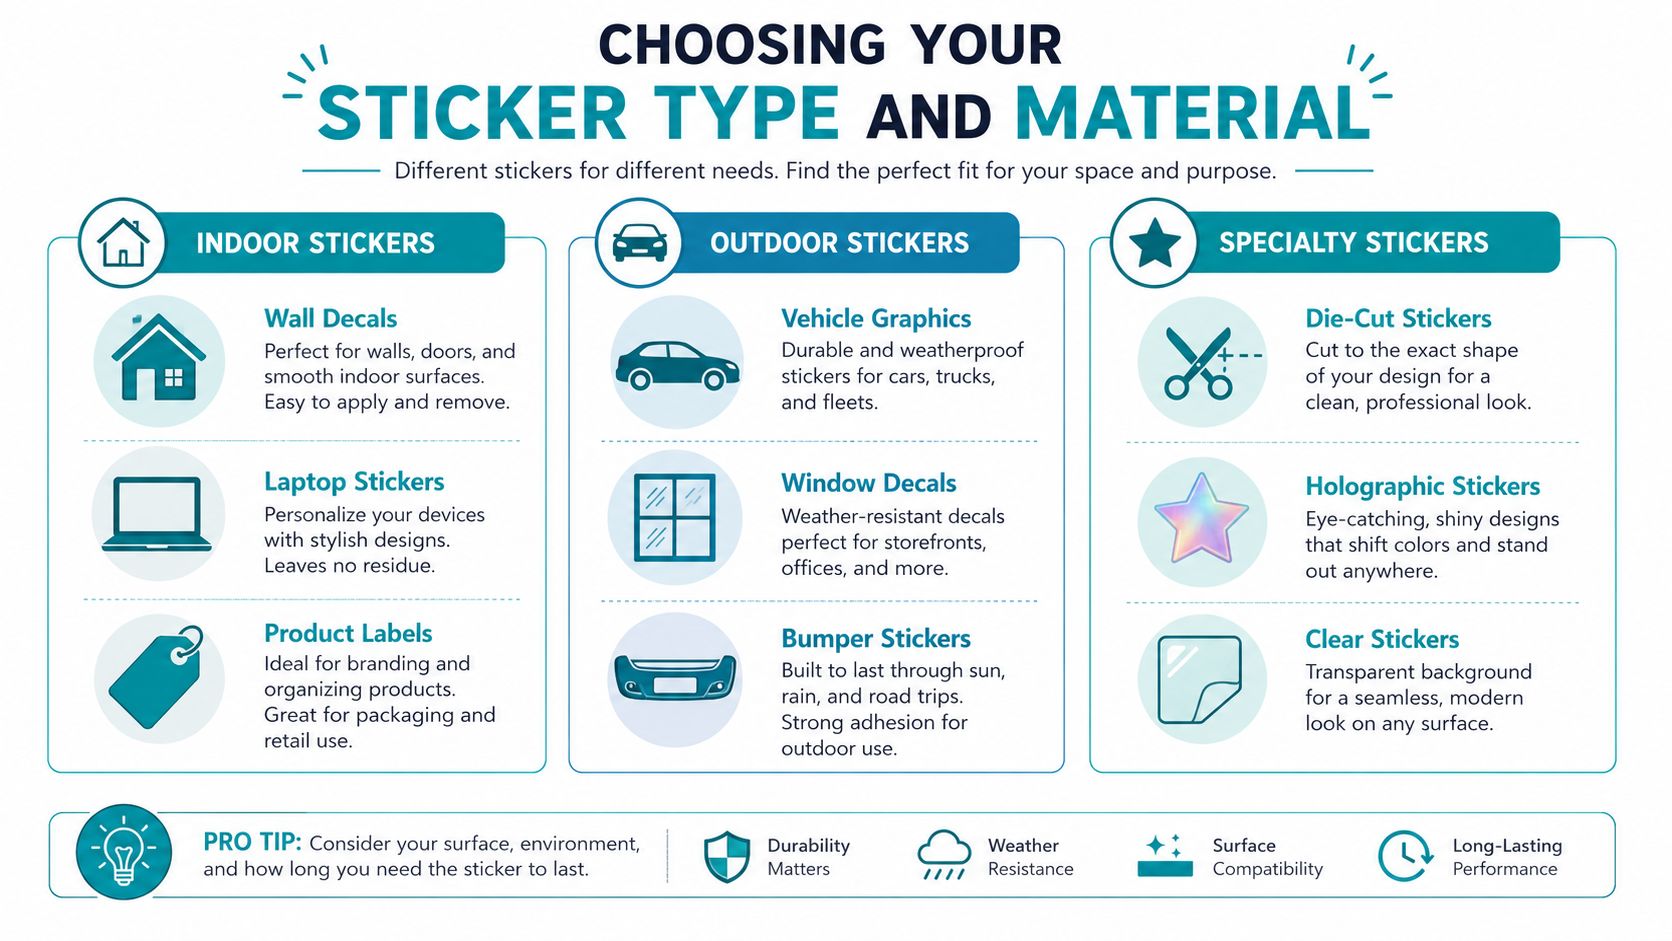
Match the product to the surface first
Wall decals belong on smooth, painted interior walls, where a removable vinyl is usually the safest starting point. Furniture vinyl wraps need a stronger adhesive and a finish that can take handling around edges, joins, and drawer pulls. Window privacy films and window decals need a clean, flat glass surface and a material that won't look muddy when light passes through it.
For nursery stickers, finish matters as much as adhesive. A matte face usually reads more softly on bedroom walls and avoids glare from lamps and daylight, while gloss can feel sharper but may highlight wall texture. For tile stickers in kitchens and bathrooms, moisture resistance matters more than looks, because splash zones punish weak edges and cheap film.
Stick-on clothing labels are a different category again. They need an adhesive designed for fabric and regular washing, not the same vinyl you'd use on a wall. That's why product type should come before colour palette, because a beautiful design on the wrong stock is still the wrong product.
Choose removable or permanent with the room in mind
Removable adhesive suits renters, temporary décor, and children's rooms that may change over time. Permanent adhesive suits hard-working labels, furniture pieces, and places where lifting edges would become a nuisance. The primary trade-off is not just stickiness, it's what happens when the sticker needs to come off later.
If you want a practical benchmark for adhesive labels used around homes and businesses, the practical UK guide to Amberley labels is a useful reference point for thinking about label behaviour on everyday surfaces. For wall-focused projects, the material guidance in Quote My Wall's vinyl decals for walls shows how the same basic idea changes when the target is painted plaster rather than packaging or fabric.
Practical rule: decide by environment first, design second. Moisture, washing, heat, and handling do more damage than weak artwork ever will.
Setting Up Artwork for Print-Ready Results
The quickest way to waste good sticker stock is to build the artwork at the wrong size and hope the printer can sort it out later. A print-ready file starts with the final dimensions, because resizing after the fact can soften edges, shift cut lines, and leave a white border showing around the finished sticker.
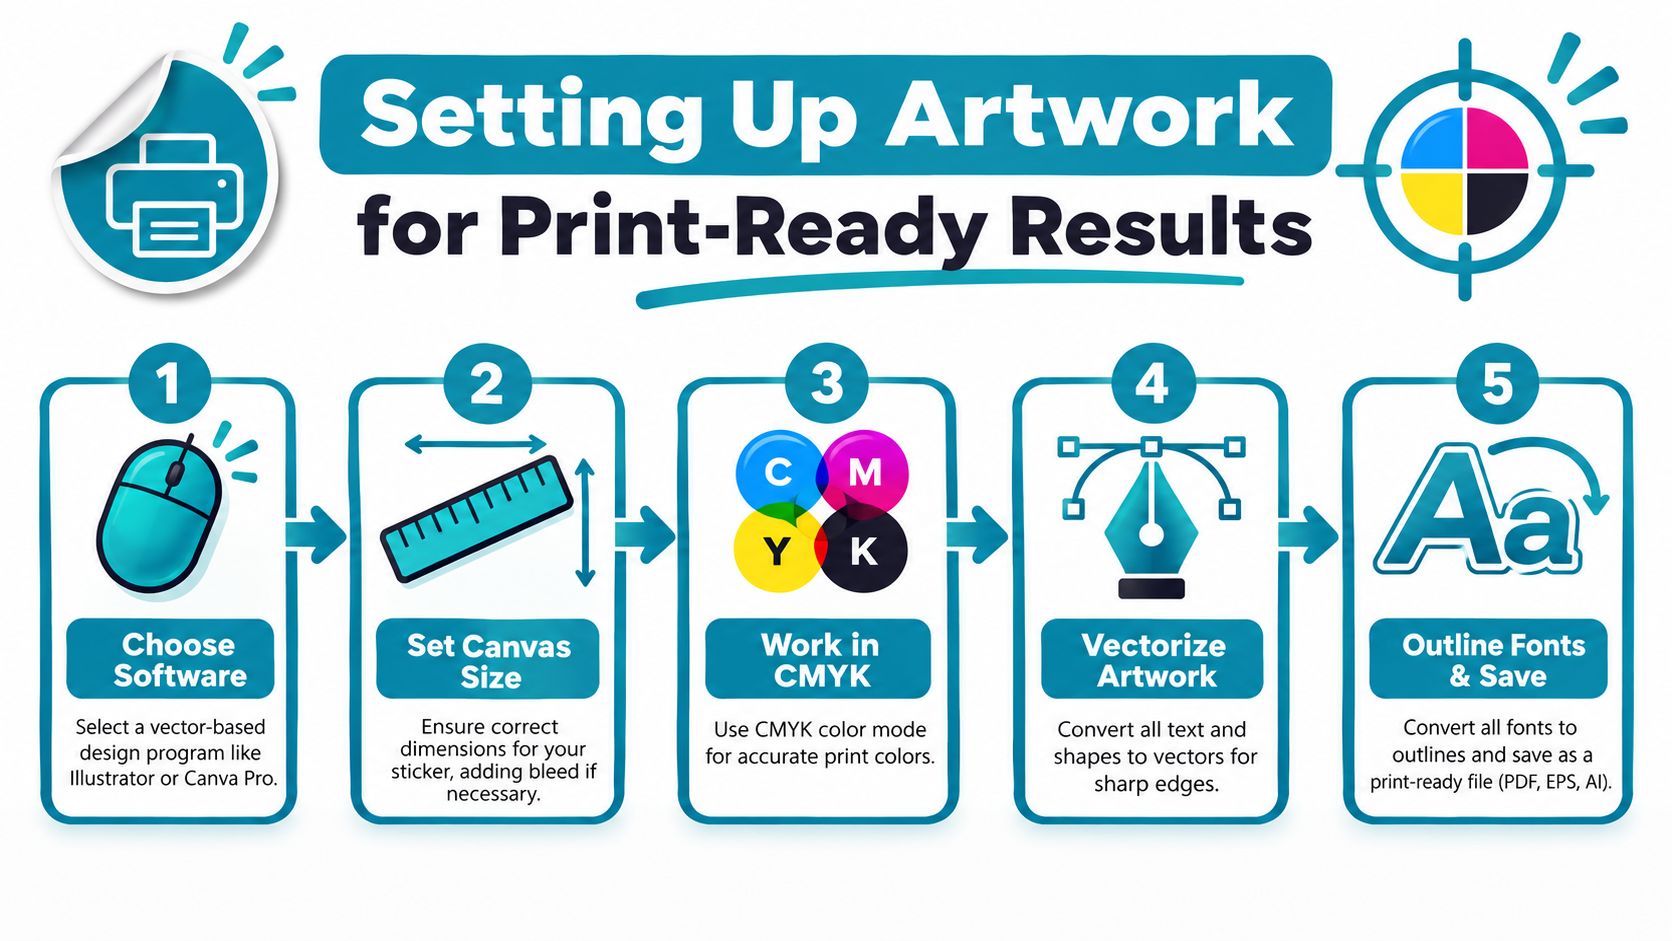
Set the canvas before you design anything
Open the file in Canva, Illustrator, Affinity Designer, or another design tool and set the document to the exact sticker size you want. Build at final scale, not “roughly right”, because small-format work exposes every mistake. If the sticker needs bleed, extend the background beyond the cut edge so the printer or cutter has room to trim it cleanly.
A practical mockup habit is to build the sticker in layers. Keep the main artwork in the centre, leave breathing room around any text, and separate the outer border from the part that must stay readable. The Shopstar mockup guide for creators is useful here because it shows why the finished shape matters, not just the artwork floating on a blank page.
For UK home projects, that extra planning prevents avoidable reprints. Wall decals for a nursery, name stickers for a school box, and labels for a care-home cupboard all fail in different ways if the artwork is only judged on-screen. For a wider look at current setup expectations, this UK custom sticker printing guide is a useful reference alongside the production basics here.
Why bleed matters: slight movement in printing and cutting is normal. Bleed gives that movement somewhere to go without leaving a white sliver at the edge.
Keep the safe zone clean and use the right file type
The safe zone is the area where all critical text and icons must stay. Anything important placed too close to the edge risks being clipped by the cutter. For name decals, that means letters, icons, and borders should sit comfortably inside the cut path, not ride on it.
Use vector artwork for text, logos, and clean shapes whenever possible, because vectors stay sharp at any size. Use raster images only when you need photos or painted textures, and keep them high resolution. Export as PDF, PNG, or SVG depending on what your printer accepts, but PDF and SVG are usually safer for crisp edges and predictable output.
Material choice affects the file setup as well. A nursery name decal, a washable clothing label, and a wall sticker may all use similar artwork, but the print preparation changes once you factor in finish, washability, and how much handling the sticker will take. That is where the basic rules around bleed, safe zones, and cut lines pay off.
The right setup can look slightly overprepared on screen, yet that extra space is what saves the job in production.
Design Tips for Readability and Clean Cut Lines
A sticker can look elegant in a browser window and still fail the second it gets printed and weeded. Tiny text disappears, thin borders snap, and intricate cutouts become a headache if the artwork is not built for the way vinyl behaves.
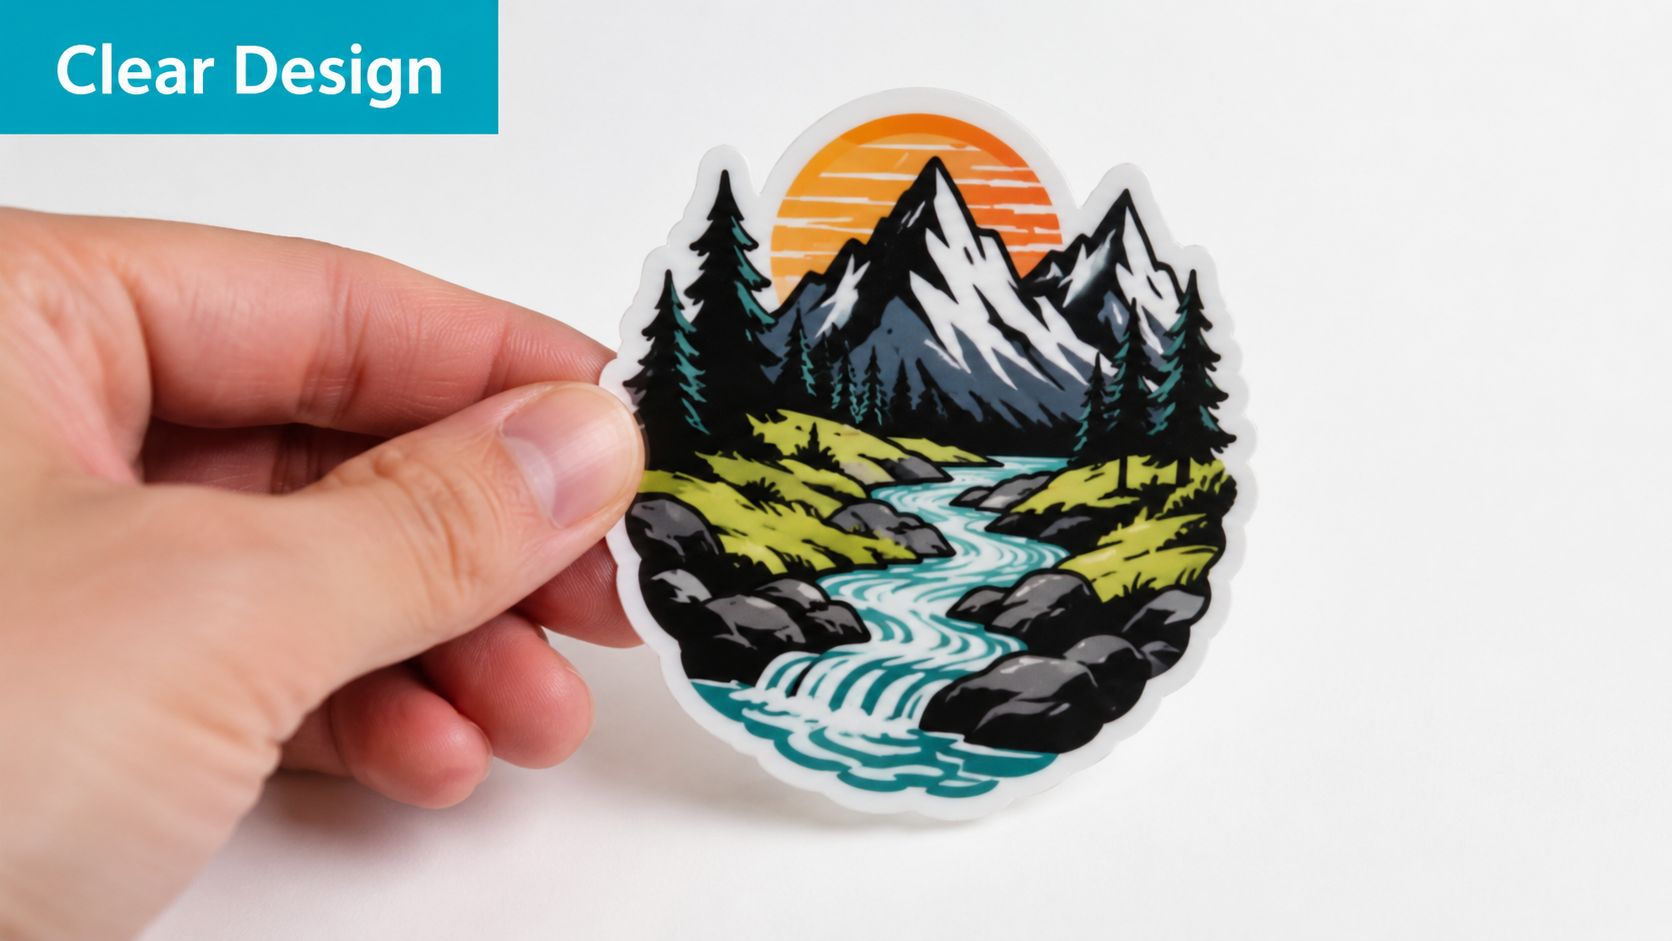
Make the text easy to read at real size
Choose a font that keeps its shape when reduced. Clean sans serif styles usually survive small-scale printing better than decorative scripts, especially for school labels and care-home name tags where the whole point is fast identification. If the message needs to be read across a room, build for contrast, not ornament.
Dark text on a light background is the safest route on painted walls and furniture. If the sticker will go on a dark surface, reverse the logic and use pale lettering with enough weight to stay legible. Thin strokes disappear first, so add weight before you add complexity.
Keep the cut line simple enough to weed
Kiss-cut stickers let the blade cut through the sticker layer while leaving the backing intact. Die-cut stickers follow the shape all the way through, which looks neat but becomes risky if the outline is too intricate. Internal holes, sharp corners, and hairline borders increase the chance of tearing during weeding.
Practical rule: if you can't trace the shape easily with your finger, it may be too fussy for a clean cut at home.
A useful test is to zoom out until the design looks the size it will be in real life. If the text still reads clearly and the outline still looks balanced, you're probably close. If the border starts looking fragile or the inner details blur together, simplify the shape before you print or order.
For wall pieces, furniture labels, and nursery decals, clean geometry often beats clever detail. The safest designs are usually the ones with fewer surprises at the cut stage.
DIY Home Printing Versus Professional Ordering
Home printing gives you control, speed, and low-risk experimentation. Professional ordering gives you consistency, cleaner finishing options, and a much better answer when the job needs to withstand hard use. The right choice depends less on budget ideology and more on how the sticker will be used after it arrives.
| Factor | DIY Home Printing | Professional Ordering |
|---|---|---|
| Cost per unit | Better for small test runs and one-offs | Better when you need repeated, identical pieces |
| Durability | Depends on your printer, stock, and any added laminate | Usually more consistent for demanding use cases |
| Finish options | Limited by what your home setup can handle | Wider choice of finishes and cut styles |
| Turnaround | Immediate once you've printed and cut it | Depends on production and delivery timing |
| Best use cases | Planner stickers, temporary jar labels, gifts | Wall decals, labels for repeated washing, furniture wraps |
When home printing makes sense
A home inkjet or similar setup works well for short runs, temporary labels, and gifts. If you're making planner stickers, pantry labels that may change later, or a one-off bedroom name decal for a gift, printing at home can be efficient. Add printable vinyl and a laminator if you want a little more protection, especially for handling and light moisture.
The weak point is repeatability. Home setups vary more from one printer to another, and if the feed slips or the colour shifts, you can lose a sheet quickly. That's acceptable for a small batch, not so acceptable when you've spent time on a school label set.
When professional ordering is the safer choice
Use professional production when the sticker has to endure real daily wear. That includes wall decals that should stay neat for years, washable clothing labels for school uniforms or care-home garments, and furniture graphics that will be touched constantly. Professional ordering is also the better route when you need a cleaner edge, more reliable registration, or a finish that has been matched to the material.
Quote My Wall is one option for buyers who want custom wall stickers, vinyl wraps, and stick-on clothing labels in one place. For a UK household that wants the same visual idea across walls, furniture, and labels, that kind of product range keeps the material choice tied to the use case instead of forcing every project through the same stock.
Ordering Checklist and Application Care Guide
Once the artwork looks right, the job still isn't finished. Most mistakes at this stage come from simple order errors, rushed surface prep, or applying the sticker before the surface is ready to receive it.
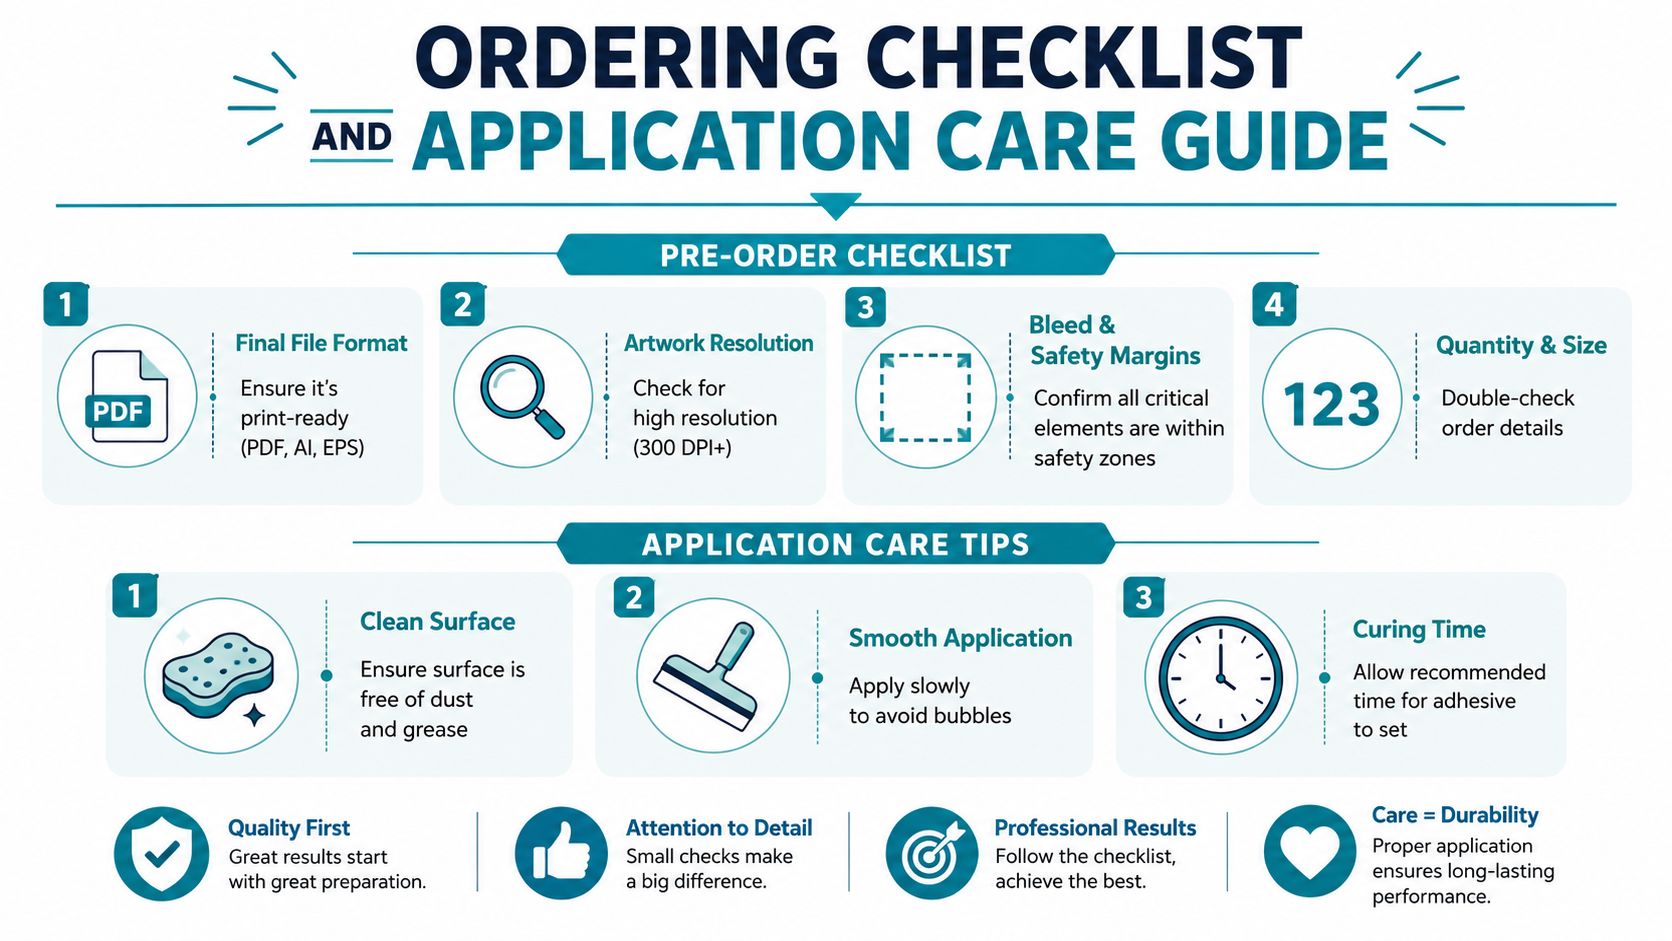
Check the order before you submit it
Start with the file format. If the printer asks for a print-ready PDF, AI, EPS, PNG, or SVG, send the format they can handle cleanly instead of exporting whatever the software offers by default. Then review the proof carefully, because the proof is where spelling errors, clipped borders, and awkward crop placement usually show themselves.
After that, confirm the quantity and size. A small mistake in dimensions can make a wall decal look too cramped or a clothing label too wide for the garment tag. If the order will be used for a school year, care-home rotation, or a room refresh, check the delivery timing before you hit submit so you're not left waiting when the project is ready to go.
Prepare the surface before application
Clean the surface first, then let it dry fully. Dust, grease, and dampness are the usual reasons stickers fail early, especially on walls, furniture, and fabric. Use firm, even pressure with a squeegee or similar tool, and work slowly from the centre outward so air doesn't get trapped.
For a practical wall-specific walk-through, How to apply wall stickers is worth reading before you start a larger decal project. The basic discipline is the same for most surfaces, though clothing labels and kitchen items need their own care rules.
Respect curing and wash limits
Let adhesive set before heavy handling or washing. For stick-on clothing labels, follow the product instructions for heat, washing, tumble drying, dishwasher use, and microwave safety, because those limits are what separate a tidy label from one that peels at the edges. A label that's technically stuck on is not the same as a label that's fully cured.
Don't rush the first wash. The label may look fixed within minutes, but the bond still needs time to settle properly.
Troubleshooting Common Sticker Design Problems
Most sticker problems look mysterious only until you trace them back to one of a few causes. Pixelation usually comes from low-resolution artwork. Colour surprises usually come from screen-to-print conversion. Lifting edges usually mean surface prep or adhesive choice was wrong.
Fix the problem, not the symptom
If the print looks fuzzy, go back to the source file and rebuild the artwork at a better quality. If colours shift, don't keep adjusting the display on your monitor and assume that will solve it, because the file mode and print process need to match the output you want. If the cut line drifts and leaves a white border, the design probably needed more bleed or a cleaner safe zone.
Edge lift on walls and furniture usually starts with contamination. A faint film of dust or grease is enough to weaken adhesion, so clean and dry the surface again before reapplying. If a clothing label peels after a few washes, the adhesive may not have been intended for that fabric or that wash routine.
Use a plain-paper test before final printing
One of the easiest fixes is also one of the least glamorous. Print a marked blank sheet first, run it through the machine, and check which side receives ink so you know whether the adhesive stock needs to face up or face down. That small test saves sticker stock, ink, and the frustration of finding out the whole sheet was loaded backwards.
If you've already built the artwork carefully, this test is the final sanity check. It won't make weak design stronger, but it will stop a perfect file from failing because the printer feed wasn't aligned correctly.
If you're ready to turn a concept into something that fits your wall, label, or garment, Quote My Wall offers sticker and vinyl options that match different surfaces instead of forcing one material to do everything. Use the guidance above to choose the right type, then visit the site when you want to move from idea to a finished custom piece without guessing at the material or finish.