
Decorative Vinyl Wall Stickers A Creative How To Guide
Decorative vinyl wall stickers are one of the best-kept secrets in home décor. They're a brilliant, affordable, and surprisingly versatile way to inject some personality into a room, all without the faff and commitment of paint or wallpaper. Whether you're after an intricate pattern or a favourite quote, these decals offer an instant style upgrade for homeowners and renters alike.
Consider this your complete guide to getting it right.
Your Ultimate Guide To Vinyl Wall Art
If you're looking for a simple but high-impact way to breathe new life into a room, decorative vinyl wall stickers are the answer. They perfectly fill that gap between an expensive, full-scale renovation and just living with boring, plain walls. It's a fantastic middle ground that's easy on the wallet and, crucially, completely reversible.
This makes them a dream for anyone renting who wants to make a place feel like their own without saying goodbye to their deposit.
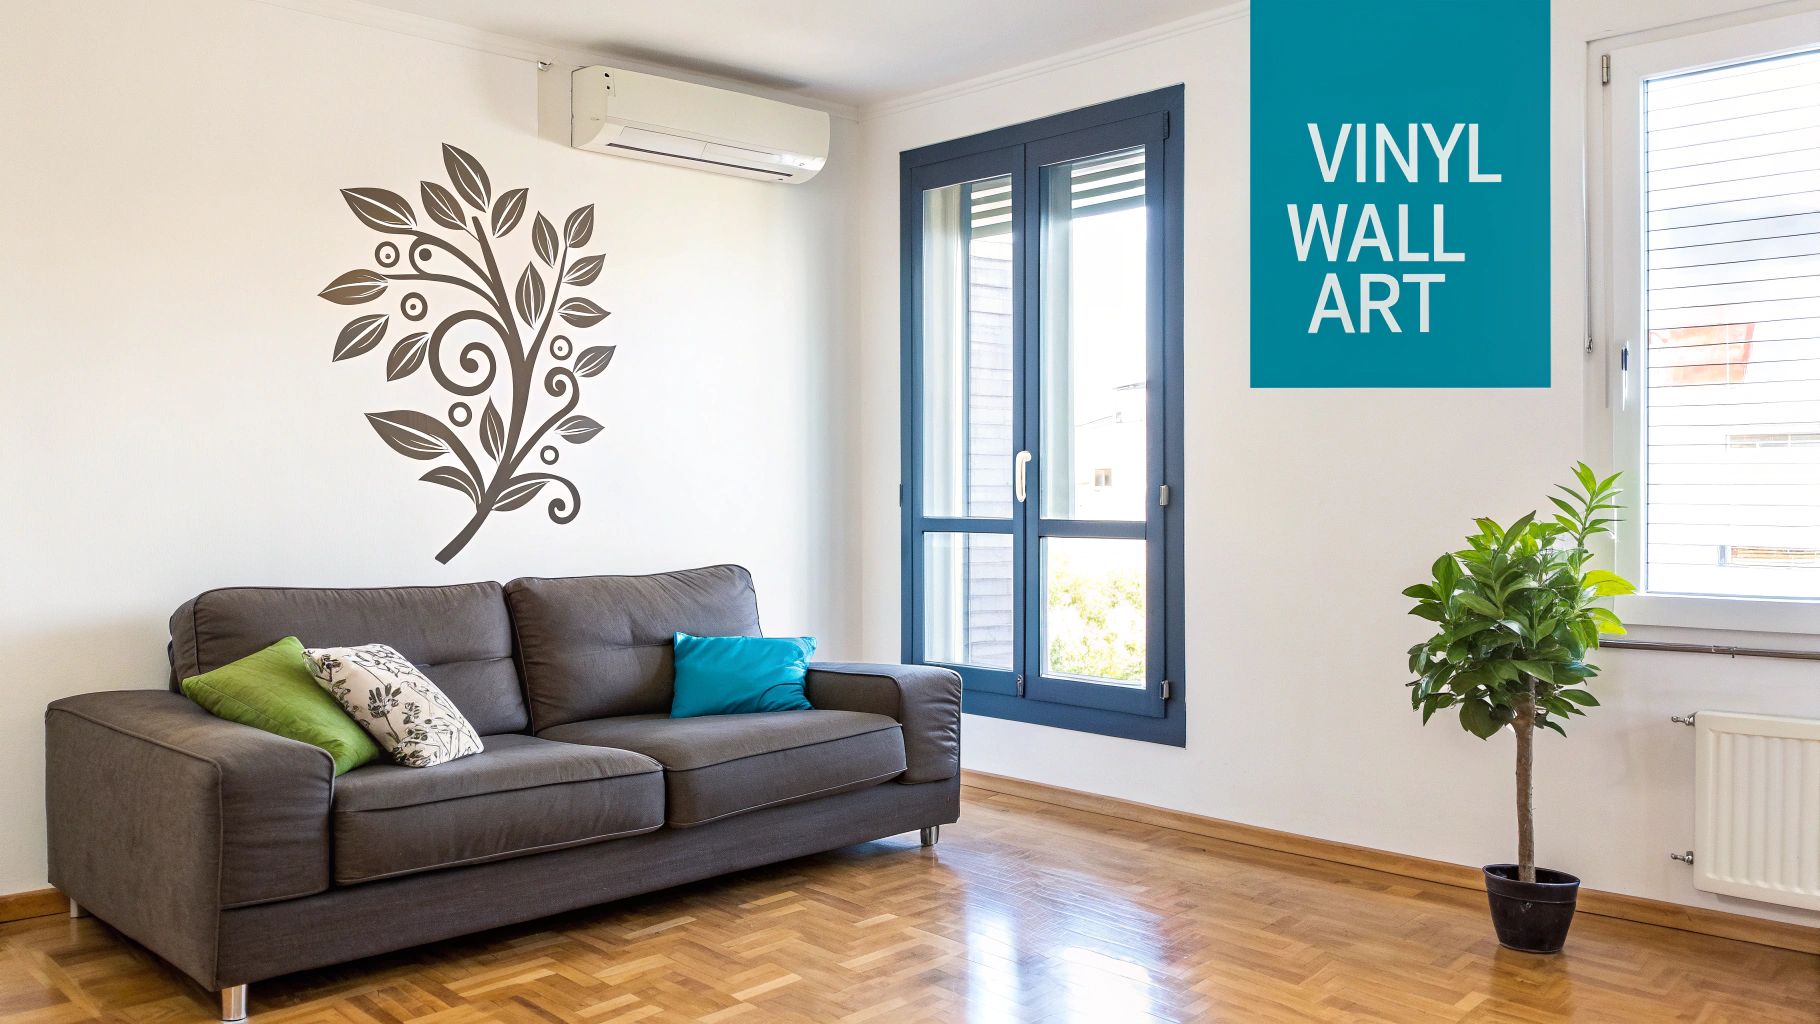
Forget the time, mess, and cost of traditional decorating. A good quality vinyl sticker can be up on the wall in minutes, transforming a space instantly. The sheer variety available is staggering, meaning there really is a design for every taste and every room, from a playful nursery to a sophisticated living room.
Why Choose Vinyl Wall Stickers?
The real magic of vinyl wall art is in its simplicity and effectiveness. It’s a decorating tool that lets you be bold and creative without any long-term regrets. I've seen them used in countless homes, and the appeal always comes down to a few key benefits:
- Properly Budget-Friendly: You can get the look of a custom-painted mural or a high-end wallpaper for a tiny fraction of the price. A single, well-placed sticker can set the tone for an entire room.
- Endless Versatility: The design possibilities are genuinely limitless. You'll find everything from delicate floral patterns and cool geometric shapes to custom quotes and huge, sprawling world maps.
- Perfect for Renters: This is a big one. They're completely removable. When you need to move out or just fancy a change, the stickers peel off cleanly, leaving the paint underneath untouched.
- Seriously Easy to Apply: You don't need to be a DIY pro. With a couple of basic tools and a little bit of patience, you can get a smooth, professional-looking finish that looks like it's been painted directly onto the wall.
At Quote My Wall, we've seen first-hand how a simple sticker can completely revitalise a space. Our premium vinyl is designed to last for at least 5 years indoors, ensuring your chosen design remains a beautiful feature in your home for years to come.
In this guide, I'll walk you through the whole process, step-by-step. We'll cover everything from choosing the perfect design and prepping your walls to getting that flawless application and, eventually, trouble-free removal. Whether you're decorating your first flat or giving the family home a fresh new look, you’ll find all the practical advice you need right here.
By the end, you'll feel confident and inspired to get started, armed with the know-how to make your next project a stunning success.
Choosing The Perfect Vinyl Sticker For Your Room
Right, this is where the fun really starts. Picking the right design is easily the most exciting part, but it's also where you need to put your thinking cap on. A great vinyl wall sticker does more than just fill a blank space; it completely transforms the feel of a room and says something about you. It's all about striking that perfect balance between colour, size, and the overall theme.
Before you jump in and fall for the first design you see, take a step back and think about the room itself. How does the light hit that wall during the day? What colours are you already working with? A bold, dramatic sticker that looks stunning in a bright, open-plan living room might just swallow up all the light in a cosy little study.
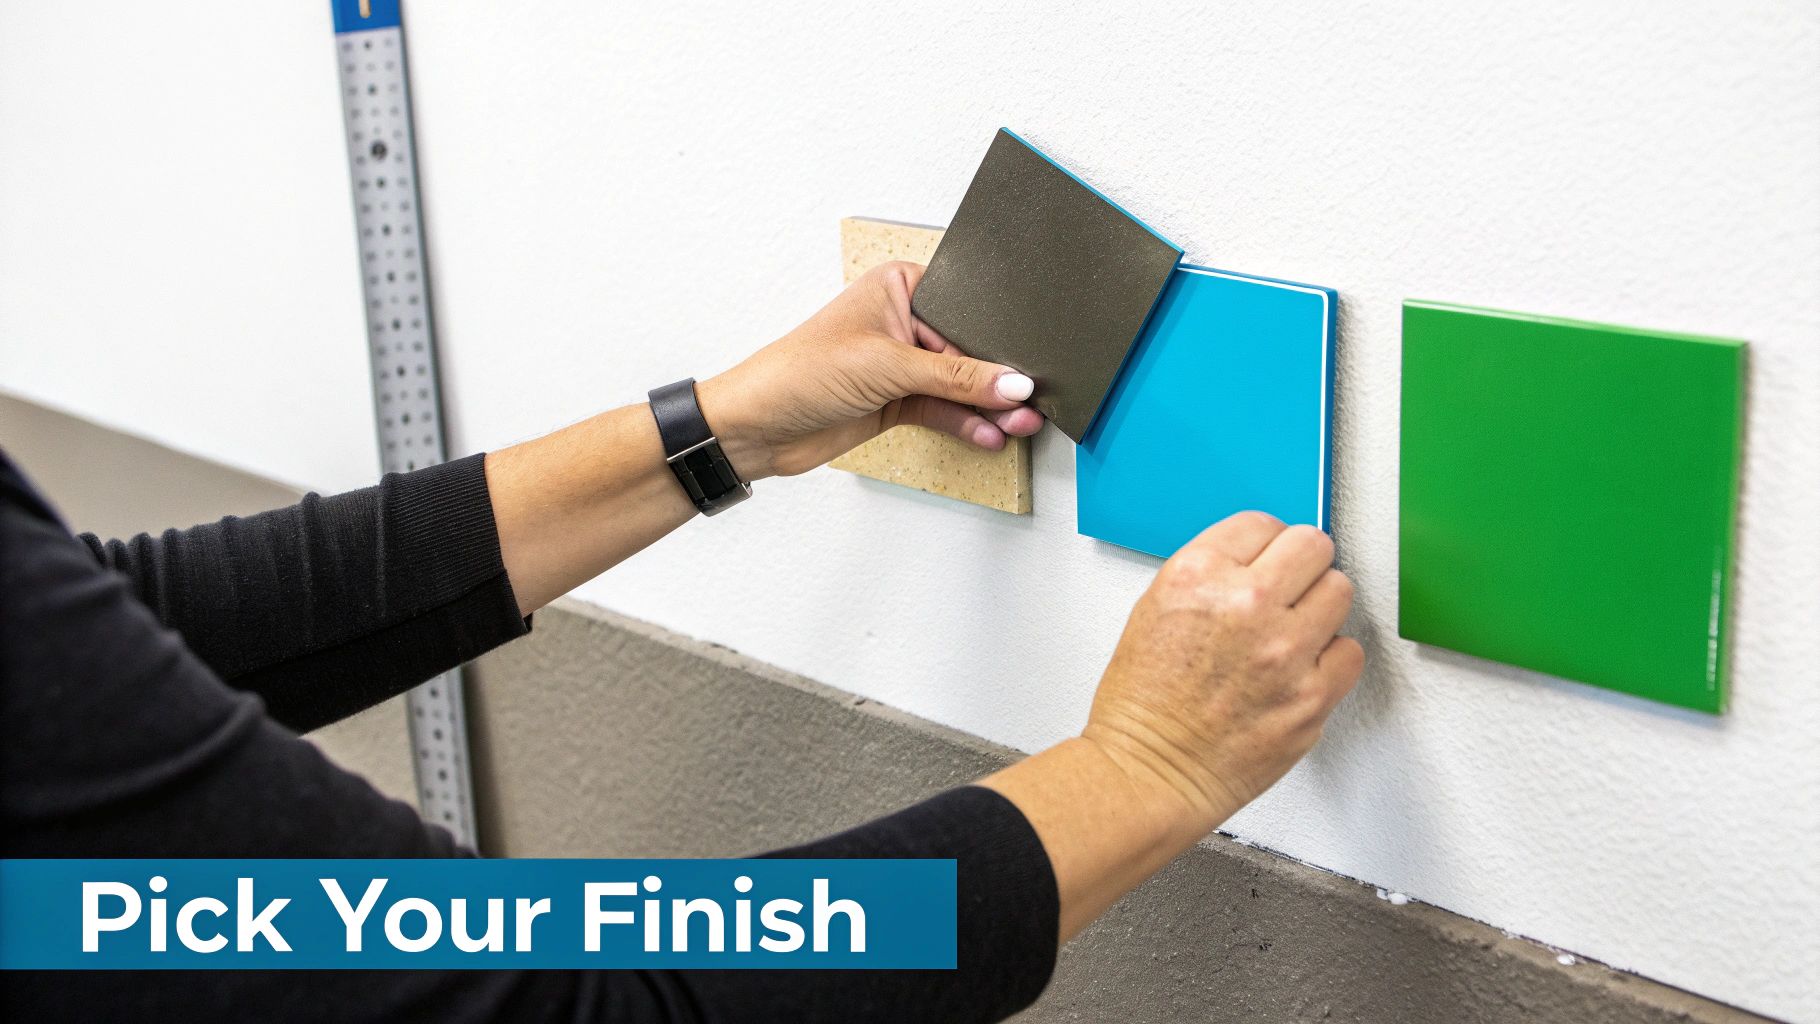
Matching The Finish To Your Space
The finish you choose is a game-changer. It's not just about the colour, but how the vinyl plays with the light in your room. Get this wrong, and you could end up with an annoying glare or a design that just looks a bit flat.
You’ll generally come across three main options, each with its own character.
Vinyl Finish And Type Comparison Guide
To help you decide, here’s a quick breakdown of the most common vinyl finishes and where they truly shine.
| Vinyl Finish | Best For | Appearance | Pro Tip |
|---|---|---|---|
| Matte | Interior walls, especially in brightly lit rooms or opposite windows. | Non-reflective, flat, and looks like a painted mural. | This is the go-to choice for a sophisticated, integrated look that avoids glare. |
| Gloss | Furniture upcycling, doors, and accent pieces in rooms with controlled lighting. | Shiny, reflective, and vibrant. | Excellent for making a statement, but use it carefully on walls to avoid distracting reflections. |
| Metallic | Creating a luxurious focal point or adding a touch of glamour. | Shimmery and eye-catching (e.g., gold, silver, copper). | Best used for smaller decals or lettering to add an elegant accent without overwhelming the space. |
Essentially, matte is your safest and often most stylish bet for interior walls. It gives you that seamless, hand-painted look everyone loves. A gloss finish, on the other hand, is brilliant for giving an old piece of furniture a new lease of life.
Pro Tip: If your chosen wall is directly opposite a window, always, always go for a matte finish. It will stop any harsh reflections from the sun, meaning your design looks crisp and clear from every angle, just like a proper mural.
Aligning The Design With The Room’s Purpose
The design you pick should feel like it belongs in the room. You're aiming for something that complements the room’s job, whether that's helping you relax, focus, or have fun.
Think about it like this:
- For the Bedroom: You want calm and quiet. Think soft, flowing botanical prints, gentle abstract shapes, or a serene nature scene placed just above the headboard to create a little sanctuary.
- For a Child's Nursery: Let your imagination run riot! This is the place for playful animals, whimsical storybook scenes, or a huge, colourful world map to spark their curiosity. If you're after more ideas, you can learn more about personalised wall stickers in our guide to creating unique décor.
- For the Home Office: The goal here is to inspire focus without being a distraction. A simple motivational quote, a clean geometric pattern, or a subtle cityscape outline can set a productive mood perfectly.
The trick is to ask yourself: how do I want to feel when I'm in this room? Then, find a design that helps create that exact feeling.
Getting The Size And Scale Just Right
One of the most common slip-ups I see is getting the scale wrong. A tiny little sticker on a massive wall looks lost and awkward, while a design that’s too big for the space can make the whole room feel cramped and thrown off balance.
Here’s a foolproof way to avoid that. Get your tape measure and some low-tack painter's tape. Once you have the dimensions of the sticker you’re eyeing up, mark out its footprint on the wall with the tape. It’s a simple trick, but it’s incredibly effective.
Leave the tape outline up for a day or two. See what it looks like in the morning light versus the evening. Walk in and out of the room. This gives you a real-world preview, helping you feel confident that the scale is spot-on before you commit. It ensures your new decorative vinyl wall sticker will look like it was made for the space.
Getting Your Walls Ready for a Flawless Finish
Think of your wall as a canvas. You wouldn't start a painting on a dirty, bumpy surface, and the same logic applies here. Taking the time to properly prep your wall is genuinely the secret sauce to getting that professional, long-lasting look—the kind that seems like it was painted right on. It’s a step people often want to rush, but a little patience here pays off massively.
If you skip this prep work, you’re setting yourself up for disappointment. You’ll likely see poor adhesion, pesky air bubbles, and edges that start peeling way too soon. It's all about giving the vinyl’s adhesive the best possible chance to create a strong, lasting bond with your wall. The good news? It’s all surprisingly simple.
Clean Your Surface for Maximum Stick
First things first, the wall needs a good clean. You’d be surprised how much invisible dust, grime, and even oils from cooking or fingerprints can build up. This film is the number one enemy of a good vinyl application because it gets between the adhesive and the wall itself.
All you need is a soft cloth or sponge, lightly dampened with a bit of mild soap and water. Gently wipe down the entire area where you plan to place the sticker. Follow up with another cloth dampened with just water to rinse away any soap residue. And then comes the most important part: let it dry completely. I always tell people to wait at least 24 hours. You want to be absolutely certain there’s no moisture trapped underneath.
Why Your Paint and Its Curing Time Matter
The type of paint on your wall really does affect how well your sticker will hold. Vinyl sticks best to a smooth, non-porous surface. Paints with a slight sheen, like satin or semi-gloss, are the absolute ideal canvas for the adhesive to grip onto.
Matte paints can be a bit more temperamental, especially the "washable" or "stain-resistant" types. These formulas often contain additives like silicone or Teflon that are designed to repel dirt, but unfortunately, they can also repel the sticker's adhesive.
If you’ve just painted, you need to play the waiting game. Fresh paint releases solvents as it cures, a process called "outgassing." If you apply a sticker too soon, you'll trap those gases, which leads to bubbles and eventual failure of the adhesive. You absolutely must wait at least two to three weeks for the paint to fully cure before putting up any decorative vinyl.
It's no surprise these stickers are so popular. The UK holds a huge share of Europe's self-adhesive vinyl films market, which is valued at a whopping USD 77.59 billion. A lot of that growth comes from homeowners like you looking for creative décor solutions. It's also why there's a rising demand for high-quality materials, like the ones we use at Quote My Wall, which are designed to last for years. You can get more insights on the vinyl sticker market growth if you're curious about the trends.
Measure and Mark for Perfect Placement
Right, your wall is clean, dry, and the paint is fully cured. Now it's time to map out exactly where your new sticker is going to live. Please, don't just eyeball it! What looks straight from one angle can look completely wonky once you step back. A few simple tools here will be your best friends.
You'll want to grab:
- A tape measure
- A pencil
- A spirit level
First, measure the dimensions of your sticker and figure out its final position on the wall. Use your tape measure and pencil to make a few very light marks to indicate the corners or the top edge of where the design will sit. Then, take your spirit level and draw a faint, perfectly straight guideline. This line is your anchor—it guarantees your design won't be crooked.
And if you’re replacing an old design and find some stubborn adhesive left behind, don't worry. We have a complete guide on how to remove sticky residue from walls.
A Practical Guide To Applying Your Wall Sticker
Okay, with your wall perfectly prepped, it’s time for the fun part—bringing your vision to life. This is the moment where that roll of vinyl transforms into a stunning piece of wall art. Don't feel intimidated; the process is actually quite straightforward when you take it step-by-step. With a little patience and a steady hand, you can get a flawless, bubble-free finish that looks like it was professionally painted on.
The real key here is to take your time. Rushing is the quickest way to end up with wrinkles, tears, or a wonky design. So, put on some music, clear a bit of space, and let’s get this done right.
Getting Started: Unrolling And Flattening
Your new wall sticker will most likely arrive rolled up in a protective tube. The very first thing to do is carefully unroll it on a large, flat surface—a clean floor or a dining table works perfectly. You’ll notice it wants to curl back up, which is completely normal.
To fix this, just lay it out with the design facing up and place a few heavy books on the corners and in the middle. Let it sit for at least a few hours, or even overnight if you can. This simple step makes the sticker so much easier to handle when it’s time for application, preventing it from curling away from the wall while you work.
Burnishing The Transfer Tape
Once it's flat, you’ll see your sticker is a three-layer sandwich: the waxy backing paper, the vinyl design itself, and the semi-transparent transfer tape on top. The transfer tape's job is to lift the entire design off the backing paper in one go. To make sure it does its job, you need to burnish it.
Using a squeegee, credit card, or any firm, flat-edged tool, firmly rub over the entire surface of the transfer tape. Use consistent pressure and work your way from the centre outwards. This action really strengthens the bond between the tape and the vinyl, ensuring every little detail of your design lifts off cleanly.
A common mistake is not burnishing enough, especially with intricate designs that have fine lines or small letters. Give it a thorough rubdown now to save yourself a headache later. This one step is absolutely crucial for a smooth transfer.
Positioning With The Hinge Method
For larger or more complex designs, the "hinge method" is a lifesaver. It lets you position your sticker perfectly without having to wrestle with the entire sticky surface at once.
First, position the sticker (all three layers still together) on the wall, using your pencil guideline. Secure the top edge with a few pieces of low-tack painter's tape. Now, run a long strip of tape horizontally across the middle of the sticker, creating a "hinge" that holds it firmly in place.
With the hinge set, you can lift the top half of the sticker up and carefully peel the backing paper away from the transfer tape, peeling it down to your central hinge. Snip away the removed section of backing paper with scissors. Now, you’re ready for the main event.
Smoothing Your Sticker Onto The Wall
Holding the top edge of the newly exposed vinyl and transfer tape away from the wall, start smoothing it down from the centre hinge upwards. Use your squeegee and work from the middle outwards in smooth, overlapping strokes. This technique is brilliant for pushing any trapped air out towards the edges, preventing bubbles from forming.
Once the top half is secure, remove the tape you used for the central hinge. You can now let the bottom half hang down and carefully peel away the rest of the backing paper. Repeat the same smoothing process, working from the centre hinge downwards and outwards until the entire design is stuck to the wall. The core principles of careful application are surprisingly similar across different self-adhesive products. In fact, you'll find transferable tips in guides on how to install peel and stick flooring, where surface prep and smoothing techniques are just as vital.
The infographic below shows a quick recap of the prep work that makes this stage possible.
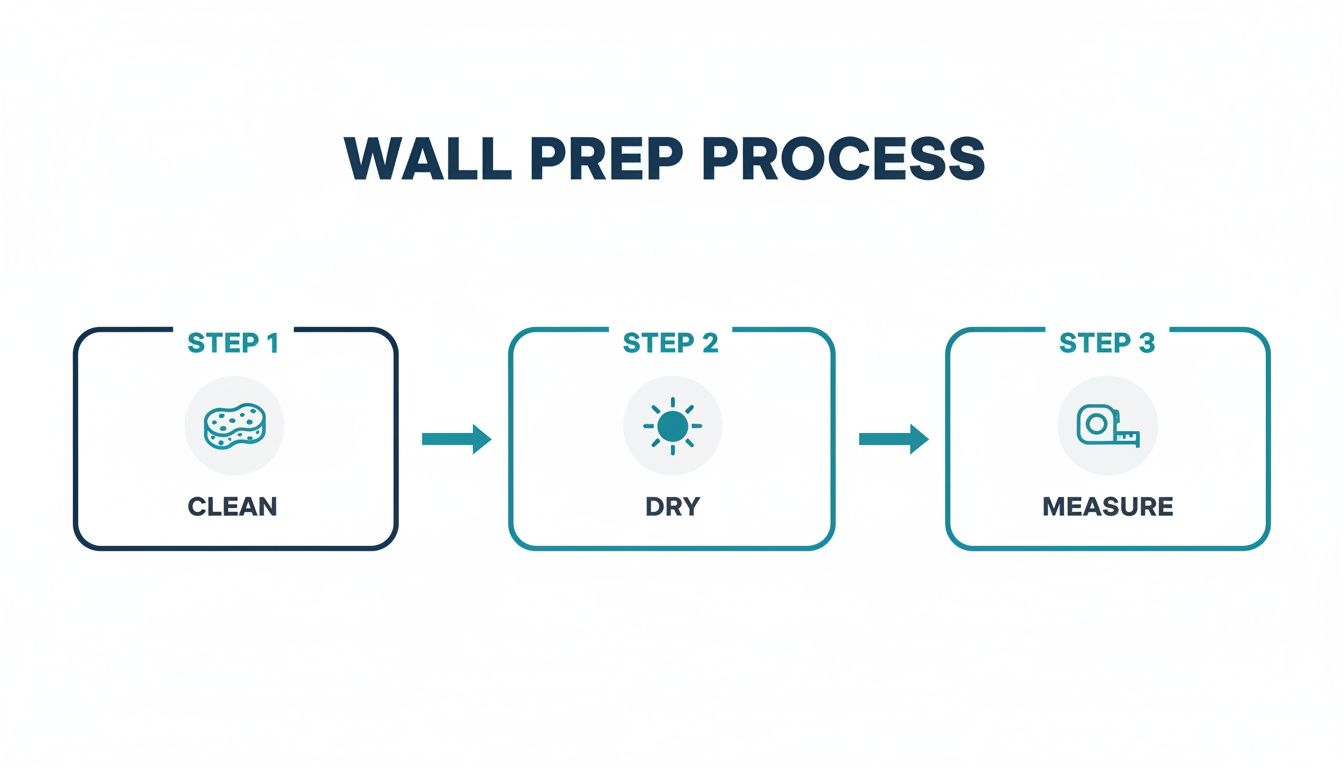
This just hammers home that a clean, dry, and well-measured surface is the non-negotiable foundation for a perfect finish.
After the whole design is smoothed onto the wall, give it one last, firm burnish with your squeegee directly over the transfer tape. This ensures the vinyl adhesive has made a strong bond with the wall. For more detailed instructions and even some video tutorials, you can also check out our comprehensive guide on how to apply wall stickers for extra tips.
The Final Reveal: Removing The Tape
And now for the most satisfying step of all. Let the sticker sit for about 10-15 minutes to let the adhesive really grab hold, then you can begin to slowly peel the transfer tape away.
The trick is to pull the tape back on itself at a sharp, 180-degree angle, keeping it as close to the wall as you can. Don't pull it straight out towards you, as this can easily lift the vinyl off with it. Go slowly and keep a close eye on the design. If any part of the sticker starts to lift with the tape, just pause, press it back down, and burnish that specific spot again before you continue peeling.
Once the tape is all off, take a step back and admire your handiwork. You've just successfully applied your own beautiful piece of wall art.
Creative Styling and Fuss-Free Removal
Right, you’ve got your sticker on the wall and it looks fantastic. But now for the fun part: thinking about the bigger picture and, of course, the inevitable "what if I want to change it?" question. This is where you can get really creative, but it's also where we need to talk about removal, especially for those of you renting.
Let's dive into some styling ideas that go beyond just plonking a design in the middle of a wall. We’ll also walk through the ridiculously simple, damage-free removal process that makes these things so brilliantly flexible.
Thinking Outside the Box with Placement
A single, well-placed sticker can absolutely define a room, but the real magic happens when you start combining them or using them in slightly unconventional ways. The trick is to stop seeing them as just 'wall art' and start thinking of them as a versatile design tool.
Here are a few ideas to get you started:
- Build a Gallery Wall: Don't be afraid to mix and match smaller, complementary stickers with your framed prints and photos. This adds an amazing layer of texture and depth, turning a standard feature wall into something that feels properly curated and personal.
- Frame Your Features: Got a lovely doorway, window, or little alcove? Use thin, geometric line stickers to frame it. It’s a subtle touch, but it’s an incredibly clever way to draw the eye to your home's best bits.
- Upcycle Old Furniture: Who said vinyl was just for walls? A dated chest of drawers, a boring wardrobe door, or even a plain tabletop can be completely transformed with a patterned vinyl wrap or a detailed decal.
This kind of versatility is exactly why vinyl décor has exploded in popularity. In the UK, the market for self-adhesive vinyl films (which includes these decorative stickers) is a huge deal, holding a massive 46.37% revenue share of the entire European market. It's all driven by people like us – homeowners and renters looking for quick, affordable ways to decorate without the fuss of traditional methods. You can read more about the booming self-adhesive vinyl market in Europe to see just how big this trend has become.
Room-by-Room Inspiration
So, how does this look in practice? Let’s get specific.
A child's bedroom or nursery is the perfect playground. Instead of one big scene, why not scatter individual star, planet, or animal stickers across the ceiling or a wall? It creates a really immersive feel, and you can easily add more as they get older and their interests change.
In the living room, a large-scale botanical or abstract sticker behind the sofa can act as a powerful focal point, doing the same job as expensive wallpaper for a fraction of the price and effort. For the bedroom, a beautiful quote placed above the headboard can set a calming, personal tone for the whole space.
Pro Tip: Don't forget the unexpected spots. A subtle pattern on the risers of your staircase or a witty quote on the inside of a cupboard door adds a playful, hidden detail that’s guaranteed to make you smile.
The Renter's Guide to Damage-Free Removal
Honestly, one of the best things about good-quality vinyl is how easily it comes off. When you fancy a change or you’re moving out, you can take it down without leaving a single mark. The process is dead simple and you only need one tool you’ve definitely got at home.
The secret weapon? Gentle heat.
Your Step-by-Step Removal Process
All you’ll need is a hairdryer. You can also use your fingernail or a plastic scraper (a credit card works in a pinch, just be careful not to scratch the paint). That’s it.
- Warm It Up: Pop your hairdryer on a low or medium heat setting. Hold it about 15-20 centimetres from the sticker’s edge and gently warm the vinyl, moving the hairdryer back and forth for around 30 seconds.
- Get a Corner Loose: The heat works by softening the adhesive, making it pliable. Use your fingernail or the edge of a plastic card to carefully lift up a corner of the sticker.
- Peel Slowly and Lowly: Once you’ve got a good grip, start peeling the sticker back on itself at a really sharp angle – almost flat against the wall (180 degrees is perfect). Avoid pulling it straight out towards you, as that puts too much stress on the paint.
- Follow with Heat: As you peel, keep aiming the hairdryer just ahead of the part you're pulling. This keeps the adhesive soft and ensures it releases cleanly all the way down. A slow and steady pace wins the race here.
This method works like a charm on properly prepped and cured painted walls. By using gentle heat, you're not fighting the adhesive, you're just gently persuading it to let go. Your wall—and your security deposit—will remain perfectly intact.
Got Questions? We've Got Answers
Even when you know the ropes, it's normal to have a few lingering questions. You want to be absolutely sure that a wall sticker is the right choice for your home and your specific needs. Let's walk through some of the most common queries we get from customers, so you can move forward with total confidence.
Getting these details sorted upfront is the key to a flawless finish.
Can I Put Vinyl Stickers in a Bathroom or Kitchen?
Absolutely. This is probably the number one question we hear, and the answer is a big yes! We use a premium quality vinyl that’s specifically made to be durable and water-resistant. This makes it a brilliant choice for high-humidity spots like bathrooms and kitchens.
It’s a fantastic way to inject some personality into these practical spaces without worrying about steam or splashes causing any trouble. Just make sure the wall is completely clean and bone-dry before you start. It’s also a good idea to avoid putting the sticker right inside a shower cubicle where it will be constantly soaked. A gentle wipe with a damp cloth is all it takes to keep it looking fresh.
Will Wall Stickers Work on Textured Walls?
This is a really important one. Vinyl stickers get that lovely, smooth, "painted-on" look by sticking to flat, non-porous surfaces. While they can sometimes work on a very light texture, like a subtle "orange peel" finish, heavily textured or bumpy walls are often a no-go.
The vinyl needs a good, solid surface to grip onto. Deeper textures mean lots of tiny air pockets, which stops the sticker from adhering properly and can cause it to peel away over time.
Our top tip: Always test it first. We often pop a small sample piece in with orders for this very reason. Stick it on a discreet part of the wall and leave it for a day or two to see how well it holds before you commit to the main design.
How Long Will My Vinyl Wall Sticker Last?
The lifespan of your sticker really depends on two key things: the quality of the material and where you put it. Here at Quote My Wall, we only use premium-grade vinyl, which is rated to last for at least 5 years indoors. This isn't just a temporary fad; it's a genuine piece of décor that's built to last.
When it's applied correctly to a well-prepped wall, and kept away from direct, harsh sunlight or constant temperature swings, your wall art will keep its colour and stick for years. Think of it as a lasting investment in your home's character.
Can I Get a Custom Wall Sticker Made?
Yes, of course! Creating custom and personalised wall stickers is what we love to do. This is your chance to get creative and design something that's a perfect match for your space and your style.
Maybe you have a favourite family quote, a specific design you've doodled, or you need an unusual size to fit an awkward nook. Whatever your idea, we can help bring it to life. You can play around with our online design tool or just get in touch with our team to chat through your project. It's the perfect way to create something truly unique that makes your house feel like home.
Ready to transform your space? Explore the huge range of designs at Quote My Wall and find the perfect decorative vinyl wall sticker for your home. Visit our shop at https://www.quotemywall.co.uk today.