
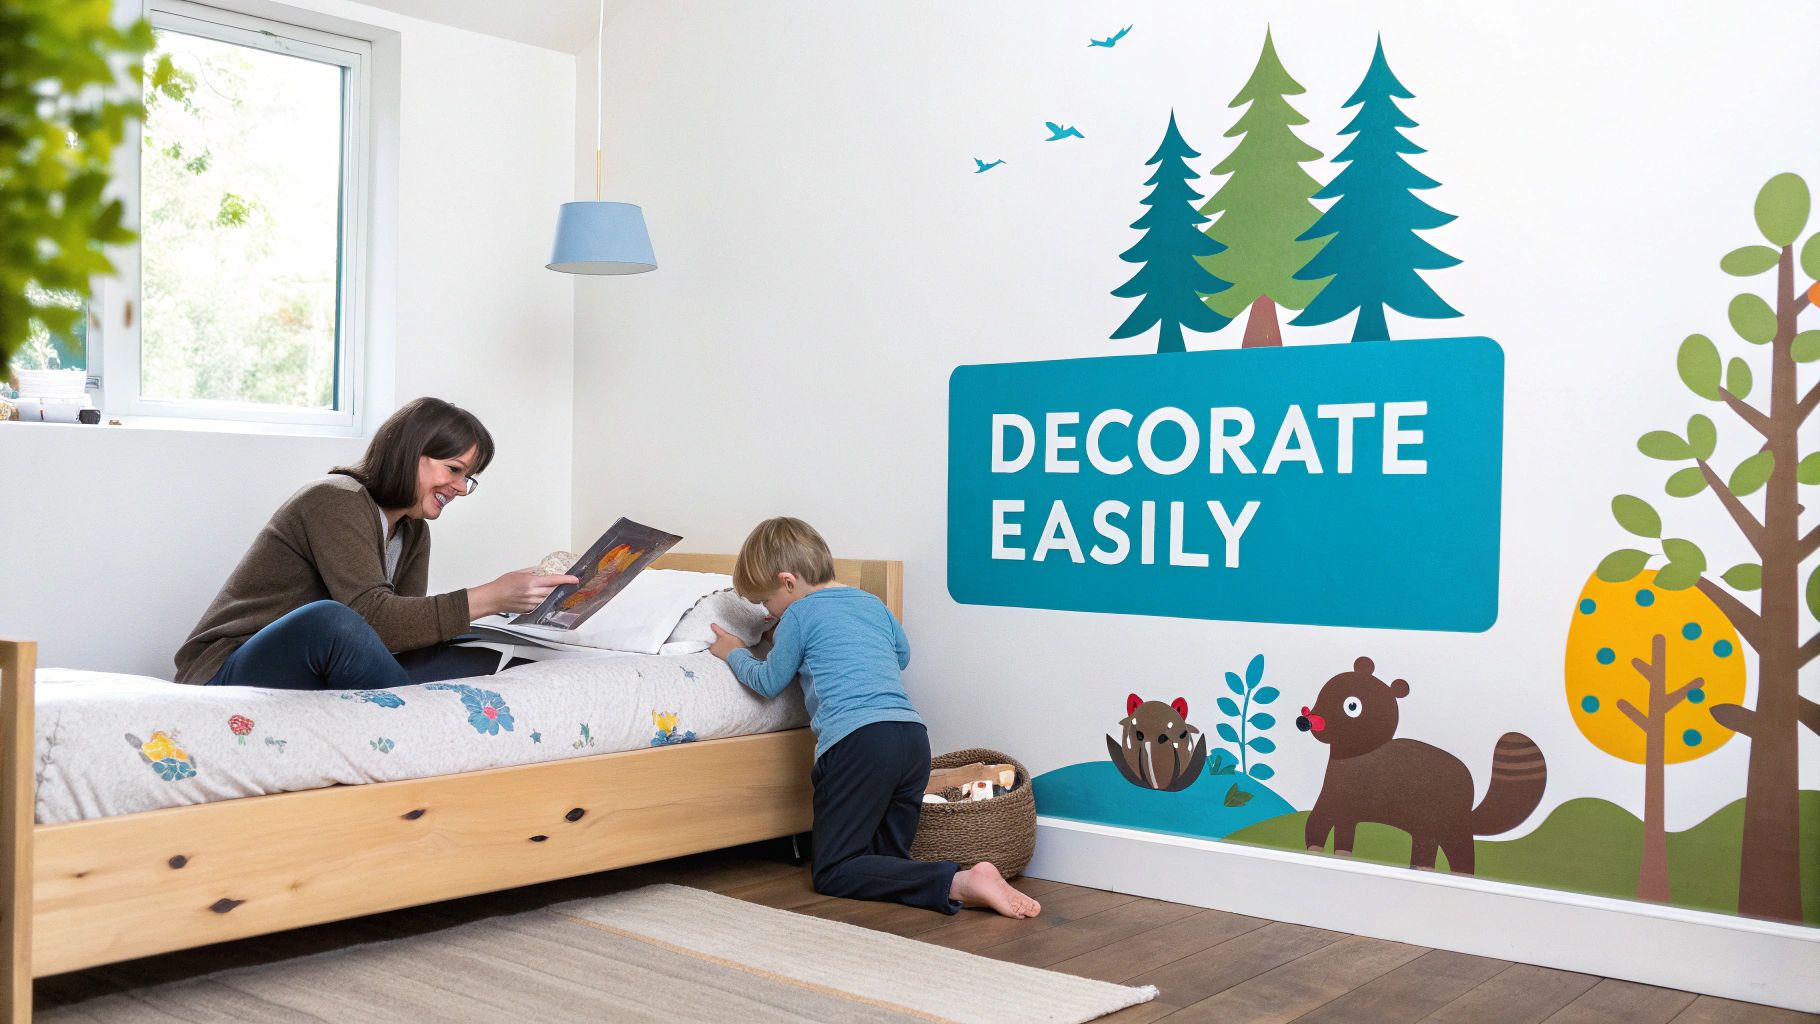
A Parent's Guide to Childrens Room Wall Decals
Decorating your child's room should be fun, not a chore. Wall decals are a fantastic way to bring personality and magic into their space without the fuss and permanence of paint or wallpaper. They're a simple, affordable, and stylish alternative that lets you create an imaginative world that can easily change as your little one grows.
Why Wall Decals Are a Decorating Game Changer
Let’s be honest, keeping up with a child's ever-changing interests can be a real challenge. One minute they're obsessed with dinosaurs, the next it's all about space rockets. This is where wall decals truly come into their own, offering a practical and enchanting solution for parents across the UK.
Instead of committing to a painted mural or wrestling with wallpaper, decals offer an instant transformation. You can add a splash of colour, introduce a cast of whimsical characters, or even create a learning corner, all in a single afternoon. This kind of flexibility is a lifesaver, especially if you're renting and can't make permanent changes to the walls.
The DIY Decor Boom
It’s no surprise that childrens room wall decals have become so popular here in the UK, fitting perfectly with the growing trend for DIY home updates. As more families look for creative ways to personalise their homes on a budget, wall stickers have soared in popularity, now making up around 35% of the demand for children's room decor in some regions. And that number is only set to grow as more people discover just how much creative punch these simple stickers pack.
More Than Just a Pretty Picture
The best decals do more than just brighten up a blank wall; they create an atmosphere that inspires play and learning. Think about transforming a plain corner into a lush jungle scene with friendly animal decals, or turning a ceiling into a galaxy of glowing stars for your little astronomer. These visual prompts can kickstart imaginative play and make their room a genuine haven for them to grow and dream.
A child’s room is their first personal universe. Wall decals act as the building blocks, allowing you and your child to co-create a world that reflects their personality, dreams, and current obsessions—without the stress of a permanent overhaul.
Of course, the quality of the vinyl makes all the difference. Choosing premium materials, like the ones we use at Quote My Wall, gives you a few key advantages:
- Durability: They’re built to last for years without peeling, fading, or cracking.
- Safety: We use non-toxic, water-based inks, so they're perfectly safe for nurseries and playrooms.
- Easy Application: You don’t need to be a DIY expert to get a smooth, professional-looking finish.
- Clean Removal: When it’s time for a change, they come off cleanly, leaving your paintwork undamaged.
This mix of affordability, style, and practicality makes decals a winning choice. Whether you're setting up a nursery, redecorating for a toddler, or letting an older child have a say in their room's design, decals give you the power to make wonderful changes with ease. To get a better feel for the material, you can explore our guide on what makes vinyl decals a superior choice. They're the perfect tool for creating a space that’s just as dynamic and wonderful as your child.
How to Choose the Perfect Decal for Your Child
Choosing the right wall decal for your child’s room is one of the most exciting parts of decorating. It’s a chance to go beyond just filling a blank wall and create a space that genuinely reflects who they are. You're crafting a backdrop for their imagination, a little world where they feel safe, inspired, and completely at home.
The best place to start? Think about what truly lights them up. Are they obsessed with dinosaurs and jungle adventures? Or maybe they're fascinated by the cosmos, dreaming of planets and stars. Tapping into their current passions is the secret to choosing a theme that makes their room their absolute favourite place to be.
Matching Themes to Your Child's Age and Interests
For the littlest ones, it's all about sensory development. When you're picking out decals for a nursery, simple is often best. For instance, decals featuring high contrast images in black, white, and other bold colours are fantastic for a newborn’s visual development. Gentle, friendly animal faces and simple shapes also work wonders.
Once they hit the toddler and preschool years, their world starts to explode with new ideas. This is the perfect time for themes that spark stories and learning.
- Woodland Wonders: Think friendly foxes, wise old owls, and calming trees. These themes create an enchanting, peaceful vibe that’s perfect for bedtime stories.
- Adventure Awaits: Cars, trains, aeroplanes, and rockets can fuel a sense of discovery and excitement for little explorers.
- Playful Learning: A beautifully designed world map or a colourful alphabet can make learning feel like a natural part of their everyday environment.
As they get older, bringing them into the decision-making process is a game-changer. It gives them a real sense of ownership and pride in their space, ensuring the final design is something they’ll love for years.
When you let your child help choose their wall decals, you’re not just decorating. You’re showing them their interests matter and empowering them to express themselves. It turns a chore into a fun, collaborative project.
Why Material Quality Is a Non-Negotiable
Okay, let's talk practicalities. While picking the design is the fun part, the material itself is what determines whether your decal will be a lasting joy or a frustrating mess. Trust me, not all vinyl is created equal, and for a child's room, you can't compromise on durability and safety.
Cheaper, flimsy materials might look like a bargain, but they often peel, fade, or tear within months. Worse, they can be a nightmare to apply without creases and might even strip the paint off your walls when you try to remove them. This is where investing in premium-grade vinyl makes all the difference.
To help you decide, here’s a quick comparison of the most common materials you'll find.
Wall Decal Material Comparison for Your Child's Room
| Material Type | Best For | Durability | Finish | Removability | Quote My Wall Option |
|---|---|---|---|---|---|
| Premium Vinyl | Nurseries, kids' rooms, high-traffic areas. | High - Resists tearing, fading, and peeling. | Matt, looks painted on. | Excellent - Removes cleanly without residue or damage. | Yes, our standard. |
| Standard/Thin Vinyl | Temporary decorations, party decor. | Low - Prone to tearing and peeling quickly. | Often glossy, can look cheap. | Variable - Can leave sticky residue or pull paint. | No. |
| Fabric (Polyester) | Textured walls, renters needing easy repositioning. | Good - Reusable and tear-resistant. | Textured, soft look. | Excellent - Can be moved and reapplied multiple times. | Not currently. |
| Paper | Short-term use, craft projects. | Very Low - Easily damaged by moisture or touch. | Varies, often papery. | Poor - Typically a one-time application, tears on removal. | No. |
As you can see, quality really matters. At Quote My Wall, we only use a high-quality, non-toxic vinyl. This choice gives you a vibrant, matt finish that looks like it was painted right onto the wall. More importantly, it means our decals are safe for the most sensitive environments, including nurseries. They’re designed to be wiped clean, so they can stand up to the inevitable sticky fingerprints that come with family life.
For more advice on this, you might find our guide on what to consider when buying nursery wall stickers helpful.
The Power of Personalisation
What makes a space feel truly special are the personal touches. A custom name decal, for instance, can instantly transform a wall from simply decorated to a statement of identity for your child. It’s a small detail with a massive impact, making them feel like the room is uniquely theirs.
This move towards customisable and educational decor is something we're seeing more and more from UK parents. The global market for kids' wall stickers was recently valued at USD 1.2 billion, and one survey showed 62% of UK mums prefer removable decals because they offer flexibility as their children grow. With 40% of households redoing kids' spaces since the pandemic, the demand for adaptable, engaging decor has never been higher.
Ultimately, choosing the perfect decal is about finding that sweet spot between beautiful design, lasting quality, and personal meaning. By focusing on your child's passions and opting for a durable, safe material, you can create a feature in their room that you’ll all love for a long time.
Giving Your Walls the Right Prep for a Flawless Finish
The secret to getting your new childrens room wall decals to look like they were painted on isn't really in the application technique. It's all in the prep work. Honestly, skipping this step is the number one reason I see decals bubble, peel, or just refuse to stick properly. A little bit of effort now makes all the difference, ensuring your design adheres perfectly and looks fantastic for years.
Think of it like this: the decal's adhesive needs a clean, smooth, and stable surface to grab hold of. Any dust, greasy fingerprints, or hidden moisture creates a barrier, weakening the bond right from the start. Taking an hour to get the wall ready is the best investment you can make for a lasting, professional-looking result.
Start with a Clean Slate
Before you even dream of peeling the backing off that decal, the wall needs a good, gentle clean. It’s amazing how much dust and grime can build up on a wall over time, especially in a busy family home.
Getting the surface ready is simple:
- First, give the whole area a quick wipe with a soft, dry cloth or a feather duster to get rid of any loose dust.
- Next, mix a tiny drop of mild washing-up liquid into some warm water.
- Lightly dampen a clean sponge or microfibre cloth in the solution, and wring it out really well—you don't want it dripping.
- Wipe the wall using gentle, downward strokes.
- Finally, go over the area again with a different cloth dampened with just plain water to lift off any soap residue.
Now for the important part: let the wall air dry completely for at least 24 hours. It might feel dry to the touch much sooner, but moisture can still be trapped in the paint, which is the ultimate enemy of decal adhesive. A bit of patience here pays off massively.
A Quick Word on Paint and Curing Times
This next point is absolutely vital, particularly if you’ve just had the paintbrushes out. A freshly painted wall needs time to "cure," which is a chemical process and is totally different from just being touch-dry. As paint cures, it releases solvents while it hardens. If you stick a decal on too soon, you trap those solvents, and they’ll slowly destroy the adhesive, causing the decal to fail.
Crucial Tip: You must wait a minimum of three weeks after painting before applying any vinyl wall decals. I know it's tempting to rush, but this is the golden rule. Putting them on any earlier will almost certainly lead to peeling as the paint continues to off-gas.
The type of paint you have also makes a difference. Here in the UK, most of us have either a matt or silk emulsion on our walls.
- Matt Emulsion: This is perfect. The slightly porous, non-shiny surface gives the decal’s adhesive the ideal texture to grip onto.
- Silk or Satin Emulsion: These paints have a slight sheen, making them less porous. Decals will still stick, but you need to be extra meticulous with the cleaning step to make sure the surface is completely free of any residue.
- Washable/Scrubbable Paints: A little word of warning on these. Paints marketed as "stain-resistant" or "scrubbable" can be tricky. Some contain additives like silicone or Teflon that are brilliant at repelling stains, but unfortunately, they can repel adhesives too. If you have this type of paint, it's always a good idea to test a small, hidden piece of the decal first to see how it sticks.
By giving your walls a bit of TLC beforehand, you’re not just sticking on a design; you’re creating the perfect canvas for a piece of art that will bring a smile to your child’s face every day.
How to Apply Wall Decals Like a Pro
Right, this is the fun bit—watching your design come to life. Applying a wall decal might seem a bit nerve-wracking, especially if you’ve chosen a big, detailed design, but I promise it's simpler than you think and incredibly rewarding. With the right technique and a little patience, you'll get that flawless, painted-on look that completely transforms the room.
Forget any DIY horror stories you've heard. High-quality vinyl, like the kind we use at Quote My Wall, is made to be user-friendly. This isn't about having specialist skills; it's about following a few easy steps to get a professional finish. Let’s get your childrens room wall decals on the wall, stress-free.
Gather Your Application Toolkit
First things first, get your tools ready. Having everything you need within arm's reach makes the whole job go much more smoothly. You don't need anything fancy, and you've probably got most of it in a drawer somewhere already.
Here’s your essential kit list:
- Masking Tape: Your absolute best friend for getting the position just right before you commit.
- A Squeegee or a Credit Card: This is the key to a smooth, bubble-free finish.
- A Spirit Level (Optional): If you've got a design with straight lines, like a quote, this will make getting it perfectly level a doddle.
- A Soft, Dry Cloth: Great for a final press-down to make sure all the little edges are secure.
Once you’ve got your gear, it’s time to get the decal itself ready.
Unrolling and Planning Your Layout
Most decals arrive rolled up in a tube to keep them safe. The very first thing to do is carefully unroll it and lay it flat on a clean, hard surface—a table or even a clean bit of floor will do. Pop a few heavy books on the corners and leave it for a couple of hours. Overnight is even better if you have the time. This just helps it relax and flatten out, which makes it far easier to handle.
Now that it’s flat, take it over to the wall and figure out exactly where you want it. This is where your masking tape is brilliant. Don't peel a thing yet! Just tape the whole decal to the wall, step back, and have a proper look. Is it centred? Is it at the right height for your child to see? Fiddle with it until you're 100% happy with where it sits.
For larger decals, a great little pro trick is to create a 'hinge' by running a long strip of masking tape horizontally across the middle. This simple planning step saves you from any "oops" moments later on.
The Application Process, Step-by-Step
Happy with the position? Let the magic begin. Your decal is basically a sandwich of three layers: the paper backing, the vinyl sticker itself, and the see-through application tape on top. The aim is to transfer the vinyl from the backing paper onto the wall, using the application tape as a guide.
If you've used the hinge method, you can work on one half at a time. Start with the top half, peeling the backing paper away from the application tape and down towards the hinge. The vinyl decal should stay stuck to the clear tape. Once it’s peeled back, just snip off the loose backing paper.
Now, starting from your central hinge and working outwards, use your squeegee or credit card to smooth the sticky side onto the wall. Apply firm, overlapping strokes at roughly a 45-degree angle. This is what pushes out any air and ensures the vinyl gets a really good grip.
Once the top half is done, you can remove the central masking tape hinge and the rest of the backing paper. Then just repeat the process for the bottom half, always squeegeeing from the centre outwards.
Take your time with the squeegee. This is the single most important step for preventing air bubbles. A slow, steady approach is much better than a rushed job. Think of it like you're ironing the decal onto the wall.
After the whole decal is smoothed down, give it one final, firm once-over with the squeegee, really focusing on the edges. Now, give it 10-15 minutes for the adhesive to start bonding properly with the paint. Finally, slowly peel back the clear application tape, pulling it back on itself at a really sharp angle. If a little piece of the vinyl tries to lift off with the tape, just press it back down, give that spot a firm rub with your finger, and then continue peeling.
For an even more detailed guide with pictures, check out our full article on how to apply wall stickers correctly.
Troubleshooting Common Application Issues
Even when you do everything right, you might hit a small snag. Don't worry, they are almost always incredibly easy to fix.
The best defence is a good offence, and that starts with the wall itself. This simple flow is the key to avoiding most problems from the get-go.
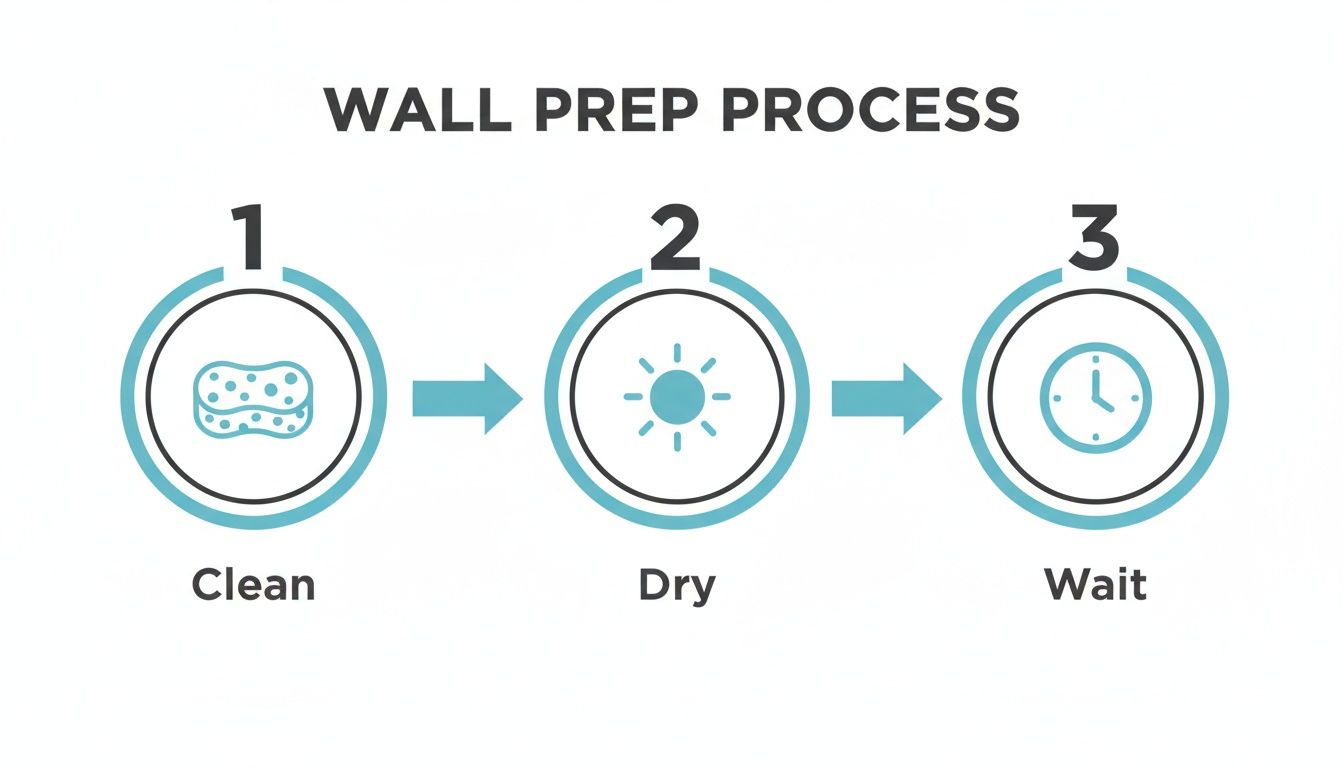
As you can see, a clean, completely dry wall is the foundation for a perfect finish.
But if something does pop up, here’s how to handle it:
- Air Bubbles: Spotted a pesky bubble after you’ve removed the top tape? No problem. Take a pin or a needle, make a tiny prick in the middle of the bubble, and then gently push the air out with your finger. The tiny hole will be invisible.
- Applying Around Switches: If your design goes over a light switch or socket, take the faceplate off first. Apply the decal right over the top of the opening, then use a sharp craft knife to carefully trim away the vinyl covering the hole. Smooth the edges down around the opening and pop the faceplate back on for a seamless look.
- Corners and Curves: For internal corners, you can gently slice the decal with a craft knife right where it meets the corner, then smooth each half into place. On a curved wall, a quick blast with a hairdryer on a low setting will make the vinyl a bit more flexible and easier to mould.
With these tips in your back pocket, you’ll find that applying childrens room wall decals is a genuinely fun and satisfying way to bring a huge dose of personality into their favourite space.
Creative Styling Ideas Beyond the Feature Wall
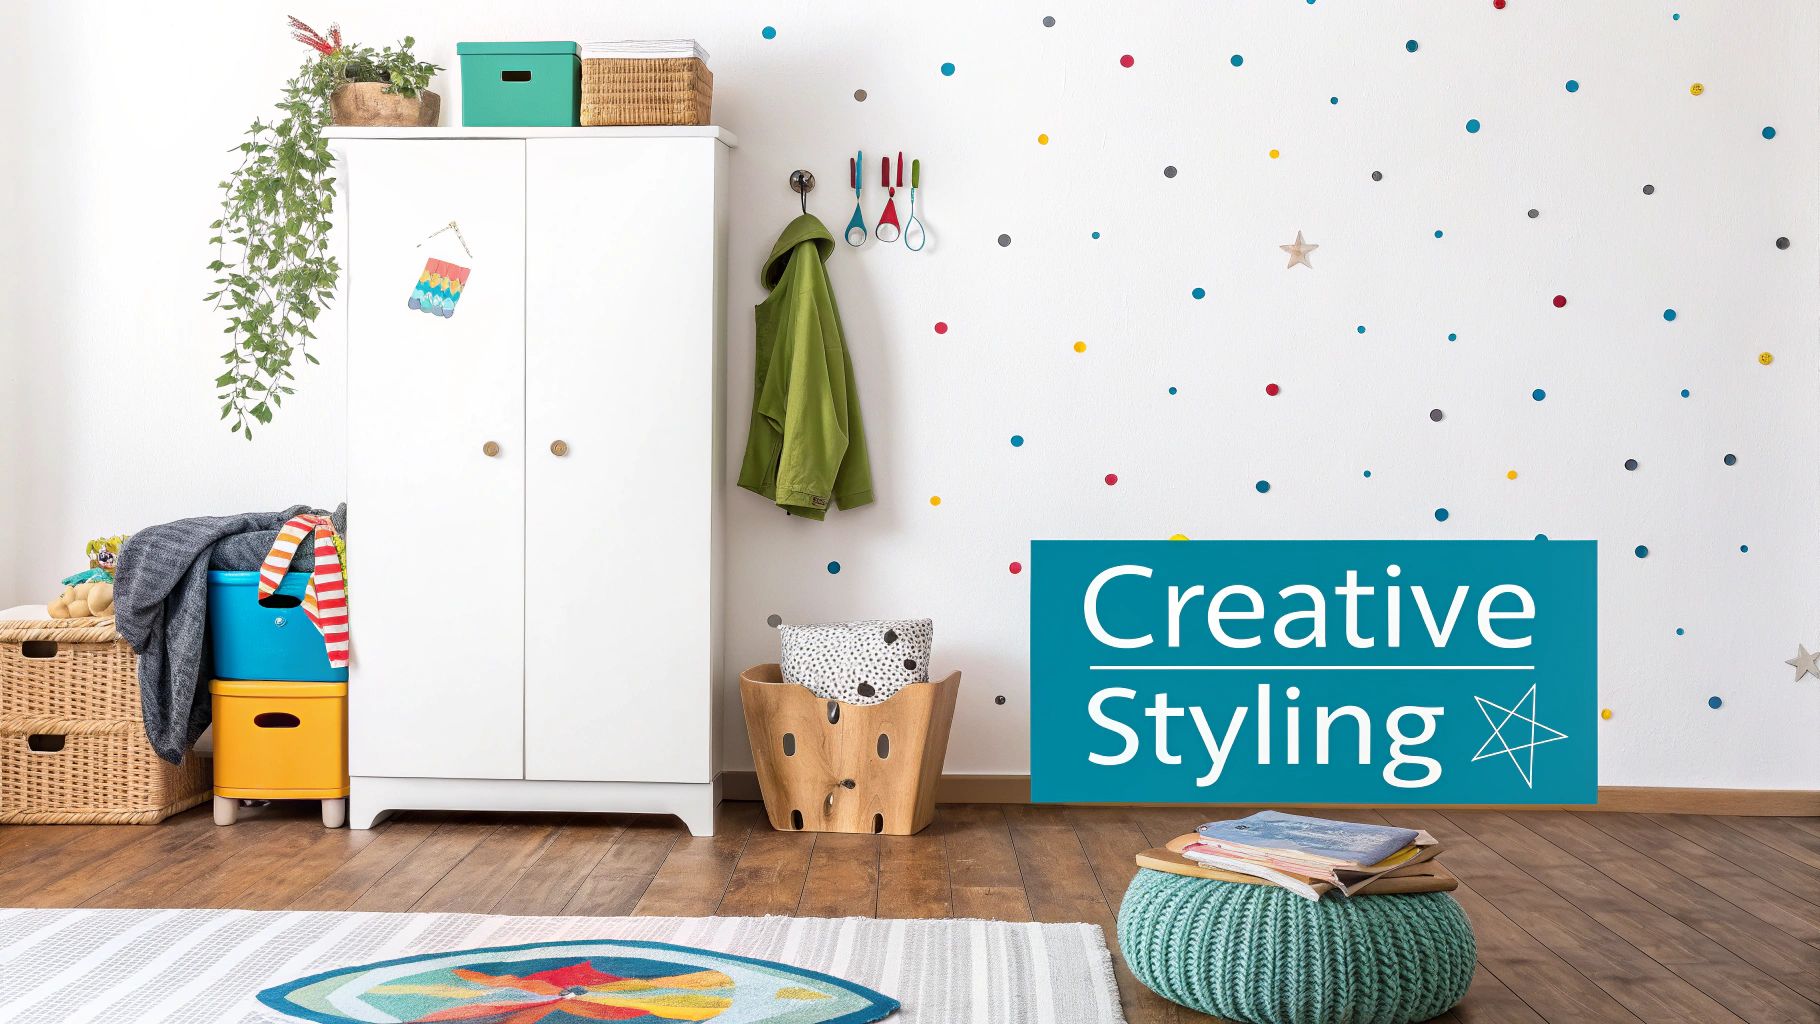
So, you’ve got the hang of applying childrens room wall decals. Now the real fun begins. It’s time to start thinking beyond just one feature wall and see how these simple stickers can truly transform a room into a magical space for your child.
A big, beautiful decal makes a great focal point, of course. But with a bit of creative thinking, you can weave a story that flows through the entire room. Think of decals less as pictures stuck on a wall and more as flexible design tools. They can climb onto wardrobes, peek out from behind shelves, or create whimsical patterns that guide the eye from one corner to the next. This is how you build a cohesive theme that feels alive and full of your little one’s personality.
Creating an Immersive Themed Room
Why keep an amazing scene confined to one wall when it could spill out across the whole space? This is where smaller, individual decals really come into their own. Imagine a "deep sea adventure" where fish decals aren't just on the main wall, but swim across the wardrobe doors and even pop up on the side of a toy box. Or picture a magical forest where tiny toadstools and woodland creatures appear in the most unexpected places.
Here are a few ideas to get you started:
- Scatter decals for a patterned effect: Instead of one large mural, use packs of smaller decals like stars, polka dots, or raindrops. Scatter them across two or three walls to create a custom wallpaper look that feels light and playful.
- Bring the furniture into the story: That plain, flat-pack furniture is your secret weapon. A simple chest of drawers can become part of a mountain range decal, or a wardrobe door can be the trunk of a tall tree in your woodland theme.
- Tell a story with clever placement: Arrange animal decals so they look like they’re interacting. Maybe a little fox is peeking out from behind a bookshelf, or a flock of birds is flying towards the window, creating a wonderful sense of movement.
This approach is becoming hugely popular here in the UK. The affordability of premium vinyl, which can last for up to five years indoors, makes it a brilliant choice for renters and homeowners. We’re seeing a big trend on social media, too, with UK searches for 'nursery wall stickers' jumping by 35% in the last two years.
Layering Decals with Other Decor
Wall decals look even better when they’re not working alone. Mixing them with other textures and objects is the key to a richer, more professional-looking design. This layered approach adds real depth and makes the whole theme feel more considered and complete.
For instance, you could place a mountain range decal behind your child’s bed and then string star-shaped fairy lights above it for a magical night-sky effect. For a more personal touch, you could even pair gentle, nature-inspired decals with meaningful elements like Bible verses for nursery wall decor.
Styling Tip: A simple but effective trick is to coordinate the colours of your decals with other things in the room, like the bedding, cushions, or a rug. It instantly ties the whole look together and makes the decals feel like a core part of the design.
Think about how different elements can play off each other. A decal of a tree branch could have real, 3D fabric birds or butterflies attached to it. You could even place a floating shelf strategically "under" a decal of a sleepy owl, making it look like the owl is perched right there. It’s these little details that turn a nicely decorated room into a truly enchanting space that sparks your child's imagination.
Still Have Questions About Children's Wall Decals?
It’s completely normal to have a few questions buzzing around, even after you’ve found a design you love. Decorating your child's space is a big deal, and you want to feel confident about every little detail, especially when it comes to things like safety and practicality.
We get it. You want something that looks fantastic, holds up to family life, and won't give you any hassle later on. To help set your mind at ease, here are some straightforward answers to the most common questions we hear from parents about children's room wall decals.
Are Wall Decals Safe for Nurseries and Children's Rooms?
This is usually the first question parents ask, and for a good reason. The short answer is a definite yes, as long as you're buying from a reputable UK supplier. Quality decals are made from premium-grade, non-toxic vinyl and printed with water-based inks. This means they’re free from nasty chemicals and don't release any fumes, so the air in your child's room stays clean and healthy.
For extra peace of mind, especially with a new baby, it's wise to place larger decals away from the immediate area of their cot. Just as you would with a heavy picture frame, position them where curious little hands can't quite reach. This simple step keeps their sleep space a completely safe and uncluttered zone.
Will Wall Decals Damage My Walls When I Take Them Down?
The thought of peeling paint is enough to put anyone off, especially if you're renting. But here’s the good news: high-quality removable vinyl is engineered to come off cleanly, without leaving behind a sticky residue or pulling your paintwork with it.
The secret to a perfect, damage-free removal almost always comes down to the prep work we talked about earlier. As long as your wall was clean, dry, and the paint was fully cured before you applied the decal, you shouldn’t have any issues at all.
Our Pro Removal Tip: To make removal incredibly easy, gently warm the decal with a hairdryer on its lowest heat setting. Hold it about 15-20 centimetres from the wall, moving it back and forth. This softens the adhesive just enough to let the decal release its grip, allowing it to peel away like a dream.
How Do I Clean Wall Decals?
Life with kids is beautifully messy, and their bedroom walls often see a lot of action. Thankfully, one of the best things about premium vinyl is how tough and easy to clean it is. Sticky fingerprints and mystery smudges don’t stand a chance.
All you need to do is take a soft, damp cloth (a microfibre one is perfect) and gently wipe the surface. A little water is fine. Just be sure to avoid abrasive sponges or harsh chemical cleaners, as they can scratch the vinyl or dull the vibrant colours. A simple wipe is all it takes to keep them looking brand new.
Can I Reuse Wall Decals After Removing Them?
This is a great question, and it’s important to set the right expectation here. For the most part, high-quality vinyl wall decals are designed for one-time use. The term "removable" guarantees they won't wreck your walls, but it doesn't mean they're "reusable."
When you peel a decal off, the vinyl can stretch a little, and the adhesive loses that first-time stickiness. It just won't adhere as securely a second time around. While some specific fabric 'peel-and-stick' products are made to be repositioned, traditional vinyl art is meant for one perfect placement. This single-use design is what makes them so affordable, allowing you to easily update your child's room as they grow and their passions change.
At Quote My Wall, we love helping families create beautiful, personal spaces with high-quality vinyl that’s safe, durable, and a joy to use. Explore our huge range of designs for every room in your home. Find your perfect wall decal today at https://www.quotemywall.co.uk.