
A Parent's Guide to Children's Room Decor Wall Stickers
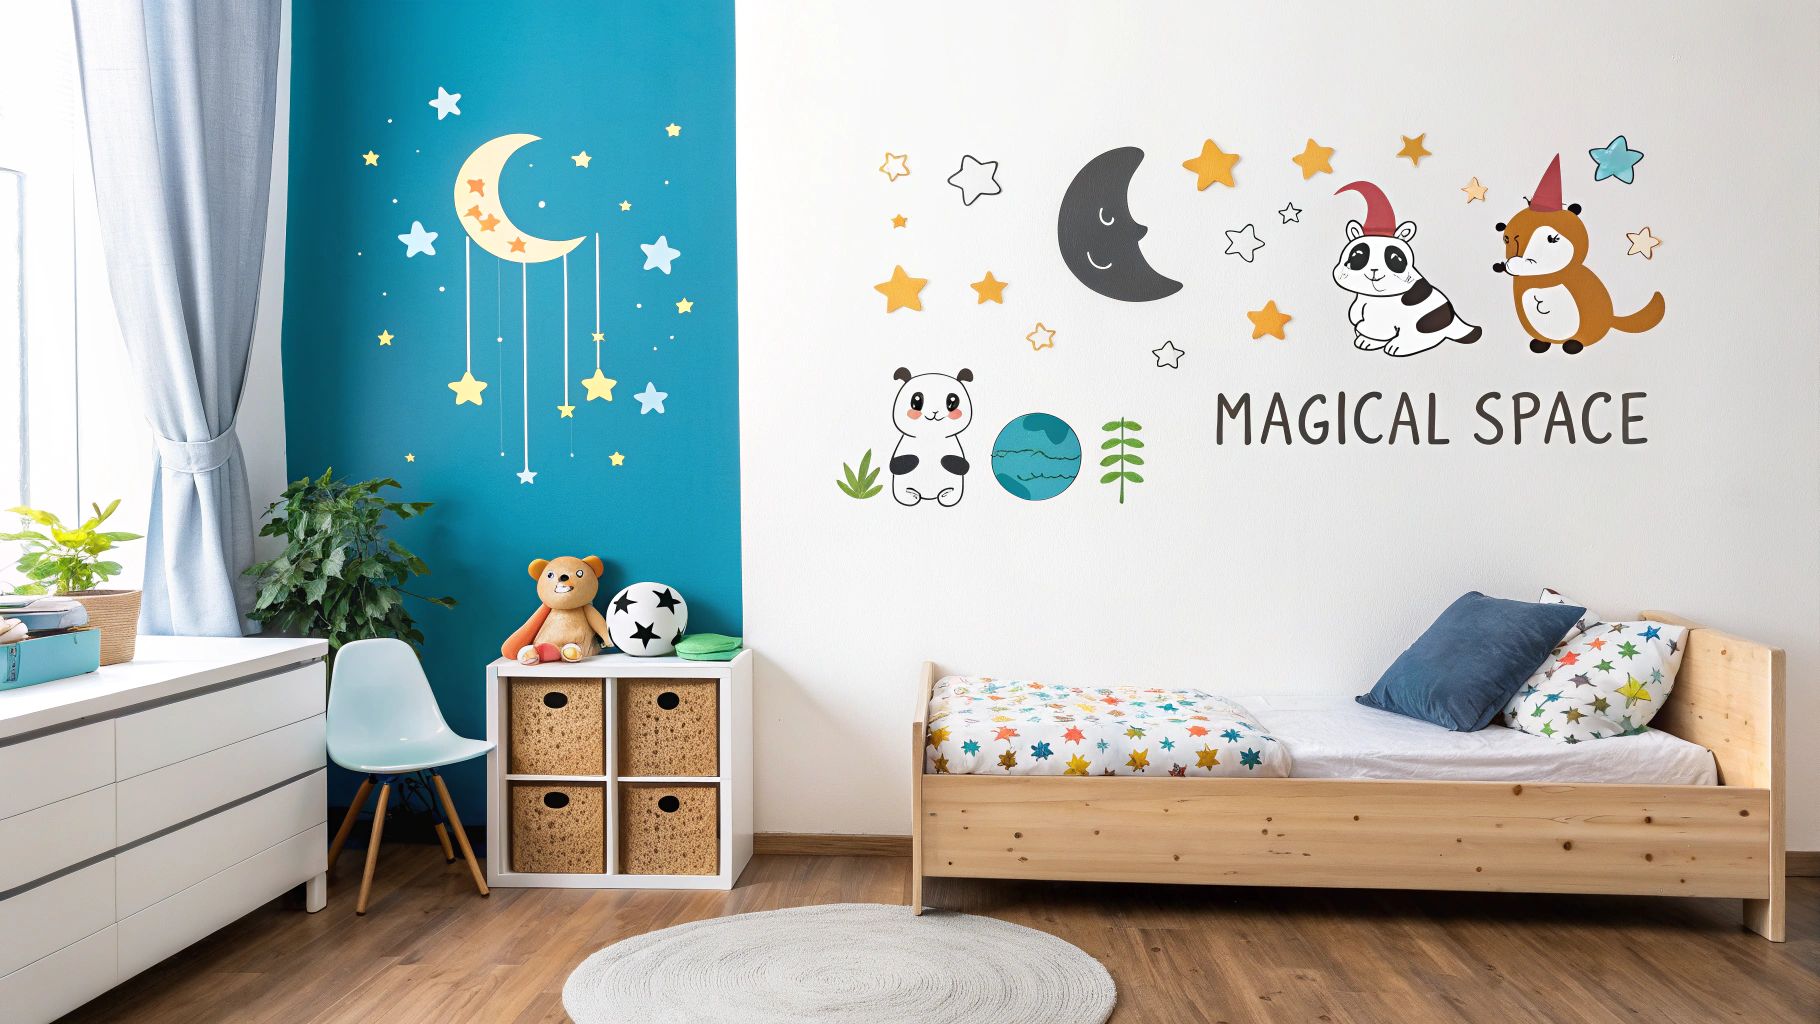
Decorating a child's room can feel like a huge task, but wall stickers are a brilliant, budget-friendly shortcut to creating a space filled with personality. These vinyl decals are all about maximum impact with zero long-term commitment, which is perfect if you're renting or know your little one's favourite theme will change in a flash.
Why Wall Stickers Are a Parent's Best Friend
If you've ever balked at the thought of messy paint pots or the permanence of wallpaper, you're about to discover a game-changer. Vinyl decals are one of the simplest and most joyful ways to bring a bit of magic into your child's world, and it's easy to see why so many parents are turning to this clever alternative.
The secret to their popularity is a winning combination of affordability, easy application, and—crucially—damage-free removal. This flexibility is a lifesaver for renters and for any family who loves to switch things up. You can craft a calm, dreamy nursery one year and, when the time is right, transform it into a prehistoric jungle roamed by dinosaurs.
A Growing Trend in UK Homes
This isn't just a passing fad. The move towards wall stickers reflects a real shift in how modern families think about interior design. Across the UK, parents are looking for customisable, creative ways to make nurseries and kids' bedrooms feel special. Market analysis shows that UK consumers spend an estimated $16.90 per person on wall decor, with a big preference for contemporary styles that fit right into a family home.
Here at Quote My Wall, we see this trend every day. Our premium vinyl nursery wall stickers are designed to last up to five years indoors, making them a far more cost-effective choice than traditional wallpaper over time. For more on the growing wall decor market, you can find some great insights on futuremarketinsights.com.
The real magic of wall stickers is the creative freedom they give you. You're not just decorating a room; you're building a little world that sparks your child's imagination day in and day out.
Think of this guide as your complete roadmap. We'll walk you through everything you need to know, from start to finish. We'll cover how to:
- Find the perfect theme that matches your child's age and passions.
- Apply the stickers like a pro, without any of those frustrating air bubbles.
- Get creative and use decals to give old or plain furniture a new lease of life.
Drawing on our years of experience, we're here to help you kick off this fun and rewarding project with complete confidence. Right, let's get started.
Finding the Perfect Wall Stickers for Your Child's Room
Here’s where the fun really starts. Choosing the right wall stickers is about so much more than just picking a pretty design. It’s a chance to bottle your child’s personality and splash it across their walls, creating a space that’s truly theirs.
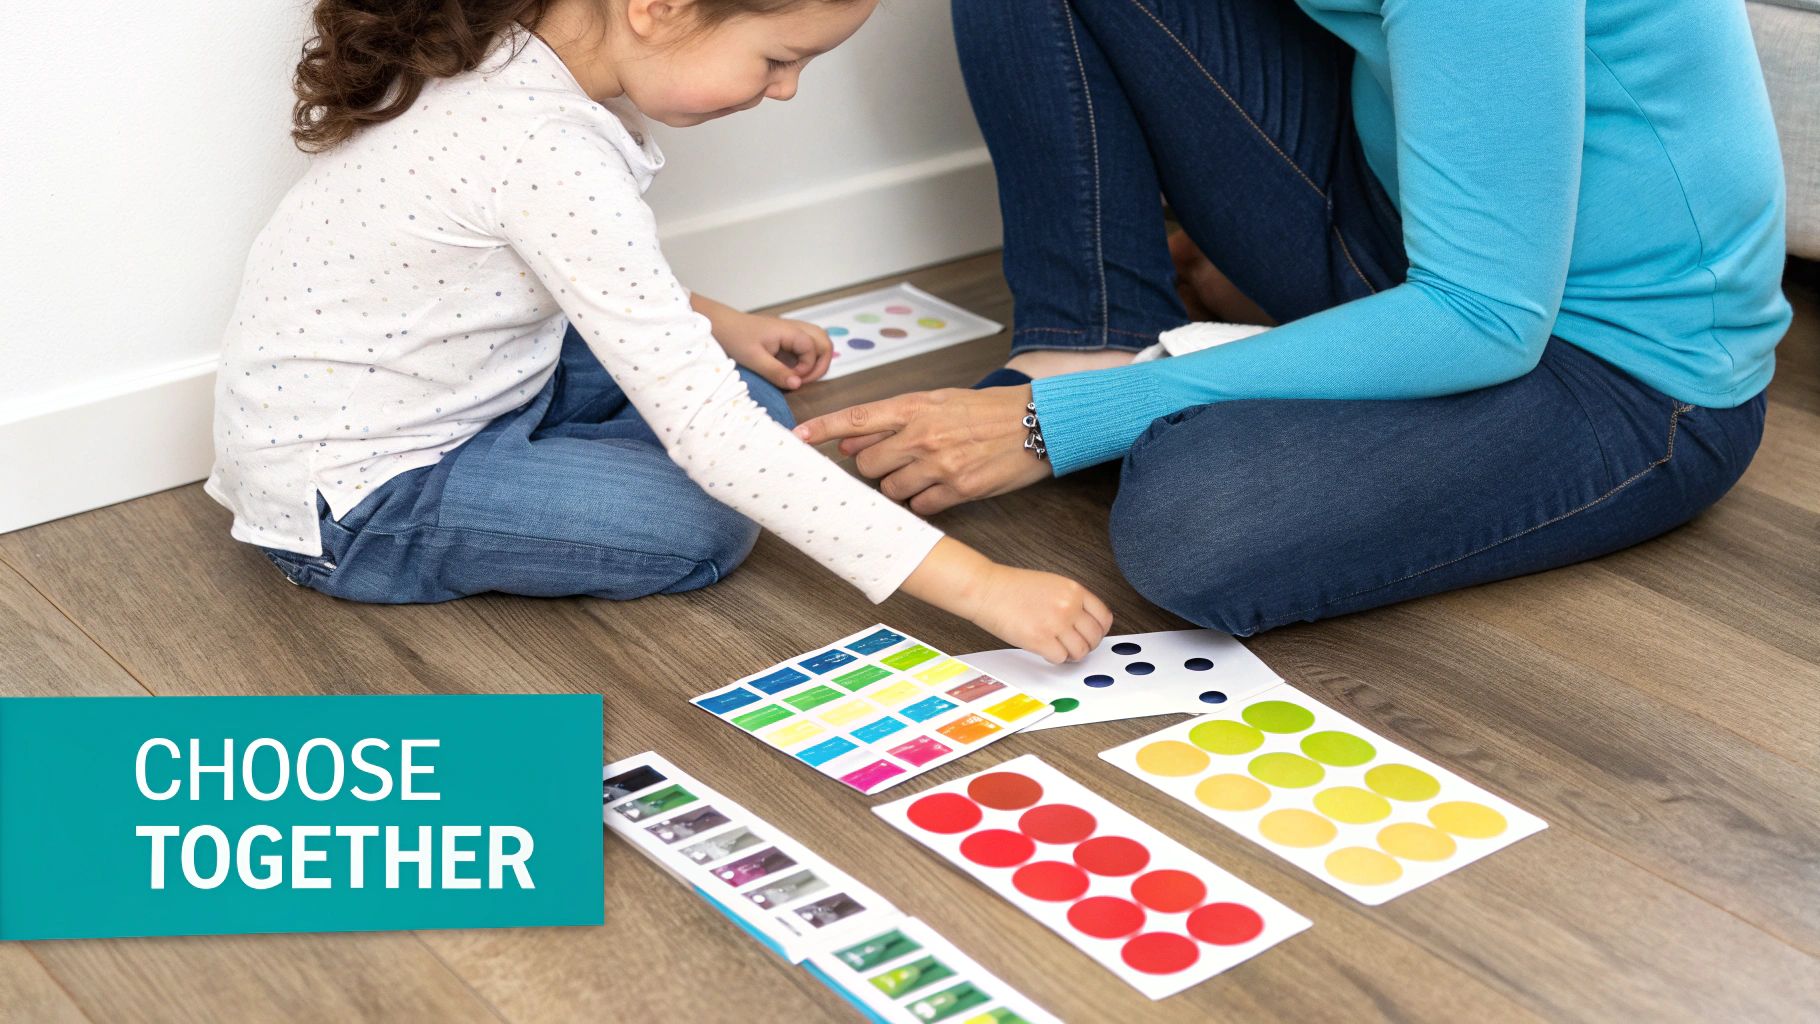
Why not turn it into a little project you can do together? For younger kids, you could pre-select a few options you're happy with and let them have the final say. A toddler will have no problem pointing emphatically at the colourful jungle animal they love, while an older child might already have grand plans for a sprawling space scene. When they're involved, they feel a real sense of pride and ownership over their room.
It’s clear that parents are embracing this kind of personalisation. In fact, there's been a 10% annual rise in demand for decorative wall stickers in the UK since 2020 as we've all spent more time making our homes special. This is exactly why our own personalised nursery prints are so popular—they offer a simple, affordable way to create a unique space.
Matching Themes to Their Age and Interests
A great way to narrow down the options is to start with a theme. You're looking for that sweet spot: something they'll love right now, but that won't feel dated in a year's time. Or, at the very least, something that can be easily updated without a major redecorating job.
Choosing a theme that aligns with their developmental stage can also turn their room into a subtle learning environment. A theme isn't just decoration; it can spark imagination, encourage storytelling, and introduce new concepts in a fun, visual way.
Here’s a quick guide to help you find the perfect theme for your little one.
Wall Sticker Themes by Age Group
| Age Group | Popular Themes | Developmental Benefit |
|---|---|---|
| Nursery (0-2) | Gentle woodland creatures, clouds, stars, simple geometric shapes. | Soft, pastel colours create a calming atmosphere. High-contrast shapes can help stimulate a baby's developing vision. |
| Toddler (2-4) | Farm animals, brightly coloured dinosaurs, construction vehicles. | Sparks imagination and provides visual cues for learning new words, sounds, and stories. |
| Young Child (5-8) | Magical unicorn kingdoms, solar systems, world maps, personalised names. | Reflects more defined interests, encouraging curiosity about specific topics like geography or space. |
Ultimately, these are just starting points. The right theme is whatever your child is passionate about at this moment.
Don't get too hung up on finding a "forever" theme. The beauty of wall stickers is their flexibility. When the dinosaur phase ends and the superhero era begins, you can make the switch in an afternoon.
Practical Things to Keep in Mind
Once you’ve got a theme, there are just a few practical points to consider before you hit "buy".
First, and most importantly, check the material. It's absolutely essential that any stickers for a child's room are made from high-quality, non-toxic vinyl. Here at Quote My Wall, we only use premium-grade vinyl that’s both durable and completely safe for your home.
Next, think about scale. Get the tape measure out and size up the wall space you're working with. A huge, empty wall is the perfect canvas for a big, dramatic scene, but a smaller nook might look better with a thoughtfully arranged cluster of individual stickers.
Finally, consider the room's existing interior colour schemes. Try to choose sticker colours that complement the paint, curtains, and bedding to create a cohesive look. For a deeper dive into picking the perfect design, have a look at our guide on selecting the best kids' wall stickers.
Getting Your Walls Ready for a Flawless Finish
The real secret to making wall stickers look like they were professionally applied isn't just in the application—it all starts with the prep work. Honestly, taking a bit of time to get your surface just right is the single best thing you can do for a smooth, bubble-free finish that will last for years.
First things first, your walls need to be clean and bone dry. You'd be surprised how much household dust and grime builds up over time, and this invisible layer can stop the sticker's adhesive from getting a proper grip. A quick wipe-down is usually all it takes to solve this.
The Right Way to Clean
For the best results, just grab a soft, lint-free cloth and dampen it lightly with some mild soap and water. Gently clean the area where the sticker will go, and then follow up with another cloth dampened with plain water to rinse away any soap residue.
Here's the most important part: you have to let the wall air dry completely for at least 24 hours. It might feel dry sooner, but you can't rush this bit.
So what should you avoid? Definitely steer clear of those all-in-one cleaning sprays or wipes. A lot of them contain oils or silicones that leave behind a film you can't even see. This residue is the number one enemy of good adhesion.
The golden rule of wall prep is simple: if the surface isn’t clean and dry, the sticker won’t stick. A little patience now will save you from dealing with peeling edges down the line.
Patience is Key After Painting
This is probably the most common mistake I see people make: applying stickers to a freshly painted wall. Even though the paint might feel dry to the touch in just a few hours, it hasn't actually cured yet. Curing is the chemical process where all the solvents evaporate and the paint hardens completely.
If you stick a decal on too soon, you’re essentially trapping those escaping gases. This is what causes those annoying bubbles and makes the sticker lift and peel away from the wall. So, how long do you need to wait?
- For standard matt or silk emulsion: Give it a minimum of three weeks.
- For wipeable or "scrubbable" paints: These are a bit trickier. They often contain additives like Teflon or silicone to repel stains, which unfortunately means they can repel stickers too. You’ll want to wait even longer, maybe up to four weeks, and even then, adhesion isn't always guaranteed.
If you’re ever in doubt, the best thing to do is test a small, out-of-the-way piece of the sticker first to see how it holds.
Finally, think about your wall's texture. Our vinyl stickers look fantastic on smooth, plastered walls. If you have a slightly textured surface, like a common orange-peel finish, you’ll just need to apply a bit more pressure when you put it on. This helps the sticker mould into all the tiny grooves for a secure fit. For really heavily textured or bumpy walls, though, stickers might struggle to adhere evenly.
Applying Wall Stickers Like a Pro
Right, this is the exciting part—where the magic happens! Your walls are prepped and ready, and it's time to bring that design to life. It’s actually a lot simpler than you might think, and with a couple of handy tricks up your sleeve, you’ll get a finish that looks genuinely professional.
When your children's room decor wall stickers arrive, they’ll probably be safely rolled up in a tube. The first thing you need to do is gently unroll them on a clean, flat surface. A dining table or even a clean floor will do just fine. Pop a few heavy books on the corners and leave them for a few hours—overnight is even better—to flatten out. Trust me, trying to apply a sticker that keeps wanting to curl up is an exercise in frustration, so this simple step is well worth it.
Positioning for Perfection
Before you even think about peeling anything, let's get the placement perfect. This is where a roll of masking tape becomes your most valuable tool.
Lightly tape your sticker to the wall, then step back and have a good look. Does it look level? Is it centred where you want it? This is your one chance to shuffle things around without any commitment. For bigger designs or scenes with lots of little pieces, this stage is absolutely crucial for getting the overall composition spot on.
It’s no surprise that clever décor solutions like this are becoming so popular. The global wall art market was valued at a huge $66.89 billion in 2023 and is expected to shoot up to $145.49 billion by 2034. For parents here in the UK, that means more choice than ever when it comes to safe, washable vinyl themes that can really spark a child's imagination. Plus, with the boom in DIY upcycling—where 72% of consumers are looking for waterproof options—it's clear why durable, high-quality vinyl is a must for busy family homes. You can read more about the growing wall decals market on marketreportanalytics.com.
The Game-Changing Hinge Method
Got a larger decal to tackle? Don't panic. The "hinge" method is a brilliant, foolproof technique that stops the sticker from creasing or sticking to itself. It sounds a bit technical, but I promise it's dead easy.
-
Make Your Hinge: Once you've got the sticker positioned exactly where you want it with masking tape, run another piece of tape vertically right down the middle, sticking it to the wall. This is your "hinge."
-
Peel One Side: Pick a side, any side! Carefully start peeling the backing paper away from the sticker, working from your central hinge outwards. Once it’s peeled back, just snip off the loose backing paper near the tape.
-
Smooth It Down: Now, starting from the centre, use a squeegee or even a credit card to smooth that half of the sticker onto the wall. You want to work from the middle outwards, using firm, even strokes to push out any air.
-
Repeat for the Other Side: Great, you're halfway there. Now you can remove the central hinge tape and the other bits of masking tape. Gently lift the remaining side of the sticker and peel off the rest of the backing. Smooth this side down just like the first, always working from the centre outwards.
Pro Tip from Quote My Wall: "Don't be afraid to use firm pressure. A simple tool like a credit card wrapped in a soft cloth gives you the perfect edge for smoothing out the vinyl, ensuring it adheres properly to the wall and pushing any trapped air bubbles to the edges."
With the sticker firmly on the wall, the final step is to slowly peel away the top layer of application tape. The trick is to pull it back on itself at a really sharp angle. Take your time here to make sure the vinyl decal stays put. If any part of the design starts to lift, just lay the application tape back down, give it another good rub, and then continue peeling.
For more detailed pointers and visuals, check out our comprehensive guide on how to apply wall stickers. It’ll walk you through everything.
Creative Ways to Use Stickers Beyond Your Walls
Don't let the name fool you—children's room decor wall stickers are for so much more than just walls. Once you start seeing them as a versatile decorating tool, you’ll spot opportunities to splash personality and colour across almost every surface in your child’s room. It's a brilliant way to pull a theme together and breathe new life into things you already own.
Take a look at that plain white wardrobe or the simple wooden toy box. To me, those are just blank canvases crying out for a creative touch. A few thoughtfully placed vinyl decals can turn a basic piece of furniture into a custom-designed feature that feels like it was made for the room.
A plain headboard, for example, can become the heart of the room with a personalised name sticker or a dreamy cluster of stars above it. The possibilities are truly endless, and it’s a fantastically budget-friendly way to get a high-end, coordinated look without splashing out on new furniture. Stickers are just one of many clever ways you can add color to your home without painting.
Upcycling Furniture with a Personal Touch
Upcycling is all about giving old or plain items a fresh look and purpose, and vinyl stickers make it unbelievably easy. This works best on smooth, non-porous surfaces – something most furniture provides.
Here are a few projects I've seen work wonders:
- Wardrobes and Chests of Drawers: A simple border of geometric shapes, a scattering of playful animal decals, or a single large character on the doors can completely change the vibe.
- Toy Boxes: Why have a plain storage box when you can have a pirate's treasure chest? Or a magical carriage covered in whimsical swirls and crowns?
- Bookshelves: Decorate the outer sides with your child’s favourite storybook characters. It’s a lovely little nudge that makes reading time even more inviting.
If you're planning something more ambitious, like changing the entire colour of a tabletop or the drawer fronts, our vinyl wraps at Quote My Wall are the perfect partner for your sticker collection. You can wrap the main surfaces for a bold new base colour, then layer smaller decal details on top for a truly custom finish.
This simple infographic shows the basic application process, which is the same for furniture as it is for walls.
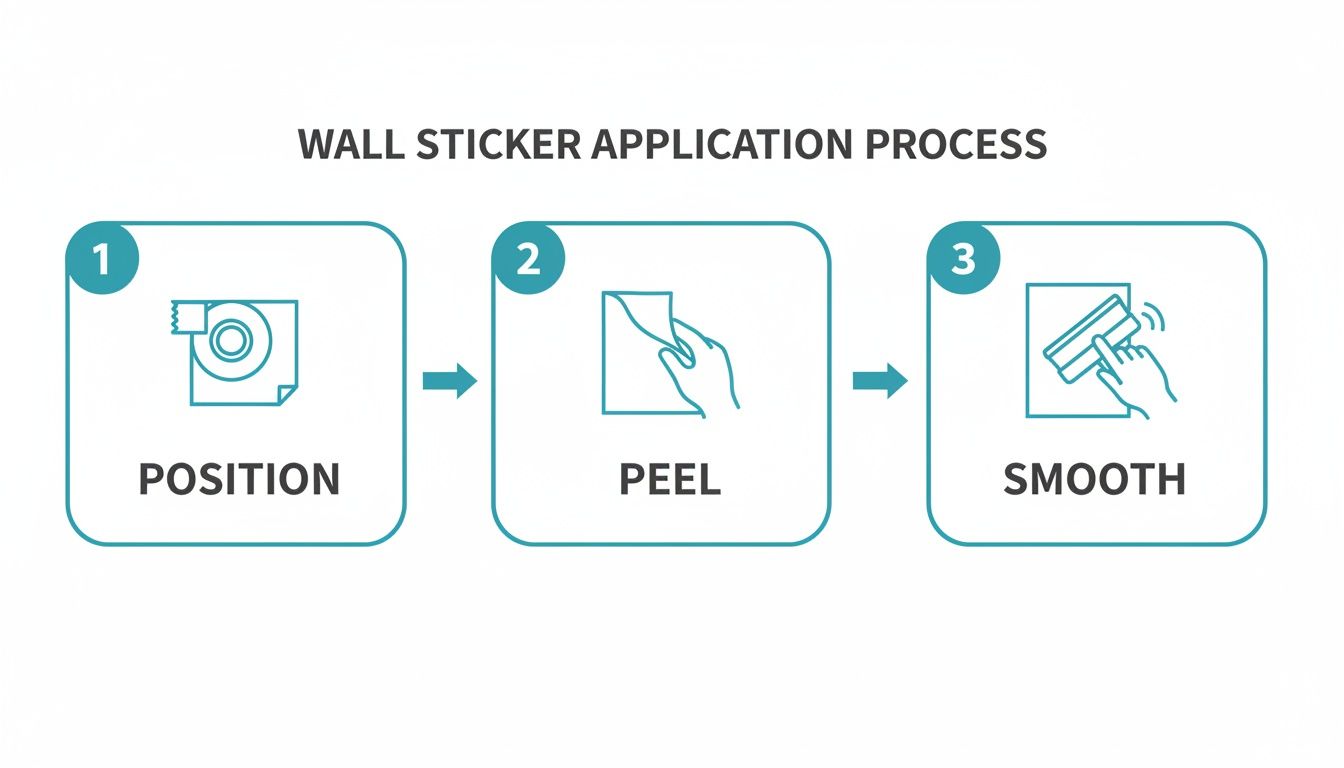
The trick is to be methodical. Position everything first, then peel and smooth carefully. That's how you get a professional-looking finish every single time.
Think of your vinyl stickers as a creative toolkit. You're not just decorating; you're personalising your child's environment, making it a space that truly reflects who they are and what they love.
Extending the Theme with Smaller Details
The real magic is often found in the small things. Don't overlook the little surfaces around the room, as they offer fantastic opportunities to carry your theme through and create a beautifully cohesive design.
Using the smaller, individual stickers from a larger set is the secret to tying everything together. Imagine placing a few stray stars from a galaxy wall onto the light switch plate, or a single butterfly on the corner of a mirror. How about a little dinosaur peeking out from behind the bedroom door?
These are the thoughtful touches that add depth and a sense of playful discovery. They show a level of care that turns a decorated room into a truly special space.
Keeping Your Wall Stickers Looking Fresh (and Removing Them Without a Fuss)
One of the things I love most about children's room decor wall stickers is just how little looking after they need. They're built to last, but a tiny bit of care now and then will keep them looking their best. The good news? It’s incredibly easy and you won’t need any special cleaning potions.
If you spot a few dusty fingerprints or a little smudge, a soft, damp cloth is all you'll need. Just give the sticker a gentle wipe. It’s best to steer clear of harsh cleaning sprays or abrasive scrubbers, as they can damage the vinyl or make the colours fade over time. A quick, light wipe is usually enough to bring them back to life.
Sometimes, you might see a small corner or edge start to peel up, especially in rooms where the temperature goes up and down. Don't panic! It’s a simple fix. Grab a hairdryer and, from about six inches away, give the lifting area a quick, gentle blast of warm air for a few seconds. This helps reactivate the glue. Once it's warm, just press it firmly back against the wall.
A Fresh Start: The No-Stress Removal Guide
When your little one decides they’re over dinosaurs and are now fully committed to becoming an astronaut, you’ll be glad to know that taking the stickers down is just as easy as putting them up. The main worry is always damaging the paint, but follow this simple technique and your walls will come away completely unscathed.
Your hairdryer is the hero here once again. Just like fixing a lifting corner, warming up the vinyl makes the adhesive soft and flexible, allowing it to release its grip without a fight.
The secret to a clean removal? Gentle heat and a bit of patience. Warming the sticker stops it from leaving that horrible, sticky mess behind, so your wall is ready for its next adventure straight away.
Tackle one sticker at a time. Gently warm the whole thing with your hairdryer for around 30-45 seconds. Then, use your fingernail or a plastic card (like a loyalty card) to gently lift one of the corners.
Once you’ve got something to hold onto, peel the sticker back on itself, keeping it as flat against the wall as possible—think a 180-degree angle. This slow, steady pull is far better than yanking it away from the wall. If it feels a bit stubborn, just give it another little blast of heat.
For a more detailed guide, we've put together a full walkthrough on how to remove wall stickers without leaving a trace. It’s this simple, damage-free process that makes wall stickers such a fantastic, flexible choice for a growing child's room.
Got a Question About Wall Stickers? We’ve Got Answers
Even though wall stickers are one of the simplest ways to transform a room, it's completely normal to have a few questions before you start. Knowing the ins and outs will help you get the best results, so I've gathered the queries we hear most often from parents.
Are Wall Stickers Actually Safe for a Nursery?
This is, quite rightly, the first thing most parents ask. And the answer is a confident yes, as long as you buy from a reputable supplier. Quality stickers are made from non-toxic vinyl that doesn't release any nasty fumes, making them perfectly safe for nurseries and bedrooms where good air quality is a top priority.
Just a quick safety tip: if you're decorating a baby's or toddler's room, make sure any small, individual stickers are placed well out of their reach to avoid any potential choking hazards.
Will They Stick to My Textured Walls?
Wall stickers definitely look their best and last the longest on smooth, clean, and dry surfaces. That said, you can often get away with applying them to lightly textured walls, like those with a common orange peel finish. You’ll just need to apply a bit of extra, firm pressure when you put them up to help the vinyl properly adhere to all the little grooves.
However, if your walls are heavily textured, bumpy, or have a finish like rough plaster, stickers just won't work well. They can't get enough surface contact, which means they’ll trap air and eventually peel off.
If you're on the fence about your wall's texture, my best advice is to test a small, out-of-the-way spot first. A quick check can save you a whole lot of hassle down the line.
How Long Should I Wait to Apply Stickers After Painting?
This is a big one, and patience is your best friend here. While a freshly painted wall might feel dry to the touch in a few hours, the paint is still "curing" – releasing solvents into the air.
You really need to wait at least two to three weeks after painting before putting up any vinyl stickers. If you apply them too soon, those gasses get trapped underneath, causing the sticker to bubble up and peel away. Giving the paint enough time to fully cure is the secret to making sure your new design stays stuck for years to come.
Feeling ready to bring your child's room to life? At Quote My Wall, we have a huge range of beautiful, non-toxic wall stickers that are perfect for any theme. Explore our collections and find your perfect design today.