
Your Guide to the Perfect Bedroom Wallpaper Feature Wall
A bedroom wallpaper feature wall is more than just a decorative touch. It’s a powerful design move that can completely transform the feel of your space, create a stunning focal point, and inject a serious dose of personality. With surprisingly minimal effort and investment, this single surface can anchor the entire room and set the tone for your personal sanctuary.
Why a Feature Wall Can Completely Remake Your Bedroom
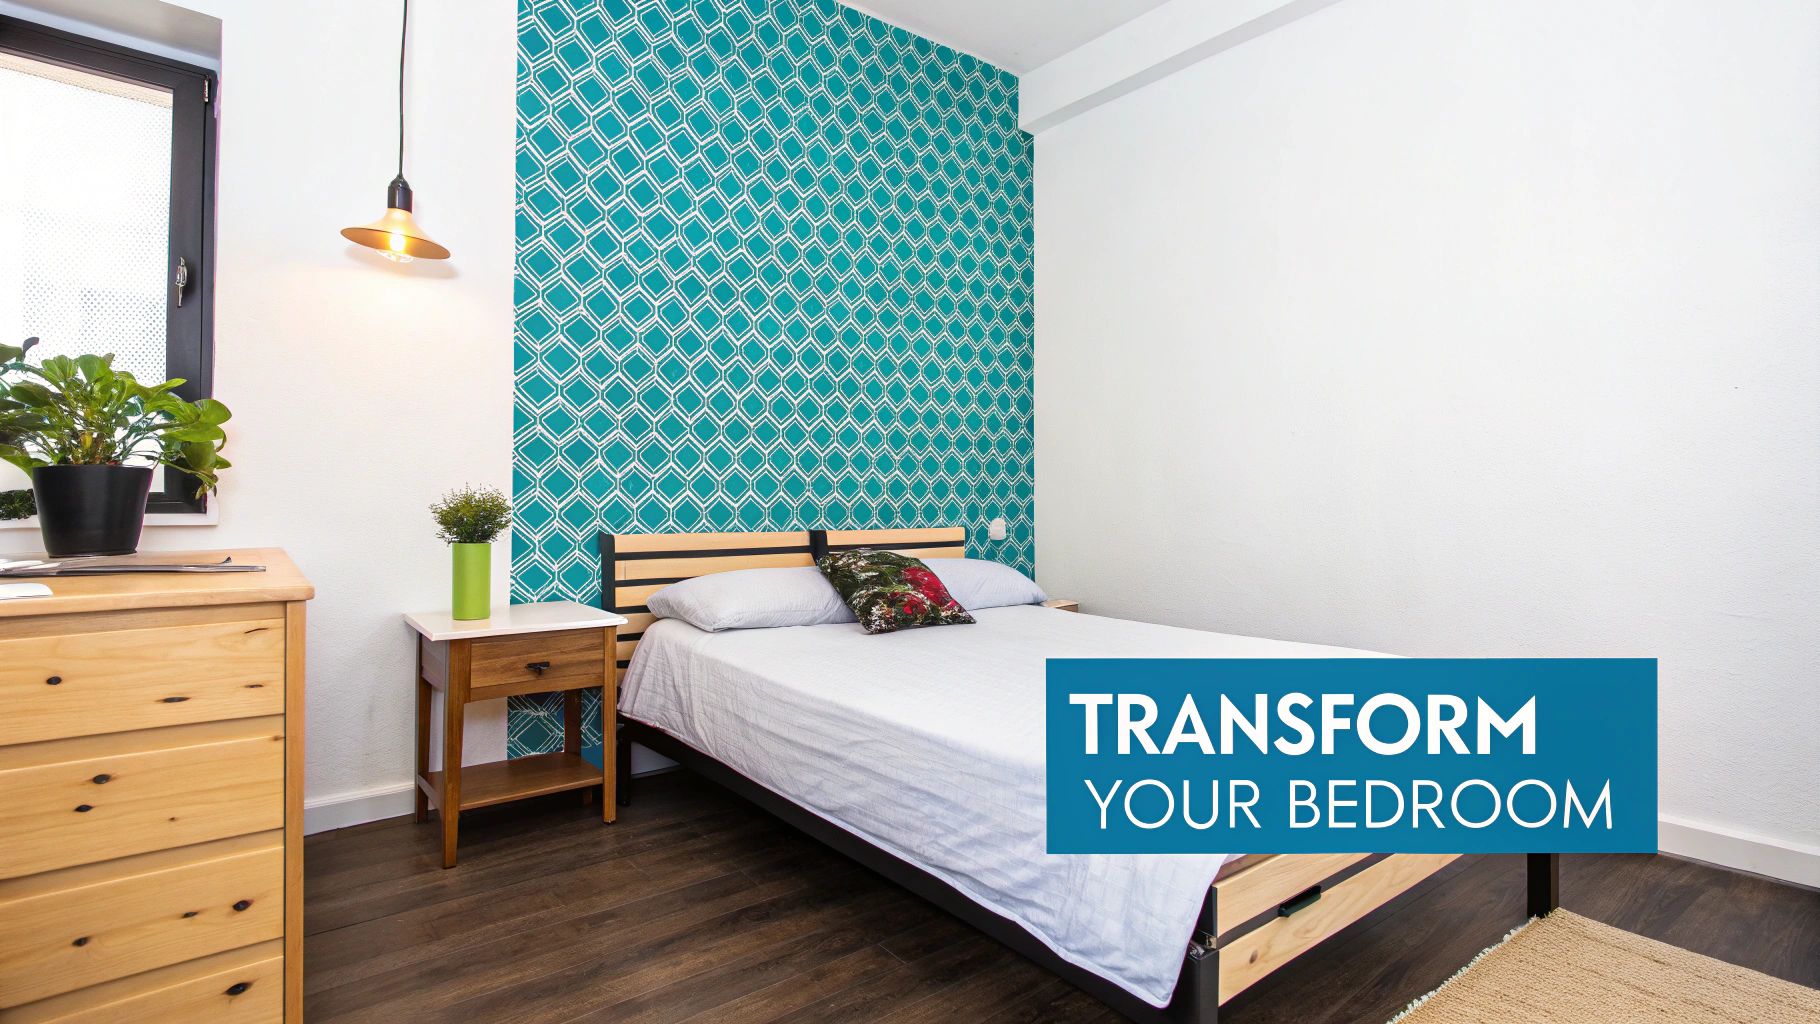
Think of a feature wall as the fastest way to get a designer look without committing to a full-on redecoration. By creating a visual centrepiece—usually the wall behind your headboard—you instantly draw the eye and give the room a clear sense of style and purpose. It’s amazing how this one simple change can take a plain, boxy room and turn it into a chic, inspired retreat.
The concept itself isn't some new fad; it has deep roots in British interior design. The idea of breaking up monotonous walls started gaining traction back in the Victorian era. The V&A Museum notes that a frieze-filling-dado wallpaper scheme was first suggested in 1868, and by 1880, this layered approach was a hallmark of fashionable homes. Today's feature wall is a modern echo of that same design principle.
The Lasting Appeal of an Accent Wall
These days, it’s about smart, practical design as much as it is about aesthetics. A feature wall is a brilliant tool for solving common design dilemmas.
- Add Depth and Dimension: The right pattern can work wonders. I've seen a carefully chosen design create an illusion of space, making a small room feel larger or a cavernous one feel cosier and more intimate.
- Express Your Personality: This is your chance to be bold. It's a canvas for your unique style, whether you're drawn to lush botanicals, calming geometrics, or a simple, subtle texture.
- Create a Specific Mood: Never underestimate the psychological impact of colour and pattern. A deep, inky blue can feel incredibly calming and promote rest, while a vibrant floral might be just the thing to energise you in the morning.
For many of us, the bedroom is the one space in the house that is truly ours. A feature wall is a low-risk, high-reward way to claim that space and make it a genuine reflection of who you are.
Modern Alternatives for Every Lifestyle
While traditional wallpaper will always be a classic, today's market has solutions for everyone, regardless of their living situation or DIY confidence. Premium vinyl wall stickers, for example, offer the same visual punch without the long-term commitment.
These modern options are perfect for:
- Renters who aren't allowed to make permanent changes.
- Busy parents who need a durable, wipeable surface that can stand up to daily life.
- Anyone who loves to refresh their décor every few years without a major project.
A good quality, high-tack vinyl can easily last for 5+ years indoors, giving you the look of wallpaper at a fraction of the cost and with none of the messy paste. If you're ready to start personalising your space, a good first step is getting some inspiration and practical tips from a guide on creating a feature wall.
Choosing the Right Design and Material
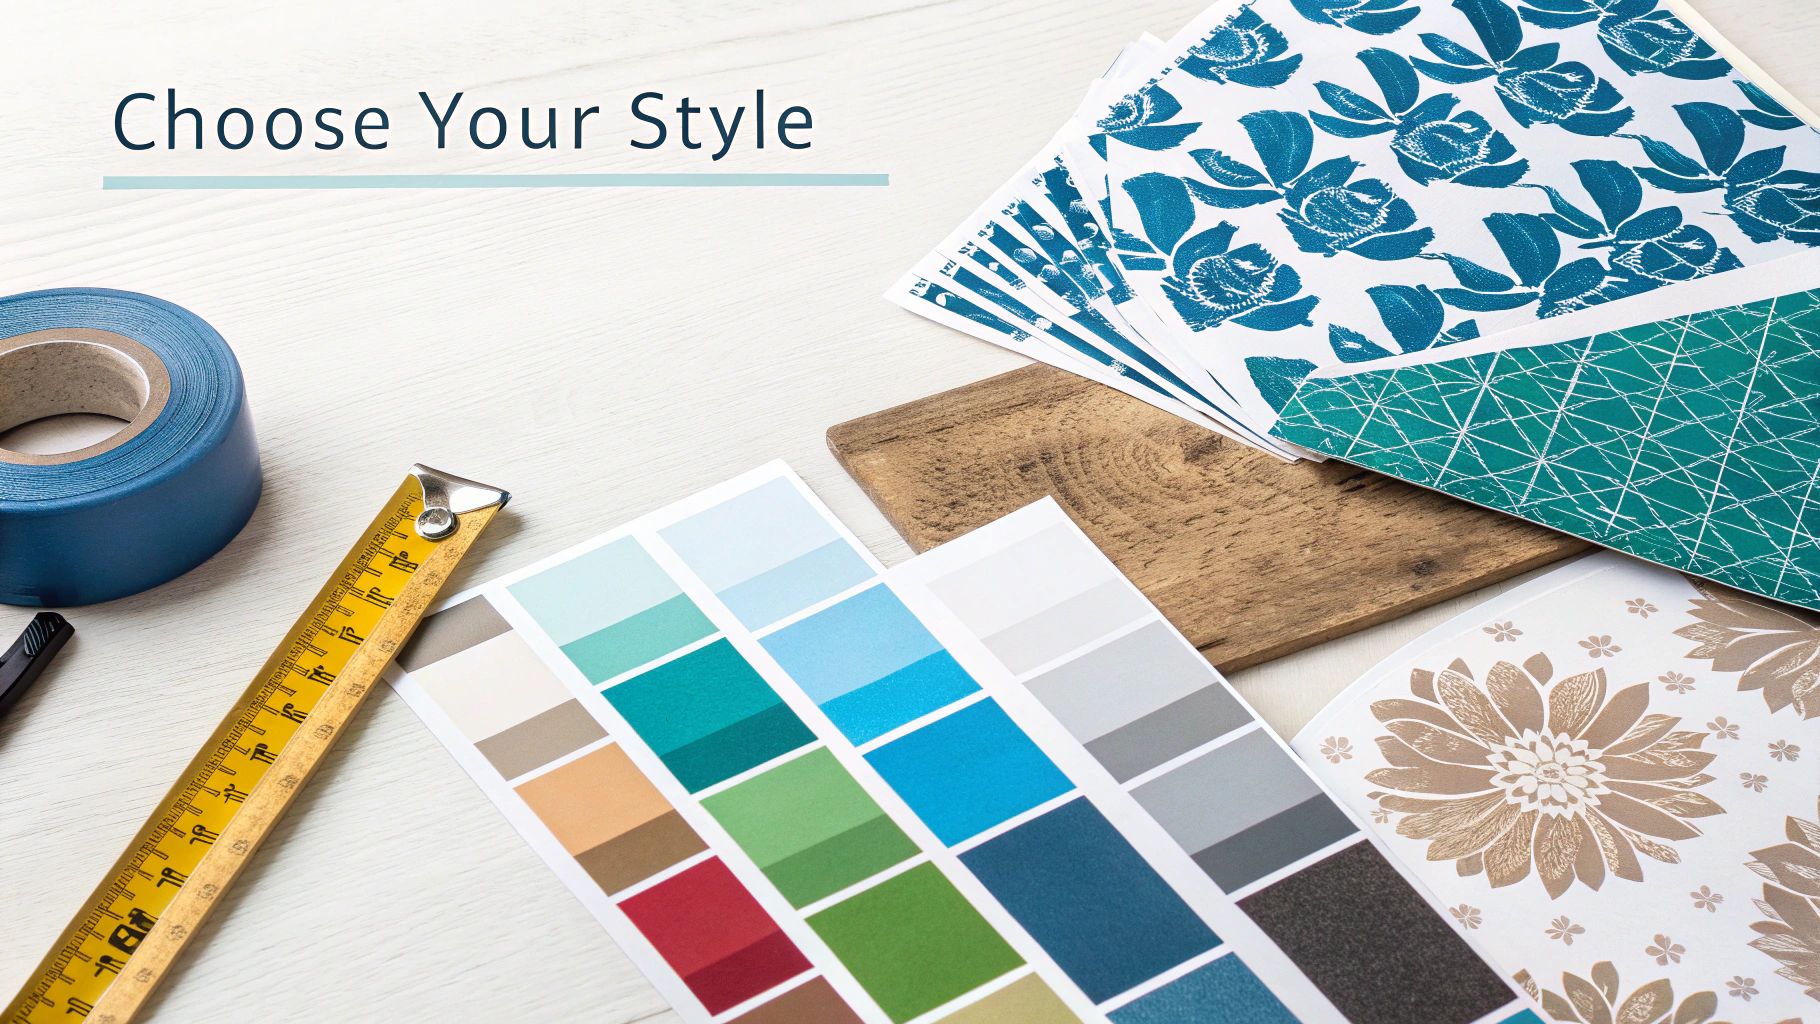
This is where the fun really starts. Picking the perfect design is the first step in genuinely transforming your bedroom into a space that feels like you. A feature wall should be a statement, whether it's a bold, leafy print that connects you to the outdoors or a subtle geometric pattern that brings a sense of calm and order.
The colours you choose are just as important, setting the entire mood of the room. We’re seeing a huge shift towards nature-inspired palettes, and for good reason—they’re incredibly relaxing. In fact, green has become a firm favourite for UK bedroom wallpaper, with everything from soft linden blossom to deep forest greens popping up in modern designs. It's a brilliant way to refresh the 68% of UK bedrooms that currently feel more like 'stressful spaces'.
While you're dreaming up designs, remember the goal is creating a perfectly balanced accent wall that works with your existing furniture and decor, not against it.
Finding Your Perfect Style
Think about how you want to feel when you walk into your bedroom. Is it a peaceful sanctuary for unwinding, or a vibrant space that energises you for the day ahead? Your answer will point you in the right direction.
- Botanicals and Florals: These are fantastic for bringing a bit of nature and softness inside. Big, dramatic leaf prints feel very contemporary, while delicate florals can create a timeless, romantic atmosphere.
- Geometric Patterns: If you lean towards a clean, modern aesthetic, geometric designs are your friend. They can add a touch of texture and structure without overwhelming the space.
- Textured Effects: Don't overlook papers that mimic other materials! Designs that look like wood, linen, or even plaster can introduce incredible depth and warmth, making a room feel cosy and sophisticated.
Traditional Wallpaper or Modern Vinyl Stickers
Once you’ve settled on a style, your next big decision is the material. This usually comes down to a mix of lifestyle, budget, and how permanent you want this new look to be. Both traditional wallpaper and modern vinyl options have their own clear benefits.
Traditional wallpaper is the classic for a reason. It offers an unmatched range of textures and premium finishes, perfect for a permanent, high-end feature wall. The trade-off is that it’s more of a commitment, requiring paste, a few more tools, and a bit more skill to get just right.
On the other hand, vinyl stickers offer amazing flexibility. They are a game-changer for renters, people who love to redecorate often, or anyone new to DIY. The peel-and-stick application is completely mess-free and far more forgiving if you need to reposition it.
Deciding between the two is a crucial step in your project. Let's look at a head-to-head comparison to see which one aligns best with your needs.
Wallpaper vs Vinyl Stickers: Which Is Right for Your Bedroom?
| Feature | Traditional Wallpaper | Vinyl Wall Stickers (e.g., Quote My Wall) |
|---|---|---|
| Application | Requires paste, booking time, and more tools. Can be tricky. | Simple peel-and-stick. Repositionable during application. |
| Durability | Very durable and long-lasting when applied correctly. | High-quality vinyl lasts 5+ years indoors and is wipeable. |
| Removability | Can be difficult to remove, often requiring steamers or chemicals. | Peels off cleanly with minimal to no residue. Ideal for renters. |
| Cost | Generally higher upfront cost for paper, paste, and tools. | More affordable for a single wall; no extra supplies needed. |
Ultimately, the choice comes down to how much time, effort, and commitment you're ready to invest.
If you're drawn to the simpler, more modern approach, our full guide to https://www.quotemywall.co.uk/blogs/news/peel-and-stick-wallpaper-your-guide-to-easy-and-stylish-home-decor-in-2025 is a great read. It shows just how easy it is to get a stunning result without the fuss of traditional wallpapering.
Getting Your Wall Measured and Prepped Like a Pro
A stunning bedroom feature wall doesn't just happen by magic; it’s all down to solid prep work. Trust me, skipping these early steps is the most common pitfall I see, and it’s what makes the difference between a professional finish and a DIY disaster. Taking a bit of time to measure up properly and get your wall ready is the single best thing you can do to guarantee a smooth, seamless result.
Think of it this way: you wouldn't start painting a masterpiece without a clean, primed canvas. The same logic applies here. This groundwork ensures your wallpaper or vinyl sticker grips properly and looks flawless for years to come.
Nailing Your Measurements
Before you fall in love with a wallpaper design, you need to get your measurements spot on. This simple step will save you the headache of running out of material halfway through or buying more than you actually need.
- Get the Height: Grab a metal tape measure and check the height of your wall from the skirting board right up to the ceiling. Make sure to do this in three spots—the left, the centre, and the right. Walls are rarely perfectly straight, so use the longest of the three measurements to be safe.
- Measure the Width: Now, do the same for the width, measuring from corner to corner. Again, take readings at the top, middle, and bottom of the wall, and use the widest measurement you find.
- Work out the Total: To get the total square meterage, simply multiply your widest width by your longest height. This gives you a solid number to work with when you're shopping.
Pro Tip: Don't forget about the pattern repeat! If your wallpaper has a design, you’ll need a bit extra to line it up perfectly between each strip. The pattern repeat length is usually listed on the roll's label. I always recommend adding at least 10% to your total to cover this and any little mistakes along the way.
Your Essential Toolkit
Having everything you need within arm's reach stops you from having to down tools and search for something mid-hang. You don’t need a huge professional kit, just a few key items that will make the job a whole lot easier.
- A sturdy step ladder
- A metal tape measure and a pencil
- A spirit level or a laser level to get that first strip perfectly straight
- A sharp craft knife (or a snap-off blade) for crisp, clean cuts
- A wallpaper smoother or squeegee to get rid of any pesky air bubbles
- A few clean, soft cloths or sponges
- Sugar soap or a mild detergent solution
- A bit of filler and a putty knife for any blemishes
- Fine-grit sandpaper
- A good quality wall primer
Creating the Perfect Canvas
With your tools ready, it’s time to focus on the wall itself. A clean, smooth, and primed surface is absolutely non-negotiable for a great finish, whether you're using traditional paste-the-wall paper or a modern peel-and-stick vinyl.
First things first, give the wall a good clean with sugar soap and warm water to get rid of any dust, grime, or grease. Let it dry completely. Then, have a proper look at the surface for any little imperfections—things like old nail holes, hairline cracks, or dents. Fill these with a dab of filler, wait for it to dry, and then sand it down until it's perfectly smooth to the touch.
Finally, the step that so many people are tempted to skip: priming. Applying a coat of primer seals the wall, which stops the wallpaper paste from just soaking into the plaster. It also gives the adhesive a uniform surface to stick to. This small effort makes both hanging the wallpaper and, eventually, removing it so much easier, all while protecting your wall.
The desire for homeowners to create lasting, personalised spaces isn't new; UK wallpaper production nearly doubled between 1900 and 1939 to meet the demand for affordable bedroom makeovers. That same drive is alive and well today, with 70% of decorators noting a 25% rise in feature wall enquiries since 2023. It just goes to show that a well-prepared wall is a trend that never fades. You can learn more about the latest wallpaper insights and how history influences modern decor choices.
Your Guide to Applying the Wallpaper
Right, with the wall prepped and ready, we can get to the exciting part – actually getting your design up and turning that vision into a reality. This is where a roll of paper becomes a stunning bedroom feature wall. The secret here isn't speed; it's patience and being methodical. It all starts with getting that first piece perfectly straight.
Here's a tip I learned the hard way: never, ever trust that your walls or ceiling are perfectly level. They almost never are. If you use a corner as your starting point, you're practically guaranteeing a crooked finish by the time you get to the other side. Instead, you need to create your own guide, a plumb line. Measure out from the corner of your wall, but come in just a bit less than the width of your wallpaper – around 50cm is a good benchmark. Grab your spirit level and draw a faint, perfectly vertical pencil line from the ceiling down to the skirting board. This line is your north star; align your first strip of wallpaper to it, and every piece that follows will be perfectly straight.
This initial prep work is the foundation for everything that comes next. Getting it right is non-negotiable.
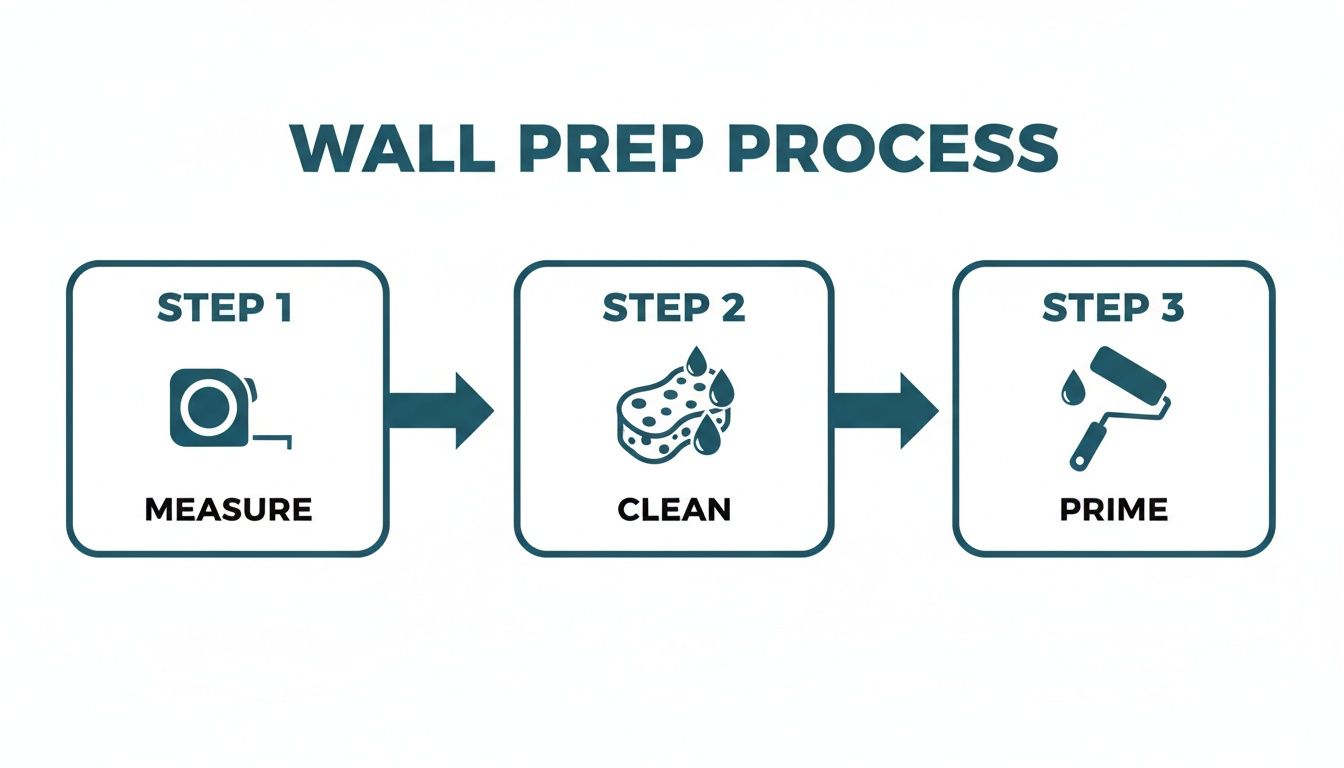
This simple process—measure, clean, prime—is what separates a professional-looking finish from a DIY disaster.
Applying Traditional Wallpaper
If you've opted for traditional wallpaper, your first job is to check whether it's 'paste-the-wall' or 'paste-the-paper'. If you're new to this, paste-the-wall is definitely the more forgiving option.
- Paste-the-Wall: This modern approach is wonderfully straightforward. You simply use a roller to apply a ready-mixed adhesive directly onto the wall, covering an area just a little wider than your first strip. Then, you hang the dry wallpaper strip onto the pasted section, lining it up with your plumb line. Simple.
- Paste-the-Paper: This is the classic method. Here, you'll apply paste to the back of your pre-cut wallpaper strip. The crucial step is to then gently fold it, pasted sides touching, and let it rest for a few minutes. This is called 'booking', and it lets the paper absorb the paste and expand before it hits the wall, which is key to preventing bubbles later on.
Whichever type you’re working with, hang your first strip against your plumb line. Always leave a little extra at the top and bottom – you'll trim this off later. Use a wallpaper brush or a smoother to work from the centre outwards, gently pushing out any air bubbles as you go. You don't need to apply a lot of pressure; a firm but gentle sweeping motion is all it takes.
Installing Peel-and-Stick Vinyl
Using a modern vinyl sticker or wrap? The process is even easier. Think of it as a massive, high-quality sticker.
Start by peeling back just the top 10-15cm of the backing paper. Don't pull the whole thing off at once! Align the top edge with the ceiling (again, leaving a slight overlap for trimming) and press it firmly against the wall, making sure it’s dead straight against your plumb line. Now, working from the top down, slowly pull away the backing paper with one hand while using a squeegee in your other hand to smooth the vinyl onto the wall. This steady, top-to-bottom motion is the best way to avoid trapping any air.
The real beauty of peel-and-stick is how forgiving it is. If a wrinkle or bubble appears, you can gently peel that section back and reapply it. It’s a fantastic, low-stress choice if this is your first feature wall project.
Mastering the Finer Details
Once that first piece is up and looking good, the rest is about creating a seamless finish. Carefully slide the next strip into place, butting its edge up tightly against the first one. This is where you need to pay close attention to the pattern – take your time to align it perfectly for an invisible seam.
Tricky spots like plug sockets and light switches can feel a bit daunting, but there’s a simple process to get them looking neat.
- First, and most importantly, turn off the electricity at the fuse box.
- Unscrew the faceplate so it’s loose, but don’t remove it completely.
- Hang the wallpaper right over the top of the socket.
- Feel for the corners of the socket through the paper and, using your craft knife, make a small diagonal cut from the centre of the socket out to each corner.
- Gently fold back the little triangular flaps you’ve just created and trim away the excess paper around the socket box.
- Smooth the paper down and screw the faceplate back on over the top. Perfect.
When you reach a corner, smooth the paper right into the crease and let it run a few centimetres onto the next wall. Using a straight edge and your craft knife, make a clean, vertical cut right in the corner. Then, start your next strip on the new wall, slightly overlapping the little piece you just wrapped around to create a perfect join.
Troubleshooting Common Problems and Aftercare
Even the most meticulous installation can hit a few snags. Don't panic. Almost every common issue has a straightforward fix that will get your bedroom wallpaper feature wall looking picture-perfect. Whether it's a rogue air bubble or a stubborn edge that refuses to stick, a little bit of know-how goes a long way.
The most common culprit is the air bubble you only spot once everything is dry. It's so tempting to just push on it, but that almost never works. Instead, grab a very fine pin or the sharp tip of a craft knife and make a tiny, discreet puncture right in the middle of the bubble. Now, with a clean cloth or your smoother, you can gently push the trapped air out through that little hole, flattening the wallpaper back against the wall. You'll never even know the slit was there.
Keeping Your Feature Wall Flawless
Once your new wall looks stunning, the goal is to keep it that way. Thankfully, long-term care is pretty minimal but crucial for keeping the colours vibrant and the finish looking fresh.
- Gentle Cleaning: For most modern wallpapers and vinyl, a soft, damp cloth is all you need to get rid of dust or light scuffs. Steer clear of any abrasive cleaners or rough scrubbing, as that’s a surefire way to damage the print.
- Peeling Edges: If a seam or corner starts to lift over time – often due to changes in room temperature or just a spot that missed a bit of adhesive – it's an easy fix. A small dab of vinyl-over-vinyl (VOV) adhesive, applied with a tiny artist's brush, will secure it back in place.
- Mismatched Seams: Noticing a seam that isn't perfectly aligned after the fact can be frustrating. With peel-and-stick vinyl, you can often gently lift the strip and reposition it. This is one of its biggest advantages. With traditional pasted paper, however, you're pretty much stuck with it, which really underlines how important getting that first strip right is.
The point of aftercare isn’t to create more work for yourself. It’s about knowing the quick fixes for minor issues if they ever pop up. A well-installed feature wall should be a low-effort, high-impact addition to your room for years to come.
The Removal Process and Why Vinyl Wins for Renters
Inevitably, the day will come when you fancy a change. This is where the difference between materials really shows. Taking off traditional wallpaper can be a messy, time-consuming job involving scoring tools, steamers, and a whole lot of scraping.
High-quality peel-and-stick vinyl, on the other hand, is designed to come off cleanly. You just warm the surface a little with a hairdryer to soften the adhesive, find a corner, and slowly peel the panel away from the wall. It usually comes off without leaving any sticky residue behind, making it the clear winner for renters or anyone who likes to switch up their style often. You get the same stunning visual impact as wallpaper, but with total freedom for the future.
For more on how these materials handle different conditions, our guide on using peel-and-stick wallpaper for bathrooms has some really useful insights.
Got a Few Questions About Your Feature Wall?
Even the most seasoned DIYer has questions before getting started. It's completely normal. Let's run through a few of the most common queries I hear about creating a bedroom wallpaper feature wall. Hopefully, this will clear up any last-minute doubts and get you ready to roll.
Can I Really Put a Feature Wall in a Small Bedroom?
Absolutely. In fact, it's one of the best tricks in the book for making a small space feel more considered and even a bit bigger. Forget the old myth that it will cramp the room.
The secret is choosing the right design. A pattern with a bit of scale to it or one with a lighter background colour can create a real sense of depth. It draws your eye through the space, making it feel less boxed in. Tucking it behind the headboard is a classic move because it creates a powerful focal point without taking up an inch of floor space.
My advice? Steer clear of patterns that are too dark, dense, or have a tiny, busy repeat. Those are the ones that can sometimes make a compact room feel a little claustrophobic.
How Much Does a Bedroom Feature Wall Cost in the UK?
This is a "how long is a piece of string" question, as the cost really depends on the materials you choose and whether you're doing it yourself or calling in a pro.
- Traditional Wallpaper: You can find rolls from £20, but for something special, you could be looking at over £50 a roll. Factor in paste and tools, and then a decorator's daily rate (often £200-£400). A professionally hung wall could easily set you back £500+. If you hang it yourself, you're probably looking at around £100 all in.
- Vinyl Stickers: This is where you can make some serious savings. A beautiful, high-quality vinyl feature wall from a UK supplier usually falls somewhere between £40 and £150 for the whole wall. Best of all, you don't need any extra supplies.
A feature wall is one of those projects where the budget is firmly in your hands. High-quality vinyl gives you that high-end designer look for a fraction of the price and completely removes the cost of a professional decorator. It's a savvy choice for a quick, high-impact refresh.
Is Vinyl Wallpaper as Durable as Traditional Wallpaper?
Yes, and in some ways, it’s even better for modern life. The high-quality vinyl we use today is incredibly tough and engineered to last. It's designed from the ground up to be moisture-resistant, wipeable, and to stand up to the scuffs of daily life. A good quality vinyl is typically rated for at least 5 years of indoor use.
This makes it a brilliant, low-maintenance option, particularly in a child's bedroom or a busy part of the house. While some very high-end traditional papers are built like tanks, modern vinyl strikes the perfect balance between durability, style, and value. It’s ideal for anyone who likes to change things up. For more on this, check out our guide on finding the perfect removable wallpaper for renters.
Ready to transform your space with a stunning feature wall? At Quote My Wall, we offer a huge range of premium vinyl wall stickers and wraps to bring your vision to life. Find your perfect design today at https://www.quotemywall.co.uk.