
A Guide to Peel and Stick Wallpaper for Bathroom Transformations
Let's cut to the chase: can you actually use peel-and-stick wallpaper in a bathroom? The short answer is a resounding yes, but with a big caveat. Your success lives and dies by choosing the right product and doing the prep work. For it to survive the steam and humidity, you absolutely must opt for a vinyl-based, moisture-resistant wallpaper. Think of it as a stylish, heavy-duty raincoat for your walls—it's designed to repel water, not soak it in.
Your Guide to Bathroom Wallpaper Success
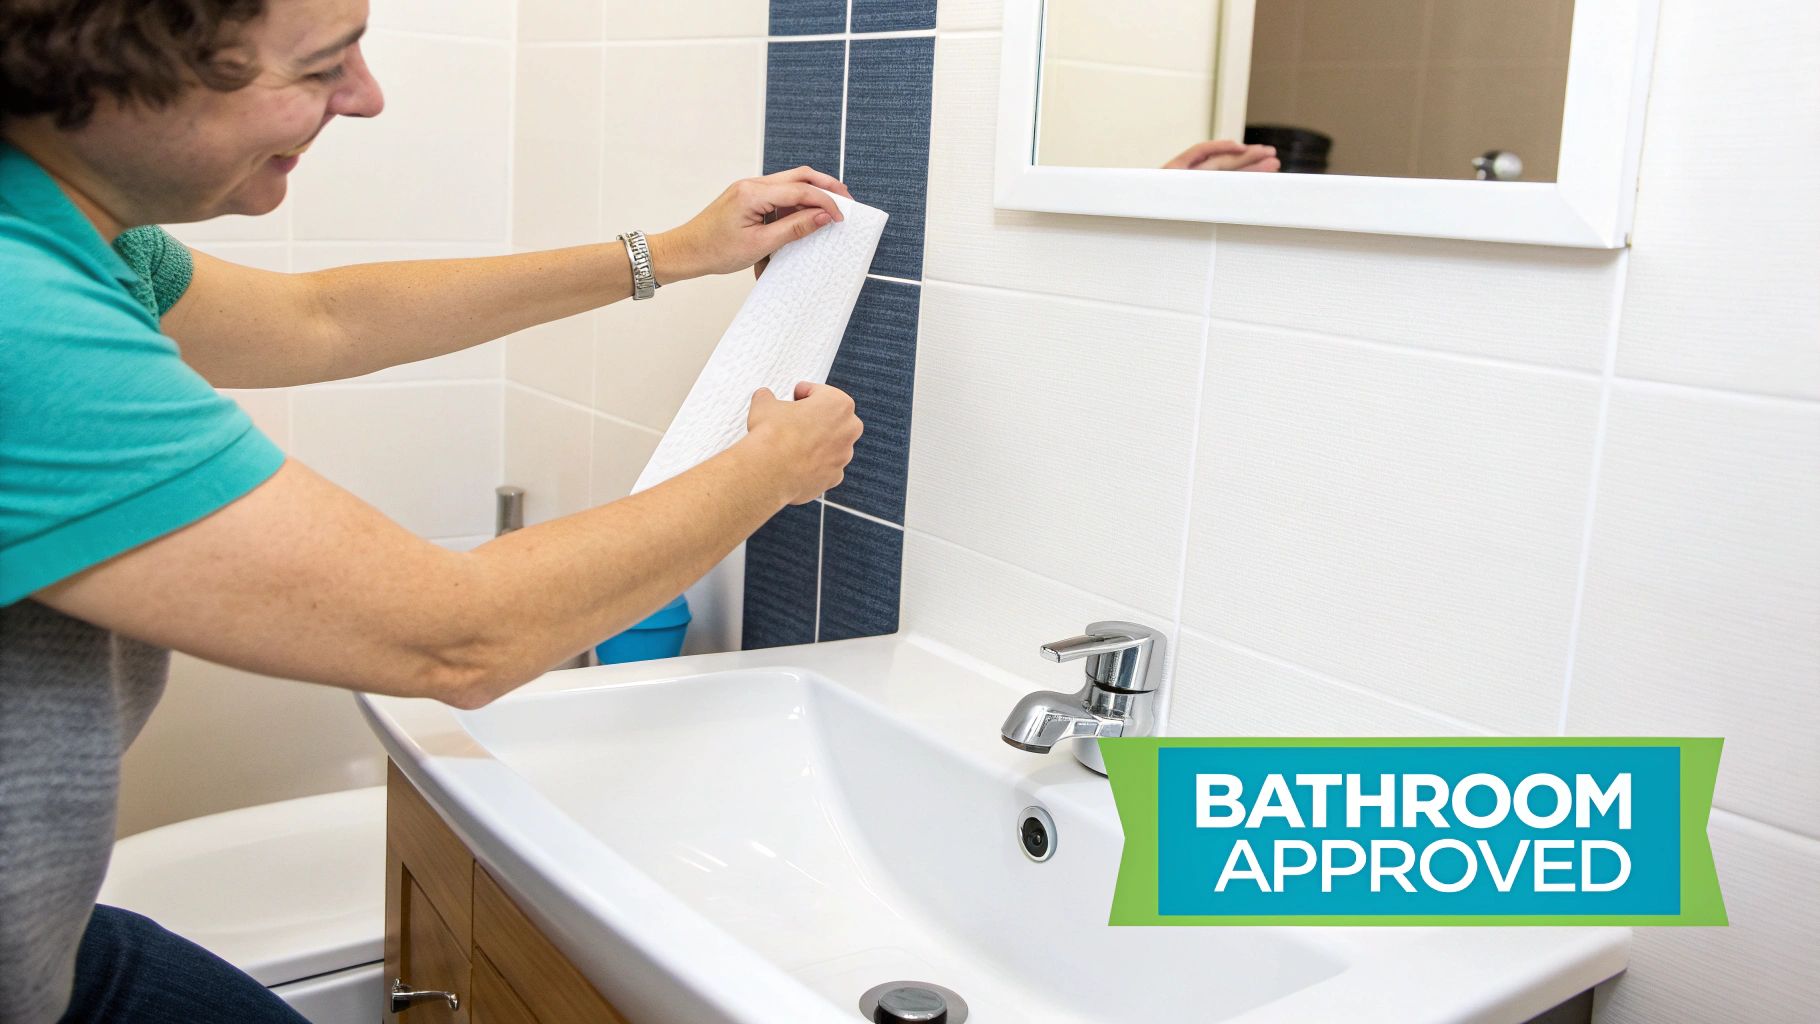
Turning a bathroom from a purely functional room into a personal retreat is something many of us dream of, whether we own or rent. For a long time, the only real options were a lick of paint or the costly, permanent commitment of tiles. Now, peel-and-stick wallpaper has completely changed the game, offering a dynamic and surprisingly affordable alternative.
It's no longer just a clever hack for tenants. It's become a go-to for anyone wanting a quick, dramatic style update without the long-term commitment.
The elephant in the room, of course, is moisture. Bathrooms are uniquely tough environments. The constant steam from hot showers, splashes from the sink, and ever-changing humidity can destroy traditional wallpapers, causing them to bubble, peel, and give up. This is exactly where modern, high-quality peel-and-stick options prove their worth.
Understanding the Key Factors
To get this project right, you need to focus on a few crucial things from the get-go. This isn't just about picking a pattern you love; it's about making a smart choice that ensures your new wall looks flawless for years to come in a high-humidity space.
- The Right Material: Your wallpaper has to be vinyl or a similar non-porous material. This is the number one rule for a bathroom. No exceptions.
- A Stubborn Adhesive: Look for products that boast a strong, high-tack adhesive specifically made to handle moisture and temperature swings.
- Proper Wall Prep: A smooth, squeaky clean, and bone-dry surface is the foundation for a perfect stick. Cutting corners here is the single biggest mistake people make.
- Good Ventilation: Even the best wallpaper needs a helping hand. Decent airflow from an extractor fan or an open window is crucial for managing moisture in the air.
To get a better sense of where peel-and-stick wallpaper fits in the grand scheme of decorating, it helps to see how it stacks up against other choices. This overview of Interior Painting vs. Wallpaper offers some great context on durability, cost, and aesthetics. It’ll give you the confidence that you’re making a sound decision.
If you want to dive deeper into how this amazing product is shaking up interior design, you can learn more about transforming spaces effortlessly with the rise of peel and stick wallpaper.
To make things even easier, I've put together a quick checklist that covers the essentials.
Bathroom Wallpaper Success Checklist
Getting peel-and-stick wallpaper to work in a bathroom isn't about luck; it's about paying attention to the details. This table breaks down the most important factors for a long-lasting, professional finish.
| Factor | Why It Matters | What to Look For |
|---|---|---|
| Material Choice | This is your first line of defence against moisture, preventing bubbling and peeling before they start. | 100% vinyl or vinyl-coated papers. Anything paper-based will absorb steam and fail. |
| Adhesive Quality | The glue needs to be tough enough to hold on tight, even when the room gets steamy. | A high-tack, moisture-resistant adhesive. Check the product description for "bathroom safe" or "splash-proof." |
| Wall Preparation | The wallpaper only sticks as well as the surface underneath it. A perfect canvas means maximum grip. | A clean, dry, and perfectly smooth surface. Consider using a wallpaper primer for best results. |
| Ventilation | Constant dampness will eventually weaken any adhesive. Good airflow helps everything dry out quickly. | A working extractor fan is ideal. If not, make sure to open a window during and after every shower. |
Keep these four points in mind, and you'll be well on your way to creating a bathroom that’s both beautiful and built to last.
Why Material Choice Is Everything in a Humid Environment
Ever worn a paper jacket in a downpour? It's a disaster, right? That’s exactly what happens when you pick the wrong wallpaper for a bathroom. Every hot shower turns the room into your own personal steam sauna, and that constant humidity is the ultimate stress test for whatever's on your walls.
Moisture in the air is the arch-enemy of adhesives and porous materials. It worms its way behind the paper, turns the glue into a weak paste, and before you know it, you're looking at ugly bubbles, curling edges, and eventually, the whole thing peeling away. Traditional wallpapers, especially paper or fabric-based ones, just can't handle it – they act like a sponge.
Vinyl: The Unbeatable Champion for Bathrooms
This is where the material you choose for your peel and stick wallpaper for bathroom walls becomes absolutely critical. For a space this damp, your only real contender is vinyl. A good quality vinyl wallpaper is like a proper raincoat for your walls; it’s non-porous, so steam and splashes simply bead up on the surface instead of soaking in.
It’s no surprise that vinyl options are so popular, making up a huge 36.22% of the UK's wallpaper market. Its water-resistant nature makes it the default choice not just for bathrooms, but for kitchens and utility rooms as well. You can get a better sense of these trends and discover why vinyl is a leading material in the UK. Honestly, choosing vinyl is the secret to a bathroom makeover that actually lasts.
Decoding the Labels: Solid Vinyl vs. Vinyl-Coated
When you start browsing, you’ll see a few different terms thrown around. Knowing what they mean is the key to avoiding that "paper jacket in the rain" moment. Not all vinyl is the same, and the difference really matters in a bathroom.
Here’s a quick rundown of what you’ll find:
- Solid Vinyl Wallpaper: This is the gold standard for a bathroom. The pattern is printed on a layer that’s fused to a solid vinyl backing. It’s tough, completely waterproof, and you can even scrub it clean. If you want the most durable, long-lasting option for a steamy room, this is it.
- Vinyl-Coated Wallpaper: This type has a paper base but is sealed with a liquid vinyl coating on top. It gives you decent water resistance and can handle splashes, but it’s not quite as bulletproof as solid vinyl. It’s a solid choice for a guest loo or a powder room that doesn't see a lot of daily steam.
- Paper-Backed or Fabric Wallpaper: Steer clear of these for any bathroom project. Seriously. They have zero defence against humidity and are practically guaranteed to fail, leaving you with a peeling mess and a lot of wasted effort.
Choosing the right material isn't just a helpful tip; it's the most important rule for a finish that lasts. Solid vinyl creates a total barrier against moisture, making sure your design looks just as good a year from now as it did the day you put it up.
By sticking to solid vinyl or at the very least, a high-quality vinyl-coated paper, you're setting yourself up for success from the get-go. This one decision ensures your lovely new peel and stick wallpaper for bathroom walls won't start bubbling at the first sign of steam, giving you a look you’ll love for years.
How to Select the Perfect Bathroom Wallpaper
So, you've decided on the right material. That was the first hurdle, but now for the really fun part: picking a design that not only stands up to steam but also completely transforms the feel of your bathroom. Think of this as your practical shopping guide for finding the one.
We’ll look past the pretty patterns and show you how to read between the lines on product descriptions to find the features that guarantee a lasting finish. It’s all about making a smart choice, so you end up with a peel and stick wallpaper for bathroom use that’s as durable as it is beautiful.
Decoding Product Descriptions
When you're browsing online, you’ll be hit with a lot of marketing fluff. To find a wallpaper that’s genuinely up to the job, you need to become a bit of a keyword detective. Keep an eye out for specific terms that signal it’s built to perform in damp conditions.
Here’s what you should be looking for:
- Water-Resistant or Moisture-Resistant: This is your absolute baseline. It means the paper can handle ambient steam and the occasional splash without turning into a soggy mess.
- Scrubbable or Washable: Let's be honest, bathrooms get grubby. A scrubbable surface lets you wipe away toothpaste splatters and soap scum without worrying about the pattern fading or rubbing off.
- High-Tack Adhesive: This simply means it has stronger glue. It’s designed to grip tight and stay put, even when the room’s temperature and humidity are all over the place.
These terms are your green light. They tell you the product has been engineered for the unique challenges a bathroom throws at it, separating the proper stuff from the purely decorative papers that are doomed to peel.
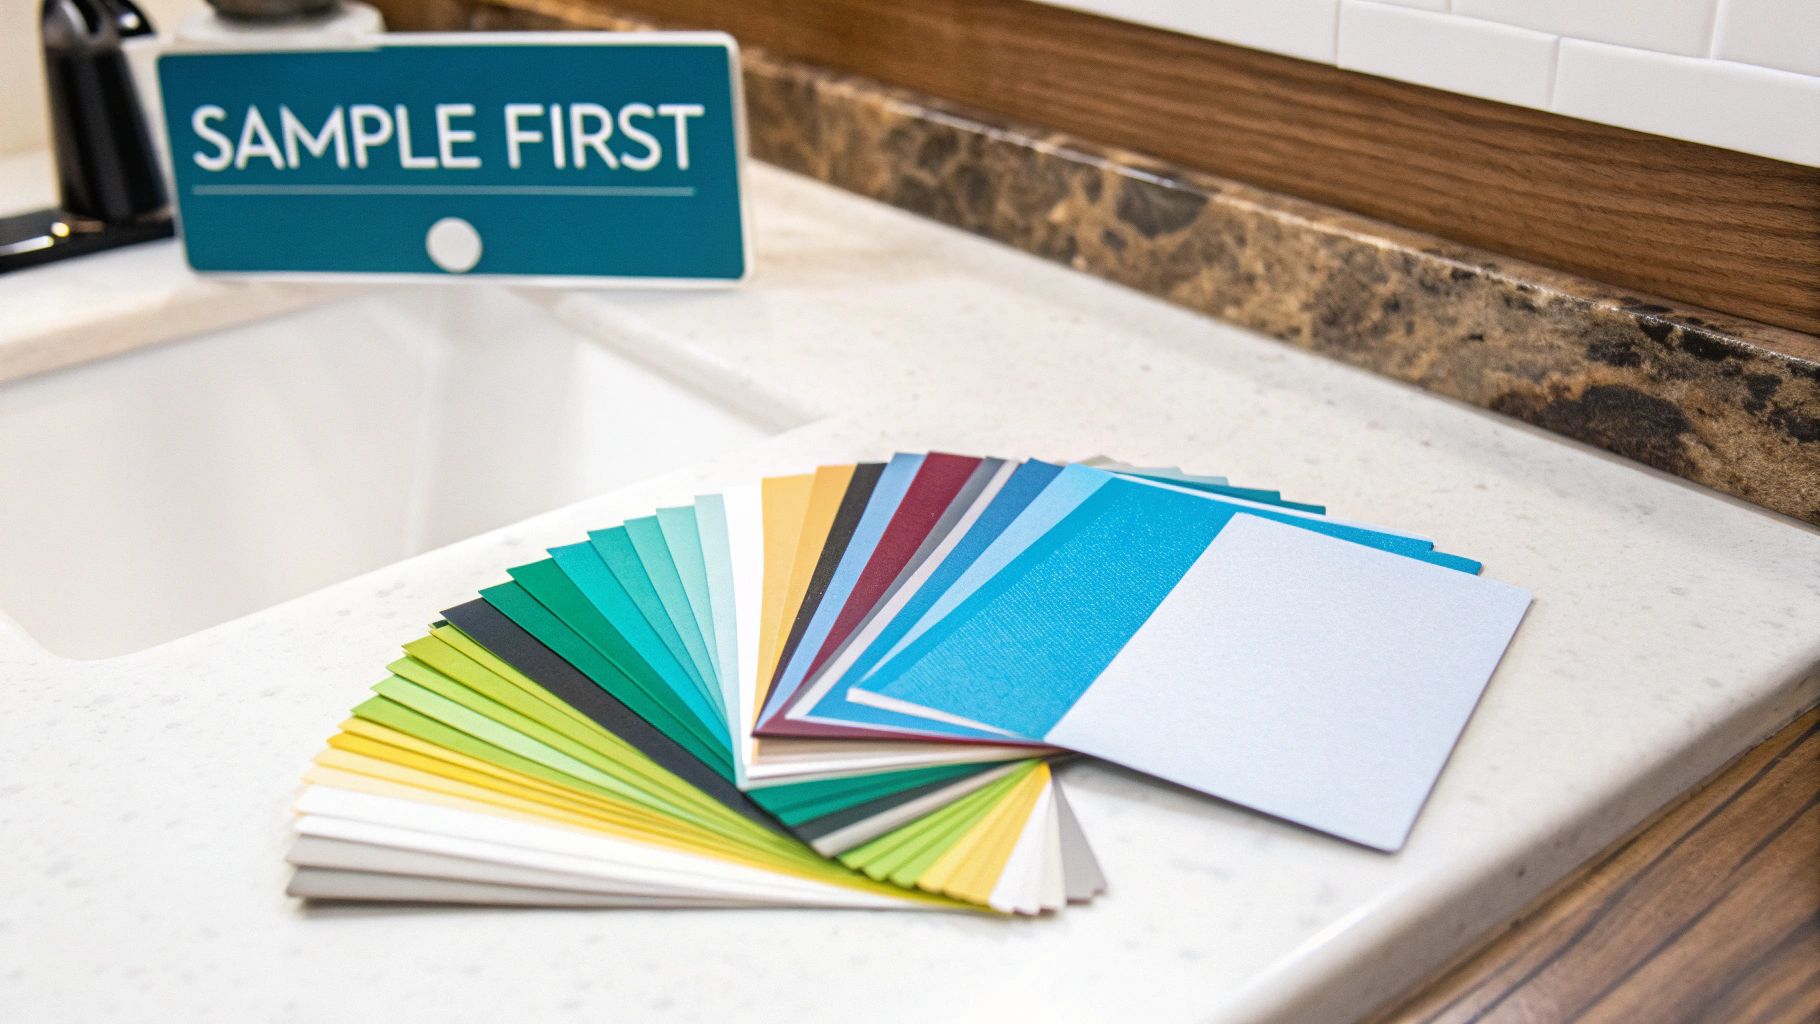
The Crucial Step of Ordering Samples
I can’t stress this enough: never, ever commit to multiple rolls of wallpaper without getting your hands on a sample first. It’s easily the most important part of the process. That small square you see on a website can look completely different under the unique lighting in your own bathroom.
Ordering samples lets you do two vital things. First, you get to see how the colours and the scale of the pattern actually look in your space. Is that bold floral just right, or does it completely overwhelm the room? Does that subtle geometric design just vanish in the dim light?
Secondly, and most importantly, it’s your chance to test the adhesive. Stick the sample to the wall—ideally in a spot that gets a bit steamy—and just leave it there for a few days. See how it’s holding up after a couple of hot showers. This simple test is the ultimate quality check.
Matching Your Wallpaper to Bathroom Trends
Your wallpaper choice is a brilliant opportunity to inject some real personality into what is often a very practical space. Here in the UK, interest in peel and stick options has shot up, quickly becoming the most-searched-for type of bathroom wallpaper. The current trends lean towards bold, nature-inspired designs, with floral patterns seeing a massive spike in popularity every spring.
If you need a bit of inspiration, consider these popular styles:
- Bold Botanicals and Florals: These can turn a plain, functional bathroom into a lush, vibrant sanctuary. They work especially well as a feature wall behind a vanity or a freestanding bath.
- Geometric Patterns: If you’re after a more contemporary, clean look, geometric designs add a sense of structure and visual interest without making a small space feel cluttered.
- Faux Effects (Tile, Wood, Marble): Love the look of expensive materials but not the price tag or the hassle? Faux-effect wallpapers can be incredibly realistic. If this catches your eye, our guide on using tile stickers for a bathroom makeover has some fantastic ideas.
By focusing on those bathroom-specific keywords, always testing a sample, and choosing a design that reflects your own style, you’ll be well on your way to finding the perfect wallpaper for a durable and stunning bathroom retreat.
Preparing Your Walls for a Flawless Finish
Think of hanging your beautiful new peel and stick wallpaper for bathroom walls like painting a masterpiece. You wouldn’t start on a dirty, cracked, or uneven canvas, would you? The same principle applies here. In fact, a stunning, long-lasting finish is about 90% preparation and only 10% application.
Taking the time to get your walls perfectly ready is the single most important thing you can do to guarantee your wallpaper sticks tight and looks seamless for years to come. Skipping these steps is the fastest way to peeling edges and frustrating bubbles down the line.
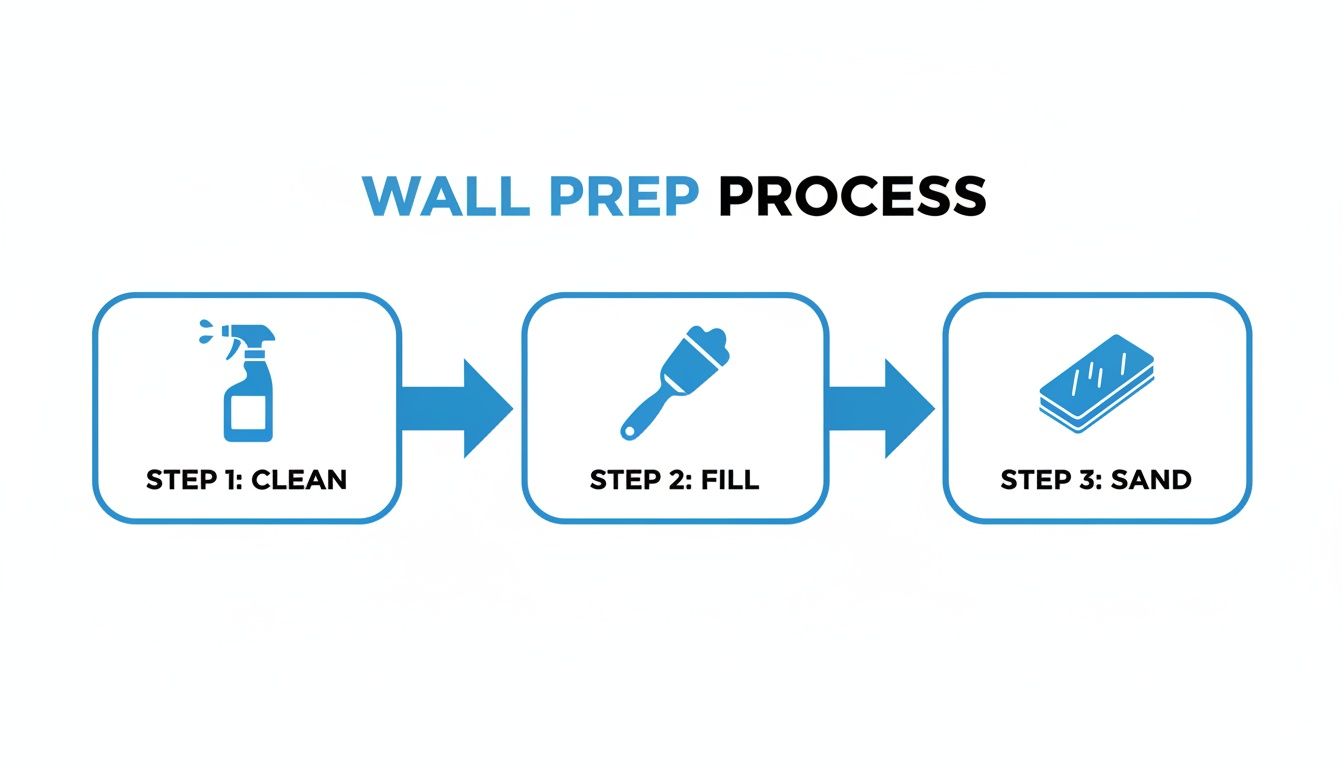
Your Essential Wall Preparation Checklist
Before you even think about peeling off the backing paper, your walls need a bit of TLC. A perfectly smooth, clean, and primed surface gives the adhesive the best possible grip, which is absolutely crucial in a humid bathroom.
Here’s a simple checklist to get a professional result:
-
Deep Clean the Surface: Bathroom walls are magnets for invisible layers of soap scum, hairspray residue, and general grime. Grab some sugar soap or a gentle degreasing cleaner and give the walls a thorough wash. Rinse with clean water and let them dry completely—I'd give it at least 24 hours to be safe.
-
Smooth Out Imperfections: Now, run your hand over the wall. Feel that? Any bumps, old paint drips, or rough patches will show through the wallpaper, trust me. Fill any cracks or holes with a good quality filler. If you've got plaster issues, a key part of getting a truly flawless surface is fixing bubbles in drywall mud before you go any further.
-
Sand for a Silky Finish: Once your filler is bone dry, lightly sand the filled areas and any other rough spots with fine-grit sandpaper. The goal is a surface that feels consistently smooth to the touch. Afterwards, wipe down the entire wall with a damp cloth to get rid of every last speck of dust.
The Non-Negotiable Step: Priming Your Walls
In a high-humidity environment like a bathroom, priming isn't just a suggestion; it's essential. Think of primer as the ultimate double-sided tape between your wall and the wallpaper. It creates a perfect, uniform surface for the adhesive to grab onto, stopping it from just soaking into porous paint or plaster.
Even more importantly, it seals the wall against moisture.
For a bathroom, you absolutely must use a moisture-resistant or mould-proof primer. This creates a protective barrier that stops steam from sneaking behind the wallpaper and weakening the adhesive over time. It’s a small extra step that makes a world of difference.
Tackling Different Wall Surfaces
UK homes have all sorts of walls, and each needs a slightly different touch.
-
Painted Drywall: This is the most common surface you'll find. As long as the paint is in good nick (not flaking or peeling), you can just follow the clean, fill, sand, and prime process above. If you're working with a gloss or satin finish, give it a quick scuff with sandpaper first. This roughs up the surface just enough to help the primer stick properly.
-
Bare Plaster: New plaster is incredibly thirsty and will suck the moisture straight out of the wallpaper adhesive, causing it to fail almost immediately. You have to seal it first with a proper plaster sealer or a mist coat (just a watered-down coat of matt emulsion), followed by your moisture-resistant primer.
-
Applying Over Tiles: Yes, you can put peel and stick wallpaper for bathroom tiles directly over existing ones! The trick is creating a smooth surface. First, clean the tiles and grout lines meticulously to get rid of every bit of soap scum. For the best result, skim a thin layer of filler over the grout lines to bring them level with the tile face, then sand until smooth and prime the whole area.
Your Step-By-Step Installation Guide
Right, with your walls prepped and ready, we can get to the fun part – actually hanging the wallpaper and seeing your design come to life. Don't be daunted; putting up peel-and-stick wallpaper in a bathroom is a fantastic weekend DIY project. I'll walk you through it, step-by-step, so you feel confident from the first panel to the very last.
Before you even think about peeling, remember that a flawless finish all starts with a perfectly prepared surface.
As you can see, a clean, smooth wall is non-negotiable. It gives the adhesive the best possible chance to grip properly and stay put.
The Installation Process Made Simple
First, gather your kit. You'll need a measuring tape, a spirit level, a sharp craft knife (and spare blades!), and a plastic smoother or a squeegee. Got them? Let's begin.
-
Measure and Cut Your First Piece: Measure the height of your wall and cut your first strip of wallpaper, adding an extra 10cm or so. This little bit of overhang at the top and bottom gives you wiggle room for a perfect, crisp trim later on.
-
Establish a Straight Guideline: This is the single most important step. Whatever you do, don't assume your walls or ceiling are perfectly straight – they rarely are! Use a spirit level to draw a faint, vertical pencil line (a plumb line) about 50cm from the corner. This line, not the wall's edge, will be your guide to ensure the first piece hangs perfectly straight.
-
Peel and Position: Gently peel back about 30cm of the backing paper from the top of the roll. Line up the edge of the wallpaper with your pencil guideline, letting the extra 5cm overlap onto the ceiling.
-
Smooth It Down: Now, take your smoother and, working from the centre outwards, press the wallpaper firmly against the wall. This technique pushes any pesky air bubbles out towards the edges. Keep pulling the backing paper down in manageable sections, smoothing as you go. Slow and steady wins the race here.
-
Match the Pattern: For the next panel, bring it up to the edge of the first, taking a moment to align the pattern perfectly. Most manufacturers suggest a tiny overlap (often 1-2mm) which helps prevent gaps from appearing if the vinyl shrinks over time. Always double-check the instructions that came with your roll.
-
Trim the Excess: Once a panel is up and smoothed, use your craft knife and a straight edge to neatly trim the excess paper at the ceiling and skirting board. A fresh, sharp blade is your best friend for getting a clean cut without any tearing.
Navigating Tricky Spots
Corners and plug sockets always look more intimidating than they are. With a bit of patience, they're surprisingly simple.
- For Internal Corners: Smooth the wallpaper right into the corner, letting it run onto the adjoining wall by about 2cm. Then, start your next piece by overlapping it directly in the corner. Use your spirit level again to make sure this new piece is perfectly vertical.
- For Outlets and Switches: Safety first! Turn off the electricity at the consumer unit. Paper straight over the socket, then use your knife to carefully cut an 'X' from corner to corner over the fixture. You can then trim around the edges and smooth the paper down before screwing the faceplate back on.
The real beauty of peel-and-stick wallpaper lies in its forgiving nature. If you misalign a panel, you can gently peel it back and reposition it without losing adhesion—a massive advantage over traditional pasted papers where a mistake can be a real headache.
Even with the best preparation, you can run into a few snags. Here’s a quick troubleshooting guide for the most common issues.
Common Installation Problems and How to Fix Them
| Problem | Cause | Solution |
|---|---|---|
| Bubbles Appearing | Air trapped between the wall and wallpaper during application. | Use the smoother to push bubbles to the edge. For a stubborn one, prick it with a pin and smooth it flat. |
| Edges Peeling Up | Wall wasn't perfectly clean or smooth; not enough pressure applied. | Gently lift the edge, wipe the wall with a dry cloth, and press down firmly. A little extra wallpaper adhesive can help. |
| Pattern Misalignment | Not starting with a perfectly vertical plumb line; stretching the material. | Gently peel back and reposition. Avoid pulling or stretching the vinyl, as this can distort the pattern. |
| Gaps Between Panels | Panels were butted together, and the material shrank slightly. | Overlap panels by 1-2mm as per the manufacturer's instructions to accommodate for any minor shrinkage. |
Tackling these little issues as they crop up will ensure your final result is something you can be proud of.
The Simple, Stress-Free Removal Process
One of the biggest draws, especially if you're renting, is just how easily this wallpaper comes off. When you fancy a change, just find a top corner and slowly pull the panel downwards at a 45-degree angle.
If you hit a stubborn patch, a quick blast with a hairdryer on a low setting will soften the adhesive, helping it peel away cleanly. You'll be left with a clean wall, no sticky residue, and no damage to the paint underneath. It’s the ultimate tenant-friendly decorating solution.
Keeping Your Wallpaper Looking Great for Years
Right, you’ve done the hard part. The new peel and stick wallpaper is up, and your bathroom looks fantastic. The job isn't quite finished, though. Now it's all about making sure it stays looking that good for the long haul. A little bit of care goes a long way in turning a quick style update into a lasting feature.
The biggest challenge in any bathroom is always going to be moisture. Even the best water-resistant vinyl needs a bit of help to stand up to the daily steam from showers and baths. Over time, that constant humidity is what can start to mess with the adhesive.
This is especially true now, with so many of us getting stuck into DIY. The UK wallpaper market was valued at around USD 107.8 million in 2023, and peel-and-stick options are a huge part of that trend. You can read more about the rising popularity of wallpaper in the UK on grandviewresearch.com to see just how popular this stuff has become.
Why Ventilation is Your Wallpaper's Best Friend
Good airflow is non-negotiable. Think of it as your first line of defence. It whisks away all that steam before it has a chance to settle on your walls and work its way into the seams of the wallpaper.
Getting into a good ventilation habit is easy:
- Use the Extractor Fan: Flick it on before you get in the shower and let it run for a good 15-20 minutes afterwards. This clears the air properly.
- Crack Open a Window: If you don’t have a fan, opening a window during and after you shower does the same job. It gives all that humid air an escape route.
Easy Cleaning and Simple Repairs
One of the best things about vinyl wallpaper is how easy it is to keep clean. Most are designed to be scrubbable, but you rarely need to be that aggressive.
For day-to-day cleaning, a soft, damp cloth with a tiny bit of mild cleaner is all you need. A drop or two of washing-up liquid in some water works perfectly for wiping away toothpaste splashes or soap marks. Just steer clear of harsh chemical cleaners or anything abrasive, as they can scratch the surface or fade the design.
You might eventually spot a corner or a seam lifting ever so slightly, particularly near the shower. Don't worry, it's a simple fix. Just get a bit of wallpaper seam adhesive, dab a tiny amount behind the lifted edge, press it down firmly, and wipe any excess away with a damp cloth.
Catching these little things early stops them from becoming a bigger issue down the line. And when you decide it's time for a change, taking it down is just as straightforward as putting it up. Our guide on how to remove a wall sticker has some great tips for getting it off without any fuss.
Your Questions Answered
Right, let's tackle some of the common questions that pop up when you're thinking about using peel-and-stick wallpaper in a bathroom. Getting these sorted will help you feel confident you're making the right choice for your space.
Can I Put Peel-and-Stick Wallpaper Straight Onto Bathroom Tiles?
Yes, you can, but the secret to a great finish is all in the prep work. You can't just stick it straight on and hope for the best.
First, the tiles need to be squeaky clean – no soap scum, no grease, nothing. If your grout lines are deep, they will almost certainly show through, creating a grid pattern under the paper. To avoid this, you'll want to fill the grout lines with a skim coat of filler and sand it perfectly smooth once it's dry. This gives you a flat, even surface to work on. Some of the thicker, high-quality vinyl wallpapers are a bit more forgiving, but I'd always recommend a test patch in a less visible spot first to see how it looks and sticks.
How Long Does This Stuff Actually Last in a Bathroom?
If you choose the right material and install it properly in a bathroom that has decent ventilation, it can last for years. Its longevity really comes down to the quality of the wallpaper's adhesive, how well you prepped the walls, and the level of steam it has to deal with every day.
In a typical UK bathroom with proper care, a good quality peel-and-stick wallpaper for bathroom use can easily look great for 3-5 years, and sometimes even longer. It’s a brilliant and worthwhile way to update your decor.
Is This a Smart Choice for Renters in the UK?
Absolutely. In fact, it's one of the main reasons peel-and-stick has become so popular. It’s designed to come off without a fight, letting you put your own stamp on a rented bathroom without waving goodbye to your deposit.
It’s always wise to have a quick scan of your tenancy agreement, just to be sure there are no specific rules about wall coverings. When it’s time to move on, the wallpaper should peel away cleanly. Here's a top tip: gently warm the surface with a hairdryer on a low setting as you peel. This softens the adhesive and makes removal even smoother, leaving the wall exactly as you found it.
Ready to transform your bathroom with a stylish and durable design? At Quote My Wall, we offer a huge range of premium vinyl wall stickers, tile stickers, and wallpapers perfect for any room in your home. Discover your perfect pattern today at https://www.quotemywall.co.uk.