

Are Tile Stickers Any Good? Honest UK Homeowner Guide
You're staring at a tired row of kitchen tiles and wondering whether a quick peel-and-stick makeover will save the room, or leave you scraping adhesive from the grout a few months later. The appeal is obvious. Tile stickers promise a fresh pattern, little mess and far less disruption than removing tiles, preparing a wall and starting again.
So, are tile stickers any good? Yes, but only in the right place. They're useful decorative coverings for clean, flat, low-moisture surfaces. They're a poor substitute for properly fixed tiles in shower areas, on hard-working floors or anywhere you need a permanent, waterproof finish. The trade-off is durability versus moisture, and that's where many cheerful online reviews stop short.
Why UK Homeowners Are Asking If Tile Stickers Work
A renter might be looking at dated avocado-green tiles in a kitchen and facing strict rules about making permanent changes. A homeowner might be comparing the disruption of retiling with the modest price of a pack of decorative stickers. In both cases, the question sounds simple: can a surface covering make the room look better without creating a maintenance problem?
The answer depends less on the pattern and more on the surface beneath it. A sticker applied to a smooth, degreased tile in a dry splashback area has a reasonable chance of delivering a tidy cosmetic refresh. The same product placed across damp grout, a textured wall or a shower enclosure is being asked to do a job it was never designed to do.
Practical rule: Treat tile stickers as a reversible decorative layer, not as a new waterproofing system.
The UK tiling industry has long separated wall tiles, floor tiles and wet-area installations because each environment demands different fixing performance. The TTA guidance on tile adhesives and installation requires at least 85% adhesive coverage in dry areas and 100% coverage on floors and wet areas. It also says wet internal locations such as showers need solid-bed fixing and void-free contact under the tile. Peel-and-stick coverings use pressure-sensitive backing instead of bonded tile adhesive, so they don't offer the same technical system.
That doesn't make them useless. It defines their proper role. They can disguise an unattractive finish, suit a rental where removability matters and provide a quick change in a low-risk area. They can also become a false economy if you choose them for constant steam, direct water or heavy wear because the initial price looks attractive.
The sensible question isn't whether stickers are universally good or bad. Ask whether they suit your surface, your room and your planned length of use.
What Tile Stickers Actually Are
Tile stickers are thin self-adhesive surface coverings, usually made from vinyl or PVC, with a printed tile-effect design and a pressure-sensitive adhesive backing. You peel away the liner, position the sticker and press it onto the existing surface. Some products are supplied as individual tile shapes, while others cover several tiles or span grout lines.
That construction makes them different from ceramic or porcelain. Real tiles are rigid, fired materials fixed with tile adhesive and normally finished with grout. They add physical depth, create a hard wearing surface and form part of a properly prepared tiling system. Stickers add almost no structural depth and don't strengthen a damaged substrate.
They also differ from tile paint. Paint coats the surface and depends on preparation, primer and curing to create a durable film. A sticker remains a separate layer on top of the tile, which is why removal can be possible in a rental. It also explains why a lifting edge, dirty grout line or damp patch can undermine the whole result.
The layers that affect performance
Most tile stickers combine three working layers:
- Design layer: The printed pattern creates the appearance of encaustic, metro, geometric or plain tiles.
- Protective finish: A laminate or surface coating helps the print resist everyday wiping and minor splashes.
- Adhesive backing: Pressure-sensitive adhesive bonds to the prepared surface when you apply firm, even pressure.
Gloss finishes can look bright and are easy to wipe, while matte and textured finishes may create a more convincing tile-like appearance. The terms tile stickers, peel-and-stick tiles and tile decals are often used interchangeably, but products vary in thickness, finish, backing and adhesive strength. Read the installation instructions rather than assuming every product will behave identically.
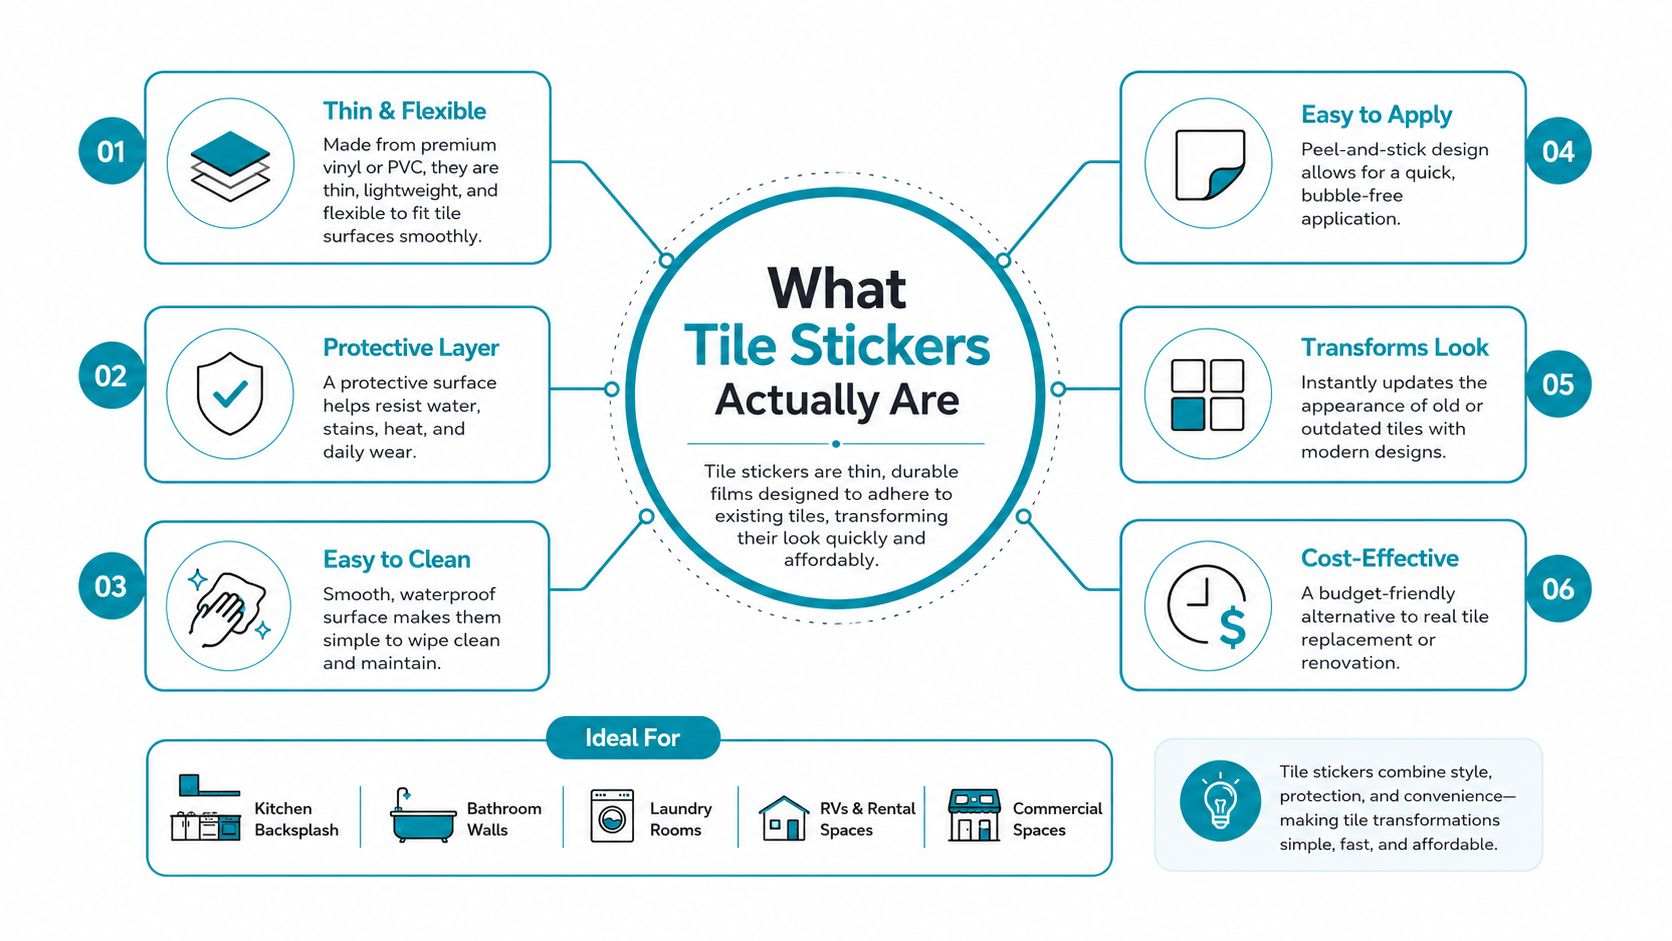
The right mental model is straightforward: a tile sticker mimics the look of a tile, not its technical performance. It's a cosmetic overlay, and its success depends heavily on the condition and cleanliness of the surface underneath.
Durability and Water Resistance in Real UK Homes
A tile sticker can survive a kitchen splashback and fail quickly inside a shower. The difference is repeated exposure, not the label on the packet. Splashbacks face occasional water, steam and grease. Shower walls receive direct spray, condensation and regular cleaning, so they demand a much higher standard of performance.
British tiling guidance requires 100% adhesive coverage for conventional tiles in wet areas. Shower locations also need solid-bed fixing with void-free contact, as explained in the Tile Association's technical adhesive guidance. Stickers do not create that bonded fixing layer or form a tiled shower system. Their pressure-sensitive backing can handle splashes after careful installation, but it is not designed to replace proper wet-area construction. For a bathroom-specific assessment, see our bathroom tile sticker waterproof guide.
What causes stickers to fail
Adhesive needs a smooth, clean, dry and non-porous base. Soap film, cooking grease, dust, damaged glaze and moisture all reduce contact between the backing and the tile. Recessed, crumbling or damp grout can leave small unsupported sections, giving water and air a route behind the sticker.
House Beautiful's advice on using tile stickers reaches the same practical conclusion. Smooth, clean, dry, non-porous tiles provide the strongest starting point, while dirt, grease, soap residue and surface damage weaken adhesion. Floors create a harsher test than walls because grit, foot traffic, abrasion and repeated cleaning attack both the surface and its edges.
Typical failure patterns include:
- Edge lifting: Corners and seams curl when water repeatedly reaches the perimeter.
- Bubbling: Trapped air, grease or an uneven base creates raised areas, which become more obvious with heat and steam.
- Peeling at grout lines: Recessed or damaged grout leaves parts of the sticker without firm support.
- Surface wear: Floor versions face scuffs, grit, cleaning and foot traffic that wall stickers rarely experience.
- Cleaning damage: Harsh products and forceful scrubbing can dull the printed finish or weaken the bond.
The distinction between water-resistant and waterproof matters. Water-resistant products may tolerate splashes or occasional wiping under the manufacturer's stated conditions. Waterproof implies resistance to sustained exposure. A splashback description does not make a sticker suitable for a shower enclosure.
The independent UK testing covered in Testix's mosaic tile review shows why an attractive installation day is not enough. Some peel-and-stick products developed curling edges after repeated cleaning and struggled to adhere in humid areas. Treat bathroom stickers conservatively, particularly where ventilation is poor or water reaches the seams.
| Room / Condition | Expected Lifespan | Primary Failure Risk |
|---|---|---|
| Dry wall or feature area | Short to medium term | Surface contamination or lifting edges |
| Kitchen splashback with occasional splashes | Short to medium term | Grease, heat and repeated cleaning |
| Bathroom wall outside direct spray | Variable | Steam, condensation and poor ventilation |
| Shower enclosure or bath surround | High risk | Direct water, humidity and adhesive breakdown |
| Floor with regular foot traffic | Highly variable | Abrasion, grit, seams and edge lifting |
There is no dependable universal lifespan. Adhesive quality, preparation, traffic and moisture exposure vary too widely. Ideal Home's guidance on floor tile stickers gives a broad estimate of 5 to 25 years for floor products under differing conditions. It also identifies sealed concrete, smooth tiles and vinyl flooring as suitable substrates, while warning that dust, moisture and cleaning residue reduce adhesion. That range supports a practical conclusion: use stickers where replacement is manageable, and avoid relying on them where failure would expose the room to continual water.
Tile Stickers Versus Real Tiles and Other Alternatives
Tile stickers win on speed and initial effort. Real tiles win on permanence and wet-area performance. Tile paint and re-grouting sit between those choices, but they solve different problems.
Traditional tiling involves more than buying the tile. UK retail guidance describes adhesive consumption at roughly 2 to 3 kg per square metre for walls and 4 to 6 kg per square metre for floors, as shown in Wickes' tile adhesive guidance. You also need suitable substrate preparation, adhesive selection, grout, tools and installation time. The same guidance reflects the need to work in controlled areas, with open times and coverage managed carefully.
That complexity is the reason stickers appeal to renters and homeowners who want a quick cosmetic change. A small-area adhesive product can cover up to 11 square metres in one unit, according to the same UK retail source. The saving is real at the point of purchase, but replacement becomes part of the calculation if the environment is demanding.
| Option | Cost per m² | Lifespan | Installation Time | Skill Level | Best For |
|---|---|---|---|---|---|
| Tile stickers | Low initial cost | Short to medium term, condition dependent | Fast | Beginner | Dry walls, splashbacks and temporary updates |
| Real ceramic or porcelain tiles | Higher total project cost | Long term with correct installation | Longer and disruptive | Intermediate to professional | Permanent walls, floors and wet areas |
| Tile paint | Moderate material cost | Depends on preparation and exposure | Preparation and drying required | Beginner to intermediate | Sound existing tiles needing a colour change |
| Re-grouting | Low to moderate material cost | Depends on grout condition and moisture | Moderate | Beginner to intermediate | Sound tiles with tired or damaged grout |
Real tiles also bring hidden project costs. Removing old tiles can expose substrate damage, and professional labour may be sensible for complicated layouts, floors or wet rooms. For a permanent bathroom renovation, compare the complete installed project rather than the sticker price of a pack.
If you're weighing a shower makeover, a guide to what homeowners actually pay for showers can help you think about the wider renovation budget, including the work that sits behind the visible tiles. It isn't a reason to spend more than you can afford. It's a reminder that a shower is a water-management project, not just a pattern change.
Tile paint can be a practical middle ground when the existing tiles are firmly attached and the surface is suitable for coating. It still needs thorough cleaning, careful preparation and proper curing, so it isn't as immediate as a sticker. Re-grouting is even more limited, but it can transform a tired installation when the tiles themselves are sound. It won't hide cracked tiles, poor layout or a damaged substrate.
Choose stickers when speed, reversibility and appearance matter more than a permanent finish. Choose real tiles when the area receives sustained water, heavy wear or needs to last through a long ownership period.
Best Rooms and Use Cases for Tile Stickers
The best application is usually a kitchen splashback behind a sink or hob, provided the stickers are kept away from direct flame and installed on a sound, smooth surface. That area experiences splashes and steam, but it isn't normally submerged or constantly sprayed. Grease remains the main enemy, so cleaning and surface preparation matter as much as the sticker itself.
A bathroom wall outside the shower zone can work if the room has effective ventilation and the wall dries between uses. A shower enclosure, bath surround or wall directly behind a shower head is a different proposition. Persistent steam, standing water and repeated wiping put pressure on the edges and seams, and early lifting can allow moisture behind the covering.
For product-specific kitchen placement, this guide to stickers for the kitchen is useful because it keeps the discussion focused on splashbacks and decorative applications rather than treating every tile surface as interchangeable.
Match the covering to the room
- Rental kitchens: A sensible choice for a reversible visual update, particularly when the existing tiles are flat and glazed. Keep spare stickers if the design is difficult to match later.
- Feature walls: A strong candidate because there's little abrasion and usually limited moisture. Decorative patterns can make a noticeable difference without building work.
- Fireplace surrounds: Suitable only on surfaces that stay within the product's stated heat limits and away from direct flame or intense radiant heat. Check the manufacturer's instructions before applying anything.
- Stair risers: Low foot contact makes risers more forgiving than floors, although edges still need careful trimming and firm pressure.
- Bathroom walls outside direct spray: Possible in a well-ventilated room, but don't confuse occasional dampness with a wet-room installation.
- Floors: Use caution. Foot traffic, grit, chair legs and cleaning create abrasion, and the floor versions face much higher wear than wall products.
- Exterior walls: Avoid them unless the product is specifically designed and rated for outdoor exposure. Temperature changes, damp and weather movement create a hostile surface.
Use a simple filter before buying. Low moisture, low abrasion and a temporary need point towards stickers. High heat, direct spray, standing water or heavy wear point away from them. A sticker can make a dull backsplash presentable. It won't correct loose tiles, leaking grout, damp behind the wall or a failed waterproofing detail.
How to Install and Maintain Tile Stickers Properly
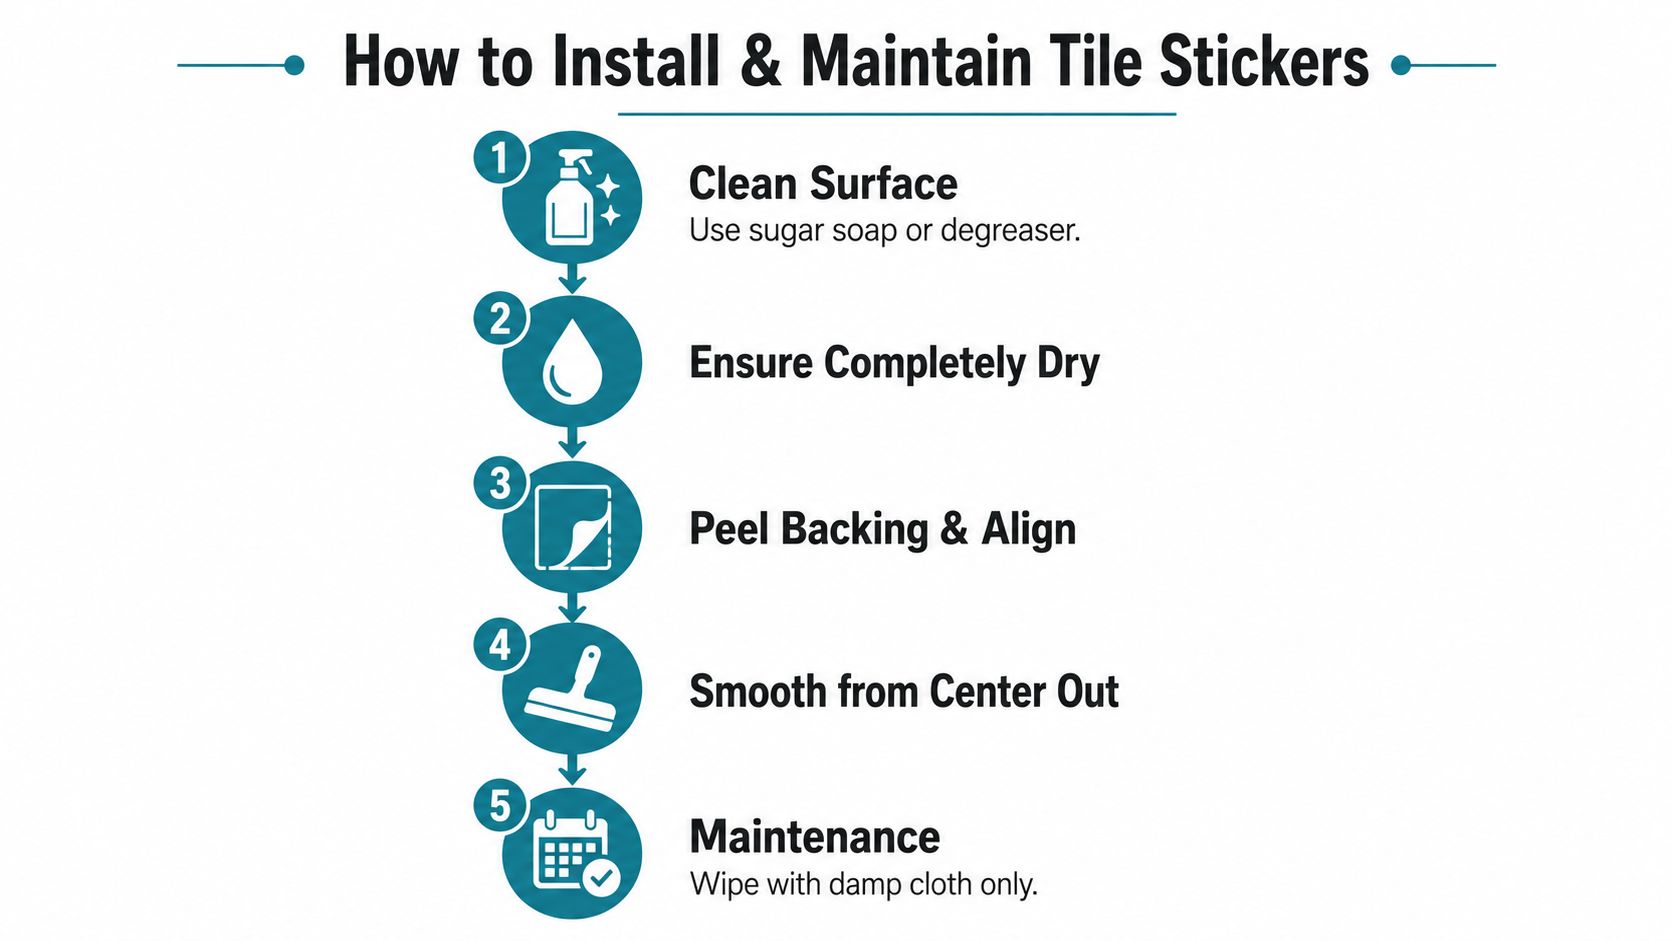
Most sticker failures start before the first piece is applied. Clean the tiles with sugar soap or a suitable degreaser, remove grease and soap residue, and pay particular attention to grout edges. Silicone residue is especially troublesome because the adhesive won't form a dependable bond over it.
Allow the surface to dry completely. In a damp room, don't rely on the wall feeling dry to the touch. Ventilate the space and give moisture time to leave the tile and grout. A dry, stable base gives the pressure-sensitive adhesive a much better chance of making full contact.
Prepare, align and press
Measure the area and dry-fit the stickers before removing any backing. Check the pattern direction, tile spacing and awkward cuts around sockets, pipes and corners. Start with a visible full tile where possible, then use a sharp utility knife and a straightedge for the partial pieces.
Peel back a small section of backing rather than exposing the entire adhesive surface at once. Align the top edge, press gradually and smooth from the centre outwards with a squeegee, brayer or old credit card. That technique pushes air towards the edges instead of trapping bubbles under the middle.
Grout-line coverings need careful alignment because one misplaced sheet can make the whole pattern look crooked. Individual tile decals are more forgiving, but they still need full contact across the tile face and neatly trimmed edges.
For floors or other peel-and-stick surfaces, Flacks Flooring's simple peel and stick flooring guide offers useful preparation and fitting principles, although floor applications still demand more attention to wear and edge protection than a wall splashback.
Clean finished stickers with a soft damp cloth and a mild, non-abrasive product. Avoid stiff brushes, abrasive creams and bleach-heavy cleaners unless the manufacturer specifically approves them. Repeated aggressive scrubbing can damage the print and work moisture into the seams.
If a small edge starts lifting, press it down after cleaning and drying the area. A tiny amount of clear adhesive may stabilise a minor problem, but it can make later removal harder. If several edges lift, bubbles spread or moisture has reached behind the covering, replacement is usually the honest solution. Don't keep patching a failing surface in a shower zone.
For a kitchen backsplash layout and application ideas, this stick-on tile backsplash guide can help you plan the arrangement before committing to the full wall.
Deciding If Tile Stickers Are Right for Your Home
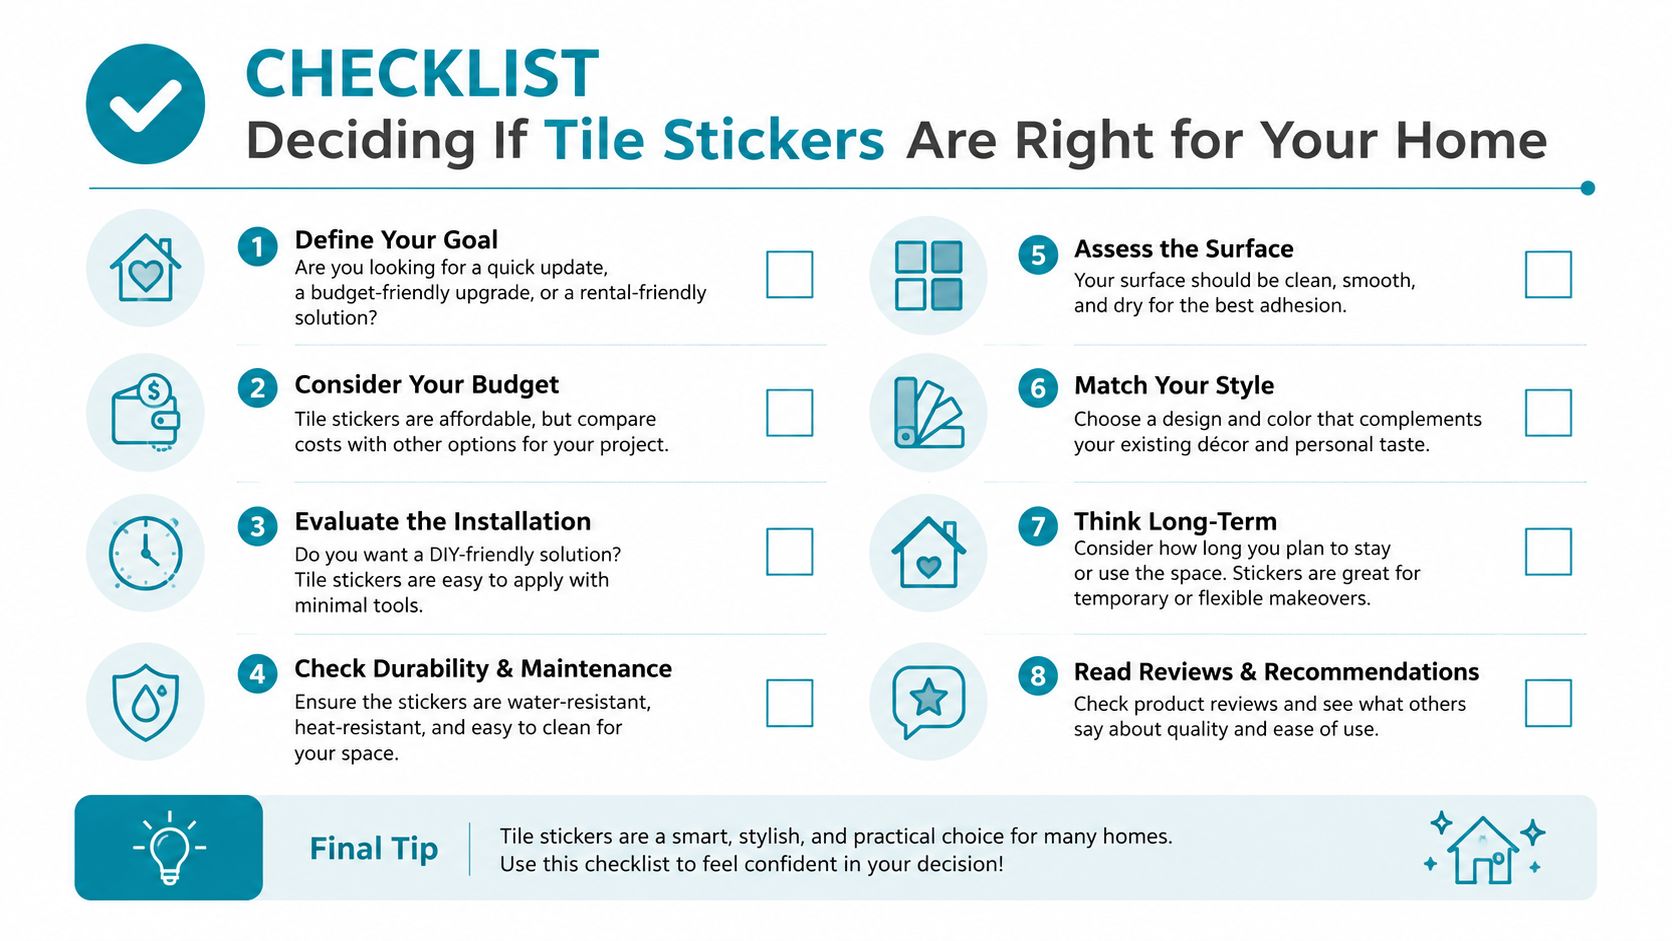
Tile stickers make sense when you want a quick, affordable and reversible cosmetic change. They're particularly suited to rental kitchens, dry feature walls and sound existing tiles that need a fresh pattern rather than structural repair.
Ask yourself four questions:
- How long will you stay? A temporary update is easier to justify than a finish you expect to keep indefinitely.
- How wet is the room? Occasional splashes are manageable. Direct shower spray and standing water are high-risk.
- Are the existing tiles flat and sound? Stickers won't repair loose tiles, deep grout recesses, cracks or damp.
- What happens if they fail? If peeling would be inconvenient or costly to remove, choose a more durable coating or proper tiling system.
The cost comparison needs to include replacement, not just the first purchase. A UK rental guide gives an example of roughly £50 for three rolls of temporary tile covering compared with around £800 for professional installation. That makes stickers compelling for a short-term makeover, but there is limited neutral information on how replacement frequency, cleaning products and several years of use alter the final value. See the UK rental comparison as an illustration of the upfront gap, not a guarantee of long-term savings.
My verdict is direct. Buy tile stickers for appearance, convenience and reversibility in low-moisture areas. Don't buy them as a permanent answer for a shower, a busy floor or a damp problem. Prepared properly and used within their limits, they're a useful decorating shortcut. Used outside those limits, they're a cheap finish that becomes another job.
Quote My Wall offers removable, wipeable tile stickers for kitchen and bathroom updates, alongside other vinyl coverings for home projects. Visit Quote My Wall to browse designs that suit a low-moisture splashback or temporary decorative refresh, and check the product guidance before ordering for a demanding area.