
World Map Wallpaper Decal Installation Made Easy
There's something uniquely transformative about a world map wallpaper decal. It's more than just decor; it's a statement piece, a source of inspiration, and a brilliant way to bring a sense of adventure right into your home. It can instantly elevate a room, turning a plain wall into a testament to global curiosity.
Choosing the Right World Map Decal for Your Space
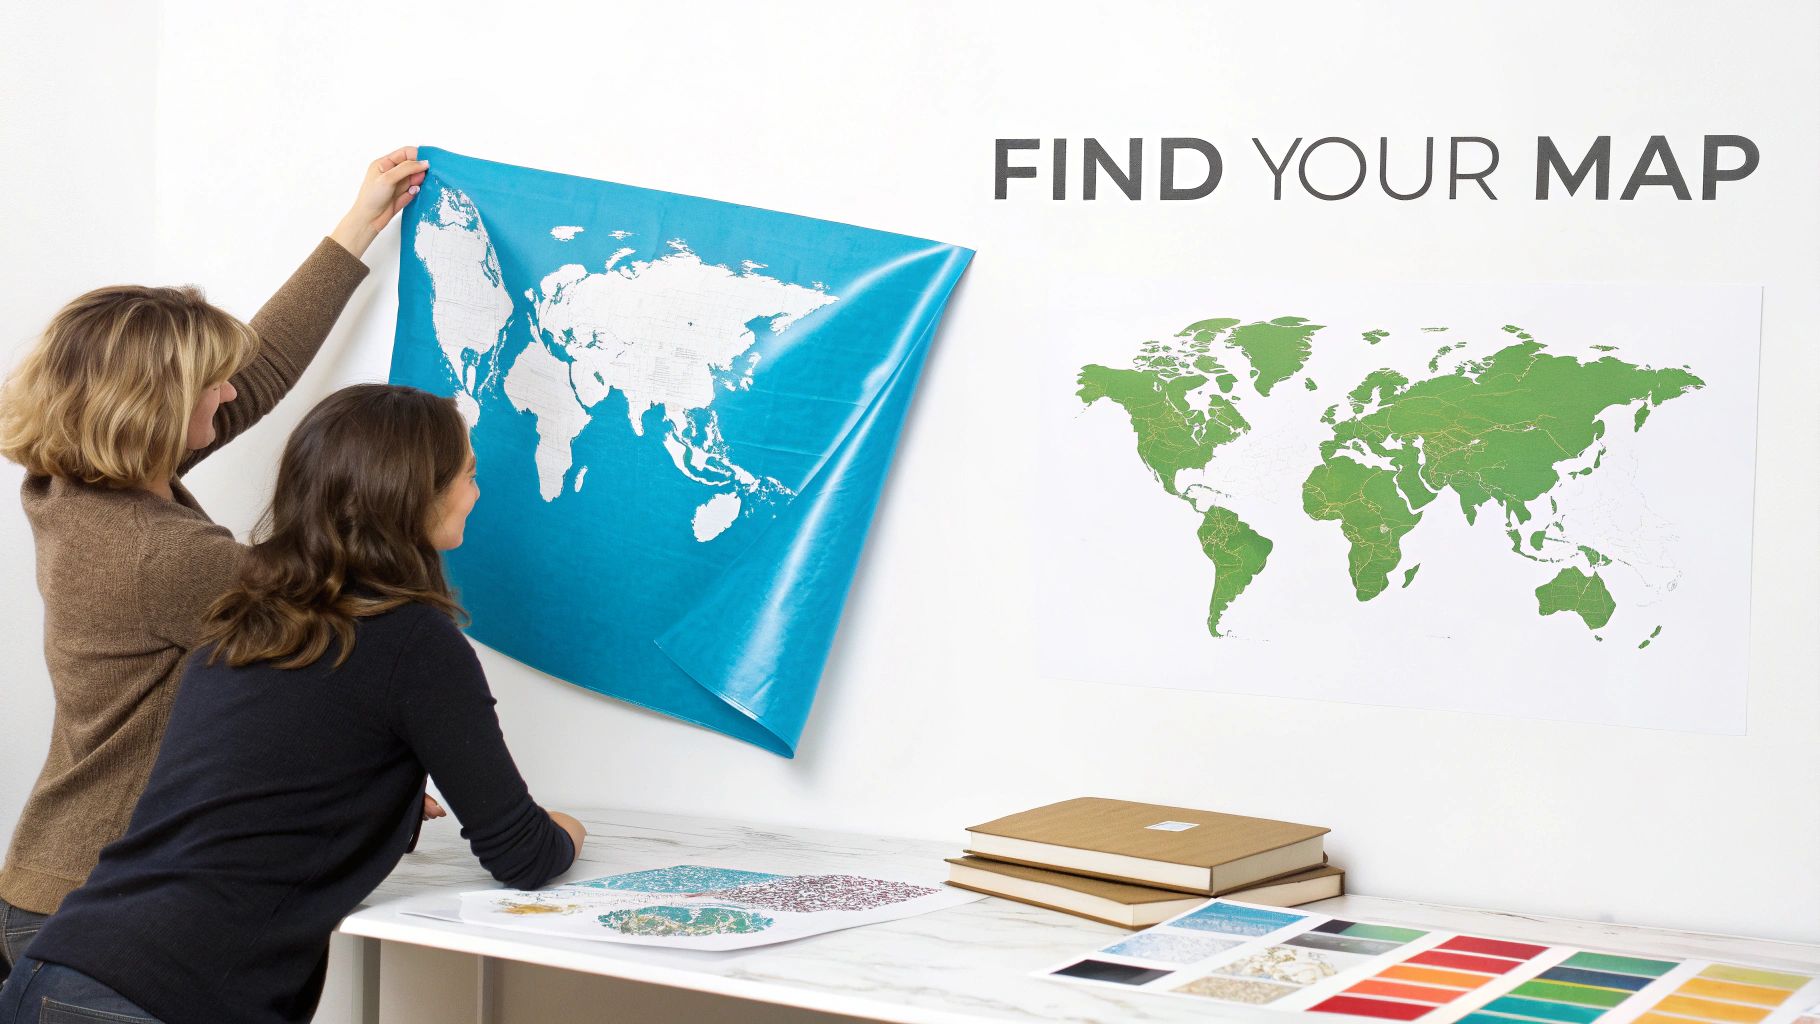
Before you even think about measuring your wall, the first real step is picking the perfect decal. This decision is about more than just a pretty design. It’s about finding a material, finish, and style that genuinely complements your home and the purpose of the room. Get it right, and you have a timeless centrepiece; get it wrong, and it can feel a bit out of place.
This trend towards personalised, high-impact decor is booming. The UK wallpaper market alone was valued at USD 107.8 million in 2023, driven by a wave of home renovations and new printing technologies that make intricate designs like world map decals more accessible than ever.
Matching Material and Finish to the Room
The material and finish of your decal will have a huge impact on both its look and its longevity. Here’s a quick breakdown to help you decide.
| Material/Finish | Best For | Durability | Key Feature |
|---|---|---|---|
| Glossy Vinyl | Kids' rooms, playrooms, kitchens, high-traffic areas | High | Wipeable, reflective, and makes colours pop. |
| Matte Vinyl | Living rooms, offices, bedrooms, sunlit rooms | High | Non-reflective, sophisticated, and hides imperfections. |
| Textured Fabric | Home offices, main living areas, feature walls | Medium | Premium, tactile feel that adds warmth and depth. |
As you can see, the right choice really depends on the room's function. A durable, glossy vinyl is a lifesaver in a bustling playroom, while a textured fabric decal can bring a sophisticated, warm feel to a home office or living room.
Selecting the Perfect Style
Once you’ve settled on the practical side of things, it’s time for the fun part: style. The aesthetic of the map itself should harmonise with your existing decor.
A clean, monochrome map is a perfect match for sleek, modern furniture, creating an uncluttered and contemporary vibe. If your home leans more traditional or rustic, a vintage or antique-style map with rich, earthy tones can add a layer of character and history.
My best advice? Think about the mood you want to create. For a calm and focused home office, a muted, antique-style map is ideal. But for a child's bedroom, a bright, colourful map can be both fun and educational.
Don’t be afraid to go bold with colour, either. For a truly coordinated look, you can find a world map wall art decal in over 36 colours to perfectly match your paint or soft furnishings. Taking the time to get this initial choice right is what turns a simple wall sticker into a stunning focal point you’ll love for years.
Getting Your Wall Ready for a Flawless Finish
Here’s a little secret from years of experience: a professional, bubble-free finish for your world map wallpaper decal has almost nothing to do with how you stick it on the wall. It’s all about the prep work. This is the one step people tend to rush, and it’s almost always the reason for peeling edges or annoying air bubbles down the line.
Think of this part as laying the perfect foundation. Your decal needs a perfectly smooth, clean surface to grab onto. Even tiny bits of dust or faint grease from fingerprints can get in the way of the adhesive, causing it to lift over time.
Start by giving the wall a gentle wash. A simple mix of mild soap and water works wonders, or you can use a 50/50 blend of isopropyl alcohol and water. Grab a soft sponge, give it a good wipe-down, then dry it off with a clean, lint-free cloth. The most important part? Let it air dry completely for at least 24 hours.
Smoothing Out Bumps and Dents
Once it's dry, get up close and personal with your wall. Run your hand over the surface where the map will go. You’re trying to feel for any little bumps, old nail holes, or hairline cracks that your eyes might miss.
- Patch it up: Use a small amount of spackle to fill any holes or dents. It's a good idea to overfill them just a tiny bit, as the spackle will shrink as it dries.
- Sand it down: After the spackle has fully cured, take a piece of fine-grit sandpaper and sand the area until it’s perfectly level with the rest of the wall.
- Wipe it clean: Sanding creates a fine powder that is the absolute enemy of adhesion. Wipe the area again with a slightly damp cloth to get rid of every last bit of dust.
Taking the time to do this ensures your world map has a completely flat surface to bond with, so you won't see any weird textures or bumps showing through.
The goal here is a surface so smooth the decal looks like it was painted right onto the wall. Even a single grain of sand can create a noticeable bubble, so an extra ten minutes on this step can save you a world of frustration later.
A Quick Word on Paint and Curing Times
The paint on your wall is a huge factor. If you’ve just painted, you need to be patient. Freshly painted walls release gases as they cure, and these gases can literally push the decal right off the wall from behind. You absolutely must wait at least 30 days after painting before applying your map.
Paint finish matters, too. Matte, eggshell, or satin finishes are great because they have just enough grip for the adhesive to stick properly. High-gloss, semi-gloss, and any paints marketed as “stain-resistant” or “washable” are a different story; they’re designed to repel things, including your decal’s adhesive.
If you have one of these slicker finishes, you’ll likely need to give the area a very light sanding and maybe even apply a primer to make sure your map stays put for good. For a deeper dive into which surfaces work best, this peel and stick wallpaper guide for an easy home decor update has some excellent advice.
Applying Your Peel and Stick World Map Like a Pro
Right, the wall is prepped and you’re ready for the main event—turning that blank space into a stunning feature. This is where the magic happens. Forget the tiny, folded instructions that come in the box; we're going to walk through the process the way the pros do it, ensuring your world map wallpaper decal looks seamless and expertly installed.
The absolute key to a smooth application is to take it slow. It's tempting to rip the entire backing paper off in one go, but trust me, that's a one-way ticket to a sticky, tangled disaster. The secret is to work in small, manageable sections. This gives you total control to smooth the decal as you go, stopping those dreaded air bubbles before they even have a chance to form.
Think of it like this: a clean, smooth, and fully cured wall is the foundation for a flawless finish.

Each of these prep stages builds on the last, creating the perfect canvas for your new map.
Mastering the Hinge Method
If there's one trick you need to know for positioning a large decal, it's the 'hinge method'. This technique is a genuine game-changer. It lets you get the alignment spot-on before any of the sticky stuff actually touches the wall, taking all the guesswork out of the equation.
- Position and Level: First, hold the decal against the wall with the backing paper still on. Grab a spirit level to get it perfectly straight and a tape measure to ensure it's centred exactly where you want it.
- Create Your Hinge: Once you’re happy with the placement, run a strip of painter's tape horizontally across the middle of the decal, sticking it firmly to the wall on either side. This tape is now your 'hinge'.
- Peel the Top Half: Gently lift the top section of the decal, folding it back over the hinge. Now, peel the backing paper away from the top edge down to the tape line. Snip off that loose piece of backing paper.
- Smooth It Down: Starting from your tape hinge in the centre, use a squeegee to press the decal onto the wall. Work your way upwards and outwards, applying firm, even pressure.
This controlled approach is brilliant for tackling a large world map wallpaper decal on your own, without needing an extra pair of hands.
The Art of the Squeegee and Seamless Panels
Your squeegee is your best friend during this process. As you continue down the wall, the goal is to methodically push out any trapped air as you adhere the vinyl.
The trick is to always smooth from the centre outwards. Use overlapping strokes at a 45-degree angle. This movement channels any air towards the edges, preventing bubbles from getting stuck right in the middle of your beautiful new map.
Now, what if your map comes in multiple panels? Getting the seams right is what separates a good job from a great one. Most quality decals are designed with a small overlap—usually around 1-2 cm—to create a continuous image without any gaps.
When you bring in the next panel, don't try to align the whole thing at once. Instead, pick a prominent feature to focus on, like the coast of Africa or a major country border. Let the new panel overlap the first one by the recommended amount, keeping that overlap consistent all the way down.
For big vertical panels, roping in a friend can make a world of difference. Ask them to hold the bottom of the panel away from the wall, keeping it taut while you focus on aligning and smoothing the top section. This simple bit of teamwork prevents the panel from sticking where you don't want it to, giving you the control to achieve a perfect match. A bit of patience here pays off, resulting in seams so clean your map looks like one single, incredible piece of art.
Styling Your Room Around Your World Map
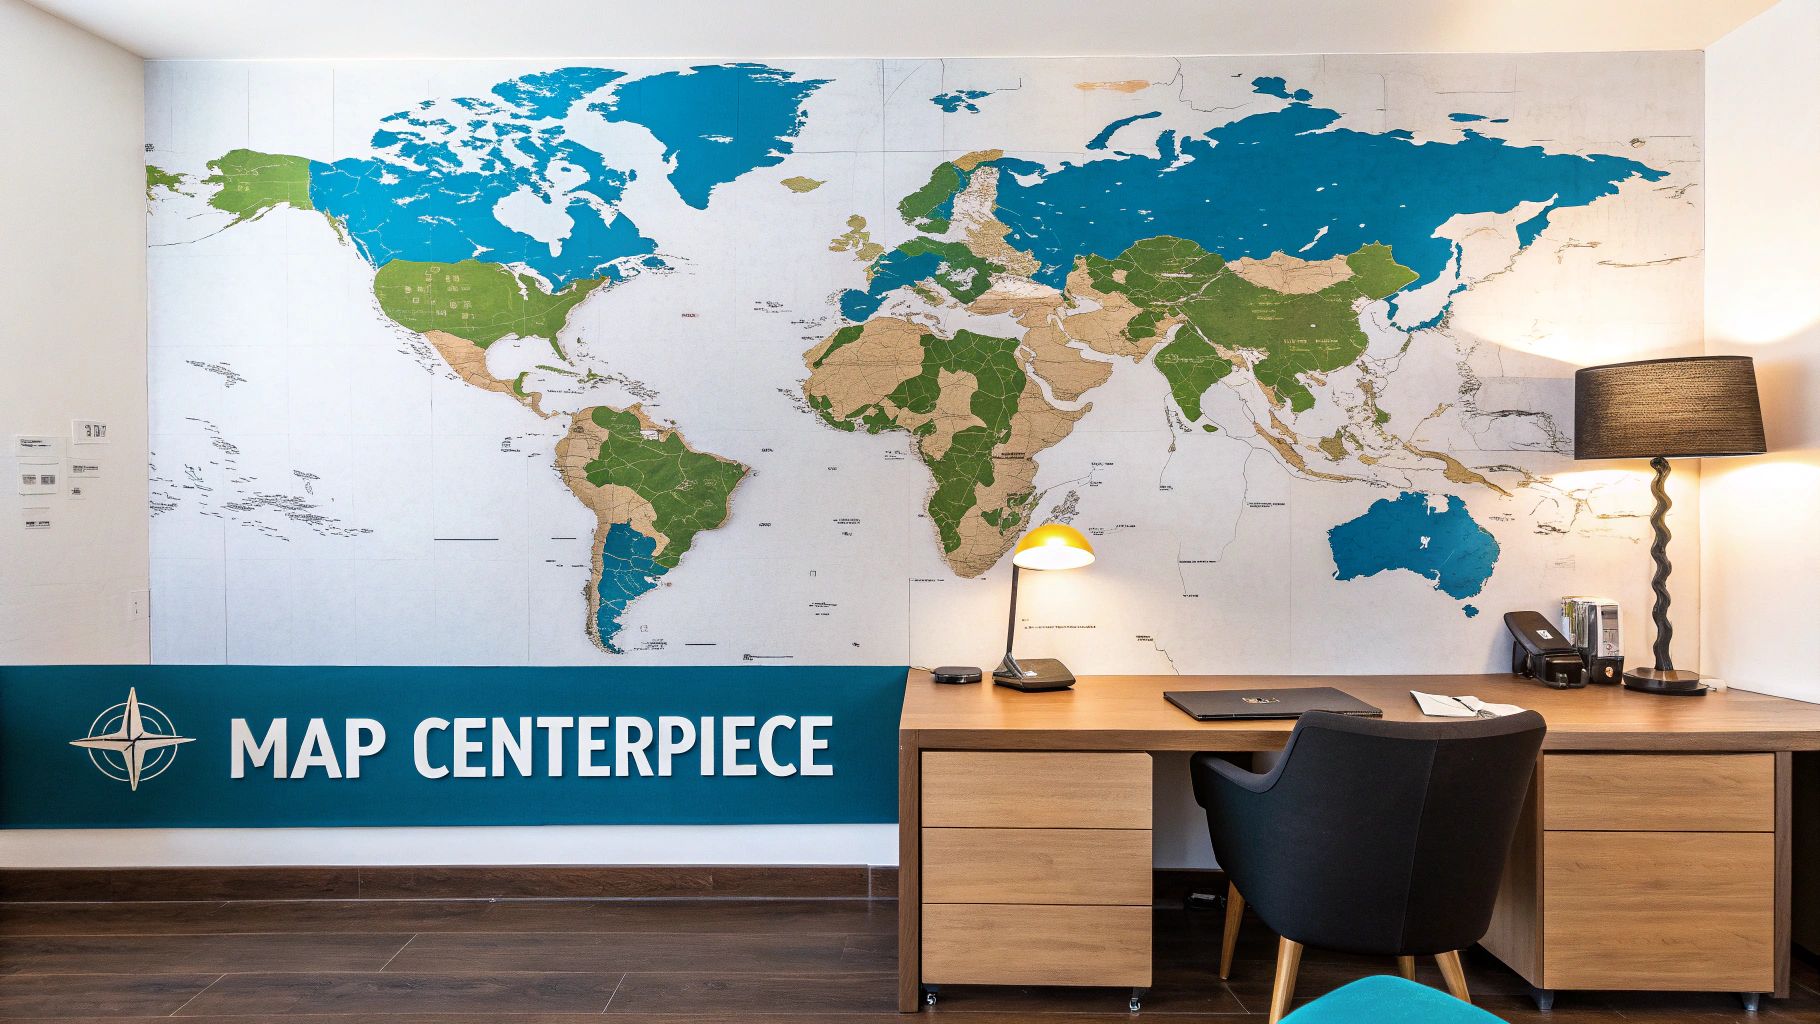
So, your map is on the wall. Fantastic! But the decal is just the beginning. A world map is a powerful statement piece, and now the real fun starts: styling the rest of the room to complement it. Getting the furniture, colours, and accessories right will transform your map from a simple decoration into the true heart of your space.
This isn't just a niche trend, either. People are putting more thought into personalising their homes than ever. The residential part of the UK wallpaper market was valued at a huge USD 105.5 million in 2023, and it's unique items like a world map wallpaper decal that are fuelling that growth. Homeowners want decor that tells a story, and a well-styled map does exactly that. You can dig into the numbers and trends in this detailed UK wallpaper market report.
Creating a Sophisticated Home Office
In a home office, you want to strike a balance between a space that feels focused and professional but also keeps you inspired. This is where a large monochrome or vintage-style world map decal really shines. The subtle tones of a black-and-white or sepia map add a layer of worldly sophistication without creating visual clutter.
To tie it all together, think sleek and modern with your furniture choices. You’re aiming for clean lines and function.
- A minimalist desk in dark wood or a simple metal finish works wonders.
- Pair it with a comfortable ergonomic chair in a neutral like grey, black, or tan.
- Industrial-style shelving is perfect for keeping books and files organised.
Don't forget the lighting. A good task light on your desk is a must, but a stylish floor lamp in the corner can create a softer, ambient glow that highlights the map beautifully without causing screen glare. The result is a calm, productive environment you’ll actually enjoy working in.
Designing a Vibrant Living Room Hub
A living room is the perfect place to go big and bold. A massive, colourful world map wallpaper decal can create an incredible feature wall, instantly injecting energy and personality into the room. This is your chance to let the map be the undeniable star of the show. Think about a brightly coloured political map or even an artistic, abstract design.
The key is to pull colours from the map into your decor. If your map has deep ocean blues and sunny yellows, echo those shades in your sofa cushions, a cosy throw, or a statement armchair. It’s usually best to keep the big items, like your sofa, in a neutral tone to let the map and accessories do the talking.
Your world map is a natural conversation starter. I always recommend styling the area with comfortable seating and good lighting to create an inviting nook where friends can gather, share travel stories, and maybe even plan their next adventure.
Igniting Imagination in a Child's Room
For a nursery or a child's bedroom, a world map is both a beautiful decoration and a fantastic learning tool. I love seeing whimsical designs, especially those with cartoon animals native to each continent. It makes geography feel like a game and captures their imagination right from the start.
From there, you can build a whole travel-themed room around it. Think about adding fun accessories that inspire a sense of adventure—a small globe on the dresser, aeroplane-themed bedding, or framed pictures of famous landmarks. Furniture with natural wood finishes adds a lovely warmth and rustic charm, creating the perfect basecamp for your little explorer.
What to Do When Things Go Wrong
Even the most seasoned DIYer can run into a few snags when applying a world map wallpaper decal. But don't panic—most common issues are surprisingly simple to fix without having to peel everything off and start again. Let's walk through a few pro tips for handling those little imperfections.
The most common culprit? A stubborn air bubble that you only spot after you've smoothed everything down. Your first instinct might be to push it towards the edge, but once the adhesive has grabbed the wall, that's rarely effective.
Instead, try this simple trick:
- Find the smallest, sharpest pin or needle you have.
- Carefully prick a tiny hole right in the middle of the bubble.
- Now, use your squeegee or a credit card to gently push the trapped air out through that tiny hole.
The vinyl will flatten out beautifully, and the pinhole will be so small it’s practically invisible. It’s a little secret that has saved many an installation from looking less than perfect.
Adjusting and Realigning Sections
Stepped back to admire your work and realised a panel is slightly crooked? It happens. If you catch it fairly quickly, most high-quality vinyl decals have enough give to be repositioned.
Start from a top corner and slowly peel the decal back from the wall, pulling it at a sharp angle. The key here is to go slowly and avoid yanking, which can stretch and distort the vinyl. Once it's off, just re-apply it using the painter's tape hinge method to get the alignment spot-on before smoothing it down again.
Don't be afraid to lift a section if the alignment is off. A small adjustment is much better than living with a crooked map. Just be gentle and patient, especially with larger panels where the seams need to match up perfectly.
Dealing with Stubborn Edges and Textured Walls
Sometimes you'll find a corner or an edge that just won't stay down, which is common on walls with even a slight texture. This usually happens because tiny dust particles or the uneven surface is stopping the adhesive from getting a proper grip. Before you do anything else, try giving the edge a firm press with a clean, dry cloth.
If that doesn't solve it, grab a hairdryer. A quick blast of warm air on a low setting can make all the difference. Gently heat the rebellious edge for just a few seconds to soften the adhesive, then press it firmly against the wall until it cools. This little trick also works wonders for getting a world map wallpaper decal to stick to walls that aren't perfectly smooth, helping the vinyl mould itself to minor bumps for a much stronger bond.
Looking After and Removing Your Wallpaper Decal
So, your new world map is on the wall, and it looks fantastic. The good news is, keeping it that way is incredibly easy. High-quality world map wallpaper decals are designed to be low-maintenance, so you won’t need to spend much time on upkeep.
For general cleaning, like getting rid of dust or the occasional fingerprint, a gentle touch is all that’s needed. Just take a soft, microfibre cloth, dampen it slightly with plain water, and gently wipe the surface. Steer clear of any harsh chemicals or abrasive sponges, as they can scratch the vinyl and cause the beautiful colours to fade.
It’s no surprise that easy-to-manage wall decor is booming. The UK wallpaper market actually saw a 10% growth in consumption in 2024, hitting 37,000 tons. It just goes to show how many of us are looking for stylish updates that don't come with a lot of hassle. You can read more about the rising popularity of wall decor in the UK.
Removing Your Decal Without Leaving a Mark
One of the best things about a peel-and-stick decal is that you're not locked in forever. Whether you fancy a change or you’re moving home, taking it down is designed to be a straightforward, stress-free job. This is a huge plus for renters. The trick is to soften the adhesive before you start peeling.
For this, your best friend is a humble hairdryer.
- Pop your hairdryer on a low or medium heat setting.
- Hold it about 15-20 cm from one of the top corners of the map.
- Gently warm that corner for 30-45 seconds, keeping the hairdryer moving to distribute the heat evenly.
This little bit of warmth makes the adhesive much more pliable and cooperative. Once the corner feels warm, you can get a fingernail or a plastic scraper underneath it to gently lift it away from the wall.
Here's a pro tip: peel the decal back on itself at a really sharp, 180-degree angle. Don't pull it straight out towards you. This simple change in technique minimises the stress on the paint underneath and is the secret to avoiding any damage.
Work your way down the wall, applying a bit of heat to each section just before you peel it. If you feel any stubborn spots, just give them another quick blast of warmth. A little patience here goes a long way and ensures your wall will look just as good as it did before. For renters, knowing you can remove decor cleanly is everything. We’ve got more advice in our guide on using removable wallpaper for renters. It’s this versatility that makes a world map a brilliant, worry-free choice from start to finish.
Ready to start your own decor adventure? Explore the stunning collection of customisable wall art at Quote My Wall and find the perfect map to transform your space. Visit us today at https://www.quotemywall.co.uk.