
Your Ultimate Guide to World Map Decals for Walls
World map decals are a fantastic way to create a stunning feature wall without the commitment of wallpaper or paint. They’re a stylish, affordable, and completely customisable solution that’s perfect for both renters and homeowners who love to switch up their decor. Most are made from a high-quality vinyl, which makes them a breeze to apply and, more importantly, remove without a trace.
The best decals manage to be both durable and elegant, fitting in just about anywhere.
Choosing the Right World Map Decal for Your Space
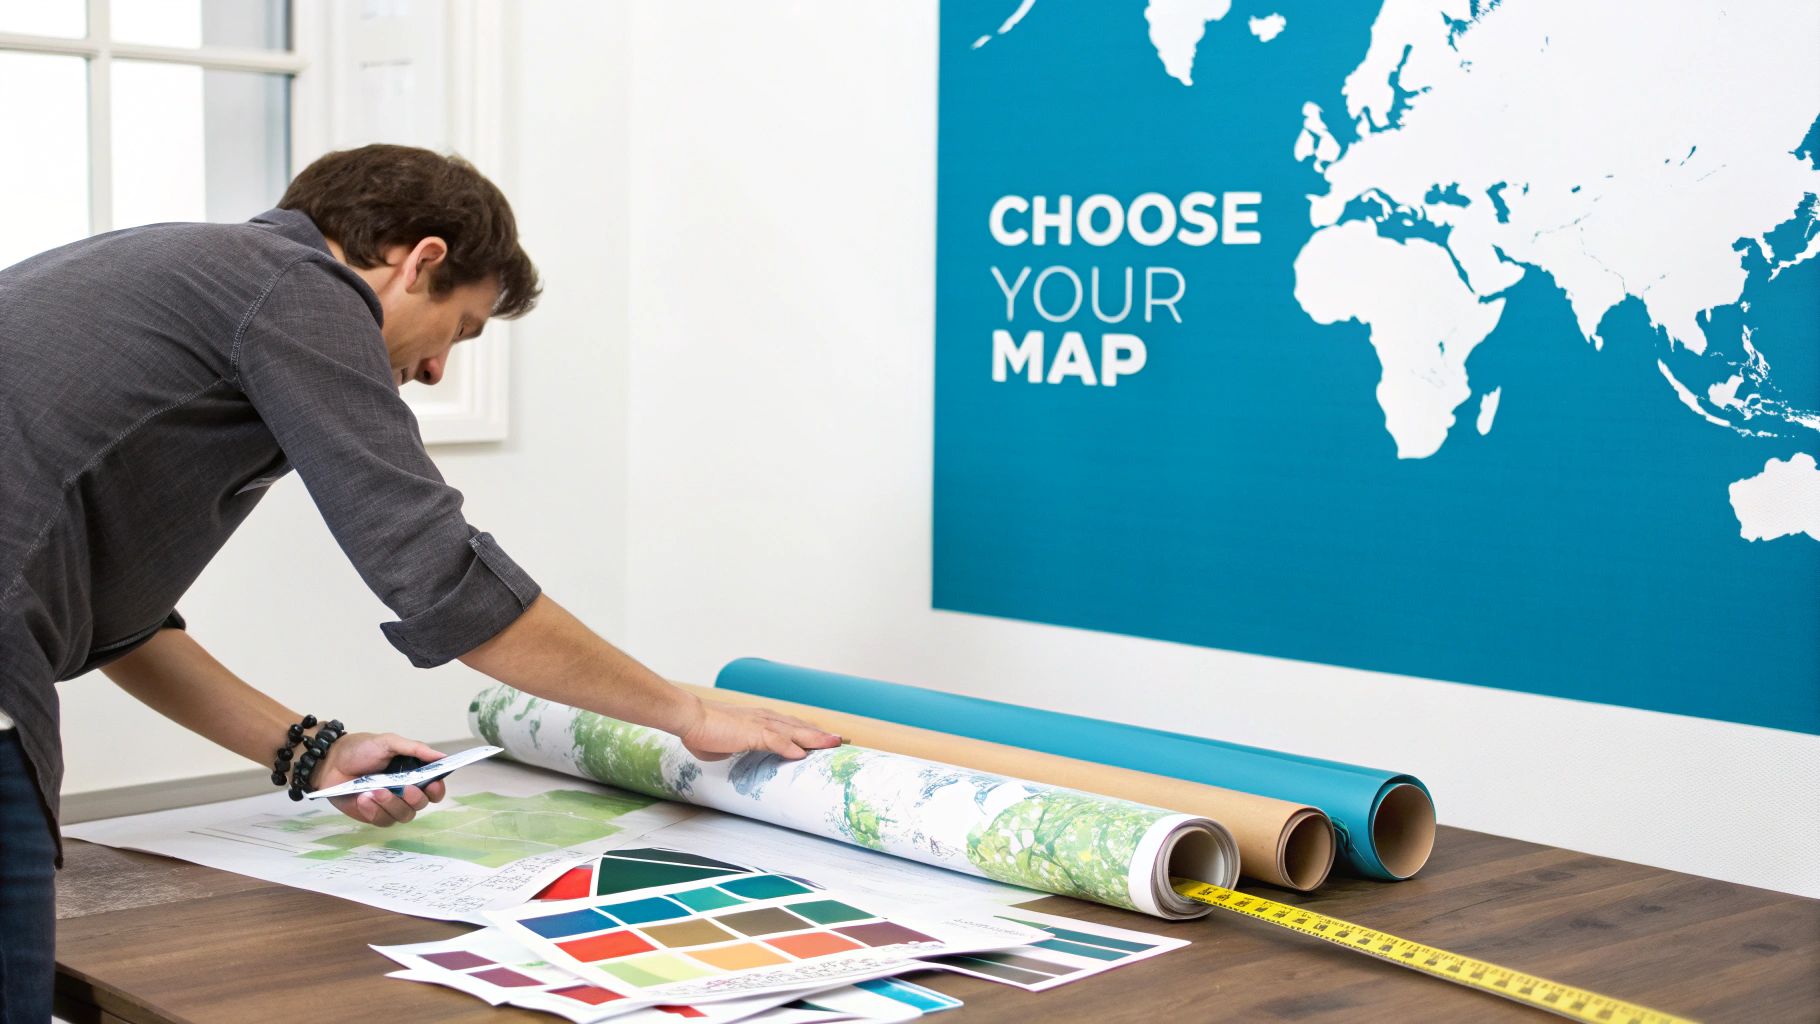
Before you jump into transforming a blank wall, it pays to spend a little time thinking about what you really want. Getting the right map comes down to three things: the material it's made from, its size, and, of course, the style. Nailing these choices from the start ensures your new map feels like it was always meant to be there.
Understanding Decal Materials and Finishes
When it comes to wall decals, high-quality vinyl is the undisputed champion. It's tough enough to look great for years, but the real magic is in the adhesive. It’s specially formulated to peel away cleanly without damaging your paintwork – a must-have feature for anyone in a rental or those of us who get the itch to redecorate every so often. This is where you can really tell the difference between a quality decal and cheaper alternatives that might leave a sticky mess behind.
The finish you pick will also have a big impact on the final look. To help you decide, here’s a quick rundown of what to consider.
Decal Material and Finish Comparison
This quick reference guide will help you select the ideal material and finish for your world map decal, depending on the room and the look you're after.
| Material Type | Best For | Finish Options | Key Benefit |
|---|---|---|---|
| Matte Vinyl | Living rooms, bedrooms, home offices | Matte | Reduces glare for a sophisticated, "painted-on" look. |
| Gloss Vinyl | Kitchens, bathrooms, children's playrooms | Glossy | Easy to wipe clean and adds a vibrant, modern pop. |
| Fabric Decal | Nurseries, textured walls, frequent movers | Satin, Matte | Re-positionable and forgiving on less-than-perfect walls. |
| Chalkboard Vinyl | Kids' rooms, family command centres, kitchens | Black Matte | Interactive and can be written on with chalk. |
Ultimately, the goal is to choose a finish that not only suits the room but also complements your existing style. Thinking about how it fits with your other luxury home decor and homewares helps create a space that feels truly cohesive.
A world map decal is more than just decoration; it's a personal statement. Whether it's a sophisticated political map for a home office or a vibrant animal map for a nursery, the style you choose sets the tone for the entire room.
Matching Map Style to Room Function
The map's design should be a reflection of both your personality and how you use the space. For a home office, a detailed political world map in a monochrome or muted colour scheme can create a focused, inspiring atmosphere.
On the other hand, a child's nursery or playroom really comes to life with a colourful, illustrative map filled with animals or famous landmarks, turning a plain wall into a fun, educational centrepiece. Our world map wall art decal is a great example, available in a huge range of colours to match any theme you can dream up.
This desire for personalisation is a huge trend right now. People are moving away from one-size-fits-all decor, and UK homeowners are especially keen on finding bespoke options that feel unique. This growing preference for affordable, removable, and custom solutions is why vinyl decals are becoming such a popular alternative to traditional decorating methods.
Getting Your Walls Ready for a Flawless Finish
The real secret to a stunning, bubble-free world map decal isn't just in how you apply it—it's all in the prep work. Honestly, spending a little time getting your wall ready is what guarantees your map will stick properly and look like it was professionally installed. Think of it as creating the perfect canvas for your new piece of art.
First up, your wall needs a good clean. You’d be surprised how much invisible dust, grime, and even oils from our hands can build up on a surface. These are the biggest culprits when it comes to a decal not sticking well. A quick wipe-down with a soft, damp cloth is usually enough. If you’re working in a kitchen or a high-traffic hallway, a bit of mild soap and water will do the trick, but just make sure the wall is completely dry before you start.
Why Your Paint Finish and Curing Time Really Matter
I've learned over the years that not all paints play nicely with vinyl. The best surfaces are those with a matte or eggshell finish; they have just enough texture for the decal's adhesive to get a good grip. On the other hand, you need to be a bit wary of silk, satin, or high-gloss paints. They’re designed to be easy to wipe clean, which means they have a slick surface that can cause your decal to start peeling at the edges over time.
Got glossy walls? Don't worry. You can give the area a very light scuff with some fine-grit sandpaper. It just roughs up the surface enough for the adhesive to bond properly. Just be sure to wipe away all the dust afterwards.
A freshly painted room seems like the perfect backdrop for a new map, but this is where a little patience pays off. Paint needs time to "cure," which is the process where all the solvents fully evaporate from it. Sticking a decal on too soon traps those gases, which leads to bubbles and, eventually, the decal falling off.
This is a big one: you must wait at least three to four weeks after painting before applying any vinyl. The paint might feel dry to the touch in a day, but the chemical curing process is still happening under the surface. Rushing this is probably the most common mistake I see people make.
Your Simple Toolkit
You don't need a whole toolbox for this job. In fact, you probably have everything you need already. Before you unroll your map, grab these few things:
- A soft, lint-free cloth: For cleaning the wall and giving the map a final press.
- Measuring tape and a pencil: Absolutely essential for getting your map perfectly centred and level.
- Masking tape: This is your best friend for holding the decal in position while you work.
- A squeegee or a credit card: This is your number one tool for smoothing out the vinyl and pushing out any pesky air bubbles.
Having these bits and bobs ready to go makes the whole process so much smoother and saves you from that frantic last-minute search. Taking just 20 minutes to clean and measure properly will save you a world of frustration and ensure your new map becomes a long-lasting centrepiece you can be proud of.
Your Guide to a Smooth and Easy Installation
Let's be honest, the thought of applying a huge sticker to your wall can feel a bit daunting. But trust me, with the right approach and a little patience, it’s a totally manageable project. Think of it less as a stressful DIY task and more as the final, rewarding touch that brings your whole room to life. A bit of prep is all it takes to get that professional, seamless look without any of the frustration.
The absolute key to a perfect finish is getting the positioning spot-on before you peel anything away. This is where masking tape becomes your best friend.
Hold your decal up to the wall, step back, and once you're happy with how it looks, run a long strip of tape across the middle or top edge. This creates a brilliant 'hinge', locking the map in place so it won't budge while you work.
Positioning and Application Technique
With your decal hinged and hanging straight, you’re ready for the main event. Start by gently peeling the top part of the backing paper away from the vinyl itself, folding it down. The trick is not to pull it all off at once. Working in smaller, more manageable sections gives you much more control.
Now, grab your squeegee (or even a credit card wrapped in a soft cloth) and start smoothing the exposed sticky vinyl onto the wall. Always work from the centre of the decal outwards. This is a crucial technique because it expertly pushes any trapped air towards the edges, stopping bubbles from forming in the first place.
This little infographic perfectly sums up the simple but vital prep work needed before you even think about applying the decal.
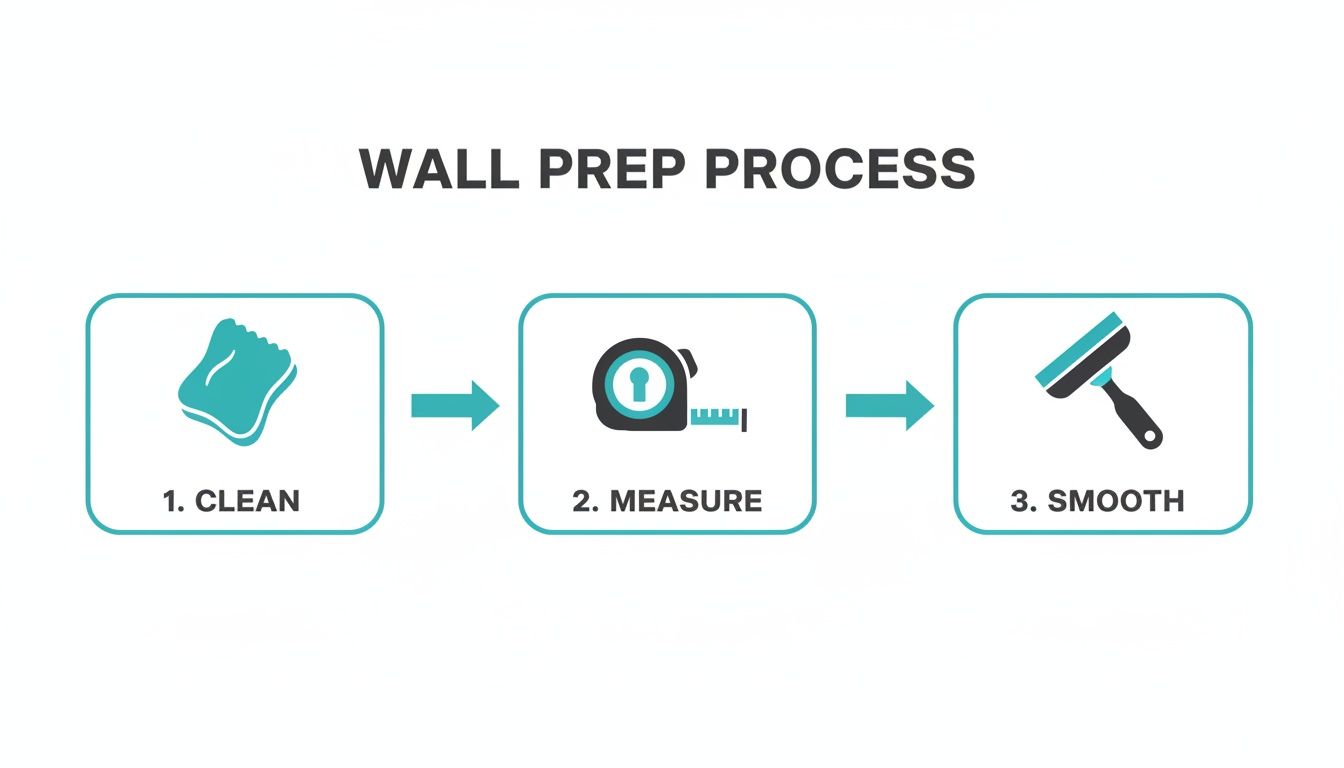
As you can see, it really just boils down to those three core actions: cleaning, measuring, and smoothing. Get these right, and you've laid the groundwork for a flawless installation.
Continue peeling back more of the backing paper, section by section, smoothing the vinyl as you go. Holding the squeegee at a 45-degree angle will give you the perfect amount of pressure and control. It’s those consistent, firm strokes that create that fantastic bond between the decal and your wall. If you're tackling one of our larger world map decals, it’s a massive help to have a second person on hand to hold the loose end.
Slow and steady wins the race here. Rushing is the number one cause of creases and bubbles. If you see a bubble starting to form, don't worry – just gently lift that bit of vinyl and re-smooth it before the adhesive has a chance to fully stick.
Aligning Multi-Piece Decals
Many of the more detailed world maps arrive in a few different sections, which actually makes them much easier to handle. This just requires a little extra care with alignment, but the principle is exactly the same. I'd recommend starting with the largest continent, like Eurasia, as your anchor piece. Apply it using the hinge method we just covered.
Once your first piece is securely on the wall, take the next section and carefully line it up before removing its backing paper. Pay close attention to matching up coastlines and borders to get that seamless connection. It's best to apply the smaller islands and individual countries last, as you can place them with pinpoint precision.
Quick Troubleshooting Tips
Even with the most careful application, a small air bubble can sneak in. Don’t panic! It’s an easy fix.
- For tiny bubbles: Use a pin or the very tip of a craft knife to make a tiny prick in the bubble at one edge.
- Press the air out: Gently use your finger or the corner of the squeegee to push the trapped air towards the tiny hole until the vinyl is flat against the wall.
This simple trick works like a charm, and the pinprick will be completely invisible. The fact these stickers are removable is a huge draw, especially in the UK rental market where tenants need temporary decor that won't cause issues with their tenancy agreement. It’s why you’ll see an emphasis on premium-quality vinyl that ensures durability for at least 5 years indoors, meeting that demand for both value and quality.
For a deeper dive into the different types available, have a look at our guide on choosing the perfect world wall map sticker for your space. Armed with these tips, you're more than ready to get your map up with confidence.
Styling Your World Map in Any Room
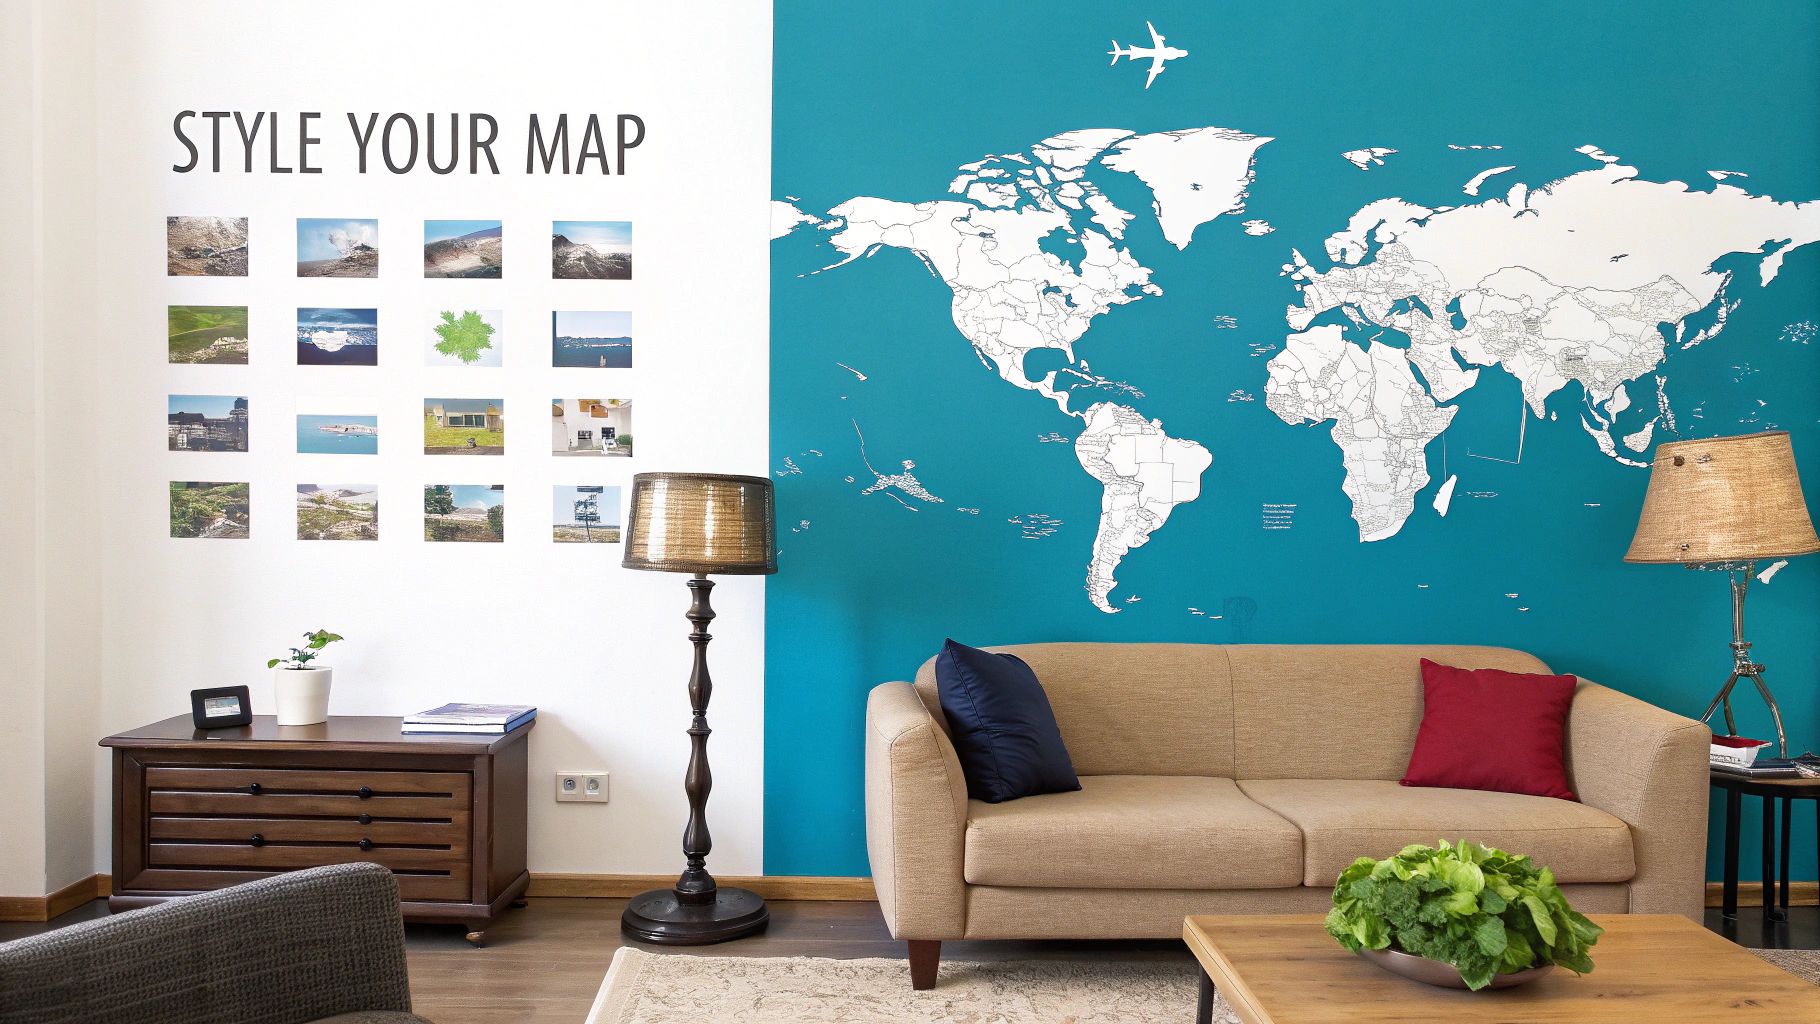
A world map decal is so much more than just a sticker. Think of it as a powerful design anchor, something that can set the tone for an entire room. It can be a source of inspiration, a pinboard for your memories, or even an educational tool, all depending on how you style it. The real magic of world map decals for walls is just how versatile they are.
In a hallway or living room, a large-scale map is an instant conversation starter. Picture a sleek, minimalist map behind your sofa, dotted with tiny pins showing where you've been and where you dream of going next. It turns a plain wall into a personal story that your guests will love.
Creating an Inspiring Home Office
Your home office needs to feel professional but also keep you motivated. A world map decal nails this brief, giving you a sophisticated backdrop that looks brilliant on video calls.
A monochrome or metallic-finish political map adds a sense of global perspective without being distracting. I always suggest positioning it directly behind your desk to make it the room's main feature. Pair it with a modern desk lamp and some clean, organised shelving, and you've got a focused, uncluttered space that helps you get things done.
Designing a Whimsical Nursery or Playroom
A child’s room is a canvas for imagination, and a world map is a fantastic way to blend fun with learning. Forget stuffy political maps; go for a vibrant, illustrative design with animals native to each continent. It turns the decal from simple decoration into an interactive tool for discovery.
This mix of decor and education is a huge trend right now. The kids' wall sticker market is booming, projected to hit USD 1.85 billion by 2032, as more parents see the value in making learning part of their children's spaces. If you want to spark a little one's curiosity, there are some wonderful kids room decor ideas that show how a map can be both beautiful and educational.
To bring the whole room together, just pull colours from the map into your other decor:
- Soft Furnishings: Grab a prominent colour from the map and find it in cushions, a rug, or bedding.
- Storage: Colourful storage boxes or bins that echo the map's palette work wonders.
- Lighting: A lampshade in a complementary shade can tie the entire scheme together perfectly.
Styling Recipe: Rustic Traveller
Want a rustic, adventurous vibe in your living area? Pair a large, vintage-style sepia world map with a worn leather armchair. Use an old wooden trunk as a coffee table. Add warm, ambient light from an industrial-style floor lamp and scatter a few travel books nearby to complete the look.
This kind of thoughtful approach creates a cohesive theme that feels inviting and full of personality. Whether you're aiming for a sophisticated office, a playful nursery, or a travel-inspired living room, your map decal is the perfect starting point.
How to Look After and Safely Remove Your Decal
Your world map is finally up, and it looks fantastic. The great news? Keeping it that way is incredibly easy. High-quality vinyl is built to last without needing any special treatment, so you can put the fancy cleaning products away.
Most of the time, all you'll need is a quick wipe with a soft, dry cloth to get rid of any dust. If you spot a smudge or a mark, just dampen the cloth slightly with plain water and gently clean the spot. Steer clear of harsh chemical cleaners or abrasive sponges, as they can scratch the vinyl, cause the colour to fade, or even make the edges start to peel.
Removing Your Decal Without a Trace
One of the best things about a world map decal is that it's not a lifelong commitment. When it's time for a change or you're moving house, taking it down properly is the key to leaving your wall unmarked – something renters know all about. The secret weapon here is gentle heat.
Grab a standard hairdryer and set it to a low or medium heat. Gently warm up one corner of the decal for about 20-30 seconds, keeping the hairdryer moving about 15-20 centimetres from the wall. This prevents overheating the paint and softens the decal’s adhesive, making it much easier to peel away.
Pro Tip: Don't get impatient and try to rip it off in one go. Peeling too quickly can stretch the vinyl or, on rare occasions, might take a tiny chip of paint with it. A slow, steady hand is your best bet for a perfectly clean removal.
Once a corner feels warm, you should be able to lift the edge with your fingernail. From there, peel the decal back on itself at a sharp angle (think close to 180 degrees) instead of pulling it straight out from the wall. Keep warming the vinyl with the hairdryer just ahead of the section you're peeling.
Dealing with Stubborn Residue
Nine times out of ten, a good quality decal will come off without leaving anything behind. However, if it’s been on the wall for a few years or in a spot that gets a lot of direct sun, you might feel a little sticky residue. Don't panic – it's simple to sort out.
Start with a cloth dipped in warm, soapy water and gently rub the area. If that doesn't quite shift it, a bit of rubbing alcohol on a cotton ball will break down any remaining adhesive. For a more in-depth guide covering every possible scenario, check out our complete walkthrough on how to remove wall stickers. It’s packed with expert tips to get your walls looking good as new.
Your World Map Decal Questions Answered
It’s completely normal to have a few questions rattling around before you start a project like this. We get asked all the time about the little details that make a big difference, so I've put together answers to the most common queries about world map decals for walls.
My aim here is to get you feeling totally confident, from the moment you pick your map to that final, satisfying smooth-down of the vinyl. Let's clear up those last few uncertainties.
Will My World Map Decal Stick to a Textured Wall?
This is easily one of the most frequent questions we get, and the answer isn't a simple yes or no. For the absolute best results, a smooth wall is your friend. However, our high-quality vinyl is surprisingly forgiving and can often work beautifully on lightly textured surfaces, like the common 'orange peel' finish you see in many new builds.
The secret really comes down to prep and patience. First, the wall needs to be spotlessly clean. Then, once the decal is on, you’ll need to put in some extra effort, really pressing the vinyl firmly into all the tiny nooks and crannies of the texture. This ensures every bit of the adhesive makes proper contact. If your wall is heavily textured or uneven, it's a bit of a gamble.
A great tip is to order a small, cheap sample decal first. It’s far better to spend a few pounds testing a small patch than to invest in a gorgeous, large map only to find it won’t stick properly. A quick test can save you a world of frustration.
Can I Reuse My World Map Wall Decal?
Our vinyl decals are designed for one perfect application. A huge plus is that they are completely removable and won’t pull your paint off, which is brilliant if you're renting or just like to change your décor often.
However, the removal process, which involves a bit of heat and gentle peeling, will stretch and distort the vinyl. The adhesive is also compromised once it’s been peeled away. This means trying to reapply it elsewhere will almost certainly end in a bubbly, crooked mess. If you're looking for something you can move around, you might want to look into fabric-based wall stickers instead, as they're specifically designed for repositioning.
Ready to create that stunning feature wall you’ve been dreaming of? Dive into the huge range of customisable designs at Quote My Wall and find the perfect world map decal for your space. Take a look at our collection today