
Bathroom tile cover up ideas: Quick, Budget-Smart Makeovers
Staring at dated bathroom tiles every morning can get old, fast. But before you start budgeting for a full-scale demolition, what if you could get a fresh new look without the mess and expense? That's where clever bathroom tile cover up ideas come in. From stylish peel-and-stick tile stickers and specialised tile paint to sleek waterproof wall panels, there are plenty of ways to completely transform your space.
These aren't just stop-gap measures; they're smart, budget-friendly solutions that work for homeowners and renters alike.
Why Covering Up Your Tiles is a Smarter Move
Let's be honest, a full bathroom renovation is a huge undertaking. It means dust, disruption, and a hefty bill at the end of it all. This is exactly why so many people are now looking for high-impact alternatives that deliver a visual punch for a fraction of the cost and effort.
When you choose to cover your existing tiles, you skip the noisy, messy demolition, avoid complicated plumbing work, and don't have to juggle multiple tradespeople. It's the kind of project you can realistically tackle over a weekend.
This trend is booming, especially here in the UK. Bathroom updates were actually the third most popular home improvement project on Pinterest in 2024, with a huge emphasis on cost-effective makeovers. Given that the average UK bathroom remodel can set you back around £6,000, it’s no surprise that savvy solutions are more popular than ever. You can see more on these UK home renovation statistics from Hillarys.
The Big Wins of a Tile Cover Up
Deciding to cover your tiles instead of ripping them out comes with some serious perks.
-
It’s Seriously Cost-Effective: A tin of paint or a pack of vinyl stickers costs a tiny fraction of what you’d spend on new tiles, grout, adhesive, and a tiler.
-
You'll Save So Much Time: A cover-up project can often be done and dusted in a day or two. A traditional retiling job? You're looking at a week, easily.
-
Perfect for DIYers: These solutions are designed for everyone, regardless of your skill level. You don't need a van full of specialised tools or years of experience to get a great result.
-
Renter-Friendly Freedom: Options like peel-and-stick vinyl are a renter's dream. They're completely removable, so you can add your personal style to your space without saying goodbye to your deposit.
Choosing a tile cover up isn’t just about saving a bit of cash. It’s about investing your weekend into a project that delivers an immediate, satisfying transformation. It’s the ultimate home improvement win.
Comparing Your Best Tile Cover-Up Options
Choosing the right way to cover up old bathroom tiles is about more than just picking a pretty pattern. You’ve got to think about your budget, how confident you feel doing it yourself, and, of course, the steamy, damp reality of a bathroom. Let's walk through the most popular methods so you can figure out what’s best for your space.
To help you get started, this decision tree can quickly point you in the right direction, especially if you’re renting or need to keep costs down.
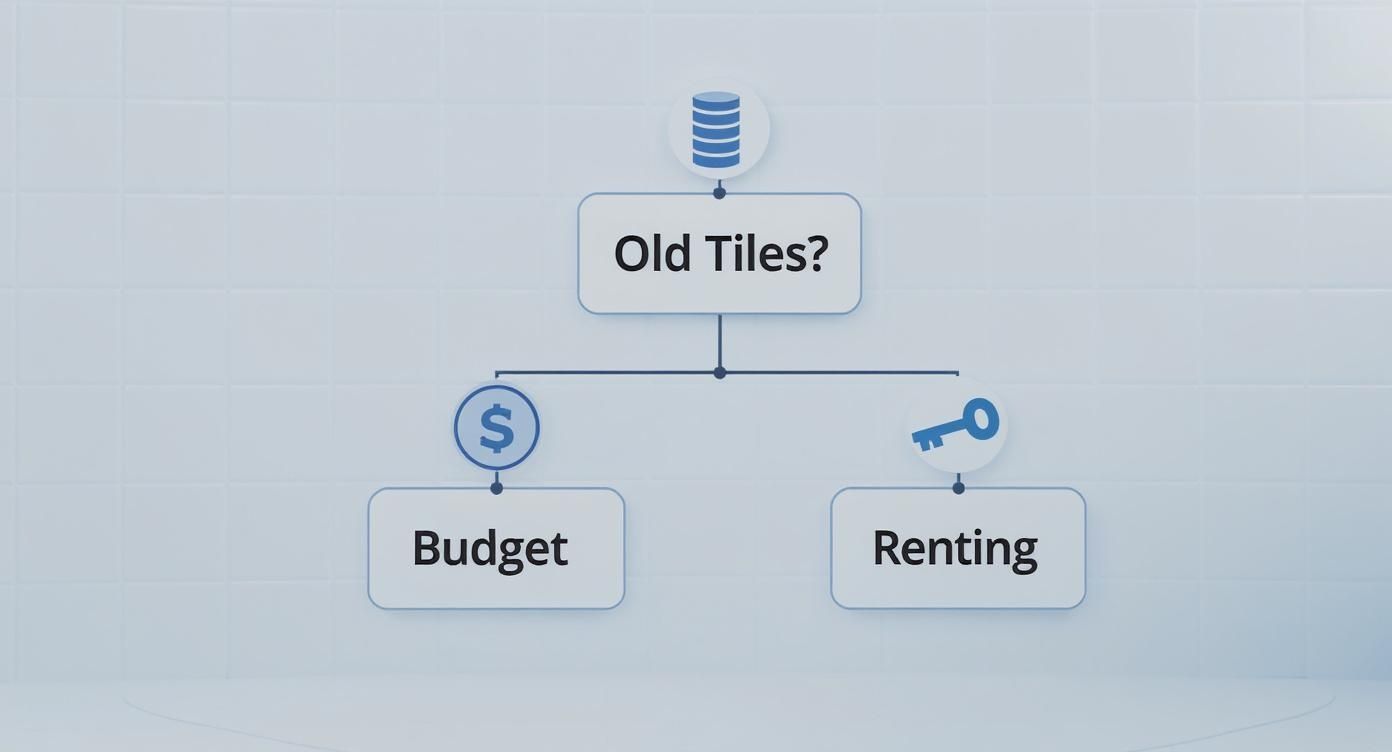
As you can see, renters will almost always find peel-and-stick options are their go-to solution. For homeowners on a budget, it’s a toss-up between paint and stickers, depending on how long you need the fix to last.
Comparing Bathroom Tile Cover-Up Methods
To make it even clearer, here’s a side-by-side look at the most common solutions. This table breaks down what you can expect in terms of cost, longevity, and the skills needed for a great result.
| Method | Average Cost (per sq m) | Durability | DIY Skill Level | Best For |
|---|---|---|---|---|
| Peel-&-Stick Stickers | £15 - £40 | Low to Medium (1-3 years) | Beginner | Renters, quick aesthetic updates, low-splash zones, floors with light footfall. |
| Tile Paint | £10 - £25 | Medium (2-5+ years) | Intermediate | Homeowners, budget renovations, changing the entire colour scheme of a room. |
| Waterproof Wall Panels | £50 - £150+ | High (10-15+ years) | Intermediate | A permanent, grout-free solution, modern finish, covering large shower areas. |
| Vinyl Floor Wraps | £20 - £50 | Medium (3-7 years) | Beginner | Covering dated floor tiles, achieving a seamless look (e.g., wood or stone). |
| Grout Refresh | £5 - £15 (per pen/tube) | Low (1-2 years) | Beginner | Brightening up existing tiles without covering them, tackling stained grout. |
Ultimately, the "best" method really depends on your specific bathroom and goals. For a quick, reversible refresh, stickers are unbeatable. For a longer-term, budget-friendly change, paint is a solid choice. And for a truly modern, low-maintenance finish, wall panels are in a league of their own.
Peel-and-Stick Tiles: The Renter's Best Friend
There's a good reason peel-and-stick tiles are the most talked-about solution, especially for anyone renting. They deliver a massive visual punch with almost zero commitment. You’ll generally find them in two forms: vinyl and gel.
- Vinyl Stickers: These are the thin, flexible ones that are perfect for applying over smooth, flat tiles. They come in every design imaginable, from classic metro tile looks to intricate Moroccan patterns.
- Gel or 3D Tiles: These have a much thicker, resin-like top layer that does a surprisingly good job of mimicking the look and feel of real ceramic or glass. The added depth gives them a more premium finish and can even help smooth over minor bumps on the original tile surface.
No matter which type you choose, getting them to last in a damp room comes down to one thing: preparation. The surface needs to be spotlessly clean and bone dry. A great trick I've learned is to use a hairdryer to gently warm the adhesive as you press the sticker down—this helps it create a much stronger, more water-resistant bond.
If you’re keen on this kind of temporary fix, our guide on using peel and stick wallpaper in the bathroom has some extra tips that might come in handy.
Tile Paint: A Durable DIY Facelift
For homeowners who want a more permanent change without the cost of a full re-tile, specialist tile paint is a brilliant option. Now, this isn't your standard wall emulsion. It's a purpose-made paint engineered to grab onto non-porous surfaces like ceramic and porcelain.
The absolute non-negotiable step for a finish that lasts is the primer. A top-notch bonding primer is what creates that tenacious grip for the paint to stick to. If you skip this, you're just asking for the paint to peel and chip, especially in a room that sees so much traffic and moisture.
Pro Tip: My best advice for painting tiles is to apply several thin coats instead of trying to slap on one thick one. It takes a bit more patience, but it prevents drips and gives you a much smoother, professional-looking finish that will actually last.
Waterproof Wall Panels: The Ultimate Seamless Solution
If your goal is a total transformation and you're sick and tired of scrubbing grout lines, then waterproof wall panels are a game-changer. These are large sheets, usually made from acrylic or a composite material, that get fitted directly over your old tiles.
The result is a completely seamless, 100% waterproof surface that is unbelievably easy to clean. No more mouldy grout! While they are more of an investment upfront compared to paint or stickers, they provide a sleek, modern look and are far quicker and less messy to install than retiling from scratch.
Of course, what works for walls doesn't always work for floors. You have to choose materials designed for their specific purpose. For instance, while some might explore options like installing carpet over existing tile for a warmer feel in other parts of the house, it's a total non-starter for a wet zone like a bathroom. It just goes to show how important it is to match the material to the room's function.
Getting Your Tiles Ready for a Flawless Finish
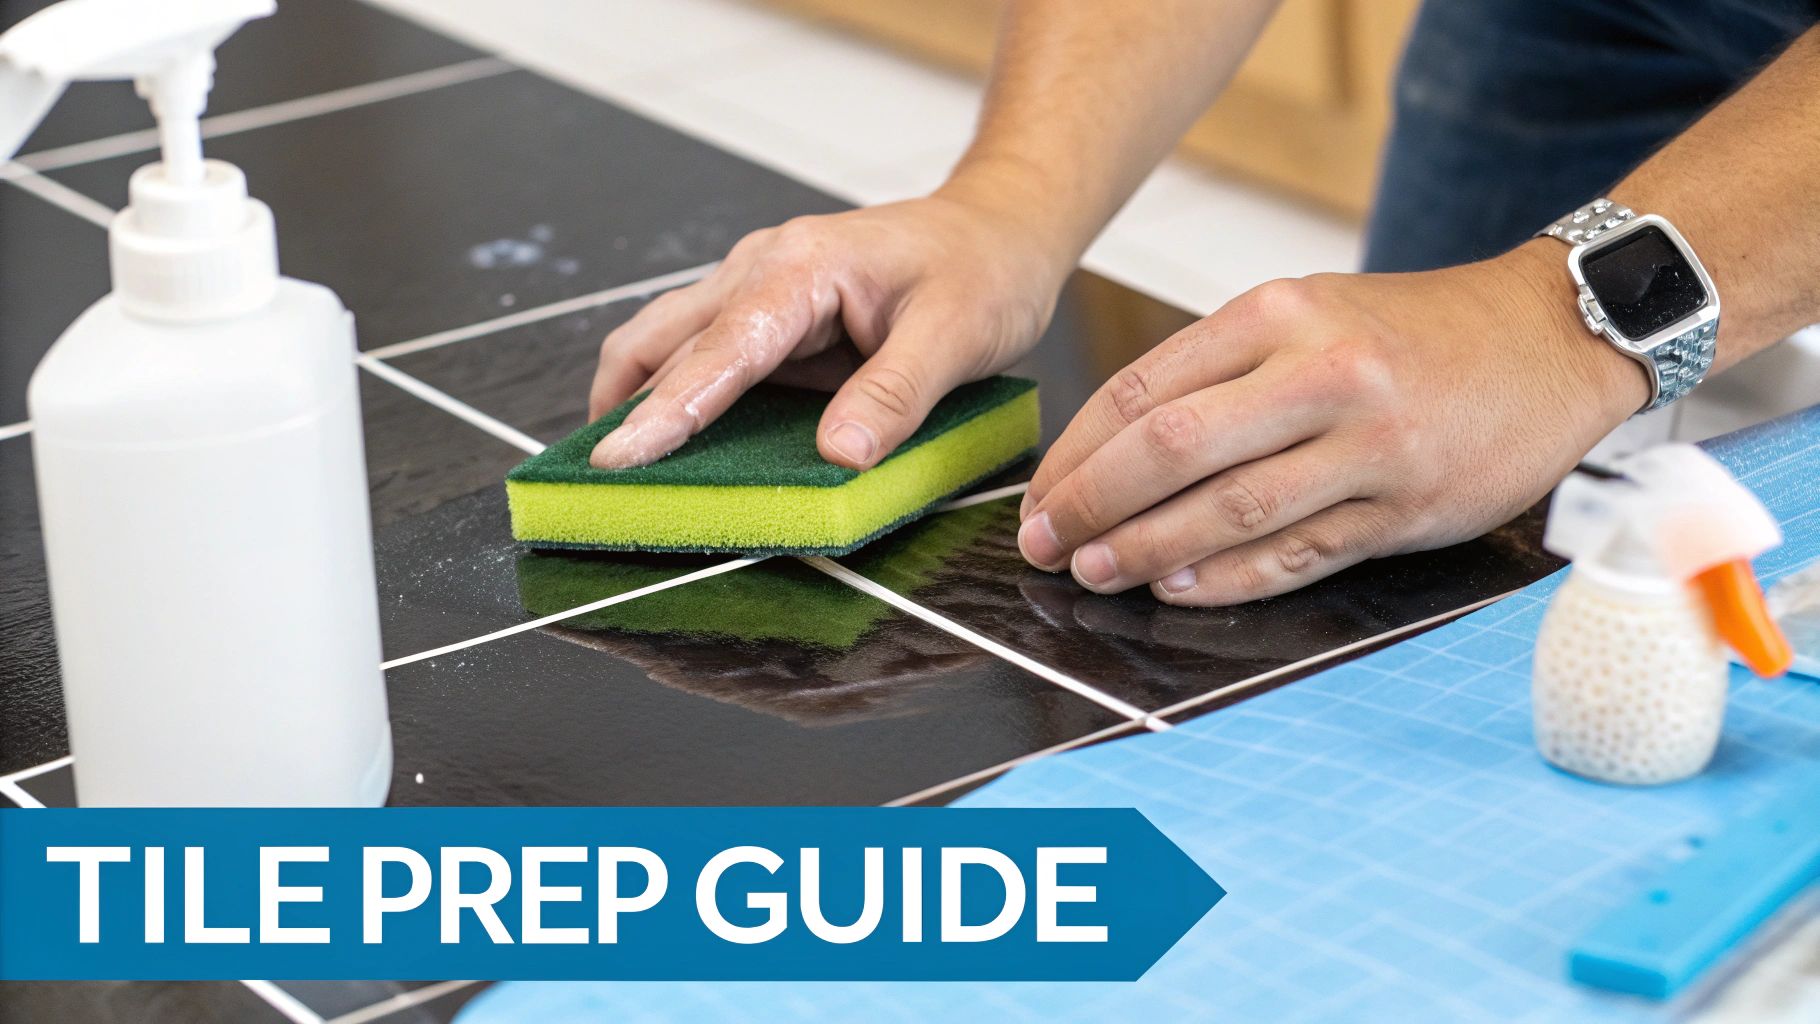
Here's a secret from years of experience: the real magic of a durable, professional-looking tile makeover isn't in the final application—it's all in the prep work. Honestly, rushing this part is the single biggest reason DIY projects go wrong. Any bit of grease, soap scum, or hidden moisture will ruin the adhesion of your new surface.
Think of your old tiles as the canvas. If you don't prepare it properly, your masterpiece is guaranteed to chip, bubble, or peel before its time.
These fundamental prep steps are non-negotiable, whether you're working on a bathroom, a splashback, or anywhere else. In fact, many of these techniques are universal, as we also touch on in our guide on how to cover kitchen tiles, which provides a slightly different perspective for another high-use area of the home.
Deep Cleaning Your Tiles and Grout
First things first, you've got to get rid of years of bathroom grime with a proper deep clean. Your everyday bathroom spray just won’t cut it for this job. You need a heavy-duty solution that will obliterate stubborn residue and leave the surface completely sanitised.
A simple solution of sugar soap and warm water is a fantastic, budget-friendly choice. Grab a stiff-bristled brush and really work it into the tiles and, crucially, the grout lines where grime loves to hide. After a good scrub, rinse everything down with clean water and dry the whole area with a lint-free cloth.
Pro Tip: One of the most common mistakes is not giving the surface enough time to dry. The tiles might feel dry to the touch, but grout is porous and can secretly hold onto moisture for ages. I’d recommend giving it at least 4-6 hours in a well-ventilated room before you even think about the next phase.
Making Repairs and Creating a Grippy Surface
With the tiles spotless and bone-dry, it's time to play detective. Look for any imperfections. Small chips or deep cracks can usually be sorted with a bit of epoxy filler. Just apply it with a putty knife, smooth it out so it's flush with the tile, and let it cure completely based on the product’s instructions.
Now, let's talk about the tile’s finish. Most bathroom tiles have a slick, glossy glaze that is a nightmare for paint and adhesives to stick to. To give your new covering a fighting chance, you need to gently sand the tiles. This scuffs up the surface just enough for the new material to grab hold.
For this stage, you'll need a few essential bits of kit:
- Sugar Soap or a Strong Degreaser: For that initial, all-important clean.
- Stiff Scrub Brush: Absolutely necessary for getting deep into those grout lines.
- Fine-Grit Sandpaper: Look for a 180-220 grit. It’s perfect for roughing up the glaze without gouging the tile.
- Epoxy Filler: Your go-to for any minor chips or cracks.
- Tack Cloth or Microfibre Cloth: For meticulously wiping away every last speck of sanding dust.
This light sanding, often called ‘keying’ the surface, is arguably the most critical step of the entire process. It creates thousands of microscopic scratches that give your primer or adhesive a surface to mechanically bond with. Get this right, and your new finish will last for years to come.
Applying Your Tile Cover Up Like a Pro
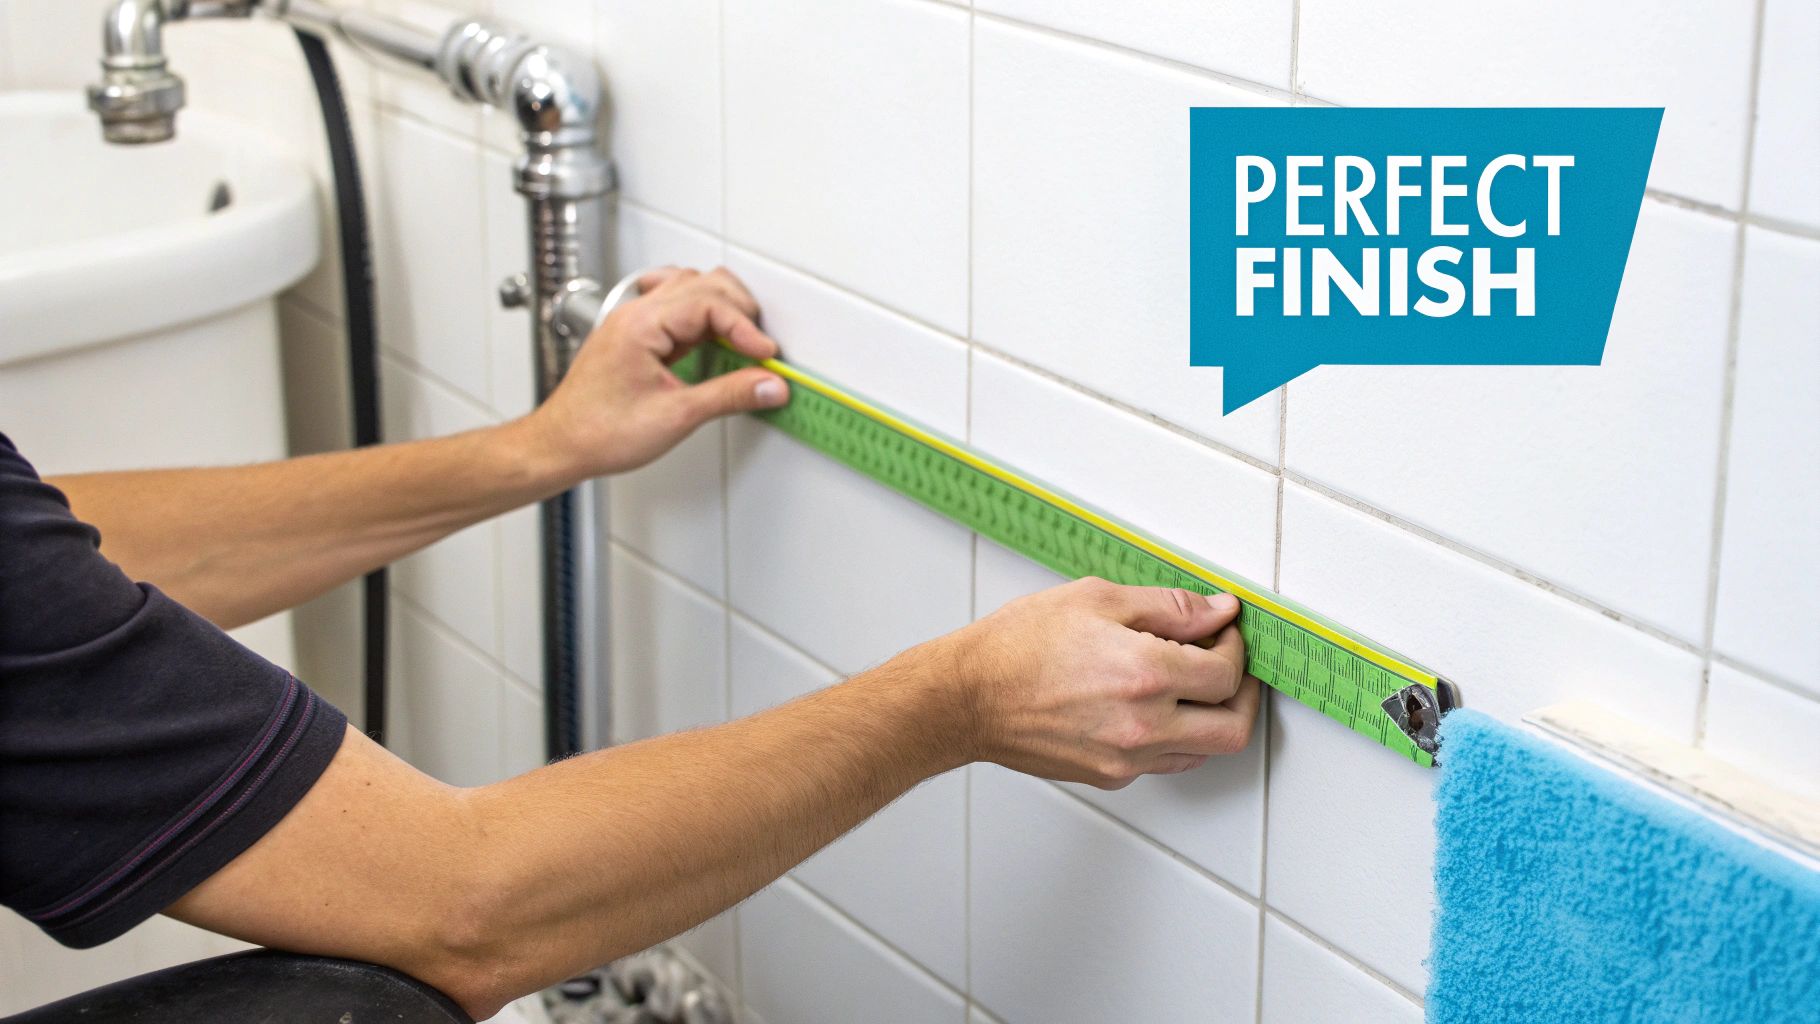
Right, this is where the fun really begins. You’ve done the prep work, your tiles are sparkling clean, and now it’s time to bring your vision to life. Applying your chosen cover-up correctly is what makes the difference between a decent DIY job and a finish that looks genuinely professional.
Each method has its own little quirks and techniques. Paying close attention to these details is the secret sauce for a flawless transformation. Let’s get into the specifics for the most popular options and how to avoid those common, frustrating mistakes.
Mastering Peel and Stick Tiles
The big draw for peel-and-stick tiles is how simple they seem, but a truly great result comes down to a bit of finesse. The old saying, “measure twice, cut once,” has never been more relevant, especially when you’re navigating awkward spots like pipes or the base of the loo.
Here’s a trick I swear by: make a paper template first. Just trace the tricky shape onto a sheet of paper, cut it out, and check that it fits perfectly. Once you’re happy, use that paper as your guide to cut the actual tile sticker. It’s a simple extra step that can save you a world of frustration and wasted vinyl.
When you’re ready to apply the sticker, resist the temptation to peel the entire backing off in one go.
- Start by peeling back only the top inch or two.
- Line it up carefully with the top of your tile or your guideline.
- Gently press it onto the surface, smoothing from the centre outwards as you slowly pull away the rest of the backing paper.
This little bit of control makes a huge difference and is the best way to avoid trapping air bubbles. If a stubborn bubble does pop up, don’t panic. Just prick the centre with a pin and gently smooth the air out towards the tiny hole. If you’re feeling a bit nervous, checking out a complete DIY guide on removable tile stickers and vinyl wraps before you start can give you that extra bit of confidence.
Achieving a Perfect Painted Finish
When it comes to painting tiles, patience is everything. Rushing the job, particularly the drying time between coats, is the fastest way to ruin your hard work. After applying your specialist bonding primer, you absolutely must let it cure for the full time stated on the tin. This isn’t a step you can skip if you want the paint to last.
Once you’re ready for the colour, think thin. It’s always better to apply two or three light coats of tile paint rather than slathering on one thick, heavy layer. A thick coat will only lead to drips, visible brush marks, and a ridiculously long curing time.
Pro Tip: A high-density foam roller is your best friend for painting tiles. It gives a beautifully smooth, almost spray-painted finish on the tile faces. Use a good-quality angled brush to neatly cut in around the grout lines before you roll the main surface.
Don't forget that "dry to the touch" isn't the same as "fully cured." Most specialist tile paints need up to 7 days to completely harden and become properly water-resistant. If you use the shower or try to scrub the tiles before then, you’ll almost certainly damage the finish.
Installing Waterproof Wall Panels
With bigger solutions like waterproof wall panels, precision is the name of the game. Before you even think about cutting, take meticulous measurements of the wall area, carefully noting the location of windows, shower fixtures, or any niches. Transfer these measurements to your panel, then check them again. And again.
When you're ready to cut, use a fine-toothed saw. A great tip is to apply masking tape along your cut line on the panel’s decorative side—this helps prevent chipping and gives you a much cleaner edge. For installation, apply a generous amount of the manufacturer’s recommended adhesive in a grid or S-pattern on the back of the panel.
The single most important part of this job is sealing every single joint and edge. Use a high-quality, mould-resistant silicone sealant along every seam, in every corner, and anywhere the panels meet the bath, shower tray, or floor. This is what creates the watertight barrier that makes these panels such a brilliant, low-maintenance solution.
Budgeting Your Bathroom Tile Makeover
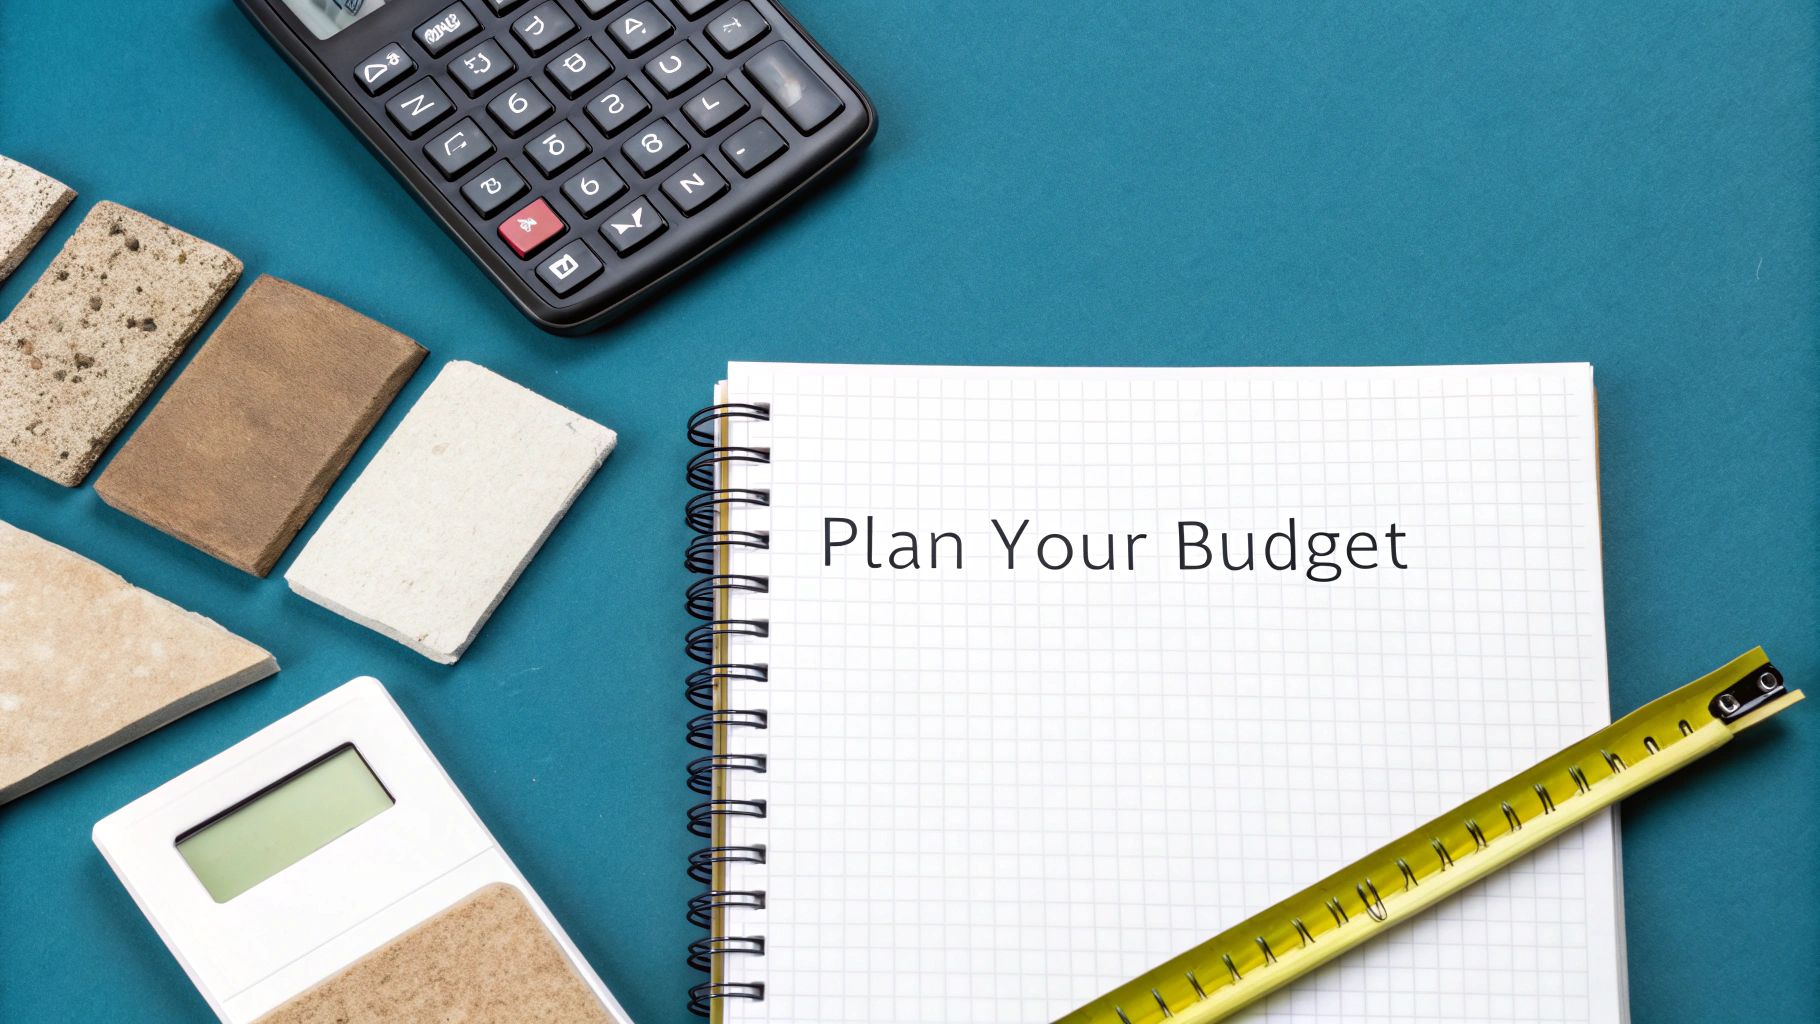
Before you get carried away with colour swatches and tile patterns, let's talk numbers. Getting a realistic grip on your budget is the key to a stress-free project. It’s so easy to just price up the main materials—the pretty stuff—but the small, forgotten expenses are what catch people out every single time.
A smart budget covers absolutely everything. You need to account for the star of the show, whether that’s your tile paint or vinyl stickers, but don't forget the supporting cast. I'm talking about things like sugar soap, good-quality painter's tape, sandpaper, rollers, and decent brushes. These are the tools that will make the difference between a slap-dash job and a genuinely professional finish, but they’re often left out of the initial sums.
Material Cost Estimates
To give you a rough idea of what you’ll be spending, here’s a breakdown of the typical costs for the most common DIY solutions. Bear in mind these are average UK price ranges, and they can easily shift depending on the brand, quality, and of course, the size of your bathroom.
-
Peel-and-Stick Tile Stickers: You can expect to pay anywhere from £15 to £40 per square metre. The fancy 3D gel tiles sit at the top end of that scale, while standard vinyl decals are a much more wallet-friendly option.
-
Specialist Tile Paint: A good tile paint kit, which usually includes the primer you'll need, will set you back about £30 to £60. This is typically enough to cover the tiled walls in a small to medium-sized bathroom.
-
Waterproof Wall Panels: This is definitely the biggest investment of the bunch, with prices ranging from £50 to over £150 per square metre. The final cost here really depends on the material, finish, and brand you choose.
If you're weighing up your options, having a look at a guide on the overall bathroom resurfacing cost can give you some useful context and help you compare different approaches.
The Hidden Value of DIY Labour
One of the biggest financial wins with these methods is that you don't have to hire a professional tiler. This is a massive deal right now in the UK. Bathroom refurbishments make up over two-thirds of all bathroom sales, but the industry is facing a major shortage of skilled installers. That mismatch between high demand and low supply often means long waits and eye-watering labour costs.
The widening gap between what homeowners want and the number of skilled tradespeople available is pushing more and more of us towards clever, labour-saving bathroom tile cover-up ideas. By choosing a DIY-friendly solution, you completely bypass scheduling headaches and pocket a significant chunk of cash.
This trend isn't going anywhere; the bathroom renovation market is only set to grow. Opting for a project you can tackle yourself doesn't just save you money—it puts you firmly in control of the schedule. When you take on the work, you're not just cutting labour costs; you're making a savvy move that fits the reality of today's UK renovation scene.
Your Questions Answered: What to Know Before You Cover Your Tiles
It's completely normal to have a few questions buzzing around your head before you dive into a project like this. After all, a bathroom isn't just any room—it has to stand up to steam, splashes, and daily use. Let's tackle some of the most common queries I hear, so you can get started with total confidence.
The first thing most people wonder about is the cost. Is this really a cheaper option? Absolutely. A full professional bathroom renovation in the UK can easily set you back anywhere from £4,500 to over £11,000. When you consider that wall finishes and tiling often eat up about 21% of that budget, you're looking at a potential spend of over £2,000 just for the tiles. Suddenly, a DIY cover-up looks incredibly appealing. You can see a full UK bathroom renovation cost breakdown on buildpartner.com to get a better idea of the numbers.
Will These Solutions Actually Work in a Shower?
This is the big one. A steamy, high-traffic shower is the ultimate test for any bathroom product. The short answer is yes, some of these solutions can work, but you have to be smart about it and extremely careful with the application.
- Waterproof Wall Panels: These are your best bet. They are engineered specifically for wet areas like shower enclosures and offer the most robust and reliable coverage.
- Specialist Tile Paint: If you follow the instructions to the letter—using a top-quality primer and allowing the paint to cure fully, which can take up to 7 days—you can create a surprisingly tough, water-resistant finish. Don't rush it.
- Peel-and-Stick Tiles: This is where you need to be cautious. While many brands claim to be water-resistant, they aren't designed for the constant, direct spray you get inside a shower. Over time, the adhesive will likely give up. They are much better suited for a backsplash or the walls outside the immediate shower zone.
The biggest mistake I see people make is grabbing a product that isn't rated for wet zones. Always read the fine print on the packaging. If it doesn't explicitly say it's suitable for direct water contact, don't use it in the shower.
Are These Options Genuinely Renter-Friendly?
If you're renting, the goal is to get your deposit back. That means any changes you make have to be completely reversible without leaving a trace.
Peel-and-stick tiles and vinyl wraps are the heroes for renters. They’re designed to be temporary. When it's time to move out, you can usually just warm them up with a hairdryer to soften the glue and peel them off cleanly.
Tile paint, on the other hand, is a permanent commitment. Think of it as a one-way street. Only go down this route if you own your home or have written permission from a very understanding landlord.
How Do I Clean and Maintain the New Surface?
Keeping your freshly covered tiles looking good is simple, but it does require a change in habits. Aggressive cleaners and scrubbing pads are now off-limits, as they can scratch the paint or vinyl.
A gentle approach is all you need:
- Always use a soft cloth or a non-abrasive sponge.
- Stick to mild cleaners. A pH-neutral spray or just a bit of soap and warm water is perfect.
- Steer clear of anything containing bleach or harsh acids, as these can cause ugly discolouration and damage the finish.
Treat it gently, and your new-look bathroom will stay looking fresh for years.
Ready to bring your bathroom transformation to life? At Quote My Wall, we have a huge range of high-quality tile stickers and vinyl wraps perfect for your next project. Explore our collection and find the perfect design for your space at https://www.quotemywall.co.uk.