
peel and stick wallpaper bathroom: Transform in Minutes
Of course you can. Using peel and stick wallpaper in a bathroom is a fantastic way to get a stunning and long-lasting finish. Modern vinyl-based wallpapers are specifically designed to be water-resistant and handle humidity, which makes them a brilliant choice for a quick, stylish, and renter-friendly bathroom makeover.
Why Removable Wallpaper Is Perfect for UK Bathrooms
For years, the mere thought of putting wallpaper in a bathroom was enough to make any UK homeowner wince. We all have visions of peeling seams, damp patches, and a generally sorry-looking mess. Traditional paper and paste just couldn't cope with the constant steam and condensation.
But the game has completely changed. Peel and stick wallpaper for bathroom walls has emerged as a clever, stylish, and incredibly practical solution to this age-old problem.

The secret is in the material. Unlike their porous paper predecessors, the best removable wallpapers today are made from a durable, water-resistant vinyl. This non-porous surface effectively acts as a barrier, stopping moisture from getting through to the adhesive or the wall itself. It’s a perfect match for the unique challenges a bathroom presents.
To really see the difference, it helps to compare the two options side-by-side.
Peel and Stick vs Traditional Wallpaper in Bathrooms
| Feature | Peel and Stick Wallpaper | Traditional Wallpaper |
|---|---|---|
| Material | Typically vinyl-based, inherently water-resistant. | Usually paper-based, requiring special coatings for moisture resistance. |
| Installation | DIY-friendly. No paste, no mess, no professional help needed. | Requires messy paste, booking, and often a professional decorator. |
| Durability | Excellent. Resists humidity, steam, and splashes. Easy to wipe clean. | Prone to peeling, bubbling, and mould growth in damp conditions. |
| Removal | Peels off cleanly with no residue or damage. Ideal for renters. | Difficult and messy to remove, often damages the wall surface. |
| Cost | Lower upfront cost, as no professional installation is needed. | Higher initial cost due to materials, tools, and professional labour. |
As you can see, the modern approach offers clear advantages for a humid space like a bathroom.
A DIY Dream Come True
One of the best things about peel and stick wallpaper is just how straightforward it is. You don't need messy pastes, booking tables, or a decorator on speed dial. It’s a genuine DIY project you can tackle in an afternoon, transforming a drab bathroom into something special with minimal fuss.
Here's why so many people are turning to it:
- Cost-Effective: It gives you the high-end look of expensive tiles or custom murals for a fraction of the cost.
- No Mess Installation: Forget about buckets of glue and hours of cleaning up. You literally just peel off the backing and stick it to the wall.
- Instant Gratification: The transformation is immediate. You can completely change the look and feel of your bathroom in a few hours.
The real magic of peel and stick wallpaper lies in its ability to empower anyone to become their own decorator. It removes the old barriers of cost, mess, and long-term commitment, making great design accessible to everyone.
This shift is clearly reflected in market trends. The UK wallpaper market, which includes these bathroom-friendly options, was valued at around USD 107.8 million in 2023. It's projected to grow at 5.3% annually, driven largely by consumer demand for durable, moisture-resistant vinyl types which already dominate the market.
The Ultimate Renter-Friendly Solution
For the millions of people renting across the UK, making a space feel like home without losing your security deposit is a constant balancing act. Peel and stick wallpaper is the perfect answer.
Because it's designed to be fully removable, it lets tenants go bold with patterns and colours without making a permanent change. When it’s time to move out, it peels away cleanly, leaving no sticky residue or damage behind. This flexibility also appeals to homeowners who just love to switch up their décor. You can try out a bold botanical print for a season and swap it for a subtle geometric pattern next year without the headache of stripping traditional paper.
For a broader look at transforming bathroom spaces, you might want to explore bathroom wrapping as a chic alternative to renovation. It’s this winning combination of durability, style, and non-committal ease that makes peel and stick such a perfect fit for modern homes.
Choosing the Right Wallpaper for Your Bathroom
Picking out the perfect peel and stick wallpaper for a bathroom isn't just about finding a pattern you love. Bathrooms are tough environments—they're all about steam, condensation, and splashes. You need a wallpaper that’s as hardworking as it is beautiful, otherwise, you'll be redecorating again in a year.
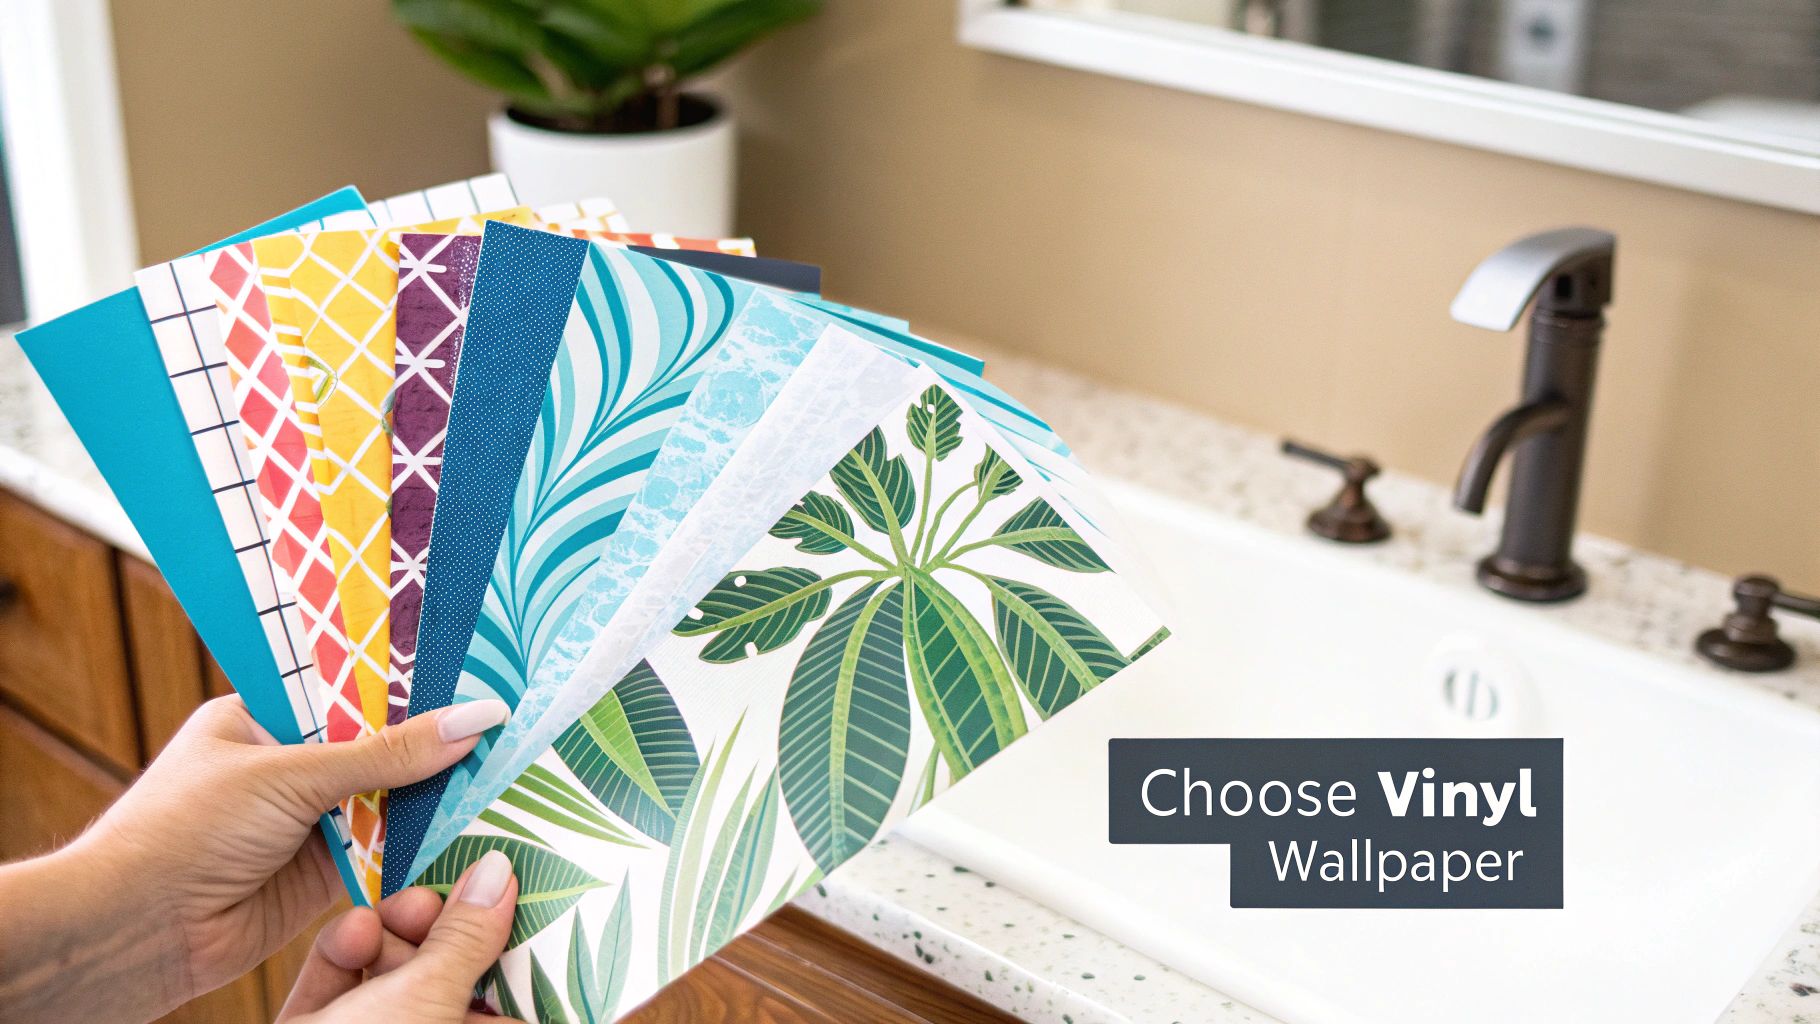
The single most important factor? The material. For a high-humidity space like a bathroom, vinyl-based wallpaper is non-negotiable. It’s the only way to go. Unlike wallpapers made from paper, vinyl naturally resists water, which means it won’t soak up moisture, start peeling at the corners, or become a breeding ground for mould. Honestly, it's what makes this whole idea work.
Matching Patterns to Your Space
Once you’ve got your search narrowed down to vinyl options, you can get to the fun part: picking a design. The right pattern can completely change the feel of your bathroom, making it seem bigger, cosier, or more luxurious.
- For smaller bathrooms or cloakrooms: Think big patterns and light colours. A bold, large-scale botanical print or wide vertical stripes can trick the eye, creating a sense of height and space that stops the room from feeling boxy.
- For larger, more spacious bathrooms: You’ve got a bit more creative freedom here. Feel free to experiment with darker hues or more detailed patterns. A moody floral, a sophisticated faux marble, or a complex geometric design can add a real touch of drama.
- To hide imperfect walls: If your walls aren't perfectly smooth, a textured wallpaper or one with a busy, organic pattern is your best friend. Things like floral prints or abstract swirls are fantastic for disguising minor lumps and bumps.
Looking at recent UK design trends, it's clear people are craving wallpapers with a bit more personality. We saw searches for textured bathroom wallpaper hit a high in August 2024, and interest in floral designs spiked in October 2024. This tells us that homeowners are moving towards designs that add both visual interest and a tactile feel. You can dive deeper into these bathroom wallpaper trends at Accio.com.
Why You Must Order Samples
I can't stress this enough: what you see on your screen is rarely what you get in real life. The colour of your lightbulbs, the amount of daylight your bathroom gets, and even the colour of your tiles can all change how a wallpaper looks.
Ordering samples is the single most important step in the selection process. It allows you to see the true colours, feel the texture, and test the adhesive on your specific wall surface before committing to several rolls.
Stick your samples up on the wall and live with them for a few days. Check them in the bright morning light and again at night with the lights on. This simple step can save you from a very expensive and frustrating mistake. And if you're thinking of putting it over old tiles, our guide on using tile stickers for a perfect bathroom makeover has some specific tips for that.
Calculating How Much Wallpaper to Buy
There's nothing worse than getting halfway through the job only to realise you're a few feet short of wallpaper. Getting your measurements right from the start is absolutely crucial.
First, measure the height and width of every wall you want to cover. Multiply these figures for each wall to get the area in square metres, then add them all together. Don't forget to measure any big openings, like doors and windows, and subtract their area from your total.
Here’s a quick way to work it out:
- Measure the Wall Height (m): From the skirting board to the ceiling.
- Measure the Wall Width (m): Go from corner to corner for each wall.
- Find the Total Area (m²): (Total Width of All Walls) x (Wall Height).
- Subtract Openings: Calculate the area of doors and windows and take it away from your total.
- Check Roll Coverage: The product description will tell you how many square metres a single roll covers.
- Figure Out How Many Rolls: Divide your total area by the coverage per roll.
Always round your result up to the nearest whole number. Then, and this is the important bit, order an extra 10-15%. This isn't just for 'just in case' – you'll need it for trimming around obstacles, correcting any mistakes, and for matching up patterns, which always results in some waste. It’s far better to have a bit left over for future repairs than to be scrambling to find another roll from the same batch, as colours can vary slightly between print runs.
Preparing Your Walls for a Flawless Finish
Let’s be honest, prepping the walls is the part everyone wants to skip. But trying to hang your beautiful new peel and stick wallpaper in a bathroom without doing the prep work is like building a house on a shaky foundation. The secret to that professional, long-lasting finish that won’t peel or bubble is all in what you do before the first panel even touches the wall. Trust me, taking an hour or two now will save you a world of frustration later.
First things first: give those walls a proper clean. You might not see it, but bathroom walls are covered in a thin film of soap scum, hairspray residue, and general grime from condensation. This invisible layer is the enemy of good adhesion.
Grab a sponge and a bucket of sugar soap solution, or even just some mild detergent in warm water. Give every inch of the wall a good scrub, focusing on those sneaky areas around the sink, behind the toilet, and near the shower. Once you’re done, wipe it all down with a clean, damp cloth and then let it dry completely. And I mean bone dry. Give it a good 24 hours to be safe.
Creating the Perfect Canvas
Now that your walls are clean, it's time for a quick inspection. Run your hand over the surface. Feel any bumps, flaking paint, or little cracks? While peel and stick wallpaper is quite forgiving, it won’t hide major flaws. Any significant texture underneath is going to show right through.
For any holes or cracks, grab a filling knife and a bit of decorator's filler. Once the filler has set, sand it down with fine-grit sandpaper until it’s perfectly smooth and flush with the wall. You're aiming for a surface that feels as smooth as you can possibly get it.
This is also the moment to think about the bigger picture. A successful wallpaper project in a bathroom depends on a dry, stable wall. If you have any underlying damp issues, they need to be sorted out first. Understanding how to prevent damp and condensation in your home is a crucial step before you even think about wallpapering.
The Critical Role of Your Paint Finish
Here’s a piece of advice that many people learn the hard way: the type of paint already on your walls can make or break your project. The adhesive on peel and stick products needs a slightly slick, sealed surface to really grab hold.
Key Takeaway: Never apply peel and stick wallpaper directly onto a matte or flat paint finish. These paints are chalky and porous, meaning the adhesive can't form a strong bond and will likely start peeling at the edges over time.
For the best possible results, the walls should have a satin, eggshell, or semi-gloss finish. These paints create a much smoother, more durable surface that the wallpaper can stick to properly—and just as importantly, be removed from cleanly down the line.
If your walls are currently matte, don't panic. You don’t have to completely repaint. A single coat of a good-quality wallpaper primer will do the trick. It seals the porous surface and gives the adhesive the perfect base to grip onto.
The Importance of Patience
This last point is for anyone who has recently painted their bathroom. Fresh paint needs to "cure," which is different from just being dry to the touch. The curing process, where the paint fully hardens and all the solvents evaporate, takes longer than you might think.
Follow this one simple rule to avoid a decorating disaster:
- Wait at least four weeks after painting before you even think about applying peel and stick wallpaper.
Putting wallpaper on uncured paint is a recipe for failure. The adhesive can react with the chemicals still off-gassing from the paint, which severely weakens the bond. Even worse, when you eventually go to remove the wallpaper, it'll probably rip off big chunks of paint with it, leaving you with a huge repair job. A little bit of patience now will keep your walls looking great for years to come.
Your Step-by-Step Installation Guide
Right, this is where the fun really begins. With your walls prepped and ready, it's time to bring your bathroom vision to life. If you're new to this, don't sweat it. Installing peel and stick wallpaper in a bathroom is a world away from the messy, stressful process of traditional wallpapering. The secret is simply to take your time and have the right gear to hand.
Speaking of gear, a flawless finish comes down to just a few key items. You don't need a professional decorator's entire van, just the essentials to get a smooth, bubble-free result.
Assembling Your Toolkit
Before you even think about unrolling that first panel, get your tools lined up. Having everything within reach means you can get into a good rhythm without stopping and starting.
- A Sharp Craft Knife: This is non-negotiable. A fresh blade gives you clean, crisp cuts around sockets and corners. A dull one will just snag and tear the vinyl.
- A Smoothing Tool: A simple plastic squeegee is perfect for pressing the wallpaper firmly to the wall and chasing out any pesky air bubbles.
- A Steel Ruler or Straight Edge: You'll need this to guide your knife for perfectly straight cuts along the ceiling and skirting boards.
- A Tape Measure: Obvious, but essential. Measure twice, cut once!
- A Pencil: For making light, easily erasable marks on the wall or the back of the wallpaper.
- A Spirit Level: Absolutely critical for getting that first piece perfectly vertical.
With your kit ready, you're set to hang the most important panel of the whole job.
Hanging the First Panel Perfectly
Get this first piece right, and everything else will fall into place. If it's even a fraction off, every panel that follows will be skewed, and you'll end up with a wonky finish. One thing to remember is that very few walls in UK homes are perfectly square, so never, ever use the corner of the room as your guide.
Instead, you need to create your own perfectly vertical line. From your starting corner, measure out a distance that’s just a little less than the width of your wallpaper roll. For instance, if your roll is 50cm wide, measure out 49cm and make a small pencil mark near the ceiling.
Now, grab your spirit level. Place it on that mark and draw a faint, perfectly straight vertical line all the way down the wall. This is your plumb line, and it’s the secret to guaranteeing your first panel goes on straight.
This quick infographic breaks down the prep work.

Following these steps gives the adhesive the best possible chance to bond properly for a finish that lasts.
Now, cut your first panel to the right length, but leave an extra 5cm or so at the top and bottom for trimming later. Carefully peel back about 15-20cm of the backing paper from the top. Line up the edge of the wallpaper with your plumb line, and press it firmly to the wall.
Slowly pull the backing paper down with one hand while using your smoothing tool with the other. Work from the centre outwards, pushing any air bubbles towards the edges as you go.
Pro Tip: Whatever you do, don't peel the entire backing off in one go! It makes the panel a nightmare to control and it'll almost certainly stick to itself or trap a load of air. Small, manageable sections are the way forward.
Aligning Patterns and Navigating Obstacles
Once your first piece is up, the rest is just a case of careful pattern matching. Take your second panel and hold it against the wall, overlapping the first one slightly. Nudge it around until the pattern lines up perfectly. Once you're happy, stick the top section and work your way down just like before, keeping the seam tight.
You'll inevitably hit an obstacle like a light switch or socket. First things first: turn off the electricity at the fuse box. Hang the wallpaper right over the fixture, then take your craft knife and carefully cut an 'X' from corner to corner across the fitting. You can then trim away the small triangles of vinyl around the edges and smooth the paper down for a neat finish.
Corners can look tricky, but they're straightforward if you take your time.
- Internal Corners: When you reach a corner, smooth the panel into it and let it run onto the next wall by about 2-3cm. Then, hang your next panel right into the corner, overlapping the small flap. Use your spirit level again to make sure this new piece is perfectly vertical before you stick it down.
- External Corners: For outer corners, just wrap the wallpaper around the edge, smoothing it down firmly. You might get a little bunching at the very top and bottom, but a small, careful relief cut with your knife will solve that.
For other creative projects, like jazzing up old furniture or tiles, check out this fantastic DIY guide on transforming your home with removable tile stickers and vinyl wraps.
The boom in this kind of user-friendly decor is part of a much bigger trend. Driven by peel and stick options, the UK wallpaper market was valued at around USD 105.5 million in 2023 and is expected to soar past USD 167.5 million by 2033, growing at a rate of 4.7% to 5.3%. It's all down to new printing technologies and people wanting stylish, personalised homes without the hassle.
With all the panels in place, the last job is to trim the excess wallpaper along the ceiling and skirting board. Use your straight edge to guide your craft knife for a clean, professional line that will perfectly finish the job.
Keeping Your Wallpaper Looking Brand New
So, your stunning peel and stick wallpaper bathroom project is complete. Now, how do you keep it looking that good? The great news is that high-quality vinyl wallpaper is surprisingly low-maintenance, even in a steamy bathroom. The secret to its longevity isn't about cleaning, it's about ventilation.
Make it a habit to run your extractor fan during a shower and for about 20-30 minutes afterwards. This one simple step stops steam from condensing on the walls, which is the best way to prevent moisture from ever causing a problem. No fan? No worries. Just crack a window open to get the air circulating.
Gentle Cleaning and Upkeep
Splashes from toothpaste and soap are just part of bathroom life, but dealing with them is a doddle. The trick is to be gentle. Stay away from harsh, abrasive chemicals, as they can damage the vinyl finish or, worse, weaken the adhesive over time.
For most day-to-day marks, a soft, damp cloth is all you'll ever need. If you come across something a bit more stubborn, a spot of warm water with a tiny drop of mild washing-up liquid will lift it right off.
- Always grab a microfibre cloth; they're soft and won't scratch the surface.
- Wring the cloth out properly so it’s just damp, not dripping wet.
- Wipe gently, rather than scrubbing hard.
- Never use bleach-based cleaners, scouring powders, or those rough green sponges.
Think of it like cleaning a painted wall—a light touch is always best. Following these simple rules will keep your wallpaper looking vibrant and sticking perfectly for years to come.
The beauty of modern vinyl wallpaper is its resilience. It's designed for real life, which means a quick, gentle wipe-down is all it takes to handle the daily wear and tear of a busy bathroom.
The Simple Removal Process
Perhaps the biggest selling point of this wallpaper is that it’s not a forever commitment. When you decide it's time for a new look, or if you're moving out of a rental, taking it down is just as easy as putting it up. You can forget about steamers, scrapers, and hours of frustrating work.
Just find a top corner of one of the panels and pick at it with your fingernail to get it started. Once you’ve got a decent grip, peel it downwards slowly and evenly. I find that pulling at a 45-degree angle seems to work best.
For an extra-smooth removal, a hairdryer is your secret weapon. Gently warm the vinyl as you peel, which softens the adhesive and helps it release from the wall without leaving any sticky mess behind. The same technique applies to other vinyl products, as you can see in this guide on how to remove a wall sticker.
The wall underneath will be left clean and undamaged, ready for a fresh coat of paint or your next wallpaper adventure. It’s this effortless flexibility that makes peel and stick such a brilliant choice for modern decorating.
Your Bathroom Wallpaper Questions, Answered
It's completely normal to have a few questions before you take the plunge with peel and stick wallpaper in a bathroom. After all, it’s a room that works hard, dealing with steam and splashes every single day. Let's walk through some of the common things people worry about so you can get started with confidence.
These are the practical, real-world concerns that pop up when you're planning a project like this. Getting clear on them now will save you a lot of guesswork later.
Can Peel and Stick Wallpaper Really Handle a Steamy Bathroom?
Yes, it certainly can, but there's a big "if" attached: you have to choose the right kind. Always, and I mean always, go for a vinyl-based wallpaper. Vinyl is naturally water-resistant, so it just shrugs off humidity and splashes instead of soaking them up. It’s made precisely for tricky spaces like bathrooms and kitchens.
The other half of the equation is preparation. You need to give the wallpaper the best possible surface to stick to. That means a clean, smooth wall, ideally with a satin or semi-gloss paint finish. This creates a powerful, lasting bond that won't give up after a few hot showers. Good ventilation helps enormously too – just flicking on that extractor fan makes all the difference.
What Do I Do If a Corner or Seam Starts to Peel?
First off, don't panic! This is usually a quick fix and doesn't mean your whole project is doomed. It's almost always caused by a tiny bit of dust or moisture that got trapped underneath when you first applied it, weakening the grip in that one spot.
To sort it out, just gently lift the peeling section. Take a clean cloth with a dab of rubbing alcohol and wipe both the wall and the back of the wallpaper. This gets rid of any grime that’s causing the problem. Let both surfaces air dry for a minute or two.
For a rock-solid repair, squeeze a tiny amount of wallpaper seam adhesive onto the wall itself (never on the paper). Then, press the wallpaper back into place and go over it firmly with a seam roller. This creates a bond that's even tougher than the original.
Can I Put Peel and Stick Wallpaper Over My Old Tiles?
Absolutely! In fact, this is one of the most brilliant ways to use peel and stick wallpaper in a bathroom. It’s a game-changer for covering up dated tiles without the dust and cost of a full demolition. The only catch is that you need a completely smooth surface to start with, otherwise, the wallpaper will sink into the grout lines and look bumpy.
You’ve got two main ways to tackle this:
- Fill the Grout Lines: You can buy a waterproof filler and use it to fill every grout line until it's flush with the tile. Once it's dry, a quick sand will leave it perfectly smooth.
- Skim-Coat the Wall: For a truly flawless finish, you can get a professional to apply a skim coat—a very thin layer of plaster—over the entire tiled wall.
Once your surface is flat, clean, and primed, you can apply the wallpaper just like you would on any other wall.
Is This a Good Choice for Renters in the UK?
It’s probably one of the best decorating tricks a renter has up their sleeve. Because it’s designed to come off cleanly without pulling paint or damaging the wall, you can add some serious personality to your bathroom without risking your tenancy agreement. It’s all of the impact with none of the risk.
When your tenancy is up, removal is simple. Just warm each panel with a hairdryer to soften the adhesive, then slowly peel it away. It shouldn’t leave any sticky residue, leaving the bathroom exactly as you found it and helping you get your full deposit back.
Ready to transform your space with a stylish and renter-friendly update? At Quote My Wall, we offer a huge range of peel and stick wallpapers perfect for any bathroom project. Explore our collection and find your perfect pattern at https://www.quotemywall.co.uk.