
Stick on Name Labels for School Guide
The lost-property box is full by Friday afternoon. A jumper has no name, three PE kits look identical, and a lunchbox has been separated from its owner before anyone notices. Staff spend valuable time sorting, asking children to identify clothing and sending messages home, while parents replace items they may already own.
Stick on name labels for school won't prevent every loss, but they give staff a practical way to return found belongings quickly. A clear label on a care label, lunchbox or water bottle turns a guessing exercise into a simple identification task. The same principle helps care-home teams keep residents' clothing connected to the right laundry process.
A UK primary-school survey found that 98% of schools store lost property, while 88% say name labels are the best way to reduce it. Yet only 3% report that 75% to 100% of pupils' school kit is labelled, according to the detailed UK school lost-property survey. The problem isn't that schools doubt labels. The problem is inconsistent labelling.
A good system starts with the right label, the right surface and careful application. Parents can also make preparation more engaging by using fun DIY school projects by Playz, then labelling the equipment children will take to school. For a broader explanation of why ownership marking matters, see this guide to the importance of name labels in school supplies.
Introduction to Stick On Name Labels for School
Lost property becomes expensive and frustrating when nobody can identify it. A plain jumper may belong to several children in the same class, and a PE bag may look like every other bag in the changing area. Without a name, staff either hold the item for longer or rely on a child recognising it, which isn't a dependable process.
The strongest argument for labels is operational, not decorative. A visible name helps a teacher, lunchtime supervisor, cleaner or care-home laundry worker return an item without needing to remember its owner. That reduces unnecessary replacement and makes shared spaces easier to manage.
Practical rule: Label the item before it enters the school bag, not after the first lost-property incident.
The most useful stick-on labels are designed for smooth care labels and hard, non-porous items. They work particularly well on uniform care tags, coat labels, lunchboxes, pencil cases, bottles and other belongings with a flat surface. Direct application to textured, stretchy fabric is less reliable because the adhesive has less solid area to grip and the material moves during wear and washing.
A systematic approach is simple:
- Clothing: Use the care label or another smooth sewn-in label.
- Hard items: Choose a flat, clean area on the lunchbox, bottle or stationery.
- Identification: Use a name that staff can read quickly.
- Review: Check labels when clothing is handed down or belongings change.
This matters even more as school uniform policies change. Families may own more plain, interchangeable garments, so discreet ownership marking becomes a practical part of kit management rather than an optional extra.
The result is not a perfect lost-property system. Children will still leave items behind. A durable label gives the adult who finds the item a realistic chance of returning it.
How to Choose the Right Washable Stick On Name Labels
Choose labels by surface first, then by appearance. The label that performs well on a polyester care tag may not perform equally well on a knitted jumper or an elasticated waistband. Adhesive strength matters, but compatibility matters just as much.
For most school clothing, select a washable label intended for care labels. For lunchboxes, bottles and stationery, choose a format designed for smooth hard surfaces. Avoid placing a standard clothing label across a seam, ribbed edge, grip section or stretchy fabric. The label may attach initially, then lift as the item bends or moves.
Compare the main material options
The following comparison is a practical buying guide. Product specifications vary, so check the manufacturer's instructions before ordering.
| Material | Surface Compatibility | Wash Durability | Best Use |
|---|---|---|---|
| Vinyl | Smooth care labels and rigid, non-porous items | Suitable for repeated washing when applied correctly | Uniform tags, bottles, lunchboxes and stationery |
| Polyester | Smooth labels and selected hard surfaces | Suitable where the product is specifically rated for laundering | Clothing care labels and everyday school kit |
| Paper | Dry, smooth surfaces only | Not a dependable choice for laundering or dishwasher use | Temporary organisation, dry storage and short-term marking |
A high-tack adhesive is useful where the surface is slightly difficult, but it doesn't make every fabric suitable. Smooth polyester or nylon care labels provide a more stable bonding area than textured clothing. If a garment has no suitable tag, check whether it has a smooth printed brand or size area. Otherwise, use a product specifically intended for that application rather than assuming any sticker will hold.
The 2026 UK uniform guidance gives this choice added relevance. The government's school uniform guidance says governing boards must ensure policies comply with a cap on branded items from 1 September 2026. As schools move towards lower-branded uniform systems, families need labels that are discreet, readable and compatible with plain garments, rather than large decorative marks that may conflict with school expectations.
Size should match the item. Use a compact format for narrow care tags and stationery, and a larger format where staff need to read the name at a glance. Keep the design uncluttered. A child's name, surname initial or family surname is usually more useful than a busy illustration that reduces legibility.
How to Design and Order Personalised Stick On Labels
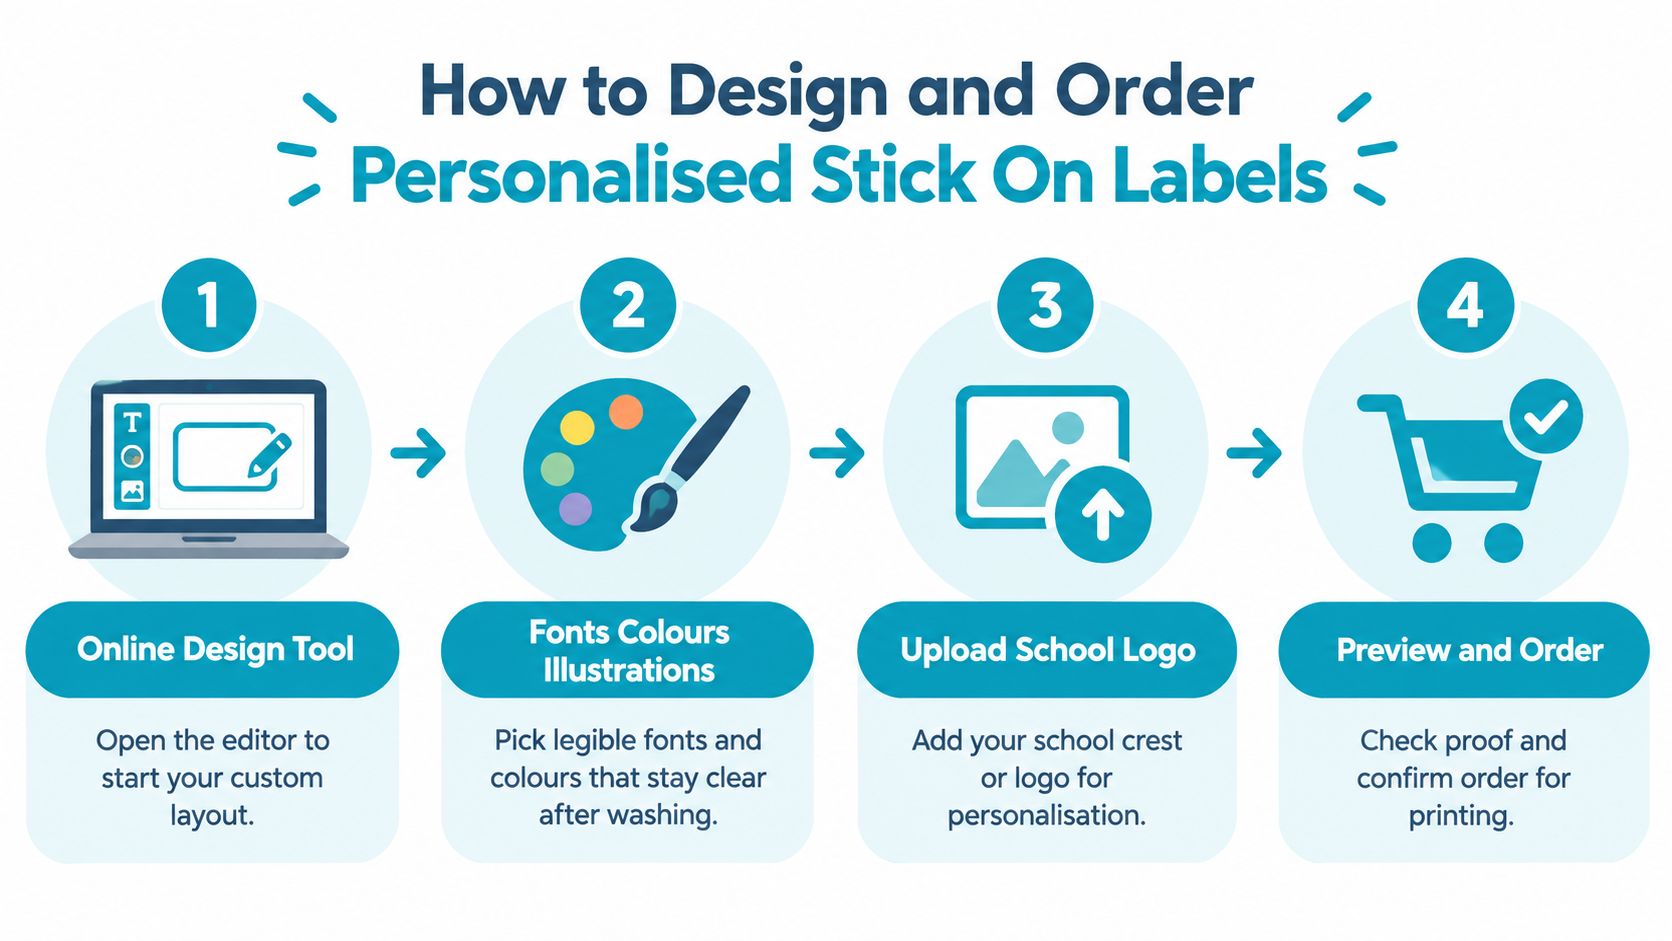
A label design should pass one test: can a busy adult identify the owner without holding the item close to their face? If the answer is no, simplify it. Strong contrast, a clear typeface and enough space around the name matter more than elaborate decoration.
Start by checking the spelling carefully. This is especially important for bulk orders, sibling sets and care-home batches, where one incorrect letter can make an otherwise sound labelling system useless. Type names into a separate list first, then compare that list with the digital proof.
Build a readable design
Use a bold, uncomplicated font. Very thin lettering, tightly packed script and low-contrast colours may look attractive on screen but lose clarity on a small label. This guide to choosing fonts for name labels is useful when comparing type styles.
For school use, choose a consistent format across clothing, lunchboxes and stationery. A child may recognise a favourite colour or symbol, but staff still need the written name. For care homes, add a simple room, unit or resident identifier only where the organisation's privacy policy permits it.
Design checkpoint: Read the proof at the size it will be printed. Don't judge a tiny label from a large screen preview.
If a supplier allows logo uploads, confirm that the school crest or care-home icon is sharp and correctly positioned. Don't allow the logo to crowd the name. A logo can support recognition, but it shouldn't replace readable ownership information.
Place the order carefully
Before payment, check:
- Names: Compare every spelling with your prepared list.
- Quantity: Include the belongings that go through school or laundry routines.
- Surface plan: Confirm that the chosen label suits care tags, plastic or another intended surface.
- Proof: Check alignment, colour contrast and the visible edge of each label.
- Delivery: Order before the uniform is needed, especially if several people need to apply labels.
Families can order one consistent set for school clothing and belongings. Schools or care homes may prefer a shared template, but each person's label should remain easy to distinguish. Avoid assuming that the largest order is the most efficient. A smaller, accurate batch is better than unused labels with outdated names.
Apply labels only after the order has been checked. Printing errors are preventable; replacing a complete batch because nobody reviewed the proof is not.
How to Apply Stick On Name Labels Effectively
Application determines whether a washable label becomes a reliable identifier or a loose sticker in the washing machine. Most failures begin before the label touches water. Lint, detergent residue, fabric softener and moisture all reduce the quality of the bond.
Prepare the surface
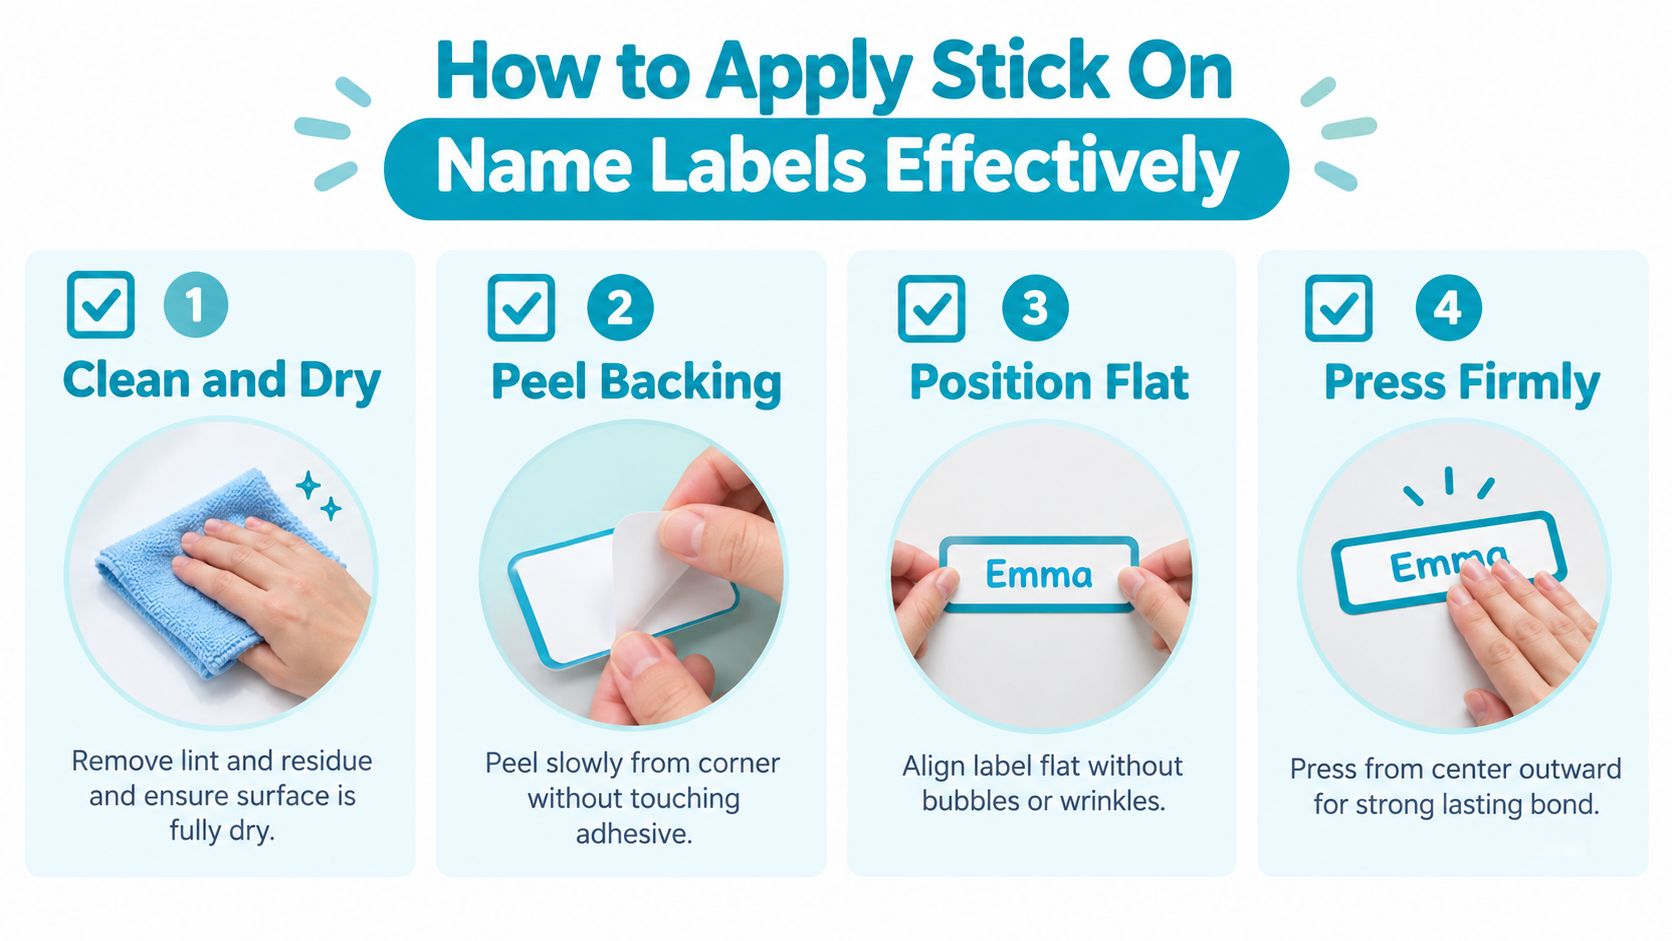
Choose a flat, smooth area. On clothing, the care label is usually the sensible location because it offers a stable surface. On a lunchbox or bottle, avoid textured panels, curved edges, hinges and areas that hands rub repeatedly.
Clean the surface with a suitable lint-free cloth, then let it dry fully. Don't apply a label immediately after washing an item, even if the surface appears dry. Moisture trapped in fibres or around an edge can weaken the adhesive.
Apply without trapping air
Peel the backing from a corner and avoid touching the adhesive. Position the label once, then press it down from one edge towards the other. Use a firm, even motion to remove bubbles and wrinkles.
If the surface is elastic, a seam or a heavily textured fabric, stop and choose a different location. Stretching the item while applying the label can create tension that later pulls the edges up. A label should lie flat in its natural position.
For bottles and lunchboxes, press around the full perimeter, paying particular attention to corners. Don't place the label over a moulded ridge or a closure that repeatedly flexes.
Allow the adhesive to cure
Leave the labelled item undisturbed before washing or exposing it to water. Independent testing guidance for clothing labels cites the BS EN ISO 6330 wash procedure for 60 washes at 40°C, and recommends allowing 24 hours before water exposure. Follow the product's own instructions if they differ, as adhesive formulations aren't identical. See this practical guide to applying vinyl stickers for the same centre-outwards pressure principle used on other self-adhesive vinyl products.
Application warning: A label that starts peeling at the edge should be dealt with early. Continued washing can lift more of the adhesive and make a clean repair harder.
If a label is misaligned before you press it firmly, lift it slowly and reposition it only if the product instructions allow this. Once the adhesive has bonded, forcing the label off may damage the label or leave residue.
Maximising Durability with Washing and Maintenance
A label needs sensible care, not special treatment. The key is to protect the adhesive from unnecessary heat, residue and friction while checking that the name remains readable.
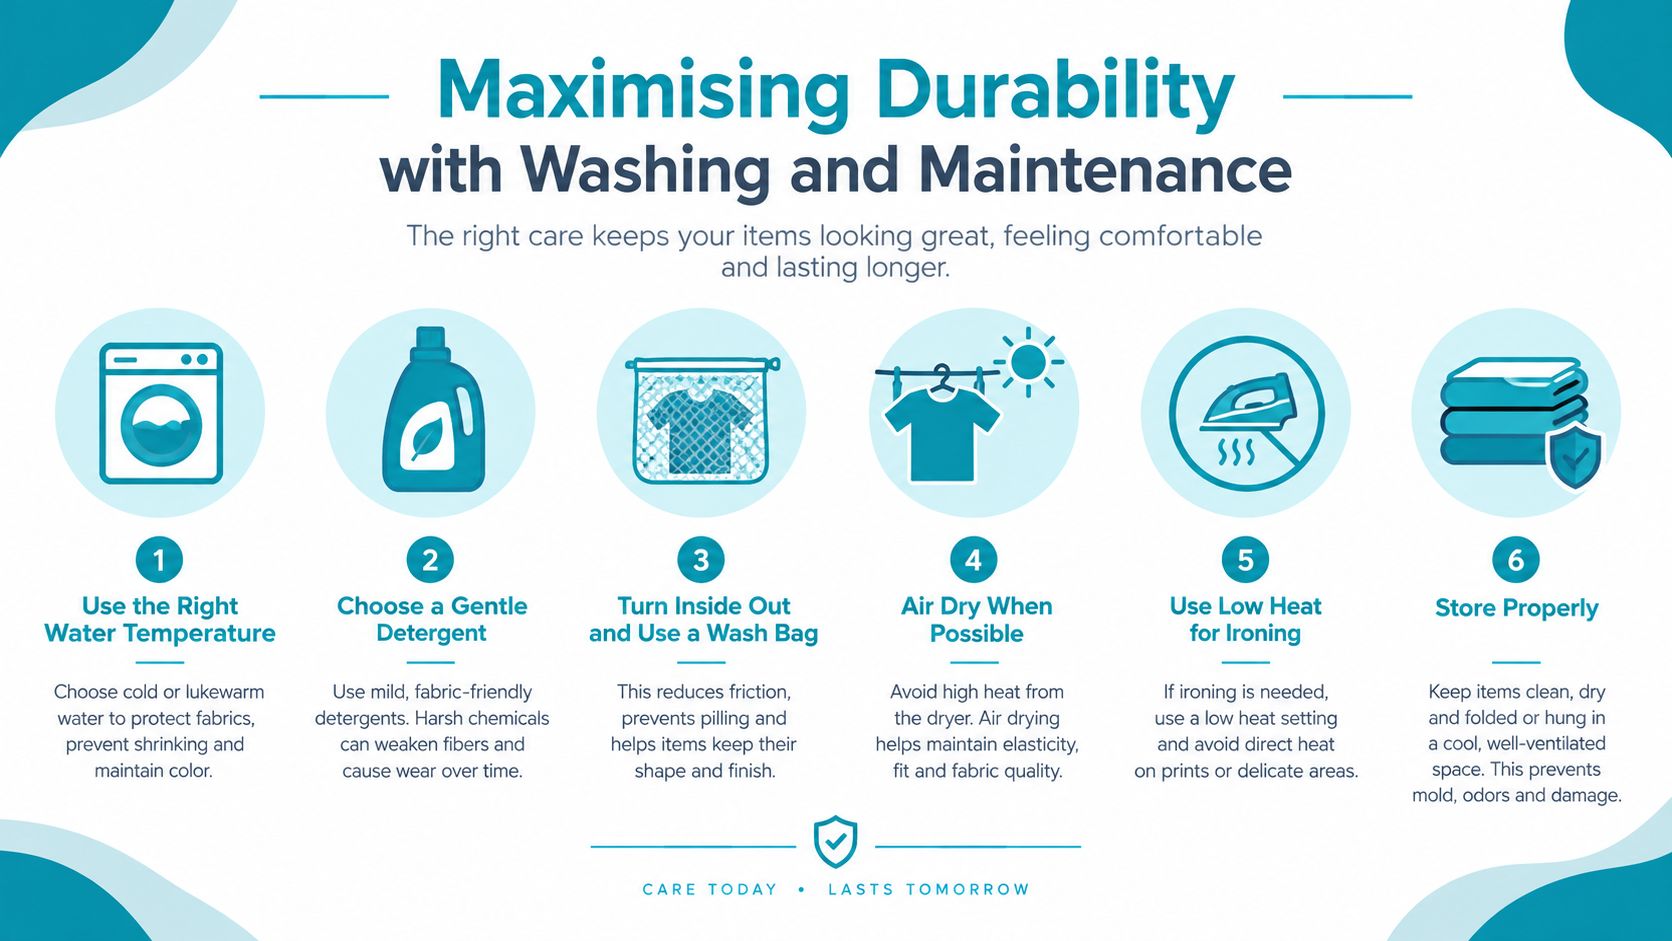
Wash clothing at the temperature recommended by the manufacturer. The independent guidance cited earlier uses 40°C for clothing-label testing and recommends a full curing period before the first wash. A UK supplier reports that quality stick-on labels last 30 to 40 washes in real-world use when applied and cared for correctly, with legibility maintained through a school year. That claim appears in the supplier's guidance on washable school name labels.
Use a consistent laundry routine
- Keep temperatures controlled: Choose the label's stated temperature limit rather than assuming hotter is better.
- Avoid fabric softener: Residue can weaken adhesion and leave the label edges vulnerable.
- Reduce friction: A gentler cycle can limit rubbing against other garments.
- Dry sensibly: Follow the product's tumble-dryer instructions and avoid unnecessary high heat.
- Inspect edges: Look for lifting, bubbling, fading or a name that no longer reads clearly.
A label on a lunchbox or bottle needs a separate check. Confirm that the product is dishwasher-safe and follow its placement guidance. The cited application guidance recommends top-shelf placement in a dishwasher for item labels. Don't place a label across a sharp curve or moving component, because mechanical stress can cause failure even when the adhesive itself is sound.
Know when to replace one
Replace a label when the name is no longer legible, the adhesive has lifted across a substantial area or the item's owner has changed. Don't wait until the label falls off in the laundry. A small edge lift may sometimes settle if the product permits firm re-pressing, but a contaminated or badly curled label is usually better replaced.
Care-home staff should inspect labels during routine laundry checks. Industrial or high-temperature processes can be harsher than a household wash, so staff must follow the label manufacturer's stated limits and the home's laundry policy. If the environment is demanding, choose a label specifically tested for that routine rather than relying on a school-clothing product.
How to Remove, Replace and Real-World Use Cases
Labels eventually need changing when a child grows, clothing passes to a sibling or a resident's belongings are reassigned. Remove them slowly from one edge. Avoid aggressive scraping, sharp tools and unapproved solvents, particularly on delicate fabric or printed surfaces. If residue remains, use only a remover that the material manufacturer permits, and test it in an inconspicuous area first.
Schools can use discreet labels across plain jumpers, coats, bags and PE kit. The 2026 move towards limits on branded uniform items makes this especially practical. The parent-focused lost-property survey summary identifies the gap clearly: families may have more generic garments that look alike, while schools still need a fast way to return them.
Care homes have a different priority. Staff need labels that remain readable through the home's actual laundry process and that sit securely on care labels or approved garment areas. Keep the naming convention consistent, protect resident privacy and check each item before it enters communal laundry.
Families should replace worn labels before a new term, after a name change or when clothing changes hands. Schools can reduce confusion by asking parents to label uniform, outerwear and personal equipment before arrival. The best system is modest and repeatable: one readable name, one suitable surface and a routine inspection.
The immediate next step is to audit the kit already in use. Sort clothing and belongings by surface, discard labels that no longer read clearly, and order a replacement set designed for the items you wash.
Quote My Wall offers personalised stick-on clothing labels for school uniforms, belongings and care-home clothing, with washable formats suitable for clothing and selected hard items. Visit Quote My Wall to choose a clear design and organise your labelling before the next school or laundry cycle.