
Your Complete Guide to Applying a Quote Wall Sticker
A quote wall sticker is simply a vinyl decal with words, phrases, or designs that you can stick straight onto your wall. They're a brilliant way to personalise a room – cost-effective, easy to apply, and completely damage-free, which is why they’ve become such a hit with homeowners and renters all over the UK.
Your Starting Point for the Perfect Quote Wall Sticker
So, you’re ready to bring a bit of personality to a blank wall? Fantastic. This guide is designed to be your launchpad, helping you move from a nice idea to a finished feature that transforms your space. We'll get into the nitty-gritty of why a quote wall sticker is such a go-to for UK homeowners and keen DIYers.
Why Choose a Wall Sticker Over Paint or Paper?
The real magic of these decals is their versatility. Think about it: you could have a powerful, inspiring quote in your home office to get you through the afternoon slump, or a beautifully scripted, custom name decal creating a charming focal point in a nursery. This guide is your roadmap to getting it right, covering everything from picking the right material to planning your design and nailing the application for a look that’s properly professional.
It's no surprise this is a popular choice, especially with the UK's wall decor market thriving. People are looking for affordable ways to refresh their homes, and these stickers can slash redecoration costs by up to 70% compared to a full paint job or traditional wallpaper. This trend is also tied to the fact that 84% of UK consumers are now actively seeking out eco-friendly and customisable decor.
The beauty of a quote wall sticker is its simplicity. It offers the impact of a bespoke art piece without the permanence, cost, or mess of traditional decorating methods.
Before you dive in, it’s worth thinking through a few key points to make sure the whole process goes smoothly. Here's a quick table to get you started.
Quick-Glance Guide for Your Wall Sticker Project
| Key Factor | Why It Matters for Your Finish | Actionable Tip |
|---|---|---|
| Surface Texture | Vinyl needs a smooth, clean surface to adhere properly. Bumpy or textured walls can cause peeling. | Run your hand over the wall. If it's not smooth, a light sanding and wipe-down might be needed. |
| Paint Type | Freshly painted walls need time to cure. Stickers on "wipeable" or Teflon-based paints can struggle to stick. | Wait at least 3 weeks after painting. For tricky paint finishes, test a small, discreet area first. |
| Room Environment | High humidity or drastic temperature changes (like in bathrooms or near radiators) can affect the adhesive. | Choose a location with a stable temperature and avoid placing stickers directly in steamy areas. |
| Design Size | A large, intricate design can be trickier to apply alone. A small quote is much more forgiving for a first-timer. | If you're new to this, start with a smaller design or ask a friend to help you with a larger one. |
Considering these factors from the get-go will save you a lot of potential hassle later on.
What This Guide Covers
We'll really dig into what makes these stickers so affordable and renter-friendly, making them the perfect way to express yourself without the commitment of paint. As you start thinking about designs, it's a good idea to see how they stack up against other options, like a thoughtfully placed motivational wallpaper, to find what really speaks to your style.
By the time you're done with this guide, you’ll have the confidence and knowledge to choose and apply your decal without a hitch. We’re covering the entire journey, from that first spark of an idea to the final, satisfying application. For a closer look at what makes these decals so great, you can read more about the benefits of using quote wall stickers.
Selecting the Right Finish and Size
Picking a quote wall sticker is about more than just finding the perfect phrase. Getting the finish and size right is what truly makes it sing. These two details are the secret sauce, determining how your sticker plays with the room's light and fits in with the rest of your decor.
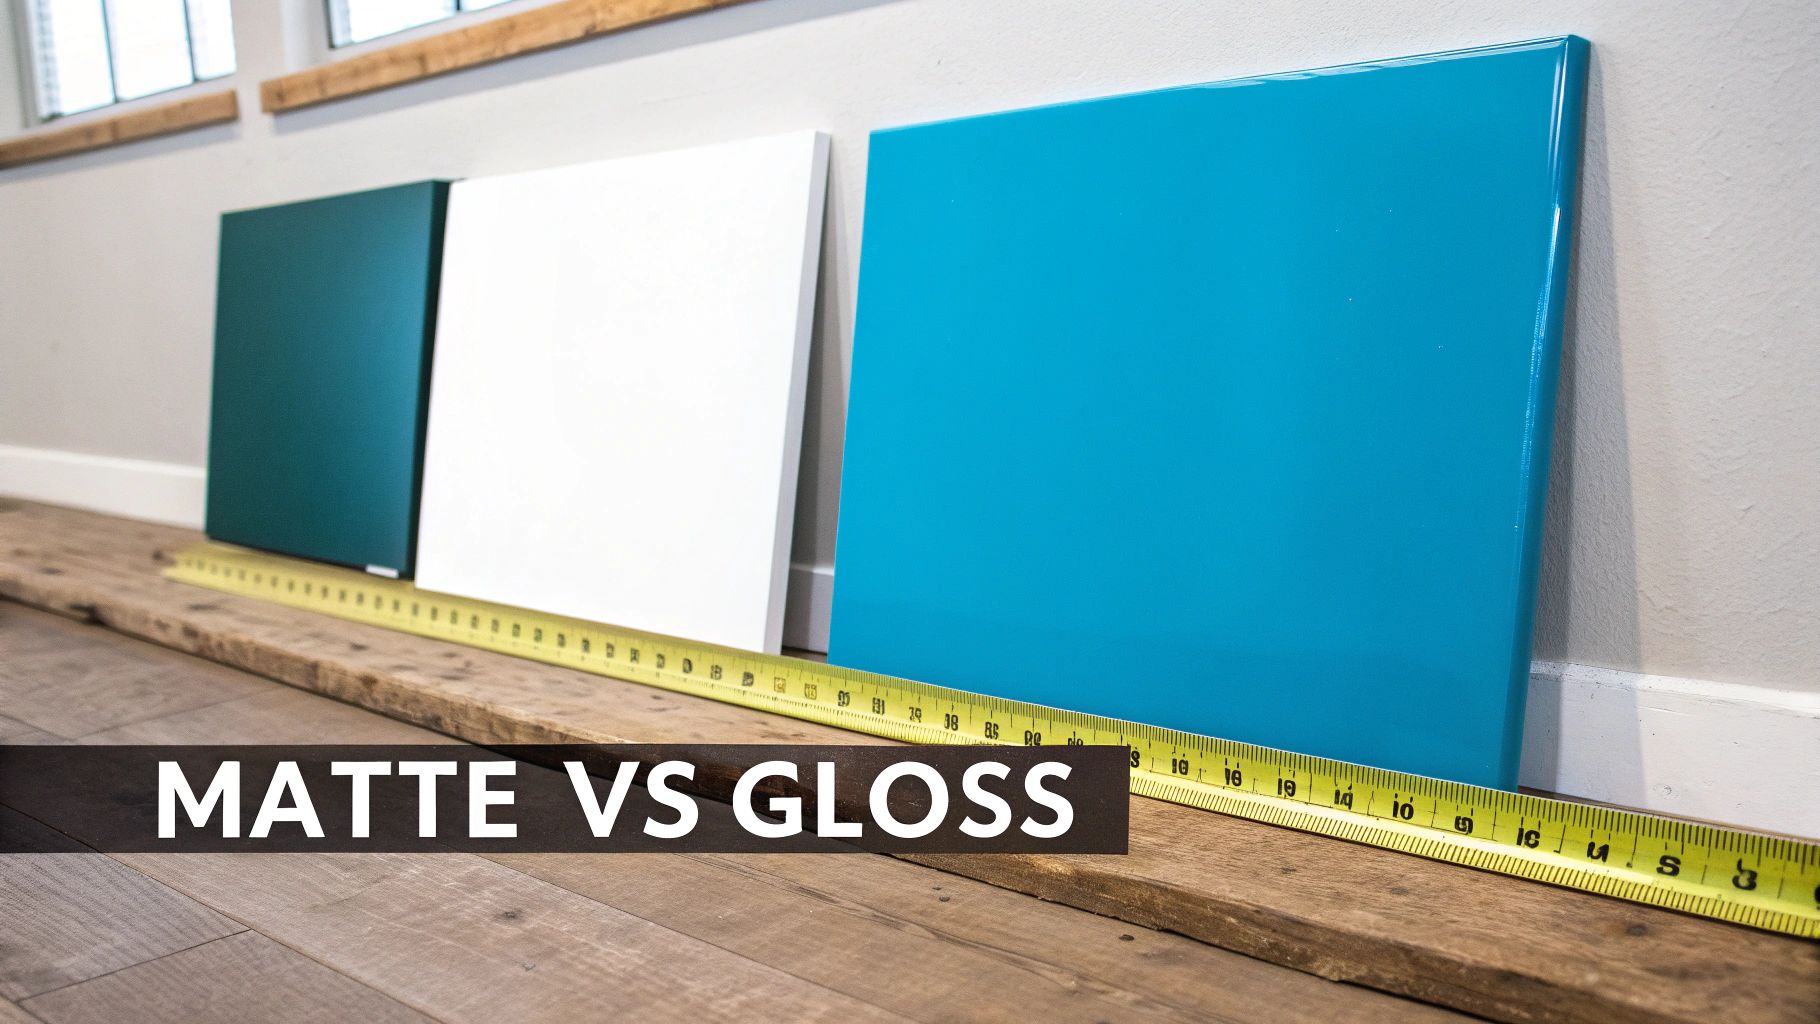
First up, you need to decide between a matte or gloss finish. It might seem like a tiny detail, but it has a massive impact on the final look. Each one has its own strengths, and the right choice really depends on where you're planning to put it.
Matte Versus Gloss Finishes
For most interior walls, I almost always recommend a matte finish. Its non-reflective surface soaks up light instead of bouncing it back, meaning you won’t get any annoying glare from lamps or windows. This gives it a really subtle, almost elegant effect that makes the quote look like it was painted right onto the wall.
A gloss finish, as the name suggests, is shiny and reflective. This can be a brilliant choice in the right setting. For instance, if you're putting a decal on a piece of furniture, a door, or even a laptop, the tough, wipe-clean surface of gloss vinyl is perfect. It can also add a fun, vibrant pop in a child’s playroom.
Pro Tip: If you're stuck on what to choose for a living room, bedroom, or hallway, go with matte. It just blends beautifully with the finish of typical interior paint and gives your wall quote a much more premium, built-in feel.
Here’s a quick rundown to help you weigh up the options for your project.
| Feature | Matte Finish | Gloss Finish |
|---|---|---|
| Appearance | Flat, non-reflective, 'painted-on' look. | Shiny, reflective, high-impact look. |
| Best For | Interior walls, especially in well-lit rooms. | Furniture, doors, windows, and high-traffic areas. |
| Glare | Minimal to none, making it easy to read from any angle. | Can create glare, potentially obscuring the text. |
| Durability | Excellent for walls, but can scuff more easily than gloss. | Very durable and easy to wipe clean. |
At the end of the day, it’s all about the effect you’re after. For a tasteful message that feels like part of the wall itself, matte is your best bet. If you want a bold statement piece that really stands out, gloss is a fantastic contender.
Getting the Size and Scale Just Right
Once you’ve nailed the finish, it’s time to talk size. A classic mistake is choosing a sticker that’s too small and gets lost on the wall, or one so big it completely dominates the room. What you're aiming for is balance.
Start by getting your tape measure out and jotting down the height and width of the wall space you're working with. A good rule of thumb is for the decal to take up between 50-75% of that designated area. This leaves a bit of breathing room around the edges, which is crucial for framing the quote and stopping the wall from looking cluttered.
To get a real feel for how it will look, try this simple trick:
- Find the dimensions of the quote wall sticker you’re eyeing up.
- Use masking tape to lightly mark out that shape on your wall.
- Stand back. Walk around the room. Look at it from different angles.
This little mock-up gives you a preview of the final proportions before you peel and stick. Does it draw the eye without being over the top? Does it look properly centred over the sofa or bed? Spending five minutes on this step can save you a world of regret later. Think of it as creating a visual anchor that pulls the whole room together.
Preparing Your Walls for a Flawless Finish
Before you even dream of peeling the backing paper off your new quote wall sticker, there’s a crucial job to do. Taking the time to properly prep your wall is the single most important step for getting that professional look. A great result starts with a clean, smooth slate; skipping this is like building a house on shaky ground. It’s simple, but it’s the difference between a stunning feature and a peeling, bubbly mess.
Think of it like this: your walls are magnets for a thin, invisible layer of dust, grease, and general household grime. If you try to stick a decal over that, it’s only going to stick to the dust, not the actual wall. The adhesive just can't get the grip it needs to last.
The First and Most Important Step: Clean Your Surface
The good news is you don’t need any harsh chemicals. A bit of mild soap in some warm water is all it takes. Grab a soft cloth or sponge, dunk it in, wring it out really well, and give the entire area a gentle but thorough wipe-down.
Pay a little extra attention to spots in the kitchen where grease might build up, or in living areas where dust loves to settle. Once it’s clean, you have to be patient. The wall must be completely dry before you even think about the next step. This usually means waiting at least 24 hours, but I’d give it even longer if the room is a bit cold or damp. Rushing this will trap moisture under the vinyl, and that’s a guaranteed recipe for peeling.
A clean, dry wall is non-negotiable. Waiting 24 hours for it to dry properly is far less annoying than having to reapply a sticker that’s already started to fail.
If you're aiming for that truly pristine surface for your quote wall sticker, you could even look into professional techniques. Understanding a bit about how to prepare walls for plastering gives you some fantastic insights into achieving the ultimate smooth finish – the perfect canvas for any decal.
What About Textured Walls?
Vinyl decals are happiest on smooth, flat surfaces like a standard painted wall. The smoother the surface, the better the adhesive can bond. But what if your walls have that 'orange peel' effect or a lightly stippled finish?
Don’t write it off just yet. It doesn't automatically mean a wall sticker won't work, but you do need to be realistic. The deeper the texture, the less surface area the decal has to cling to, which definitely increases the risk of it failing over time.
For slightly textured walls, here’s a test you absolutely must do:
- Most wall sticker kits come with a small, unprinted test piece. Use it!
- Stick this tester to a discreet part of the wall, maybe behind the sofa or a door.
- Leave it there for 48 hours, then see how well it's stuck.
- If it peels away without any effort or you can see lots of gaps, your wall texture is probably too deep for a big decal to hold on.
This simple check can save you the heartache of applying a whole beautiful quote only to see it lift off a week later.
Gather Your Application Toolkit
Getting your tools ready before you start makes the whole process so much smoother and less stressful. You don’t need a professional kit – a few common household items will do the job perfectly.
Before you start, make sure you have these essentials handy:
- Measuring Tape: To get your placement spot on.
- Pencil: For making a few light guide marks on the wall.
- Spirit Level: This is a must-have. Don't eyeball it!
- Masking Tape: Essential for holding the sticker in place while you work.
- Squeegee or Credit Card: For smoothing down the vinyl and pushing out air bubbles. A proper squeegee is best, but a firm credit card is a great stand-in.
Having everything within arm’s reach means you can focus entirely on getting your quote wall sticker up on the wall without any last-minute dashes to find something.
Applying Your Quote Wall Sticker Like a Pro
Right, this is the moment where all that careful planning pays off. Applying your quote wall sticker is easily the most satisfying part of the job, where you get to see your vision come to life. Forget any horror stories you’ve heard about tangled vinyl and crooked letters. With a bit of patience and the right technique, you'll get a perfect, bubble-free finish that looks like a professional did it.
This isn't a race. The whole idea is to be methodical. The approach I'll walk you through gives you complete control, ensuring your quote ends up exactly where you want it, looking crisp and clean.
Before we get stuck in, this little diagram breaks down the prep work. It’s simple stuff—clean, check, and gather your tools—but getting this right sets you up for a flawless application.
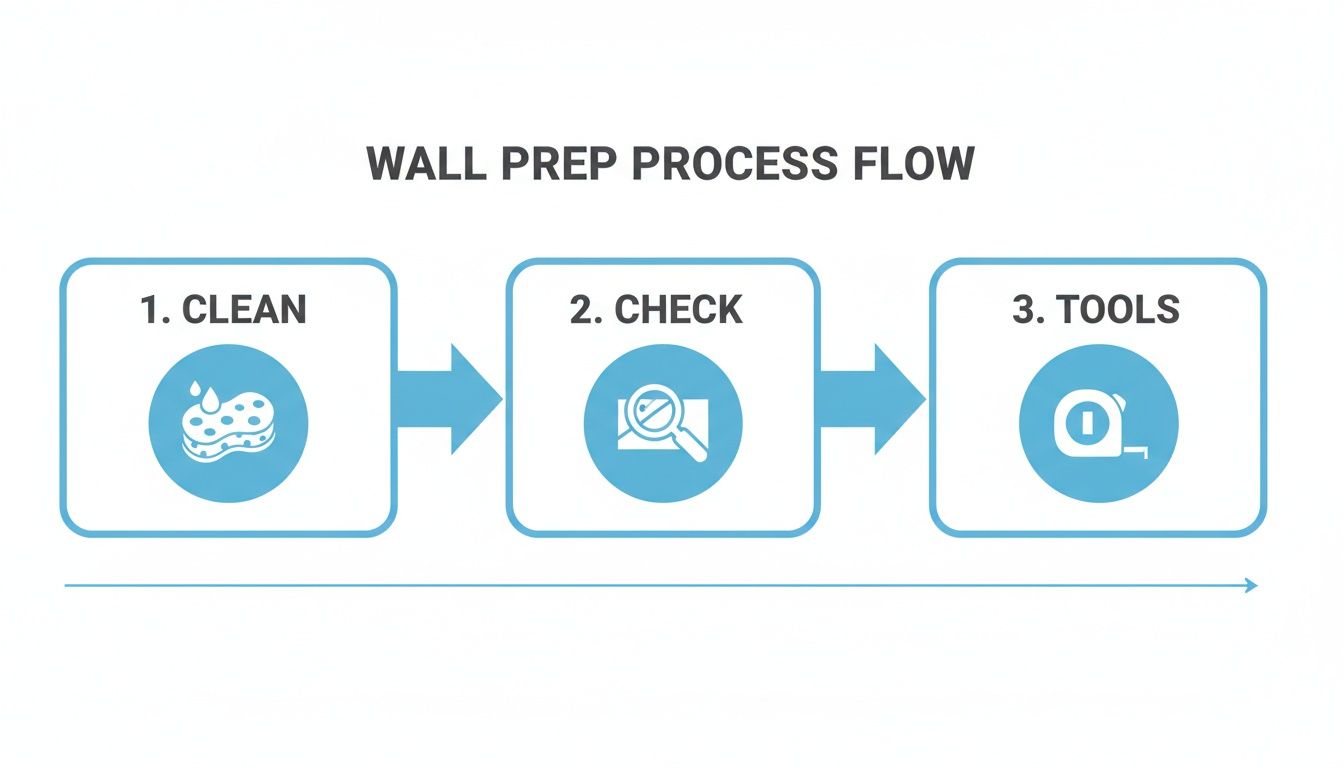
Nailing these initial steps gives your sticker the best possible chance to stick properly and last for years.
Positioning and Creating a Hinge
First things first: don't peel a thing yet! This part is all about placement. Hold the entire sticker sheet—that's the vinyl, the waxy backing paper, and the clear transfer tape—against the wall where you want it to go. Grab your spirit level and make sure it’s perfectly straight. Trust me, your eyes can play tricks on you.
Once you’re happy with the spot, use a few bits of masking tape on the top corners to hold it temporarily. Now, step back and have a proper look. Does it feel right? Is it centred how you imagined? This is your last chance to make adjustments, so take your time.
When you're 100% certain it's in the right place, run a long piece of masking tape right across the top edge of the sticker, overlapping both the sticker and the wall. This tape is your 'hinge'. It holds the decal securely in place and lets you flip it up and down like a flap. Honestly, this hinge method is the secret to perfect alignment and a total game-changer, especially for larger designs.
The Application Process Step-by-Step
With your hinge firmly in place, you can get started on the main event. Remember, slow and steady is the name of the game here.
- Flip and Peel: Gently lift the sticker upwards, using your tape hinge. Now, carefully peel the waxy backing paper away from the clear transfer tape. As you peel, you’ll expose the sticky side of the vinyl letters, which should stay put on the transfer tape.
- Go Slowly: Peel the backing down towards the hinge. If any little bit of vinyl tries to stay on the backing paper, just press the paper back down, give it a firm rub, and try peeling again.
- Cut the Backing: Once you’ve peeled the backing paper about halfway down, grab your scissors and snip off the loose bit. This just stops it from flapping around and getting in your way.
You should now have the top half of your sticky vinyl letters exposed and ready to meet the wall.
Take your time with this part. The most common mistake I see is people rushing the peel. A slow, steady motion gives you the control you need to ensure every part of your quote wall sticker transfers correctly.
Smoothing the Vinyl Onto the Wall
This is where your squeegee (or a trusty credit card) comes into its own. Holding the bottom edge of the transfer tape away from the wall, you can start smoothing the vinyl down.
- Start from the top: Begin right below your tape hinge.
- Work from the centre outwards: Place your squeegee at about a 45-degree angle and apply firm, even pressure. Start in the middle and push outwards to the left, then come back to the middle and push outwards to the right.
- Overlap your strokes: This technique is crucial. It systematically pushes any trapped air out towards the edges, which is the key to preventing bubbles from forming under your quote wall sticker.
Once the top half is securely smoothed down, you can remove the hinge tape. Let the rest of the sticker drop down gently and peel off the remaining backing paper. Now just continue with the same centre-out smoothing process until the entire decal is stuck firmly to the wall.
The Final Reveal
After the whole design is on the wall, give it one last, thorough rub-down with your squeegee. Pay close attention to the edges of every single letter to make sure they’ve got a good, strong bond with the surface.
And now for the best bit. Starting at a top corner, slowly begin to peel the clear transfer tape away from the wall. The trick is to pull it back on itself at a really sharp angle—almost flat against the wall. Whatever you do, don't pull it straight out towards you, as that can lift the vinyl off.
If a letter or part of the design tries to come away with the tape, don't panic. It happens. Just lay the tape back down, give that spot another firm rub with your squeegee, and then carry on peeling. Once the transfer tape is completely off, your stunning new wall quote is revealed. Give it a final, gentle press all over with your fingers to ensure everything is perfectly stuck, and you’re all done.
Creative Ways to Use Vinyl Beyond Your Walls
When you hear "wall sticker," you probably picture a favourite quote above the sofa. And while that's a classic, it's really just scratching the surface of what you can do. The same high-quality vinyl is a secret weapon for all sorts of decorating and organising projects around the house. It's time to think beyond the feature wall.
From bringing tired furniture back to life to finally getting a handle on the school run chaos, vinyl offers a world of clever, stylish possibilities. This is about more than just decoration—it's about finding smart, affordable solutions that actually make a difference.
Give Old Furniture a New Lease of Life
Hold off on binning that dated chest of drawers or drab coffee table for a moment. Have you considered a vinyl wrap? It’s one of the most popular ways to use vinyl, letting you completely overhaul a piece of furniture without any of the mess, fumes, or faff of sanding and painting. It's a proper DIY dream.
You could cover a plain IKEA cabinet with a wood-effect vinyl for a high-end, rustic vibe. Or maybe add a pop of colour to your bedroom by wrapping a set of bedside tables in a bold, geometric pattern. The process is a lot like applying a wall sticker, though you’ll need a bit more patience when you get to the corners and edges.
- Kitchen Makeovers: You can even find heat-resistant vinyl for kitchen worktops to give them a quick, budget-friendly update.
- Upcycling Projects: Think old filing cabinets, bookshelves, or even those bland interior doors.
- Quick Fixes: It’s also brilliant for hiding scratches or scuffs on otherwise perfectly good surfaces.
This is such a cost-effective and sustainable way to refresh your home. If you want to see just what’s possible, our guide on why it's better to upcycle with vinyl furniture wraps is packed with inspiration.
Create an Enchanting Space for Your Little One
Nurseries and children's rooms are where vinyl's playful side really gets to shine. Forget just a simple name sticker above the cot—you can create entire magical worlds. Imagine a ceiling filled with scattered vinyl stars to make a dreamy night sky, or a whole crew of safari animal decals to build an immersive jungle theme.
These stickers are a fantastic way to create a stimulating environment that you can change up as your child gets older. The superhero theme they're obsessed with at five can be peeled away for a space theme when they’re eight, all without cracking open a single tin of paint.
For parents, one of the biggest wins is the damage-free removal. When it's time for a change, the decals just peel off cleanly, leaving the wall underneath pristine and ready for the next adventure.
The Ultimate Hack for Labelling Clothes
Now for a use that solves one of life's most persistent headaches for parents: lost clothes. Forget fiddly iron-on labels or marker pens that vanish after a few washes. Ultra high-tack, stick-on clothing labels are an absolute game-changer.
These aren't your average stickers. They're made with a seriously powerful adhesive that's designed to bond with the fabric care label inside clothes—not the fabric itself. That small detail is the secret to their incredible staying power.
Just think of the morning chaos with school uniforms or the challenge of keeping track of clothes in a care home. A clear, personalised label makes everything instantly identifiable. And the best part? They’re built tough.
These specialist labels are completely:
- Washing machine safe
- Tumble dryer safe
- Even dishwasher safe (which makes them perfect for lunchboxes and water bottles, too!)
It’s a simple, peel-and-stick fix that brings some much-needed order to laundry day. This just goes to show how the same core tech behind a beautiful quote wall sticker can be adapted to solve a really practical, everyday problem. From beautifying your living room to organising your child's wardrobe, vinyl is an incredibly versatile tool to have in your kit.
Looking After, Removing, and Fixing Your Wall Sticker
So, your new quote wall sticker is up and looking brilliant. But what now? A little bit of care will keep it looking sharp for years, and knowing the right way to remove it is crucial, especially if you're renting. Here are the simple tips you need for easy maintenance and quick fixes for any little issues that might crop up.
Keeping your decal looking its best is no trouble at all. A gentle wipe with a soft, slightly damp cloth is all you'll ever need to get rid of dust. Just be sure to steer clear of harsh chemical cleaners or abrasive sponges – these can easily scratch the vinyl or, even worse, attack the adhesive at the edges and cause them to start lifting.
How to Remove It Without a Trace
When you fancy a change, the idea of peeling a large sticker off your wall can feel a bit daunting. Don't worry. Quality vinyl is made to come away cleanly without damaging your paintwork, as long as you use the right technique. The trick is a little bit of gentle heat.
Grab a hairdryer and pop it on a low heat setting. Hold it about 15-20cm from the sticker and warm the vinyl, waving it back and forth so the heat spreads evenly. In no time, you'll feel the adhesive soften. This allows you to get a fingernail under a corner and slowly peel it away. For a really detailed guide, check out our post on how to remove a wall sticker.
Top Tip for Renters: The secret to a clean removal is the angle. Always peel the sticker back on itself at 180 degrees, keeping it almost flat against the wall as you go. Pulling it straight out at 90 degrees puts far more strain on the paint. Slow and steady wins the race here!
Sorting Out Common Hiccups
Even the most perfect application can run into a minor snag now and then. The good news is that these are usually incredibly easy to sort out.
- An air bubble has appeared out of nowhere: If a bubble pops up a day or two later, just take a very fine pin and make a tiny hole right in the middle of it. You can then gently smooth the trapped air out towards the pinprick with your finger, and the vinyl will lie perfectly flat.
- An edge has started to lift: This can sometimes happen in high-humidity areas like bathrooms or if the sticker is too close to a radiator. Simply use your hairdryer on low to gently warm the peeling corner. Press it firmly back down with your thumb or a soft cloth, holding it for 30 seconds or so as it cools to help the adhesive re-bond to the wall.
- Bubbles on a freshly painted wall: Applied your sticker a bit too eagerly before the paint fully cured? If you notice bubbles appearing, it's likely just gases escaping from the drying paint. Don't panic! The pinprick trick mentioned above works perfectly here too – just release the trapped gas from each bubble.
Got a Few Questions?
It's completely normal to have a few questions before you start. Let's tackle some of the most common ones we hear from homeowners and DIY enthusiasts across the UK.
How Soon Can I Put a Sticker on a Freshly Painted Wall?
This is a great question, and the answer is all about patience. You absolutely must wait at least three weeks after painting before even thinking about applying your sticker.
Fresh paint goes through a "curing" process where it releases solvents into the air. If you apply the decal too early, you'll trap those gases underneath. The result? Bubbles, poor adhesion, and a sticker that just won't last. Give your paint the time it needs to cure properly.
Are These Quote Wall Stickers Easy to Remove?
Yes, they are! One of the best things about high-quality vinyl stickers is that they’re designed to be removed cleanly. This makes them a brilliant choice for renters or anyone who enjoys updating their space without the commitment.
When it's time for a change, here’s the trick:
- Grab a hairdryer and gently warm the sticker on a low heat setting.
- The warmth softens the adhesive, allowing you to slowly peel it back from the wall.
- Done carefully, it shouldn’t leave a mark or damage your paintwork.
What’s the Best Way to Keep My Wall Sticker Clean?
Keeping your new decal looking its best couldn't be simpler. All you need is a soft, damp cloth to give it a gentle wipe.
The key is to avoid anything abrasive, like a scouring sponge, or any harsh chemical cleaners. These can easily scratch the vinyl surface or cause the edges to lift away from the wall. A quick, gentle clean is all it takes to keep it looking perfect for years.
Feeling inspired to find the perfect decal for your home? Explore the fantastic range of designs at Quote My Wall, the UK's top spot for premium vinyl stickers, furniture wraps, and more. Go on, find your ideal quote wall sticker today.