
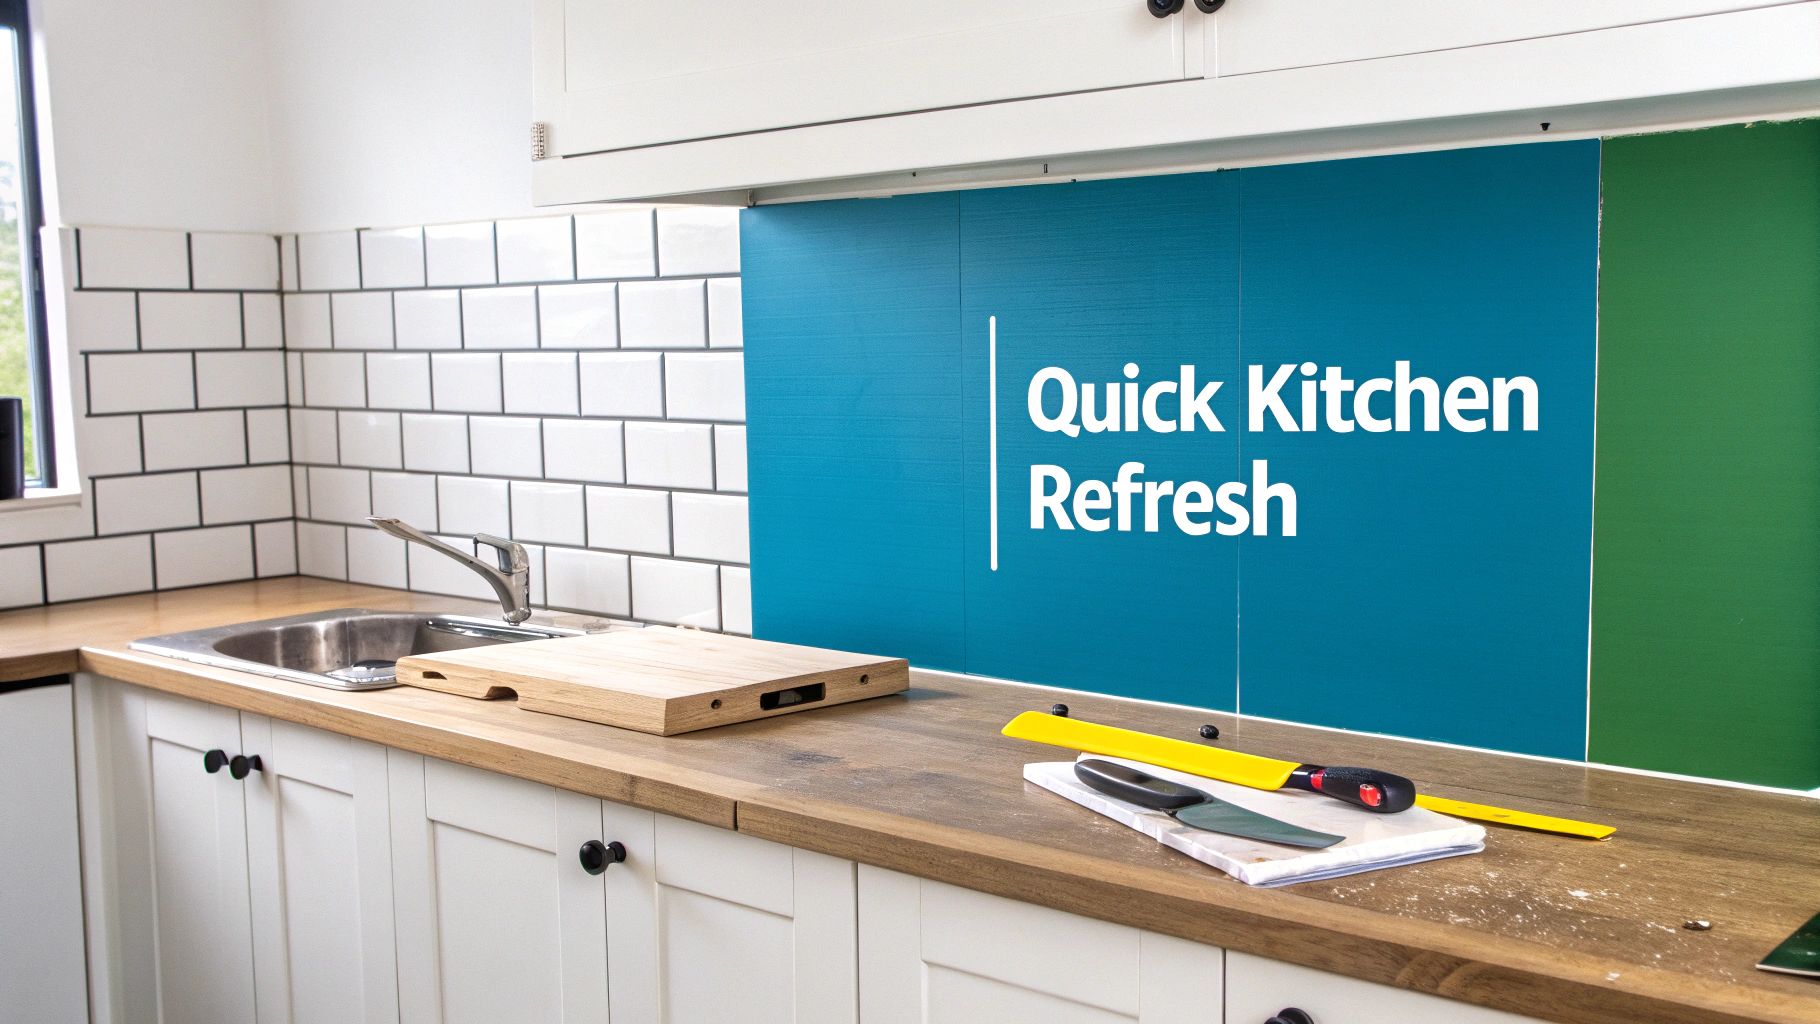
UK Peel and Stick Tile Backsplash DIY Guide
If you're looking for a brilliant, budget-friendly way to update your kitchen or bathroom without the mess and expense of traditional tiling, you've come to the right place. A peel and stick tile backsplash is a fantastic DIY solution that lets you get a high-quality finish over a weekend. It's a game-changer for homeowners and renters across the UK.
The Secret to a Fast and Stylish Home Refresh
Tired of staring at dated kitchen walls or a lacklustre bathroom? You’re not alone. So many of us are searching for simple, affordable ways to give our homes a lift, which is why fuss-free decorating solutions are more popular than ever. Peel and stick backsplashes have quickly become the go-to choice for anyone wanting maximum impact with minimum effort.
This isn’t just a passing trend; it reflects a real shift towards accessible home improvement. The market for these products is absolutely booming. In 2023, the UK market alone generated around USD 300 million in revenue, making us the top market in Europe for these tiles. That growth is set to continue at a rate of about 7.2% a year through 2032, all thanks to our growing love for a good DIY project.
What Makes Them So Appealing?
Their charm lies in just how simple and versatile they are. Forget the flimsy vinyl of years gone by—modern peel and stick tiles are impressively realistic and durable, with a style to suit any home, from a country cottage to a sleek city flat.
What’s not to love?
- No Grout, No Mess: You can completely skip the dusty, time-consuming faff of mixing and applying traditional grout.
- Renter-Friendly: Most high-quality tiles can be removed without damaging the wall underneath, which is perfect for temporary updates.
- Budget-Conscious: Get the look of expensive materials like ceramic or stone for a fraction of the cost, and with no labour fees to worry about.
The real beauty of a peel and stick tile backsplash is how it empowers you to transform a space entirely on your own terms. It closes the gap between the beautiful interiors you see online and what you can realistically achieve in your own home in just a few hours.
The DIY Decision
This guide is here to walk you through every step, from picking the right tiles to getting that flawless finish. Of course, with any home improvement, it's worth considering whether to tackle it yourself or call in an expert. If you're weighing your options, you might find it helpful to explore resources that help you decide between DIY and hiring a professional.
For this particular project, though, the tools are simple and the process is straightforward. A professional-looking result is well within your grasp.
How to Choose the Right Peel and Stick Tiles
Making the right choice upfront is the secret to a project you'll be happy with for years to come. The sheer variety of peel and stick tiles on the market now is fantastic, but it can also feel a bit overwhelming. Let’s walk through how to pick the perfect tile for your UK home, making sure it not only looks the part but performs brilliantly too.
The first thing to get your head around is the material. Not all stick-on tiles are created equal, and the material directly affects the look, how long it'll last, and what it'll cost you. Each has its own character and is suited to different jobs.
- Vinyl Tiles: These are usually the most budget-friendly option and come in an almost endless array of colours and patterns. Modern vinyl is surprisingly realistic, but it's the thinnest choice, which can sometimes look less premium than other materials.
- Gel Tiles: Made with a 3D gel-like layer, these tiles have a raised, glossy finish that does a brilliant job of mimicking real ceramic or glass. They offer far more depth and a more convincing texture than flat vinyl.
- Stone & Metal Composites: At the higher end of the market, you'll find tiles made from composites using things like lightweight aluminium or stone powders. These give you an authentic look and feel that's hard to beat and are generally more heat-resistant, making them a solid choice for behind a cooker.
Matching Tiles to Your Space
Think carefully about where these tiles are going. A kitchen splashback behind a sink is going to face different challenges—like constant splashes and scrubbing—than a decorative panel in a hallway. For high-moisture areas like bathrooms or kitchens, you absolutely need to look for tiles specifically marketed as water-resistant.
If I can give you one piece of advice, it’s this: always order samples. A tile that looks perfect on a website can look completely different under the unique lighting in your own kitchen. See how it looks in the morning sun versus how it catches your under-cabinet LEDs in the evening. This one small step can save you from a costly mistake and ensures you'll love the final colour and finish.
A classic mistake is falling for a design without checking if it’s actually suitable for the job. For instance, putting a standard vinyl tile too close to a gas hob isn't just a bad idea—it's a safety risk that can lead to warping or discolouration. Always, always check the manufacturer's heat-resistance specs.
Getting the Measurements Right
Accurate measuring is completely non-negotiable if you want a professional-looking finish. Grab a tape measure and find the height and width of the area you plan to cover. Multiply these two numbers to get the total square metres.
From there, you have to order more than you think you need. The golden rule is to add an extra 10% to your total. This "overage" is your safety net for any miscuts, mistakes, or tricky angles you need to navigate around plug sockets or window frames. Trust me, running out of tiles halfway through a project is incredibly frustrating, especially if you find the batch colour has changed slightly when you reorder.
Finally, have a good look at the surface you’ll be sticking the tiles to. A peel and stick tile backsplash needs a smooth, clean, and non-porous surface to get a proper grip. Freshly painted walls are great, but you must give them at least three weeks to fully cure. Other ideal surfaces include existing smooth tiles or laminate. Try to avoid heavily textured walls, like rough plaster or exposed brick, as the adhesive just won’t be able to form a strong, even bond.
If you’re looking for more inspiration on how different materials can transform a space, you can explore more kitchen splashback ideas to get a broader view of current trends. Done right, these tile stickers are one of the best ways to get a perfect bathroom or kitchen makeover with minimal fuss.
Prepping Your Walls for a Perfect Finish
Let me share a secret from years of experience: the real magic behind a professional-looking peel and stick backsplash happens long before you even peel off the first tile. It's all in the prep work. Honestly, rushing this part is the single biggest reason tiles fail to stick or start lifting at the corners down the line.
Think of your wall as the foundation. If it's not clean, smooth, and ready to go, your beautiful new tiles just won't have a fighting chance. Getting this right is your ticket to a flawless finish that lasts.
The Golden Rule: Clean, Degrease, and Dry
Your kitchen wall might look clean, but I guarantee it's covered in a thin, invisible film of cooking grease, dust, and old cleaning residue. This is the arch-nemesis of tile adhesive. It's especially true in kitchens where airborne oils from your hob settle on every surface.
Start by giving the entire area a proper scrub with a good degreaser. You don't need anything fancy; a simple sugar soap solution or even a mix of white vinegar and water does the trick beautifully. Use a soft cloth, get into all the nooks and crannies, and then wipe it all down again with a clean, damp cloth to get rid of any soap residue.
Now for the part that requires a bit of patience: letting it dry. And I mean completely dry. The wall must be 100% free of moisture before you even think about applying a tile. Don't just go by touch; give it a solid 24 hours to be absolutely certain, particularly in a humid room like a kitchen or bathroom.
Smoothing Out Imperfections
Peel and stick tiles are brilliant, but they are also thin. This means every little lump, bump, or dent in the wall beneath will show through on the final surface. It's surprising how a tiny nail hole can suddenly look like a crater once the tile is on.
Run your hand over the wall—you'll feel any rough patches or dips straight away. Grab some fine-grit sandpaper (around 120-grit is ideal) and gently sand down any minor bumps until they're smooth. For any small holes or cracks, a dab of filler is all you need. Smooth it flush with a putty knife, let it dry, and then sand it back so it's perfectly flat. This little bit of effort pays off massively in the end.
I’ve seen it time and time again: people get so excited to see the new look that they skip the prep. Trust me, taking an extra hour to properly clean and smooth your wall is the best investment you can make for a durable, bubble-free finish.
Before you start, it’s a good idea to gather everything you'll need. This simple checklist will ensure you have the right tools on hand, making the whole process much smoother.
Essential Tools and Materials Checklist
| Item | Purpose | Essential or Recommended |
|---|---|---|
| Tape Measure | For accurate measurements of your backsplash area. | Essential |
| Pencil & Ruler | To mark your tiles and wall for precise cuts and placement. | Essential |
| Utility Knife/Stanley Knife | A sharp blade is crucial for clean, straight cuts. | Essential |
| Cutting Mat | Protects your work surfaces and helps you cut safely. | Essential |
| Degreasing Cleaner | To remove grease and grime from the wall surface. | Essential |
| Sponges/Cloths | For cleaning, rinsing, and drying the wall. | Essential |
| Filler & Putty Knife | For filling any holes or cracks in the wall. | Recommended |
| Fine-Grit Sandpaper | To smooth out bumps and scuff glossy surfaces. | Recommended |
| Spirit Level | To ensure your first row of tiles is perfectly straight. | Recommended |
| Squeegee/J-roller | Helps to apply firm, even pressure and remove air bubbles. | Recommended |
Having these items ready will save you from frustrating interruptions and help you achieve that professional look you're after.
Dealing with Tricky Surfaces
Not all walls are created equal. While a standard matt or eggshell painted wall is the dream scenario, you might be facing something a bit more challenging. Don't worry, there's a solution for pretty much everything.
- Gloss or Satin Paint: These finishes are a bit too slick for the adhesive to get a good grip. The fix is easy – just give the wall a quick scuff with sandpaper to take the shine off. This creates a slightly rougher texture that the tile adhesive can really hang on to.
- Existing Ceramic Tiles: Great news! In most cases, you can stick your new tiles directly over old, dated ones. The key is to give the existing tiles and grout a deep clean to remove any soap scum or mildew. If your grout lines are particularly deep, you might want to level them out with a bit of filler to get a perfectly smooth surface. We have a full guide that dives deeper into this topic, which you can find here: how to cover kitchen tiles.
- Textured Walls: Applying peel and stick tiles directly onto a heavily textured surface like Artex isn't a good idea. The adhesive won't make full contact, which leads to a weak bond and a lumpy finish. The best bet here is to sand the texture down or, for a perfect result, apply a skim coat of plaster first.
The sheer ease of installation is why these products have become so popular across the UK. In 2023, the global market for vinyl peel and stick tiles—a firm favourite for backsplashes—was valued at over USD 1.5 billion. British homeowners and renters are a huge part of this trend, constantly looking for quick and stylish ways to upgrade their spaces. It just goes to show how many people are successfully transforming their homes with this simple solution.
Your Guide to a Flawless Installation
With your walls perfectly prepped, it’s time for the exciting bit—bringing your vision to life. This is where you really see the transformation happen. Getting the installation right comes down to patience and precision, but don't worry, it’s a straightforward process once you know a few tricks of the trade.
We’ll walk through everything from planning your layout to making those fiddly cuts around sockets, ensuring every tile sits perfectly. Follow these pointers, and you’ll achieve a seamless, durable finish that looks like you hired a pro.
Planning Your Layout with Precision
Before you peel a single backing, you need a game plan. Just starting in a corner is a classic rookie mistake that often leads to wonky lines and awkward, sliver-thin tiles at the far end. The secret to a balanced, professional-looking backsplash is to find your centre point and work outwards from there.
First, grab your tape measure and find the horizontal middle of your main wall. Mark it lightly with a pencil. Now do the same thing vertically to find the centre height. Using a spirit level, draw faint vertical and horizontal lines through this point to create a crosshair. This is your starting grid, and it guarantees your design will be perfectly centred and level from the get-go.
My top tip is to do a 'dry run'. Before you commit, lay out a few tile sheets on the floor or a big table to see how the pattern interlocks. It’s a great way to get a feel for the overlap system and visualise how it will all come together on the wall.
This simple visual shows the core prep work that is absolutely essential before you even think about sticking a tile to the wall.
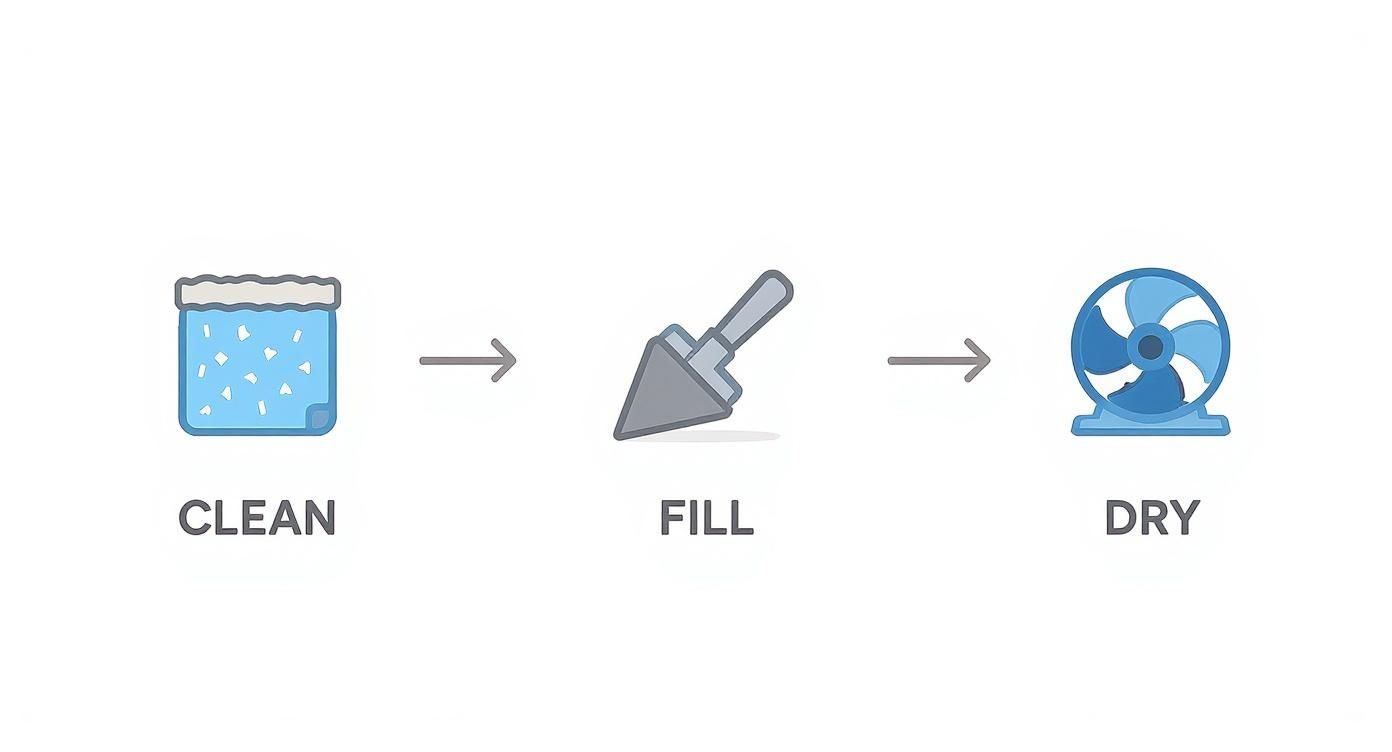
As you can see, a clean, smooth, and completely dry surface is non-negotiable. It’s the only way to make sure your tiles adhere properly and last for years.
Mastering the Art of Cutting Tiles
Let's be realistic—very few kitchens have walls that are perfect, uninterrupted rectangles. You’ll almost certainly need to cut tiles to fit around cabinets, window sills, and most commonly, plug sockets. A clean cut is what separates a genuine DIY success from something that just looks a bit… homemade.
For straight cuts, the technique is simple:
- Measure and Mark: Use your pencil and a straight edge to mark a clear cutting line on the front of the tile.
- Score and Snap: Place the tile on a cutting mat. Press your ruler or straight edge firmly along the line and use a utility knife to score the tile with firm, even pressure. You don't need to saw through it; a single, deep score is all it takes.
- Snap Cleanly: Carefully bend the tile along the scored line. It should snap perfectly, leaving you with a crisp, clean edge.
Cutting around obstacles like plug sockets requires a bit more finesse. First things first, turn off the power at your fuse box for safety. Unscrew and gently pull the socket cover away from the wall. Hold a tile sheet over the socket box and use your pencil to mark exactly where the corners of the opening need to be.
Connect the dots on your tile with a ruler, creating a rectangle. Now, carefully cut along these lines with your utility knife. I find it’s often easier to cut from the centre of the rectangle out to each corner first, creating little flaps you can then trim away neatly. Just take your time here, as a precise cut makes all the difference. Many of these same principles apply to flooring projects, too; you can see similar techniques in our guide to installing peel and stick floor tiles in the UK.
Applying Your Tiles for a Bubble-Free Finish
Right, this is the moment of truth. Start with your first tile sheet, lining it up with those centre guidelines you drew earlier. Most peel and stick tiles have a designated overlap area—a small, un-tiled edge that the next sheet sticks onto. Get familiar with how this works before you start.
Don't peel the entire paper backing off at once. That's a surefire way to get it stuck to itself or the wall in the wrong spot. Instead, peel back only the top few inches to begin with.
Line up the top edge of your tile sheet with your level guideline and gently press it into place. Working from the top down, slowly peel away the rest of the backing while smoothing the tile onto the wall with your other hand or a plastic smoother. Apply firm, even pressure from the centre outwards to push out any air bubbles as you go.
When you move on to the next tile, carefully align its edge with the overlap section of the one you just placed. This interlocking system is what creates that seamless, grout-like appearance. The key is to make sure the "grout" lines match up perfectly before you press down firmly. Keep going like this, working your way out from your centre point in a steady, methodical pattern.
A common scenario is installing behind a cooker hob. You must check the tile’s heat resistance specifications first. While most high-quality tiles can handle it, you need to maintain the cooker manufacturer's recommended safety distance from the wall—this is usually at least 15cm. For gas hobs, I’d always recommend a proper stainless steel or glass panel directly behind the flame for total peace of mind.
By following this structured approach—plan, cut, apply—you take the guesswork out of the job and set yourself up for a brilliant result. Just take your time, double-check your alignment with each new sheet, and press firmly. You'll be left with a stunning, durable backsplash that completely transforms your kitchen or bathroom.
Applying Finishing Touches and Ensuring Longevity
With your tiles looking fantastic on the wall, it's time for the final touches. This is the stage that really elevates the project from a weekend DIY job to a polished, professional-looking feature. It’s all about sealing the edges and knowing how to keep your new backsplash looking pristine for years to come.
These last few details are crucial for protecting your handiwork. A little effort now pays dividends in both the final appearance and the durability of your backsplash.
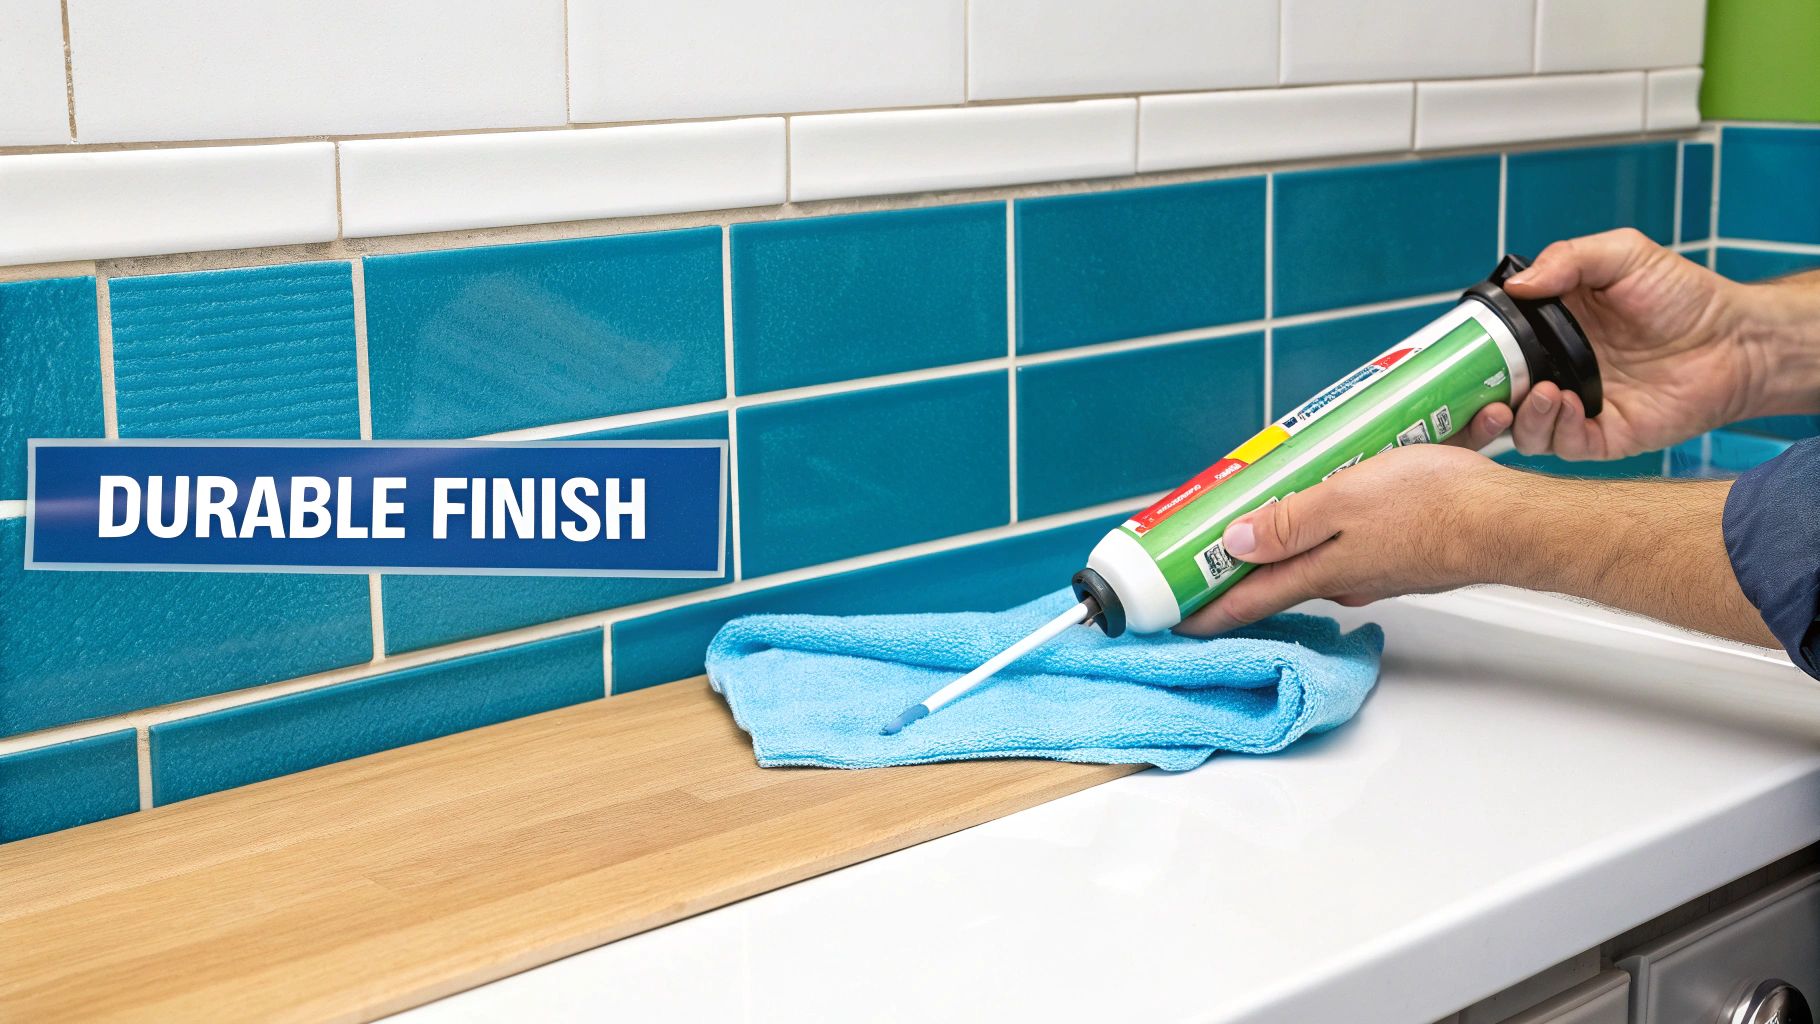
Creating a Clean and Sealed Edge
The raw edges of your backsplash—where the tiles meet a wall, cabinet, or the worktop—need a proper finish. If you leave them exposed, it not only looks a bit unfinished but also creates a perfect nook for dust and moisture to get in behind the tiles, which can mess with the adhesive over time.
You've got a couple of great options for creating that perfect border:
- Silicone Caulk: This is my go-to method for a seamless, waterproof seal. Grab a good-quality kitchen and bathroom silicone in a colour that matches your tiles or wall paint. White or clear is usually a safe bet. Run a thin, steady bead along the edges, then smooth it out with a wet finger or a caulk tool for a really neat line.
- Tile Trim: If you fancy a more defined, decorative edge, a self-adhesive plastic or metal tile trim works wonders. They come in all sorts of profiles and finishes, from shiny chrome to brushed steel. Just cut it to length and press it firmly along the outer edge for an instant, clean border.
One thing you absolutely must do is seal the gap between your worktop and the bottom row of tiles. This spot gets all the splashes, so a solid bead of silicone caulk is your best defence against water getting behind and causing the tiles to lift.
Long-Term Care and Cleaning
One of the biggest selling points of a modern peel and stick tile backsplash is just how low-maintenance it is. That said, using the wrong cleaning products can do more harm than good. Abrasive materials and harsh chemicals are the sworn enemies of both the tile surface and the glue holding it all together.
The Do's and Don'ts of Cleaning
Keeping that just-installed sparkle is easy if you stick to a few simple rules.
| Do Use | Don't Use |
|---|---|
| A soft cloth or sponge | Abrasive scouring pads or steel wool |
| Mild soap and warm water | Harsh chemical cleaners (like bleach or ammonia) |
| A gentle, circular motion to wipe | Excessive water that can seep into seams |
Honestly, for most everyday splashes and marks, a damp microfibre cloth is all you’ll ever need. If you're dealing with stubborn greasy spots, a drop of washing-up liquid in warm water will sort it out.
The key is to always dry the surface afterwards. This stops water spots from forming and protects the seams. A simple routine like this will keep your backsplash looking brilliant without ever risking the adhesive or the finish on the tiles.
Sorting Out Common Backsplash Snags
Even the most carefully planned DIY project can hit a bump in the road. If you run into a little trouble with your peel and stick backsplash, don't worry. Most of the common problems have surprisingly simple fixes, so you can still get that professional-looking finish you're after.
The biggest issue people run into? A tile that simply won't stick. Before you even think about reaching for extra glue, go back to your prep. In 9 out of 10 cases, the problem is a bit of wall that wasn't completely clean or perfectly dry. It only takes a tiny smear of grease or a hint of dampness to stop the adhesive from getting a proper grip.
When Tiles Just Won't Stick
If a tile starts to lift at the corner or along an edge, gently peel it back. Run your hand over the wall surface. Does it feel greasy, dusty, or even slightly damp? That’s your culprit. Give the spot another good clean with a degreaser, let it air dry for a solid 24 hours, and then give it another go.
For a particularly stubborn area on a wall that's otherwise fine, a light mist of a high-strength spray adhesive can give it that extra bit of tack. A word of warning for renters, though: this will make the tiles much harder to remove later on, so keep it as a last-ditch option.
The big challenge for tile makers is finding that sweet spot between an adhesive that grips like a vice and one that comes off cleanly. Durability versus easy, damage-free removal is a major concern for UK homeowners, especially renters who are worried about leaving sticky residue behind. You can find out more about peel and stick tile market challenges and how the industry is tackling them.
Fixing Crooked Tiles and Peeling Corners
So you've stepped back to admire your work and spot a tile that's gone on a bit wonky. It's frustrating, but it's not the end of the world. You can usually sort it out without having to tear off the whole section.
Grab a hairdryer and gently warm the crooked tile on a low heat setting for about 30-60 seconds. This softens the adhesive just enough for you to carefully peel it away without pulling the neighbouring tiles off with it. Once it's off, you can either reposition it perfectly or grab a fresh one from that extra 10% you bought.
Peeling corners are another classic, especially in steamy kitchens and bathrooms. Over time, moisture can creep in and weaken the bond. The fix is simple. Lift the corner, make sure the wall behind it is bone dry, then apply a tiny dab of clear, waterproof silicone sealant. Press the corner down firmly, and you'll have a strong, moisture-proof seal that keeps everything locked in place.
Your Top Questions Answered
Even with the best plan, you're bound to have a few questions before you get started. Let's run through some of the common things people ask when they're thinking about a peel and stick backsplash. My aim is to clear up any doubts so you can get going with confidence.
One of the biggest questions I hear is, "Can I stick these straight over my old ceramic tiles?" The answer is almost always a resounding yes! This is a huge relief for anyone who dreads the mess and effort of ripping out old tiling. As long as your existing tiles are in decent nick – meaning they're clean, flat, and not heavily textured – you can go right over them. Just be sure to give them a really good scrub with a degreaser first; the new adhesive needs a pristine surface to grab onto.
Durability and Water Resistance
People often wonder how these tiles hold up in steamy kitchens and bathrooms. Are they actually waterproof? Well, good quality peel and stick tiles are water-resistant, which is a key distinction. They'll easily handle everyday splashes behind the sink and the humidity from a hot shower.
However, they aren't completely waterproof. I wouldn't recommend them for the inside of a shower enclosure or anywhere that's constantly soaked. But for a kitchen backsplash or a bathroom wall that isn't getting directly sprayed, they're more than up to the job.
From my experience, the secret to making them last isn't just buying good tiles – it's all in the prep work. A well-cleaned wall and carefully placed tiles can look fantastic for five years or more.
So, what kind of lifespan are we talking about? With a properly prepared wall and a bit of care during installation, a quality peel and stick tile backsplash can look brilliant for years. How many years exactly depends on the tile quality and where you put it. A busy, steamy kitchen might show wear a bit sooner than a quiet utility room, but a solid installation is the best way to get the most out of them.
Ready to start your own stunning and simple home refresh? Quote My Wall offers a huge range of high-quality, renter-friendly tile stickers to transform your kitchen or bathroom in minutes. Find your perfect style today at https://www.quotemywall.co.uk.