
Name Labels Clothing: A Practical UK Buying Guide
Monday morning, you're standing over a pile of identical school jumpers, PE tops and coats, trying to decide which one belongs to your child. In a care home, the problem is more serious: a member of staff folds clean laundry with no readable name, then has to guess which wardrobe it should return to. Name labels clothing is often treated as a small personalisation job, but the useful label does much more. It helps recover costly garments, supports hand-me-downs and protects residents from having personal clothing misplaced.
The right choice depends on the garment, the laundry routine and who needs to identify it. Stick-on, iron-on and sew-in labels each solve a different problem. This guide is for parents, carers, care-home managers, small businesses and anyone buying a practical personalised gift. It also considers the less obvious details, including second-hand uniform, privacy, placement and textile-labelling responsibilities. For a broader introduction to the role of clothing labels, see this guide to the significance of name labels for clothes.
Why Name Labels Matter for UK Families and Care Settings
A missing jumper can become a costly Monday-morning problem. One child returns without it, the school lost-property rail fills up, and identical navy sweatshirts make ownership difficult to confirm. A clear name label for clothing gives staff a practical way to reunite the garment with its owner, helping families avoid unnecessary replacement and keeping uniforms available for future hand-me-downs.
Department for Education research on purchases made in 2023 found that compulsory school uniform and sportswear cost an average of £343.28 for a primary-school pupil and £442.25 for a secondary-school pupil in England. It also recorded average prices of £14.23 for a jumper or sweatshirt and £39.03 for a blazer. Those costs make identification worthwhile, particularly for garments left in changing rooms or shared school areas. The figures come from the Department for Education's school-uniform costs announcement.
Practical rule: Treat the label as a recovery tool first and a decorative detail second.
Photograph the labelled care-tag position for each blazer and jumper. Lost-property staff can then match the initials and garment colour in one check, rather than relying on a child's memory or a lengthy search.
Care settings carry a separate responsibility. A resident's cardigan, nightwear or personal towel may pass through shared laundry, and an unmarked item can be difficult to return confidently. A 2025 relative survey from a UK care provider explicitly identified lost clothing as an issue and called for a better tagging system. Labelling therefore supports resident dignity and a consistent laundry process, provided the label reveals only the information needed to return the item.
What a useful label must achieve
A good label should be:
- Readable: Children and staff should identify it without squinting or decoding ornate lettering.
- Secure: It must withstand the garment's usual washing and drying routine.
- Appropriately placed: It should not cover fibre or care information.
- Privacy-aware: Use limited identifying details, especially in residential care.
- Transfer-friendly: A label fixed to a care tag can be removed more easily when a uniform passes to a sibling.
For broader context, see this guide to the significance of name labels for clothes.
Choose the label format according to the fabric, laundry method and person responsible for checking the garment. That decision protects clothing value, supports reuse and keeps personal information under control.
The Three Main Types of Name Labels for Clothing
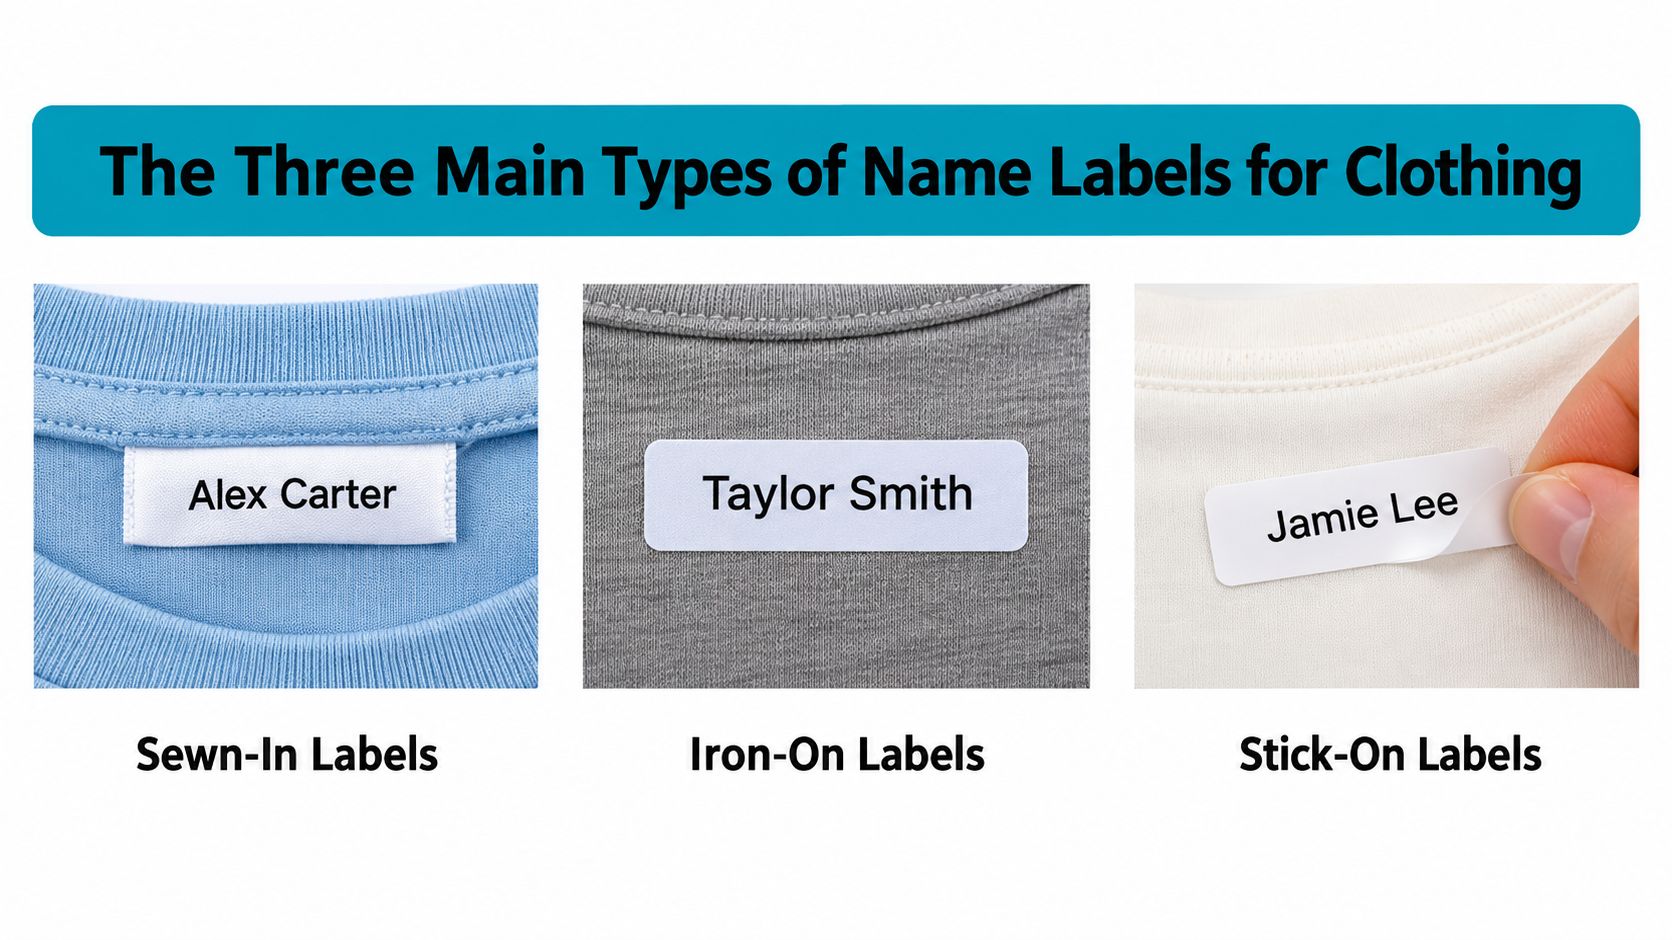
Most buyers will choose between stick-on, iron-on and sew-in fabric labels. They all identify clothing, but they attach in different ways and behave differently under heat, friction and repeated laundering.
Stick-on labels
An ultra high-tack stick-on label uses pressure-sensitive adhesive. You peel away the backing and press it onto a smooth, stable surface, usually the inside of a sewn-in care label. That distinction matters. The care label doesn't stretch and flex like the garment fabric, so it gives the adhesive a more reliable base.
This is the quickest format for school uniform, nursery clothing, coats, PE kit and items that may later be handed down. It also works on non-clothing belongings such as lunch containers, provided the product is designed for that surface. A stick-on label is reversible in a way a bonded label generally isn't, which makes it useful when ownership changes.
Iron-on labels
An iron-on label carries a heat-activated adhesive. A household iron melts or softens that adhesive so it bonds to suitable fabric fibres. It's normally chosen for cotton and other iron-safe natural or blended fabrics where a semi-permanent attachment is wanted.
Iron-on labels sit flat and can be a sensible option for shirts, trousers and cotton sweatshirts. They aren't suitable for every technical fabric. Waterproof finishes, fleece, padded outerwear and garments marked “do not iron” need a different solution.
Sew-in labels
A sew-in label is a woven or printed fabric strip secured with thread. It takes longer to apply, but the stitching provides a dependable attachment when clothing faces heavy handling, repeated washing or industrial laundry.
Sew-in labels suit knitwear, baby clothing, towels, bedding and care-home garments where longevity matters more than speed. Put them on an inner seam or another low-friction area, rather than directly against sensitive skin. They can be used in tumble-dryer routines, but the garment's own care instructions still govern temperature and laundering.
Match the format to the environment
Stick-on labels are convenient for quick identification, and products such as Quote My Wall's stick-on range are presented as washable, tumble-dryer, microwave and dishwasher safe. Those claims apply to the product and its intended surfaces, so follow the application guidance rather than assuming every adhesive label belongs directly on fabric.
Iron-on labels need a suitable heat-safe garment and correct pressing. Sew-in labels require more labour but remain the sensible choice where laundry is industrial or garments will be used for a long time. The label format should follow the garment's construction, not the appeal of a particular design.
Stick-On vs Iron-On vs Sew-In Compared
The comparison is straightforward once you stop asking which label is universally best. Stick-on wins on speed and removability, iron-on offers a strong bond on suitable fibres, and sew-in is the long-term option for demanding laundry.
| Format | Application Time | Wash Durability | Best Fabric Fit | Best Use Case |
|---|---|---|---|---|
| Stick-on | Very quick, no equipment | Good when applied to a clean, smooth care label | Care labels, synthetic tags and low-friction surfaces | School uniform, coats, PE kit, hand-me-downs |
| Iron-on | Requires a household iron and careful pressing | Strong when correctly bonded to suitable fabric | Cotton and other iron-safe natural or blended fabrics | Shirts, trousers, sweatshirts and personal clothing |
| Sew-in | Slowest, requires needle and thread | Very high when securely stitched | Knitwear, baby clothing, towels and workwear | Care-home laundry, industrial washing and long-term use |
Stick-on labels are the practical answer when a uniform rush is already under way. Apply one to the care label, press it firmly and leave it undisturbed before washing. They're also preferable where a garment may move between siblings, because a removable identifier is less likely to complicate the handover.
Iron-on labels are better where there is no suitable smooth care label and the fabric accepts heat. They form a flat attachment, but the wearer and garment still matter. A label that feels fine on a polo shirt may be unsuitable on a delicate jumper or a heat-sensitive coat.
The safe default: For most UK school and ordinary care-home clothing, start with a high-tack stick-on label on the care-label area. Use iron-on for compatible cotton garments and sew-in labels for industrial laundry, knitwear or clothing expected to last through repeated ownership.
Don't put a stick-on label directly over loose, stretchy fabric and don't force an iron onto a “cool iron” garment. If the item has high skin contact, place the identifier on an inner seam or care label rather than somewhere that can rub.
A detailed comparison of the practical differences appears in this guide to stick-on clothing labels compared with iron-on tags. The useful conclusion is simple: choose by surface, laundering and ownership, not brand loyalty.
How to Apply and Wash Each Type Correctly
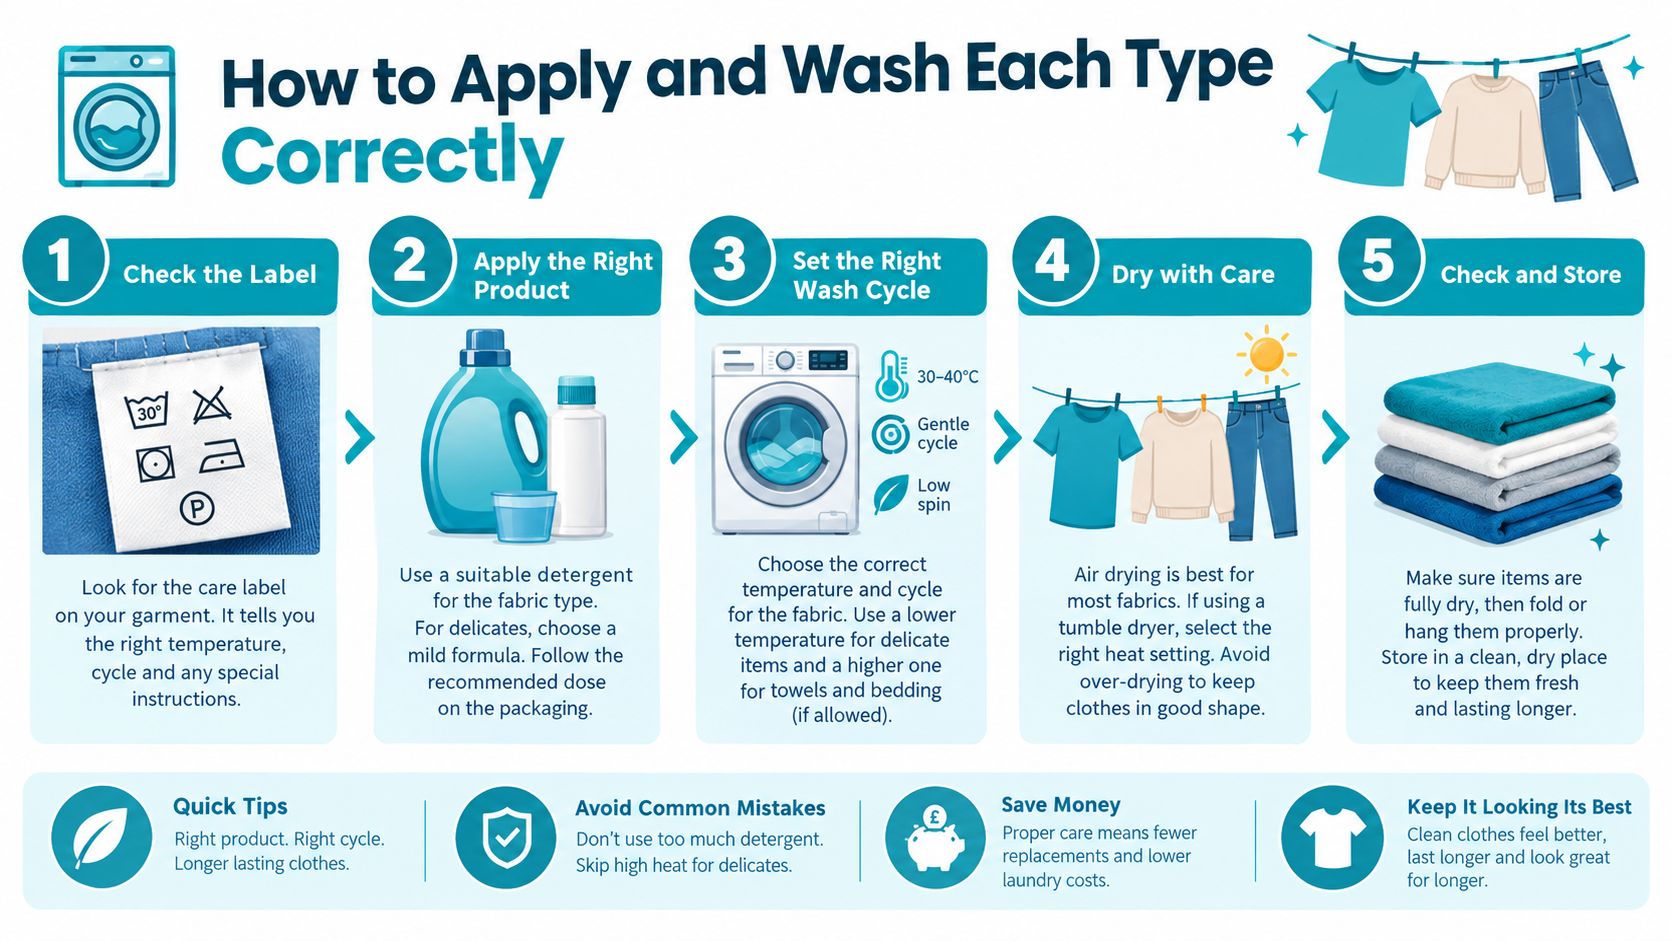
Most label failures begin before the first wash. The surface is damp, the label is sitting across a seam, or the garment goes straight into the machine before the adhesive or bond has settled.
Stick-on application
- Find the garment's flat care label or another smooth, low-friction inner surface.
- Make sure it's clean and completely dry. Remove lint with a dry cloth.
- Peel the label without touching the adhesive.
- Place it fully within the care label, not partly on the garment fabric.
- Press firmly across the centre and edges for around 10 to 15 seconds.
- Leave it to cure before washing. A full day is the cautious choice for a new adhesive bond.
- Avoid coating the label surface with fabric softener, bleach or oily laundry additives.
The label mustn't hide or cover the garment's original fibre composition and care information. UK textile rules require that fibre details remain durable, legible, visible and accessible, so a personalised identifier should never replace the manufacturer's statutory information. The UK textile-labelling guidance explains those obligations for businesses and retailers.
Iron-on application
Check the garment first. If its care instructions prohibit ironing, choose stick-on or sew-in instead. For an iron-safe cotton or blended garment:
- Set a dry household iron to roughly 150 to 170°C, commonly a medium cotton setting.
- Position the label on the inside collar, waistband or another suitable area.
- Remove any protective film and cover the label with the supplied sheet or a thin pressing cloth.
- Press without sliding for around 15 to 20 seconds, following the label maker's instructions.
- Allow the area to cool, then check every edge.
- Wait 24 hours before the first wash so the adhesive can set properly.
For a fuller practical explanation aimed at families, this guide for parents is useful when you're preparing several garments at once.
Sew-in application
Use a flat inner seam with a straight running stitch. Secure both ends and keep the thread tension firm without puckering the garment. Don't catch the label into the main seam, because a thick stitched area can create irritation and make future repairs awkward.
Wash all labelled clothing inside out where practical, keep to the garment's own care temperature and avoid harsh treatment that the fabric itself doesn't permit. Quote My Wall describes its stick-on range as machine-washable, tumble-dryer safe and dishwasher safe for relevant products, but application surface and care instructions still matter.
Further advice on selecting labels for regular laundering is available in this guide to machine-washable labels.
Reducing Replacement Costs for Expensive UK School Uniform
A missing branded jumper can turn into an avoidable purchase before the school has finished sorting lost property. As noted in the overview above, a jumper averages £14.23 and a blazer £39.03, so label those items first. A secure, readable label protects the replacement budget, especially where the uniform includes school branding or specialist clothing.
The lost-property problem needs a system, not optimism. An industry survey reported by iNews found that 75% of primary-school children lost an average of one or two uniform items per year, while 21.5% lost as many as five items. Among surveyed parents, 17% spent between £26 and £50 replacing uniform, 4% spent between £51 and £100, and 5% spent more than £100. These figures come from an industry survey rather than an official national measurement, but they show why clear identification matters. The findings are reported in iNews' advice on reducing school-uniform costs.
Use the label beyond the first owner
A durable, readable label keeps a uniform useful after its first owner has outgrown it. It helps a school return a lost coat, lets a parent identify a sibling's hand-me-down and gives a uniform-exchange volunteer a clear starting point when sorting donations.
Buy plain uniform where that is cheaper, then add a separate logo if the school permits it. A reliable identifier supports this approach by helping garments circulate instead of disappearing. Parentkind's 2025 school-uniform report found that 82% of parents believed buying plain uniform and adding a logo could save money, while 71% preferred or already used that approach. The figures appear in the Children's Society school uniform report.
Calculate your own exposure
Count the garments your child takes to school regularly, then prioritise anything expensive, branded or difficult to replace. A labelled coat recovered from lost property saves its replacement price. A clean hand-me-down that reaches a sibling or another family avoids another purchase.
Use this simple reuse workflow:
- Keep one labelled spare jumper in the school bag during term.
- Record who receives each hand-me-down.
- Before transferring it, peel the old stick-on label from the care label.
- Clean away adhesive residue and let the area dry.
- Apply the new label fully within the care label, keeping it readable and private.
For each frequently lost item, record its replacement price, likely recovery value and reuse value. That gives you a practical labelling order: start with garments that cost the most, return most often from lost property or can serve another child.
Labelling Clothing for Care Homes, Nursing and Dementia Care
A care-home labelling system should be designed around workflow, privacy and dignity. A label that survives every wash still fails if staff can't read it, if two residents have similar names or if each garment carries the identifier in a different place.
Start with a standard placement policy. Put tops at the inside neck or care-label area, trousers at the inner waistband, nightwear at an inner seam and coats at the inside collar or pocket. Record the chosen position in the laundry procedure so agency staff and new starters don't have to invent their own method.
Use the minimum information needed
A full name may be appropriate in some homes, but it isn't automatically the safest option. Consider the resident's privacy, the garment's visibility and the people who need to return it. Initials plus room or unit information can be enough where the laundry team has a reliable resident list.
Avoid printing full NHS numbers, full dates of birth or unrelated medical information on clothing. A label should identify ownership, not expose a medical record. Use high-contrast text, a straightforward font and a size that staff can read under ordinary laundry-room lighting. Decorative scripts and tiny lettering are poor choices for residents with visual impairment or for staff sorting garments quickly.
For dementia care, continuity matters. The resident may recognise a familiar name or colour, while staff need an unambiguous identifier. Resources on dementia memory support tools can help relatives and care teams think about recognition aids more broadly, but clothing labels should remain simple and privacy-conscious.
Build the process around intake
At admission or room change, create an inventory of clothing and personal laundry items. Record the garment type, colour, label position and identifier. Ask the resident or family which items are valuable, sentimental or likely to be confused with another resident's belongings.
A practical workflow looks like this:
- Intake: Count and record clothing before it enters communal laundry.
- Label: Apply the agreed identifier in the standard position.
- Laundry check: Compare unclaimed garments with the resident list during each routine audit.
- Escalation: Move unmatched items to a clearly marked lost-clothing area rather than returning them by guesswork.
- Family notice: Use a family-facing noticeboard or agreed contact process for unresolved items.
- Review: Update the inventory when clothing is replaced, donated or removed.
Don't use the label as a substitute for stock control. Staff should be able to report a missing cardigan, check whether it entered laundry and record the search outcome. Relatives deserve a clear answer, and residents deserve their own clothing returned without repeated questioning or public confusion.
Design Ideas, Personalisation and Small Business Uses
Personalisation should improve recognition, not compete with it. Choose a clear sans-serif or plain rounded font, strong contrast against the label background and a name that staff or children can read quickly. A pale label on a white care tag is harder to spot than a contrasting design, even if it looks neat in an online preview.
Icons help younger children who can't yet read. A star, dinosaur or football can identify one child's belongings at a glance, particularly on a coat hook or shared changing-room bench. For older children, initials or a restrained colour scheme may feel less childish while still making ownership clear.
Keep one design system for shared wardrobes
Parents with several children can use one colour or icon per child, provided the system is recorded somewhere. Care homes can use a consistent format across residents, with readable names and discreet location codes. Small businesses should approve one template before ordering so that labels don't arrive with mixed spelling, fonts or placement instructions.
A boutique clothing seller might add a discreet brand identifier to garments prepared for customers. A holiday-let operator may use labels for shared robes or laundry bags. A school-trip organiser can mark uniform bundles, while a wedding party can identify robes, shirts or garment bags before an event. In each case, create a single source-of-truth spreadsheet containing names, spelling, label format and placement.
Bulk ordering needs a checking stage. Have one person proof every name, standardise capitalisation and separate labels by recipient before application. For gifts, a personalised label can be a useful addition to a baby grow, PE kit bag or lunch box, especially when the recipient is starting nursery or school. If you're choosing wider personalised event items, it can also help to compare graduation stole options before settling on a consistent name and colour treatment.

The strongest design is the one people can identify without effort. Use decoration to support recognition, keep private details off visible surfaces and place every label where the next owner or laundry worker will look first.
Quote My Wall offers personalised ultra high-tack stick-on clothing labels for school uniforms, children's garments and care-home clothing, with options designed for washable items and everyday belongings. Choose the label format and design that match your laundry routine, then visit Quote My Wall to order labels for the garments you need to recover, reuse and return.