

Name Labels Explained: Types, Uses, and How to Choose
You've probably got a school jumper with a mystery surname in it, a lunch box that keeps ending up in the lost property bin, and a pile of labels waiting to be written by hand for the third time this term. That's exactly why name labels aren't a nice little add-on, they're a practical fix for a very ordinary problem that keeps costing families time and money.
Why Name Labels Matter More Than You Think
By Sunday evening, the PE kit is ready, the uniform is folded, and one jumper has vanished again. A quick handwritten note on masking tape may get a child through Monday, but it rarely survives the next wash. Replacing the garment costs more than applying a label once.
The scale of that waste is clear in a 2025 UK survey. 75% of primary school children lost 1 to 2 uniform items a year, 21.5% lost 3 to 5 items, and researchers estimated about 13 million lost items across roughly 5 million primary-age children each school year. Replacement spending followed: 17% of parents spent £26 to £50, 4% spent £51 to £100, and 5% spent over £100 (parents are spending millions on replacing lost school uniform).
Practical rule: if one jumper or fleece disappears more than once, a durable label costs less than repeating the replacement.
The money angle is simple
The Schoolwear Association reported that compulsory secondary-school uniform and sportswear in England averaged £92.35 per pupil in 2024, compared with £96.24 in 2023, and remained 25% higher in real terms than 2021 (Schoolwear Association news). The same report found that a pupil typically buys only 2.4 branded school blazers throughout secondary school. Those garments are expected to last, so keeping them identifiable protects their value.
That makes a name label a small return-on-investment decision. It keeps expensive clothing in circulation, helps school staff reunite items with their owners, and reduces unnecessary purchases. The benefit is practical, not decorative.
The same logic applies in care homes, particularly for residents living with dementia. Clear, high-contrast labels on clothing, slippers, glasses cases, and personal laundry give staff a quick identification point without relying on memory or a handwritten note that fades. Choose a label that remains readable after repeated washing, place it where staff can check it easily, and avoid adding unnecessary personal information.
For busy households, the recommendation is straightforward: label the items most likely to be misplaced, select a format matched to the material, and test the first few labels through normal washing before labelling everything. Lost property is common, but repeated replacement does not have to be.
What Name Labels Are and How They Work
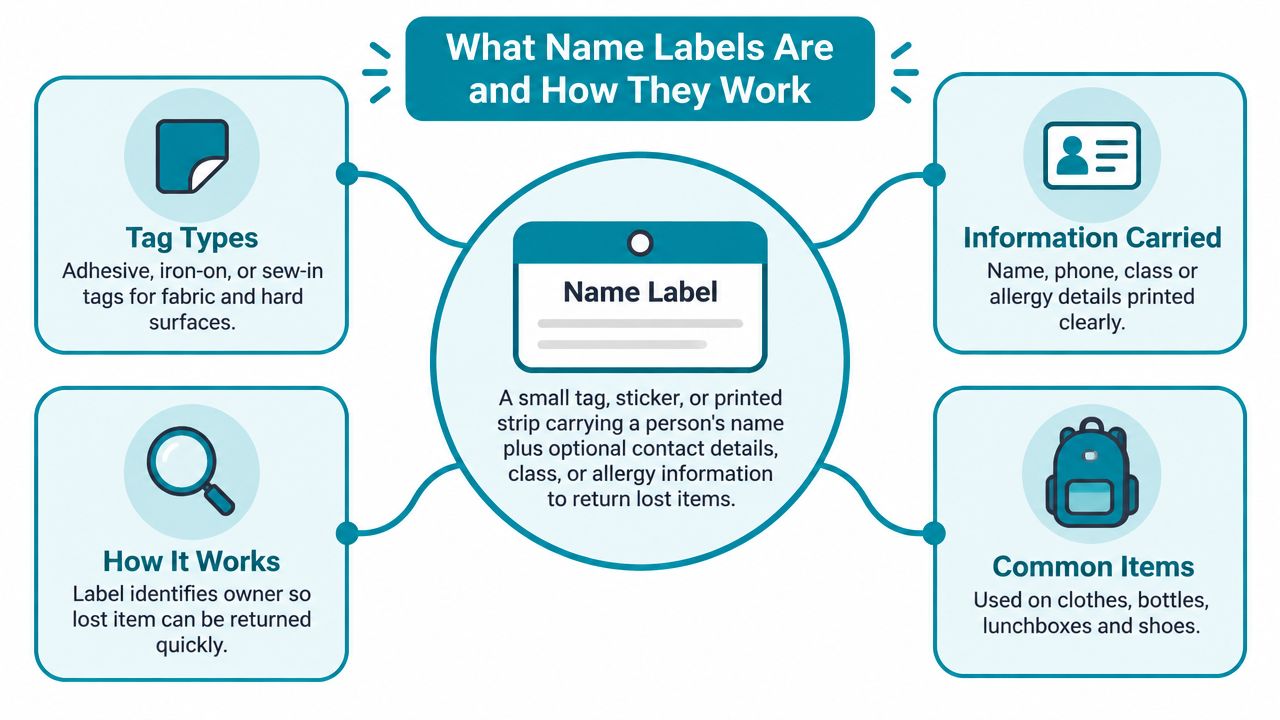
A name label is a small tag, sticker, printed strip, or writable marker carrying a person's name. Some also include contact details, class information, or allergy notes, helping a lost item find its way back. The principle is simple: the label must stay attached and readable for as long as the item remains in use.
The four formats that matter
Stick-on labels work as durable stickers. Press them onto a smooth surface, such as a care label, bottle, lunch box, or other hard item, and the adhesive holds them in place. They are quick and tidy, but direct application to stretchy or textured fabric gives less reliable results.
Sew-on labels are stitched into fabric, like traditional name tapes inside shop-bought garments. Sewing takes longer, yet the label becomes part of the garment and is unlikely to shift. Choose this format for hand-me-downs, care-home clothing, or items needing a long-term identifier.
Iron-on labels use heat-activated adhesive. A dry iron bonds the label to fabric, giving a neat finish and stronger hold than a basic sticker when applied correctly. They suit garments washed repeatedly, provided the fabric and care instructions allow heat application.
Printable or hand-written labels can be produced at home. Print the name, write it with a pen, or complete the supplied space, then apply or insert the label according to the product design. This is useful for temporary or low-stakes marking, but ink and paper-based formats usually wear sooner.
The information on a name label should remain limited to what helps identification. A first name and surname initial may be enough for school clothing, while care settings need clear, readable details that staff can check quickly without exposing unnecessary personal information.
UK textile labelling rules also apply to the product itself. Fibre content must be shown, including fur and other animal parts. Products with separate components made from different fibres must identify each component (wash care labels guidance). For name-label products, check that the material information is traceable at component level rather than reduced to a vague “fabric” description.
Comparing the Main Types of Name Labels
The smart way to choose is to compare the label against the job, not against a glossy product page. A label that works brilliantly on a lunch box can be a bad choice on a stretchy jumper cuff. A label that survives industrial-style laundry can be overkill for a bottle that just needs a clean return to the owner.
Name Label Types Compared
| Type | Durability | Application Time | Best For |
|---|---|---|---|
| Stick-on | Good on smooth, non-stretch surfaces, less reliable on textured fabric | Seconds | Care labels, lunch boxes, bottles, quick school wins |
| Sew-on | Excellent, because it becomes part of the garment | Minutes | Care-home clothing, hand-me-downs, permanent marking |
| Iron-on | Strong once applied properly, neat on fabric | A few minutes | School uniform, polo shirts, garments washed repeatedly |
| Click-on | Very practical for items with loops or small attachment points | Seconds to minutes | Socks, shoes, PE kit, removable items |
Stick-on labels are the fastest route to visible results. They're ideal on care tags and hard surfaces, and that lines up with the logic behind stick-on name labels for clothes when the label is placed on a smooth tag rather than stretched directly over fabric. On the other hand, if you want a label that survives repeated handling without fuss, sew-on and iron-on formats are more dependable.
Use this rule: speed first, stick-on. Permanence first, sew-on. Clean fabric finish, iron-on. Tiny items and loops, click-on.
For school uniform, I'd be blunt. Use iron-on labels for daily wear, stick-on for kit that only needs fast identification, and sew-on where you want something near-permanent. If you're buying once and hoping not to think about it again, sewn or ironed labels are the safer bet. For a specific hard-item option, a product such as Custom Mark name badge shows how clip-style identification can solve a different kind of attachment problem, especially where a pin or clip suits the item better than adhesive.
Materials, Durability, and Wash Safety
Labels fail in predictable ways. Edges peel, print fades, film cracks, and the whole thing lifts just enough to become irritating. That is a materials problem, and cheap labels usually fail first.
Wash durability explained
A label is only durable if it stays readable through the wash cycle the garment or item is meant to handle. For schoolwear, that means surviving repeated machine washing without the print breaking down or the adhesive giving up. The same logic applies in care homes, where clothing is often washed frequently and needs to stay identifiable after constant handling.
Material choices matter more than people think
Vinyl and thermal print are common in stick-on products. Woven polyester usually does the hard work in sew-on labels, and silicone or similar flexible materials show up in some tag-style systems. The practical difference is straightforward. The more a label has to bend, heat, and rub, the more important the bond and print quality become.
For bottles and lunch boxes, dishwasher and microwave safety depend on the product being made for those conditions, not on the idea of a name label itself. If the item is meant for food use, I would only trust a label that is clearly intended for that environment. A label that looks fine in a drawer and fails after a term of dishwashing is the wrong buy.
A useful comparison is this:
| Label Type | Wash Cycles Survived | Tumble Dry Safe | Dishwasher Safe | Microwave Safe |
|---|---|---|---|---|
| Stick-on | Good on the right surface, weaker on fabric | Often, if the product is rated for it | Yes, on suitable hard items | Yes, on suitable hard items |
| Sew-on | Very high | Yes | No | No |
| Iron-on | High when properly applied | Usually, if the garment allows it | No | No |
| Click-on | Good for removable items | Depends on the product | Not relevant | Not relevant |
The Schoolwear Association has highlighted the cost of compulsory secondary-school uniform and sportswear in England, so durability matters because every failed label can lead to another replacement (Schoolwear Association news). If a label peels halfway through term, you have bought hassle with a neat font.
For a straightforward product view on washable name labels for clothes, the standard is simple. The label must stay readable after repeated real-life washing, not just look good on day one.
Where to Place Name Labels for Best Results
Placement does half the work. A good label in the wrong spot fails faster than a decent label in the right one. If you want durability, put the label where it gets the least friction and the most readable visibility.
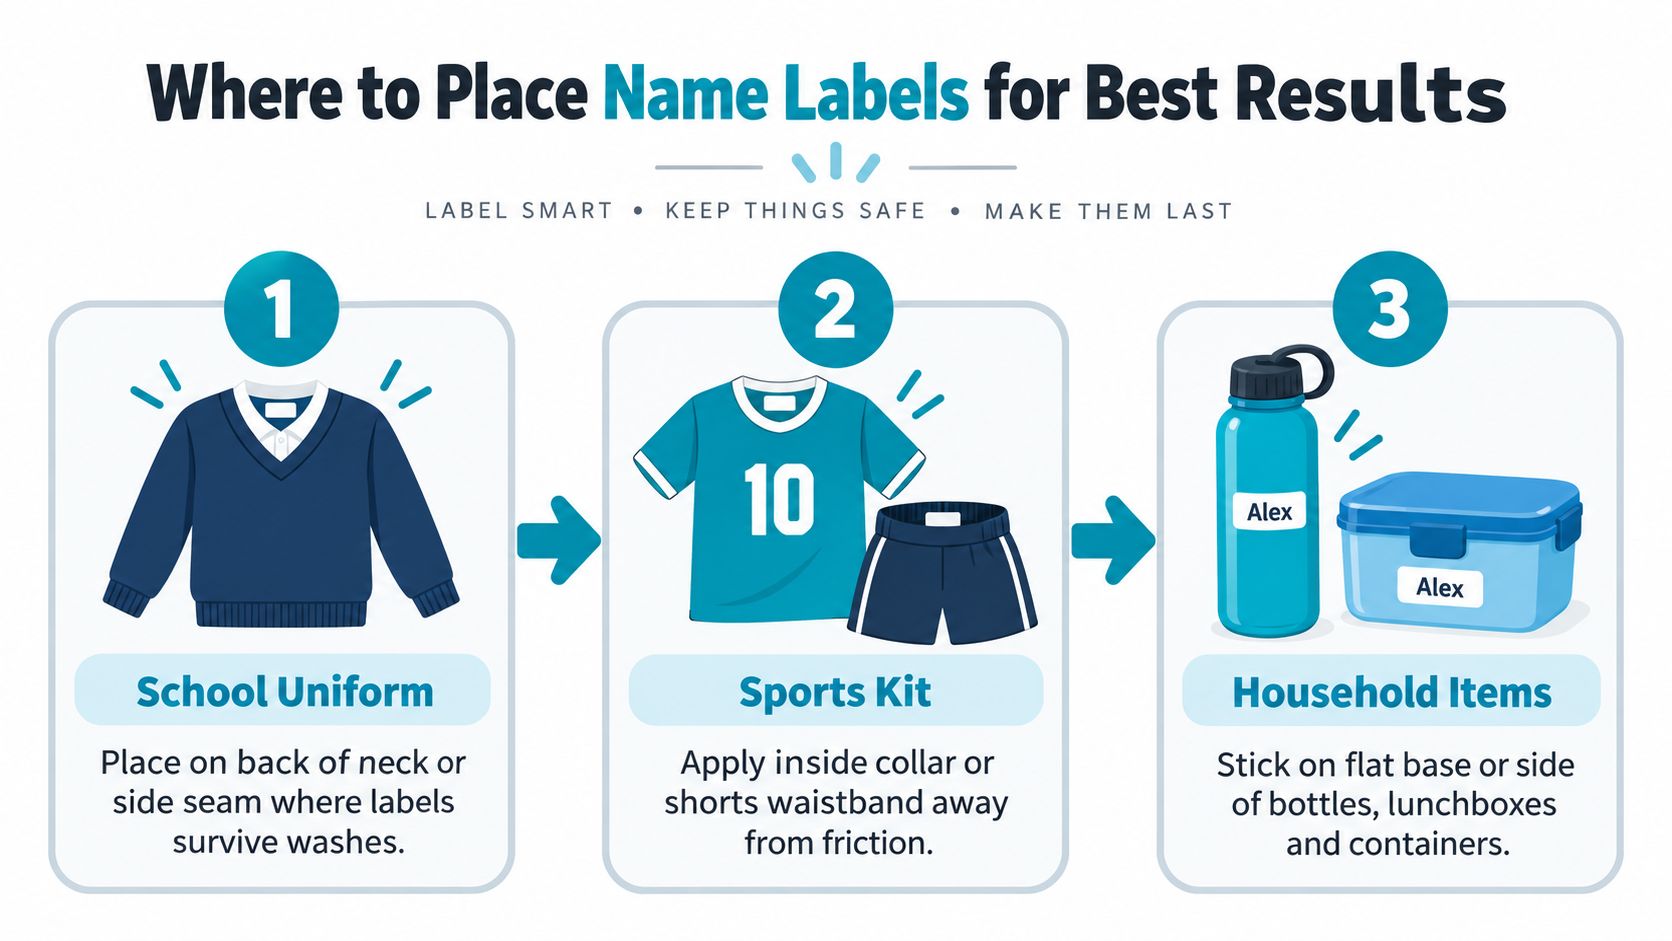
Put labels where the item naturally stays flat
On jumpers, the back of the neck or side seam is usually the safest choice. Those areas take less abrasion than the chest and don't sit directly against skin as much. On socks, the sole or heel tab works better than the cuff, because the label isn't constantly being stretched or folded open.
For lunch boxes and water bottles, choose a flat base or a smooth side panel. Curved bottle walls can still work, but a flatter zone gives the adhesive a better chance to stay put. If a container gets handled by staff in a hurry, readable placement matters just as much as adhesion.
Labels fail fastest where fabric bends, stretches, or rubs. Avoid seams, Velcro, and high-friction chest panels.
Care-home garments need a different mindset
Care-home clothing often gets handled by staff under time pressure, so labels should be large enough to read quickly and placed where they won't be hidden by folds or fasteners. For dementia-friendly use, clarity beats decoration every time. Large print, strong contrast, and a location that doesn't sit under layers all help.
The care-home angle is badly under-discussed, even though there's a clear need for clothing to be identified quickly in shared laundry. A practical guide on name labels in care homes is more useful than a generic school-focused article because the stakes are different. In care, the label is about dignity, return, and reducing mix-ups, not just preventing a missing cardigan.
If you're labelling a mixed household load, keep it consistent. Put the same label in the same place across similar items, then staff and family members stop hunting for it. That saves more time than people expect.
Best Uses Across School, Home, and Care Settings
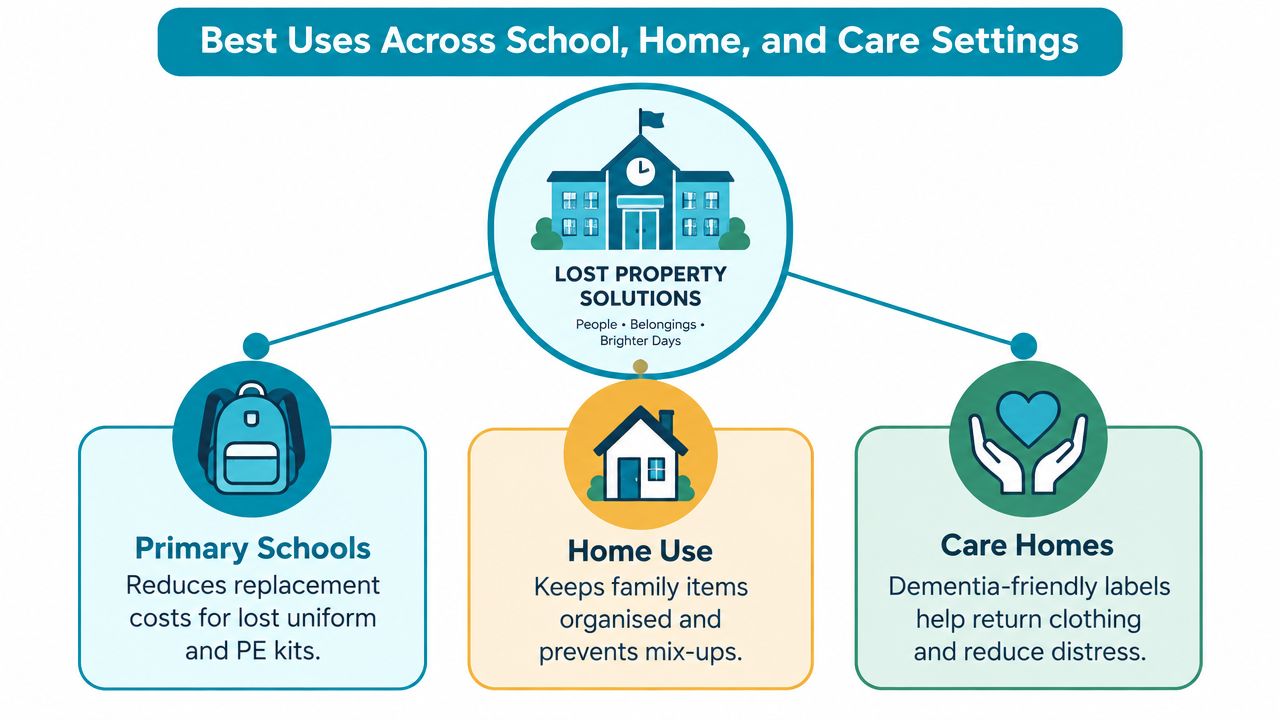
The mistake is using one label style everywhere. A primary-school child, an adult in a shared home, and a care-home resident all need clear identification, but the label has to suit the job.
Match the label to the setting
For primary schools, choose bold labels with clean, readable print. Lost uniform is still a real cost for families, so the label should do more than look neat. Put the effort into items that disappear most often, especially jumpers, cardigans, and fleeces.
For home use, labels stop family items from drifting into the wrong pile. That matters in busy houses where school kit, sports gear, lunch boxes, and nursery items all get stacked together. If you also manage baby and toddler supplies, you can find nursery packaging solutions that work alongside a simple labelling system, especially where clear ownership cuts down on confusion.
For care homes, use high-contrast labels that staff can read at a glance. Plain layouts work better than decorative ones. The priority is quick sorting, fewer mix-ups, and returning the right clothes to the right person with less hassle. A practical guide on name labels in care homes covers that use case well, because care settings need clarity and dignity, not just lost-property control.
The numbers back that up. A school lost-property survey found almost 90% of schools said name labels are the best way to reduce lost property, yet only 3% said most uniform and kit is labelled. It also found severe lost-property problems drop to 9% where at least half of parents label kit, compared with 49% where less than a quarter is labelled (school lost property survey results).
That is a clear return on effort. Labels are a small spend against repeated replacements, less staff time spent sorting piles, and fewer items vanishing into the wrong cupboard, bag, or laundry basket.
How to Choose the Right Name Label
Buy the label in this order of priority: fabric fit, size, durability, readability, then design. That sequence stops you getting distracted by colours and icons before you've answered the only question that matters, will it stay on the thing you're trying to mark?
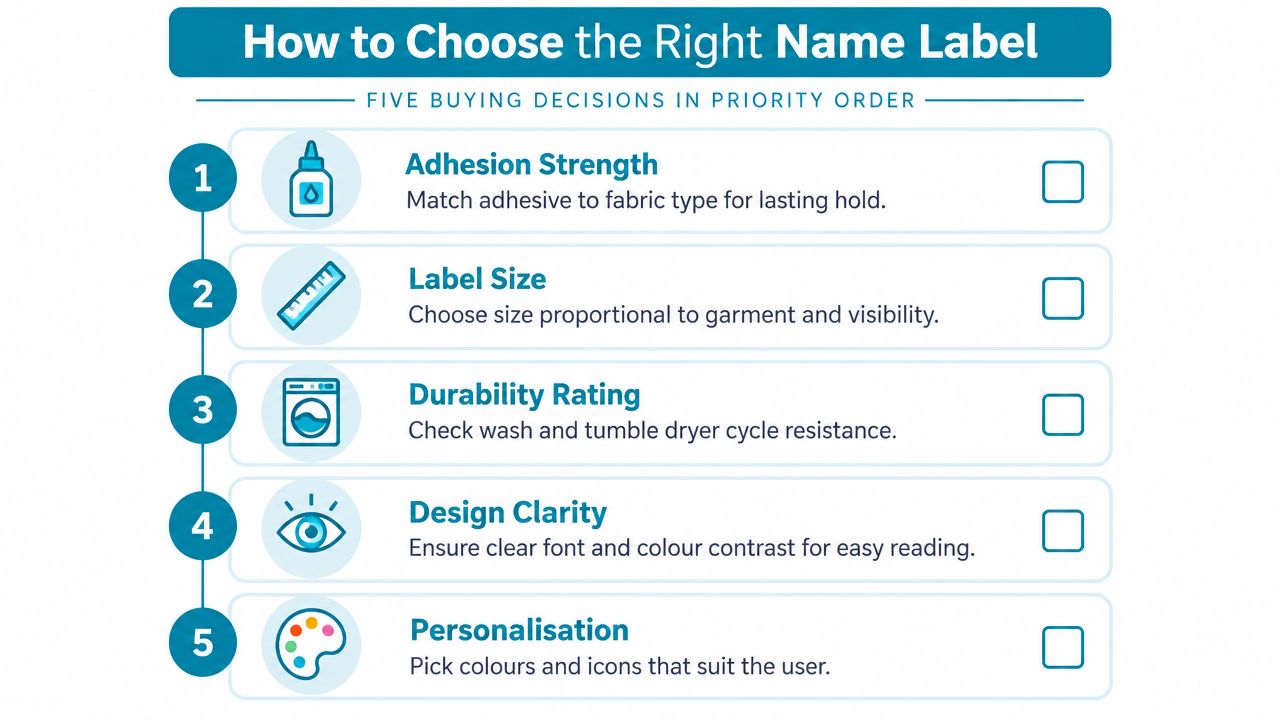
The five decisions that make the difference
Adhesion strength comes first. Match it to the surface, smooth care labels and hard goods suit stick-on labels, while fabric that gets washed hard usually needs iron-on or sew-on. If the product has to survive repeated handling, don't buy the weakest attachment and hope for the best.
Label size should match the item. Tiny labels look neat, but they're a poor choice for jumpers or garments read by teaching assistants from a distance. Bigger text is not a luxury in care settings, it's the whole point.
Durability rating matters more than design. Ask whether the label survives the wash and tumble routine the garment sees. A pretty label that fades fast is just an expensive temporary note.
Design clarity beats style. Use strong contrast, readable fonts, and simple layouts. For kids, fun graphics can help. For care homes, plain is usually better.
Personalisation and placement should be planned before ordering. Count how many garments need labels, then add a buffer. My rule is simple, buy 20% more labels than you think you need so you have replacements for lost items and growth spurts.
Don't order tiny labels for jumpers, and don't pick colours that fade into the fabric after a few washes.
If you want a quick buying shortcut, use this:
- Stick-on labels for lunch boxes and water bottles.
- Iron-on labels for school polo shirts and regular uniform.
- Sew-on labels for care-home garments and permanent marking.
- Click-on labels for socks and items with loops or attachment points.
That's the shortlist. Everything else is branding.
Name Label FAQs and Care Tips
The same practical questions come up after a label type has been chosen. The first is temperature. For school use, 40°C washing is the everyday benchmark, while some dedicated clothing labels are made for hotter laundry environments, especially in care settings where harsher washing is common. If the garment itself has a stricter care instruction, follow that first.
Ironing is another concern. Don't press directly on a label unless the product instructions say it's fine. Use a tea cloth between the iron and the label, or iron on the reverse where possible. That protects the adhesive and keeps the print from flattening or cracking.
Hard-item safety and high-loss items
For lunch boxes and bottles, stick-on labels are the obvious choice because they're designed for hard, smooth surfaces. Products in this category are often sold as microwave, dishwasher, and tumble-dryer safe, but only trust the rating that comes with the actual label. For school lost property, shoes and socks should always be labelled, because they're among the easiest things to misplace and the hardest to match later.
A few care habits help labels last longer:
- Wait before washing: Leave a fresh application to settle before the first wash.
- Skip fabric softener on stick-on areas: It can interfere with adhesion.
- Keep print readable: If a label fades badly, replace it before it becomes useless.
- Refresh annually: September is the right time to check school labels, not mid-term after the damage is done.
Here's the screenshot checklist:
- Match the label to the surface.
- Use larger text for uniforms and care homes.
- Label shoes, socks, jumpers, and bottles first.
- Place labels on flat, low-friction areas.
- Replace faded labels at the start of the school year.
If you want clothing labels that are built for real school runs, shared laundry, and care settings, take a look at Quote My Wall. Their range covers stick-on and iron-on options for clothes and belongings, which makes it easier to choose a format that fits the job instead of gambling on the wrong one.