
Kids Name Labels: Choose, Stick and Wash
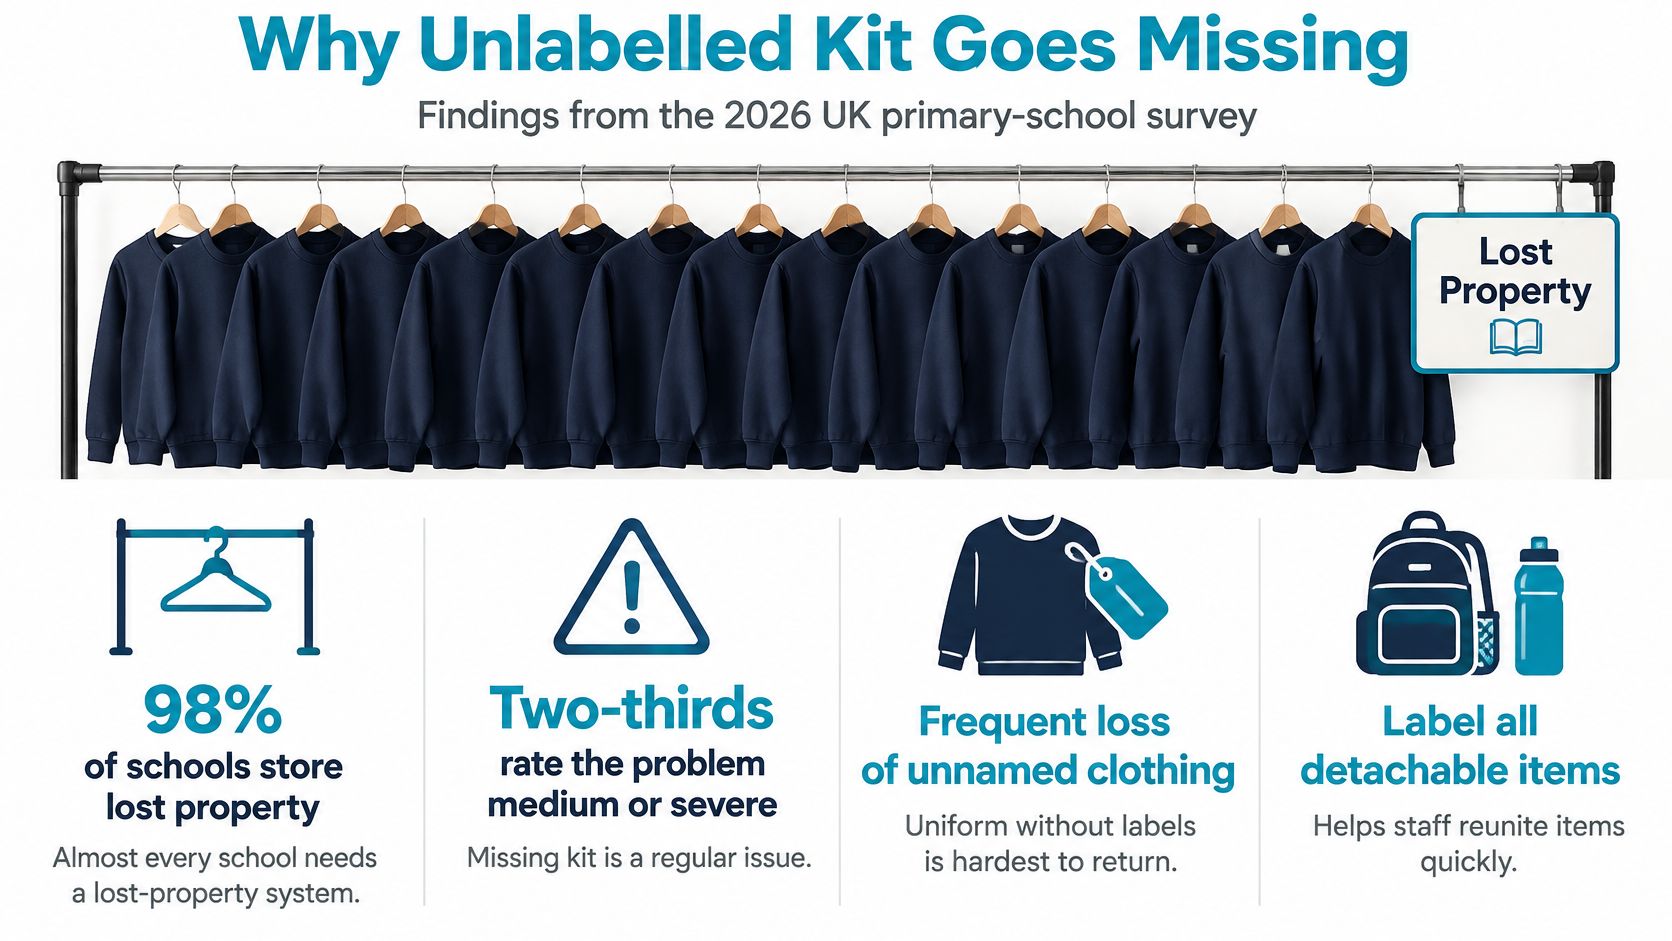
Only 3% of schools said most uniform and kit was labelled in a 2026 survey of UK primary schools published by Stikins. That reframes kids name labels as something more useful than a finishing touch before term: they give staff a way to identify clothing that otherwise looks exactly like everyone else's.
A useful label needs more than a cheerful design. It must suit the surface, survive the item's care routine, identify the right child without exposing private information, and leave the garment usable by its next owner.
Why Unlabelled Kit Goes Missing
A member of staff faces a rail of navy jumpers after PE. Several are the same size, and each child thinks the cleanest one might be theirs. Without a readable name, staff can't confidently return any of them.
In the same survey, 98% of schools stored lost property, and two-thirds rated the problem medium or severe. Where at least half of parents labelled kit, 9% of schools described lost property as severe, compared with 49% where fewer than a quarter of items were labelled; 88% named labels as their preferred intervention. These are findings from a label-company survey, not an official national census, and the association doesn't prove that labelling alone caused the difference.
Give staff something they can act on
A kids name label is a small ownership mark on clothing or a belonging that helps staff return it rather than leaving the family to replace it. It isn't decoration, and it isn't a medical alert.
The practical question is whether someone sorting an unfamiliar garment can find and read the name. A label hidden beneath a folded seam, or printed so faintly that the letters disappear against the background, doesn't do that job well.
Start with whatever comes off during the day
The expensive winter coat deserves a name, but so does the cardigan taken off at lunch. Prioritise the items children remove, carry between rooms or leave beside a changing bench:
- Extra layers: Jumpers, cardigans and coats.
- Changing kit: PE tops, shorts, tracksuit bottoms and footwear.
- Separate belongings: Sports bags, bottles and lunch boxes.
Our guide to the importance of name labels in school supplies helps extend that check beyond uniform. For an after-school sports example, Locals Jiu Jitsu Alexandria's advice on packing for Jiu Jitsu in Alexandria is a useful companion when organising clothing and belongings that travel together.
Practical rule: Name the item that can become separated, not just the bag you put it in.
The decisions that matter are the fixing method, application and removal, credible wash and heat claims, and the words that should never appear where other children can read them.
Stick-On Iron-On and Woven Labels Compared
Kids name label types compared
| Type | Fixing method | Best surfaces | Durability in real use | Main limit |
|---|---|---|---|---|
| Peel-and-stick clothing | Press onto a clean, dry approved surface, without sewing or ironing | Smooth care tags; cotton and polycotton only where direct fabric application is approved | A wash-rated adhesive can withstand the stated care routine | Can lift on fleece, fluffy knits and silicone |
| Iron-on | Household iron or heat press | Heat-tolerant, flat woven shirts and PE tops | Can outlast stickers when correctly bonded to compatible fabric | Can damage nylon, waterproof coatings, prints and do-not-iron items |
| Sew-on woven | Stitch into a seam | Coats, jumpers, bags and towels | Choose label material and thread compatible with the garment's hottest permitted wash | Sewing takes time; stiff edges can scratch |
| Shoe and footwear | Stick inside the heel or on an approved insole area | Compatible leather and synthetic shoe interiors | Sweat and abrasion can wear print faster than on shirts | Limited space may make a long name unreadable |
| Bottle, lunch box and stationery | Apply a hard-surface label | Suitable plastic, metal, pencil cases and rulers | Dishwasher-rated only when the product states it | Don't substitute a clothing-only or hard-surface-only label for the other |
Pick the row from the surface and care routine, not the prettiest design. A Sunday-night labelling session is quicker with stickers, but speed doesn't make an unsuitable adhesive stick to a fluffy jumper.
The Department for Education's uniform-cost guidance, published in 2021, identifies sew-on or iron-on labels as a practical way to help reduce replacement costs. Labelling belongs alongside sensible uniform purchasing, rather than being an extra decorative expense.
Stick-on means no heat, not every surface
Some clothing stickers are intended for the smooth synthetic care tag, not direct contact with woven fabric. Others permit direct fabric application. Read the intended application surface before buying, particularly if you're choosing labels for garments with tiny or missing care tags.
A side-seam care tag is often a better starting point than the body of a knitted jumper. Don't bridge a fold or let the sticker extend beyond the tag's edge, where the exposed adhesive can collect fluff.
Heat and stitching solve different problems
An iron-on label suits a flat, heat-tolerant shirt when you want a lasting bond. It's a poor choice for a waterproof coat unless the manufacturer expressly permits the application method, because heat can damage the coating even when the outer fabric looks durable.
Woven labels let you avoid adhesive entirely. Stitch one into an existing seam allowance rather than through the weatherproof shell of a coat, and check that neither the cut edge nor the thread ends rub against skin.
A sew-on label is only as wash-resistant as its fabric, print, thread and stitching. Don't assume that woven means indestructible.
Shoes and food containers need their own judgement. Footwear labels face rubbing and perspiration, while bottle labels face wet hands and cleaning products. A multipurpose product can cover several uses, but only when its stated applications cover each item.
How to Apply and Remove a Label
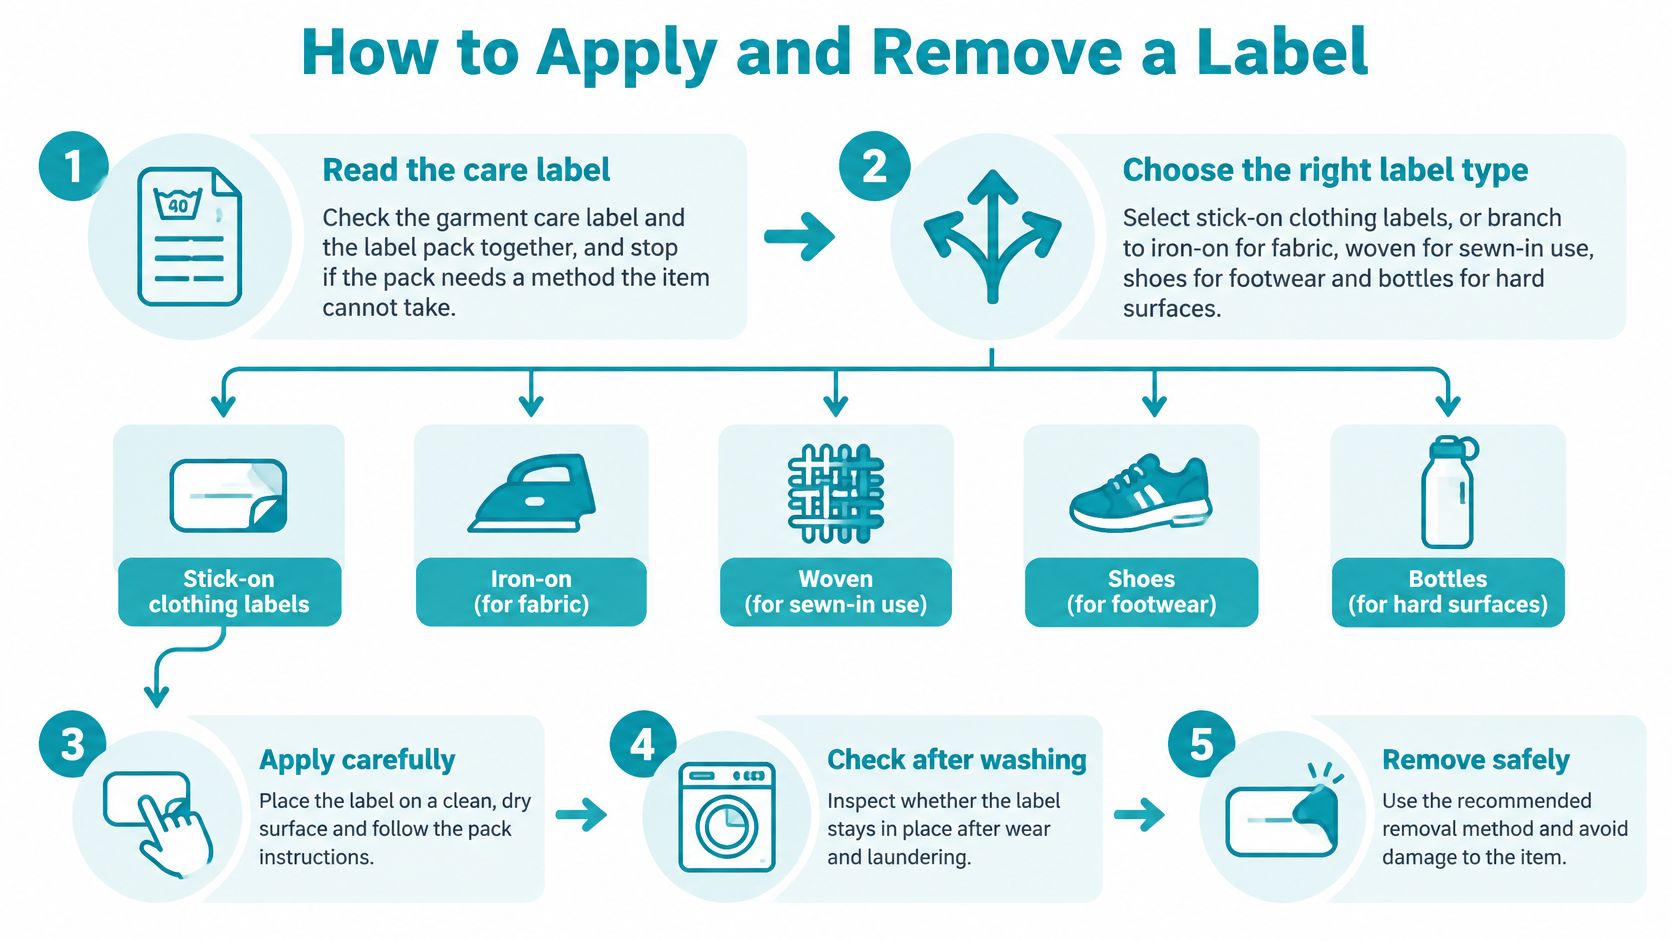
Use this routine for stick-on clothing labels, adapting the fixing stage for other types. Keep scissors, a clean dry cloth and the product instructions nearby; use a seam ripper for sewn-label removal rather than pulling at the garment.
Prepare, position and press
- Read both sets of instructions. Compare the garment care label with the name-label pack. Stop if the fixing method needs heat or treatment the garment prohibits, because a successful bond isn't worth a scorched shirt.
- Remove surface contamination. If a new garment feels stiff or carries a factory finish, wash it according to its care instructions and dry it completely. Dampness, lint and finishing residues can interfere with adhesion, so don't label clothing straight from a steamy drying rack.
- Choose a flat, accessible spot. Use the care tag when required, or an approved interior area beside a side seam or waistband. For shoes, choose the product's recommended heel or insole position; for bottles, use a smooth panel away from the mouthpiece and textured grip. Folds and curved ridges leave edges unsupported.
- Apply without touching the adhesive. Wipe away loose dust with the dry cloth, peel the backing and press from the centre towards every corner. Keep firm pressure for the time stated on the pack. For iron-ons, use the specified iron setting and pressing method; for woven labels, secure the ends so they can't flap or snag.
- Allow the bond to settle. Leave the item unused and unwashed for the product's stated waiting period. Don't assume a sticker is ready for laundering just because it feels attached, as immediate soaking or stretching can disturb the bond.
- Remove with the least force possible. Follow the product's removal instructions first. Where the item tolerates gentle warmth, a hairdryer on a low setting may help soften a sticker before you slowly peel a corner; avoid concentrated heat on coatings or delicate fibres. Pulling sharply can distort fabric or leave adhesive behind.
Deal with residue without making a stain
Try lifting tacky residue with a fresh piece of adhesive tape on a suitable surface. If you consider a small amount of cooking oil, test it on a hidden area first, because it can leave an oily mark on clothing; keep it away from suede and absorbent shoe interiors.
Unpick a woven label by cutting its attachment stitches, taking care not to cut the garment seam. Don't rip off an iron-on while it's hot: let it cool, then use the maker's removal method, accepting that some bonded labels aren't cleanly removable.
After the first wash, check that the edges lie flat, the name remains dark and no colour has transferred. Fix the cause before repeating the same application across the rest of the kit.
Washing Tumble Drying and Heat Safety
A washing-machine claim doesn't automatically include a tumble dryer. Likewise, a dishwasher-safe sticker isn't automatically suitable for microwaving or soaking on wool.
Start with the garment's care instructions, then check whether the label can tolerate that same treatment. The UK school-uniform guidance asks governing boards to consider health and safety, safeguarding and equality; practically, identification shouldn't introduce avoidable discomfort or snagging.
Read the care symbols as limits
The number inside a wash-tub symbol gives the garment's maximum washing temperature. Bars beneath the tub indicate a gentler process, while a crossed-out symbol prohibits that treatment. For ironing and tumble drying, match the permitted heat setting to the label's instructions rather than assuming all school clothes tolerate the same conditions.
Wash, dry and heat checks for kids name labels
| Cycle | Usual reality | Pass test | Failure sign |
|---|---|---|---|
| Everyday machine wash | Shirts and polo tops need regular cleaning | Label rating covers the selected temperature and detergent | Corners lift |
| Warmer uniform wash | Some polycotton items permit a warmer cycle | Both garment and label permit the chosen programme | Print deteriorates or adhesive marks fabric |
| Hot wash | Some heavily soiled kit or care-home linen needs hotter laundering | Both instructions expressly allow that temperature | Cracking, distortion or fabric marking |
| Tumble dry | Drying introduces heat and movement after washing | Explicit tumble-dryer suitability at the selected setting | Curling or rolled edges |
| Dishwasher | Suitable bottles and lunch boxes, not clothing | Both item and label are dishwasher-safe | Adhesive spreads or print fades |
| Microwave | Suitable food containers only | Both container and label permit microwave use | Softening, distortion or an unusual smell |
| Hand wash and soak | Delicates and wool may need special handling | Label permits soaking and the required detergent | Colour bleeding or edge lifting |
Don't interpret these failure signs as a testing method. If a label softens, smells unusual or transfers adhesive, stop exposing it to that treatment and remove or replace it safely.
Test the routine you actually use
Label a representative garment and run it through your normal family wash, including the dryer if that's how you dry school kit. A cool test wash tells you little if the item will routinely face a warmer programme and heated drying.
Detergent compatibility matters too. Bleaching products, stain treatments and prolonged soaking may fall outside an ordinary machine-wash claim, so check those separately before treating a labelled area.
- Check comfort: Run a finger over the label edge and attachment stitches.
- Check security: Replace labels with loose corners that can catch or irritate.
- Check readability: Reprint a faded name rather than waiting until it becomes illegible.
For nursery clothing and PE kit, choose an interior position that doesn't rub during movement. A child shouldn't have to tolerate a scratchy neck label just to keep their jumper identifiable.
Names to Print and Details to Leave Off
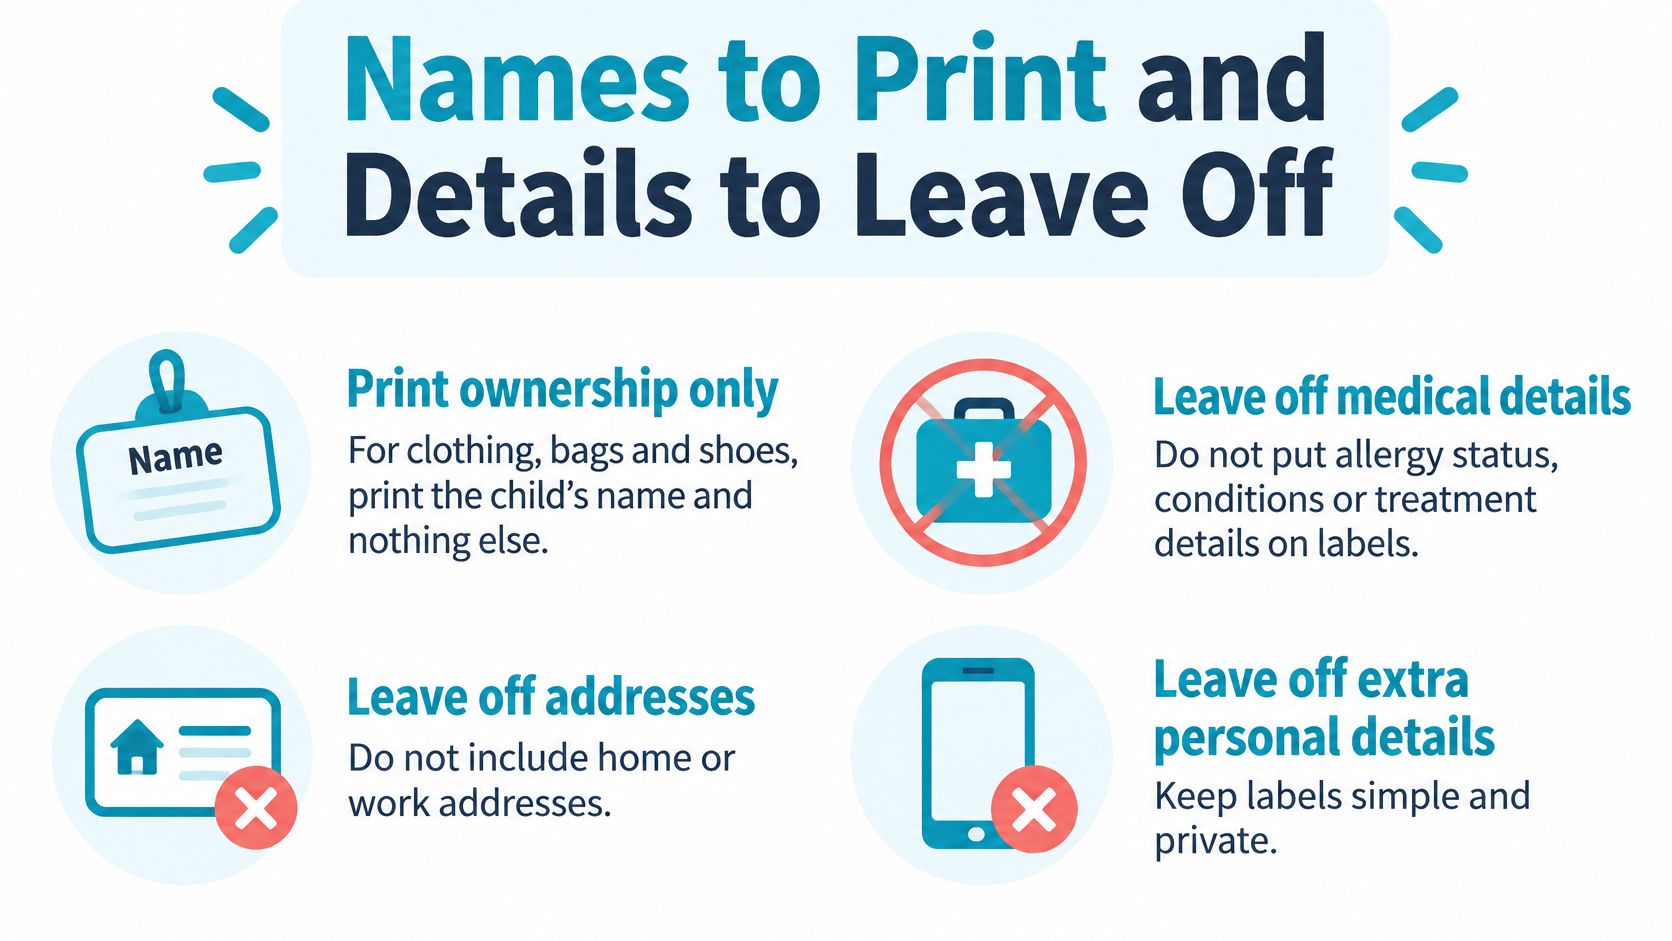
Print ownership, not a personal profile. For ordinary clothing, bag and shoe labels, use the name needed to distinguish the owner, without adding allergy status, diagnoses, treatment details, home addresses or phone numbers where other pupils can see them.
The statutory allergy-safety guidance for schools recommends clearly identifying children's bottles, drinks and lunch boxes with the intended child's name. That helps staff give the right item to the right child; it doesn't turn an everyday lunch-box sticker into a substitute for confidential allergy records or an agreed care plan.
Choose enough name to avoid confusion
A familiar first name may work within a small nursery room, but not when the same bottle travels to shared childcare or a holiday club. Choose the format for the people who must identify the item, not just for the child who owns it.
Which name format suits each setting
| Setting | Name format | Add class or year when |
|---|---|---|
| Small nursery room | First name, if unique in the room | Another child shares that name; add a surname identifier first |
| Primary class | First name plus surname initial | Children share that combination and a fuller name still needs clarification |
| Large secondary school | Full name | The full name repeats across year groups |
| Care home | Full name | Use the home's agreed additional identifier if full names repeat; school class or year isn't applicable |
Say two pupils are both called Sam P. Printing that combination won't separate their PE tops. A full surname may solve the problem without adding a class that will soon become outdated.
If full names also match, ask the school which brief identifier its staff use. Avoid inventing a code that nobody sorting lost property will understand.
Make the name easy to read
Use a plain sans-serif font with strong contrast between letters and background. A pale yellow name on white may look attractive on screen but be difficult to read on a damp bottle or in a dim cloakroom.
Keep artwork secondary. A small animal motif can help a younger child recognise their belongings, but a large illustration shouldn't force the surname into tiny lettering. Skip nicknames unless school staff recognise them as readily as the child's registered name.
Keep medical instructions in the agreed school system. An ownership sticker should never be the only place an adult can find information needed to care for a child.
Discreet placement offers a sensible balance: staff can inspect the inside of a garment without displaying the child's name across the playground. Our guide to name tags, safety and child protection explores that distinction further.
For medication or specialist medical-alert identification, follow the school's specific procedure. Those items have a different purpose from everyday ownership labels and may need information that should stay off ordinary kit.
School, Care Homes and Hand-Me-Down Kit
At the classroom door, a child hands over a coat while carrying a PE bag and a lunch box. By home time, those belongings may have travelled through different rooms with different adults. Treat them as separate objects when you organise identification.
Check each jumper, cardigan, PE top, pair of shorts, pump, bottle and pencil case against the school's actual kit list. Include detachable coat hoods or liners where they're likely to be separated, using an appropriate attachment point.
Make everyday sorting easier
A child starting nursery also needs to recognise their belongings. Practise finding the label together, then putting the item back in its usual place. Superstar Nannies' advice on helping your child settle into nursery offers useful context for making preparation part of a reassuring routine rather than a hurried doorstep task.
Shoes deserve particular attention because matching pairs can be split between changing areas. Our shoe-label guide for parents and kids helps with choosing a usable position inside footwear.
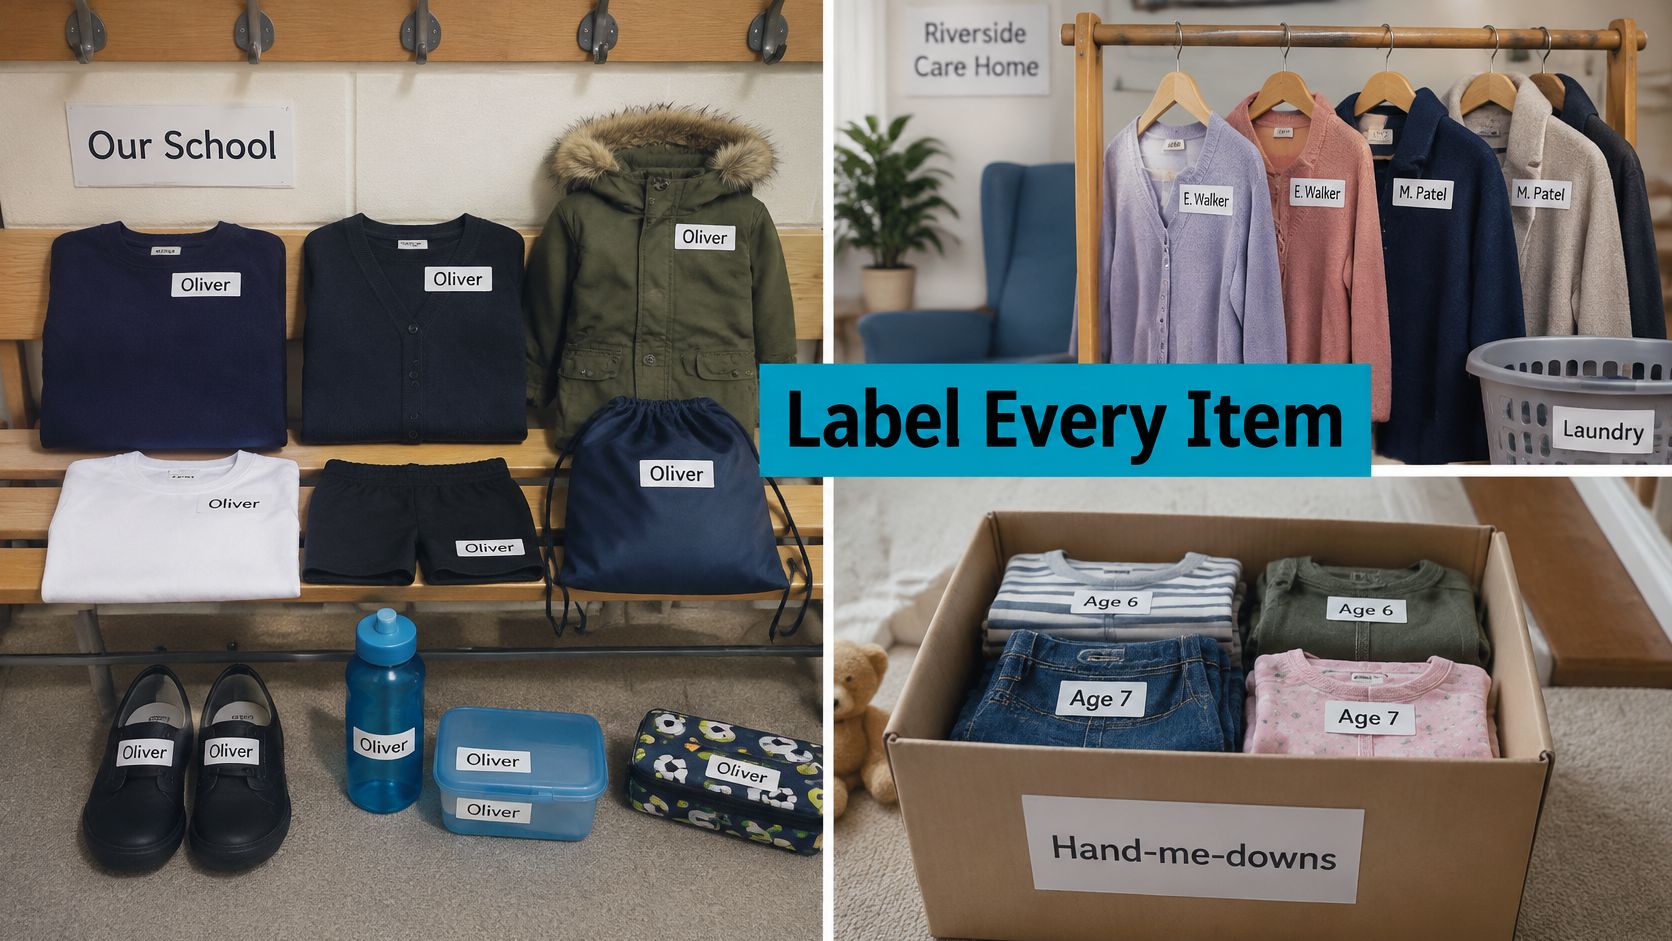
In a care-home laundry room, a carer may be sorting several similar cardigans. Confirm the home's identification format and laundry process before applying labels, then position them where staff check while sorting, without placing a rough edge against the resident's skin.
Don't assume a label suitable for a family laundry routine meets a communal laundry's requirements. The relevant test is the home's actual cleaning and drying process.
Leave the next owner a workable garment
At a second-hand uniform sale, a clean jumper with a replaceable inside label is easier to prepare for another child than one with a permanent name written across its front. The Bilingual Primary School eco-news page illustrates how schools can connect lost property with returns, emergency reuse, second-hand uniform and other routes for unclaimed clothing.
Build that next use into your labelling:
- Leave room: Keep a suitable interior area available for a replacement name.
- Remove old identities: Make the current owner unambiguous before handing clothing on.
- Check over-labelling: Don't cover an unstable, peeling label with another sticker.
The lifecycle rule is durable but replaceable ownership. Judge a label by whether it helps keep the item in use, not only whether it returns the garment to its first owner.
Choose Ultra-High-Tack Stick-On Labels
Choose peel-and-stick when you want to avoid sewing and ironing, have a compatible smooth application surface, and can match the product's care claims to your laundry routine. Don't choose an adhesive label just to avoid checking a difficult fabric.
For a fluffy knit, a sewn label may be the more dependable choice. For a waterproof coat, use an existing suitable internal tag or another manufacturer-approved method rather than applying heat or stitching through the protective shell.
Match the pack to the job
Our ultra-high-tack stick-on clothing labels are intended for children's school clothes and care-home clothing, and attach by peeling and sticking without sewing or ironing. They're washing-machine, tumble-dryer and dishwasher safe, with microwave-friendly suitability for appropriate items; the Stick On Name Labels are rated 4.8/5 by 10,000+ parents, and our 66 Personalised Stick On Clothing Labels For School & Care Homes are on sale for £6.29 GBP.
Before ordering, measure the usable space on the tag or interior area you've selected. Check that your chosen name will remain readable at that size, and distinguish clothing applications from bottles and stationery when selecting a pack.
Before committing: Test a labelled garment through the wash and dry routine it will really face.
If the name stays clear and the edges remain secure, use the same preparation and placement for the rest of the compatible kit. If it fails, change the surface, fixing method or product rather than pressing on with the whole pile.
Quote My Wall offers personalised stick-on labels for school clothing, care-home garments, bottles and stationery. Visit Quote My Wall to choose a pack that fits your items and name format, then trial it on a garment before labelling the rest.