

DIY Baby Mobile: Step-by-Step Guide & Design Ideas
You can stand in a half-finished nursery and feel stuck between two bad options, buy something generic that doesn't match the room, or keep browsing craft ideas that look lovely online but seem too fiddly, too expensive, or too risky to hang above a cot. A DIY baby mobile solves that problem when it's built with a real plan, not just a pretty Pinterest picture. It gives you control over colour, shape, and theme, and it lets you create something that feels personal without turning the nursery into a full renovation.
Why a DIY Baby Mobile Is the Smartest Nursery Upgrade
A nursery can stall at the same point every time, one plain cot, one empty wall, and a long list of choices that still need making. A handmade mobile is one of the few pieces that changes the room quickly without asking for a full redecoration or a large spend. It also gives you room to make sensible choices, because the best version is not the one that looks the fanciest online, it is the one that suits the space, stays light, and does not become a nuisance once the nursery is in use. For UK parents who want to keep the room personal without overbuying, a DIY baby mobile sits neatly between a generic store purchase and a project that takes over the whole room. nursery wall decor ideas
The practical value goes beyond cost. A mobile can be matched to the cot, wall art, and storage you already have, so the room feels planned rather than patched together. It also lets you make safer decisions about scale and materials from the start, which matters more than a perfect photo finish. If you want a nursery that looks considered, and still works in real life, custom decor is often the better route.
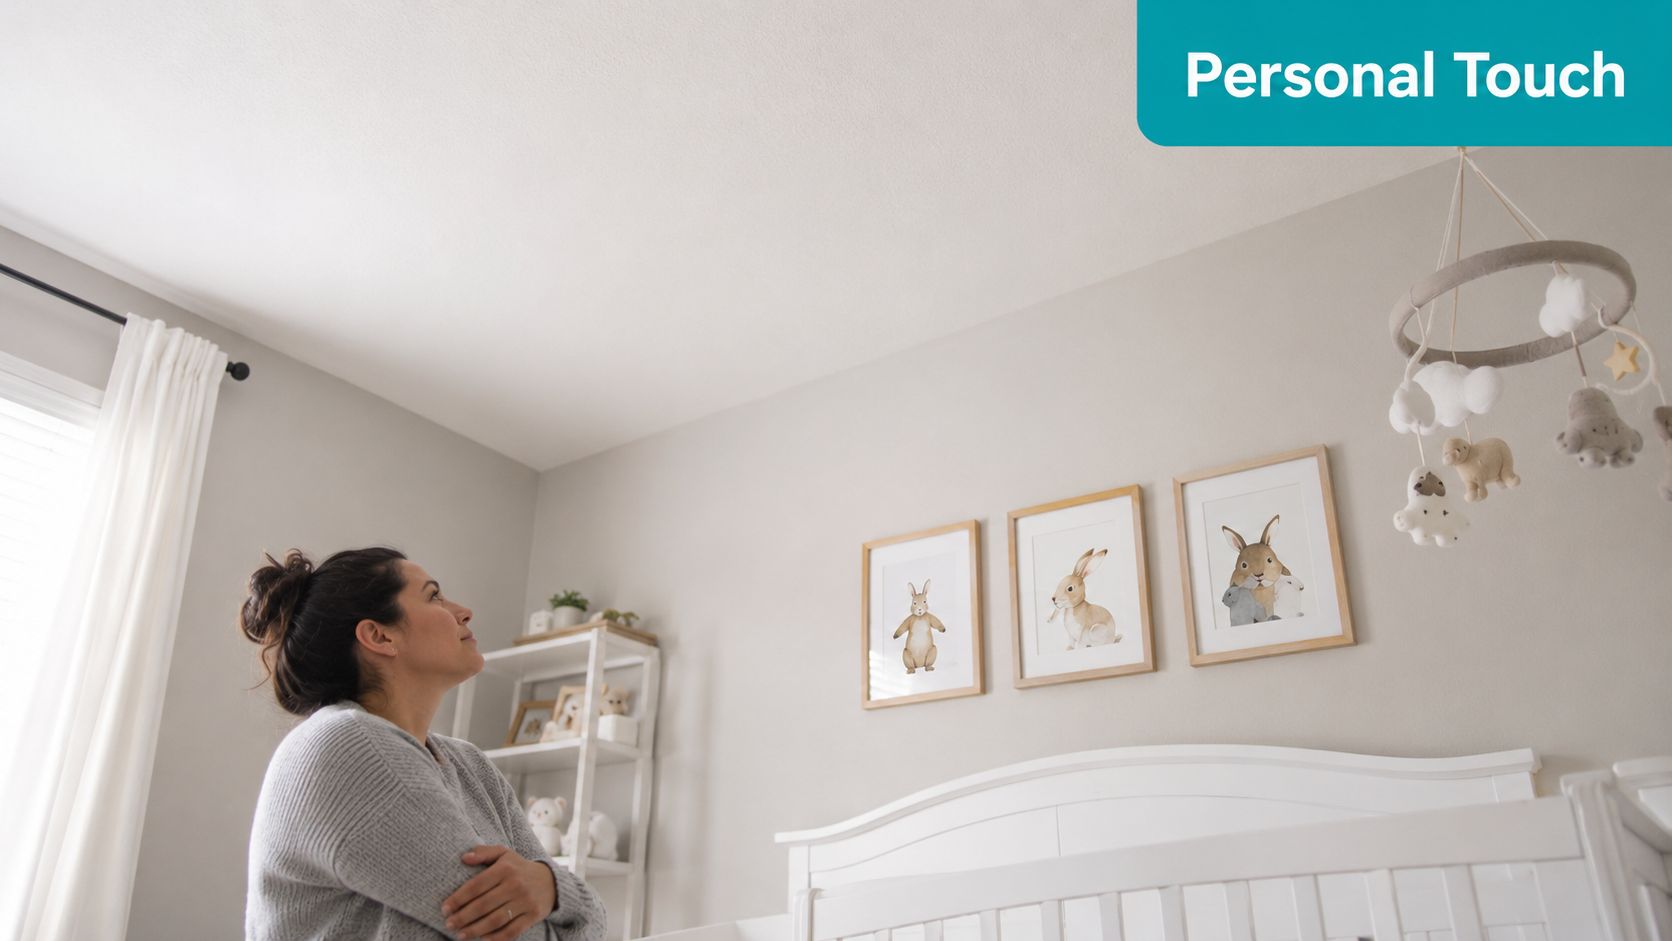
What makes this project worth doing
A paper mobile is a sensible starting point for beginners who want something light and simple. A felt mobile adds softness and works well for nursery themes that need a warmer finish. A wooden hoop design gives a calmer, cleaner look, while a vinyl-decorated mobile brings in a more polished personalised touch, especially if you want the theme to carry through from walls to hanging decor. For more nursery styling ideas that pair well with this approach, nursery wall decor ideas can help you plan the room as a whole.
The advantage is control. You can match the mobile to bedding, wall art, and storage without waiting for the perfect shop set to appear, and you can keep the design within the limits of what hangs well. I have built enough of these to know that the prettiest version on a mood board is often the one that twists, droops, or feels too heavy once it is suspended. The better choice is the one that holds its shape, suits the nursery, and can be personalised without making the build awkward.
For parents who want a softer decorative finish, The Fabric Company's nursery guide is a useful place to compare texture and fabric choices before cutting anything. That kind of planning helps you avoid the common mistake of choosing decorative materials first and only thinking about balance later. With a mobile, the order matters.
Choosing Materials That Balance Safety and Aesthetics
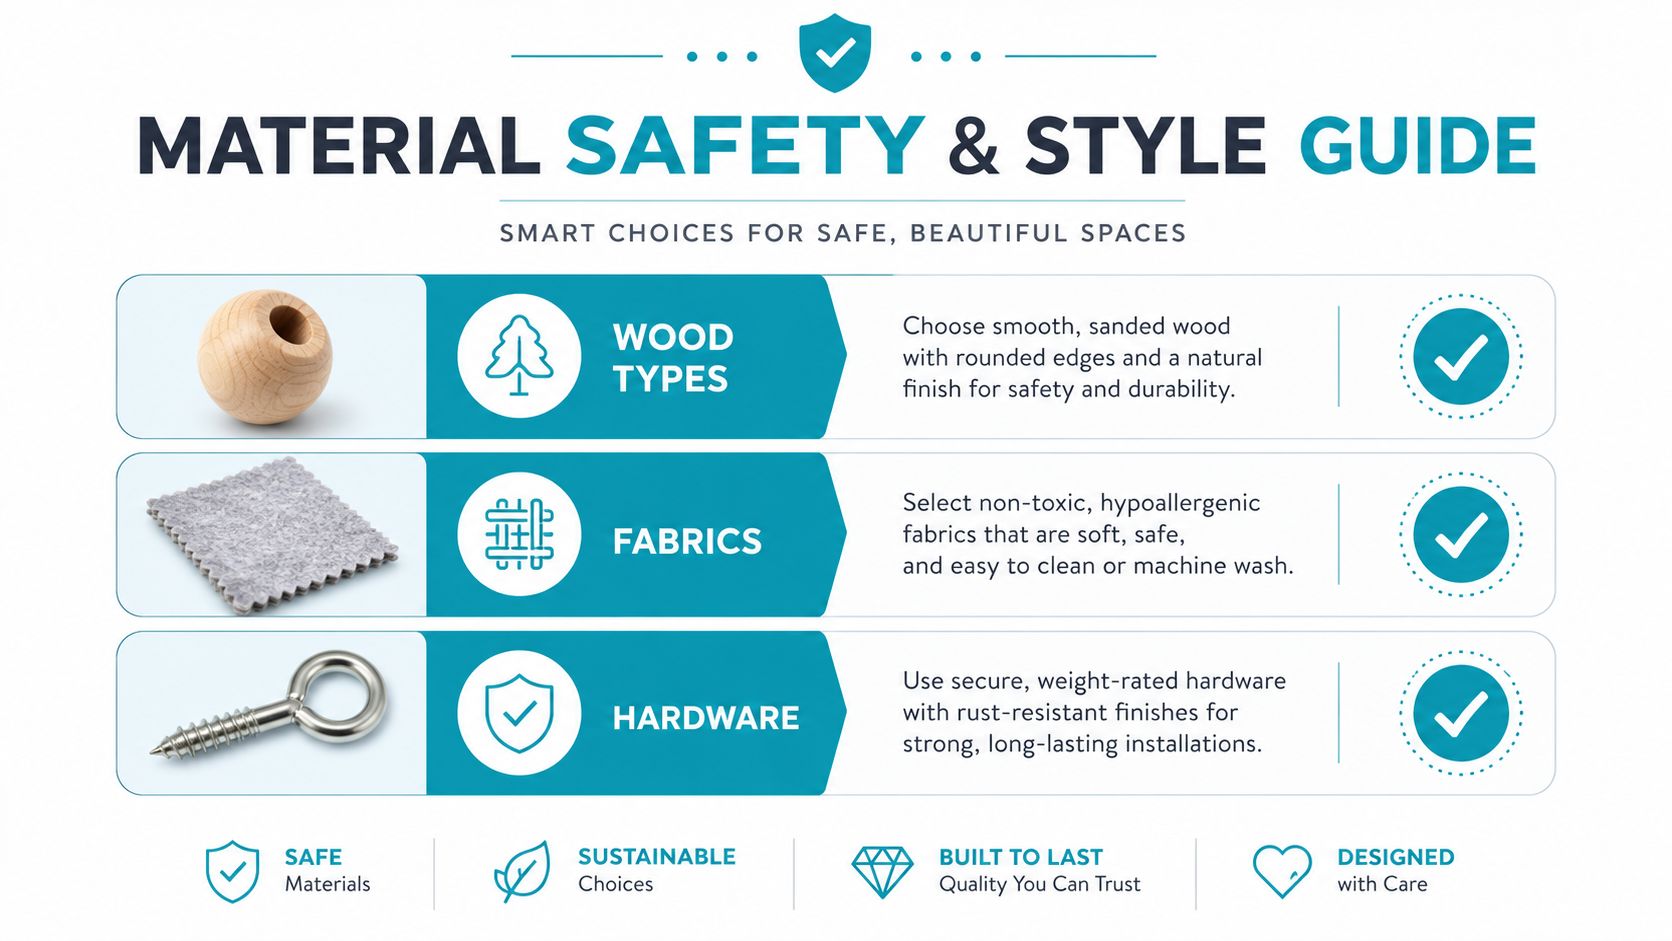
The safest DIY mobiles are the ones that look delicate but behave predictably. Light materials are much easier to balance than dense ones, and they're less likely to swing hard, pull the frame off-centre, or create unnecessary strain at the hanging point. That's why card, felt, yarn, twine, and foam shapes usually outperform heavier wood or acrylic pieces for suspended nursery decor. The idea isn't to make the mobile flimsy, it's to make it stable, easy to level, and simple to remove when needed.
Start with the frame, then choose the weight
An embroidery hoop is the easiest starting point for most crafters, and practical guidance commonly uses a hoop around 8 to 9 inches in diameter for a balanced handmade mobile. A cross-arm frame can work too, especially if you want a more symmetrical build. The frame matters because it gives you a fixed centre point, which makes the rest of the build easier to tune.
Practical rule: assemble the frame first, hang it alone, and only add decorations one by one. If it tilts before the ornaments go on, the problem is the suspension, not the decor.
Keep the suspension line strong enough to resist repeated twisting, and keep knot tails short and even. Long, uneven tails shift the visual centre and can make the mobile look lopsided even when the frame itself is level. For hanging materials, a smooth, reliable fix is more important than an expensive one.
For fabric choices, The Fabric Company's nursery guide is a useful reference if you're checking which textures feel practical in a child's room. It's especially helpful when you're deciding between soft, washable finishes and decorative fabrics that only look good on a shelf.
A simple build workflow that avoids imbalance
Work in this order:
- Pair the pieces first. Match shapes by size and visual weight before you start hanging them.
- Cut equal-length lines. If one side is longer, the mobile will drift and spin unevenly.
- Test the frame bare. Hang it before adding decor so you can catch problems early.
- Add one piece at a time. Re-centre after every addition instead of fixing everything at the end.
- Check the ceiling point. The hanging point should feel secure before the mobile goes over the cot.
That process is also where vinyl personalisation fits well. If you're decorating lightweight wooden or card shapes, vinyl decals can add initials, stars, moon motifs, or tiny nursery symbols without changing the weight enough to upset the balance. It gives the mobile a finished look without forcing you into heavy materials that fight the frame. The result feels custom and refined, not bulky.
Four DIY Baby Mobile Designs You Can Build This Weekend
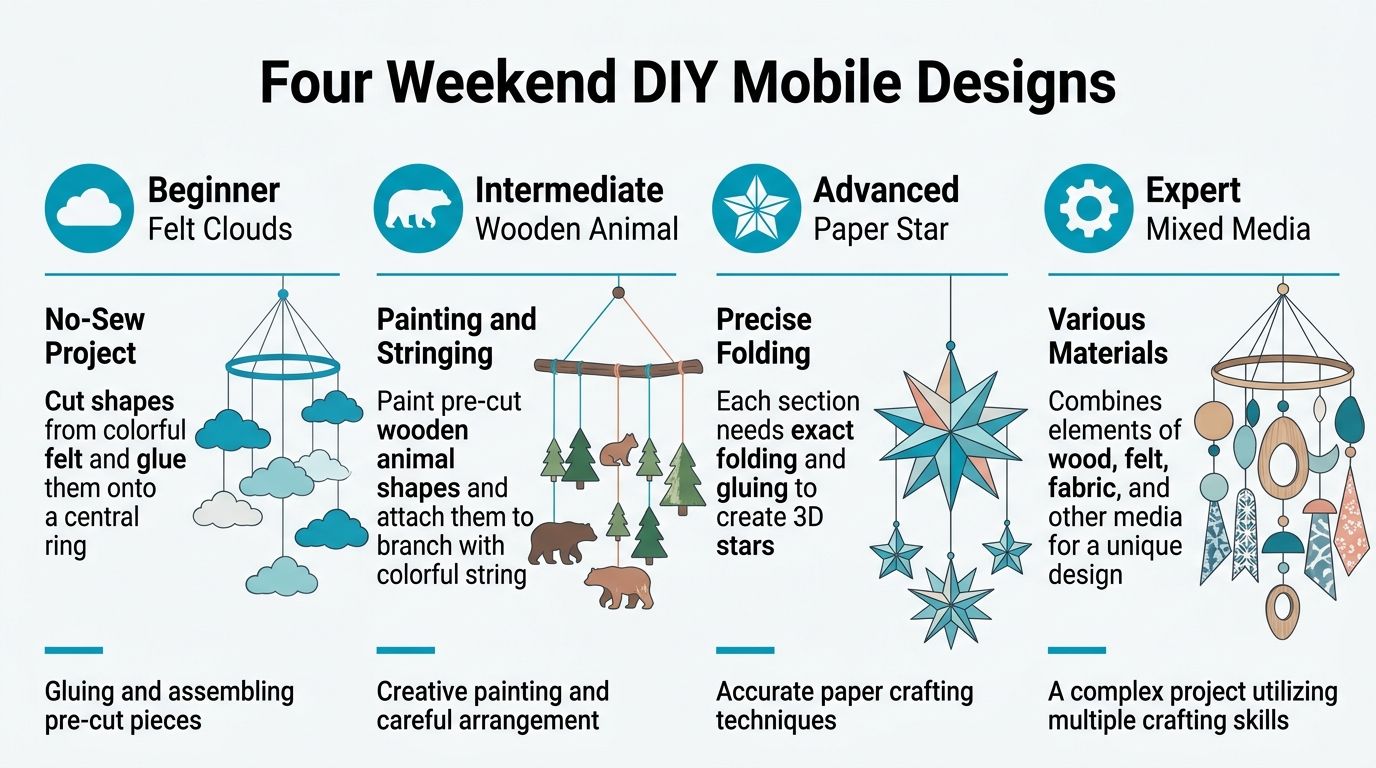
A lot of baby mobile tutorials stop at “cut the shapes and tie the strings.” That's fine for inspiration, but not much use when you're standing at the table with scissors in your hand. These four versions give you a clear choice based on skill, time, and the look you want, and they all work better when you keep the weight distribution even from the start.
Paper-cut cloud mobile
This is the easiest build if you want something soft-looking without sewing. Use an embroidery hoop, white or pale card, cotton thread, scissors, and glue. Cut cloud shapes, stars, or raindrops, then hang them at matching lengths so the cluster doesn't pull to one side.
The trick is keeping the shapes light and spaced apart. If you crowd them too tightly, the pieces bump into each other and spin messily instead of drifting. A clean paper mobile looks best with fewer elements and generous gaps between them.
Felt animal mobile
A felt mobile is more forgiving if you want more character. Cut mirrored front and back pieces, stitch or glue the edges, and add just enough stuffing to give the shapes body without turning them heavy. Felt animals, moons, and little leaves all sit well on a hoop because the material is soft and easy to rebalance.
For a practical nursery project, felt is also kinder to the eye than dense mixed materials. It gives you texture without visual noise. If you want a handmade look that still feels calm, this is the safest middle ground.
Minimalist wooden hoop mobile
A wooden design works best when the shapes are simple. Think circles, discs, beads, or slender cut-outs, then keep the finish smooth and sanded. This style looks modern, but it only works if you resist the urge to overload it with too many ornaments.
The balance rule matters even more here. If one wooden piece is heavier, shorten that side a little or move the suspension point slightly towards it. That tiny adjustment often makes the difference between a slow, level turn and a mobile that keeps leaning.
For a more detailed hanging approach, the crochet wall hanging guide is a useful companion if you like soft, layered nursery decor with a similar handmade feel. And if you're making coordinating cloth accessories for the room, a simple guide to making burp cloths can help you keep the whole space visually consistent.
Vinyl-decorated personalised mobile
This is the version that feels closest to a boutique nursery piece. Start with lightweight card, wood, or foam shapes, then add vinyl initials, constellations, tiny animals, or a simple pattern that matches the room. The vinyl gives you crisp detail without adding much mass, which is exactly what you want in a hanging piece.
This design is strongest when it repeats a theme already present in the nursery. If the wall art uses moons and stars, carry that language into the mobile with the same shapes and similar colours. If the room is quieter and more neutral, keep the vinyl minimal and let the form do the work.
Baby Mobile Safety Rules Every UK Parent Must Follow
A mobile can look perfect and still be wrong for a cot space. The biggest mistake is treating it like permanent decor instead of a temporary nursery accessory that needs clear limits. Current UK safe-sleep guidance keeps cot sleep spaces free of soft objects and loose items, which means the mobile has to stay high enough that a baby cannot reach it, pull it down, or tangle with it.
Hanging height and removal timing matter most
The safest rule is simple. If the baby can sit up, push up, or reach upward with enough control to pull, the mobile comes down. UK-relevant advice aligns with the widely used rule that mobiles should be removed once a baby begins to sit up or by around 5 months, because that's when they can become a hazard if the infant can reach or pull them down. cot teething rail guidance
A handmade mobile should be fixed high enough that a child cannot grab it from the cot. It also needs a hanging point that feels solid, not decorative, so test the fixing with a gentle tug before use. If the hanging point shifts, wobbles, or creaks, stop there and improve the fixings before it ever goes over the mattress.
A mobile belongs above the nursery space, not inside the sleep space.
What fails in real homes
The most common problems are all avoidable. Strings that are too long drift into the cot zone, small hooks that aren't rated for the load slip, and heavy decorations make the whole piece drop lower than planned. A mobile that hangs nicely in a craft room can still become unsafe once it's suspended over a mattress.
A quick checklist keeps that from happening:
- Fix high and out of reach. The lowest point should stay well above where a baby could touch it.
- Use secure ceiling hardware. Choose fittings that suit the surface you're drilling into.
- Keep loose ends short. Long tails invite tangling and make the piece look messy.
- Remove it on time. Once mobility increases, the mobile needs to come down.
That's also why handmade mobiles should be treated as temporary decor, not a feature you leave in place for the whole nursery phase. The safest version is the one that looks charming, hangs securely, and leaves the cot itself uncluttered.
Designing a Mobile That Supports Baby Development
A mobile isn't just something to fill the empty air above a cot. For very young babies, visual input matters, and the best designs are usually simpler than people expect. High-contrast shapes and clear outlines tend to work better than dense, busy clusters, especially in the earliest stage when the room should feel calm rather than overstimulating.
Keep the visual field readable
A packed mobile with too many colours, too many patterns, or too much dangling motion can look clever to adults and chaotic to a baby. A slower-moving piece with three or four strong elements usually feels more settled and easier to follow. The point is not to create a toy-box effect above the cot, it's to give the eye something clean to rest on.
That's where minimal, sensory-led nursery decor fits naturally. Simple forms, soft movement, and a limited palette work together better than a crowded theme. A baby doesn't need every idea in one object.
Let the design match the stage
Newborns respond best to bold shapes and strong contrast, while older babies can handle a little more variety. That doesn't mean adding complexity as early as possible. It means choosing a mobile that can stay visually calm even when it has a clear theme. Black, white, soft grey, muted green, and a restrained accent colour often do more for the room than a rainbow of competing details.
For milestone context, tracking early childhood milestones can help you think about how quickly a baby's needs change in the first months. That shift is exactly why a mobile should be designed with removal in mind, not permanence.
Vinyl shapes work especially well here because they let you keep the design bold and clean. A single moon, a few stars, or one strong motif can add identity without cluttering the sightline. That's the sweet spot, recognisable, but not busy.
Hanging Your Mobile and Styling the Nursery Around It
Once the mobile is built, the last job is making it look intentional in the room. A level hang matters more than decorative extras, because a tilted mobile always reads as unfinished. A balanced two-point or cross-arm suspension usually gives the cleanest result, as long as the strands are equal or adjusted until the load sits at the centre point.
Fine-tuning the hang
Hang the frame, then adjust the strand lengths until it sits level. If one side carries a slightly heavier shape, shorten that side a few millimetres or move the suspension point towards it. That tiny correction often fixes the tilt without having to rebuild the whole piece.
Then give it a gentle manual spin. The completed mobile should stay level and drift without swinging into the cot zone. If it yaws hard or leans while rotating, the problem is still the weight distribution, not the room.
Useful habit: test it once, walk away, then test it again the next day. Small balance issues often show up only after the first hour of hanging.
Styling works best when the mobile repeats one or two ideas from the rest of the room. A vinyl name on the wall, matching decals near the changing area, or a colour echo in the bedding can make the mobile feel like part of the plan instead of a random extra. If the room changes later, the mobile can move from ceiling decor to wall art, which is a neat way to extend the life of the project without ignoring the safety rules.
If you want nursery decor that feels custom without starting from scratch, take a look at Quote My Wall. You'll find vinyl wall stickers and personalised designs that pair naturally with a handmade mobile, especially when you want the cot area to feel coordinated, calm, and easy to update as your baby grows.