
Clothes Labels Explained: Types, Washing and Application
You're sorting tomorrow's uniform and find a jumper with no name, a peeling sticker inside a polo shirt and somebody else's initials in a second-hand coat. Or you're packing clothing for a care-home resident and wondering which labels will still be readable when the laundry comes back.
A clothes label works a bit like a passport: it identifies who something belongs to, while the garment's original labels carry the information needed to look after it. The useful question isn't which label to buy. It's which attachment, in which position, will survive the way you wash and dry that item.
The Main Types of Clothes Labels and What They Do
Personal name labels and manufacturers' labels do different jobs. A name tape helps return a cardigan to its owner; fibre and care labels help someone decide how to handle the cardigan without damaging it. Keep both readable rather than treating the name label as a replacement.
For personal identification, start with the attachment method. Sewing gives a mechanical hold, heat transfers bond through heat and pressure, and pressure-sensitive labels rely on adhesive making good contact with a suitable surface.
Clothes label types compared
These durability descriptions are useful starting points, not guarantees. A well-applied adhesive label on a smooth garment tag can outperform a badly stitched tape, while printed lettering can wear away even when its backing remains securely attached.
| Label type | How it attaches | Wash durability | Best use |
|---|---|---|---|
| Woven name tape | Sewn in | Very high when tape and stitching suit the wash | Care-home and school clothing washed hot and often |
| Printed cotton tape | Sewn in | High attachment durability; print needs checking | Long-lasting school uniform |
| Iron-on heat transfer | Pressed on with an iron | Medium; can lift after repeated high heat | Quick labelling of children's kit and sportswear that tolerate ironing |
| Stick-on fabric label | Peeled and pressed on | Medium to high on an approved surface with a compatible adhesive | No-sew school and care-home labelling |
| Marker tape | Handwritten, then sewn or ironed | Low; handwriting can fade quickly | Short-term labelling only |
Woven tape makes sense when you want lettering formed from thread rather than surface ink. Its main costs are the purchase and the time spent sewing, and a coarse tape can irritate sensitive skin.
Printed cotton tape offers a softer alternative, but secure stitching doesn't prove the print will remain readable. Iron-on labels save sewing time, although you need a flat, heat-tolerant surface and enough pressure to establish the bond.
Stick-on labels are convenient for urgent school preparation. Many are intended for the garment's smooth care tag, not direct application to fleece, wool or stretchy jersey. Marker tape is useful for temporary arrangements, but don't assume a household permanent marker is laundry-proof.
Choose the backing before the design
Compare the backing, edge finish and permitted attachment surface before choosing colours or pictures. The guide to clothing label materials is useful for separating fabric choices from attachment choices.
If you're also sourcing stockroom tags or retail identification supplies, you can find labels for clothing through Display Guru. Keep removable tagging products separate from permanent wash-in name labels: they solve different problems.
Practical rule: A label's appearance in the packet tells you little about its laundry performance. Judge the attachment, the receiving surface and the result after washing.
Matching Clothes Labels to Schoolchildren, Care Homes and Kitchen Items
Schoolchildren, care-home residents and kitchen users expose labels to different problems. Children take off outer layers and leave them behind. Shared laundries separate garments from their owners, while kitchen containers expose adhesive to water, detergent and hard, sometimes greasy surfaces.
In a report published in 2022, Stikins' parent survey summary reported that 75% of UK primary-school children lose an average of one or two uniform items each year. A school label therefore needs to be findable by someone sorting a pile of similar garments, not merely present somewhere inside a seam.
Label choice by audience and garment
| Use case | Main priority | Placement | Suitable label type |
|---|---|---|---|
| School outer layers, including cardigans, jumpers and fleeces | Quick identification after frequent removal | Inside back neck, beside the care label and not over it | Sewn woven tape or stick-on label on a suitable smooth tag |
| School PE kit and shoes | Heavy wear and sweat | Waistband for clothing; shoe tongue or approved insole position for footwear | Stick-on label approved for the surface, or printed cotton tape for clothing |
| Care-home residents' clothing | Survives commercial laundering and stays readable to staff | Collar, waistband or smooth flat area in a consistent position | Sewn woven tape, or stick-on label validated on the fabric |
| Socks and underwear | Small area and comfort against skin | Inside waistband for underwear; inside upper cuff for socks | Small, soft woven tape |
| Kitchen aprons and tea towels | Heat and detergent in washing | Neck facing or hem edge, away from working surfaces | Sewn woven tape or heat-resistant iron-on |
| Lunch boxes and containers | Compatibility with dishwasher and microwave use | Smooth base or lid, outside food-contact areas and seals | Stick-on label rated for the intended appliance use |
Make the position predictable
On school outerwear, an inside back-neck position gives a finder an obvious place to look. Don't put a label across a reversible garment's visible face just because it's easy to reach. Use an internal pocket facing or another discreet, accessible position that won't interfere with either wearing arrangement.
Waterproof coats need particular care. Sewing through the outer shell can create holes, and ironing can damage coatings, so an existing internal tag is often the better receiving surface.
For care homes, agree a placement convention with the laundry team before labelling a wardrobe. Staff shouldn't have to unfold every sleeve to find a name, and residents shouldn't have to tolerate a stiff edge against fragile skin. The guide to clothing labels for nursing homes can help families prepare questions about identification and shared laundry.
Treat kitchen labels as a separate application
A clothes-label claim doesn't automatically establish suitability for a lunch box. Check whether the product is approved for the container material and the appliance exposure you intend.
Keep labels away from drinking rims, food-contact surfaces, steam vents and lid seals. A dishwasher-safe label also doesn't make an unsuitable container microwave-safe: the container and label each need appropriate instructions.
Shoes need the same surface-specific thinking. A label that catches under the heel will receive far more rubbing than one protected beneath the tongue, so comfort and abrasion matter as much as resistance to water.
Choosing What to Print and Answering Common Questions
Choose the identification before choosing the decoration. The aim is to give the person returning or sorting the item enough information to act, without displaying details they don't need.
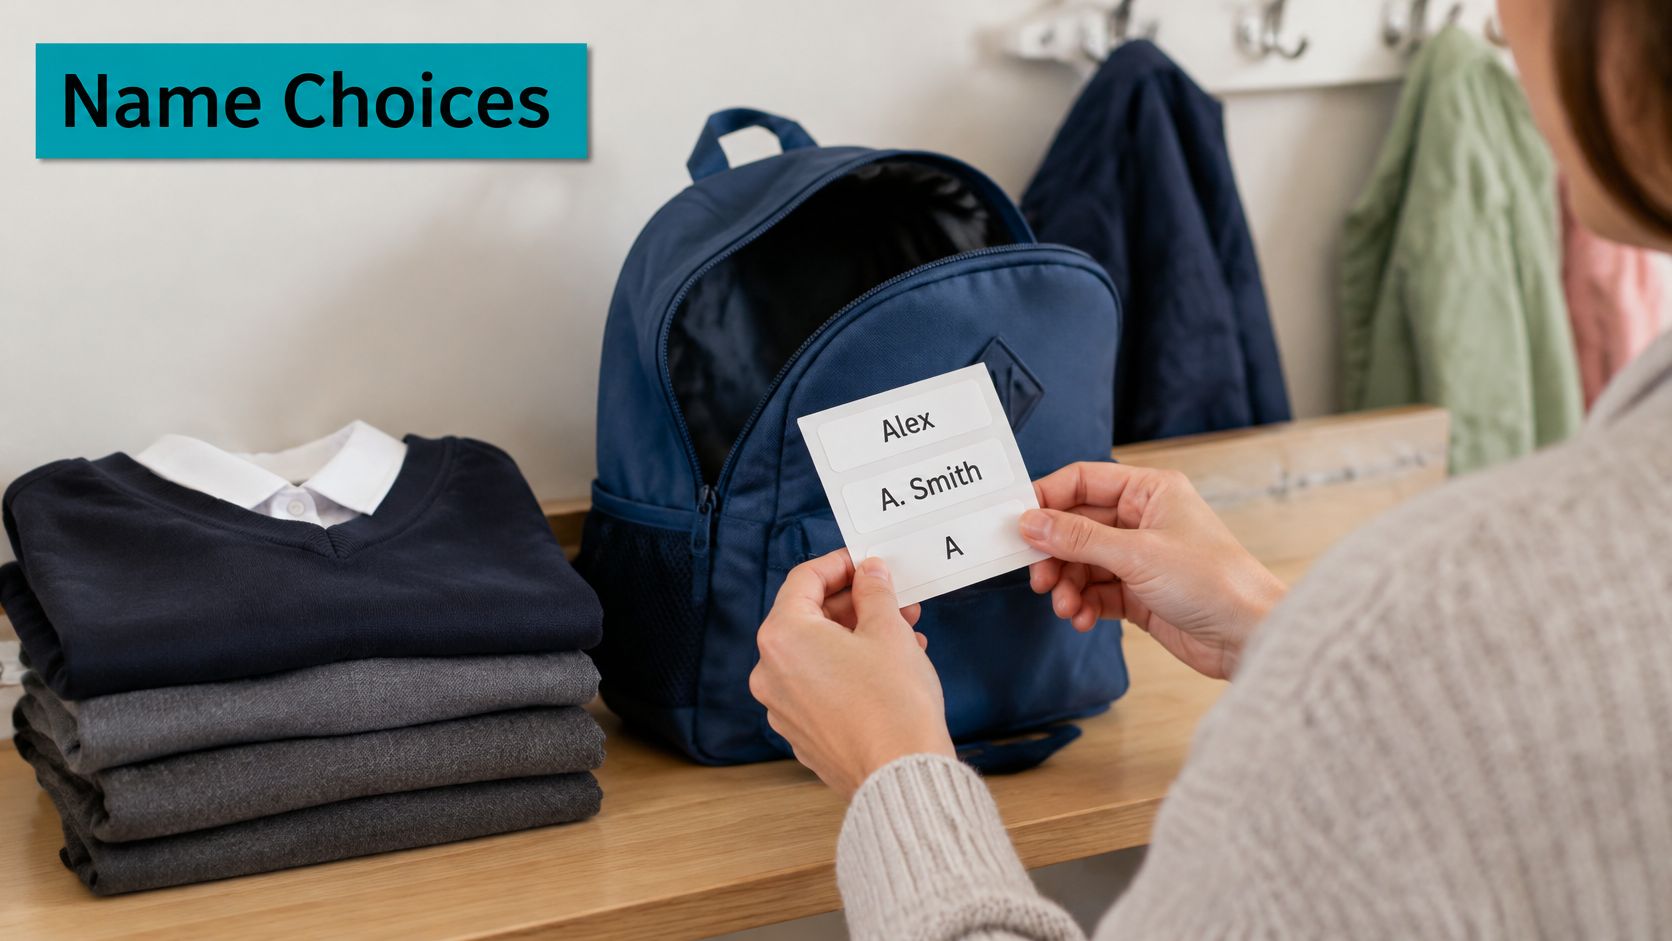
- Full name: Usually the clearest option for distinguishing owners, but it exposes a child's identity if visible to strangers.
- First name and surname initial: A more discreet choice where staff can resolve any ambiguity.
- Class or year group: Useful within school, but it reveals information about the child's routine and becomes outdated.
- Symbol or colour: Helps a young child recognise belongings without reading, but shouldn't be the sole identifier in shared laundry.
- Phone number: Usually unnecessary on clothing. I would leave it off children's everyday garments and use the school's return process instead.
- Care-home identifier: Agree a name format or staff-assigned code with the home, keeping the identifying detail inside the garment.
A clear name format matters more than an elaborate layout.
How much personal information is enough?
For school, check whether another pupil shares the same first name and surname initial. If so, a fuller identifier on an internal label may be more useful than a discreet format that staff can't confidently match.
Keep the text large enough to read without stretching the garment. Decorative scripts, pale lettering and busy backgrounds can make a perfectly attached label practically useless, especially in a dim cupboard or crowded lost-property area.
For care-home clothing, don't assume a room number is a reliable identity. Residents may move rooms, and the number reveals location rather than ownership. A staff-assigned code works only if the laundry team can readily match it to the resident through an agreed record.
Keep names inside clothing rather than on visible outer surfaces. Where a resident has cognitive or visual difficulties, a familiar colour can help them recognise their clothing, but staff still need a readable identifier.
Can stick-on clothes labels go in the washing machine and dryer?
They can if the particular product, receiving surface and laundry process are compatible. A washable claim is a starting point, not proof that every application will survive every programme.
Quote My Wall offers personalised stick-on clothing labels and describes them as ultra high tack, fully washable, microwave-safe, tumble-dryer-safe and dishwasher-safe. Treat that as a product description to check against the intended surface and actual use, just as you would with another supplier's claims.
Ask what the claim covers. Does the label need to sit on a polyester care tag? Is direct-to-fabric application permitted? Are there restrictions on drying, stain removers or ironing over the label? Those answers are more useful than the word durable on its own.
Does a personal label replace other garment information?
No. A personal name label identifies ownership; it doesn't replace the manufacturer's fibre information or instructions for looking after the garment.
A school may also have its own requirements about naming PE bags, footwear or kit. Check those before ordering, particularly if you're considering initials alone or a symbol without text.
For second-hand uniform, make sure only the current owner's identification is unambiguous. Several readable names can delay a return even when every label remains attached.
Should every care-home garment be labelled?
For a resident using shared laundry, the practical aim is to identify every garment that enters that process, including less obvious items such as nightwear and detachable cardigan belts. Use an admission inventory to spot omissions rather than relying on memory.
The care-home clothing guide for families from Counting to Ten highlights problems with labels that loosen, fade, bleed or sit where staff can't quickly find them. Secure attachment alone isn't enough if the person sorting the laundry can't read the name.
Colour-coded laundry bags can support the system where the home uses them, but they don't replace garment identification once staff empty the bags. Agree who checks and replaces damaged labels, rather than leaving that responsibility uncertain.
What if the wearer dislikes labels?
Check the edge and position before changing the whole labelling method. A soft tape sewn flat on a facing may be more comfortable than a stiff adhesive patch against the neck.
Avoid putting a bulky label across an elasticated area. It can restrict movement, rub the wearer or repeatedly flex until the attachment fails. Comfort is a reason to change placement, not a reason to leave shared-laundry clothing unidentified.
Prioritising Labels When You Cannot Label Everything
A limited uniform budget makes replacement risk more important than matching labels on every item. In UK government parent, pupil and learner voice research, 79% of parents said uniform became more expensive when schools increased compulsory branded items, while only 4% said it became cheaper.
That doesn't mean the most expensive label is the economical choice. It means spending your labelling effort where an unreturned item would cause the greatest inconvenience or replacement cost.
Use a risk-and-cost order
- Start with branded outer layers: Prioritise the cardigan, jumper or fleece that gets taken off during the day and looks much like everyone else's.
- Move to coats and PE kit: Consider replacement cost, how often the item travels between places and whether it's likely to be left in a changing room.
- Then cover shoes and smaller items: Include socks and accessories as your budget and time allow, rather than delaying the most important garments until everything can be done together.
A plain shirt that stays on all day may be a lower priority than a costly branded jumper. Equally, a child who changes for sport frequently may need PE clothing identified before spare classroom clothing.
For care homes, use prioritisation to stage the work, not as a permanent reason to leave shared-laundry garments unmarked. Start with residents' outer garments and socks, then complete the rest of the inventory before those items join communal loads.
Keep a simple record
A notebook or phone note can list the garment, label type and application position. Record any failure too: replacing a lifted sticker with another on the same unsuitable surface won't solve the cause.
For hand-me-downs, reuse a sound name tape only if you can make the new identification clear and permanent. Don't write over dark lettering until neither name is readable; cover or replace the personal label instead.
Buy for the garments you're ready to label, not for an imagined future wardrobe. A smaller successful order is more useful than unused labels with the wrong name format.
How Clothes Labels Hold Up to Washing, Drying and Disinfection
Labels usually fail through edge lift, loss of readable print or release of the attachment. Heat, detergent, movement and drying act together, so a label that survives soaking may still fail when it tumbles against other garments.
Woven tape avoids printed-ink failure, but its stitching can still break or its edges can fray. With adhesive labels, inspect the whole construction: backing, print and bond.
Wash and drying conditions and their stress on labels
Use the garment's permitted programme rather than increasing the temperature to challenge the label. The descriptions below compare likely stresses; they aren't a certification scale.
| Wash condition | Typical temperature | Stress on label | What to check |
|---|---|---|---|
| Domestic cool wash | Garment-approved cool programme | Lower thermal stress, with detergent and agitation still present | Edge lift after early washes |
| Domestic hot wash | Hottest programme permitted for that garment | Greater thermal stress | Ink fade and adhesive at the edges |
| Tumble dryer | Garment-approved drying setting | Heat combined with repeated flexing and tumbling | Curling, cracking and exposed edges |
| Dishwasher | Selected appliance programme within the label's rating | Hot detergent solution and spray | Ink and adhesive on kitchen items |
| Care-home thermal disinfection | Site-validated thermal-disinfection programme | High wet-heat exposure | Adhesive and face film under wet heat |
| Care-home thermal disinfection with a hotter, shorter holding stage | Site-validated alternative programme | High wet-heat exposure; not directly interchangeable with a longer cycle | Continued legibility and secure attachment |
WASHCO's infection-control guidance describes thermal-disinfection benchmarks of 65°C for at least 10 minutes or 71°C for at least 3 minutes. Those are laundry-process conditions, not instructions to put every resident's clothing through them.
Personal clothing may be heat-sensitive and unsuitable for thermal disinfection. A label that tolerates the process can still be attached to a garment that shrinks, stretches or otherwise suffers damage.
Run a representative wash test
Use a polyester-rich garment, cotton item, fleece and elasticated item where those fabrics form part of the wardrobe. Apply the candidate labels to the approved receiving surfaces, then use the detergent, programme and drying method the garments will encounter.
Check after each of the first few complete wash-and-dry cycles. Photograph the label before washing so you can compare fine lettering, colour loss and any change at the corners.
Your inspection should cover:
- Edges: Look for curling, gaps or trapped lint.
- Print: Check that similar letters remain distinguishable and ink hasn't transferred.
- Backing: Look for cracking, distortion or a stiffened patch.
- Garment: Check puckering, discolouration and discomfort, not just the label.
For shared laundry, ask the operator to test representative labelled garments through the actual process. A successful household trial doesn't establish suitability for commercial equipment, different detergents or disinfection.
The guide to labels on clothing for washing offers another useful checklist when comparing washing claims. Keep testing proportionate, but don't commit a whole wardrobe to an attachment you haven't tried.
How to Apply Clothes Labels Step by Step
For adhesive clothes labels, preparation matters more than pressing harder after something goes wrong. Start by reading the product's approved surfaces: some labels belong on a smooth care tag, while others are designed for direct fabric application.
Prepare the surface and establish the bond
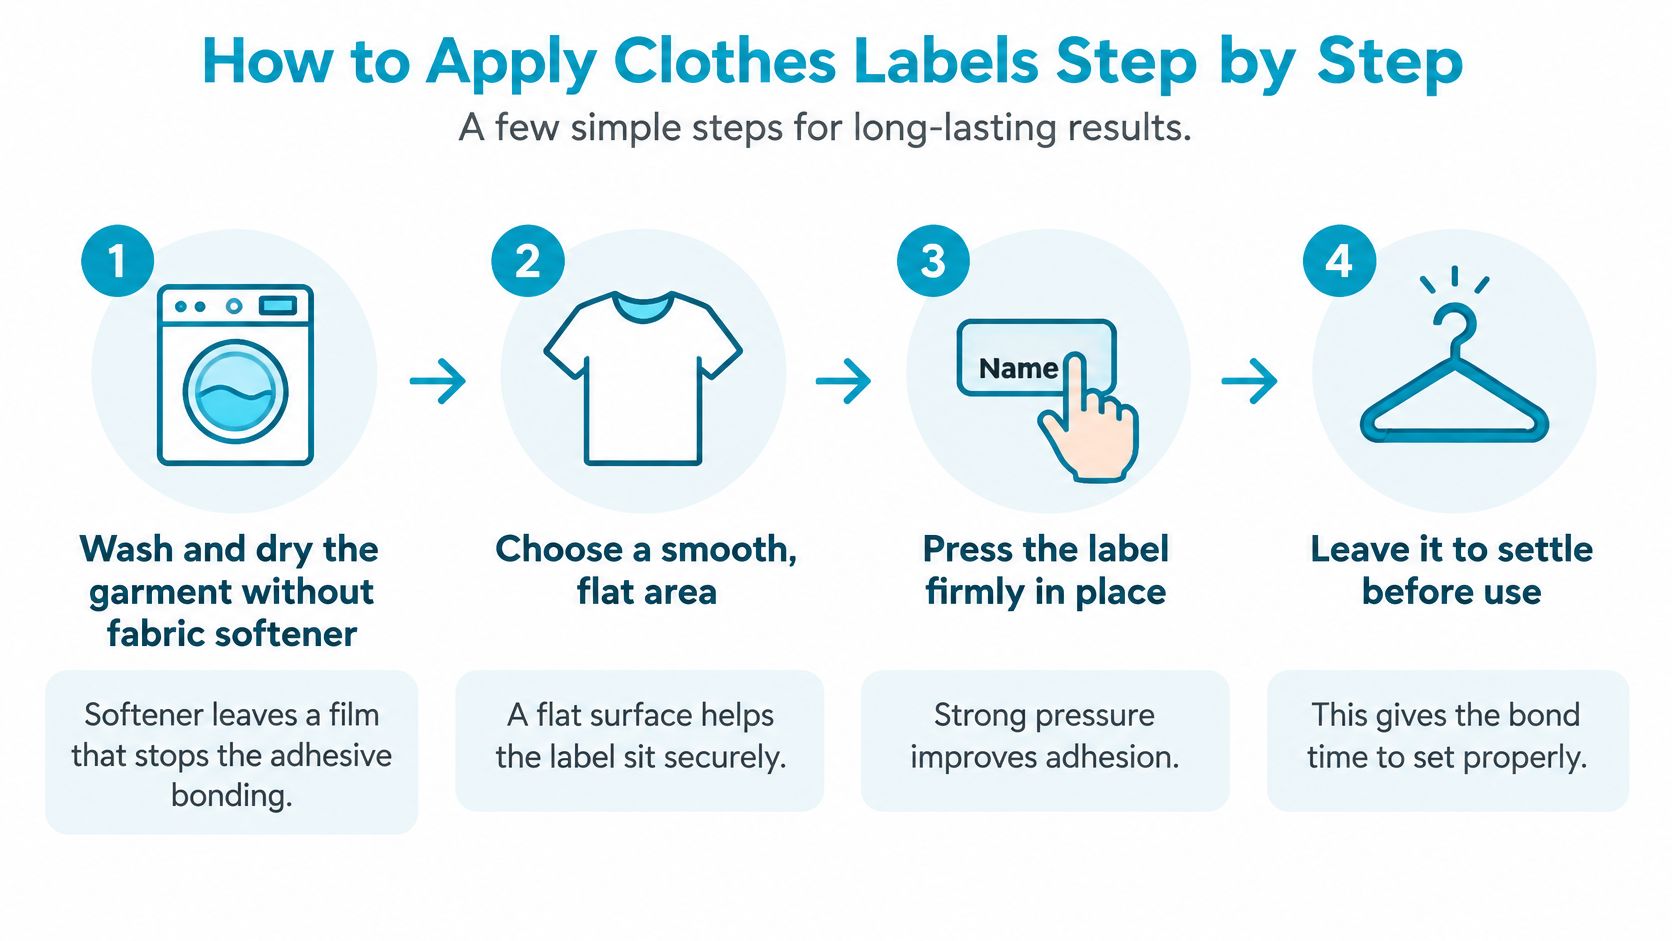
- Wash and dry the garment without fabric softener. Softener can leave a coating that interferes with adhesive contact. Let the garment cool completely before applying the label.
- Choose a smooth, flat, low-flex area. Use an unobstructed section of an existing tag if that's the specified surface, or a suitable adjacent area. Avoid seams, ribs, fleece pile and places that stretch during dressing.
- Remove loose lint with a dry, lint-free cloth. Check that the surface is dry and free from dust, grease or fibres. Don't add a cleaning solvent unless the label supplier and garment instructions permit it.
- Peel and press without touching the adhesive. Flatten the receiving surface on a firm support and apply even pressure across the centre and every edge. For an iron-on product, use the specified iron setting, pressure, protective sheet and pressing method rather than borrowing instructions from another brand.
- Leave the label undisturbed for its specified settling period. Don't wash immediately or repeatedly pick at a corner to see whether it has stuck. Pressure-sensitive adhesives need the application conditions their supplier specifies.
- Inspect after the first complete wash and dry. Look for lifted corners without deliberately pulling up a sound edge. If a corner has curled and collected lint, replace the label on a suitable surface rather than assuming another press will restore the bond.
The preparation sequence is straightforward when each stage has a clear purpose.
Keep the original information accessible
In Great Britain, government textile-labelling guidance requires fibre-composition information to identify constituent fibres and their percentages by weight in descending order, with the information durable, legible, visible, accessible and securely attached when supplied as a label. Place personal identification so that it doesn't conceal that information, care instructions or manufacturer details.
The common shortcut is pressing a sticker onto clothing straight from the dryer. Warmth can disguise remaining moisture, and a soft garment held in the air gives poor support for even pressure.
Set the garment flat, let it cool and check it again before applying. A successful application looks flat, with no bubbles, wrinkles or exposed corners, and remains comfortable when the garment is worn.
How to Remove Clothes Labels and Reuse Garments
Stick-on identification labels are often easier to remove than heat-bonded transfers, but the receiving fabric matters. A smooth synthetic tag can release cleanly while an open weave holds adhesive within its fibres.
Before starting, distinguish your personal name label from the original garment information. Removing the wrong label can make future laundering harder for the next owner.
Remove adhesive labels without pulling the cloth
- Warm gently: Use a hairdryer at a moderate setting, moving it rather than concentrating heat in one place. Stop if the fabric or coating reacts.
- Lift a corner: Try a fingernail or blunt plastic scraper. Don't use a knife against clothing.
- Peel low and slowly: Support the fabric with your other hand and pull the label back along the surface rather than upwards.
- Test residue treatment: If adhesive remains, try a textile-compatible remover on a hidden seam first. Use a small amount on a cotton pad and avoid spreading softened adhesive.
- Wash appropriately: Launder according to the garment instructions once the residue treatment allows it.
Avoid acetone, aggressive scraping and high heat on waterproof coatings, elastic fibres or delicate fabrics. If the garment starts stretching or losing colour, stop rather than trying to achieve a perfectly clean patch.
Handle sewn and iron-on labels differently
Use a seam ripper to cut the stitches holding a sewn name tape. Work with good light, lift the thread away from the cloth and check that you're not cutting a structural seam.
Iron-on transfers may leave residue or a visible outline. A fresh identification patch can be more practical than repeated heating, provided it forms a secure attachment and doesn't leave competing names visible.
Second-hand caution: Remove or obscure the previous owner's personal identification, but leave the original fibre-composition and care labels intact.
For a hand-me-down, a clear replacement is better than a messy overwrite. The next person sorting the garment should see an unmistakable current owner, not have to choose between names.
Choose and Order the Right Clothes Labels for Your Situation
Order against a written list of garments and conditions, not just a preferred pack design. That helps you spot where a single label type won't cover the whole job.
A household might need adhesive labels for smooth uniform tags, sewn tapes for frequently washed aprons and separate appliance-rated labels for containers. A care home may prefer a standard sewn option while allowing an alternative for garments that can't comfortably take it.
Make the purchase decision in order
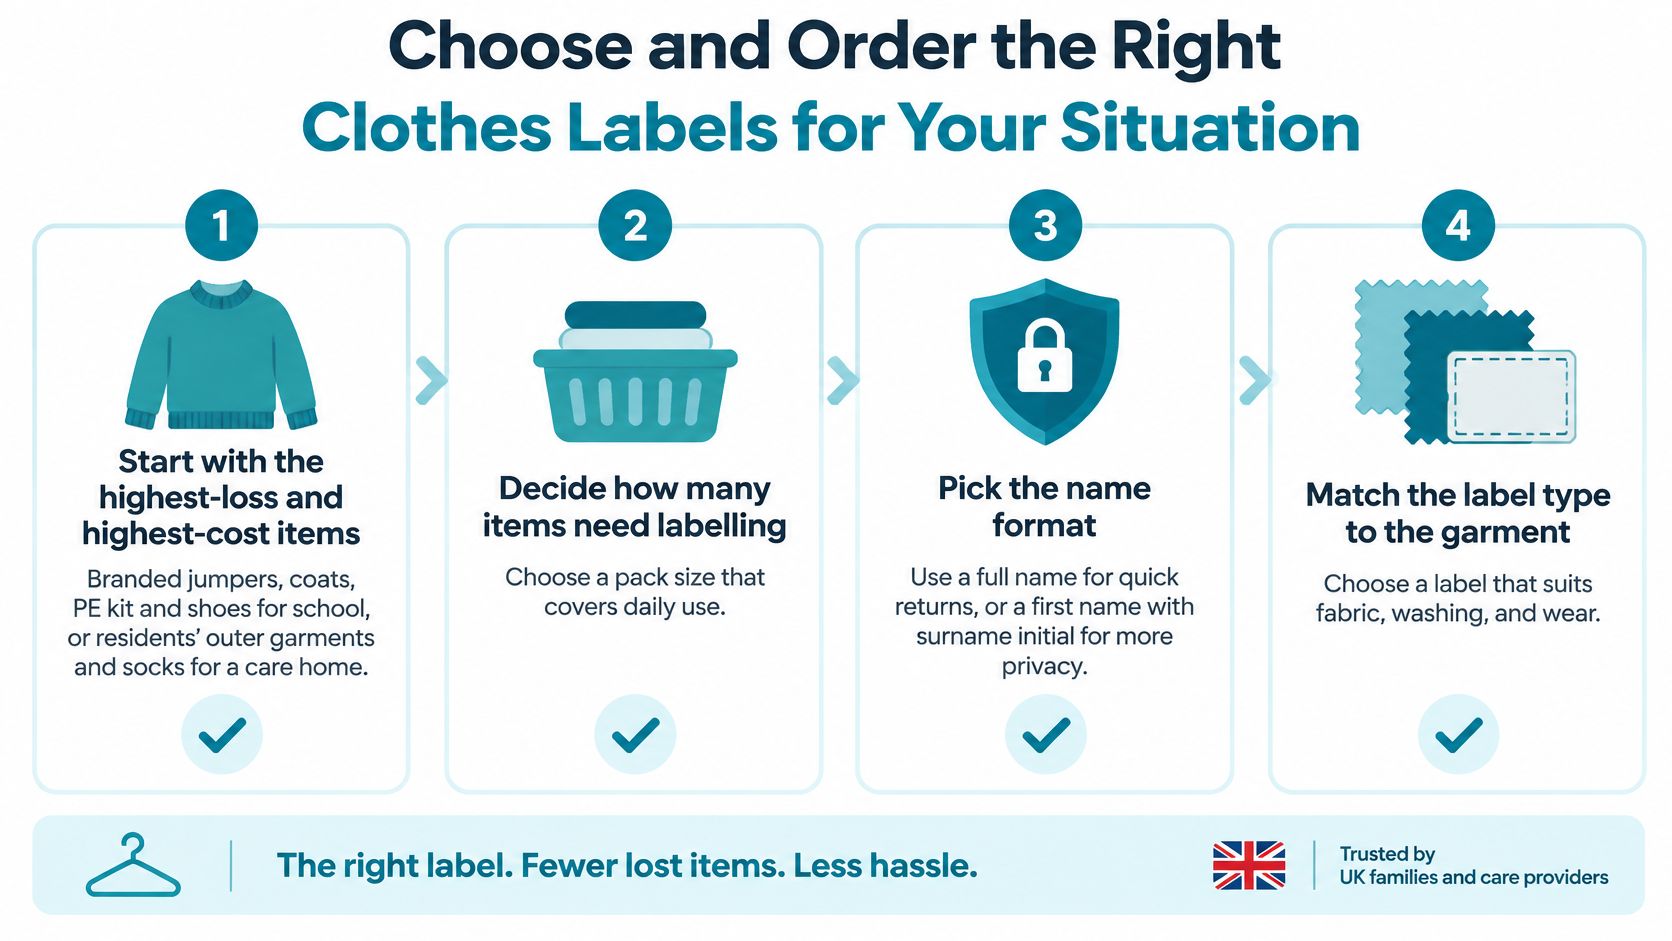
- Identify the items that matter most. Put replacement cost, likelihood of removal and shared handling beside each garment on your list. This makes the first purchase manageable without pretending every item has equal risk.
- Match the attachment to the laundry process. Choose a candidate that suits both the receiving surface and the operator's wash requirements. Ask for commercial-laundry compatibility where relevant, rather than relying on a household washable claim.
- Get samples or a small trial pack. Use representative garments and complete the wash-and-dry trial before committing to a larger order. Keep the successful product specification so repeat orders don't accidentally substitute a different backing.
- Approve the identification and layout. Check spelling, contrast and readability at the actual printed size. Confirm that the selected position leaves the original garment information accessible.
- Scale up with a replacement plan. Allow for newly acquired clothing and damaged labels, but avoid a large reserve containing information likely to change. Decide who will apply replacements and keep the ordering details.
This checklist helps turn a general shopping task into a clear purchasing decision.
Ask suppliers questions they can answer precisely
Ask which surface the label is intended for, what application preparation it needs and which laundering restrictions apply. If a supplier can't explain the conditions behind a durability claim, don't treat the claim as evidence for demanding care-home use.
Businesses commissioning uniforms have another opportunity: specify the identification position before production. When assessing clothing production partners through Genpire, include a smooth, accessible labelling area and preservation of garment information in the manufacturing requirements. That's more reliable than improvising an awkward attachment after delivery.
Keep a spare labelled garment or a photograph of the approved arrangement for staff or family members who will do the remaining work. Consistent placement is easier to maintain when people have a concrete example.
This week, choose a candidate label and begin a small trial on the garments you use. Place the main order only when the attachment, readability and wearer comfort all pass.
Quote My Wall offers personalised stick-on clothing labels for school uniforms, care-home garments and other belongings, without sewing or ironing. Visit Quote My Wall to compare the available designs and pack options, then choose a small starting order suited to your application and wash test.