

Blank Face Templates: Crafts, Decor & Labels Guide
You know the moment. You're standing over a printer with a fresh sheet of card, or at your cutting mat with a half-weeded vinyl face that's already sticking to itself, and you're wondering whether the template you picked is the right one for the job. A blank face template looks simple until you try to make it do real work, whether that's a KS1 self-portrait, a nursery wall decal, a furniture stencil, or a washable clothing label.
The good news is that the same face outline can carry a lot of different projects if you choose the right source, file type, and settings. In UK classrooms, blank face templates are already a mainstream low-cost resource for self-portraits, emotions work, and fine-motor practice, and the same outline can be repurposed for vinyl cutting, stencil work, and durable labels when you prep it properly, rather than treating it like a throwaway colouring sheet. The difference between a useful template and a frustrating one usually comes down to scale, format, and whether the design was made for paper or for a cutter.
Why a Blank Face Template Is Such a Handy Starting Point
The reason I keep reaching for blank face templates is that one outline can do the job of several different resources. A teacher can use it for self-portrait work, a parent can turn it into an “all about me” sheet, and a crafter can convert the same shape into wall art or a vinyl decal without redrawing the head from scratch. That flexibility is why UK-facing education suppliers keep publishing printable face resources, which shows the format has settled into everyday classroom use, not just occasional art lessons, and it sits comfortably alongside the long visual tradition of self-portrait work that traces back to the early Renaissance and Jan van Eyck's early role in it TES resource on historical figure fact files.
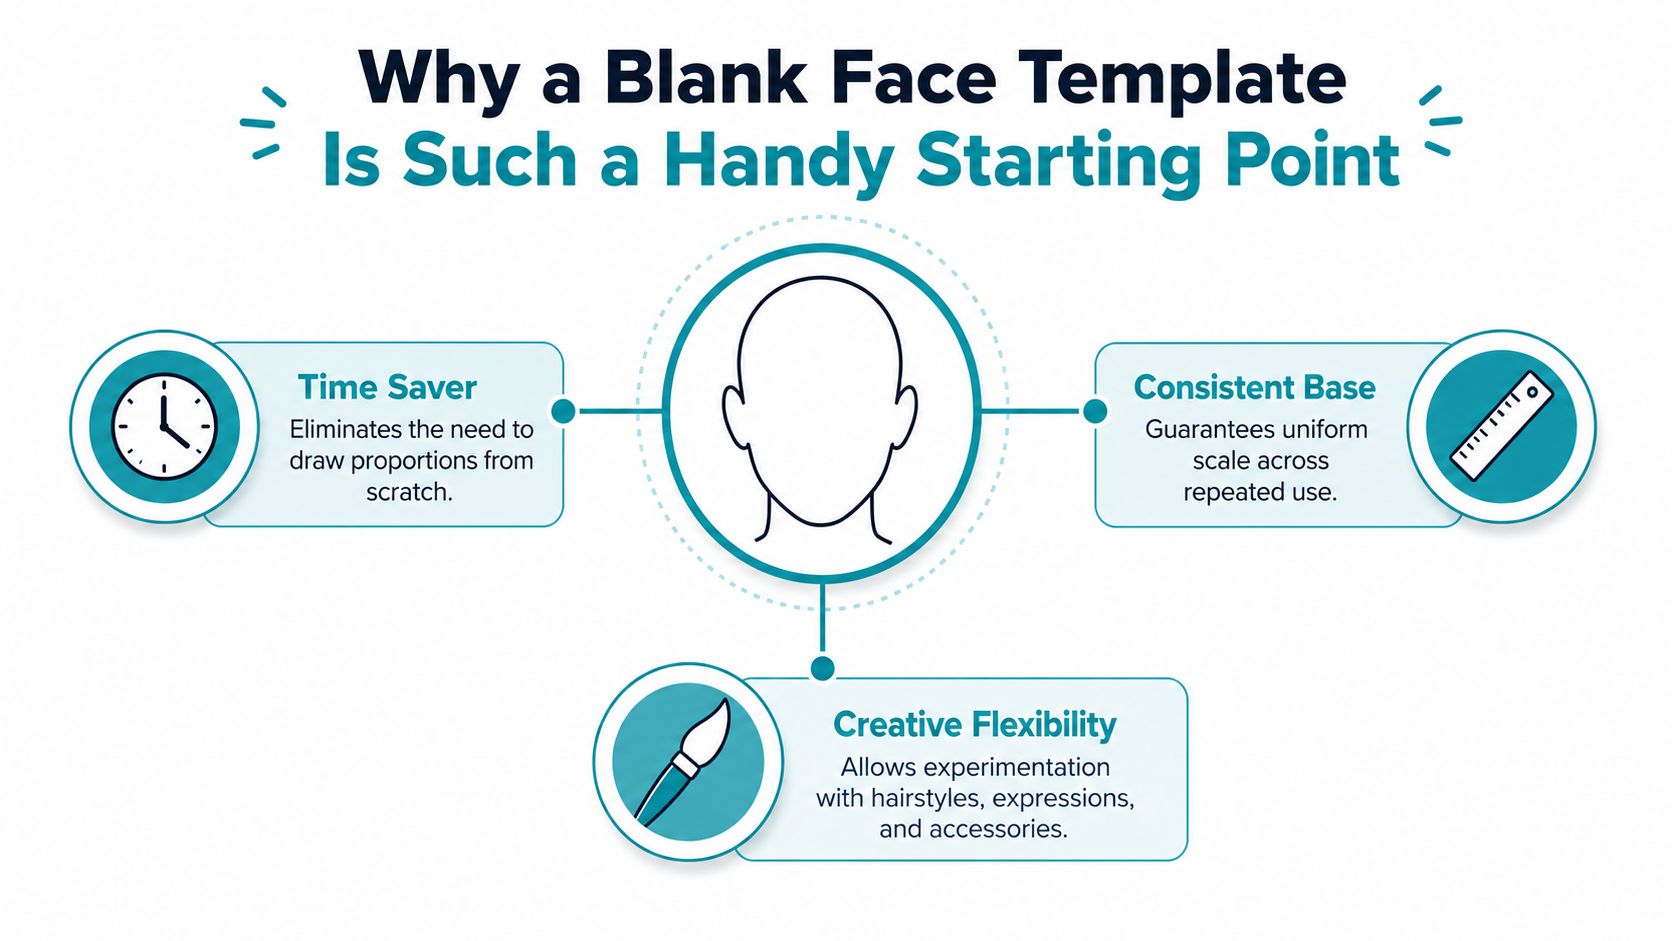
The four jobs one outline can cover
For schools, the template gives children a stable face shape so they can focus on features, emotions, hair, and identity markers instead of proportion. For nurseries or bedrooms, the same outline can become a simple wall decoration with vinyl hair, stickers, or painted details. For crafters, it works as the base for decals and stencils, and for clothing labels it gives you a clear, repeatable shape that can be scaled to a small, neat mark.
Practical rule: if the outline itself is doing the hard part, you're probably using the right template.
The trick is to decide which job is yours before you download anything. If your project needs children to draw or collage, a printable sheet is enough. If your project needs a clean edge for a cutter, you want a vector outline that will stay crisp when it's resized. And if you're making labels or decals, you want something that survives shrinking without the eyes, nose, or jawline turning muddy.
Once you see the template as a reusable base rather than a one-off worksheet, the rest gets much easier. The same face shape can hold a lesson, a craft session, or a branding-style label, and the only real variable is how carefully you prepare it.
Finding a Blank Face Template That Fits Your Project
There are three places I'd trust first: UK education publishers such as Twinkl and TES, vector-friendly design libraries for cutters, and paid marketplaces like Etsy when you need something more polished or niche. Each one solves a different problem. Education sites usually give you classroom-ready pages, cutter libraries tend to focus on clean outlines that behave well in SVG or DXF, and marketplaces are useful when you want a particular style, pose, or bundled pack.
A wall sticker file, a PSHE worksheet, and a vinyl decal all start from the same basic face shape, but they do not need the same kind of source file. I've downloaded templates that looked perfect on screen and turned into a nuisance as soon as I tried to trace, resize, or weed them. The better starting point is the one that matches the job before you spend time editing it.
What to check before you download
Start with the file's purpose, not the preview image. A template made for an A4 worksheet can still be awkward in Cricut Design Space if the lines are soft or the edges aren't clean enough to trace. A file made for vinyl can be brilliant on a cutter and frustrating on paper if it arrives as a bare outline with no educational prompts or writing space.
- Look for the intended use first. If the listing talks about classroom printables, assume paper first. If it mentions SVG, DXF, or cutter compatibility, assume a machine workflow.
- Check the licence or usage note. Some files are fine for personal classrooms but not for resale or product-making. That matters if you're planning decals or labels.
- Inspect the outline quality. Clean jawline, simple curves, no stray textures. Busy linework wastes time when you're weeding or tracing.
- Match the size to the task. A worksheet face and a wall decal face should not be the same scale, even if they start from the same art.
If you want a quick decision rule, use this one. Printable lesson or colouring page, go with an education source. Vinyl, stencil, or layered craft, pick a vector-first file. If you're paying for a design, make sure the preview shows a shape you'd be happy cutting, not just viewing on a screen.
The biggest mistake is downloading the first face outline that looks cute and then trying to force it into the wrong workflow. A good source saves you more time than any later fix. For wall-style craft projects, it also helps to read a practical guide such as design your own wall sticker, because the same outline choices affect how cleanly the finished decal applies.
Choosing the Right File Format and Software for Editing
The file format decides how much pain you'll feel later. A PNG is fine when you only need to print a worksheet or trace a shape, because it's a flat image. An SVG or DXF is what you want when a Cricut or Silhouette needs a true cut path, because the software can read the outline as a shape instead of a picture. A PDF sits in the middle, useful for printing and sharing, but less flexible if you need to edit individual curves.
Match the format to the task
If you're printing a school resource, a good PNG or PDF is often enough. If you're cutting vinyl, choose SVG first, DXF if your software prefers it. Inkscape is useful when you want to inspect or tidy an SVG before cutting, Cricut Design Space handles SVG workflow well, Silhouette Studio often works well with DXF, and Canva is mostly a layout tool rather than a cutter prep tool.
| File format | Best for | Software that opens it |
|---|---|---|
| SVG | Vinyl cutting, layered decals, editable outlines | Inkscape, Cricut Design Space, many browsers |
| PNG | Printed worksheets, tracing, colouring pages | Canva, Word, most image viewers |
| DXF | Cutting workflows, especially with Silhouette | Silhouette Studio, some CAD-capable apps |
| Sharing print layouts, classroom handouts | Acrobat Reader, browsers, Canva import |
Practical rule: if you need to move a nose, split a fringe, or resize a jawline without blurring the art, start with a vector file, not a screenshot.
A lot of beginners try to trace a JPEG from a search result and wonder why the cut edges look jagged. That's because the software is guessing where the line is. Redraw instead of tracing when the source file is low-resolution, has fuzzy edges, or includes shading that'll confuse the cutter. For a clean face outline, a simple vector is almost always quicker than rescuing a messy bitmap.
For home crafters, the best approach is usually to keep one master SVG and export from it as needed. That gives you a classroom sheet in PDF, a printer-friendly PNG, and a cutter-ready outline without rebuilding the design every time. It's a small habit, but it stops a lot of rework.
Printer and Cutter Settings That Save You a Wasted Sheet
The part that usually wastes material is not the template itself, it's the setup. A face outline can be perfect and still fail if it prints at the wrong scale, gets mirrored at the wrong moment, or goes through the cutter with too much pressure. The settings below are the ones that matter before you commit a sheet of vinyl, cardstock, or label stock.
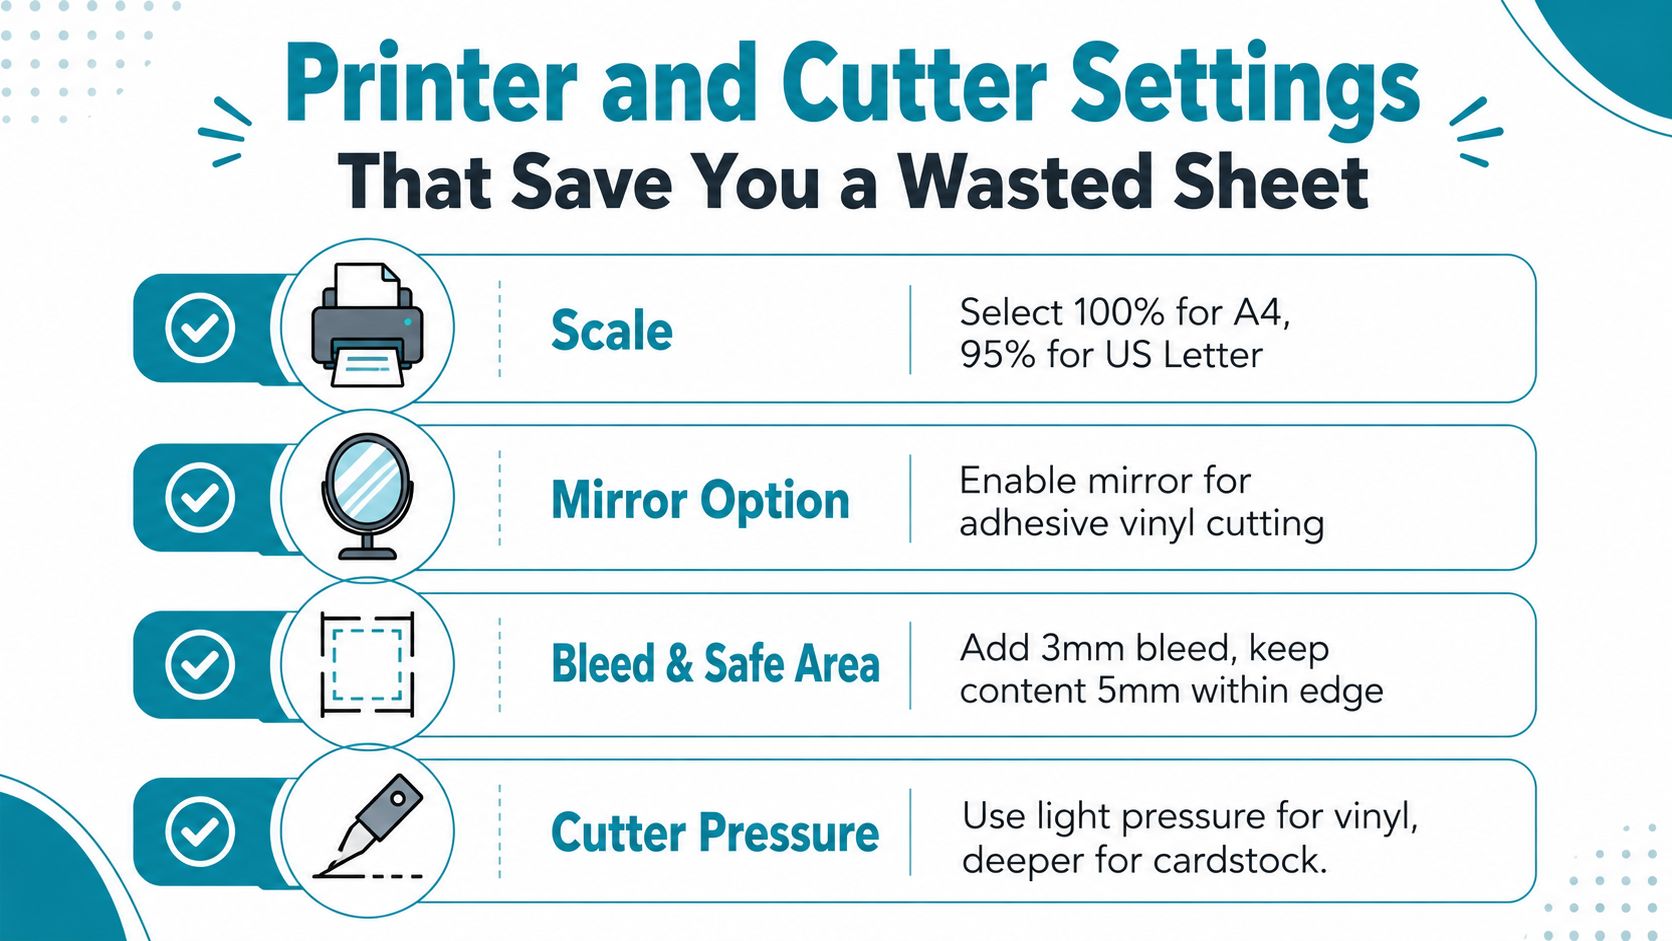
The order that works in real life
First, check the page size. A4 and US Letter aren't interchangeable, and a template that looked right on screen can come out unexpectedly small if the software auto-fits it to the wrong page. Second, set the scale deliberately. For A4, the infographic guidance is 100%, and for US Letter it shows 95% as the example scale to use printer and cutter settings infographic.
If you're cutting adhesive vinyl, remember to mirror the design before sending it. Forgetting that step is a classic beginner error, and it matters most on text, asymmetrical hair, or any face detail that has a left-right orientation. For printed labels, build in bleed and keep key details away from the edge. The infographic calls out 3 mm bleed and keeping content 5 mm inside the edge as a practical rule printer and cutter settings infographic.
Cutter pressure in plain English
On vinyl, lighter pressure is usually safer because you want the blade to cut the film, not score the backing paper. On cardstock, you often need a deeper cut, but not so deep that the mat gets marked or the corners snag. That's why a face stencil can fail on the first pass if the blade is too aggressive, especially around small eye shapes and narrow hair strands.
A useful habit is to do a tiny test cut on the corner of the sheet before you send the whole design. If the cut weeds cleanly but the backing still holds together, you're close. If the corners lift, the pressure is probably too high. If the blade drags and leaves uncut points, it's too low.
A simple mental checklist before hitting print or cut goes a long way. Confirm page size, confirm scale, mirror only when needed, and match pressure to the material. That small pause usually costs less than replacing a wasted sheet.
Adapting Blank Face Templates for Inclusive Classrooms
Most blank face template downloads are still written as if every child sees, processes, and represents faces in the same way. That's the gap. In UK classrooms, SEND numbers mean teachers often need one resource to work for a mixed-ability group, and a generic outline on its own doesn't answer how to support sensory preferences, additional needs, or culturally varied hair and skin-tone representation Mr T's Activity blank face template resource.
Simple adjustments that make a real difference
Start with contrast. A darker outline on a plain white sheet is easier to follow than a faint sketch, especially for children who benefit from stronger visual boundaries. Then enlarge the cut-outs for eyes, mouths, glasses, and hair pieces if you're using collage or stick-on parts. Smaller pieces are fiddly, and fiddly quickly becomes frustrating.
- Use high-contrast outlines. Strong black lines make the structure easier to see and trace.
- Offer larger feature pieces. Bigger eyes, mouths, and hair shapes are easier to handle and position.
- Add tactile materials. Felt, foam, and textured paper can help some children engage more comfortably than smooth printouts.
- Provide more than one hair option. Straight, curly, short, and covered styles give children room to represent themselves authentically.
- Leave space for identity markers. Glasses, head coverings, freckles, or hearing aids can be added without forcing a single face norm.
Why this matters in practice
The best face templates are the ones children can use without being pushed into one version of “normal”. That's especially important for self-portrait work, because the activity isn't just decorative, it's personal. If a template makes a child feel mismatched to the task, the craft becomes harder than it needs to be.
For school teams, this is also where label work and name ownership come into play. A practical resource like importance of name tags for kids in school is a useful companion read when you're thinking about identity, ownership, and classroom organisation alongside visual self-representation.
A good adaptation takes minutes, not an entire planning afternoon.
If you already have a template, the fastest upgrade is to print two versions, one with bold outlines and one with extra-large feature pieces. That gives you a quick option for different learners without redesigning the whole activity.
Four Real Projects You Can Finish This Weekend
The nicest thing about a blank face template is that it doesn't belong to just one corner of the house or classroom. I've seen the same outline used on school desks, nursery walls, painted furniture, and uniform labels, and the settings change more than the shape does. Once the template is clean and scaled properly, each project becomes a matter of material choice and application method.
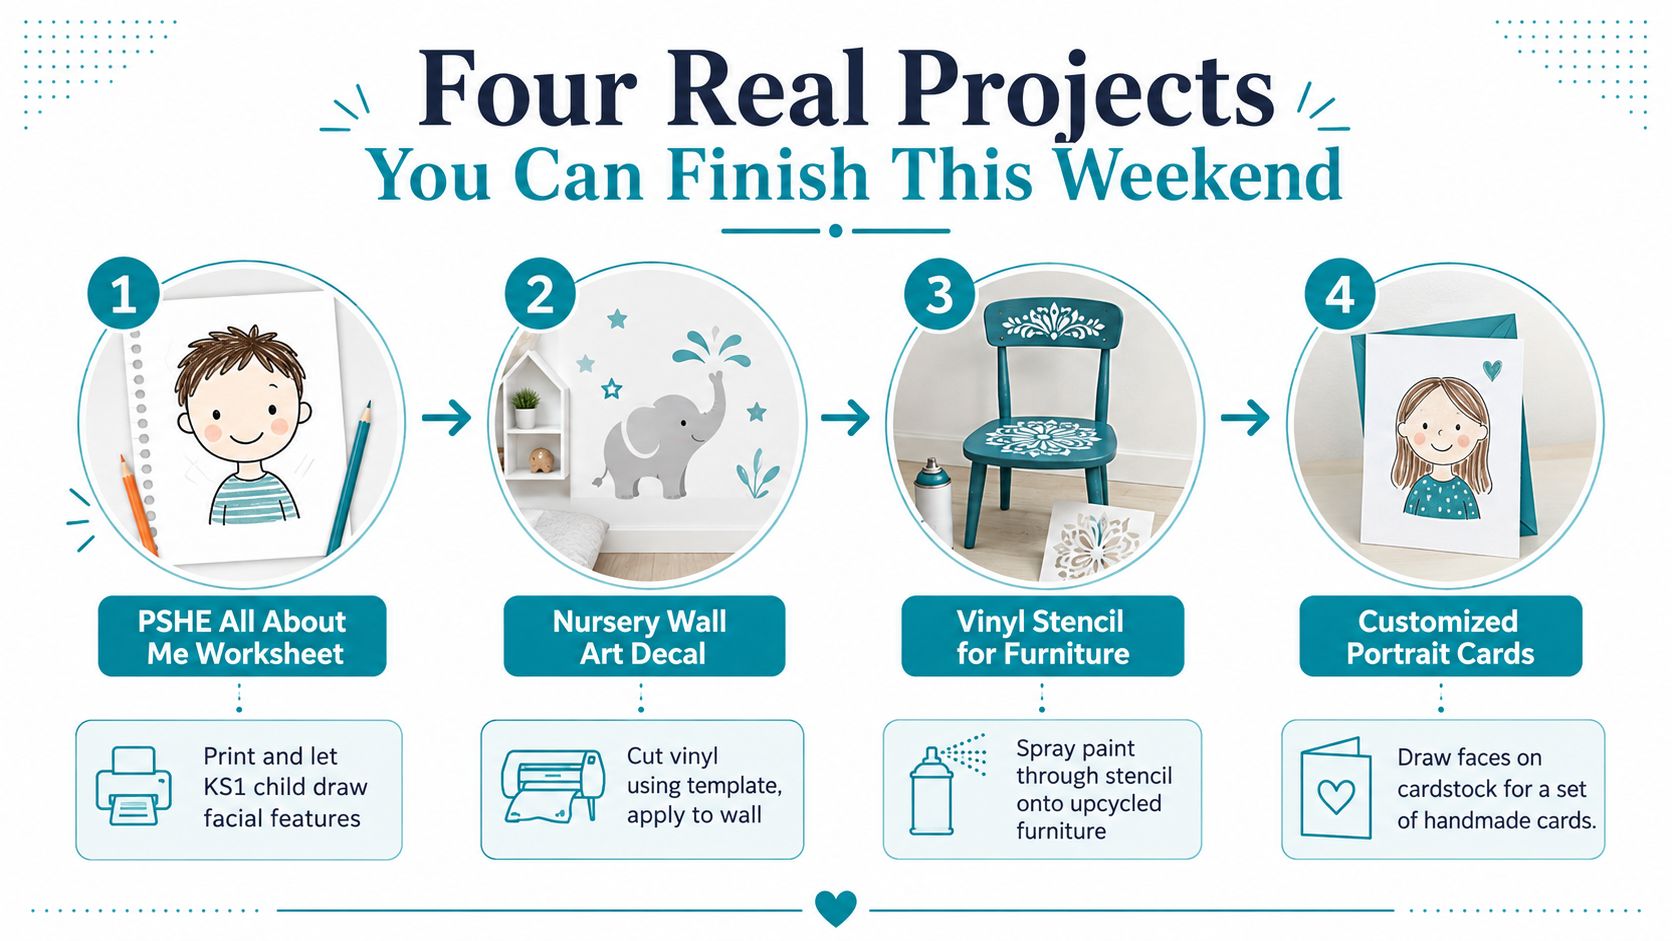
PSHE worksheet for KS1
For a classroom “all about me” sheet, print the template on A4 paper or light card and leave the outline simple. Children can add eyes, hair, glasses, and feelings with pencils, crayons, or collage pieces. The main pitfall is over-designing it, because too much visual clutter steals the attention from the child's own drawing.
Nursery wall art decal
For a wall decal, use an SVG and cut it in vinyl so the face outline stays crisp on the wall. If you're making hair or eyebrows as separate pieces, keep the shapes broad enough to weed without tearing. The wall version benefits from restraint, because small facial details can look busy once they're enlarged.
Furniture stencil
For furniture upcycling, a stencil is often the easier route. The blank face outline becomes a spray or sponge template, and how to create stencils is a useful reference if you're planning to paint through the design rather than apply a finished decal. The mistake to avoid is cutting the bridges too thin, because paint will bleed through gaps and soften the face shape.
Stick-on clothing labels
For school uniform labels, I'd follow the same discipline used in a proper Cobra DTF label template guide, which is to treat sizing, placement, and repeatability as the whole job, not an afterthought. In practice, that means using a very clean face shape, keeping details bold, and choosing a small format that remains legible after washing and handling. The template doesn't need decorative extras here, it needs clarity.
If you want to move from school-style labels into broader apparel and merch planning, FLYP LTD's merch operating system is worth looking at for how a repeatable asset can be managed across different product types. The same thinking applies here, a reliable master shape saves rework every time you need another batch.
Your Blank Face Template Workflow at a Glance
A clean blank face template saves time only if you set it up for the job in front of you. Start with the right source file, then match the format to the workflow, SVG for cutting, PNG or PDF for printing. After that, adjust the face for the person or setting, whether that means larger features, higher contrast, or more inclusive hair options. Then cut or print at the right scale, check mirror settings for vinyl, and use the material that suits paper, walls, furniture, or fabric.
The same mistakes keep showing up. The first is picking the wrong file format, which turns a quick make into a repair job. The second is forgetting to mirror vinyl before sending it to the cutter. The third is using a template that is too small or too detailed for the mat, which makes weeding slow and frustrating.
Keep one clean master file, and stop rebuilding the same face from scratch.
If you want to design your own instead of downloading one, begin with a simple outline and build it around the final use. A classroom printable needs room for drawing and writing. A decal needs smooth curves that weed cleanly. A label needs legibility at a small size. The template should serve the object, not the other way round.
For anyone who wants a ready route into wall stickers, labels, and nursery décor, Quote My Wall is a sensible place to browse ideas and materials that already work in practice. If you've got a face-shaped project in mind, it's worth checking their range and using it as a benchmark before you cut your next sheet.