
Baby Nursery Wall Stickers: A Parent's Guide
Decorating your baby’s first room is one of the most exciting parts of preparing for their arrival. Baby nursery wall stickers are a wonderfully simple, affordable, and magical way to create a special space for your little one. These peel-and-stick designs let you get creative and build a comforting, stimulating environment without the fuss or commitment of paint or wallpaper.
Creating a Dream Nursery with Wall Stickers
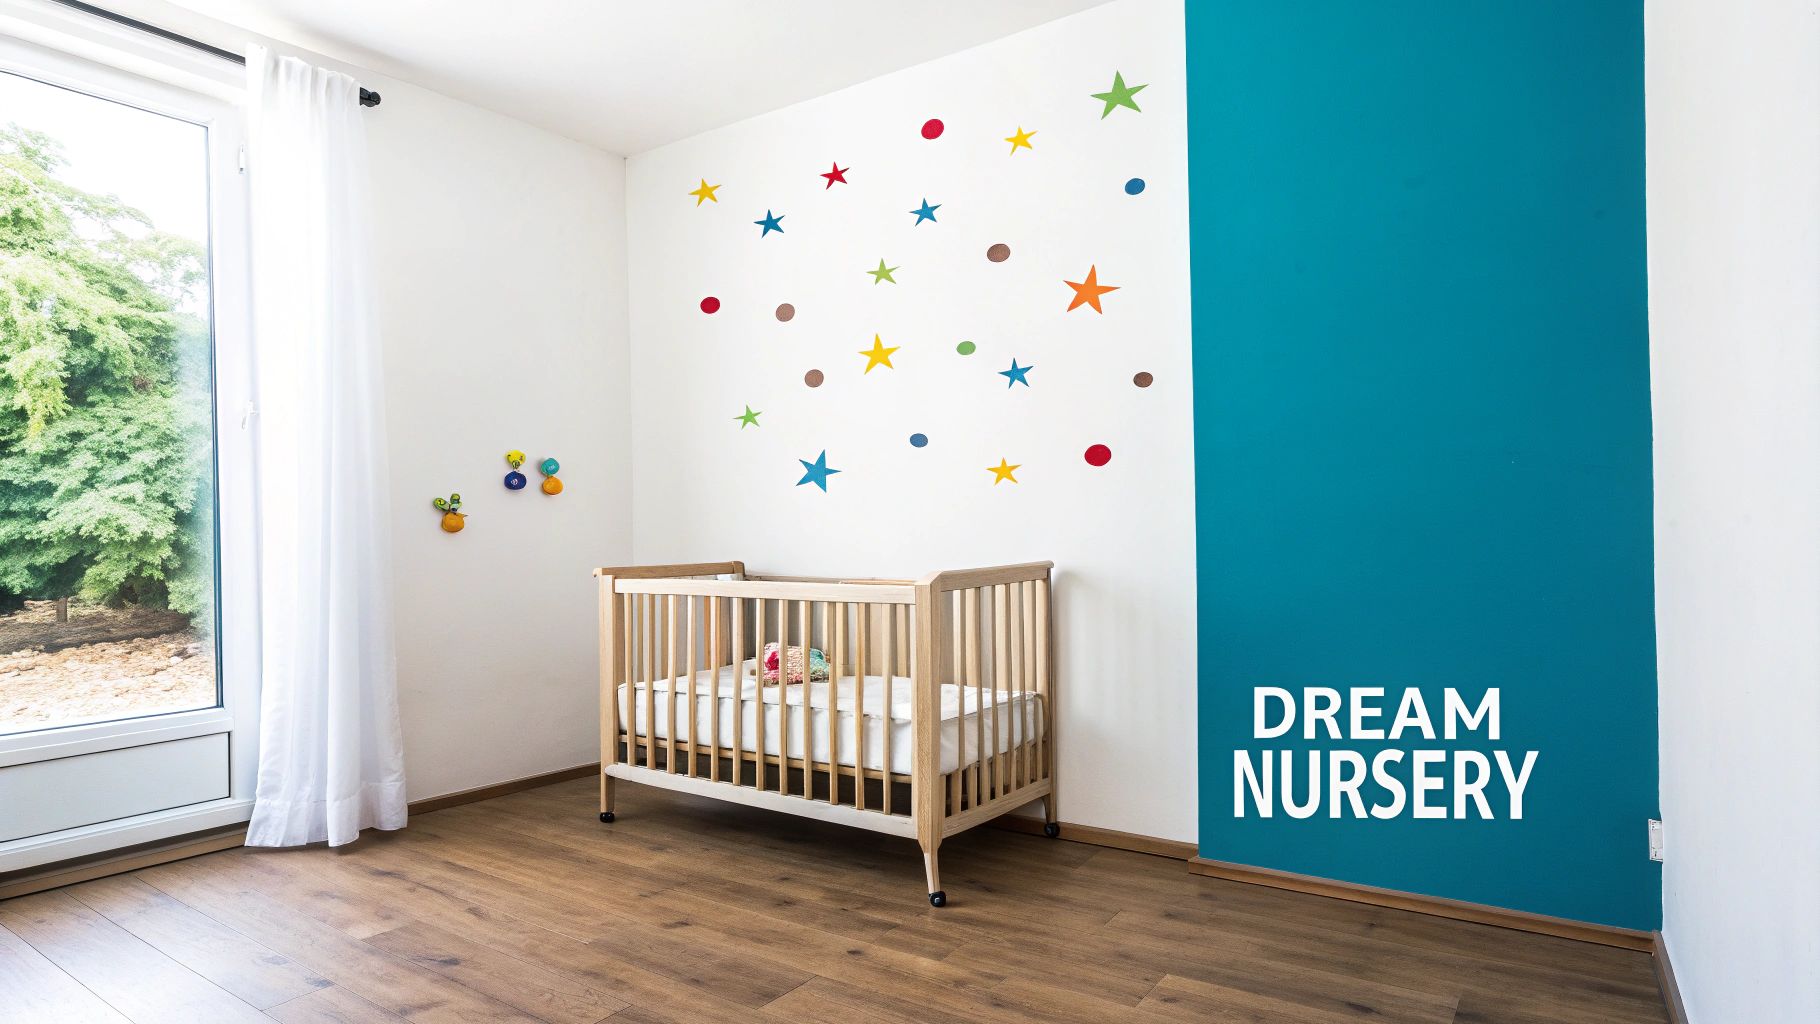
Welcome to the lovely journey of designing your baby’s first room! This is the space where so many precious moments will unfold, and it’s natural to want every detail to be just right. Turning a plain room into a personal sanctuary can feel like a big task, but baby nursery wall stickers offer a flexible and beautiful solution that’s perfect for modern parents.
Think of them as more than just decorations; they're tools for telling a story. With a simple peel and stick, you can create a whimsical woodland, a dreamy night sky full of stars, or a playful safari adventure right on the walls. This guide is here to help you do more than just pick pretty pictures—it’s about giving you the confidence to create a nursery that you and your baby will absolutely adore.
Why Wall Stickers Are a Parent's Best Friend
It's no surprise that wall stickers have become a go-to choice for nursery decor. They give you the power to personalise a space quickly and without breaking the bank, which is a huge win when you're busy preparing for a new arrival.
- Effortless Transformation: You can completely change the look of a room in a single afternoon. No need for professional decorators or messy paint pots.
- Budget-Friendly Creativity: Compared to the cost of wallpaper or a custom mural, stickers are a far more affordable way to introduce colour, character, and a specific theme.
- Adaptable and Temporary: As your child grows, their tastes will change. Removable stickers make it easy to update the room's theme without any drama.
The rise in popularity of wall stickers is part of a bigger trend towards personalising our homes. In fact, the UK nursery decor market was valued at around £320 million back in 2020, and wall stickers accounted for nearly 15% of that. This growth is all down to parents wanting to create stimulating yet safe spaces for their children.
Of course, stickers are just one piece of the puzzle. Exploring other aesthetic room decoration ideas can spark even more inspiration for the perfect nursery. In this guide, we’ll cover everything from choosing non-toxic materials to getting a flawless, bubble-free application, making sure your creative vision comes to life safely and beautifully.
Choosing Safe Materials for Your Baby's Room

When you're setting up the room where your new baby will sleep and play, nothing matters more than safety. It’s easy to get swept up in the adorable designs and colours of baby nursery wall stickers, but what they're made from is far more important. Understanding the basics helps you create a healthy, nurturing space right from the start.
This means looking past the cute animal faces and becoming a bit of a materials detective. You'll want to check the labels and product descriptions for key safety information. The aim is simple: choose decorations that are as harmless as they are beautiful, so you can have complete peace of mind.
Why Material Choices Matter
It's a simple fact: babies are much more sensitive to their environment than we are. Their little bodies are still developing, and they breathe more rapidly, which means even low levels of airborne chemicals can have a bigger impact. That's why every material you bring into the nursery deserves a second thought.
Many common wall stickers are made from Polyvinyl Chloride, better known as PVC or vinyl. It’s a cheap and versatile material for manufacturers, but the downside is that it can release potentially harmful substances into the air over time. For a truly safe nursery, it’s always best to seek out materials free from these kinds of chemicals.
Prioritising non-toxic, PVC-free materials isn't just about following a trend; it's about making a conscious investment in your child’s health and well-being. A safe nursery is the foundation for a happy home.
Decoding the Labels: What to Look For
Navigating product descriptions can feel a bit overwhelming, but you only need to keep an eye out for a few key terms. Think of these labels as your guarantee that a product has been made with your baby's safety at its core. And the good news? Awareness around this is growing.
A 2022 report found that 73% of nursery wall stickers sold in the UK now carry labels indicating they are PVC-free and phthalate-free. That’s a huge jump from just 42% back in 2017. What's more, a recent survey showed that 81% of UK parents now actively look for wall stickers with non-toxic certifications.
Here are the most important things to spot:
- PVC-Free: This is the big one. Look for stickers made from alternative materials like fabric, paper, or other non-vinyl polymers to avoid the risks linked to PVC.
- Phthalate-Free: Phthalates are chemicals added to plastics like PVC to make them more flexible. Choosing phthalate-free stickers removes another layer of potential chemical exposure.
- Non-Toxic Inks: You’ll want to ensure those vibrant colours are printed with water-based or soy-based inks, which don't contain harmful solvents.
To go a bit deeper, have a look at our guide on what to consider when buying nursery wall stickers.
Understanding VOCs and Air Quality
You know that "new car smell" or the distinct scent of fresh paint? That odour comes from Volatile Organic Compounds (VOCs). These are chemicals that are released as gases from certain materials, and while the initial smell often fades, the emissions can continue at low levels, affecting indoor air quality.
Think of it like an air freshener that slowly releases its scent over weeks—some materials do the same thing, but with invisible chemicals. In a small, enclosed space like a nursery, keeping these emissions to a minimum is crucial for creating a healthy breathing environment for your baby.
Choosing low-VOC or zero-VOC baby nursery wall stickers helps ensure the air in your baby’s room stays as clean and fresh as possible. High-quality manufacturers make it a priority to use materials and adhesives that don't release these compounds, contributing to a much safer nursery.
To help you quickly check what matters, here’s a simple checklist.
Nursery Wall Sticker Material Safety Checklist
This table is a quick-reference guide to help you feel confident when evaluating the safety of different wall sticker materials.
| Safety Feature | What to Look For | Why It Matters for Your Baby |
|---|---|---|
| Material Base | "PVC-Free," "Fabric," or "Paper-based" labels | Avoids potential off-gassing of chemicals commonly found in vinyl/PVC products. |
| Chemical Additives | "Phthalate-Free" certification | Phthalates are used to soften plastics and are linked to health concerns; best to avoid them entirely in a nursery. |
| Inks & Colours | "Water-based inks," "Soy-based inks," or "Non-Toxic" printing | Ensures the vibrant designs don't introduce harmful solvents or heavy metals into the air. |
| Air Quality Impact | "Low-VOC" or "Zero-VOC" | Minimises the release of Volatile Organic Compounds, promoting cleaner indoor air for developing lungs. |
| Adhesive Type | "Water-based adhesive," "Non-toxic glue" | The sticker's backing is just as important; a safe adhesive prevents airborne chemicals. |
By keeping these points in mind, you can choose beautiful decorations that also help create the purest, safest environment for your little one. Your baby deserves nothing less
Finding the Perfect Theme for Your Nursery
This is where the real fun starts. Choosing a theme for your baby's nursery is about so much more than just picking out a few decorations; it's about crafting a feeling, an atmosphere for the newest member of your family. The right baby nursery wall stickers can turn four plain walls into a world of wonder, sparking their little imagination and setting the perfect mood for both sleep and play.
Before you jump into choosing a design, take a moment to think about the kind of space you want to create. Are you picturing a serene sanctuary that feels calm and restful? Or maybe a gently stimulating environment that encourages curiosity? Your theme becomes the backdrop for your baby’s first years, the visual story they’ll wake up to every single day.
Timeless Themes to Inspire You
The world of nursery decor is huge, but some themes just never go out of style, partly because they have a timeless charm and a wonderful ability to grow with your child. A 2023 market analysis found that out of over 1,200 nursery wall sticker designs in the UK, themes from nature and the animal kingdom are the undisputed favourites. In fact, animal-themed stickers alone make up a whopping 38% of all sales, which just goes to show how much we love bringing a bit of the outdoors in. You can dive deeper into the numbers in the full report on the kids' wall sticker market.
Here are a few classic ideas to get your creative juices flowing:
- Woodland Wonderland: Imagine gentle deer, friendly foxes, and wise old owls peeking out from behind soft green trees. This theme is incredibly soothing and helps connect your baby to the calm of the natural world. It pairs beautifully with natural wood furniture and cosy, moss-green blankets.
- Safari Adventure: If you’re after something a bit more playful and vibrant, safari animals like lions, elephants, and giraffes are a fantastic choice. This theme really sparks a sense of curiosity and adventure. Try complementing these stickers with bold patterns, textured rugs, and pops of sunny yellow or jungle green.
- Celestial Skies: What could be more peaceful than a dreamy escape filled with twinkling stars, a gentle moon, and soft, fluffy clouds? This is the perfect theme for creating a calming atmosphere that encourages sleep. Think deep blues, soft greys, and gorgeous metallic silver or gold accents.
- Botanical Bliss: For a touch of elegance, you can't go wrong with delicate floral patterns, leafy vines, and charming garden critters. This theme is wonderfully versatile—it can feel vintage and quaint with pastels, or modern and chic with a more vibrant colour palette.
And don't feel limited to the traditional options. You could even build your decor around an engaging octopus theme, which is a wonderful way to spark imagination while incorporating unique, eco-friendly pieces.
Using Colour to Shape the Mood
Colour is easily one of the most powerful tools in your design kit. It’s not just about what looks pretty; it’s about how it makes a room feel. A little bit of colour psychology can go a long way in helping you create a nursery that actively supports your baby’s development and well-being.
Lots of parents instinctively reach for neutral colours, often because they're worried about getting it wrong. While there's nothing wrong with a beautiful neutral base, don't be afraid to bring in some colour! Even small, thoughtful accents can make a huge impact without feeling overwhelming.
A well-chosen colour palette does more than decorate a room; it nurtures an emotional environment. Soft, warm blues can create a sense of calm and security, while gentle yellows can inspire happiness and energy.
A great way to approach this is to think about the different zones in the nursery.
- For the Sleep Zone: Soothing colours are your best friend here. Soft blues, muted greens, gentle lavenders, and warm greys are all known to have a calming effect, helping to promote that much-needed restful sleep.
- For the Play Zone: This is where you can afford to be a bit more playful. Introducing brighter, more stimulating colours like a cheerful yellow, a soft orange, or a vibrant teal in small doses can encourage engagement and creativity. A colourful rug or a feature wall with fun stickers can define this area perfectly.
Creating a Cohesive Look
The real secret to a beautifully designed nursery? Cohesion. Your baby nursery wall stickers might be the star of the show, but all the other decor elements are the supporting cast, and they’re just as important. The goal is to make everything feel like it truly belongs together.
A good way to do this is to start with your wall stickers as the focal point and build out from there.
- Textiles: Pull colours directly from your wall decals and echo them in the cot bedding, curtains, and rugs. If your stickers feature little green leaves, a matching green blanket will instantly tie the room together.
- Lighting: The right lighting can completely change the atmosphere. A warm, dimmable lamp casts a cosy glow that's perfect for a celestial night-sky theme, while a natural rattan light shade adds beautiful texture to a woodland or safari room.
- Furniture: Try to stick to a consistent furniture style. Whether you've gone for modern and minimalist with clean lines or something more classic and traditional, keeping the furniture style uniform creates a real sense of harmony.
- Accessories: Don’t forget the small details! Things like wall art, storage baskets, and even books can be chosen to match your theme. Displaying colourful books on floating shelves, for example, adds both a decorative touch and practical storage.
By thoughtfully pairing your chosen theme with complementary colours and decor, you’ll create a nursery that isn't just beautiful and stylish, but is also a truly nurturing, comfortable, and inspiring space for your little one to grow.
How to Apply Wall Stickers for a Flawless Finish
Putting up your baby nursery wall stickers is one of the most exciting parts of decorating. It’s that final, creative flourish that really makes the room yours. To make sure the process is all joy and no stress, a little bit of prep work is your best friend. This guide will walk you through every step, helping you get a smooth, professional-looking finish that’ll have everyone thinking you hired an expert.
Think of it like baking a cake. You wouldn't just chuck all the ingredients into a bowl and hope for the best, would you? You follow the recipe, you measure everything out, and you get your kitchen ready. It’s the exact same principle here – a methodical approach is your ticket to a beautiful result, without any of those frustrating bubbles or wonky lines.
Preparing Your Canvas: The Wall
Before you even dream of peeling off that backing paper, the most important job is to prep your wall. A clean, smooth surface is the secret ingredient for a strong stick and a seamless look. Any sneaky dust, grease, or grime will stop the sticker from bonding properly, which can lead to peeling edges later on.
Start by giving the whole area a gentle wipe-down with a soft, damp cloth and a tiny bit of mild soap. Go over it again with a new, clean damp cloth to get rid of any soap residue. Then, the crucial part: make sure the wall is completely dry. You can pat it down with a dry, lint-free cloth or just let it air dry for a couple of hours.
Here's a pro tip that saves a lot of headaches: never apply stickers to a freshly painted wall. Paint might feel dry to the touch within a day, but it needs time to properly cure. That's the chemical hardening process, and it can take up to four weeks. Sticking a decal on too soon traps moisture underneath, which can make both the paint and the sticker peel away.
Planning Your Perfect Layout
Once your wall is sparkling clean, it’s time for the fun part – planning the design. It's so tempting to just dive in and start sticking, but trust me, a few minutes of planning will save you from the pain of a lopsided moon or a herd of safari animals marching downhill.
Grab some low-tack painter's tape and use it to temporarily pop the stickers on the wall. This lets you stand back, see how it all looks from different parts of the room, and shuffle things around until you’re 100% happy with the layout. This little trick is an absolute lifesaver, especially if you’re creating a gallery wall with lots of smaller stickers or positioning a big, detailed centrepiece.
This simple process helps you visualise the final look and make sure it all ties in with your nursery's theme.
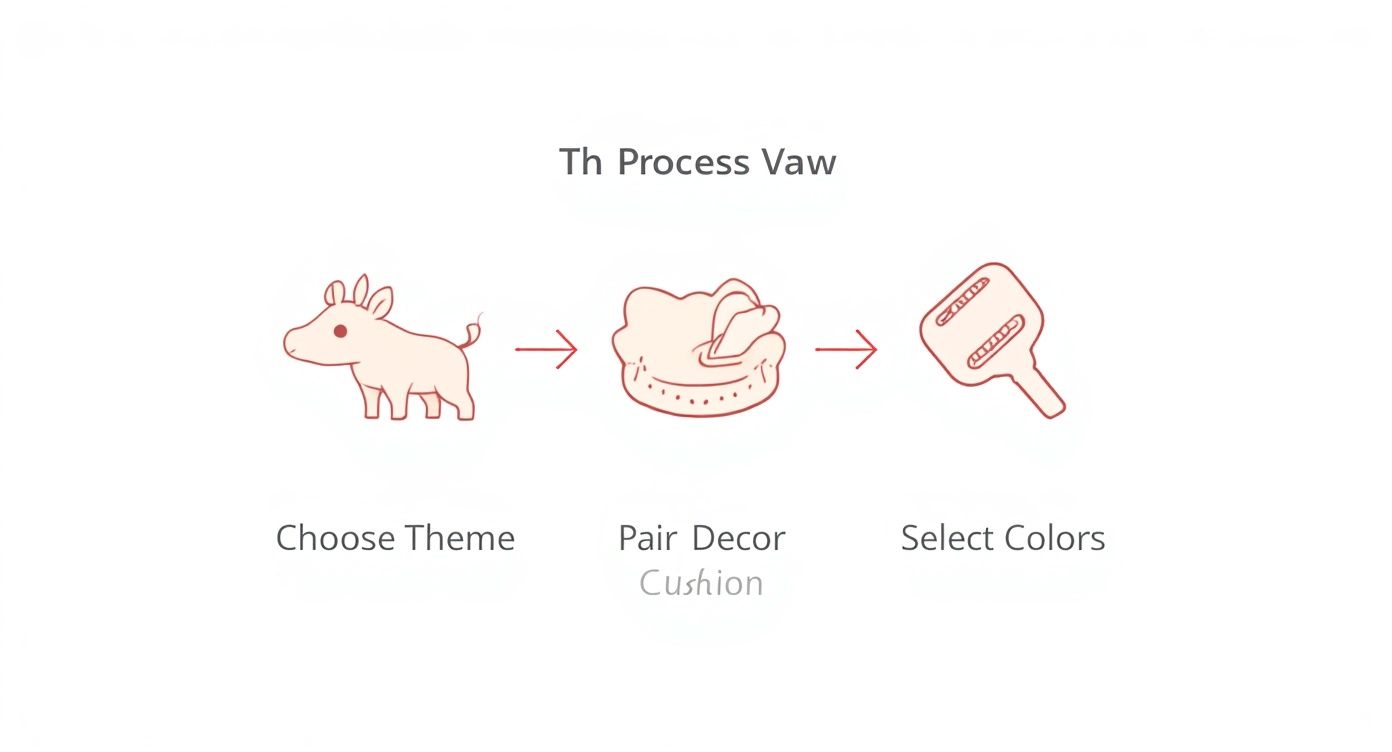
As the diagram shows, when you nail down your theme first, pulling together the right decor and complementary colours for a coordinated look becomes so much easier.
The Application Process: Step by Step
With your layout sorted, you’re ready for the main event. For bigger decals, the 'hinge method' is a total game-changer. It stops the sticker from folding over on itself or trapping those annoying air bubbles.
- Secure the Sticker: While the sticker is still on its backing paper, use painter's tape to fix it to the wall along the top edge. This creates a hinge.
- Peel the Backing: Lift the sticker up like you're opening a flap and start peeling the backing paper away from the top, moving downwards. Just expose the top third of the sticky side for now.
- Smooth It On: Starting from the middle and working your way out to the edges, use a squeegee (or a credit card wrapped in a soft cloth) to smooth the exposed part of the sticker onto the wall. This pushes out any air bubbles as you go.
- Continue Downwards: With one hand, keep peeling the backing paper down slowly. With your other hand, carry on smoothing the sticker onto the wall. Working in small, manageable sections gives you the most control.
- Final Smoothing: Once the whole sticker is on the wall, give the entire surface one last firm go-over with your squeegee. Pay extra attention to the edges to make sure they're properly sealed down.
For smaller, individual stickers, it’s much more straightforward. Just carefully peel them off the sheet and press them onto the wall, smoothing from the centre outwards with your fingers or a soft cloth. If you're designing a feature wall with lots of different bits, like a personalised name or a favourite quote, you can find more great advice in our guide to applying stick-on wall quotes.
Follow these steps, and you’ll get a perfect, bubble-free finish for your baby nursery wall stickers every single time.
Damage-Free Decorating for Renters
Just because you're renting doesn't mean you have to put your dream nursery on hold. A common worry for any tenant is whether their decorating choices will end up costing them their security deposit. This is where high-quality baby nursery wall stickers really shine—they let you create a gorgeous, personal space for your little one without leaving a single mark when you move out.
The secret is in the adhesive. We’re not talking about those super-permanent decals from years ago. Modern removable stickers use a clever, low-tack glue that bonds gently with the wall. Think of it like a Post-it note for your decor; it sticks around for as long as you want but peels away cleanly when it’s time for a change, leaving your paintwork untouched.
What to Look for in Renter-Friendly Stickers
To make sure your decorating project ends with your full deposit back in your pocket, you need to choose the right product. Not all wall stickers are created equal, and some have far more aggressive adhesives than others. When you're browsing, make sure to look for products specifically marketed as renter-friendly.
Here’s what to keep an eye out for:
- "Removable": This is the most important word you'll see. It’s your guarantee that the sticker is designed to come off without a fight or leaving behind a sticky mess.
- "Peel and Stick": This usually signals a user-friendly design meant for easy application and, just as importantly, clean removal.
- "Residue-Free": The best brands will often promise that their adhesive won't leave a tacky film on your walls, which can be a real magnet for dust and fluff.
- Material Type: Fabric-based stickers are often a renter's best friend. They tend to be more forgiving and easier to remove than vinyl because they are stronger and less likely to tear during the process.
Focusing on these features will give you the confidence to decorate freely. If you'd like to dive deeper, our complete guide to removable wall stickers in the UK has even more tips.
The Safe Removal Process Step by Step
When your lease is up or your little one has outgrown the design, taking the stickers down is a breeze. All you need is a bit of patience and a gentle touch to get your walls looking good as new. The key is not to rush – pulling too fast or aggressively is the main cause of any potential damage.
Just follow this simple, paint-safe method:
- Warm It Up: This is a little trick the pros use. Grab a hairdryer, set it to low heat, and hold it about 15-20 centimetres from the sticker's edge. Wave it back and forth for around 30 seconds to gently soften the adhesive.
- Lift a Corner: Once the sticker is slightly warm to the touch, use your fingernail or a plastic scraper (a credit card works too!) to carefully lift a corner.
- Peel Slowly and Gently: Here's the crucial part: pull the sticker back on itself at a 180-degree angle, keeping it almost flat against the wall as you peel. Don't pull it straight out towards you, as that puts much more strain on the paint.
- Apply Heat as You Go: If you’re tackling a larger sticker, you might need to apply a little more heat with the hairdryer as you peel it away bit by bit.
It’s always a good idea to do a patch test before you cover a whole wall. Stick a small, out-of-the-way piece of the sticker in a hidden spot—behind a door or inside a wardrobe—and leave it for 24 hours. When you peel it off, you'll see for yourself how cleanly it removes.
This quick test offers complete peace of mind, confirming your chosen baby nursery wall stickers are the perfect, damage-free fit for both your walls and your rental agreement.
Right, you’ve brought your gorgeous design to life on the nursery wall. Now, how do you keep it looking that way? The good news is, a little bit of care goes a long way in keeping your baby nursery wall stickers looking bright and beautiful for years. It’s incredibly easy, but knowing the right way to look after them means your designs will stay as perfect as the day you put them up.
Think of it like caring for a favourite jumper—you wouldn't just throw it in a hot wash and hope for the best. A gentle touch is all that’s needed to stop colours from fading, edges from curling, or the surface from getting scuffed.
Simple Cleaning for Lasting Looks
Life with a little one means spills and smudges are inevitable. Whether you're dealing with a splash of milk or a few dusty fingerprints, cleaning your wall stickers is thankfully no trouble at all. Just remember one thing: be gentle. Harsh chemicals and abrasive scrubbers are their worst enemy.
Most of the time, a quick wipe with a soft, dry, lint-free cloth is all you need to get rid of dust. For anything a bit more stubborn, just follow these simple steps:
- Take a soft cloth or sponge and dampen it with a little water. Make sure to wring it out properly – you want it damp, not dripping.
- Gently wipe the mark, using light pressure. Whatever you do, don't scrub. That's the fastest way to lift the edges or scratch the design.
- Let it air dry. Simple as that.
A quick word of warning: steer clear of all-purpose cleaners, chemical sprays, or anything abrasive like a scouring pad. They often contain solvents that can react with the vinyl and ink, causing colours to fade or the sticker to break down.
Troubleshooting Common Issues
Even with the most careful application, you might spot a corner or edge starting to lift over time. This is often down to changes in temperature or humidity in the room. Don't panic – it's usually a very easy fix.
Grab a hairdryer and put it on its lowest heat setting. Gently warm the peeling area for about 10-15 seconds, holding it a few inches away. This softens the adhesive just enough to make it sticky again. Then, just firmly press the edge back onto the wall with your fingers or a soft cloth. Hold it for a minute or so to make sure it gets a good grip.
Storing Reusable Wall Stickers Correctly
If you opted for reusable fabric stickers and fancy a change or need to store them for a move, how you store them makes all the difference. The secret? That waxy backing paper they originally came on.
- Don't Throw Away the Backing Paper: Always hang on to the sheet your stickers arrived on. It’s specially designed to protect the adhesive without sticking to it for good.
- Lay Them Flat: Carefully peel each sticker off the wall and smooth it back onto its original backing sheet.
- Store in a Cool, Dry Place: Roll the sheet up and pop it somewhere out of direct sunlight and away from extreme heat or cold. Inside a wardrobe or under a bed is perfect.
Following these simple tips will ensure your nursery wall stickers remain a cherished feature of the room for as long as you love them.
Common Questions About Nursery Wall Stickers
Diving into nursery decor is exciting, but it often brings up a few questions, especially when you’re aiming for perfection. When it comes to baby nursery wall stickers, I’ve noticed the same queries pop up time and time again from parents. Getting the right answers from the start can make all the difference between a decorating triumph and a frustrating mishap.
I’ve put together the most common questions I hear, along with some straightforward, practical advice. From getting the timing right on a freshly painted wall to figuring out what works on different surfaces, these tips will help you sidestep the usual pitfalls and create a nursery you’ll love.
When Is the Best Time to Apply Stickers in a Newly Painted Nursery?
This is a big one, and it’s a detail many people accidentally overlook. You absolutely must let fresh paint fully cure before you even think about applying a wall sticker. A wall might feel dry to the touch in a day or so, but curing is a much longer chemical process where the paint truly hardens and bonds to the surface.
Depending on the paint and the humidity in the room, this can take anywhere from two to four weeks. If you jump the gun and apply stickers too soon, you can trap solvents underneath. This not only stops the paint from curing properly but can also cause your beautiful new stickers to bubble, peel, or worse, pull the paint right off the wall when it’s time for a change. Always have a quick look at the paint tin for the manufacturer's recommended curing time.
Can I Use Baby Nursery Wall Stickers on Textured Walls?
This is a tricky one. Most wall stickers are made for smooth, flat surfaces where the adhesive can get a solid, even grip. When you try to put them on textured walls—like those with a popular orange peel or knockdown finish—the uneven surface creates tiny air pockets. This prevents the sticker from bonding securely, which often leads to peeling edges and trapped bubbles.
Some companies do make decals with a more aggressive adhesive specifically for textured walls, but you’ll need to read the product description very carefully.
My best advice for any surface, but especially textured ones, is to do a patch test first. Stick a small, sacrificial piece of the decal in a discreet spot. It’s a quick and easy way to see how well it will adhere before you commit to putting up the entire design.
Are All Removable Wall Stickers Also Reusable?
It’s easy to assume they are, but "removable" and "reusable" actually mean two different things. It’s a crucial distinction to understand before you click "buy," as it will determine whether the product fits your long-term plans.
- Removable stickers are designed to come off the wall cleanly, without damaging the paint or leaving that awful sticky gunk behind. The catch is that once they’re off, the adhesive often loses its tackiness, meaning they’re a one-time-use deal.
- Reusable stickers (you’ll often see them called repositionable) are the real stars if you want flexibility. They’re made with a special, less aggressive adhesive that lets you peel them off and stick them back on multiple times. This is perfect if you're renting, think you might move rooms, or just love to switch up the decor.
So, if you want the freedom to move your design around, make sure you’re looking for stickers that are explicitly labelled as reusable or repositionable.
Ready to create the nursery of your dreams? Explore the beautiful and safe collection of baby nursery wall stickers at Quote My Wall and find the perfect design for your little one today! https://www.quotemywall.co.uk