
Your Guide to Using 3D Decals for Walls
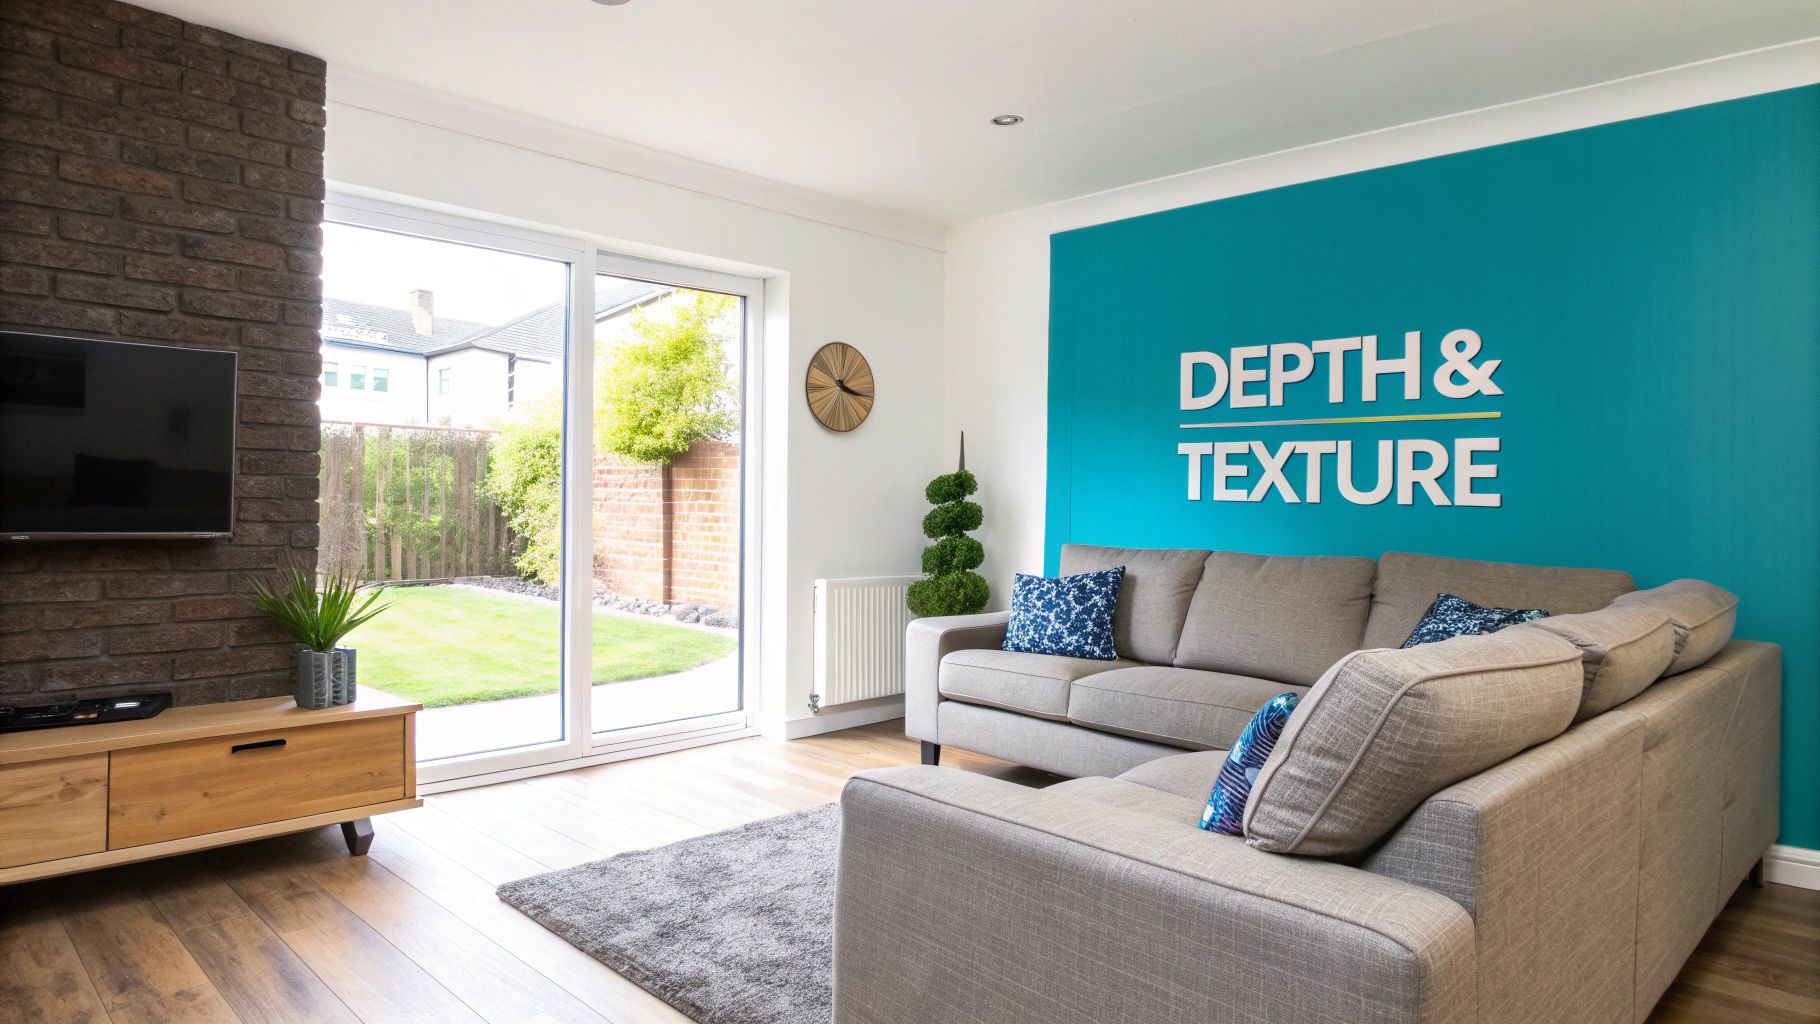
Forget everything you think you know about wall stickers. 3D decals for walls are a whole different ball game. They offer a brilliant way to bring depth, texture, and a serious dose of personality into any room, but without the faff and commitment of paint or wallpaper. Unlike your standard flat vinyl, these designs literally pop off the wall, creating a layered, tangible effect that can make a space feel instantly more dynamic and thoughtfully designed.
Why 3D Decals Are Popping Up in UK Homes
There's a real shift happening in how we decorate our homes here in the UK. We're moving away from permanent, 'forever' choices and looking for clever, high-impact solutions that can change as our tastes do. This is exactly where 3D wall decals come into their own, beautifully bridging the gap between a simple framed print and a full-blown feature wall.
What makes them so appealing is their ability to physically stand out. They cast subtle shadows and play with the light in a way that flat stickers just can't match. Picture it: sharp geometric shapes that seem to float off a minimalist living room wall, or a cluster of delicate, layered butterflies fluttering up the wall in a child's bedroom. It’s that extra dimension that makes all the difference.
A Fresh Take on Making a Space Your Own
These days, it’s all about personalisation, especially for the millions of us in rented properties. 3D decals are the perfect answer. They let you create a powerful statement piece without reaching for a single nail or paintbrush. It's decorating without the commitment, giving you the freedom to switch things up whenever the mood strikes.
So, why are they becoming so popular?
- They Create Instant Depth: A plain, boring wall can become a multi-dimensional feature that draws you in.
- They Showcase Your Style: Whether your vibe is sleek and metallic or soft and natural, there’s a design to match.
- They Tap into Key Trends: Think biophilic design with 3D leaves, or Scandi-cool with minimalist geometric forms.
- They're Perfect for Renters: Most are a doddle to remove, leaving walls mark-free and your deposit safe.
The real magic of 3D decals is how they interact with the light in your room. A metallic design might glint in the morning sun, while a thicker acrylic piece will cast soft shadows as evening draws in. It's like having a living piece of art that subtly changes throughout the day.
This hunger for unique, modern decor is a nationwide trend. In fact, the demand for personalised homewares is booming, with the UK wall decor market projected to hit around USD 24.7 billion by 2025. It's clear that clever solutions like 3D decals are becoming a go-to for contemporary home styling. You can read more about the UK's evolving home decor market trends and see just how much our decorating habits are changing.
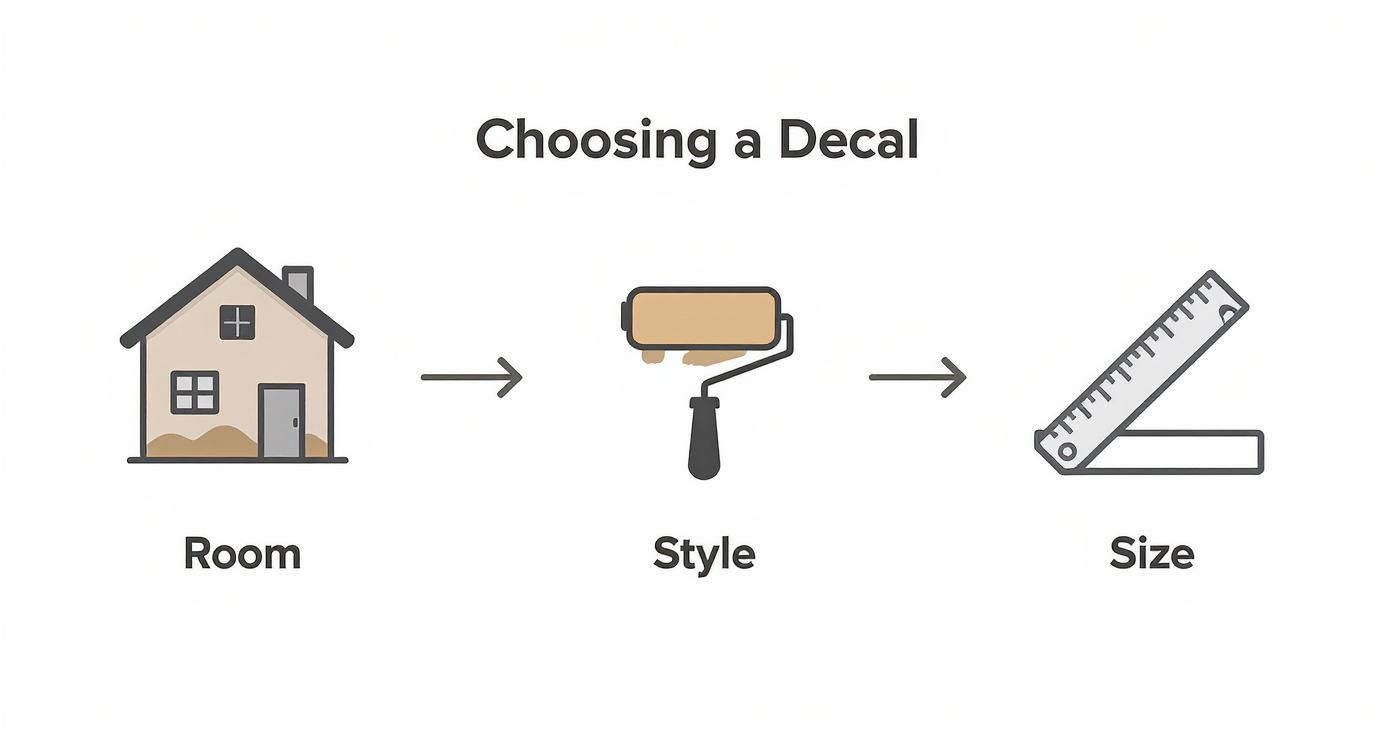
How to Choose the Right 3D Wall Decal
Picking out the perfect 3D decals for walls goes deeper than just falling for a cool design. It's really about finding the right balance between the material, the finish, and the size of the decal for the specific room you have in mind. Get it right, and it’ll look like a custom piece of art. Get it wrong, and it can just feel a bit... off.
Let's start with the building blocks: the material. They’re not all the same, and what a decal is made of will tell you where it’s going to look its best.
Finding the Right Material and Finish
The material and finish work hand-in-hand to create the final look. One dictates durability and texture, while the other controls how the decal plays with the light in your room.
For most people, vinyl is the go-to. It's tough, often waterproof, and you can just wipe it clean, which makes it a brilliant choice for busy hallways, kitchens, or even a bathroom where steam is a factor.
If you’re after a softer, more high-end feel, look for fabric decals. They have a lovely woven texture that brings a gentle, calming vibe to a space – perfect for a nursery or bedroom. They just aren't the best pick for rooms that get a lot of moisture.
Then you have acrylic. If you want a serious 3D effect, this is it. These are hard, shiny pieces that physically stand off the wall, casting interesting shadows. They make fantastic statement pieces in a living room or home office.
To make things a bit clearer, here’s a quick comparison to help you decide.
Comparing 3D Decal Materials and Finishes
This table is a quick-reference guide to help you choose the best decal material and finish based on your room, the look you're going for, and how much wear and tear it needs to handle.
| Material/Finish | Best For | Durability | Key Feature |
|---|---|---|---|
| Vinyl (Matte) | Brightly lit rooms, living rooms, bedrooms | High | Reduces glare for a painted-on, subtle look |
| Vinyl (Gloss) | Kids' rooms, playrooms, darker spaces | High | Reflects light, making colours pop |
| Fabric | Nurseries, bedrooms, low-traffic areas | Medium | Soft, textured, premium feel |
| Acrylic | Feature walls, offices, modern living areas | Very High | Rigid, high-gloss, creates a true 3D effect |
| Metallic | Dining rooms, hallways, glamourous spaces | High | Catches the light with a dynamic sparkle |
Ultimately, the finish gives the decal its personality. A matte finish is understated and sophisticated, while a gloss finish is energetic and bold. Metallics? They're pure elegance. Choose the one that fits the mood you want to create.
Getting the Scale and Size Just Right
This is where so many people go wrong. The size of your decal is what makes it look like a deliberate design choice instead of a random sticker you just slapped on the wall. A decal that’s too small for a big wall will just get lost and feel unimportant.
For a large, blank canvas – think the wall above your sofa or bed – go big. A single, large-scale decal can command attention and act as a focal point, just like a massive piece of art. It could be a sprawling geometric pattern or an oversized botanical design that ties the whole room together.
On the other hand, you can create a completely different effect with a group of smaller, related decals. Think of a cloud of 3D butterflies fluttering up a wall next to the stairs, or a curated collection of small geometric shapes arranged in a dynamic pattern in your office. This approach gives you a lot more room for creativity and personalisation.
My Pro Tip: Before you click "buy," grab some painter's tape and mark out the decal's dimensions on your wall. It’s a super simple trick that takes two minutes but gives you a real-world sense of the scale and helps you be sure you’re choosing a size that will have the perfect impact.
If you’re renting or just like to change things up often, it’s worth exploring all your options. Our guide on removable wall stickers in the UK is packed with ideas for making a big statement without any long-term commitment.
Applying Your Decals for a Flawless Finish
This is where the magic happens. A successful application isn’t just a case of peeling and sticking; it’s the small details beforehand that guarantee your 3D decals for walls look like they were professionally installed. Getting these right will give you a finish that’s free from bubbles, perfectly straight, and built to last.
The single most important step is preparing the surface. Any dust, grease, or grime will stop the adhesive from bonding properly, which often leads to peeling edges down the line. A simple wipe-down with a damp cloth and a mild, non-oily cleaner is all it takes. Just make sure the wall is completely dry before you even think about unwrapping your decal.
Essential Tools for a Professional Look
You don’t need a massive toolbox, just a few key items that make all the difference. Gathering these beforehand will save you a lot of hassle and make the whole process smoother.
- A Squeegee or Credit Card: This is your best friend for smoothing out the decal and pushing out any trapped air bubbles.
- A Spirit Level: Absolutely crucial for larger designs. Nothing ruins the effect of a beautiful decal faster than realising it’s wonky after you’ve stuck it down.
- Masking Tape: Perfect for temporarily holding your decal in place while you get the alignment just right.
This quick visual guide shows how to approach selecting a decal, which is the first step before you even get to application.
A Step-by-Step Guide to Perfect Placement
Right, let’s get this on the wall. Forget rushing – a bit of care here pays off big time.
First, decide on the final position. Hold the decal against the wall (with the backing paper still on) and use your spirit level to get it perfectly straight. Once you’re happy, secure the top edge with a few pieces of masking tape. This creates a hinge, keeping everything aligned as you work.
Next, lift the decal up like it's on a hinge and carefully peel the backing paper away from the top edge downwards. Peel about 10-15 cm to start, and then press that exposed sticky section firmly to the wall with your squeegee.
Now, work your way down slowly. Continue peeling the backing paper off with one hand while smoothing the decal onto the wall with the other, using your squeegee. Always work from the centre outwards to push any air bubbles towards the edges. This systematic approach is the secret to a bubble-free finish. You can see a similar method used for wall stick on quotes. It’s especially handy for text-based designs where even a slight misalignment is obvious.
Tackling Textured Walls
One of the most common worries is whether decals will stick to walls that aren’t perfectly smooth. While heavily textured surfaces can be a real challenge, lightly textured walls (like those with an "orange peel" finish) are often manageable. The key here is patience and pressure.
After applying the decal, use your squeegee to methodically press the vinyl into the slight grooves of the texture. You might need to go over it a few times to ensure a solid bond. For a little extra help, a quick blast with a hairdryer on a low setting can soften the vinyl, making it more pliable and helping it conform to the wall's surface. Just be careful not to overheat it.
A common mistake is rushing the final step. Once the decal is on the wall, take your time to firmly press down every single edge and detail. This final press ensures all parts of the adhesive have made contact with the wall, drastically reducing the chances of any edges lifting later on.
To go even deeper, you can explore this comprehensive guide on architectural vinyl film installation to master the process, as many of the principles apply to high-quality wall decals.
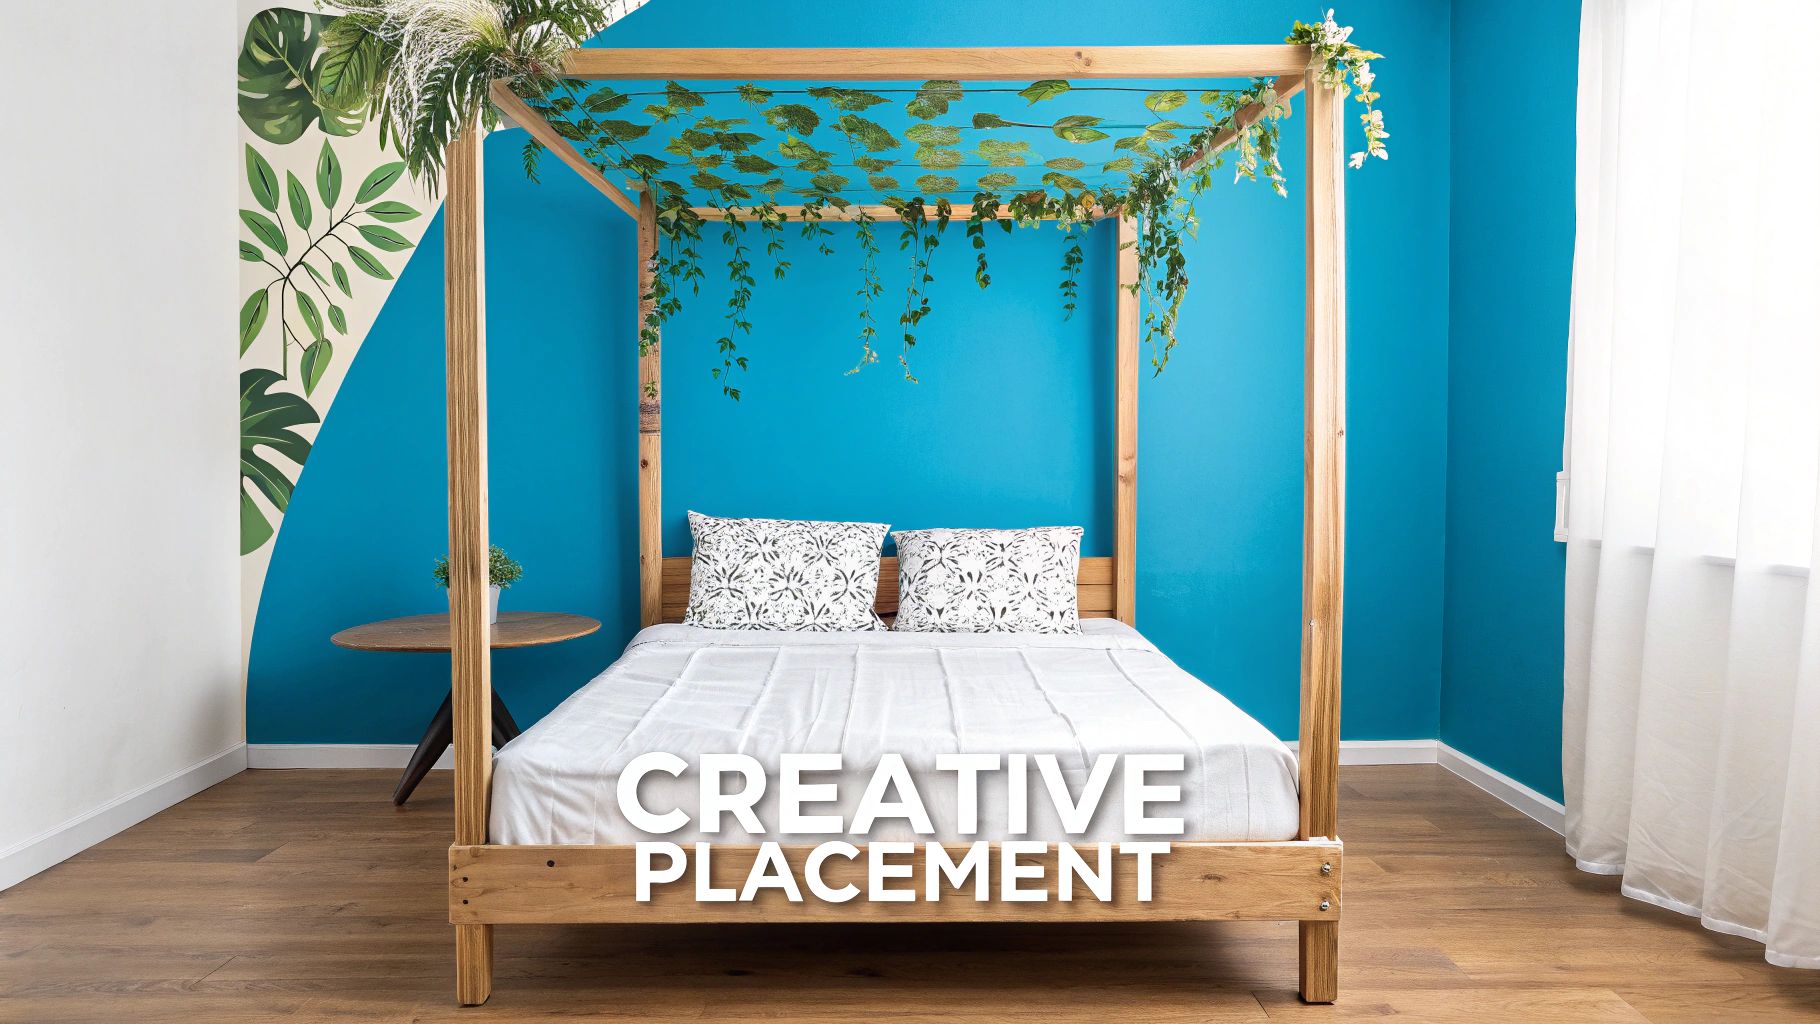
Creative Placement Ideas for Any Room
The real magic of 3D wall decals is just how versatile they are. Sure, popping one above the sofa or bed is a classic move, but if you think a little differently, you can turn a simple sticker into a show-stopping feature that completely transforms a room. Let's explore some clever ways to use these decals all around your home.
In the living room, why not create a proper focal point behind your main sofa? A large-scale geometric pattern or a sprawling abstract metallic design can really anchor the space, giving it a polished, designer feel. This works wonders in minimalist or contemporary homes where the decal can stand out as the main piece of art.
For a more dynamic touch, think about how the decal can play off your furniture. Picture a flock of 3D birds appearing to fly out from behind a bookshelf, or delicate floral vines winding their way up the wall from a side table. It’s a brilliant way to add a sense of movement and story to your decor.
Beyond the Main Feature Wall
Don't feel tied to just one big wall. Sometimes, the most unusual placements have the biggest impact because they catch you by surprise. This is where you can really let your personality shine.
One of my favourite tricks is to wrap a decal around a corner. A design that flows, like a city skyline or a botanical pattern, starting on one wall and continuing onto the next, creates an immersive and unexpected effect. It blurs the lines of the room and pulls you in.
Another spot people often forget is the ceiling.
Putting a decal on the ceiling is a fantastic way to add interest without cluttering your walls. A subtle pattern, a smattering of stars in a bedroom, or a geometric design over the dining table draws the eye upward, making the room feel taller and more open.
Small Details, Big Impact
You don't always need a huge decal to make a statement. Sometimes, small, carefully placed 3D wall decals can bring charm to those overlooked nooks and crannies.
- In the Kitchen: Think about applying small, themed decals like herbs or coffee cups onto a splashback or even a bare cabinet door. It’s a low-commitment way to inject some life into a functional space without splurging on new tiles.
- In the Hallway: You could create a 'breadcrumb trail' of small, related decals leading up the stairs or along a corridor. It adds a bit of fun and discovery to an area you usually just pass through.
- In the Bedroom: Creating a serene botanical canopy over the headboard can turn your bedroom into a peaceful sanctuary. If you're thinking about how 3D decals can elevate your personal space, you might find more inspiration in these master bedroom decorating ideas for a full room makeover.
At the end of the day, the best placement is whatever feels right to you. Don’t be afraid to experiment with different spots and combinations. The beauty of most decals is that they're easy to remove, so you have the freedom to play around until you find that perfect spot that makes your room come alive.
Maintaining and Removing Your Wall Decals
One of the biggest draws of 3D wall decals is that they offer serious visual punch without a serious commitment. This is a huge plus if you're renting or just someone who loves to switch up their decor on a whim. Knowing how to look after them—and eventually take them down—is all part of the process.
Thankfully, most decals are built to last but still appreciate a little TLC. A quick wipe with a soft, damp cloth is all it takes to get dust off vinyl or acrylic designs. Just be sure to steer clear of harsh chemical sprays, as they can ruin the finish and even start to break down the adhesive.
Quick Fixes for Common Issues
Even with the best application, you might see a corner or edge start to lift over time. This is pretty common in rooms where the temperature fluctuates, but it's no cause for alarm.
The fix is simple. Just use your thumb or a squeegee to press the lifting bit firmly back against the wall. Hold it there for 30-60 seconds; the warmth and pressure are usually enough to get the adhesive to stick again. If you have a delicate fabric decal, it's best to use a dry microfibre cloth to dust it gently instead.
A word of advice from experience: don't scrub your decals. You're only trying to get surface dust off. A light touch is all it takes to keep those colours looking sharp and the finish perfect.
How to Remove Decals Without Damaging Walls
When the time comes for a change, you want that decal to come off cleanly, leaving your paintwork completely untouched. The secret? A bit of gentle heat.
Grab a hairdryer and set it to a low or medium heat. Warm up one corner of the decal for about 15-20 seconds, keeping the hairdryer a few inches from the wall. You'll feel the vinyl soften, which means the adhesive is loosening its grip.
Now, you can get your fingernail under the warm corner and start to peel it back. Don't just rip it off! Pull it back on itself at a sharp, flat angle, going slow and steady. If you hit a stubborn spot, just give it another little blast of heat. Patience is key to preventing any paint from coming away with the sticker.
For a more detailed walkthrough, our guide on how to remove a wall sticker breaks down every single step.
Got Questions About 3D Wall Decals? Let's Get Them Answered
Even after you've got a plan, a few lingering questions can pop up when you're about to start decorating with 3d decals for walls. That’s completely normal. Let’s tackle some of the most common queries I hear, so you can feel totally confident before you begin.
One of the biggest worries, especially here in the UK with our mix of modern and period homes, is whether these decals will even work on less-than-perfect walls.
Will They Stick to My Textured Walls?
This is a classic "it depends" situation, but I can break it down for you. It really comes down to the texture's depth and the decal's quality. If you're dealing with a light texture, like the common "orange peel" finish, a decent quality vinyl decal should stick just fine. The trick is to be patient during application, using a squeegee to apply firm, even pressure. You need to work that vinyl into every tiny groove.
However, if you're up against something more dramatic, like old-school Artex, a standard vinyl sticker just won't cut it. It can't make full contact, which means you'll get air bubbles and it'll start peeling almost immediately.
- Light Texture: You're usually safe with high-quality vinyl. Just take your time.
- Heavy Texture: This is a tough one. Your best bet is to look at rigid acrylic 3D pieces that use strong adhesive pads instead of a full sticky back. They bridge the gaps instead of trying to conform to them.
- My Top Tip: Always, always do a spot test. Stick a small, out-of-the-way piece of the decal on the wall and leave it for 24 hours. It’s the only way to know for sure how it will behave.
Are 3D Wall Decals Safe for a Kid's Room?
Absolutely, safety first. The great news is that the vast majority of wall decals sold in the UK are made from non-toxic materials. To be extra sure, look for labels that specifically mention things like phthalate-free, eco-friendly, or child-safe.
The real thing to watch out for is the peeling hazard. We all know how curious little fingers can be, and small, peeled-off pieces could become a choking risk.
My rule of thumb for nurseries and rooms for toddlers is simple: place the decals out of reach. Positioning them higher up the wall, or behind a piece of furniture like the cot or changing table, gives you that extra peace of mind.
How Can I Stop the Edges From Lifting?
It’s so disheartening to see a corner start peeling away, but this is almost always a preventable issue. The number one culprit? A wall that wasn't properly prepped. Even a fine layer of dust or a bit of grease can stop the adhesive from getting a proper grip.
Before you even think about applying the decal, make sure the wall is spotless and completely dry. As you apply it, give the edges some extra love. Go over them a few times with your squeegee, really pressing down to create a solid seal. It also helps to avoid placing 3d decals for walls in spots that get a lot of direct steam or humidity, like right over a shower, as that will weaken the adhesive over time.
Ready to bring some depth and personality to your walls? Check out the brilliant collection of renter-friendly designs over at Quote My Wall and discover the perfect 3D decal for your home at https://www.quotemywall.co.uk.