
Your Guide to the Perfect World Map Wall Decal Installation
A world map wall decal is more than just a sticker; it's a huge, self-adhesive piece of art designed to turn a blank wall into a statement. Think of it as a modern, budget-friendly alternative to traditional art or messy wallpaper. It gives you a massive visual impact without the massive commitment.
Why a World Map Wall Decal Is Your Next Decor Upgrade
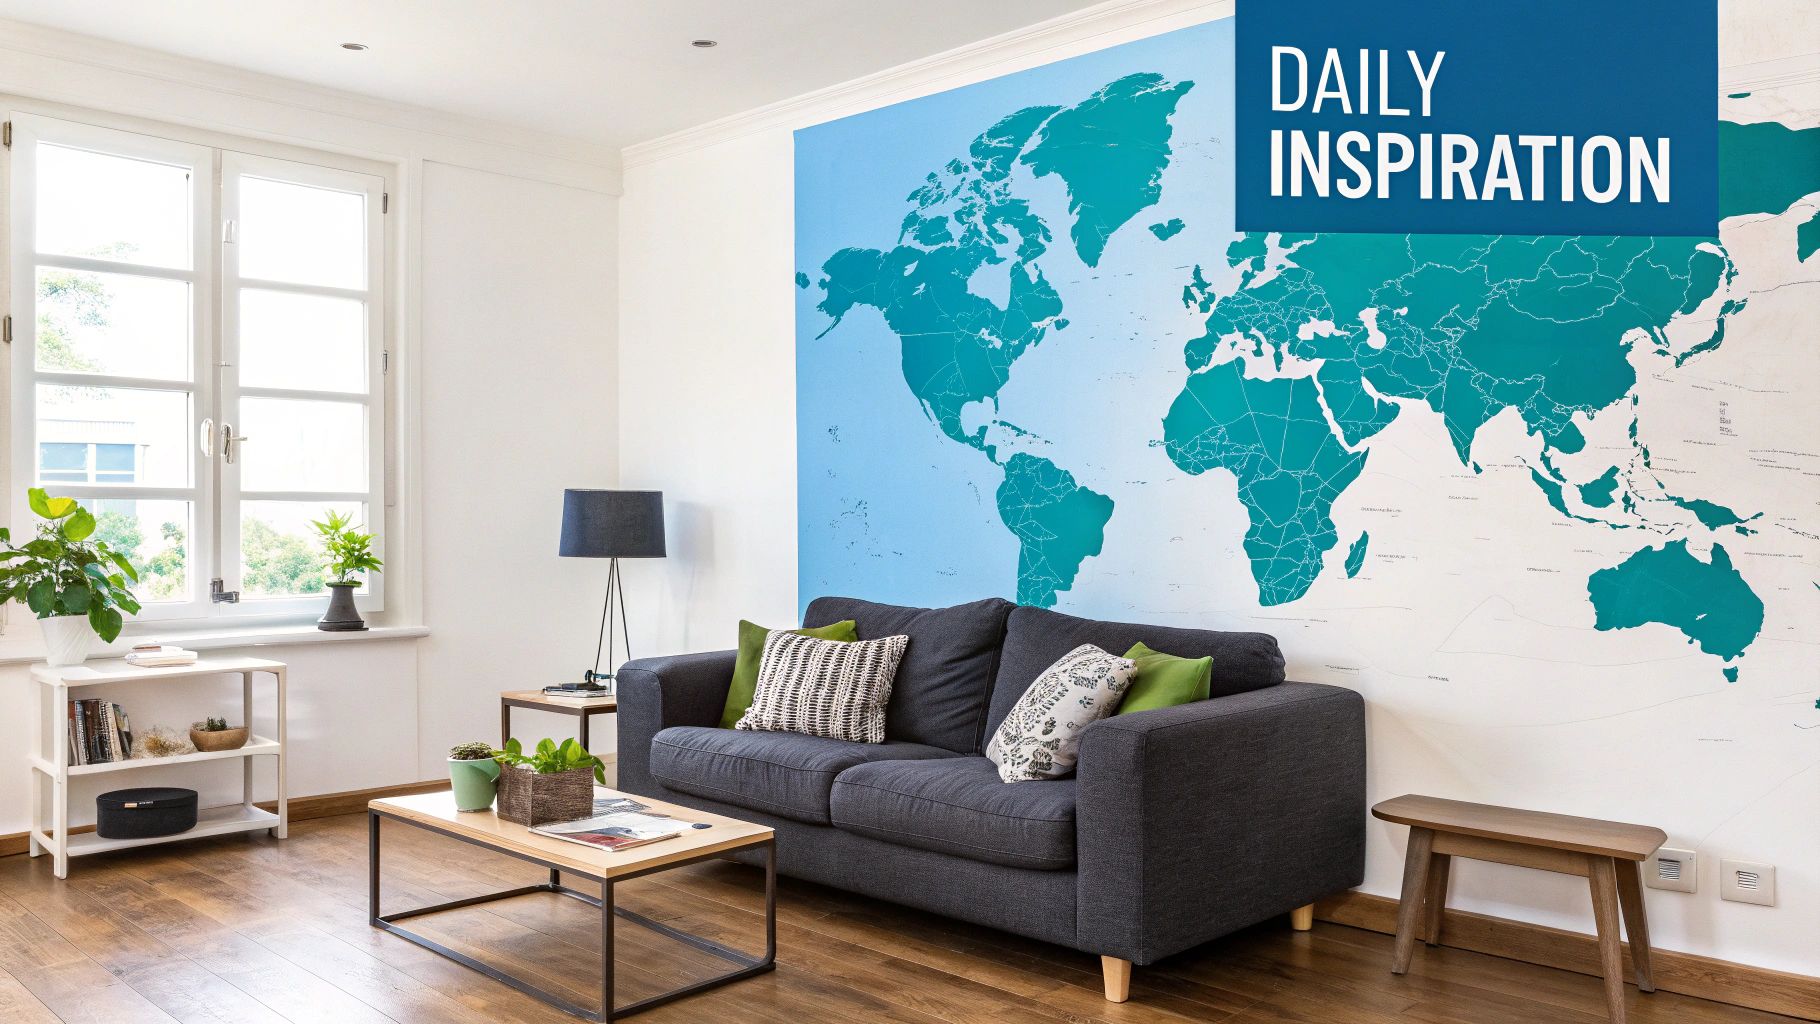
Far from being just another bit of decoration, a world map decal says something about you. It sparks conversations, offers a daily dose of inspiration, and is a fantastic way to truly personalise your home. It's an easy win for refreshing a living room, bringing some energy to a home office, or creating a fun, educational feature in a child's room.
This guide will walk you through everything you need to know. We'll cover choosing the right material, getting the size spot on, and achieving a flawless application. By the end, you'll have the confidence to pick and install the perfect map for your space.
A Growing Trend in Home Decor
You've probably noticed wall decals popping up more and more, and for good reason. Across the UK, homeowners and renters are loving them because they deliver a custom look without the permanence—or the price tag—of a full redecoration.
The numbers back this up. The UK wall art market, which includes decals, was worth a staggering USD 3,597.2 million in 2022. It's set to climb to over USD 5,500 million by 2030, which shows just how much we've embraced this simple but effective decor choice.
More Than Just a Map
A world map on your wall does more than just look good; it’s a powerful way to ignite that feeling of wanderlust. It becomes a living document of your life's adventures, a visual reminder of where you've been and where you dream of going next.
I've seen people use their maps to:
- Pin the locations they've visited.
- Plot out their next big holiday.
- Get their kids excited about geography in a way a book never could.
It might just be the thing that pushes you to explore inspiring hiking destinations around the globe and start planning that adventure you've always talked about. A map on your wall isn't static—it's an invitation to dream a little bigger every single day.
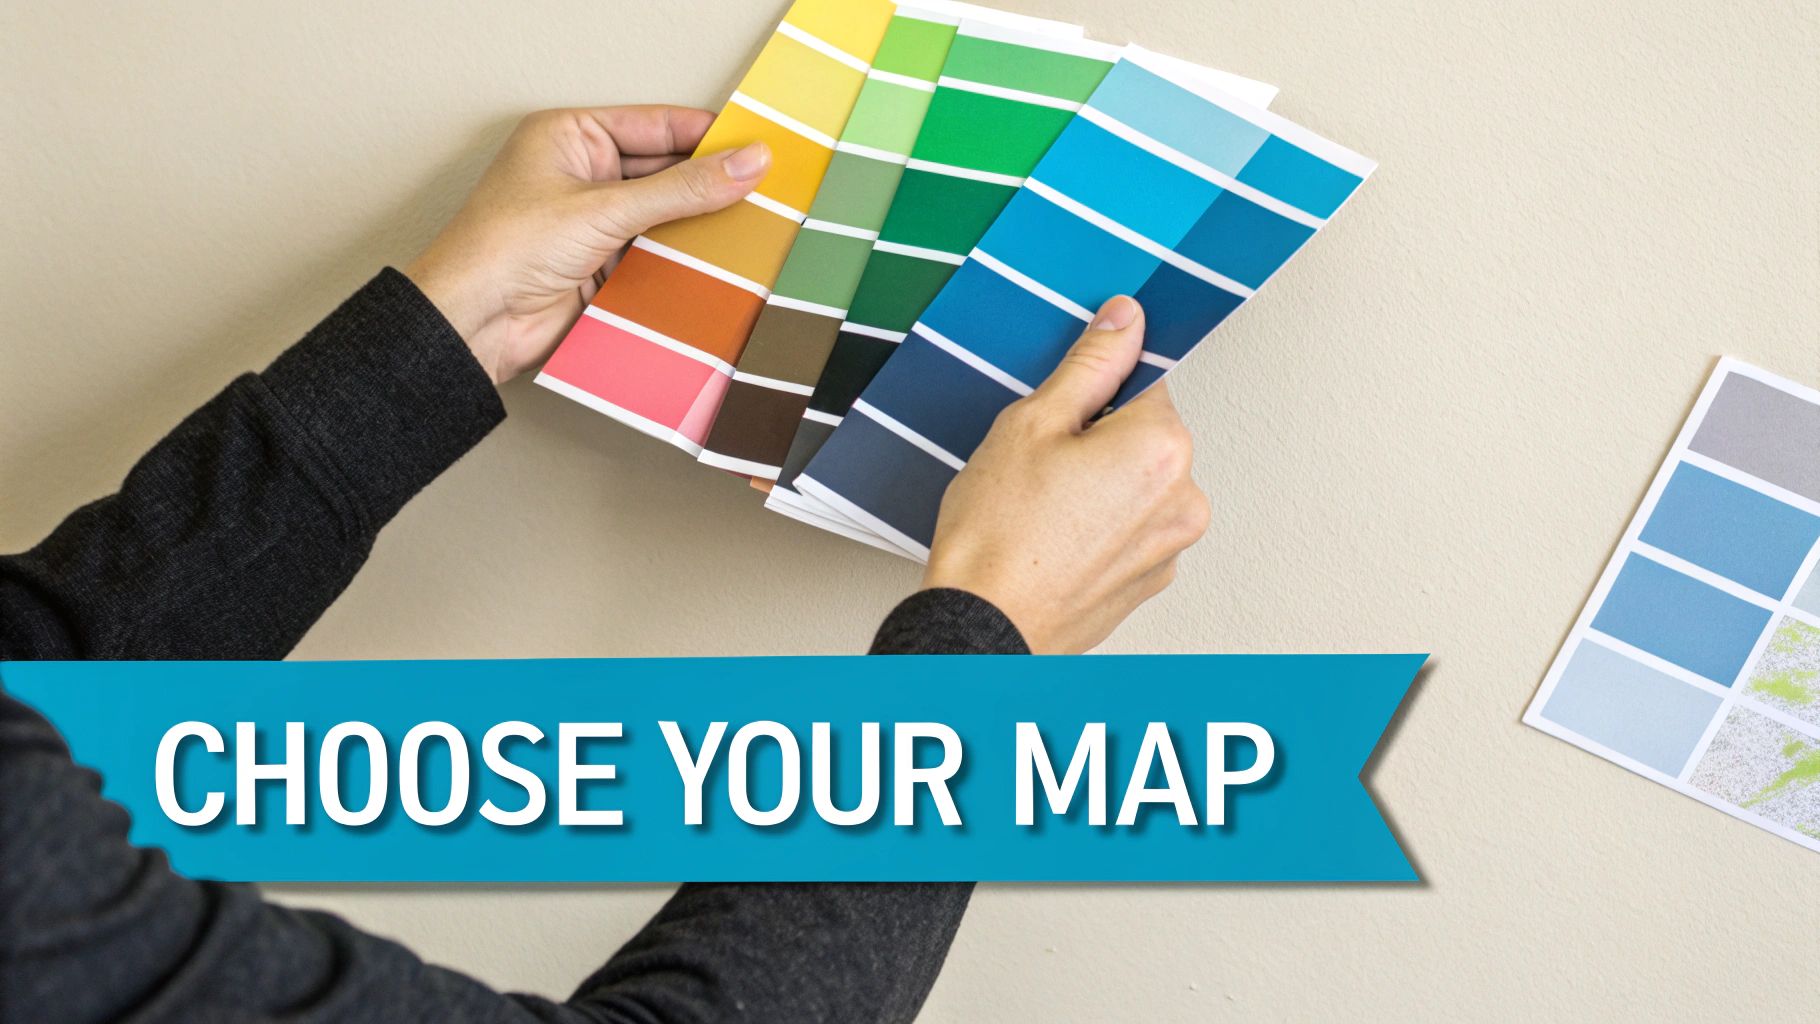
How To Choose the Right World Map Decal
Choosing the perfect world map wall decal is about more than just finding a design you love. It’s a balancing act between the right material, the best adhesive for your walls, and a style that truly fits your home. It can feel a bit overwhelming with all the options out there, so let's break it down to make sure you find a map that not only looks fantastic but lasts.
First things first, let's talk about the material your decal is made from. This decision affects the final look, the feel, and even how easy it is to put up. Your main choices will be between standard vinyl and a more premium fabric.
Vinyl Versus Fabric: What's the Difference?
Most wall decals you'll come across are made from standard vinyl. It’s a popular choice for good reason—it’s tough, simple to clean, and gives you a sharp, crisp finish that looks almost painted on. You’ll usually see it offered in a matte finish, which is great for cutting down on glare, or a gloss finish if you want the colours to really pop with a bit of shine.
Fabric decals, on the other hand, are the premium alternative. They’re typically made from a finely woven polyester material, which gives them a subtle texture and a much more luxurious feel. The real win with fabric is its forgiving nature; it’s often repositionable, which is a lifesaver if you’re worried about getting the placement spot-on the first time.
My Advice: If you've got smooth walls and want a sleek, modern look that’s also budget-friendly, vinyl is an excellent choice. But if your walls have a slight texture, or if you want the peace of mind that comes with being able to reposition it, a fabric decal is definitely worth the investment.
To make it even clearer, here’s a quick rundown of how they stack up against each other.
Decal Material and Finish Comparison
| Feature | Vinyl Decal | Fabric Decal |
|---|---|---|
| Look & Feel | Smooth, paint-like finish. Available in matte or gloss. | Soft, woven texture with a premium, low-sheen look. |
| Application | Requires careful application; generally a one-shot deal. | More forgiving. Can often be repositioned if you make a mistake. |
| Durability | Very durable and easy to wipe clean. | Tear-resistant and robust. |
| Best For | Smooth, flat interior walls. Budget-conscious projects. | Slightly textured walls, children's rooms, renters. |
| Removal | Standard removable vinyl comes off cleanly if removed carefully. | Typically easier to remove and often reusable. |
Ultimately, both are great options, but one might just be a better fit for your specific wall and your confidence level during installation!
Understanding Decal Adhesives
The type of adhesive on the back of your decal is a huge deal, especially if you’re renting or you just love changing up your decor every few years. You’ll typically find two main types: removable and high-tack.
- Removable Adhesive: This is your go-to for most indoor walls. It’s engineered to stick securely but also peel away cleanly when you’re ready for a change, without leaving a sticky mess or pulling off the paint. For renters, this is a must-have. If you want to get into the nitty-gritty, you can learn more about how removable wall stickers work in the UK and why they’re safe for most surfaces.
- High-Tack Adhesive: Think of this as the more permanent option. It forms a much stronger bond, which is ideal for tricky textured surfaces, busy hallways, or even some outdoor spots where you need it to hold up against the elements. Just be sure you love where you’re putting it, because it’s not designed to come off easily.
Finding a Style That Fits Your Space
Now for the fun part—picking a design! The style of your world map can completely set the tone for a room.
Here are a few popular directions you could go in:
- Minimalist Political Maps: These are all about clean lines and defined country borders. They look incredibly sharp in a modern home office or add a subtle, worldly touch to a living room without being too busy.
- Vibrant Illustrated Maps: Filled with colourful animals, famous landmarks, and cultural icons, these are absolutely perfect for a child's bedroom or playroom. They make learning about the world an exciting adventure.
- Vintage or Antique Maps: With their muted, sepia-toned palettes and classic fonts, these maps bring a sense of history and charm. They’re a natural fit for a study, a personal library, or a room with a more traditional feel.
- Customisable Designs: Many sellers now let you put your own stamp on your map. You could add your family’s name, an inspiring travel quote, or even request custom colours to match your decor perfectly. It’s a brilliant way to create a piece that is truly yours.
Preparing Your Wall for a Flawless Finish
Think of your wall as a canvas. The real secret to getting that professional, bubble-free look for your world map decal isn't just about the application itself—it all starts with the prep work. A little bit of effort beforehand makes a huge difference, ensuring the adhesive sticks properly and gives you that smooth, almost painted-on result.
First things first, you need to clean the wall. You’d be surprised how much invisible dust, grime, and oils can build up over time, and these are the number one enemy of a good stick.
Start with a Clean Slate
For most painted walls, you don't need anything fancy. A few drops of mild washing-up liquid in some warm water will do the trick. Just grab a soft, lint-free cloth, dip it in the soapy water, and give the entire area where your map will go a gentle wipe-down.
Once it's clean, you have to rinse it. Go over the same spot with a fresh cloth and plain water to get rid of any soap residue. Then, and this is crucial, let it dry completely. Don't rush this part; it can take a few hours. Patience is key here, as any trapped moisture will stop the decal from adhering properly.
What Not to Use:
- Oil-based cleaners: They leave a film behind that the decal just won't stick to.
- Scouring pads or abrasive sponges: These will scratch up your paint, creating a poor surface for application.
- All-in-one cleaning wipes: Most of these contain lotions or chemicals that can interfere with the adhesive.
The Fresh Paint Waiting Game
This is probably the most common—and costly—mistake people make. Your wall might feel dry to the touch in a day or so, but the paint hasn't actually "cured". For weeks after painting, the wall is still releasing solvents as the paint hardens.
If you stick a decal on too early, those solvents get trapped underneath. This not only weakens the adhesive but can cause the decal to bubble and peel, often taking your brand new paint job with it.
As a solid rule of thumb, you need to wait at least three to four weeks after painting before applying any kind of wall sticker. This gives the paint enough time to fully cure and create a stable, reliable surface for your map.
Map Out Your Placement
Before you even think about peeling off the backing paper, figure out exactly where you want the map to go. This simple bit of planning takes all the stress and guesswork out of the final installation.
Grab a tape measure, a pencil, and some low-tack masking tape. Measure your map and your wall, then use small pieces of masking tape to create a faint outline on the wall. This lets you stand back and check the placement from across the room, making sure it’s perfectly centred and level. A spirit level is an absolute must-have for this.
Having these bits and pieces ready will make the whole process go much more smoothly:
- Squeegee or credit card: For smoothing the decal and pushing out air bubbles.
- Spirit level: Guarantees you won't end up with a wonky map.
- Soft cloth: For the final press-down and cleaning.
- Masking tape: Essential for marking your spot and creating a "hinge" during application.
Your Step-By-Step Installation Guide
Right, this is where the fun starts. Your wall is prepped, your tools are laid out, and you’re ready to get this map on the wall. Putting up a large world map wall decal can look like a daunting task, but trust me, with the right technique and a little patience, you’ll get a flawless finish that looks like it was professionally painted on.
Forget trying to wrestle with a giant, sticky sheet all at once. We're going to use a simple, controlled approach that even a complete novice can handle.
The secret to a stress-free application, especially for the bigger maps, is something called the hinge method. It’s a clever trick that lets you apply the decal in manageable sections. This helps you avoid those dreaded wrinkles, bubbles, and wonky placements that can happen when you try to stick the whole thing on in one go. Honestly, it’s a game-changer.
This quick diagram shows the essentials you need to sort out before you even unroll the decal.
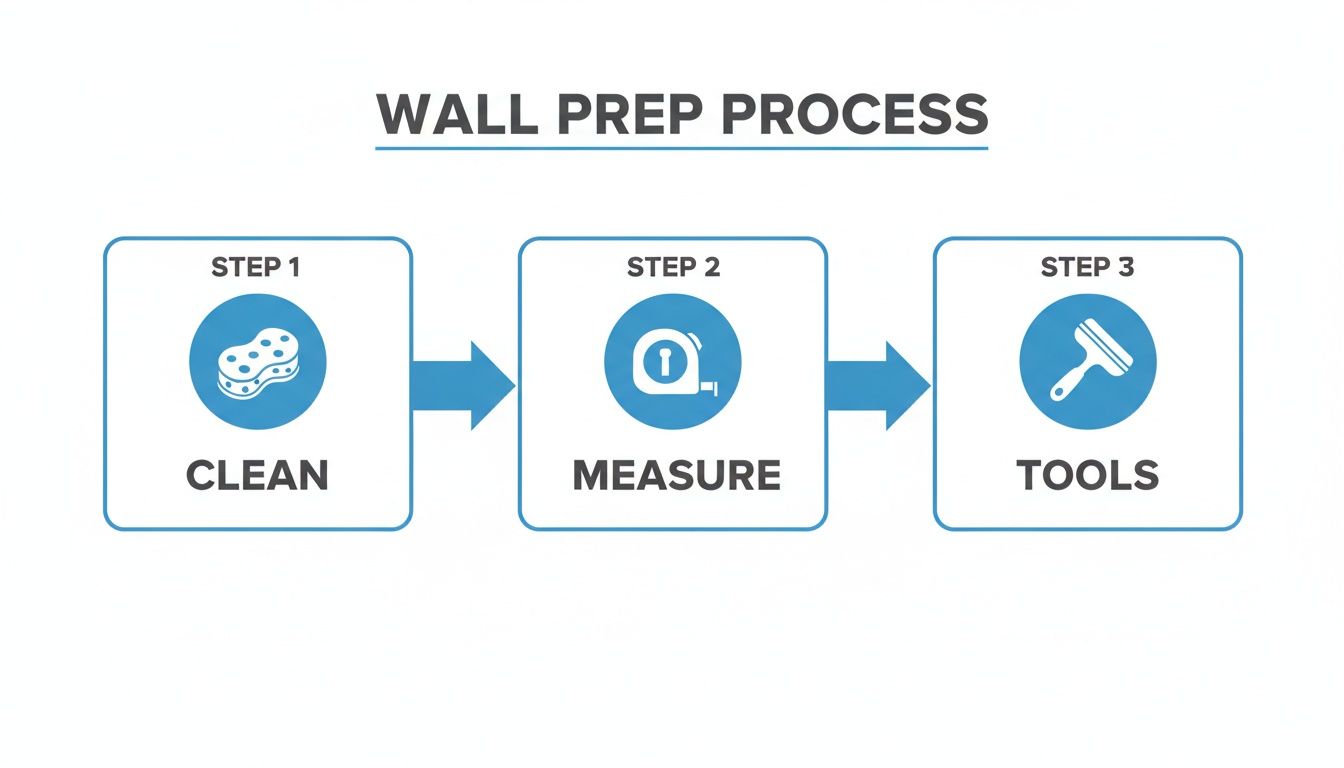
Getting the wall clean, dry, and accurately marked is half the battle won.
Mastering the Hinge Method
First things first, position your decal on the wall, lining it up with the pencil marks you made earlier. Use a few small pieces of masking tape to hold it in place for now. Then, run a long strip of masking tape horizontally right across the middle of the decal, pressing it firmly onto the wall on either side. This strip of tape is your 'hinge' – it essentially splits the map into a top and a bottom half.
Now, take the top half of the decal and begin to carefully peel the backing paper away from the vinyl itself. Stop peeling once you reach your masking tape hinge in the middle. With the paper pulled back, just grab your scissors and snip it off. You'll be left with an exposed, sticky top half and a covered bottom half, all held perfectly in position by that central hinge.
The golden rule here is to always start from the centre and work your way outwards. This motion naturally pushes any trapped air to the edges, preventing bubbles. Whatever you do, don't start from an edge and work inwards.
Grab your squeegee and start applying the top half. Hold the vinyl away from the wall at a slight angle and begin smoothing it down, starting just above the tape hinge. Use firm, overlapping strokes, first from the centre out to the left, and then again from the centre out to the right. Take your time with this part; you want to make sure every last bit of vinyl makes good, solid contact with the wall.
Completing the Application
Once the top half is on and looking good, you can gently remove that central masking tape hinge. Now it’s time to tackle the bottom half by repeating the exact same process. Let the decal hang down, peel away the rest of the backing paper, and squeegee it on, again starting from the middle and working your way out to the edges.
With the entire map stuck to the wall, give it one final, firm rubdown with your squeegee or a soft, dry cloth. Now for the most satisfying part: slowly peeling off the top layer of application tape. The trick is to pull it back on itself at a very sharp angle, keeping it almost flat against the wall as you go. If you notice any small part of the decal lifting with the tape, just pause, press that piece back down firmly, and then continue peeling.
Tackling Tricky Details
What about all those tiny islands or the really intricate coastlines? These delicate bits just need a little extra care.
- Small Islands: When you’re peeling off the application tape, go extra slowly around any small, separate pieces. I find it helps to use a fingertip to gently hold the tiny vinyl island in place as you pull the tape away.
- Complex Coastlines: For really detailed edges, press them down firmly with your finger both before and after you remove the application tape. This just ensures they’re fully bonded to the surface.
- Textured Walls: If your wall has a bit of a texture (like an orange peel finish), you might need to apply a bit more pressure. After taking the application tape off, go over the whole decal with a soft cloth, using your thumb to really press the vinyl into the tiny grooves of the wall for a much better grip.
Styling and Maintaining Your New Wall Map
So, your world map decal is up on the wall and looking fantastic. The next part is the fun bit – making it the true heart of the room. A great decal shouldn't just stick to a wall; it should feel like it belongs, blending in so perfectly that it transforms the entire feel of the space.
Styling is all about context. Think about it: the very same map can feel completely different depending on where you put it. In a home office, it’s a source of inspiration, a visual reminder of your goals. In the living room, it becomes a sophisticated conversation starter.
Making Your Map the Focal Point
How you arrange your furniture and lighting can make or break the final look. To really make your map pop, take a step back and look at the room's layout. Try arranging your main seating – maybe your sofa or a couple of comfy armchairs – to face the map. This simple shift naturally draws the eye and establishes the map as the room's star.
Lighting is your secret weapon here. A well-placed floor lamp angled towards the map or a subtle spotlight can cast a warm glow on it in the evening, adding a touch of drama and depth. It’s amazing how this one change can alter the entire mood. For anyone keen on creating a balanced and harmonious space, exploring the principles of Feng Shui home decor can offer some brilliant insights into positioning key decor elements.
To get your creative juices flowing, here are a few ideas for different rooms:
- In the Home Office: Put that map to work! Grab some small, coloured pin markers to track your global clients, map out supply chains, or just daydream about future holidays. It turns a decorative piece into a genuine motivational tool.
- In the Living Room: Create a 'vignette' around your map. A couple of floating shelves on either side, styled with travel books and souvenirs, can beautifully enhance the wanderlust theme. Try to choose a map in a colour that echoes other accents in the room, like your cushions or a rug, to tie everything together.
- In a Nursery or Playroom: Make it interactive! A big, colourful map is a brilliant learning tool. You could place little animal figures on their home continents or use it as a backdrop for telling stories about far-flung places.
One of my favourite design tricks is to pull a colour directly from the decal and use it to build the room's entire palette. Say you've chosen a beautiful world map wall art decal in a deep navy; picking up that same shade in your throws, cushions, or even a statement armchair creates a stunning, cohesive look that feels professionally designed.
Long-Term Care and Troubleshooting
Keeping your decal looking brand new is incredibly simple. A gentle wipe with a soft, dry, lint-free cloth is all it takes to get rid of dust. Just be sure to avoid any chemical cleaners or abrasive sponges, as they can easily damage the vinyl's finish.
Even with the most careful application, you might spot a minor issue later on, like an edge that's started to lift or a bubble that's appeared out of nowhere. Don't panic – these are quick fixes.
- Lifting Edges: This can sometimes happen in rooms with a bit of humidity, like kitchens or bathrooms. Just grab a hairdryer, put it on a low setting, and gently warm the peeling area for a few seconds. This reactivates the adhesive. Then, press it firmly back against the wall with a soft cloth.
- Trapped Air Bubbles: For this, you just need a very fine pin or needle. Carefully prick a tiny, almost invisible hole right in the centre of the bubble. Now, use your finger to gently push the trapped air out through the hole. The vinyl will smooth out perfectly, and you'll never even know the pinprick was there.
And when you fancy a change? Getting it off the wall is just as easy. Warm the decal with your hairdryer to soften the adhesive, then start peeling from a corner, pulling back at a sharp angle. A little patience is all it takes for it to come away cleanly, leaving a properly prepared wall undamaged.
Your World Map Decal Questions Answered
So, you've found a design you love, but a few nagging questions are holding you back. That's completely normal. Let's walk through some of the common queries we get, so you can feel confident you're making the right choice for your space.
One of the biggest concerns is always about the wall itself. What if it's not perfectly smooth?
Can I Put a Decal on a Textured Wall?
This is a great question, and the answer really comes down to just how textured your wall is.
If you've got a very light texture, something like a faint "orange peel" finish, a standard vinyl decal might stick. But, it probably won't look perfectly flat and might lift over time. For slightly uneven surfaces, a premium fabric decal is a much safer bet. The material is more flexible and does a much better job of moulding to those subtle bumps and dips.
However, for anything more pronounced, like an Artex finish, a standard vinyl decal is unlikely to work well. When in doubt, the golden rule is to test a small sample on an inconspicuous part of the wall first.
Are These Decals Genuinely Easy to Remove?
Yes, most quality vinyl decals are designed for clean, one-time removal from a well-prepared wall, meaning they shouldn't leave a mess or peel off your paint.
The premium fabric decals often go one step further – they're typically repositionable. This gives you fantastic flexibility if you don't get the placement quite right on the first go, or even if you decide to move it to a different wall later on.
The secret to a perfect, damage-free removal is a bit of gentle heat. Grab a hairdryer on a low setting and warm the decal as you peel. This softens the adhesive, allowing it to release cleanly. We've put together a full guide on how to remove a wall sticker without a trace.
Help! What Do I Do About Air Bubbles?
Don't worry, it happens to the best of us! If you spot a small bubble near the edge, you can usually just gently push it out with your squeegee.
For a stubborn bubble trapped in the middle, here’s a simple pro trick: take a pin and make a tiny hole right in the centre of the bubble. You can then smooth the air out with your finger. The pinprick is so small it will be completely invisible.
Ready to find the perfect map for your space? Explore the huge range of high-quality vinyl designs at Quote My Wall and start your wall transformation today at https://www.quotemywall.co.uk.