
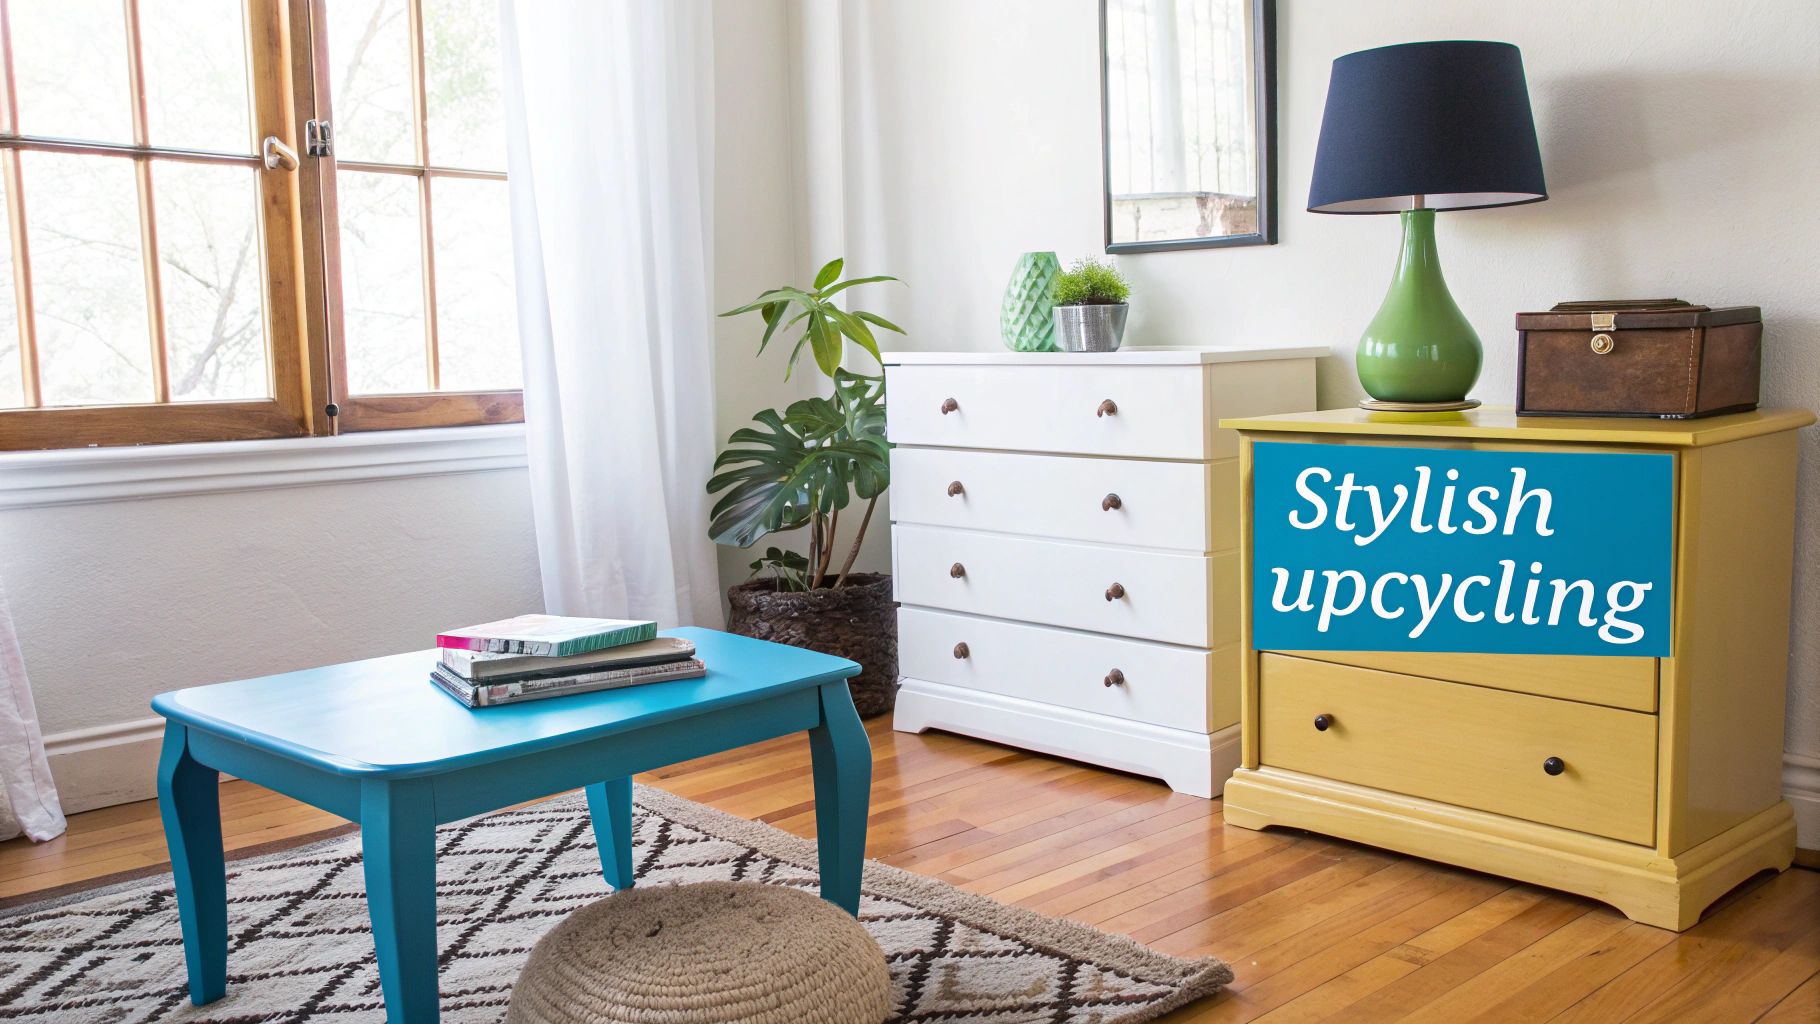
Creative Furniture Upcycling Ideas to Refresh Your Home
From a quick lick of paint to a complete vinyl wrap transformation, upcycling is all about breathing new life into a tired piece of furniture. It’s a chance to take something forgotten and make it fit your style, often for a tiny fraction of what you’d spend on something new. Best of all, it's budget-friendly and sustainable, putting a stylish home within everyone's reach.
Why Upcycling Is Your Secret to a Stylish Home
Before we get our hands dirty with specific projects, it’s worth taking a moment to appreciate why upcycling is so much more than just a passing trend. It’s a creative stand against the 'fast furniture' culture—those mass-produced pieces that often end up on the pavement after just a few years. When you choose to give an old piece a second chance, you're making a choice that’s good for your bank account and even better for the planet.
This isn’t about needing a professional workshop or a van full of expensive tools. We’re talking about accessible projects anyone can tackle. You’d be amazed at what you can achieve with simple materials, whether it's a high-quality vinyl wrap to modernise a chest of drawers or a tin of chalk paint to revive a dated dining chair.
The Real Impact of Reusing
The shift towards reusing and upcycling is picking up serious steam across the UK, and for very good reason. It reflects a change in how we think about the things we own, swapping a disposable mindset for one that values creativity and longevity.
The numbers really speak for themselves. In 2023, the UK's reuse sector kept an incredible 2.6 million furniture and electrical items out of landfill. This saved a massive 96,643 tonnes of CO2 emissions and helped low-income households save over £335 million. It just goes to show how every small creative project adds up to a much bigger, positive change.
Upcycling empowers you to become the creator of your home’s story. Each finished piece is more than just furniture; it’s a reflection of your personality, your vision, and a commitment to a more sustainable way of living.
Making Your Mark on Your Space
Whether you own your home and want to create a truly bespoke look, or you're renting and need non-permanent ways to inject some personality, upcycling opens up a world of possibilities. It’s your chance to turn a generic, run-of-the-mill item into a statement piece that nobody else has. You get to play with colours, patterns, and textures you truly love.
Ultimately, upcycling is one of the best ways to get a personalised home on a budget. If you're looking for wider inspiration, you can always explore more living room makeover ideas. Let's dive into some practical, project-based ideas that prove you don't need to spend a fortune to create a home that feels stylish and uniquely yours.
Gathering Your Essential Upcycling Toolkit
Every brilliant upcycling project begins long before you pick up a paintbrush. It starts with a little bit of prep. Having the right tools on hand doesn't just make the job easier; it's the secret to getting a finish that looks genuinely professional, not just a slap-dash DIY job. Think of this as building your foundation for success.
Before you even think about colours or patterns, the first, non-negotiable step is a deep clean. You simply can't get a durable finish on a dirty surface, no matter how good your paint is. It’s a simple but crucial starting point.
The Groundwork: Surface Preparation
I can't stress this enough: proper preparation is 90% of the work. Honestly, the most common mistake I see beginners make is skipping this stage, which almost always leads to peeling paint or vinyl that just won't stick. Don't let a rushed start ruin your creative vision.
- Sugar Soap Solution: This is a non-negotiable in my kit. It’s a powerful degreaser that cuts through years of built-up grime, greasy finger marks, and old furniture polish. It leaves you with a perfectly clean slate for your primer or paint to grip onto.
- Sandpaper (Multiple Grits): You rarely need to sand a piece right back to the bare wood. A light 'scuff sand' with a medium-grit paper (around 120-150 grit) is usually all it takes to knock the sheen off old varnish and give the new paint something to key into.
- Microfibre Cloths: Get a good stack of these. They’re brilliant for wiping away every last bit of dust after sanding and for applying your cleaning solution. Best of all, they don't leave annoying lint behind.
Once your piece is properly clean and prepped, you can finally move on to the fun bit. But even here, the tools you use will make a world of difference between a streaky mess and a flawless finish.
Tools for a Flawless Application
Choosing the right applicator is just as important as picking the perfect paint colour or vinyl pattern. I've seen too many great projects ruined at the last minute by a cheap, shedding brush.
For a smooth, modern look with hardly any brush strokes, a high-density foam roller is your best friend. They work wonders on big, flat surfaces like tabletops, side panels, and drawer fronts. When you get to the fiddly bits, like chair spindles or carved moulding, a quality synthetic paintbrush will give you the precision and control you need.
And if you're working with vinyl, your most important tool is a simple squeegee. This little thing helps you apply smooth, even pressure, pushing out any trapped air bubbles from the centre outwards for a seamless bond. You can find more tips and tricks in our complete guide to using sticky back plastic flawlessly on furniture.
A well-stocked toolkit gives you the confidence to tackle any project. It’s not about having the most expensive gear, but about having the right tool for each specific task in the upcycling process.
Finishing and Protection
After all your hard work, the last thing you want is for it to get damaged. The final step for most projects is applying a sealant to protect against scuffs, spills, and everyday life, ensuring your creation looks fantastic for years to come.
- Clear Wax: This is my go-to for chalk-painted pieces. It buffs to a lovely soft, matte finish that really deepens the colour.
- Water-Based Polyurethane Varnish: For anything that's going to see a lot of action—like a coffee table or dining chairs—this offers a much more durable, wipeable seal.
With your toolkit ready, the next step is finding that perfect piece to transform. Charity shops and online marketplaces are fantastic, but you can also find some truly unique treasures at online estate sales.
The Instant Dresser Makeover With Vinyl Wraps
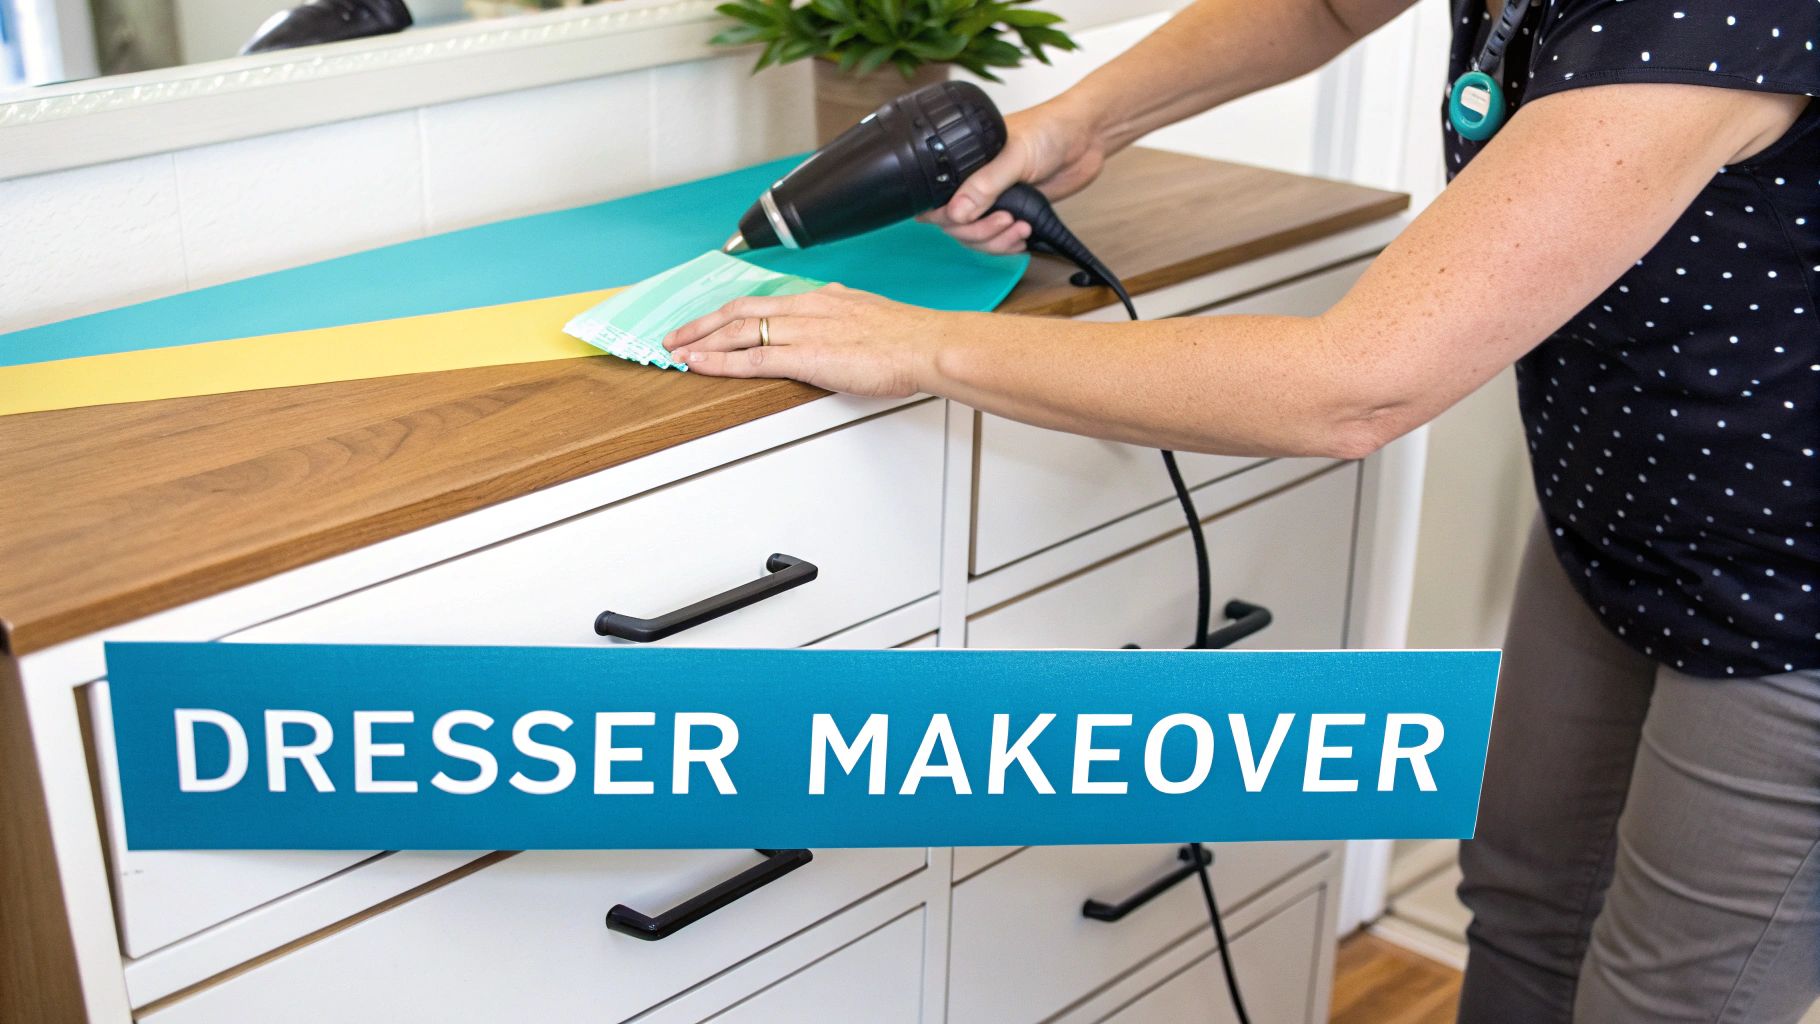
Out of all the furniture upcycling ideas we absolutely love, this one might just be the most satisfying. Watching a tired, dated chest of drawers transform with a vinyl wrap gives you an incredible 'before and after' with surprisingly little mess or fuss. It’s a total game-changer, especially for renters, offering a massive style upgrade without the permanence of paint.
The real beauty of vinyl is its versatility. You can take a piece from a dark, heavy wood effect to a bright, Scandi-style white in a single afternoon. Fancy a sophisticated marble top or a bold pop of colour to create a statement piece? No problem. This project is all about getting a high-impact look with a straightforward, forgiving process.
Selecting Your Perfect Vinyl
First things first, you need to pick the right vinyl. Really think about the style you're trying to create. A realistic wood grain can bring a lot of warmth into a room, while a glossy marble finish adds an instant touch of elegance. We've got a huge range of patterns at Quote My Wall, from subtle textures to eye-catching geometrics, so you're sure to find the perfect match for your home.
Take a good look at the piece of furniture you're working with. A simple, flat-fronted dresser is the perfect canvas if you're new to this. But if your dresser has some intricate mouldings or curved edges, don't be put off! It's still completely doable, you'll just want to choose a vinyl with good flexibility to handle the curves.
Accurate Measurements and Preparation
Your upcycling journey doesn't start with the vinyl, but with a tape measure and a cleaning cloth. As we mentioned in our toolkit list, great prep work is the secret to a flawless finish, and that’s especially true when applying vinyl. Even a tiny speck of dust or a greasy fingerprint can create a bubble or stop the adhesive from bonding properly.
Start by taking off all the hardware – that means handles, knobs, and any pulls. Next, give every surface you plan to wrap a really thorough clean with a sugar soap solution to get rid of any grime or residue. Once it's completely dry, it's time to measure each surface carefully.
Pro Tip: When you're cutting your vinyl, always add at least 5cm to every edge. This extra material is called 'bleed', and it gives you plenty of wiggle room to get a perfect, professional-looking edge without any frustrating gaps.
With your measurements noted down, you can cut your vinyl pieces. Try to work on a large, flat surface and use a sharp craft knife against a straight edge for the cleanest cuts. A little bit of precision at this stage really pays off later.
The Art of a Bubble-Free Application
Now for the magic. Applying the vinyl can seem a bit intimidating, but the real trick is to work slowly and methodically. Whatever you do, don't try to stick the entire sheet down in one go.
Instead, peel back just a small section of the backing paper at one end. Carefully line up the vinyl with the edge of your surface, making sure to leave that 5cm overhang you measured for. When you're happy with its position, use your squeegee to smooth that first section down, working from the centre outwards to push any air out.
Keep peeling the backing paper away a few inches at a time, smoothing the vinyl with the squeegee as you go. This steady, controlled rhythm is the absolute best way to stop air bubbles from forming in the first place. If you do get a small bubble, you can usually just lift the vinyl gently and re-smooth it. For a closer look at the technique, check out our guide on how to apply vinyl wrap for more detailed steps.
Mastering Corners and Edges
Corners are where many people think it's all going to go wrong, but a simple household tool is your secret weapon here: a hairdryer. Applying gentle heat makes the vinyl more pliable, letting you stretch it smoothly around corners without any creases.
Here’s how to get a perfect corner every time:
- Apply the vinyl flat across the top surface, smoothing it right up to the edge.
- Gently warm the overhanging vinyl with your hairdryer on a low setting.
- Carefully stretch the now-softened vinyl down and around the corner, smoothing it firmly with your hand or squeegee.
- Once all the main surfaces are covered, take a sharp craft knife and trim away the excess vinyl for a crisp, seamless finish.
Using this technique ensures the wrap hugs every contour of your furniture, creating a look that’s almost indistinguishable from a factory finish. The final step? Re-attach your old hardware, or even better, treat the piece to some new knobs or pulls to complete the transformation. You'll be left with a piece that looks brand new – and you’ll be hooked on one of the most effective furniture upcycling ideas out there.
Adding Personality With Stencils And Paint
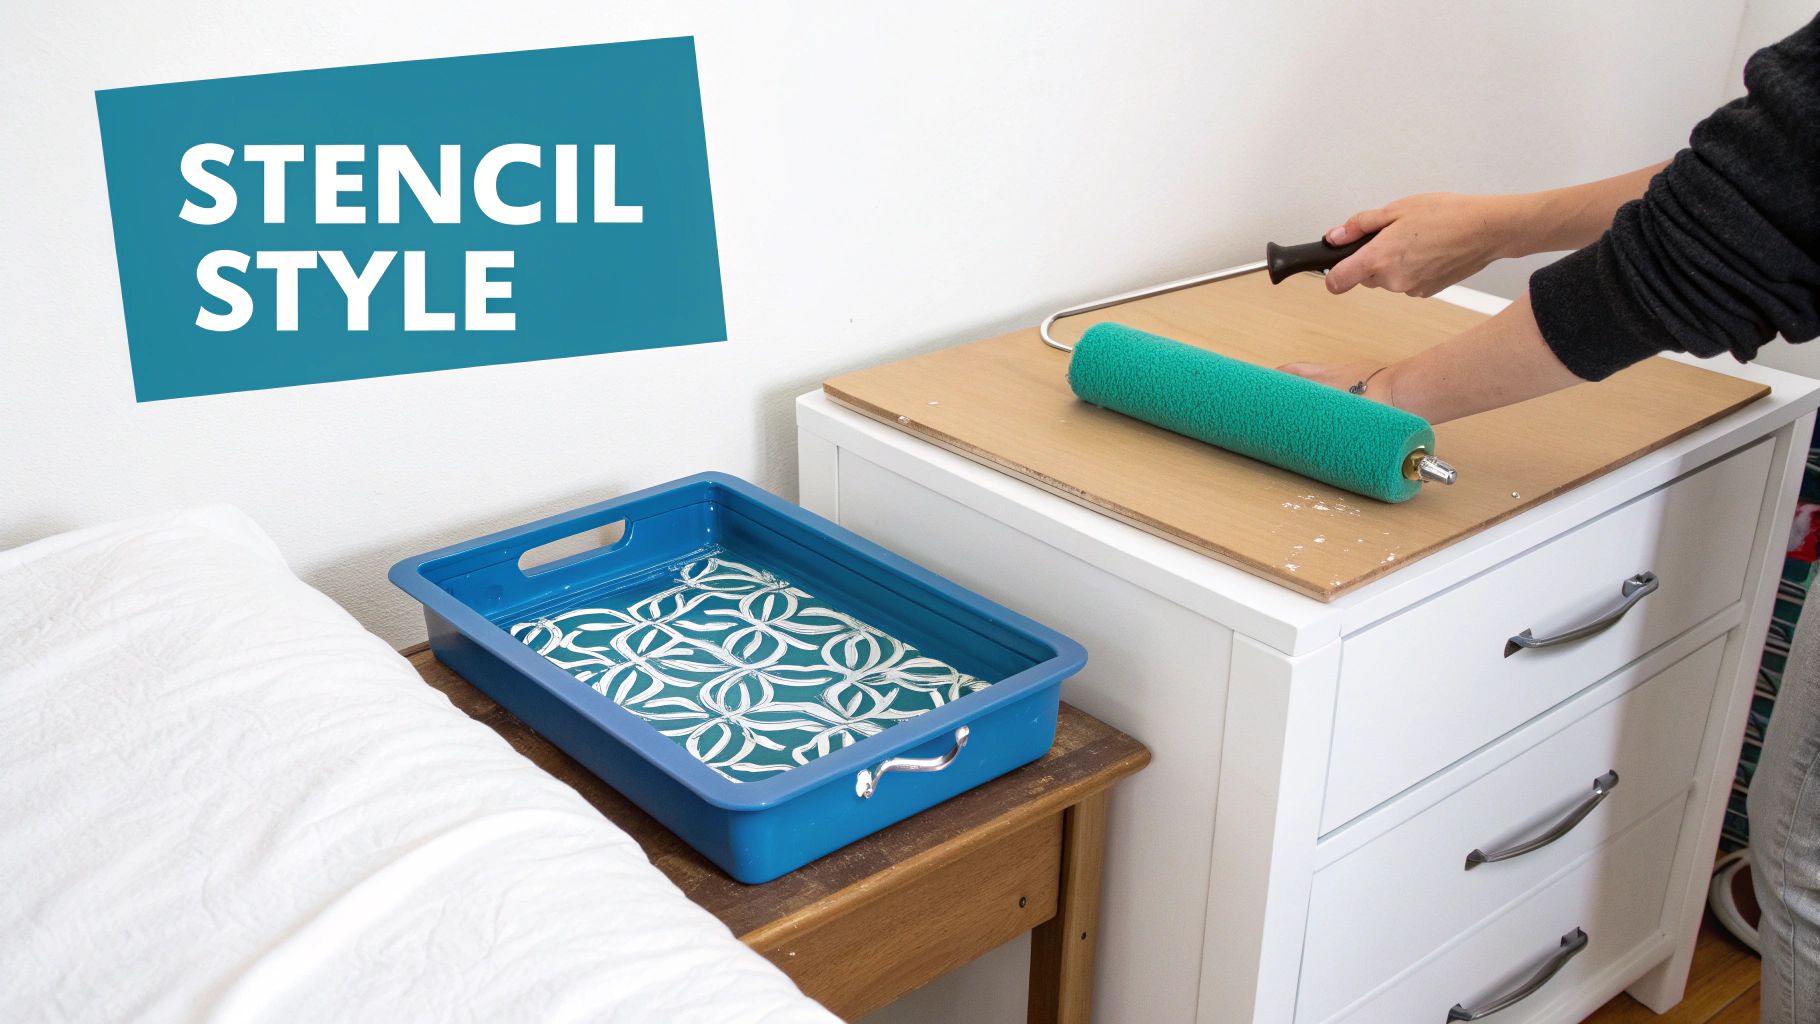
While vinyl wraps give you that instant, high-impact transformation, sometimes you crave a more hands-on, artistic touch. Stencilling is a brilliant way to add intricate patterns and character to smaller pieces, like that forgotten bedside table or a plain wooden chair. It’s the perfect project for injecting your personality directly onto a piece of furniture.
This technique isn’t about a complete overhaul. Think of it more as adding a thoughtful, decorative layer. You could create a subtle geometric border on a drawer front or go for a bold, all-over pattern on a tabletop. It’s a method that beautifully bridges the gap between a simple lick of paint and a bespoke work of art for your home.
Choosing Your Design and Prepping the Canvas
This is the fun bit – picking a stencil that really speaks to your style. Are you after a classic Moroccan tile effect, a delicate botanical pattern, or something modern and graphic? The design you choose sets the entire mood, so it’s worth spending time finding one you absolutely love.
Just be sure to consider the scale. A large, sprawling design might completely overwhelm a small chair, while a tiny, repeating pattern could get lost on a bigger surface.
Once you’ve found your perfect stencil, good preparation is everything. Your furniture needs a clean, smooth base coat for the stencil to really pop. If the existing finish is dark or a bit patchy, I’d recommend applying one or two coats of a complementary base colour first. A light-coloured chalk paint often works wonders, as its slightly matte finish gives the stencil paint something to grip onto.
And of course, don’t forget the essentials: give the surface a good clean with sugar soap and a light scuff with sandpaper before painting. A flawless base is the secret to a crisp final result.
The Stencilling Technique for Crisp Lines
The key to getting sharp, clean lines is surprisingly simple: use less paint than you think you need. This is the golden rule for avoiding the dreaded paint bleed, where colour seeps under the stencil and creates a blurry mess.
Here’s the process I always follow for the best results:
- Secure the Stencil: Position your stencil exactly where you want it. Use low-tack painter's tape or a repositionable spray adhesive to hold it firmly in place. You can’t have it shifting about while you work.
- Load Your Applicator: Whether you're using a stencil brush or a small foam roller, the trick is to use a tiny amount of paint. Dip it in, then offload the excess onto some kitchen roll or a bit of cardboard until the applicator looks almost dry.
- Apply the Paint: This is crucial. Instead of a normal brushing or rolling motion, you want to dab or stipple. Gently tap the paint over the stencil cut-outs. This gentle, up-and-down motion is far less likely to force paint under the edges.
If you want a deeper, more solid colour, it’s always better to build it up in two or three thin layers. Don’t try to slap on one thick coat. A little patience here goes a long way – let each layer become touch-dry before starting the next. This methodical approach is your best defence against smudges and bleeding.
Advanced Techniques and Troubleshooting
Once you’ve got the hang of the basics, you can start getting creative. Layering different colours is a fantastic way to create a more complex, dimensional look. You could stencil your main pattern in one colour, then use a smaller stencil to add details in a contrasting shade.
But what if you do get a bit of paint bleed? Don’t panic, it happens. Just wait until the paint is fully dry, then take a very fine-tipped artist's brush and carefully touch up the smudge with your original base colour. It’s an easy fix that makes a massive difference. Stencils are also a wonderfully cost-effective alternative to new wallpaper if you fancy adding a custom pattern elsewhere in the room.
The most rewarding part of stencilling is the final reveal. After your last layer is dry, carefully peel the stencil away. Seeing that perfectly crisp, clean pattern you created is one of the most satisfying moments in any DIY project.
Finally, always protect your beautiful handiwork. Once the stencilled design is completely cured (check the paint tin for the timings), apply a coat of clear wax or a water-based polyurethane varnish. This last step is non-negotiable; it seals the paint, protecting it from scuffs and scratches and ensuring your unique piece can be enjoyed for years to come.
Give Your Furniture an Artistic Touch with Decoupage
If you're after a way to upcycle furniture that adds a truly personal, artistic flair, you’re going to fall in love with decoupage. It’s essentially the art of glueing coloured paper cutouts onto an object, often blending them with special paint effects, to create something entirely new. It’s how you can turn a plain, forgotten surface into a detailed, intricate work of art using bits and pieces you might already have lying around.
Think about those beautiful wallpaper samples you’ve collected, or that roll of striking wrapping paper you couldn't resist buying. Even old maps, sheet music, or pages from a tatty book can be given a second life. Decoupage lets you take these scraps and give them a starring role on a piece of furniture. It’s absolutely perfect for adding a pop of charm to drawer fronts, reviving a tired tabletop, or creating a statement piece from a simple wooden box.
Choosing Your Decoupage Materials
First things first, you need to pick your paper. This single choice will define the entire character of your finished piece, so it's worth a bit of thought. The possibilities are nearly endless, but the weight and finish of the paper are key things to consider.
- Wrapping Paper: This is a fantastic starting point. It’s lightweight and comes in countless designs, but just be aware that its thinness makes it quite delicate when it’s wet, so a gentle hand is needed.
- Wallpaper Samples: These are a brilliant choice because they’re often more durable and textured, giving you a really robust finish. The heavier weight means they’re far less prone to tearing as you work, making them great for bigger, flatter surfaces.
- Napkins: If you separate them down to their single-ply layer, decorative napkins can create a beautifully delicate, almost painted-on effect. They are incredibly fragile, though, so patience is a virtue here.
- Tissue Paper: This is what you want if you're aiming for a layered, translucent look with blended colours.
Whichever you choose, the goal is to find something that complements the piece of furniture and the room it's going to live in. And don't be afraid to mix and match patterns – sometimes the most eclectic combinations create the most stunning results.
The Decoupage Application Process
With your paper selected, the process itself is wonderfully methodical and incredibly satisfying. Like any good upcycling project, success begins with a clean canvas. Make sure your furniture surface is clean, dry, and totally free from grease or dust. If you’re working with a shiny or varnished surface, giving it a quick, light sand will give the glue something to really grip onto.
Next, carefully cut out your paper shapes. A bit of precision here really pays off, so use a sharp pair of scissors or a craft knife for the cleanest edges. Before you even think about opening the glue, arrange your cutouts on the furniture to plan your design. This little dry run lets you perfect the layout without making a sticky commitment.
When you’re happy with the arrangement, apply a thin, even layer of decoupage glue (like Mod Podge) to a small section of your furniture. Carefully place your first piece of paper onto the wet glue.
The secret to a smooth, bubble-free finish is to work from the centre outwards. I find using my fingertips or a soft, bunched-up piece of cling film works best to gently press the paper down, smoothing out any wrinkles or trapped air as you go.
Keep going with this process, working in small, manageable sections. I recommend slightly overlapping the edges of your paper pieces to create a lovely, seamless collage effect. Don’t panic if the glue looks white and milky when you apply it; most decoupage mediums dry completely clear.
Sealing and Finishing Your Creation
Once your entire surface is covered and you're happy with how it looks, you need to let it dry completely. This can take several hours, so be patient. Rushing this step is the fastest way to get smudges and tears.
After it’s fully dry, it’s time for the final and most crucial stage: sealing your work. This protective top coat is what turns your delicate craft project into a durable piece of furniture. Apply another thin, even layer of your decoupage glue right over the top of the entire decorated surface.
For items that are going to see a lot of use, like a tabletop or the seat of a chair, you’ll definitely want to apply two or three coats for maximum durability. Just make sure you let each coat dry completely before applying the next. This builds up a tough, wipeable seal that protects your beautiful design from the realities of daily wear and tear.
To really complete the transformation, think about adding new hardware. A fresh set of ceramic knobs or some sleek metal pulls can beautifully complement your new decoupage design, tying the whole look together and creating a truly one-of-a-kind piece you'll be proud to show off.
Your Common Upcycling Questions Answered
When you're just getting started with upcycling, it’s natural to have a few questions. From picking the right piece to dealing with those little "oops" moments, having some answers upfront can make all the difference. Let’s tackle some of the most common queries I hear, so you can dive into your first project with confidence.
Can I Really Use Vinyl Wrap on Any Furniture?
This is a great question, and the short answer is almost anything. Vinyl wrap loves a smooth, non-porous surface. Think laminate, MDF, metal, or wood that's already got a coat of paint or varnish on it. The key is giving the adhesive a sleek, stable surface to really grab onto.
Raw, unsealed wood is the main exception. It’s a bit too porous, which means the vinyl might not get the strong, lasting bond you want. If your heart is set on wrapping a raw wood piece, no problem—just give it a coat of primer first. This seals the wood and creates that perfect smooth base for a professional, durable finish.
How Do I Fix Bubbles When Applying Vinyl Wrap?
Seeing a bubble pop up can feel a bit deflating, but don't panic! It's usually a really easy fix.
If you spot one while you’re still in the process of applying the vinyl, the best thing to do is gently lift that section back up. Then, re-apply it, using your squeegee to smooth it down firmly from the centre outwards. This will push any trapped air right out.
Only noticed a bubble after you’ve finished? A simple pin is your secret weapon. Make a tiny, almost invisible hole right in the middle of the bubble, then use your finger or the squeegee to gently press the trapped air out through it.
What Is the Best Way to Make My Upcycled Furniture Last?
Longevity all comes down to two things: excellent prep work and a solid final seal. No matter which creative idea you’re trying, these are the non-negotiable steps for a project that truly stands the test of time.
Always start by giving your piece a thorough clean to get rid of any dust, grease, or grime. Then, once you've finished painting, stencilling, or decoupaging, sealing your masterpiece is absolutely critical.
For high-traffic surfaces like tabletops, desks, or chair seats, a clear, water-based polyurethane varnish is your best bet. Apply two or three thin coats—letting each one dry completely—to build up a really robust layer of protection against daily wear and tear.
How Much Does It Typically Cost to Upcycle Furniture?
One of the best things about upcycling is how incredibly kind it is on your wallet. You'll almost always spend just a fraction of what you would on a new piece of furniture.
A small project, like stencilling a bedside table, might only set you back £20-£30 for the paint, stencil, and a few supplies. A bigger job, like transforming a chest of drawers with our vinyl wrap, could range from £30-£60, depending on its size and the vinyl you choose. The real saving, of course, comes from using a piece of furniture you already own or one you’ve snagged for a bargain from a charity shop or online marketplace.
If you're thinking about decoupage, this infographic gives a simple overview of the process we talked about earlier.
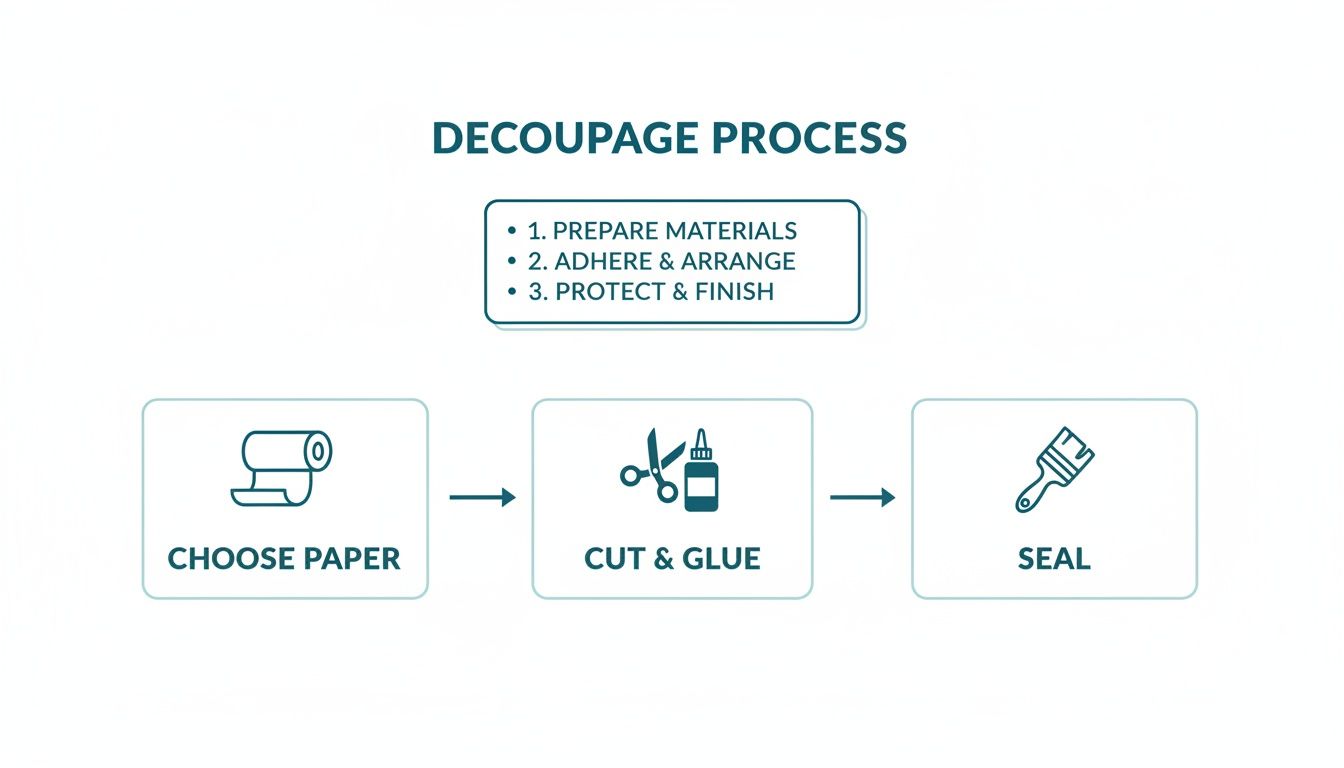
It’s a great reminder that success comes from being methodical—from selecting your materials to careful application and, finally, sealing your work so it lasts.
Feeling inspired to start your own transformation? From sleek marble effects to warm wood grains, Quote My Wall has the perfect vinyl wrap to bring your furniture upcycling ideas to life. Explore our huge range of high-quality, easy-to-apply vinyls and find everything you need for your next project at https://www.quotemywall.co.uk.