
How To Make Name Labels A Practical DIY Guide
It’s a feeling we all know too well: the sinking realisation that a favourite jumper has vanished from the school playground, a lunchbox is missing from nursery, or a resident's cardigan has been misplaced in a care home. While you can always buy pre-made labels, knowing how to make them yourself is a game-changer for personalisation and practicality.
This guide will show you how to move past temporary marker scribbles and create custom, durable labels that look great and actually last.
Your Guide to Crafting Perfect DIY Name Labels
Making your own labels isn't just about preventing lost property; it's a chance to get creative and add a personal touch to everyday items. Imagine your child’s delight at finding their favourite dinosaur next to their name on a water bottle, or the peace of mind that comes from knowing a parent's clothing is clearly and neatly identified.
This is all about turning chaos into organised calm, with a bit of fun thrown in.
What We’ll Cover
We're going to dive into the three most popular and effective DIY methods. There's an option here for everyone, no matter what tools you have at home.
- Stick-on Vinyl Labels: These are your go-to for hard surfaces. Think water bottles, lunchboxes, and gadgets. When made with the right materials, they're waterproof and incredibly tough.
- Iron-on Fabric Labels: The undisputed champion for clothing and textiles. These labels fuse directly with the fabric, so they can handle wash after wash without peeling off.
- Printable Sticker Labels: A wonderfully quick and easy option for things that don't need to be waterproof, like school notebooks, folders, and storage boxes.
Crafting your own labels puts you in complete control. You can save a bit of money, sure, but the real win is choosing the exact font, size, and design. You could even add little icons or colour-code items for different family members, making organisation truly personal.
We’ll walk through each method step-by-step, from picking the right materials to getting the application just right. By the end, you'll have all the tips and tricks you need to make sure your labels stay put.
Choosing The Right Label For Your Project
Before you jump in and start making labels, the very first step is figuring out which type is right for the job. It really comes down to what you’re labelling, how much wear and tear it’s going to get, and what tools you have at home. If you get this bit wrong, you might find your lovely labels peeling off after just one wash or fading away in the sun.
This isn't just a small detail; it's the most crucial part of the process. A simple paper sticker, for instance, is absolutely fine for a school notebook that stays dry, but it would turn to mush on a water bottle. On the flip side, using a super-durable vinyl label on a disposable party bag is probably overkill.
To make things easier, this quick visual guide should help you pick the perfect label for what you need.
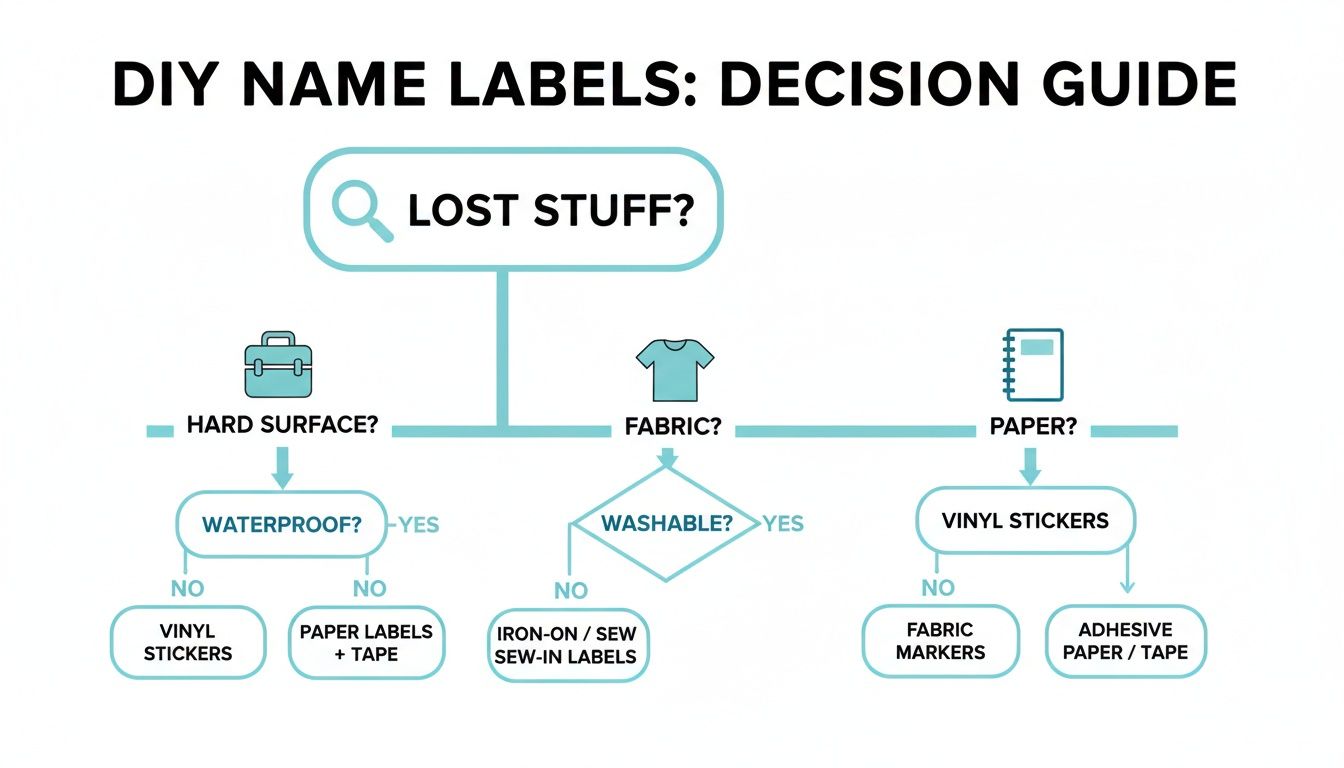
The main takeaway here is simple: the material of the item you're labelling—whether it’s hard plastic, soft fabric, or paper—is the biggest clue as to which name label will stick around for the long haul.
Understanding Your Label Options
Let's break down the three most common DIY options. Each has its own strengths and is a better fit for different situations, from getting school uniforms sorted to organising your kitchen cupboards.
-
Stick-On Vinyl Labels: These are the undisputed champions for hard, smooth surfaces. We're talking lunchboxes, water bottles, plastic toys, and even gadgets. They’re generally waterproof, dishwasher-safe, and tough enough to handle scuffs, making them a brilliant choice for things that are used every day.
-
Iron-On Fabric Labels: When it comes to clothes, iron-on labels are your best friend. They use a special heat-activated glue that fuses directly with the fabric, essentially becoming part of the garment. They're designed to survive endless trips through the washing machine and tumble dryer without a hint of peeling or fading.
-
Printable Paper Labels: This is by far the quickest and easiest route. These are ideal for things that won't get wet or handled too roughly, like school exercise books, folders, party bags, or jars in a dry pantry. They aren’t waterproof, but you can design and print them in minutes.
The need for labels that can actually last, especially for clothing, has shot up. In 2023, the UK's fashion and apparel sector was worth a massive £64.5 billion, and with over 9 million children in state schools, you can see why parents need reliable ways to keep track of everything. It's all about finding labels that can withstand the chaos of family life, meaning they have to be fully washable and tumble dryer safe.
A Quick Comparison Of DIY Name Label Types
To help you decide, here’s a straightforward table that lays out the key features of each label type. Have a think about what’s most important for your project—is it durability, how easy it is to apply, or just using the tools you already have?
| Label Type | Best For | Durability | Tools Required | Washable? |
|---|---|---|---|---|
| Stick-On Vinyl | Lunchboxes, water bottles, plastic containers, electronics | High - waterproof & dishwasher-safe | Cutting machine (e.g., Cricut), vinyl, transfer tape | Yes, on hard surfaces |
| Iron-On Fabric | Clothing, school uniforms, PE kits, fabric bags | High - machine washable & tumble dryer safe | Iron, cutting machine (for HTV) or printer (for paper) | Yes, on fabric |
| Printable Paper | Notebooks, folders, pantry jars, temporary items | Low - not water-resistant | Printer, sticker paper, scissors | No |
As you can see, choosing the right label really depends on the item itself. Each method definitely has its place.
For a child’s PE kit that gets thrown around and washed constantly, you just can’t beat the staying power of an iron-on label. We actually have a detailed guide on creating iron-on clothing name tags that takes you through it step-by-step for perfect results every time. If you're working with delicate items, knowing your materials is helpful; for example, using an exquisite thin cotton fabric can add a lovely, professional touch to handmade gifts. Ultimately, making the right choice now will save you a lot of time and hassle later.
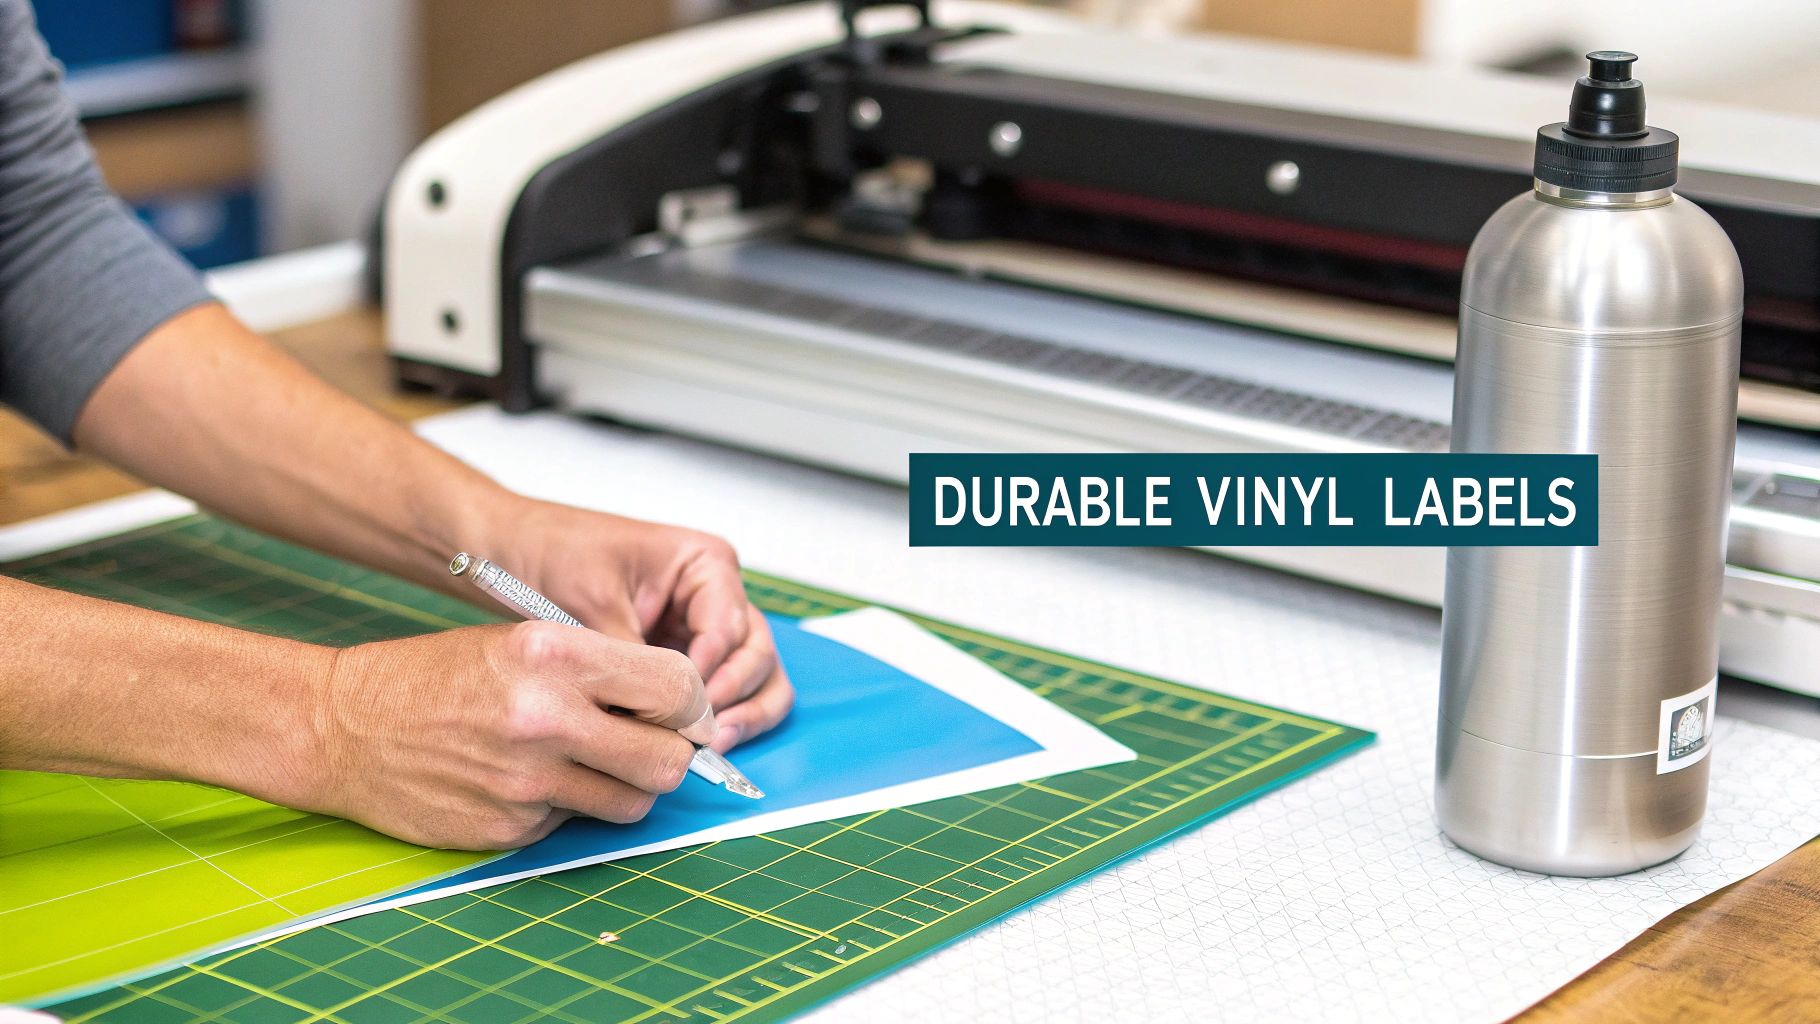
Making Durable Stick-On Vinyl Labels
When you need a label that can really take a beating, stick-on vinyl is the way to go. Think of all the items that get handled daily, chucked in bags, and washed constantly—lunchboxes, water bottles, sports gear, and electronics. For these, a simple paper sticker just won't cut it. Vinyl offers a professional, long-lasting finish that’s built to last.
If you’ve got a craft cutting machine like a Cricut or a Silhouette, you’re all set to create custom vinyl labels that are both tough and look fantastic. The process boils down to designing the label in your machine's software, letting the machine cut it from a sheet of permanent adhesive vinyl, and then applying it. It might sound a bit technical, but trust me, once you get the hang of it, you’ll be labelling everything in sight. This method gives you total creative control over fonts, colours, and shapes, turning something practical into a cool, personalised accessory.
Designing And Cutting Your Vinyl Label
First things first, you'll need to jump into your machine’s design software, whether that's Cricut Design Space or Silhouette Studio. This is where you bring your label to life. A quick tip from experience: when choosing a font, go for something clear and relatively thick. Those beautiful, delicate script fonts look amazing on screen, but they can be a real headache to cut cleanly and tend to peel off much more easily over time. I’ve found that bold, sans-serif fonts are your best bet for small, durable name labels.
Once you’re happy with the look, it’s time to get cutting.
- Pick Permanent Adhesive Vinyl: Don't be tempted by the removable kind. It might seem similar, but permanent vinyl is specifically made to stand up to water and handling, which is exactly what you need for items that get washed.
- Check Your Machine Settings: Make sure your cutting machine is set to the right material. There's usually a preset for "Permanent Vinyl" that automatically adjusts the blade depth and cutting pressure for a perfect result.
- Always Do a Test Cut: Before you commit to cutting the whole design, do a quick test cut on a corner of the vinyl—a small square or circle will do. This takes seconds but can save you from wasting an entire sheet if the settings aren't quite right.
After the machine has worked its magic, you'll have a sheet of vinyl with your design perfectly etched into it. Now for the fun part.
Weeding And Applying With Transfer Tape
The next step is called "weeding," and it's simply the process of removing all the bits of vinyl you don't need. Using a weeding tool (which looks a bit like a dental pick), carefully peel away the negative space around your design, leaving just the name itself on the backing paper. Go slowly here, especially around the insides of letters like 'o' or 'a'.
The secret to a flawless, professional-looking application is transfer tape. This is a clear, slightly sticky sheet that lifts your entire vinyl design off its backing paper in one go, keeping every letter perfectly spaced and aligned.
To use it, cut a piece of transfer tape that's a little bigger than your label. Peel off its backing and press it down firmly over your weeded vinyl design. Use a scraper tool (or even a credit card) to burnish it, which just means rubbing it hard to make sure the vinyl really sticks to the tape.
Now, gently peel the transfer tape away; your vinyl label should lift right off with it. You can now position it perfectly on your clean, dry surface—like that water bottle or lunchbox. Press it down, give it one final burnish, and then slowly peel the transfer tape off at a sharp angle. And there you have it: a perfect, durable name label.
While this process is brilliant for hard surfaces, if you're looking to label school uniforms or other clothing, you might be interested in our guide on ultra high-tack stick-on clothing labels for the UK that don't require any cutting at all.
Creating No-Sew Iron-On Fabric Labels
When you're labelling clothes, you need something that can truly go the distance. We're talking about a solution tough enough for the washing machine, the tumble dryer, and the general chaos of life. This is where iron-on labels really come into their own, creating a permanent bond with the fabric that just won't quit.
They are, without a doubt, the best choice for school uniforms, PE kits, or clothing in care homes. You get all the durability of a sewn-in label without ever having to pick up a needle and thread. All you need is your trusty household iron.
Let's walk through two brilliant ways to make your own: one using Heat Transfer Vinyl (HTV) for a super sharp, professional look, and another using printable iron-on paper that's perfect for quick, colourful designs from your home printer.
Method 1: Using Heat Transfer Vinyl (HTV)
If you have a Cricut or Silhouette machine, you’re in for a treat. HTV is a game-changer for fabric projects, creating labels that look and feel like they’re part of the actual garment. The process feels a lot like using adhesive vinyl, but there are a couple of crucial differences you can't afford to miss.
The absolute most important step? You must mirror your design in the software before you hit 'cut'. I can't stress this enough! Because you’ll be placing the vinyl design-side-down, mirroring it ensures the text reads correctly once it's ironed on. It’s such an easy mistake to make, so I always double-check it before cutting.
After it's cut, you'll weed away the extra vinyl, just as you normally would. The HTV is attached to a clear, slightly sticky carrier sheet, which handily keeps your whole design perfectly aligned and ready for pressing.
Method 2: Using Printable Iron-On Paper
No cutting machine? No problem at all. Printable iron-on transfer paper is a fantastic and very accessible alternative. It’s designed to work with any standard inkjet printer. You can create your designs in a program you already know, like Microsoft Word or Canva, and simply print them straight onto the special paper.
Just a quick heads-up when buying: check whether the paper is for light or dark fabrics, as this makes a big difference in how your colours will show up. Once printed, you just need a pair of scissors to cut them out. Here’s a little tip from experience: round off the corners as you cut. Sharp corners have a sneaky tendency to lift and peel after a few washes.
Whichever method you go with, the secret to a label that lasts is all in the prep work. Always wash and dry the garment before you apply the label, and skip the fabric softener. Softeners can leave a film that stops the adhesive from getting a proper grip.
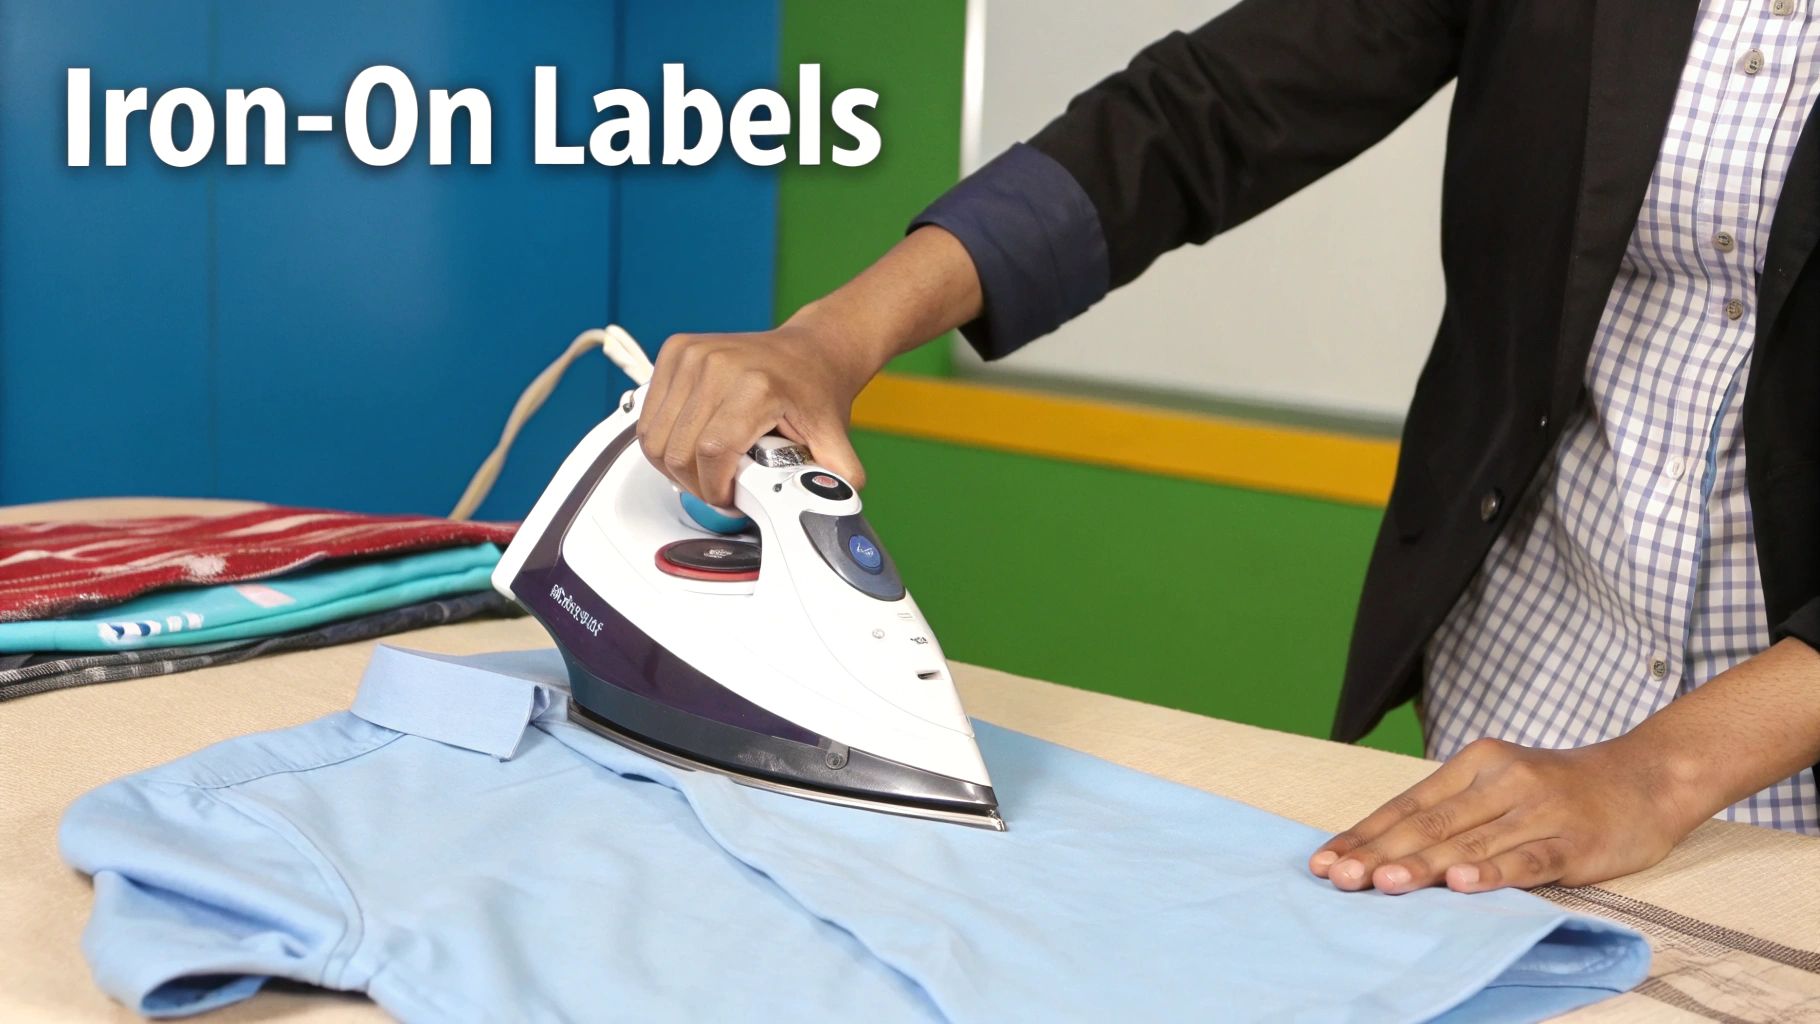
Perfecting The Iron-On Application
Getting the application just right is what makes an iron-on label truly permanent. Your standard household iron is perfectly fine for this, but the key is to turn the steam function completely off. Steam adds moisture, and moisture is the enemy of a strong adhesive bond.
- Preheat the Fabric: Before placing your label, give the spot a quick press with the iron for 10-15 seconds. This gets rid of any lingering moisture and wrinkles, creating an ideal surface.
- Apply Firm Pressure: Position your label, cover it with a thin tea towel or a sheet of parchment paper, and press down hard. Don't slide the iron around like you’re ironing a shirt. Hold it still and apply firm, even pressure for the time recommended on the instructions—usually between 15 and 30 seconds.
- Check the Peel: Let the label cool for a moment before you try to peel away the carrier sheet. If any part of the vinyl starts to lift, don't panic! Just lay it back down and press it again for a few more seconds.
The need for this kind of durable labelling isn't going away. With the UK's fashion e-commerce market projected to reach £21.01 billion, the demand for practical solutions from parents and care facilities is soaring. When you consider that 40% of families lose school uniform items every year and there’s been a 5% rise in UK care homes, labels that can survive over 50 washes have become an absolute necessity. You can dive deeper into these UK e-commerce trends to see the bigger picture.
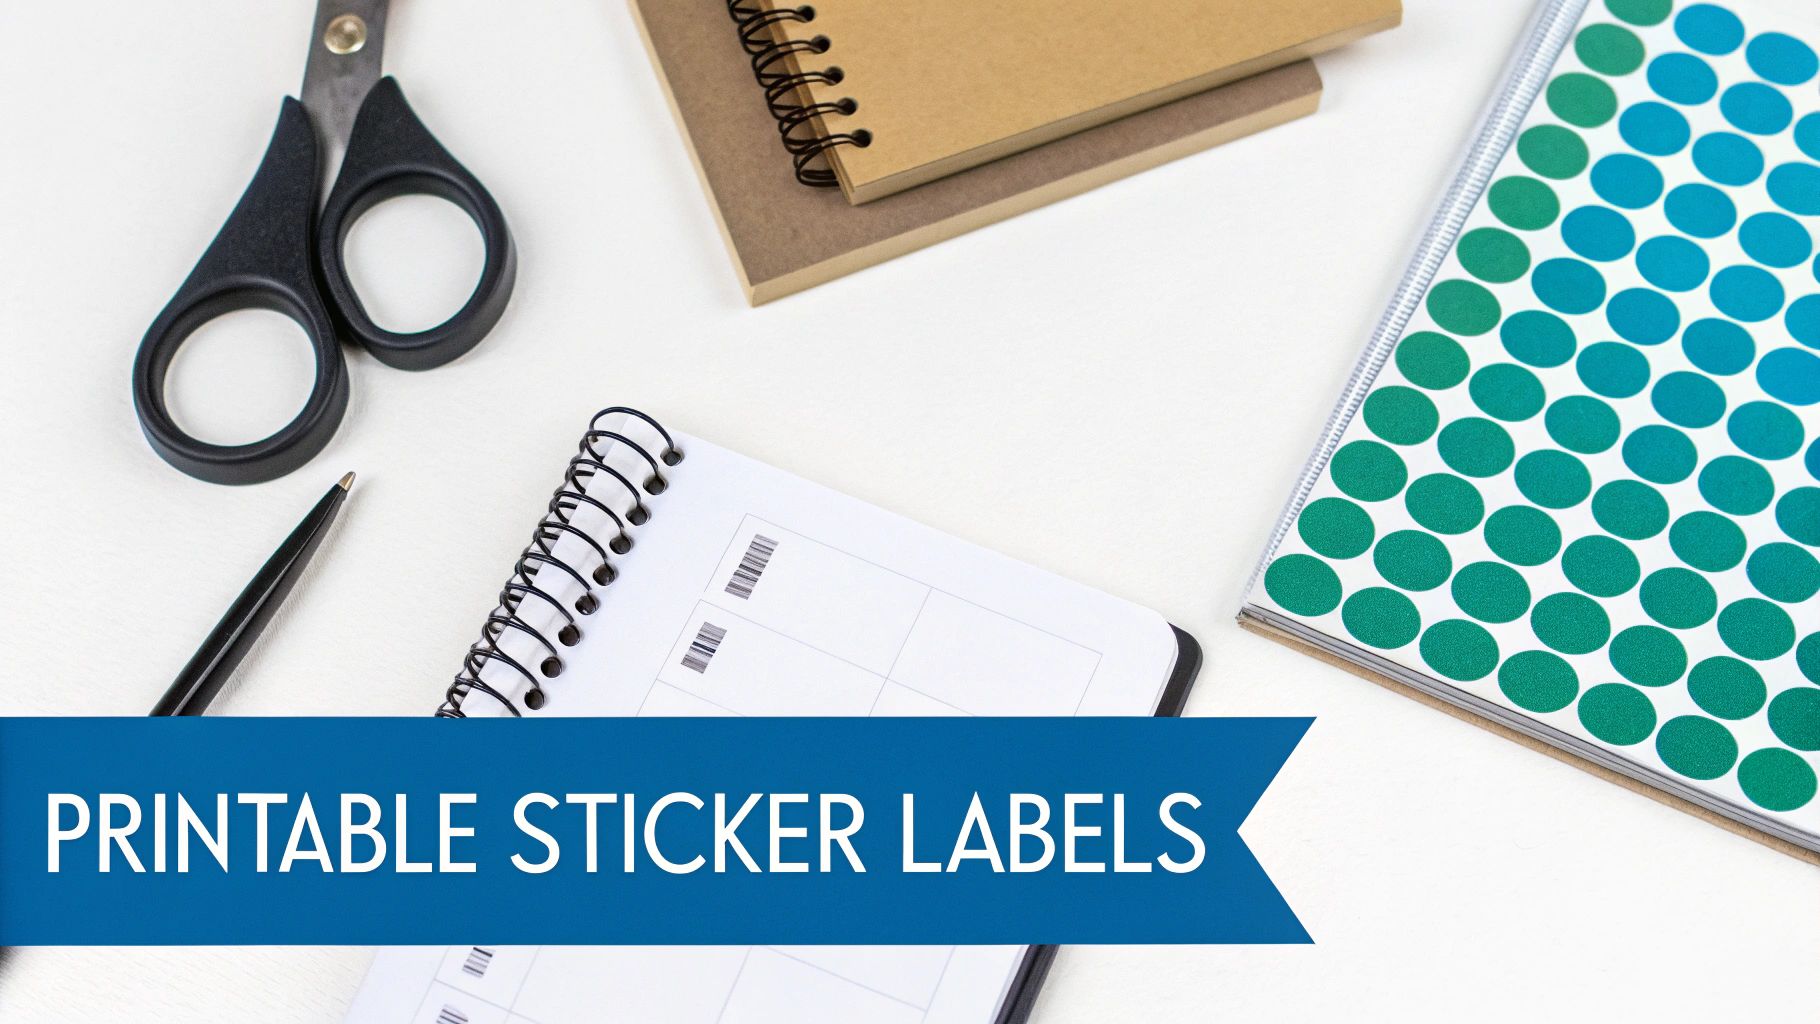
Designing Easy Printable Sticker Labels
If you need a quick, affordable, and seriously straightforward way to make labels, printable sticker paper is your best friend. The beauty of this method is its simplicity – you don't need any fancy equipment, just your home computer and a regular printer. It's the perfect solution for labelling anything that won't be getting soaked, like school books, folders, lunch boxes, and pantry jars.
You just design your labels, print them onto adhesive paper, and cut them out. It’s a brilliant way to get organised on the fly without splashing out on new gear.
Choosing Your Design Tools And Paper
Don't worry, you don’t need to be a graphic designer to whip up some great-looking labels. Free tools like Canva are fantastic for this job, packed with ready-made templates you can tweak in minutes.
My main tip? Keep it simple. A clean, bold font is always going to be easier to read at a glance than a fussy, swirly script, especially on a small label. For younger kids, adding a little icon they recognise next to their name—like a star or a football—is a game-changer for helping them spot their stuff.
When it comes to the paper itself, you’ve got a few choices:
- Matte Sticker Paper: This has a non-shiny finish, perfect for an understated look. It's also super easy to write on with a pen if you need to add a last-minute detail.
- Glossy Sticker Paper: If you want your colours to really pop, this is the one. It gives your labels a vibrant, professional-looking sheen.
- Clear Sticker Paper: This is ideal for that "no-label" effect, where only your text and design seem to float on the surface of the item.
If you're designing from scratch, getting the artwork right from the start makes a huge difference. These artwork submission tips for beginners offer some really helpful guidance.
Printing And Cutting For A Perfect Finish
Here’s a pro tip I swear by: always print a test page on plain paper first. It’s a simple step that lets you double-check the size and colours before you use up any of your precious sticker sheets.
Hop into your printer settings and make sure you select the correct paper type (e.g., "Glossy Photo Paper" or "Labels"). For the best, crispest results, always bump the print quality up to "High".
Once they’re printed and the ink is dry, a sharp pair of scissors will do the trick. But if you want perfectly uniform shapes and a super clean finish, a craft punch is a brilliant investment. A simple circle or square punch makes the job much quicker and gives your labels a really professional edge.
Printable stickers are an incredibly cost-effective way to keep track of belongings. Think about it: lost property costs UK schools an estimated £10 million a year. A simple pack of labels is a tiny investment that can save a lot of hassle and money.
While these stickers are amazing for most things, there are other easy design methods out there. If you'd rather stick with software you already know, have a look at our guide on https://www.quotemywall.co.uk/blogs/news/how-to-create-name-labels-in-word.
Common Questions About Making DIY Name Labels
Even with the best instructions, you're bound to run into a few little hitches when you first start making your own name labels. Think of this as your go-to troubleshooting guide for those common problems that can mean the difference between a decent label and a great one that really lasts.
We'll tackle the most frequent queries I hear, from getting labels truly waterproof to stopping those pesky iron-ons from peeling away. Getting these details right is what makes all the effort worthwhile.
How Can I Make My Labels Waterproof?
This is a big one, and the honest answer is that true waterproofing comes down to the materials you choose right from the start. A standard printable paper sticker, for instance, is never going to be properly waterproof, no matter what you spray on it afterwards.
For a label that can genuinely handle a soaking, these are your best bets:
- Permanent Adhesive Vinyl: This stuff is the gold standard for hard surfaces like water bottles, lunchboxes, and wellies. The material itself is a type of plastic, and its permanent adhesive is built to withstand water, making it your go-to for dishwasher-safe items.
- Heat Transfer Vinyl (HTV): When you apply it correctly to fabric, HTV creates a permanent, water-tight bond. It becomes one with the material and can handle countless cycles in the washing machine.
If you're set on using printable stickers, you can boost their water resistance. Simply apply a clear, self-adhesive laminating sheet over your printed design before you cut the labels out. It's a decent workaround, but it won't make them fully waterproof for things that are constantly submerged or washed.
Why Are My Iron-On Labels Peeling Off?
Ah, the dreaded peel. It’s a common frustration, but I can almost guarantee it’s down to one of three things: heat, pressure, or preparation. If you're finding your iron-on labels lifting at the edges after a wash, it's time to review your technique.
First off, always pre-wash the garment without any fabric softener. That stuff leaves behind a residue that can completely block the adhesive from gripping the fibres. Next, make sure your iron is hot enough (always check the instructions for your specific HTV or transfer paper) and that the steam function is switched OFF.
The single biggest mistake people make is not applying enough pressure. Don’t just glide the iron back and forth. You need to press down firmly and evenly, putting your weight into it, for the full recommended time – usually 15-30 seconds. This is what properly melts the adhesive and fuses it into the fabric.
Which DIY Labels Last The Longest?
When it comes to pure staying power, the champion label really depends on what you’re sticking it to.
For clothing that's in and out of the wash, nothing beats a properly applied iron-on label made from high-quality HTV. For hard items like plastic containers, school supplies, or metal flasks, a permanent adhesive vinyl label is hands-down the most durable option. It'll often last for years without a hint of fading or peeling.
Printable paper stickers, while wonderfully quick and easy, are best kept for temporary use or on things that won't get wet. They just don't have the same lifespan. Ultimately, choosing the right material for the job is the real secret to creating a label that sticks around for the long haul.
At Quote My Wall, we specialise in creating stunning, ultra high-tack stick-on clothing labels that are fully washable, tumble dryer safe, and dishwasher resistant. Check out our range at https://www.quotemywall.co.uk.